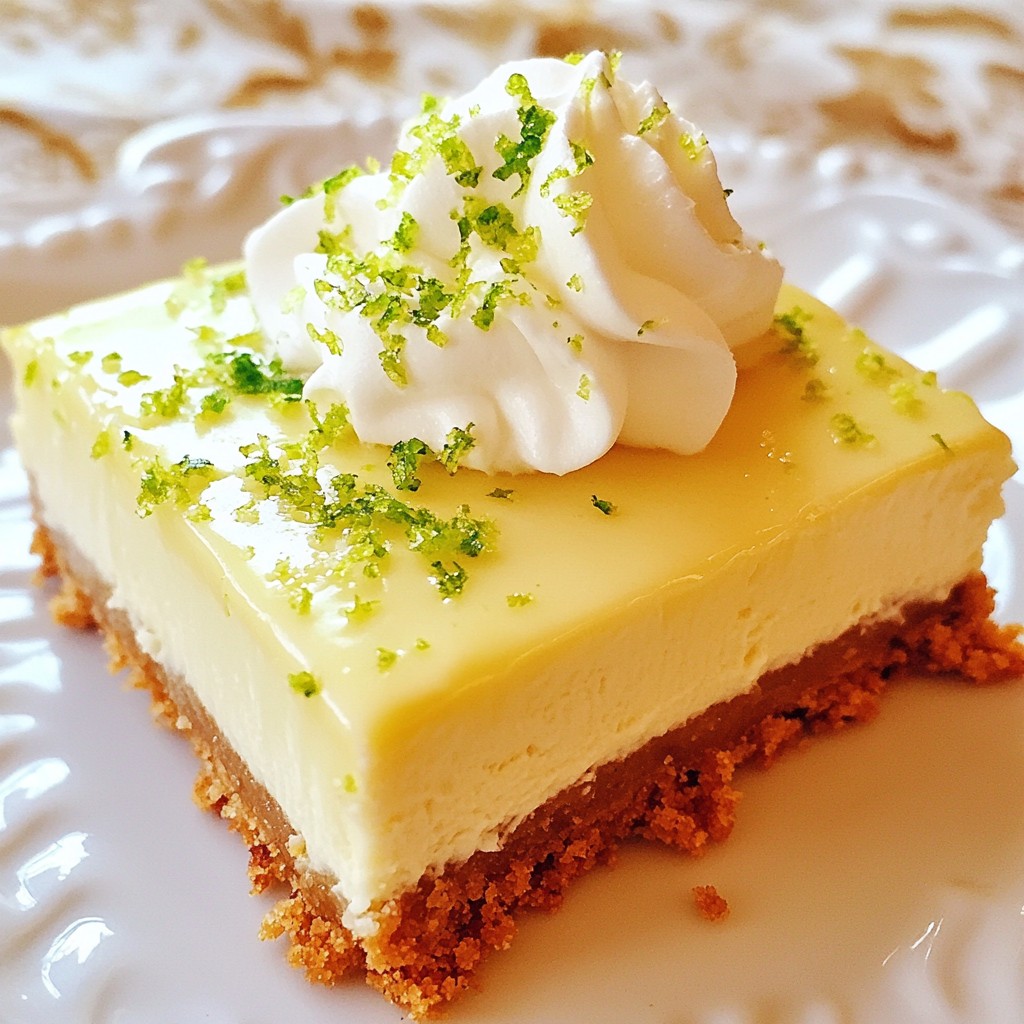
Looking for a sweet treat that's both delightful and easy? Key Lime Cheesecake Bars are your answer! These bars blend zesty lime with rich cream cheese, creating a perfect balance of tart and sweet. In this post, I’ll share everything you need to know about the ingredients, step-by-step instructions, and clever tips to make your baking a breeze. Get ready to impress friends and family with this tasty dessert!
Why I Love This Recipe
- Bright and Tangy Flavor: The fresh key lime juice and zest give these cheesecake bars a refreshing zing that is hard to resist.
- Easy to Make: With simple ingredients and straightforward steps, you'll have these delicious bars ready with minimal effort.
- Perfect for Any Occasion: Whether it's a summer barbecue or a holiday gathering, these bars are a crowd-pleaser that fits right in.
- Delightfully Creamy Texture: The combination of cream cheese and sweetened condensed milk creates a rich and smooth filling that melts in your mouth.
Ingredients
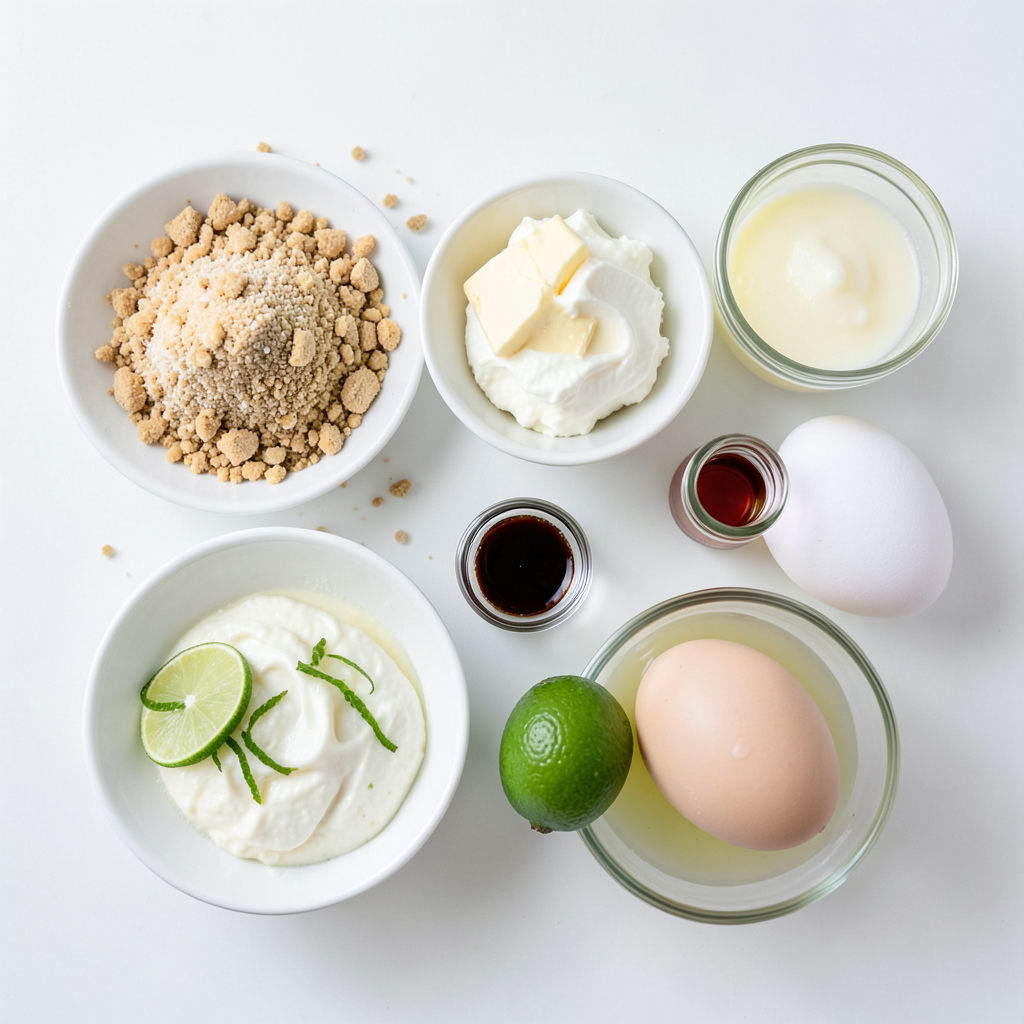
Complete list of ingredients for Key Lime Cheesecake Bars
To make Key Lime Cheesecake Bars, you need:
- 1 ½ cups graham cracker crumbs
- ⅓ cup granulated sugar
- ½ cup unsalted butter, melted
- 16 oz cream cheese, softened
- 1 cup sweetened condensed milk
- ½ cup fresh key lime juice
- Zest of 2 limes
- 2 large eggs
- 1 teaspoon vanilla extract
- Optional: Whipped cream for topping
Measuring tools and tips
Use these tools for precise measuring:
- A mixing bowl for combining ingredients
- A hand mixer to beat the cream cheese
- An 8x8 inch baking pan lined with parchment paper
- A measuring cup for liquids
- A measuring spoon for small amounts
To measure graham cracker crumbs, crush them well. Use a dry measuring cup for sugar. Melt the butter in a microwave or on the stove, then let it cool slightly.
Ingredient substitutions for dietary preferences
You can adjust these ingredients for different diets:
- For a gluten-free option, use gluten-free graham crackers.
- Swap cream cheese with a vegan cream cheese for a dairy-free version.
- Use coconut cream instead of sweetened condensed milk for a lighter taste.
- If you prefer less sugar, use a sugar substitute like stevia.
These swaps keep the bars tasty and cater to your needs. Enjoy making your version of this refreshing treat!
Step-by-Step Instructions
Preparation steps for the graham cracker crust
First, preheat your oven to 350°F (175°C). This will help your bars bake evenly. Next, take an 8x8 inch baking pan and line it with parchment paper. Make sure to leave some paper hanging over the edges. This will help you lift the bars out later.
In a medium bowl, mix together 1 ½ cups of graham cracker crumbs, ⅓ cup of granulated sugar, and ½ cup of melted unsalted butter. Stir until you see a crumbly mixture. Now, press this crumb mixture firmly into the bottom of the baking pan. This forms a solid crust. Bake it for 10 minutes. Once done, remove it from the oven and let it cool slightly.
How to make the cheesecake filling
In a large mixing bowl, beat 16 oz of softened cream cheese with a hand mixer. You want it to be smooth. Then, add in 1 cup of sweetened condensed milk. Mix it until it is creamy and well combined. Next, add ½ cup of fresh key lime juice, the zest of 2 limes, 2 large eggs, and 1 teaspoon of vanilla extract. Blend this mixture until it is smooth and all ingredients are mixed well.
Baking and cooling instructions
Now, pour the cheesecake filling over the cooled crust in the baking pan. Spread it out evenly across the crust. Bake for an additional 25-30 minutes. The center should be set but may still jiggle a bit.
After baking, take it out of the oven and let it cool at room temperature for about 1 hour. Then, place it in the fridge for at least 4 hours, or overnight if you can wait. This step allows the cheesecake bars to set completely. Once set, lift the bars out using the parchment paper and cut them into squares. If you like, top them with whipped cream before serving. Enjoy your tasty treat!
Tips & Tricks
How to achieve the perfect cheesecake texture
To make your cheesecake bars smooth and creamy, start with softened cream cheese. This helps mix easily. Use a hand mixer to beat the cream cheese until it's lump-free. Gradually add sweetened condensed milk. This method keeps the mix creamy. Mix in lime juice and zest last for a fresh flavor. Bake the bars until just set in the middle. A little jiggle shows it's done. Let them cool at room temp before chilling.
Common mistakes to avoid when making cheesecake bars
One common mistake is not using softened cream cheese. Cold cream cheese can cause lumps. Another mistake is overmixing after adding eggs. This can lead to cracks in the surface. Avoid opening the oven door too often while baking. This changes the temperature and can lead to uneven bars. Lastly, don’t skip the chilling time. Refrigeration helps the bars set properly.
Serving suggestions and pairing ideas
These Key Lime Cheesecake Bars are perfect as is, but a little extra can go a long way! Top with whipped cream for added creaminess. Fresh berries like raspberries or strawberries add a nice tartness. You can also serve them with a drizzle of lime syrup for a sweet touch. Pair these bars with a refreshing iced tea or lemonade. These drinks complement the zesty lime flavor beautifully. Enjoy your delightful treat!
Pro Tips
- Use Fresh Key Limes: For the best flavor, opt for fresh key limes over bottled juice. The zest and juice from fresh limes will enhance the tartness and aroma of your cheesecake bars.
- Don’t Overmix: When combining the filling ingredients, mix just until smooth. Overmixing can incorporate too much air, leading to cracks in your cheesecake once it cools.
- Chill Thoroughly: Allow the cheesecake bars to chill in the refrigerator for at least 4 hours, or overnight. This helps them set properly and enhances the flavor.
- Use Parchment for Easy Removal: Lining your baking pan with parchment paper makes it easy to lift the bars out once set, ensuring clean cuts and perfect squares.
Variations
Alternative ingredients for different flavor profiles
You can switch up the flavors in these bars easily. Try using lemon juice instead of key lime juice for a bright twist. You can also add a splash of coconut milk for a tropical feel. For a berry flavor, mix in pureed strawberries or blueberries into the filling. Each change adds a new layer of taste to your dessert.
Gluten-free and vegan adaptations
To make these bars gluten-free, use gluten-free graham crackers. For a vegan version, replace cream cheese with a vegan cream cheese alternative. You can use coconut cream for a creamy texture. Swap the eggs with flaxseed meal mixed with water. These swaps keep your cheesecake bars delicious and kind to all diets.
Mini versions and individual servings
Making mini versions is fun and easy! Use a muffin tin lined with paper cups. Press the crust mixture into each cup and fill with the cheesecake mixture. Bake as you would for the larger bars. This method gives each guest their own tasty treat. You can even top them with fresh fruit or a dollop of whipped cream for added flair.
Storage Info
Best practices for refrigerating cheesecake bars
After making your Key Lime Cheesecake Bars, let them cool completely at room temperature. Once cool, cover them tightly with plastic wrap or foil. This helps keep them fresh and prevents them from absorbing smells in the fridge. Always place them in an airtight container if you want to store them for longer. This method keeps the bars creamy and delicious.
Freezing instructions and tips
You can freeze Key Lime Cheesecake Bars for later enjoyment. Cut them into squares before freezing. Wrap each square in plastic wrap, then place them in a freezer-safe container. This protects the bars from freezer burn. When ready to eat, take them out and let them thaw in the fridge overnight. This way, they stay tasty and fresh.
How long Key Lime Cheesecake Bars stay fresh
Key Lime Cheesecake Bars last about 4 to 5 days in the fridge. If stored well, they can stay fresh for up to 3 months in the freezer. The flavor and texture remain great if you follow the storage tips. Enjoy these bars at their best!
FAQs
What is the origin of Key Lime Cheesecake Bars?
Key Lime Cheesecake Bars come from the Florida Keys. The area is famous for its small, tart key limes. These limes give the bars a bright, zesty flavor. Cheesecake itself has roots in ancient Greece. Over time, it blended with many styles and flavors. In the U.S., the key lime pie became popular in the early 20th century. Cheesecake bars are a modern twist on this classic pie.
Can I use regular limes instead of key limes?
Yes, you can use regular limes instead of key limes. However, the taste will change. Key limes are smaller and have a unique tartness. They also have a floral note that regular limes lack. If you use regular limes, your bars will be less sweet and more sour. I recommend using key limes for the best flavor.
How can I tell when cheesecake bars are done baking?
You can tell cheesecake bars are done by checking the center. It should be set but still slightly jiggle. If the center looks wet, give it more time. The edges should be firm, while the center remains soft. Remember, the bars will firm up as they cool.
What is the best way to cut cheesecake bars neatly?
To cut cheesecake bars neatly, use a sharp knife. First, chill the bars in the fridge. This helps them set well. Then, run the knife under hot water before each cut. Wipe the knife clean after each slice. This keeps the edges smooth. You’ll get perfect squares every time!
You’ve learned about making delicious Key Lime Cheesecake Bars from scratch. We covered every step: ingredients, measuring tips, baking instructions, and storage advice. Remember, perfect texture comes from attention to detail. Avoid common mistakes for the best results. Whether you try mini versions or gluten-free options, there’s a twist for everyone. Enjoy your tasty creation! Each bite is a reminder of why these bars are a favorite. Happy baking!