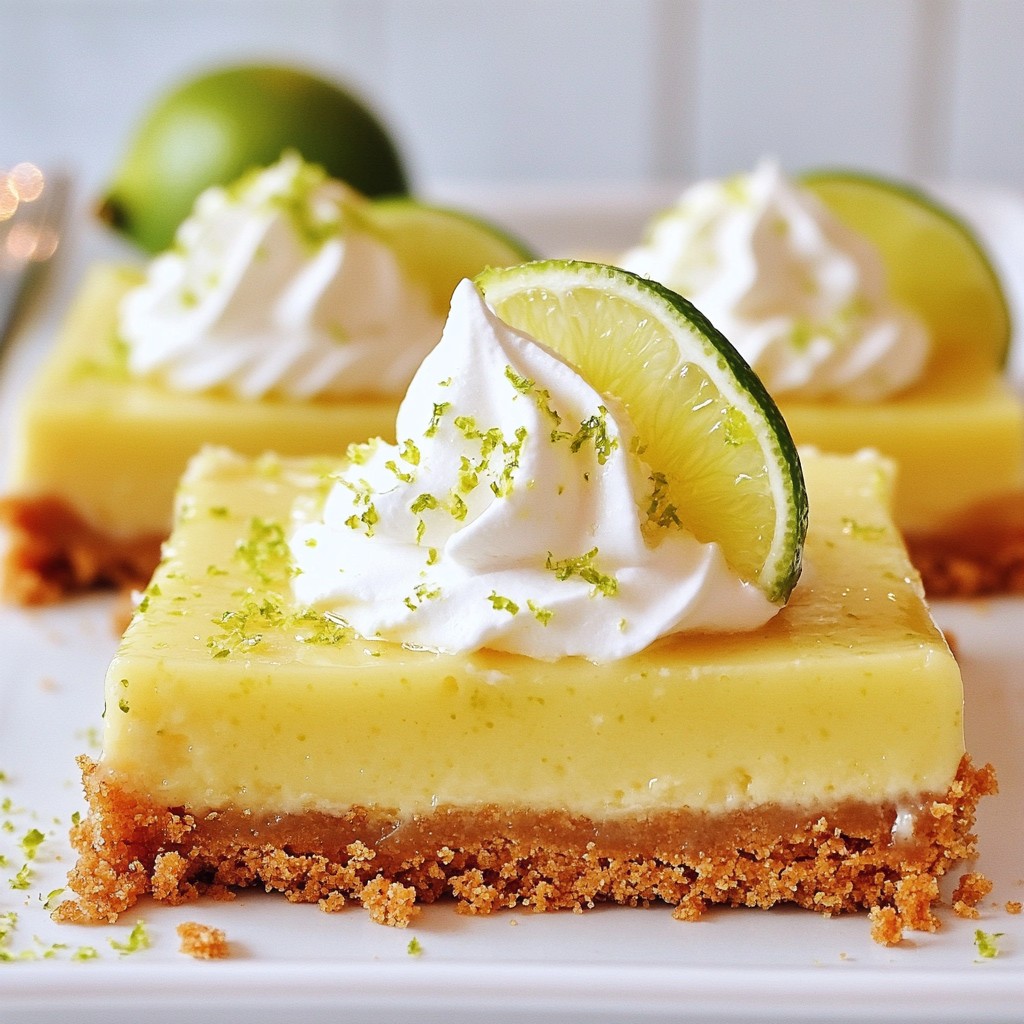
If you crave a zesty and sweet treat, look no further than Key Lime Pie Bars. They combine creamy filling with a crunchy crust for a refreshing dessert that’s sure to impress. Best of all, these bars are easy to make and perfect for any occasion. Join me as I guide you through the simple steps for making this luscious dessert, complete with tips and tasty variations. Let’s get started!
Why I Love This Recipe
- Refreshing Flavor: The zesty key lime juice provides a bright and refreshing taste that’s perfect for any occasion.
- Easy to Make: This recipe requires minimal ingredients and simple steps, making it accessible for bakers of all skill levels.
- Perfect for Sharing: These bars are easy to cut into squares, making them an ideal dessert for gatherings and parties.
- Customizable Toppings: Add whipped cream and lime zest for a beautiful presentation and extra flavor!
Ingredients
Key Ingredients with Measurements
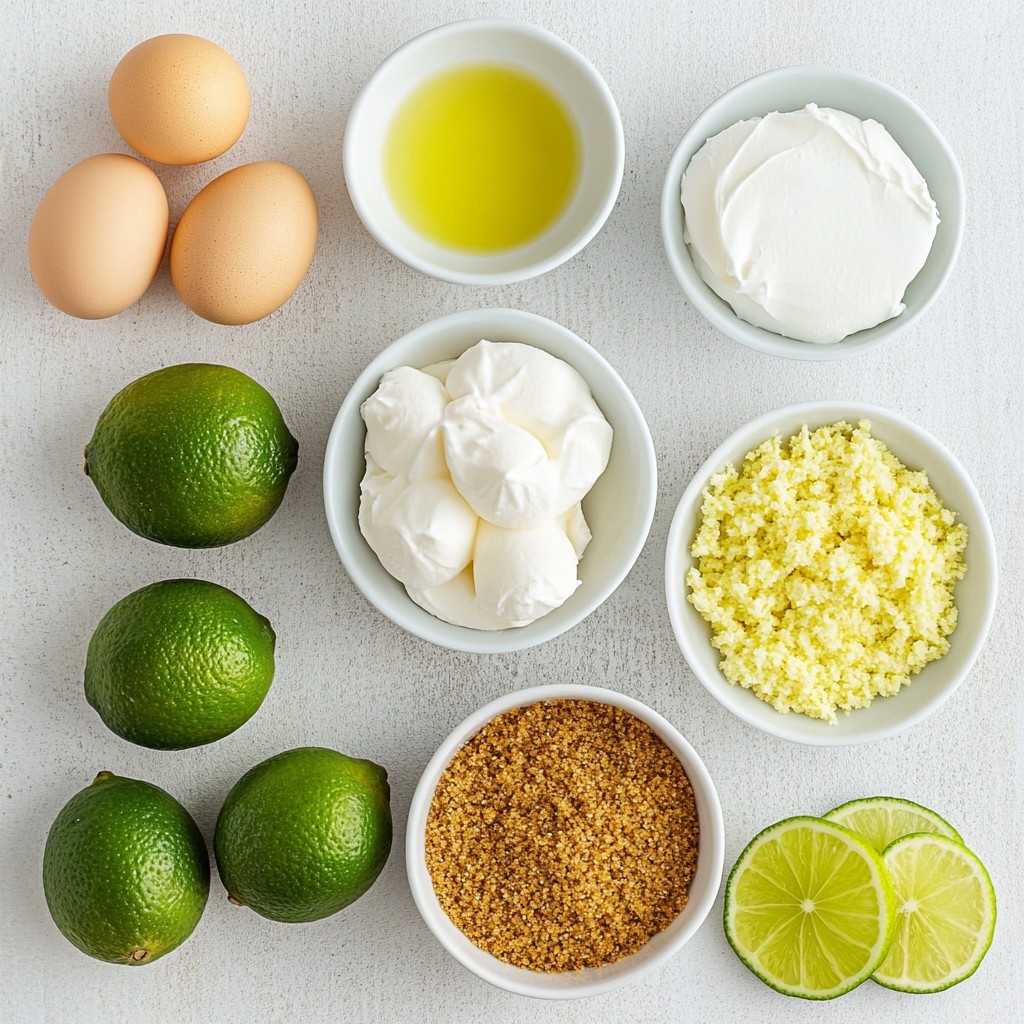
To make delicious Key Lime Pie Bars, gather these key ingredients:
- 1 cup graham cracker crumbs
- 1/4 cup granulated sugar
- 1/2 cup unsalted butter, melted
- 2 cups sweetened condensed milk
- 3/4 cup fresh key lime juice
- 2 large eggs
- Zest of 2 key limes
- 1/4 teaspoon salt
These ingredients create a smooth filling and a crunchy crust. The graham cracker crumbs form the base, while the key lime juice gives it a bright flavor.
Optional Garnishes
To make your bars even more special, consider these optional garnishes:
- Whipped cream for topping
- Lime slices or zest for garnish
These toppings add a nice touch and enhance the look of your dessert.
Ingredient Substitutions
If you need to swap some ingredients, here are a few ideas:
- Use almond flour instead of graham cracker crumbs for a gluten-free crust.
- For a dairy-free version, try coconut cream instead of sweetened condensed milk.
- You can replace key lime juice with regular lime juice for a different taste.
These substitutions make the recipe flexible, so everyone can enjoy these tasty bars.
Step-by-Step Instructions
Preparation of Graham Cracker Crust
To start, preheat your oven to 350°F (175°C). In a medium bowl, grab your graham cracker crumbs, granulated sugar, and melted butter. Mix them together until it looks like wet sand. This is the base of your bars. Next, press this mixture firmly into the bottom of an 8x8 inch baking dish. Make sure it's even. Bake it for about 10 minutes. After baking, take it out and let it cool slightly.
Mixing the Key Lime Filling
Now, it’s time for the key lime filling. In a separate bowl, whisk together sweetened condensed milk, fresh key lime juice, eggs, lime zest, and salt. Keep whisking until everything blends well and is smooth. This mixture is what makes your bars creamy and zesty.
Baking Process
Pour the key lime mixture over your cooled crust. Spread it evenly with a spatula. Bake it for an additional 15 to 20 minutes. You want the filling to set but still have a slight jiggle in the center. Once done, let the bars cool at room temperature. Then, refrigerate them for at least 2 hours to fully set. After chilling, use a sharp knife to cut the pie into squares or bars. Enjoy with whipped cream and lime garnish if you want!
Tips & Tricks
How to Ensure a Perfect Crust
To get a great crust, use fresh graham cracker crumbs. If you can, crush whole crackers yourself. Mix the crumbs with sugar and melted butter well. The mix should look like wet sand. Press it down firmly in the baking dish. This helps create a solid base. Bake it for about 10 minutes. Let it cool slightly before adding the filling.
Tips for Achieving the Right Consistency of Filling
The filling needs to be smooth. Use a whisk to blend the sweetened condensed milk with the key lime juice. Add the eggs and lime zest, mixing until it is fully combined. Don’t rush this step. A smooth filling ensures even baking. Pour it over the cooled crust gently. Bake until it is set but still jiggly in the middle.
Serving Suggestions
Once cooled, cut the bars into squares. For a nice touch, add a dollop of whipped cream on top. Garnish with lime slices or zest for color. Serve them chilled for the best taste. These bars look great on any platter. Invite friends over to enjoy this treat!
Pro Tips
- Use Fresh Key Limes: The flavor of fresh key limes is unbeatable compared to bottled juice, giving your bars a vibrant, tangy taste.
- Chill for Best Texture: Letting the bars chill for at least 2 hours in the fridge helps them set properly and enhances the overall texture.
- Check for Doneness: The filling should be set but still slightly jiggly in the center when you remove it from the oven; this ensures a creamy texture.
- Garnish Creatively: Use lime slices or zest to garnish your bars for a pop of color and a hint of extra flavor!
Variations
Gluten-Free Key Lime Pie Bars
You can enjoy these bars even if you need to eat gluten-free. Use gluten-free graham cracker crumbs instead of regular ones. They taste just as good! Check the label to ensure they are truly gluten-free. Follow the same steps in the recipe, and you will have a yummy treat.
Vegan Key Lime Pie Bars
You can make these bars vegan with a few easy swaps. Replace the eggs with flaxseed meal or chia seeds mixed with water. Use coconut cream or a vegan condensed milk for a creamy filling. The rest of the steps remain the same, and you still get the key lime flavor you love.
Flavor Variations
Want to try new flavors? You can add a twist to your key lime pie bars. For a coconut version, mix shredded coconut into the filling or the crust. You can also add fresh strawberries to the filling for a sweet twist. Just blend in some strawberry puree, and it will taste amazing! Feel free to experiment with other fruits, too.
Storage Info
How to Properly Store Key Lime Pie Bars
To keep your key lime pie bars fresh, place them in an airtight container. You can layer them with parchment paper to avoid sticking. Store them in the fridge for the best taste and texture. They should fit snugly, so they do not move around much. This helps keep their shape and flavor.
Freezing Options
You can freeze key lime pie bars if you want to save some for later. First, cut the bars and wrap each piece tightly in plastic wrap. Then, place the wrapped bars in a freezer-safe bag. Press out any extra air to prevent freezer burn. They will stay fresh for up to three months in the freezer. When you're ready to enjoy them, thaw in the fridge overnight.
Shelf Life Information
Key lime pie bars can last in the fridge for about 4 to 5 days. After that, they may start to lose their taste and texture. Always check for any signs of spoilage before eating. If they look or smell off, it is best to discard them. Enjoy your delicious bars while they are fresh!
FAQs
Can I use regular limes instead of key limes?
Yes, you can use regular limes. However, key limes give the best flavor. They are smaller and more tart than regular limes. This tartness makes key lime pie bars stand out. If you use regular limes, your bars will taste different. You might want to adjust the sugar to balance the flavor.
How long do key lime pie bars last in the refrigerator?
Key lime pie bars can last about a week in the fridge. Make sure to cover them well. Use plastic wrap or an airtight container. This keeps them fresh and firm. After a few days, the texture may change, but they will still taste good.
Can I make key lime pie bars ahead of time?
Absolutely! These bars are great to make ahead. You can prepare them a day or two before serving. Just remember to chill them for at least two hours. This will help them set properly. Making them ahead saves time for your party or gathering.
In this post, we covered key ingredients and how to make key lime pie bars. I shared tips for the perfect crust and filling, plus ways to store your bars. Variations, like gluten-free and vegan options, let you get creative. Remember, the right ingredients and techniques make all the difference. Now, you're ready to enjoy a delicious treat that everyone will love!