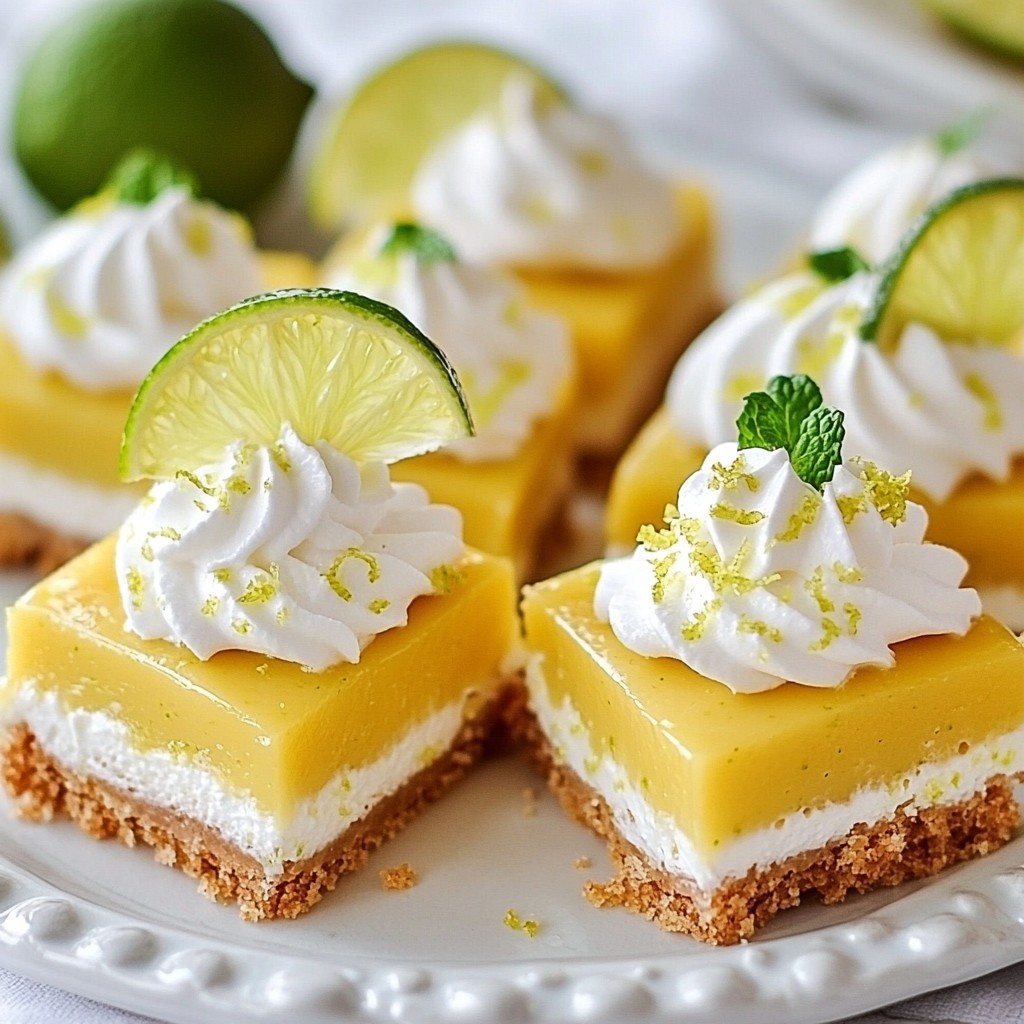
Do you crave a sweet, tangy treat that's easy to make? Key Lime Pie Bars are the perfect answer! This simple recipe combines a buttery crust with a creamy filling for a delicious dessert. You’ll learn how to make these bars from scratch, ensuring every bite bursts with flavor. Let’s dive into the world of Key Lime Pie Bars, where your taste buds are in for a delightful surprise!
Why I Love This Recipe
- Refreshing Flavor: The bright and tangy taste of key limes makes these bars a perfect dessert for warm weather.
- Easy to Make: With simple ingredients and straightforward steps, this recipe is beginner-friendly and quick to prepare.
- Perfect for Sharing: These bars can easily be sliced into portions, making them ideal for gatherings and parties.
- Customizable Toppings: Top with whipped cream, lime slices, or mint for an extra touch of flavor and presentation.
Ingredients
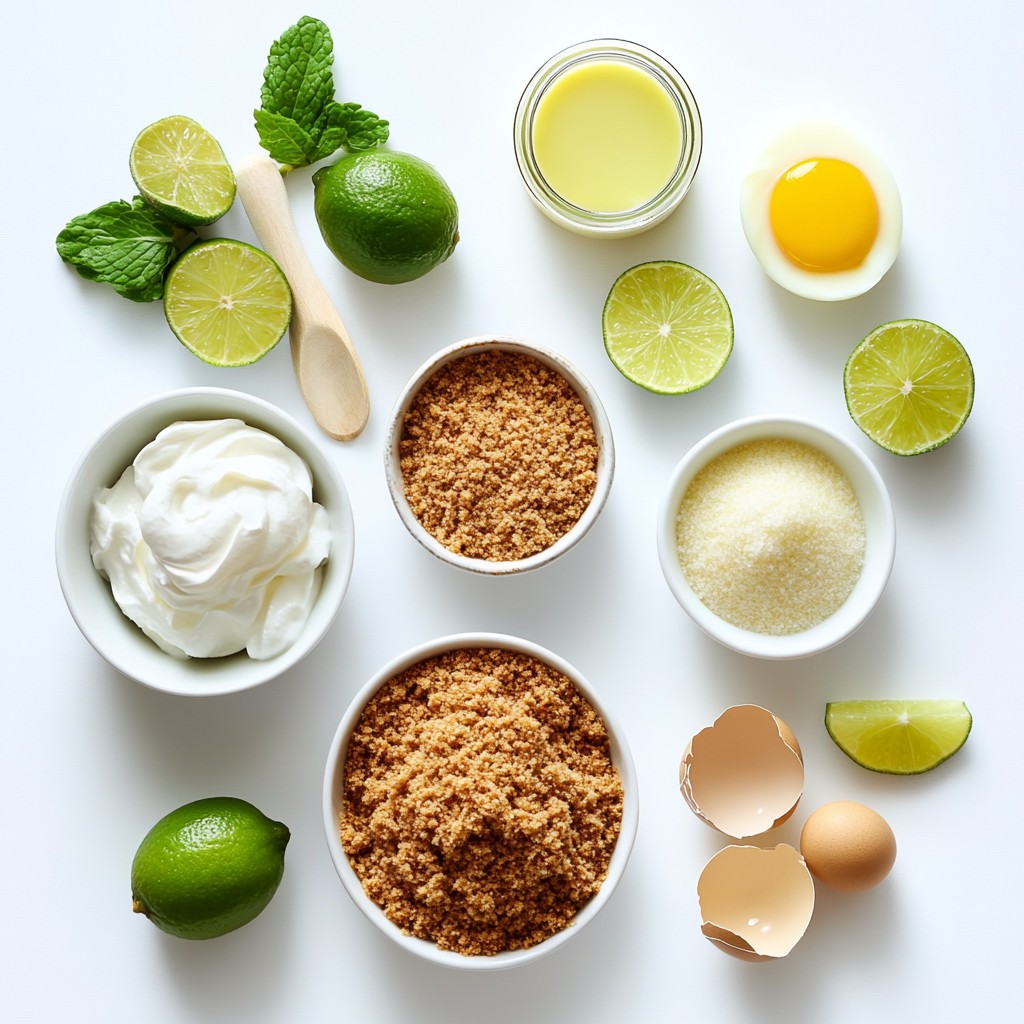
To make the best Key Lime Pie Bars, you need great ingredients. They come together to create a tasty treat. Here’s what you need:
- 1 ½ cups graham cracker crumbs
- ½ cup unsalted butter, melted
- ½ cup granulated sugar
- 1 (14-ounce) can sweetened condensed milk
- ½ cup fresh key lime juice (or regular lime juice)
- 1 teaspoon lime zest
- 2 large egg yolks
- Whipped cream (for topping)
- Lime slices and mint leaves (for garnish)
Each ingredient plays a key role. The graham cracker crumbs form a crunchy base. The butter helps hold the crust together. Sugar adds sweetness. Sweetened condensed milk gives richness. Fresh key lime juice gives that zesty flavor. Lime zest adds a pop of citrus. Egg yolks help the filling set. Whipped cream on top makes each bite creamy. Finally, lime slices and mint leaves add a fresh touch.
When you gather these ingredients, you set the stage for a delicious dessert.
Step-by-Step Instructions
Preheating the Oven
Start by preheating your oven to 350°F (175°C). This step is key for baking. A hot oven ensures even cooking.
Preparing the Crust
In a mixing bowl, combine 1 ½ cups of graham cracker crumbs and ½ cup of granulated sugar. Next, add ½ cup of melted unsalted butter. Stir this mixture until it looks like wet sand. Now, press it firmly into the bottom of an 8x8 inch baking dish. This forms a solid crust. Bake the crust for 10 minutes. After that, take it out and let it cool slightly.
Making the Filling
In another bowl, whisk together 1 (14-ounce) can of sweetened condensed milk, ½ cup of fresh key lime juice, 1 teaspoon of lime zest, and 2 large egg yolks. Mix until it’s smooth and well combined. This filling adds a bright and zesty flavor to the bars.
Baking the Bars
Pour the lime mixture over your cooled crust. Spread it evenly across the top. Now, bake it for an additional 15-20 minutes. You want the filling to be set but still slightly jiggly in the center. This jiggle means it will be creamy.
Cooling and Serving
Once baking is done, remove the dish from the oven. Allow it to cool at room temperature first. Then, refrigerate for at least 2 hours. This chill time helps the bars firm up. When ready to serve, slice into bars. Top each one with a dollop of whipped cream, a lime slice, and a sprig of mint for a pretty finish. Enjoy your tasty Key Lime Pie Bars!
Tips & Tricks
Perfecting the Crust
To make the crust just right, use fresh graham cracker crumbs. I like to crush whole crackers in a bag for the best flavor. Mix the crumbs with melted butter and sugar. This mix should feel like wet sand when done. Press it down firmly in the baking dish. A tight crust holds the filling well. Bake it lightly for ten minutes to get a golden color.
Ensuring a Smooth Filling
For a smooth filling, whisk the sweetened condensed milk well. Mix in the key lime juice, lime zest, and egg yolks until there are no lumps. Use fresh key lime juice for the best taste. If you don’t have key limes, regular limes work too. Just ensure everything blends evenly before pouring it over the crust.
Serving Suggestions
When it’s time to serve, cut the bars into neat squares. Top each square with whipped cream for a creamy touch. Add a lime slice on top for color and flavor. A sprig of fresh mint gives a nice look too. These three toppings make each bar extra special and tasty. Enjoy your Key Lime Pie Bars!
Pro Tips
- Use Fresh Limes: For the best flavor, always opt for fresh key limes or limes instead of bottled juice. Fresh juice enhances the zesty flavor of your bars.
- Chill Time: Allow the bars to chill in the refrigerator for at least 2 hours. This helps the filling set properly and improves the texture.
- Perfect Crust: Make sure to press the graham cracker crust firmly into the baking dish. A well-packed crust will hold together better when slicing the bars.
- Garnish Wisely: For an elegant presentation, top each bar with a dollop of whipped cream, a lime slice, and a fresh mint sprig just before serving.
Variations
Using Different Citrus Juices
You can switch up the flavor by using other citrus juices. For instance, try lemon or orange juice. These fruits give a bright twist to the bars. Lemon juice adds a fresh zing, while orange juice brings sweetness. Each option creates a unique taste. You can mix and match too! Use half lime and half lemon juice for a fun blend.
Gluten-Free Options
If you need a gluten-free version, it’s easy to adapt. Use gluten-free graham cracker crumbs for the crust. Look for brands that use rice flour or almond flour. These options work great and keep the same yummy taste. Make sure the sweetened condensed milk is gluten-free too. Most brands are safe, but check the label to be sure.
Vegan Adaptations
To make these bars vegan, replace a few key ingredients. Use vegan butter instead of unsalted butter. For the filling, swap the egg yolks with flax eggs. Mix one tablespoon of ground flaxseed with three tablespoons of water. Let it sit for a few minutes to thicken. You can also find vegan sweetened condensed milk at some stores. These swaps keep the delicious flavor intact while making it plant-based.
Storage Info
How to Store Leftover Bars
To keep your Key Lime Pie Bars fresh, store them in the fridge. Place them in a container with a lid. If you do not have a container, cover the bars with plastic wrap. This helps keep the bars moist and tasty. Always let them cool down first before storing.
Best Containers for Storage
The best containers for storage are glass or plastic. Glass containers with tight lids work well. They keep the bars fresh and let you see the dessert. If you use plastic, make sure it is food-safe. This way, you can enjoy your bars later without worry.
Freezing Key Lime Pie Bars
You can freeze Key Lime Pie Bars for later. Cut the bars into squares before freezing. Wrap each square tightly in plastic wrap. Then, place them in a freezer-safe bag. Be sure to label the bag with the date. They can last up to three months in the freezer. When you want to eat them, thaw them in the fridge overnight. Enjoy your tasty treat whenever you want!
FAQs
What are Key Lime Pie Bars?
Key lime pie bars are a twist on the classic key lime pie. They have a creamy, tart filling made from key lime juice. The filling sits on a crunchy graham cracker crust. These bars are easy to slice and serve, making them perfect for gatherings.
Can I use regular limes instead of Key limes?
Yes, you can use regular limes if you can't find key limes. The flavor will be a bit different, but still tasty. Regular limes provide a fresh, zesty flavor too. Just be sure to use fresh juice for the best taste.
How long do Key Lime Pie Bars last in the refrigerator?
Key lime pie bars last about five days in the fridge. Store them in an airtight container to keep them fresh. The longer they sit, the more the crust may soften. For the best texture, enjoy them sooner.
Can I make Key Lime Pie Bars in advance?
Yes, you can make key lime pie bars in advance. They taste even better after chilling overnight. Just let them cool completely before refrigerating. This will help the flavors meld and create a richer taste.
Key Lime Pie Bars are a tasty treat you can make at home. We covered the ingredients, from crust to filling, and how to bake and serve them. I shared tips to perfect each step and ways to add your own twist, including gluten-free and vegan options. Lastly, I explained how to store leftovers for future enjoyment. Enjoy making these bars, and impress your friends and family! You now have the tools to create key lime pie magic. Enjoy every bite!