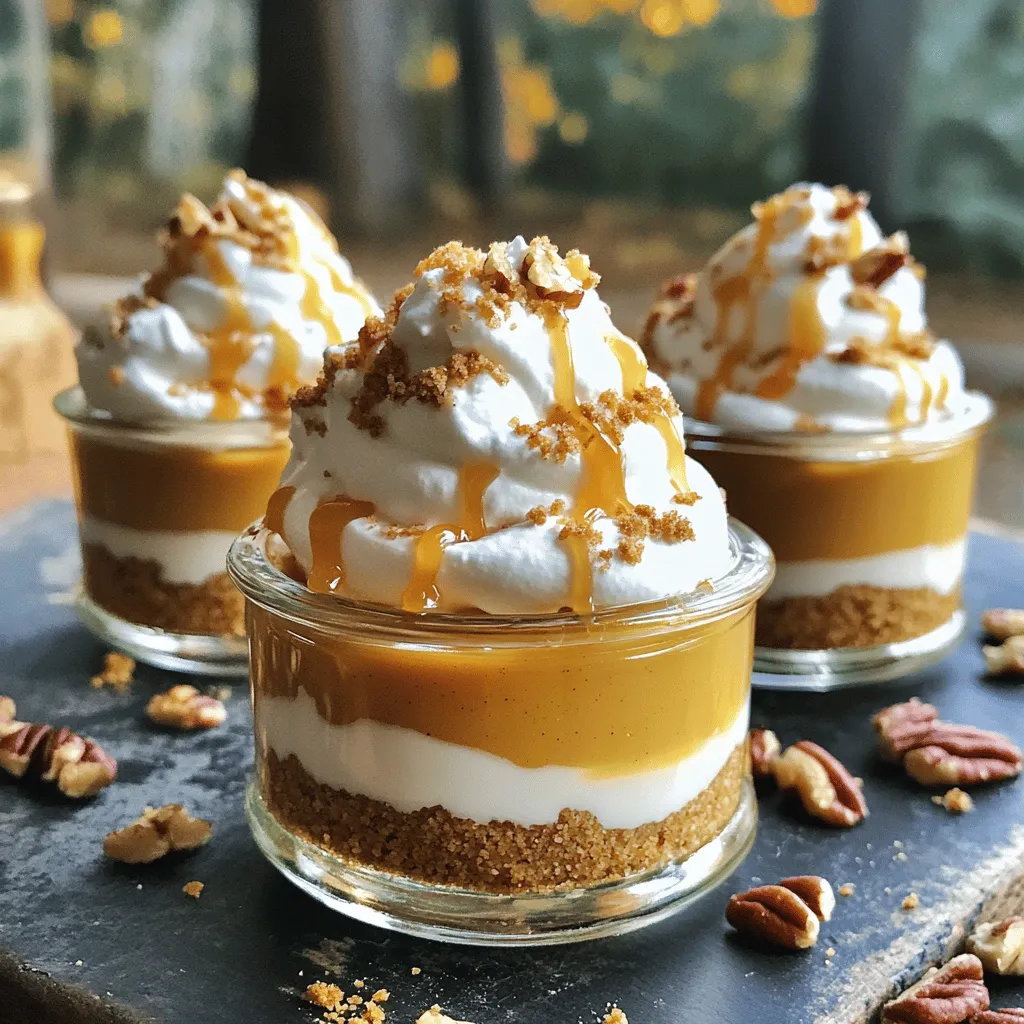
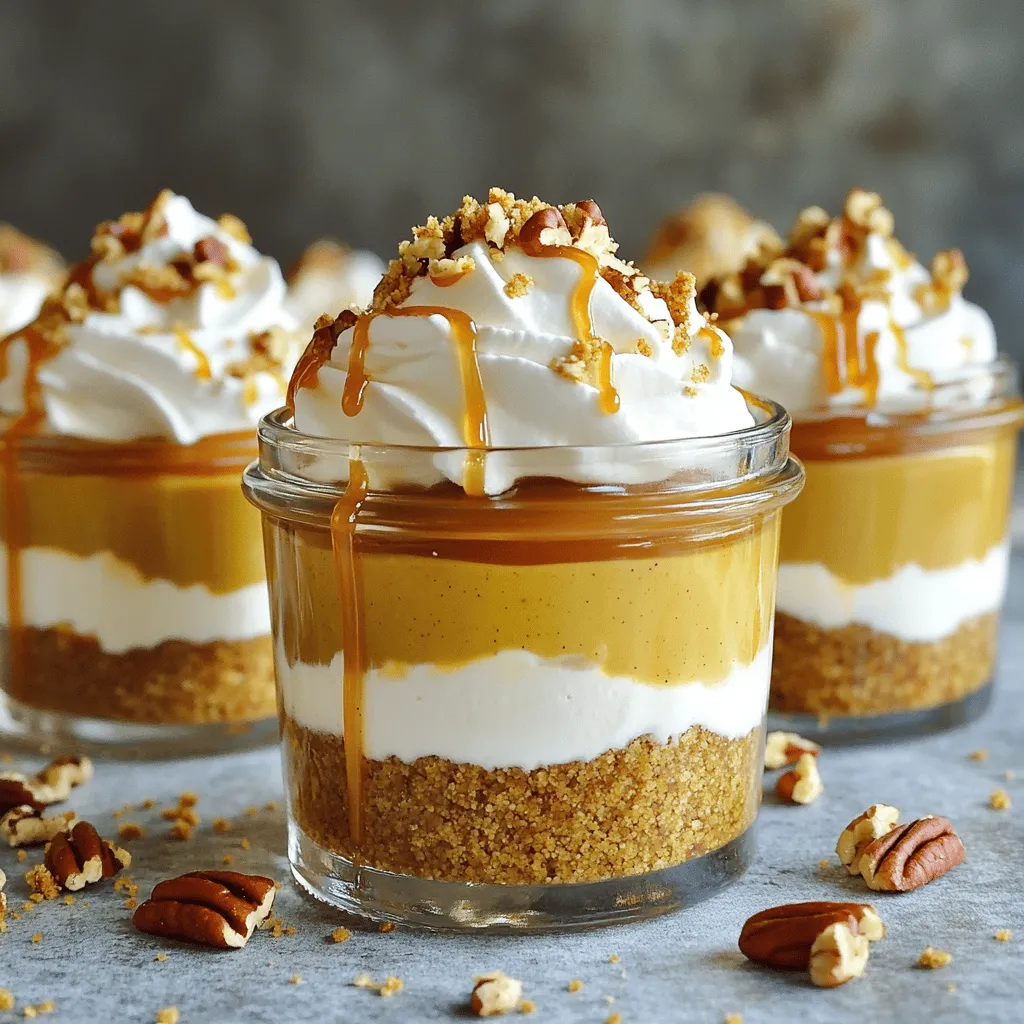
Get ready for a sweet treat! My No-Bake Caramel Pumpkin Pie Cups are easy to make and packed with flavor. Perfect for any occasion, these delightful cups will impress friends and family. Imagine creamy pumpkin filling, a crunchy graham cracker crust, and a drizzle of caramel on top. Throughout this guide, I’ll share the best tips, tricks, and variations. Let’s dive into this delicious dessert that’s sure to be a hit!
Ingredients
Complete List of Ingredients
To make these No-Bake Caramel Pumpkin Pie Cups, you need the following:
– 1 cup graham cracker crumbs
– 1/4 cup unsalted butter, melted
– 1/4 cup brown sugar
– 1 cup pumpkin puree
– 1/2 cup cream cheese, softened
– 1/2 cup powdered sugar
– 1/2 teaspoon vanilla extract
– 1 teaspoon pumpkin pie spice
– 1 cup whipped cream (store-bought or homemade)
– 1/4 cup caramel sauce (for drizzling)
– Optional: chopped pecans or walnuts for topping
Alternative Ingredient Options
You can switch some ingredients for different flavors. Try these:
– Use coconut oil instead of butter for a dairy-free option.
– Swap brown sugar with maple syrup for a richer taste.
– Replace cream cheese with silken tofu for a vegan option.
– Use a gluten-free graham cracker for a gluten-free crust.
Measuring Tips for Accurate Preparation
Accurate measuring makes a big difference in baking. Here are some tips:
– Use a dry measuring cup for the graham cracker crumbs.
– Pack brown sugar into the cup firmly to get the right amount.
– Level off the powdered sugar with a straight edge for accuracy.
– For pumpkin puree, scoop it directly from the can without packing.
– Use a kitchen scale if possible for precise measurements.
These tips help ensure your No-Bake Caramel Pumpkin Pie Cups turn out perfectly delicious!
Step-by-Step Instructions
Preparing the Graham Cracker Crust
To make the crust, you need three simple ingredients: graham cracker crumbs, melted butter, and brown sugar.
1. In a mixing bowl, combine 1 cup of graham cracker crumbs, 1/4 cup of melted unsalted butter, and 1/4 cup of brown sugar.
2. Mix well until the crumbs are evenly coated. The mixture should feel like wet sand.
3. Next, divide this mixture evenly into your serving cups or small jars.
4. Press it down firmly to form a solid layer at the bottom. This step is key for a sturdy crust.
Making the Pumpkin Filling
Now, let’s create that creamy pumpkin filling that makes these cups special.
1. In another bowl, whisk together 1 cup of pumpkin puree, 1/2 cup of softened cream cheese, 1/2 cup of powdered sugar, 1/2 teaspoon of vanilla extract, and 1 teaspoon of pumpkin pie spice.
2. Keep whisking until the mixture is smooth and creamy.
3. Once it’s well combined, gently fold in 1 cup of whipped cream. This adds lightness to your filling.
4. Make sure not to deflate the whipped cream too much. You want it fluffy!
Assembling the Cups
Now comes the fun part—putting it all together!
1. Spoon the pumpkin filling generously on top of the graham cracker crusts in each cup.
2. Be generous! You want a good layer of filling.
3. Drizzle 1/4 cup of caramel sauce over the pumpkin layer. This adds a rich, sweet touch.
4. If you want extra crunch, sprinkle some chopped pecans or walnuts on top.
5. Finally, refrigerate the cups for at least 2 hours. This helps the layers set nicely before serving.
Before you serve, top them with more whipped cream and a final drizzle of caramel sauce. Enjoy!
Tips & Tricks
How to Achieve the Perfect Whipped Cream
To make great whipped cream, start with cold heavy cream. Use a clean bowl and beaters. Whip the cream on medium speed. This helps to build air and volume. When it thickens, add powdered sugar. This will sweeten it and help it hold its shape. Keep whipping until soft peaks form. Don’t over-whip. If it looks grainy, you have gone too far.
Best Practices for Refrigerating
Chill your No-Bake Caramel Pumpkin Pie Cups for at least two hours. This helps the layers set well. Cover them with plastic wrap to keep them fresh. If you stack them, place parchment paper between cups. This will prevent sticking. Keep them in the coldest part of your fridge. This helps keep the texture creamy and smooth.
Common Mistakes to Avoid
Avoid these common mistakes for the best results. First, don’t skip chilling the cups. This step is key for texture. Second, don’t over-mix the pumpkin filling. You want it smooth but not runny. Lastly, watch the whipped cream. If you whip it too much, it can turn to butter. Keep it light and fluffy for the best taste.
Variations
Alternative Toppings and Mix-Ins
You can change up the toppings for your No-Bake Caramel Pumpkin Pie Cups. Try adding chocolate chips for a sweet twist. Crushed cookies add a fun crunch. You could also use coconut flakes for a tropical touch. Consider a mix of nuts for added flavor and texture. If you’re feeling adventurous, drizzle some melted chocolate on top too!
Dairy-Free or Vegan Substitutes
To make these cups dairy-free or vegan, swap the cream cheese for a vegan cream cheese. Use coconut cream in place of whipped cream for a rich texture. Replace regular butter with coconut oil or a plant-based butter. For the caramel sauce, choose a vegan brand or make your own with coconut milk and sugar. These changes keep the dessert creamy and delicious!
Seasonal Flavor Adjustments
You can adjust the flavors based on the season. For a winter twist, add a hint of peppermint extract to the filling. In spring, mix in fresh berries for a fruity flavor. For summer, use lemon zest to brighten the taste. Each adjustment gives your cups a unique flair and keeps them exciting year-round!
Storage Info
How to Properly Store Leftovers
To store your No-Bake Caramel Pumpkin Pie Cups, place them in an airtight container. If you use jars, just cover them tightly with lids. Keep the cups in the fridge. This method keeps the flavors fresh and the texture nice.
Shelf Life of No-Bake Desserts
No-bake desserts like these pumpkin cups stay good in the fridge for about 3 to 5 days. After that, they may lose flavor and texture. Always check for any signs of spoilage before eating.
Freezing Tips for Longer Storage
You can freeze these cups, too! To do this, let them set in the fridge first. After that, cover them with plastic wrap and then foil. They can last up to 2 months in the freezer. When ready to eat, thaw them in the fridge overnight. Enjoy the sweet, creamy taste even after freezing!
FAQs
Can I make these cups ahead of time?
Yes, you can make these cups ahead of time. I often prepare them a day in advance. This gives the layers time to set and flavors to blend. Just cover them tightly with plastic wrap and store them in the fridge until you are ready to serve. They taste even better after chilling!
What can I substitute for pumpkin puree?
If you can’t find pumpkin puree, use mashed sweet potatoes. They have a similar texture and sweet flavor. You can also use butternut squash puree as a good choice. Just make sure to check for added sugar in the store-bought versions. Both will work well in this recipe.
How to make the crust gluten-free?
To make the crust gluten-free, use gluten-free graham cracker crumbs. Many brands offer tasty options. You can also use crushed gluten-free cookies or almond flour as a base. Mix them with melted butter and sugar just like the recipe states. It’s that easy!
This blog post covered all you need to make delicious no-bake pumpkin cups. We discussed the right ingredients, how to create the perfect crust, and tips for perfect whipped cream. You learned variations to suit your taste and how to store leftovers properly. Remember, slight changes can make your dessert unique. Use the tips and tricks to avoid mistakes. Embrace your creativity and enjoy making these tasty treats!