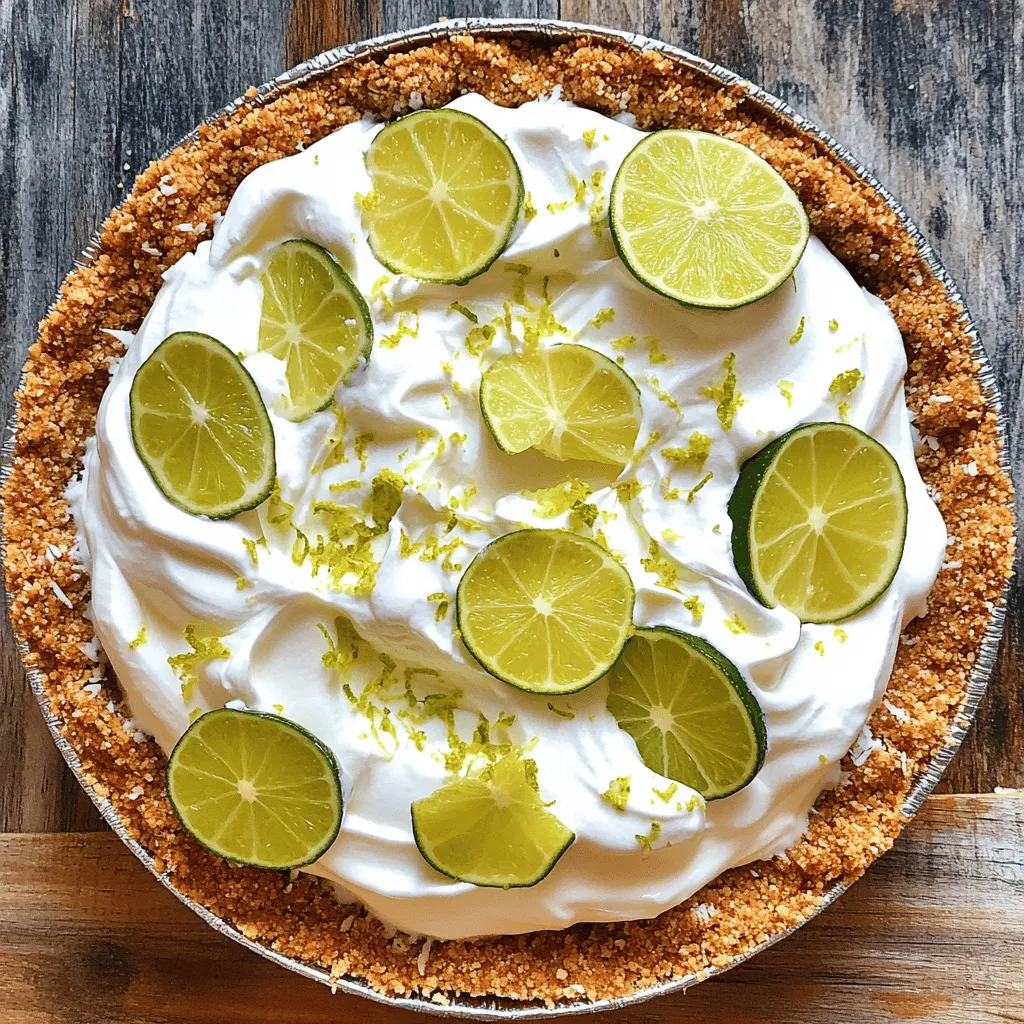
Craving something sweet and zesty? Let’s dive into the world of No Bake Key Lime Pie! This dessert is creamy, tart, and oh-so-easy to make. You won’t need an oven for this delightful treat, which means less mess and more fun. Gather simple ingredients, and I’ll guide you step by step. It’s perfect for any occasion or just a sunny day. Let’s get started!
Ingredients
Essential Ingredients for No Bake Key Lime Pie
To craft a tasty no bake key lime pie, gather these key items:
– 1 ½ cups graham cracker crumbs
– ½ cup unsweetened shredded coconut
– ⅓ cup sugar
– ½ cup unsalted butter, melted
– 2 (14 oz) cans sweetened condensed milk
– ¾ cup fresh key lime juice (about 15-20 key limes)
– 1 tablespoon lime zest (plus extra for garnish)
– 1 cup heavy whipping cream
– 2 tablespoons powdered sugar
– Key lime slices for garnish
These ingredients work together to create a creamy and delicious pie. The graham cracker crumbs form a crunchy base. The sweetened condensed milk and key lime juice give it a tangy zing.
Optional Ingredients for Customization
You can add a twist to your pie with these options:
– Fresh mint leaves for garnish
– Extra lime zest for a stronger flavor
– A dash of vanilla extract for depth
– Toasted coconut for added crunch
These optional ingredients can enhance your pie’s taste. Feel free to mix and match based on your preferences.
Notes on Freshness and Quality
Using fresh key limes is key to a great pie. They are juicier and more fragrant than regular limes. When picking limes, choose those that feel heavy for their size. This often means they have more juice. Always check the dates on your sweetened condensed milk, too. Fresh ingredients equal great flavor!
Step-by-Step Instructions
Preparing the Crust
To make the crust, grab a large bowl. Mix together the graham cracker crumbs, shredded coconut, sugar, and melted butter. Stir until it looks like wet sand. This mixture should stick together when pressed. Next, take a 9-inch pie dish and firmly press this mixture into the bottom and sides. Make sure it is even and compact. Now, chill the crust in the fridge for at least 30 minutes. This helps it set properly.
Making the Filling
In a large mixing bowl, combine the sweetened condensed milk, fresh key lime juice, and lime zest. Use a whisk to mix until everything is smooth and well combined. The key lime juice gives the pie its bright flavor. Make sure to use fresh juice for the best taste.
Whipping the Cream and Combining Mixtures
In a separate bowl, whip the heavy cream with an electric mixer. Start on medium speed until soft peaks form. Slowly add the powdered sugar while continuing to whip. Keep going until you see stiff peaks. This means the cream is ready. Now, gently fold the whipped cream into the lime mixture. Be careful not to deflate the cream; you want to keep it light and fluffy.
Filling the Crust and Chilling
Pour the creamy lime filling into your chilled graham cracker crust. Smooth out the top with a spatula. Once it looks nice, cover the pie and refrigerate for at least 4 hours. This will help it firm up. After chilling, the pie will be ready for slicing. You can garnish it with extra lime zest and key lime slices for a lovely touch. Enjoy your delightful no-bake pie!
Tips & Tricks
Achieving the Perfect Whipped Cream
To get great whipped cream, start with cold tools. Chill your mixing bowl and beaters. Use heavy cream for the best texture. Whip the cream on medium speed until soft peaks form. Then, add powdered sugar slowly. Keep whipping until you see stiff peaks. This step gives your pie a nice, fluffy feel.
Preventing Crust Sogginess
A soggy crust can ruin your pie. To avoid this, chill your crust before adding the filling. Use melted butter to bind the crumbs well. Press the mixture tightly into the pie dish. Bake the crust for 10 minutes at 350°F if you want extra crunch. Let it cool before adding the lime filling.
How to Enhance the Key Lime Flavor
To boost the key lime flavor, use fresh juice. Freshly squeezed juice makes a big difference. Try adding more lime zest for a bolder taste. You can also add a pinch of salt to balance the flavors. If you like it sweeter, adjust the sugar to your taste. These tips will help you create a pie that pops with flavor.

Variations
Coconut-Key Lime Variation
To add a tropical twist, try the coconut-key lime variation. Simply mix ½ cup of unsweetened shredded coconut into your crust. You can also fold in ½ cup of shredded coconut into the filling. This extra coconut enhances the pie’s texture and flavor. It makes every bite feel like a sunny beach day.
Gluten-Free Option
For those who avoid gluten, making a gluten-free key lime pie is easy. Use gluten-free graham crackers for the crust. There are many brands that make tasty gluten-free options. You can crush them and follow the same steps for the crust. This way, everyone can enjoy this delightful dessert.
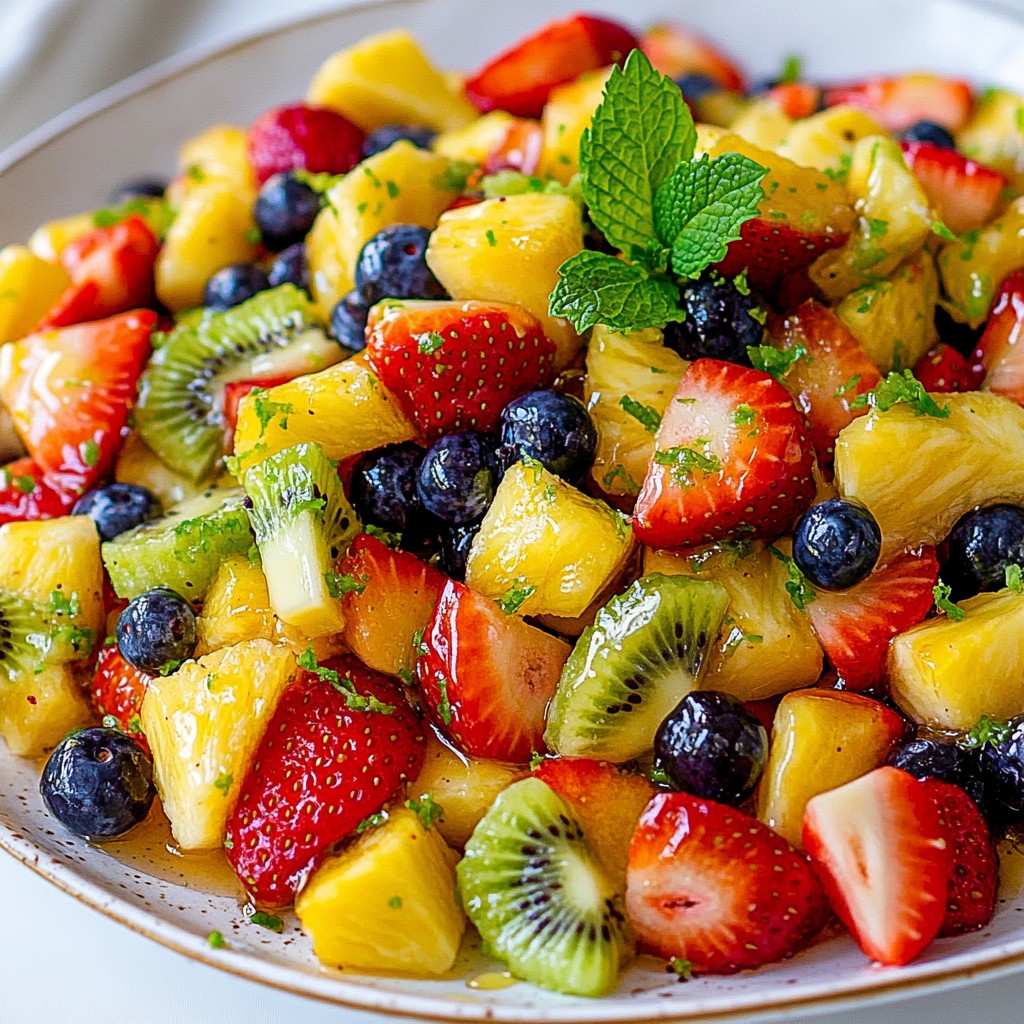
Adding a Fruit Topping
Fruits make this pie even more special. You can add fresh fruit on top after chilling. Slices of strawberries, kiwi, or blueberries work great. They add color and taste. You can also make a fruit compote by cooking down your favorite fruit. Drizzle this over the pie before serving for a lovely touch.
Want to explore more?
Storage Info
Best Practices for Refrigeration
To keep your no bake key lime pie fresh, store it in the fridge. Use an airtight container or cover it with plastic wrap. This prevents drying out and keeps flavors intact. Make sure the pie is fully set before covering it. If you don’t have a container, use a plate on top. This also protects it from any strong smells in the fridge.
How Long Does It Last?
When stored properly, the pie lasts about 3 to 4 days in the fridge. I recommend enjoying it within this time for the best taste and texture. After day four, the crust may become soggy. If you notice any change in smell or color, it’s best to toss it.
Freezing Tips for Leftovers
You can freeze the pie if you have leftovers. First, let it set in the fridge for a few hours. Then, slice it into portions. Wrap each piece tightly in plastic wrap. Place the wrapped slices in a freezer-safe bag or container. This way, you can enjoy it later! It lasts about 1 to 2 months in the freezer. To eat, thaw it in the fridge for a few hours or overnight. Enjoy every bite of your delightful key lime pie again!
FAQs
What is the difference between Key limes and regular limes?
Key limes are smaller and rounder than regular limes. They have a thinner skin and a more intense flavor. Their juice is sweeter and more aromatic. This unique taste makes Key limes perfect for desserts like pie.
Can I use bottled key lime juice?
Yes, you can use bottled key lime juice. However, fresh juice offers better flavor. Bottled juice may lack the bright taste that fresh Key limes provide. If you want the best results, I recommend using fresh juice.
How can I make my key lime pie firmer?
To make your key lime pie firmer, add more lime juice and zest. You can also chill it for longer. If you want a thicker filling, consider adding a bit of gelatin to the mixture.
Can I make this recipe ahead of time?
Absolutely! You can make this pie a day or two ahead. Just store it in the fridge. This will allow the flavors to blend and the filling to set better.
What are some serving suggestions for No Bake Key Lime Pie?
You can serve this pie with whipped cream on top. Add some lime slices or zest for decoration. Fresh berries also make a great topping. They add color and a sweet contrast to the tart pie.
You learned how to make a tasty No Bake Key Lime Pie. We covered essential and optional ingredients, along with tips for the best results. You also explored variations and storage ideas to keep it fresh.
Remember, using quality ingredients makes a big difference. Try customizing your pie to match your taste. Enjoy sharing this sweet treat with friends and family!