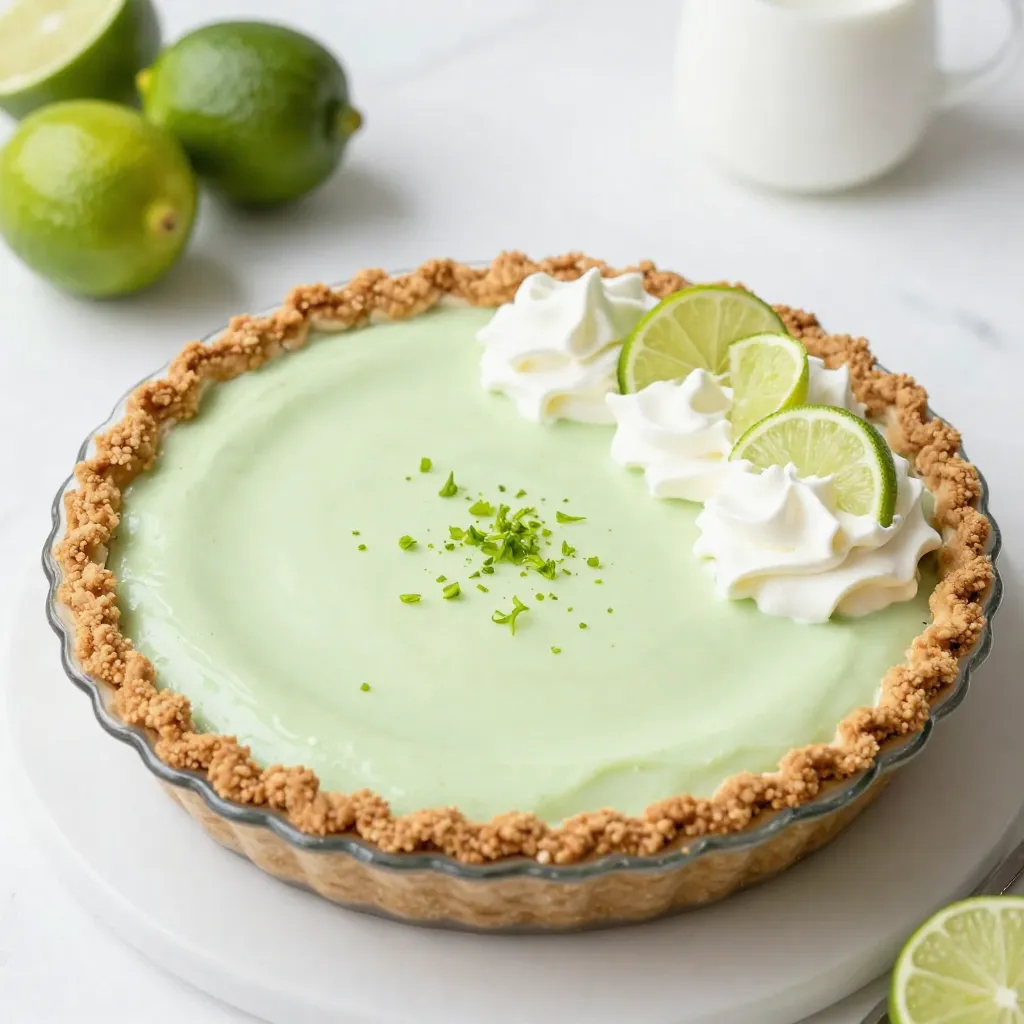
Craving a refreshing treat? This No-Bake Key Lime Pie is your answer! You don’t need an oven, just simple ingredients and a little time. With its zesty lime flavor and creamy filling, it’s a perfect dessert for any occasion. In this guide, I’ll show you how to whip up this delicious pie with easy steps, tips, and variations. Let’s dive into the sweet and tangy world of Key Lime Pie!
Why I Love This Recipe
- Refreshing Flavor: The combination of fresh lime juice and zest creates a vibrant, tangy flavor that is perfect for warm weather desserts.
- No-Bake Convenience: This pie is incredibly easy to make since it requires no baking, making it a quick and hassle-free treat.
- Creamy Texture: The whipped cream folded into the lime filling gives this pie a light and airy texture that melts in your mouth.
- Perfect for Any Occasion: Whether it’s a summer barbecue or a holiday gathering, this key lime pie is always a crowd-pleaser.
Ingredients
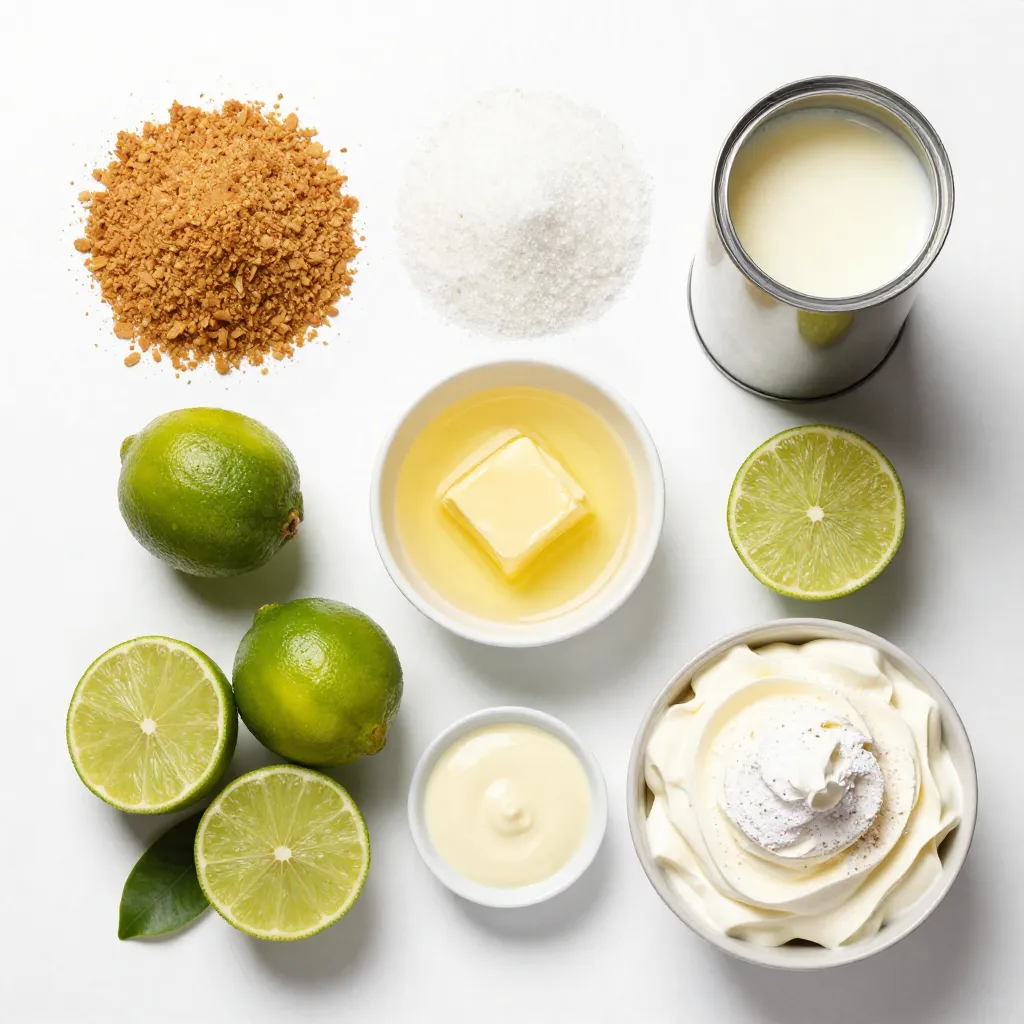
To make a no-bake key lime pie, you need these fresh and simple ingredients:
– 1 ½ cups graham cracker crumbs
– ½ cup granulated sugar
– ½ cup unsalted butter, melted
– 1 can (14 ounces) sweetened condensed milk
– ½ cup fresh lime juice
– Zest of 2 limes
– 1 teaspoon vanilla extract
– 1 cup heavy whipping cream
– 2 tablespoons powdered sugar
These ingredients work together to create a creamy, zesty pie. The graham cracker crust gives a nice crunch. The sweetened condensed milk adds creaminess. Fresh lime juice and zest bring bright flavor. I love using fresh lime juice for the best taste. The whipped cream makes the filling light and airy. This simple list helps you create a delightful dessert that everyone will enjoy.
Step-by-Step Instructions
Preparing the Crust
1. In a mixing bowl, combine 1 ½ cups of graham cracker crumbs and ½ cup of granulated sugar.
2. Pour in ½ cup of melted butter. Mix until the texture looks like wet sand.
3. Press this mixture firmly into the bottom and up the sides of a 9-inch pie dish.
4. Chill this crust in the fridge for about 30 minutes to set.
Making the Filling
1. In a separate bowl, whisk together one can (14 ounces) of sweetened condensed milk, ½ cup of fresh lime juice, lime zest from 2 limes, and 1 teaspoon of vanilla extract. Mix until smooth.
2. In another bowl, whip 1 cup of heavy cream with 2 tablespoons of powdered sugar until it reaches stiff peaks.
Combining and Chilling
1. Gently fold the whipped cream into the lime mixture. Be careful not to deflate the cream.
2. Pour the key lime filling into the chilled crust. Smooth the top with a spatula.
3. Cover the pie with plastic wrap and refrigerate for at least 4 hours or overnight for best results. This helps the filling firm up.
4. Once set, slice the pie and serve it chilled. You can add lime slices or a dollop of whipped cream for garnish if you’d like.
Tips & Tricks
Achieving the Perfect Filling
Using fresh lime juice makes a big difference. Fresh juice gives the pie its bright taste. It adds a zesty kick that bottled juice cannot match. When you squeeze your limes, aim for about half a cup. This usually means 4-5 limes, depending on their size.
Folding the whipped cream into the lime mixture is key. Start by adding a small bit of the whipped cream to the lime mix. This helps lighten the mixture. Then, gently fold in the rest. Use a spatula and scoop from the bottom up. Be careful not to deflate the whipped cream. You want it light and fluffy.
Serving Suggestions
Garnish your pie for that extra touch. Lime slices look beautiful on top. They add a pop of color and hint at the flavor inside. You can also add a dollop of whipped cream. This adds creaminess and makes each bite delightful. If you want more color, try adding some lime zest on top.
Adjusting Sweetness and Tartness
Finding the right balance is important. If you like sweeter pies, add a bit more sugar. You can adjust the sweetness in the filling. Start by adding a tablespoon of sugar and taste. If it needs more, add more slowly.
For those who love tart flavors, add more lime juice. Just a teaspoon or two can make a big change. Remember, the key is to taste as you go. You can always adjust to make it just right for you.
Pro Tips
- Use Fresh Limes: For the best flavor, always use fresh limes instead of bottled lime juice. This ensures your pie has that zesty kick!
- Chill the Crust: Make sure to chill the crust for at least 30 minutes. This helps it set properly and makes it easier to slice later.
- Whip Cream to Stiff Peaks: When whipping the cream, aim for stiff peaks. This will give your filling a light and airy texture.
- Let it Set Overnight: For the best flavor and texture, let the pie set in the refrigerator overnight. This allows the filling to firm up perfectly.
Variations
Adding Flavors
You can easily switch up the flavors in your No-Bake Key Lime Pie. For a tropical twist, add shredded coconut. Just fold in about a cup of unsweetened coconut before you pour in the filling. If you enjoy berries, try a raspberry version. Simply blend fresh or frozen raspberries into the lime mixture. For a brighter taste, switch to other citrus fruits. Oranges or lemons work well too. Each option brings a new surprise to your taste buds.
Alternative Crust Options
If you need a gluten-free crust, use almond flour instead of graham cracker crumbs. Mix it with melted butter and a bit of sugar. Press this into your pie dish just like the original recipe. For a fun twist, try a chocolate crust. Use crushed chocolate cookies mixed with melted butter. This chocolatey base pairs great with the tart lime filling and adds a rich flavor. Each crust option offers a unique bite to your pie.
Storage Info
Refrigeration Guidelines
You can store your no-bake key lime pie in the fridge for up to three days. Keep it covered with plastic wrap to maintain freshness. If you want to enjoy it later, remember to check on its texture. The pie should be firm but still creamy.
Freezing the Pie
Freezing this pie is simple. First, slice the pie into pieces. Wrap each slice in plastic wrap, then place them in a freezer-safe bag. This helps to keep the pie fresh. You can freeze it for up to three months. When you’re ready to eat, take a slice out and let it thaw in the fridge for a few hours. This way, it stays tasty and fresh. Enjoy your pie at any time!
FAQs
Can I use bottled lime juice?
You can use bottled lime juice, but fresh juice is best. Fresh lime juice has a bright taste. Bottled juice may taste flat. This can affect your pie’s flavor. If you choose bottled juice, look for one labeled 100% juice. It should have no added sugars or preservatives.
How do I know when the pie is set?
The pie is set when the filling is firm. You can check by gently shaking the pie dish. If the center jiggles slightly, it might need more time. Also, the filling should not feel sticky. After chilling, it should be smooth and creamy.
Can I make this pie ahead of time?
Yes, you can make this pie ahead of time. It stores well in the fridge for up to three days. Just cover it with plastic wrap. For best taste, let the pie chill overnight. This helps the flavors blend. You can serve it chilled, and it will still taste fresh.
This recipe shows how to make a delicious lime pie. We covered the key ingredients, step-by-step instructions, and helpful tips. You learned about variations, storage options, and answered common questions. Try adding your flavors or using a different crust. Serve it with a garnish to impress friends and family. Enjoy the bright taste of lime with each bite. This pie is a treat you can make anytime and share with others. Happy bakin