

Latest & Greatest
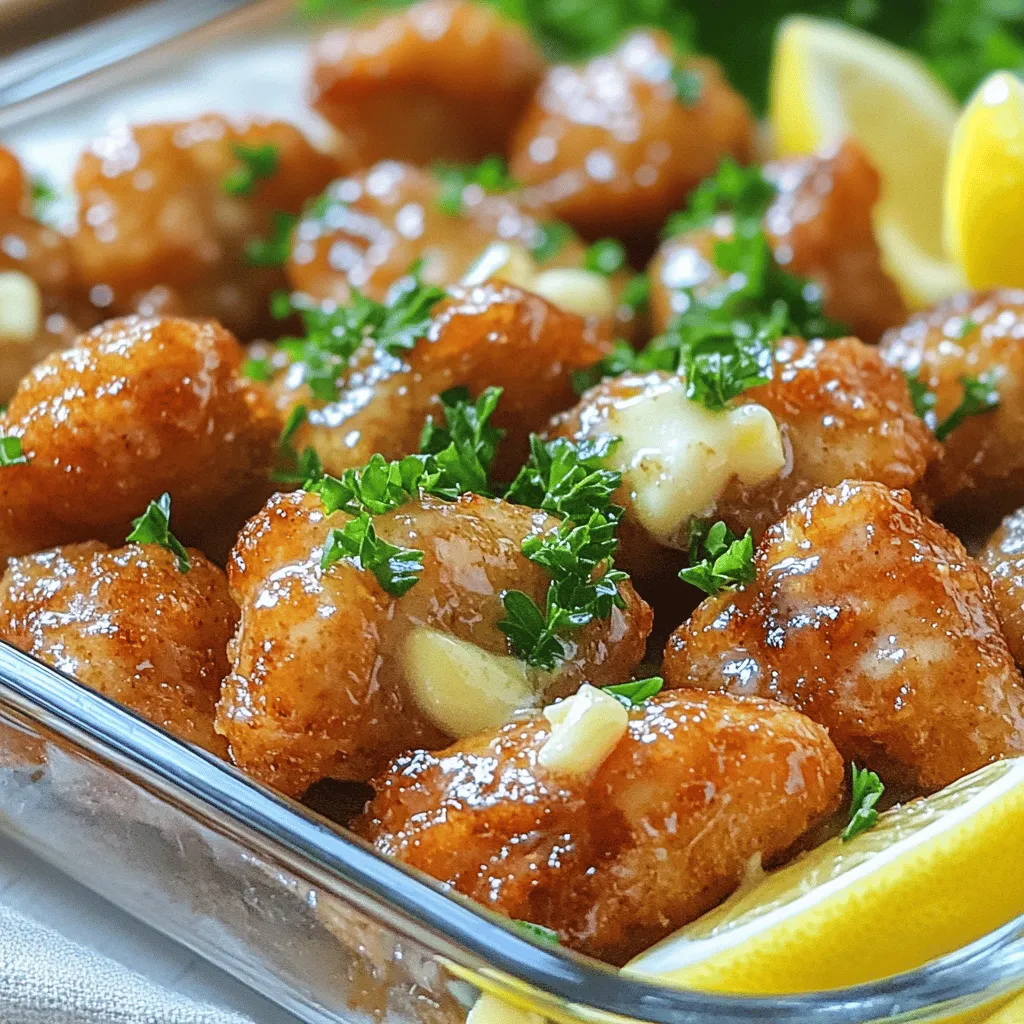
Garlic Butter Chicken Bites Savory and Simple Recipe
Are you ready for a dish that’s simple, savory, and packed with flavor? Garlic Butter Chicken Bites are a quick
Read more…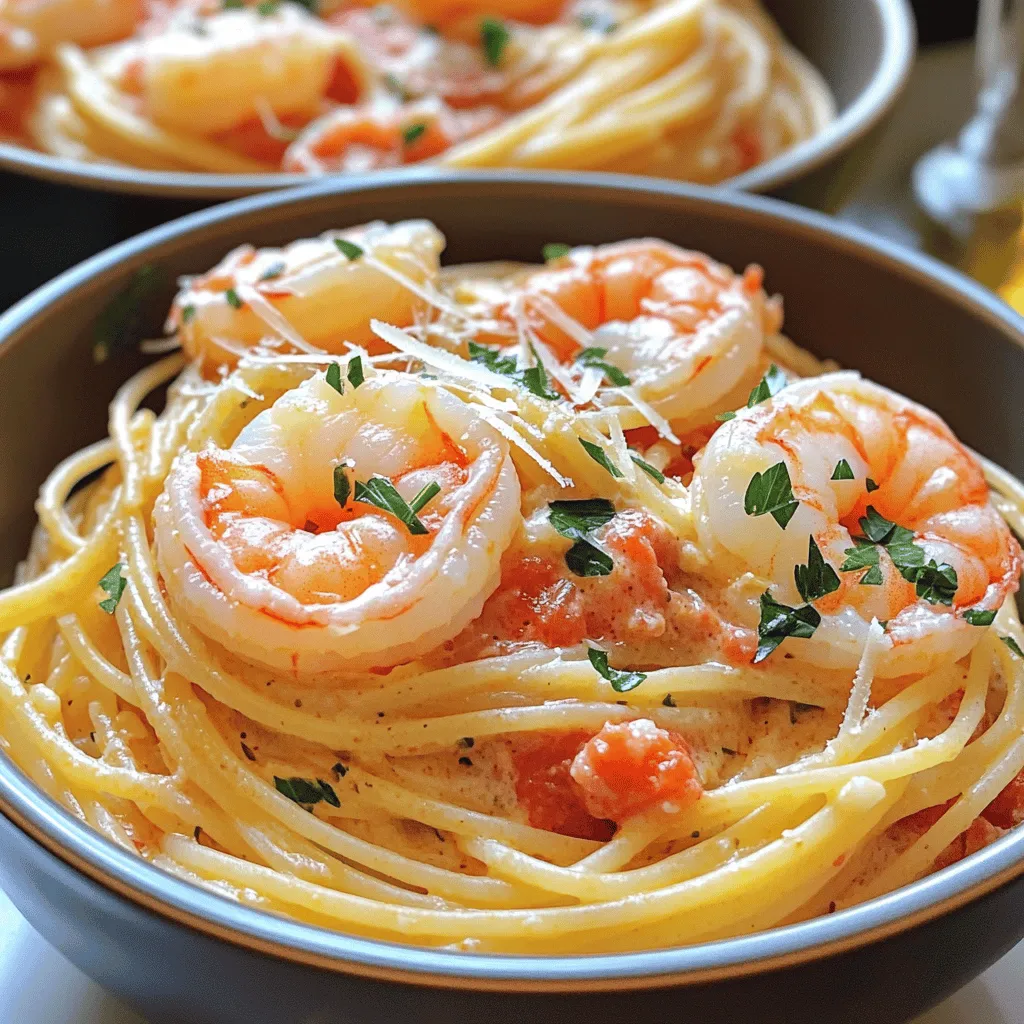
Spaghetti with Shrimp in Creamy Tomato Sauce Delight
Are you ready to elevate your pasta game? In this article, we dive into a delicious recipe for Spaghetti with
Read more…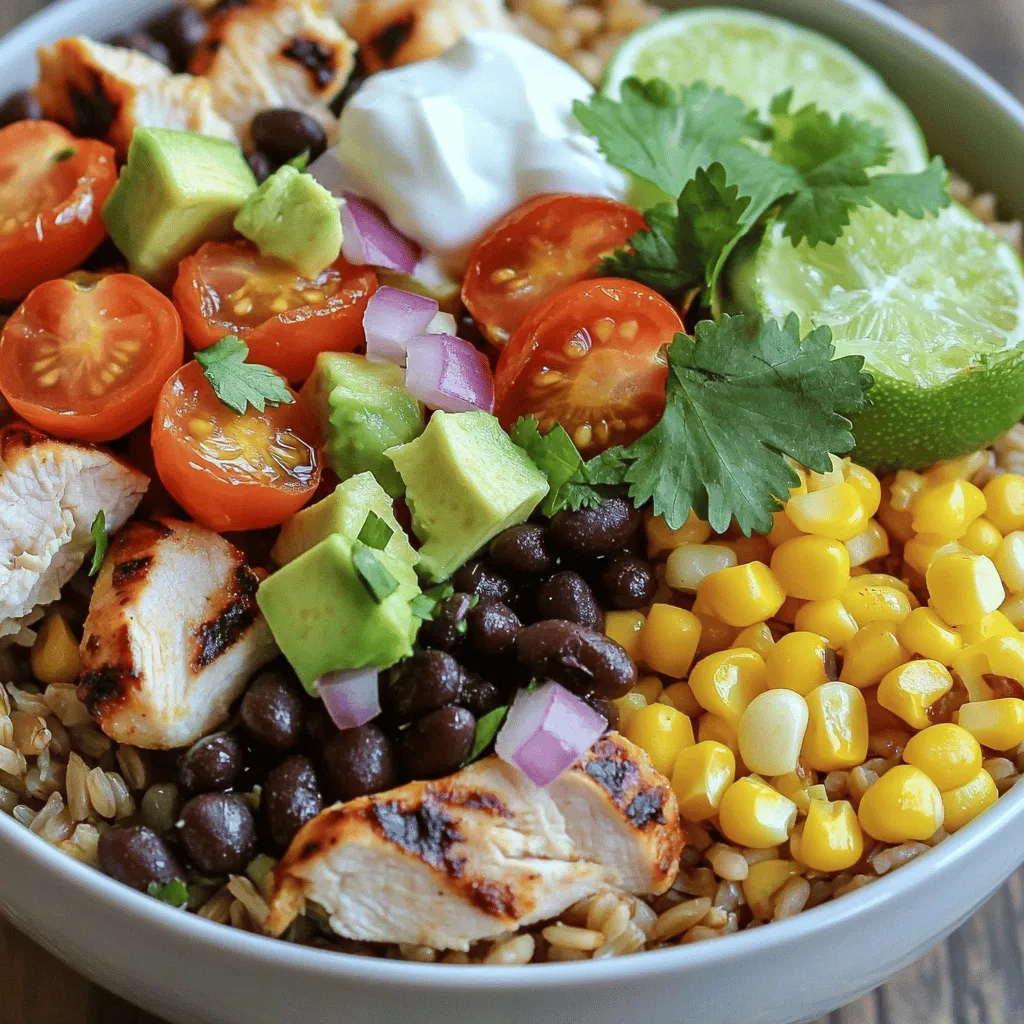
Chicken Burrito Bowl Flavorful and Simple Recipe
Are you ready to enjoy a delicious Chicken Burrito Bowl that’s packed with flavor and super easy to make? In
Read more…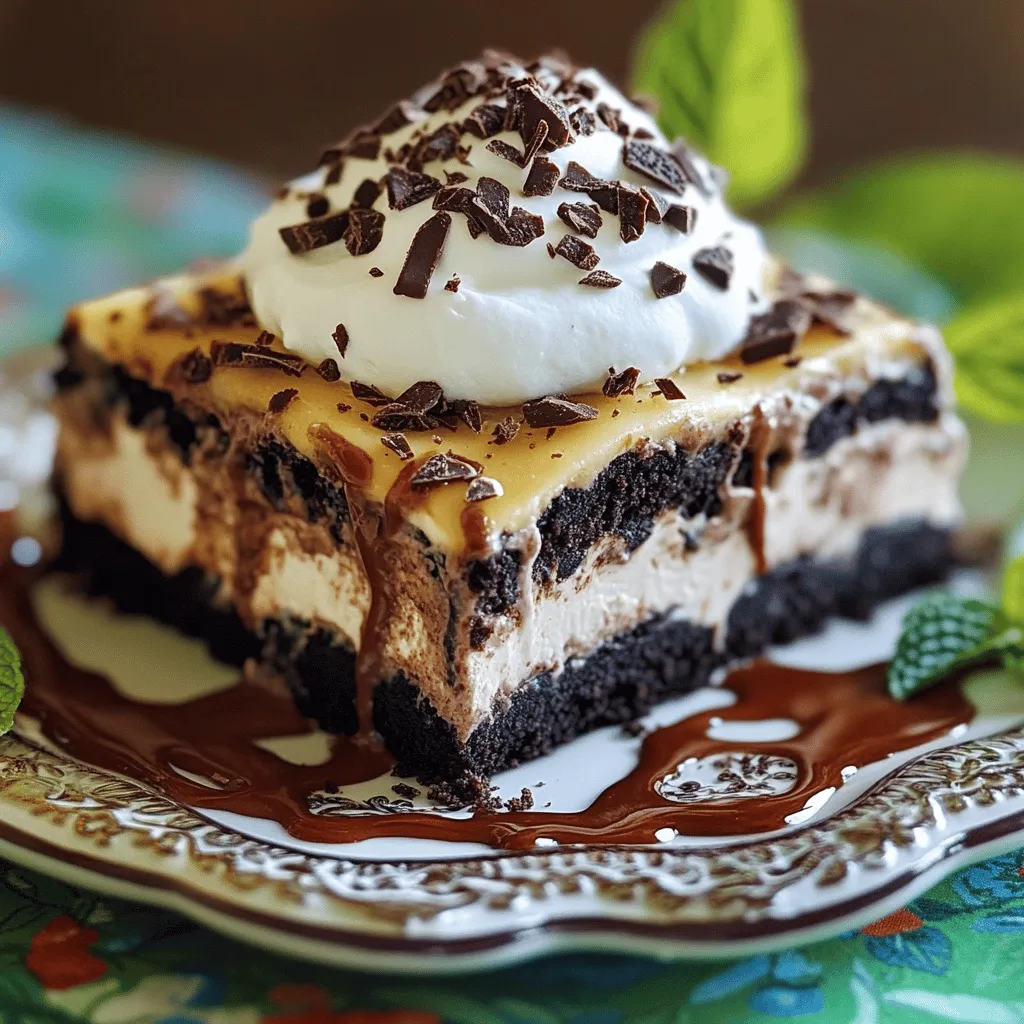
Chocolate Lasagna Delightful Dessert for Everyone
Are you ready to indulge in a sweet treat that dazzles every palate? Chocolate lasagna is a layered dessert that
Read more…
Soft and Chewy Snickerdoodle Cookies Dessert Delight
Are you ready to bake the most irresistible Soft and Chewy Snickerdoodle Cookies? With their warm cinnamon flavor and perfect
Read more…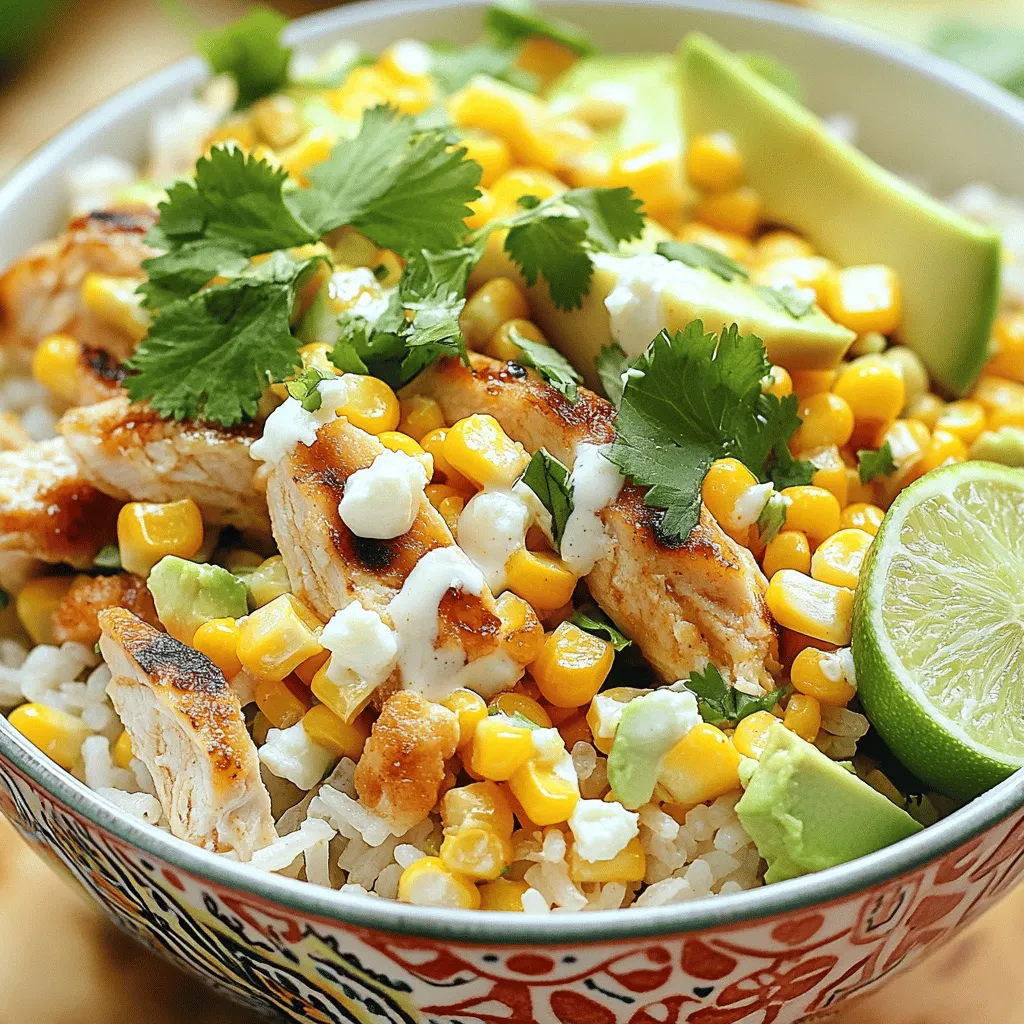
Street Corn Chicken Rice Bowl Flavorful and Filling Meal
Ready for a tasty meal? This Street Corn Chicken Rice Bowl packs tons of flavor and fills you up! With
Read more…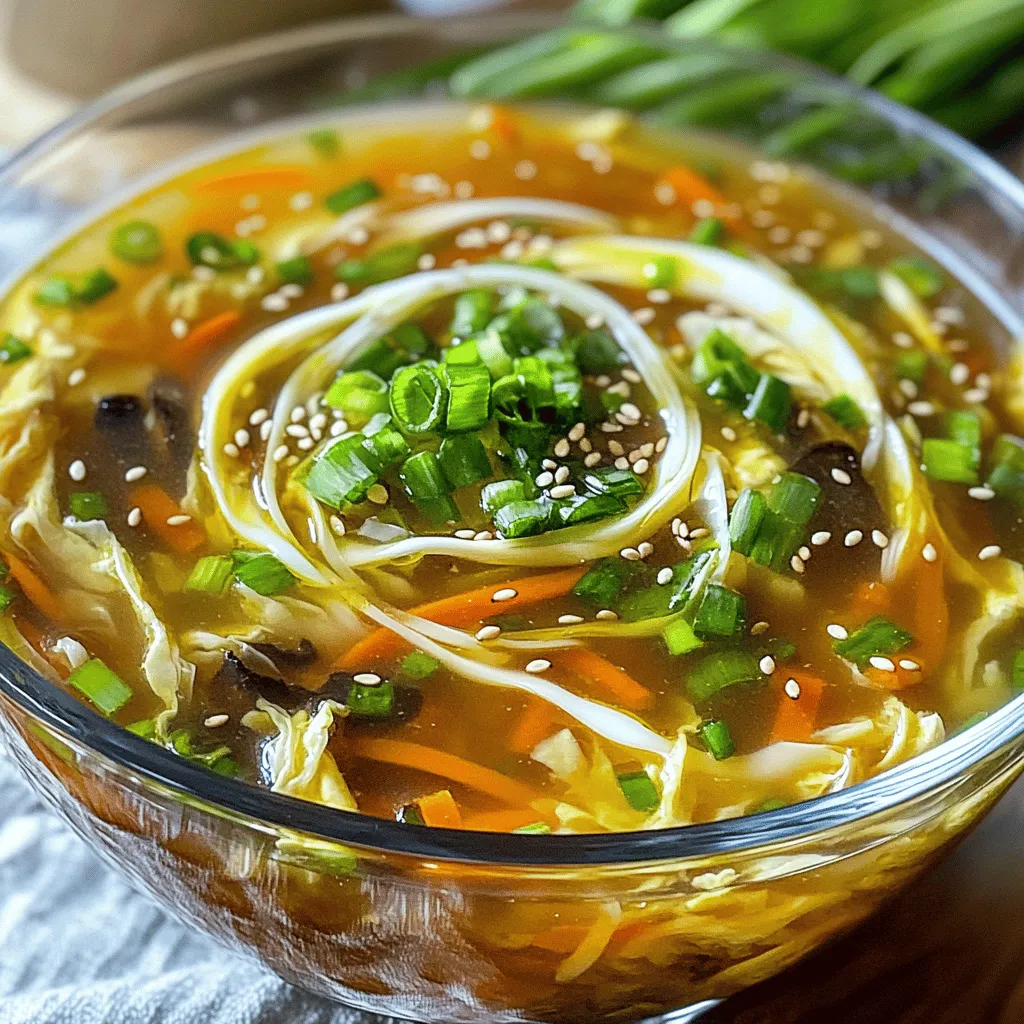
Egg Roll Soup Tasty and Simple Comfort Food Recipe
Welcome to the cozy world of Egg Roll Soup—your new go-to comfort food! With its warm broth and fresh veggies,
Read more…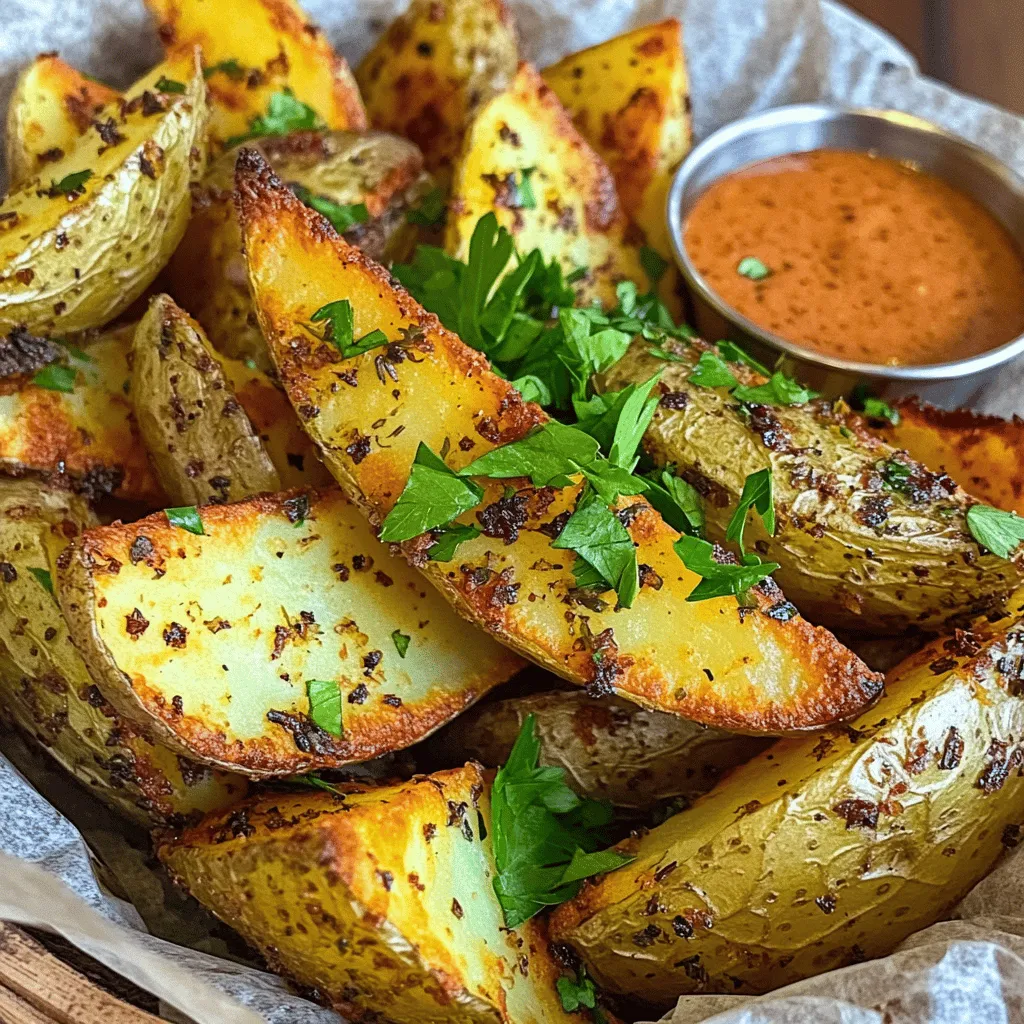
Crispy Potato Wedges Flavorful and Easy Recipe Guide
If you’re craving a snack that’s crunchy and bursting with flavor, crispy potato wedges are the answer. I’ve crafted a
Read more…browse recipes


Mini Crème Brûlée Cheesecakes Delightful Dessert Recipe
Are you ready to impress your guests with a dessert that’s both elegant and easy? Mini Crème Brûlée Cheesecakes combine rich flavors and a…
My Latest Drinks

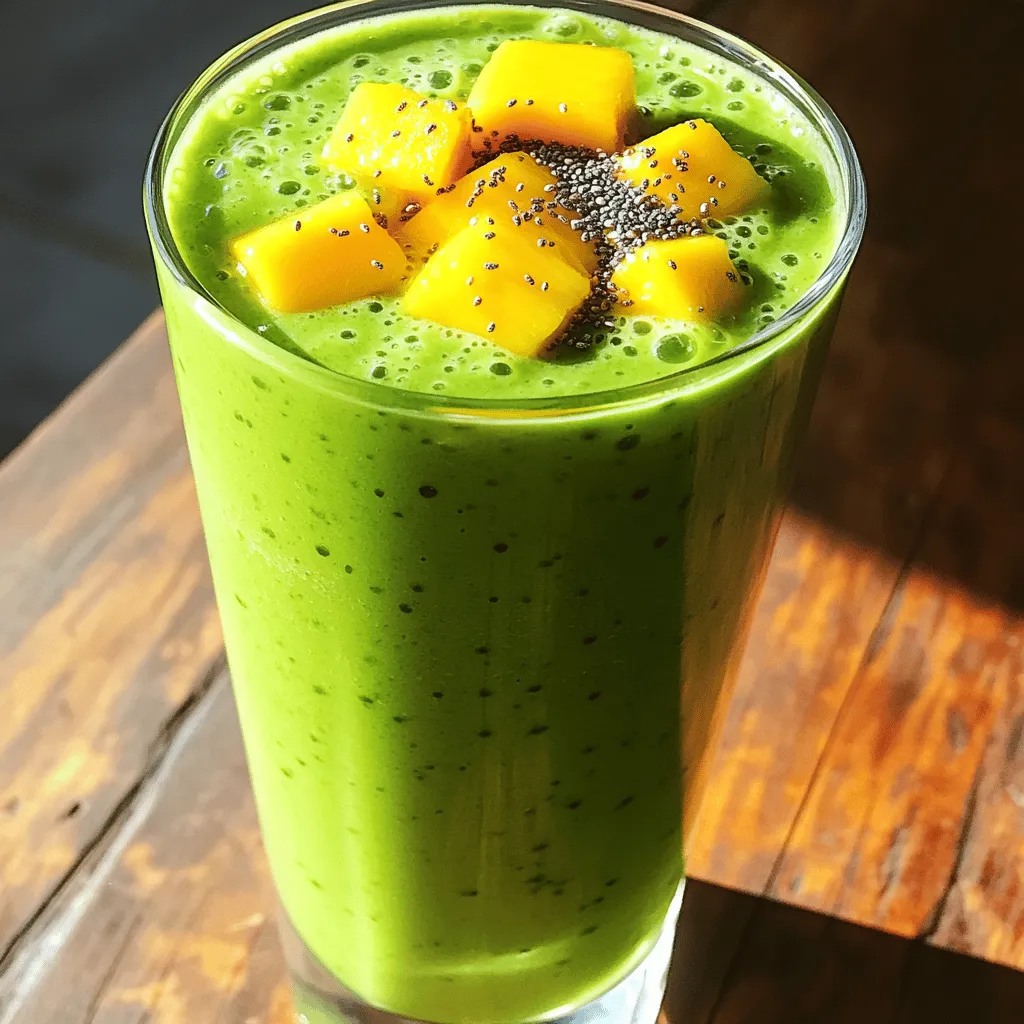
Tropical Green Smoothie Refreshing Health Boost Recipe
Looking for a refreshing drink that packs a health punch? My Tropical Green Smoothie is the perfect blend of fruits Read Full Recipe-
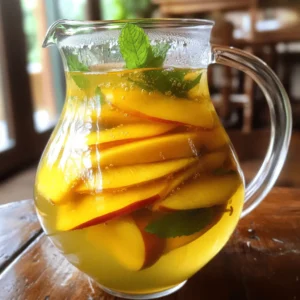
Apple Cider Harvest Punch Refreshing Fall Delight
Get ready for fall with my delicious Apple Cider Harvest Punch! This easy recipe blends fresh flavors that celebrate the Read Full Recipe -
Pineapple Coconut Smoothie Creamy and Refreshing Drink
Are you craving a drink that’s both creamy and refreshing? Look no further than my Pineapple Coconut Smoothie! This easy-to-make Read Full Recipe -
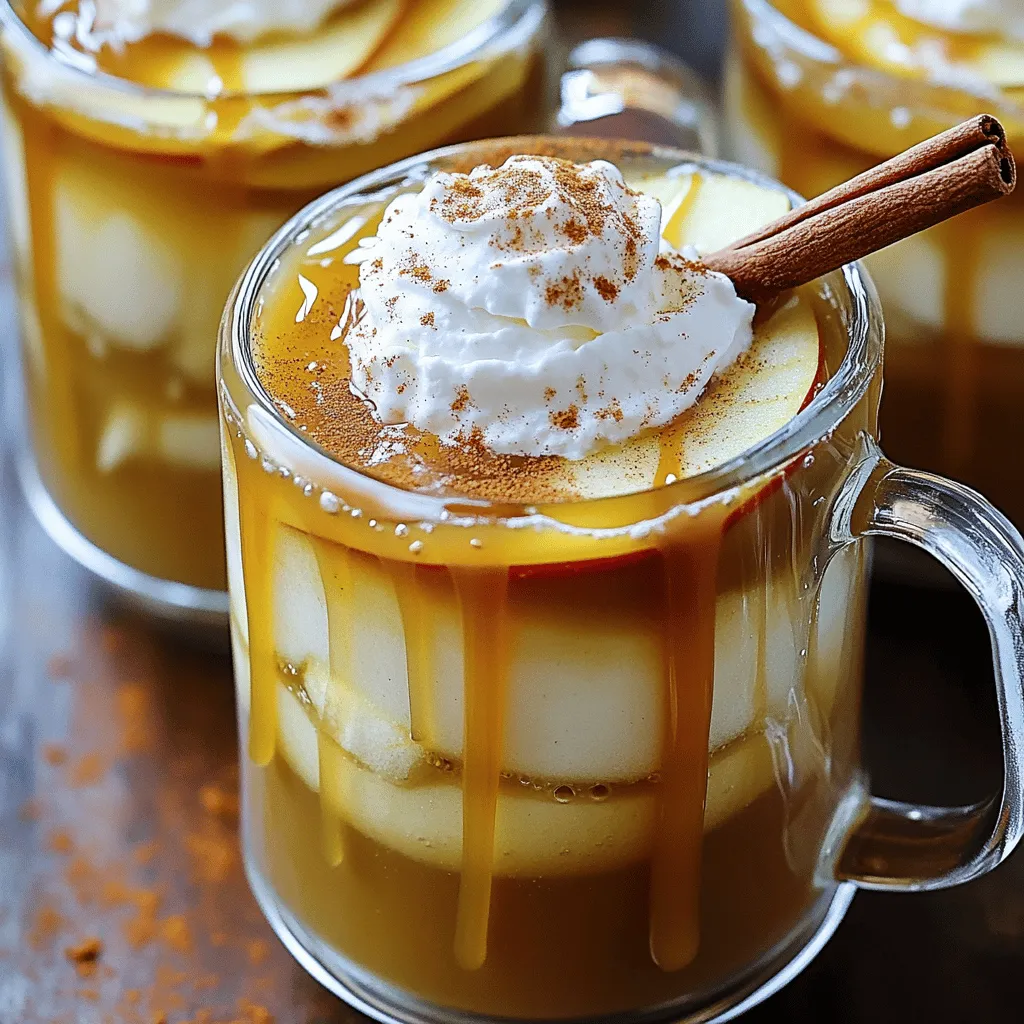
Delicious Caramel Apple Cider Cozy Fall Drink Recipe
Fall is here, and nothing says cozy like a warm cup of Caramel Apple Cider. This drink combines the sweet Read Full Recipe -
Instant Pot Apple Cider Quick and Flavorful Recipe
Looking for a quick and delicious way to make apple cider? The Instant Pot is your best friend! I’ll share Read Full Recipe -
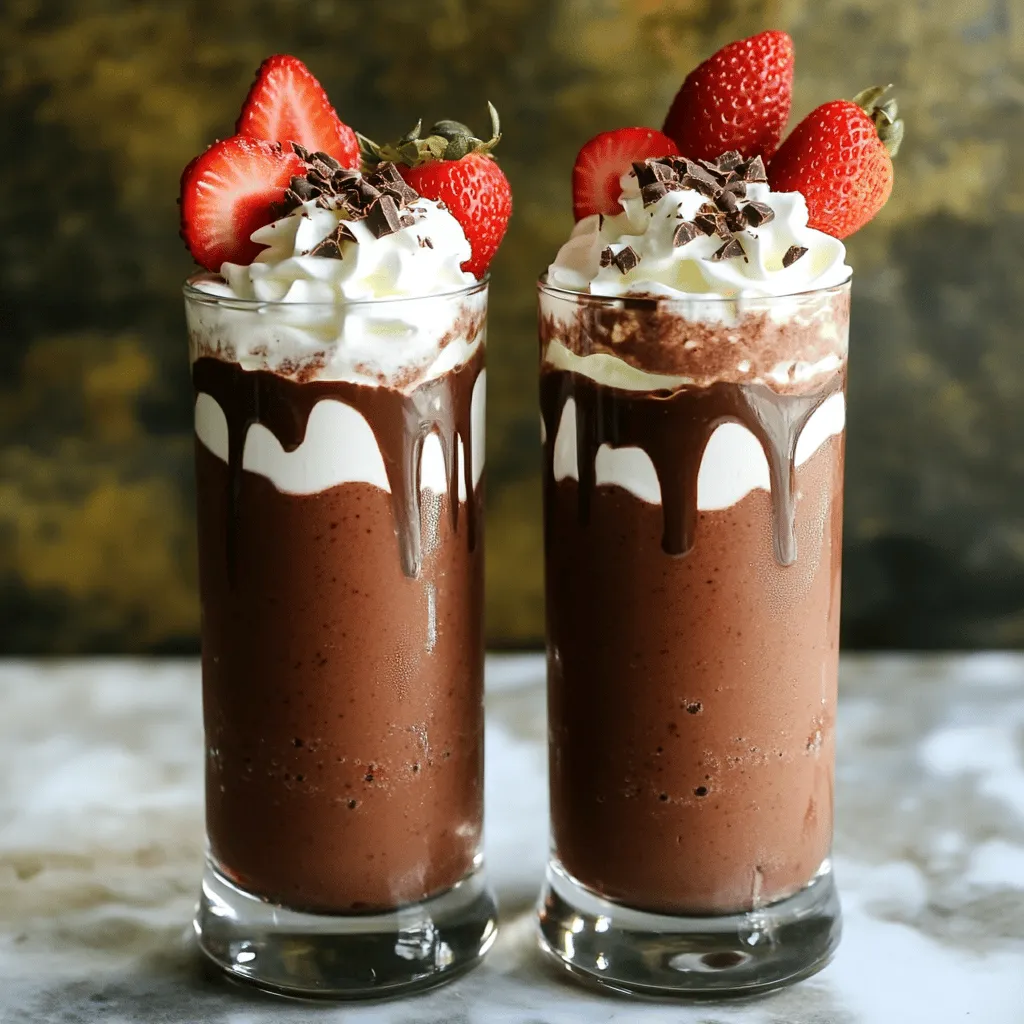
Chocolate Covered Strawberry Smoothie Delicious Treat
Craving something delicious and healthy? The Chocolate Covered Strawberry Smoothie is the perfect treat! With fresh strawberries, cocoa powder, and Read Full Recipe


My Latest Dinners
-
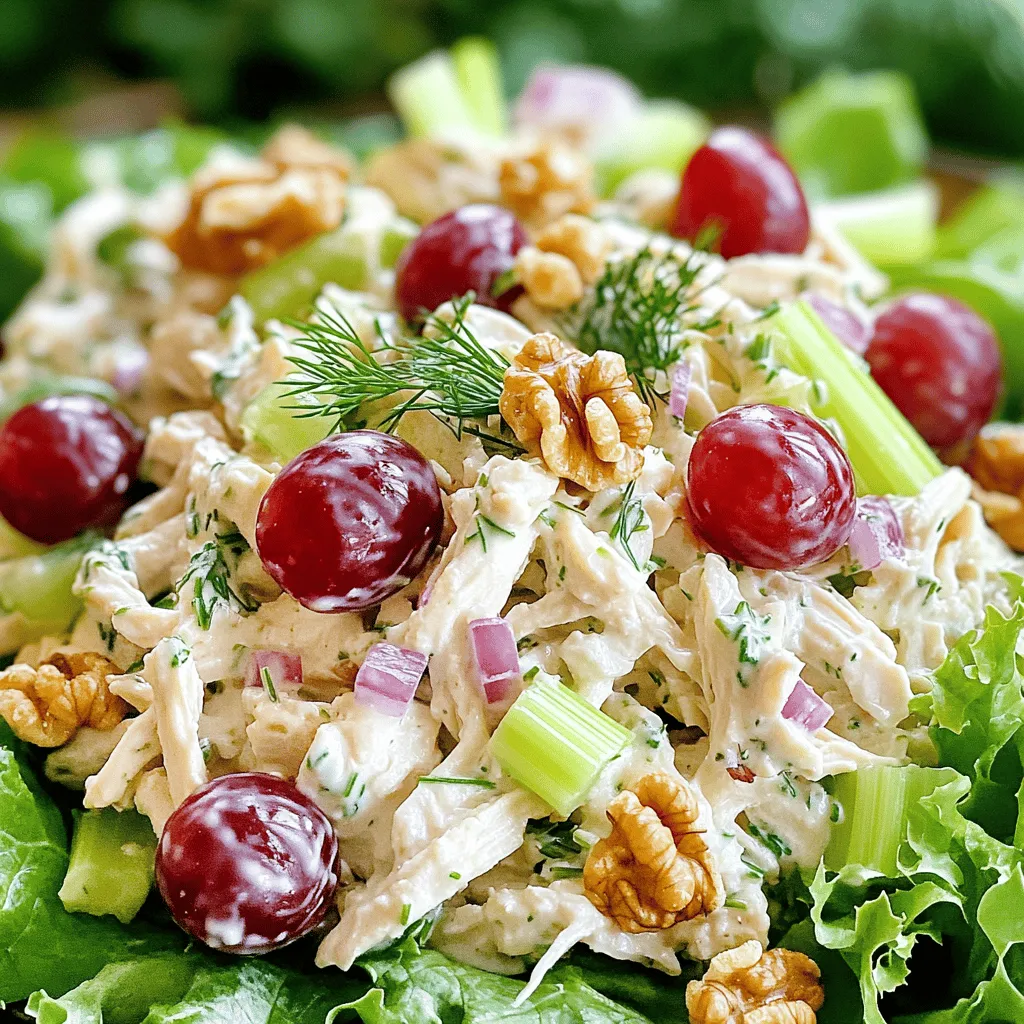
Greek Yogurt Chicken Salad Fresh and Flavorful Recipe
Looking for a fresh twist on a classic chicken salad? My Greek Yogurt Chicken Salad recipe is here to save Read Full Recipe -
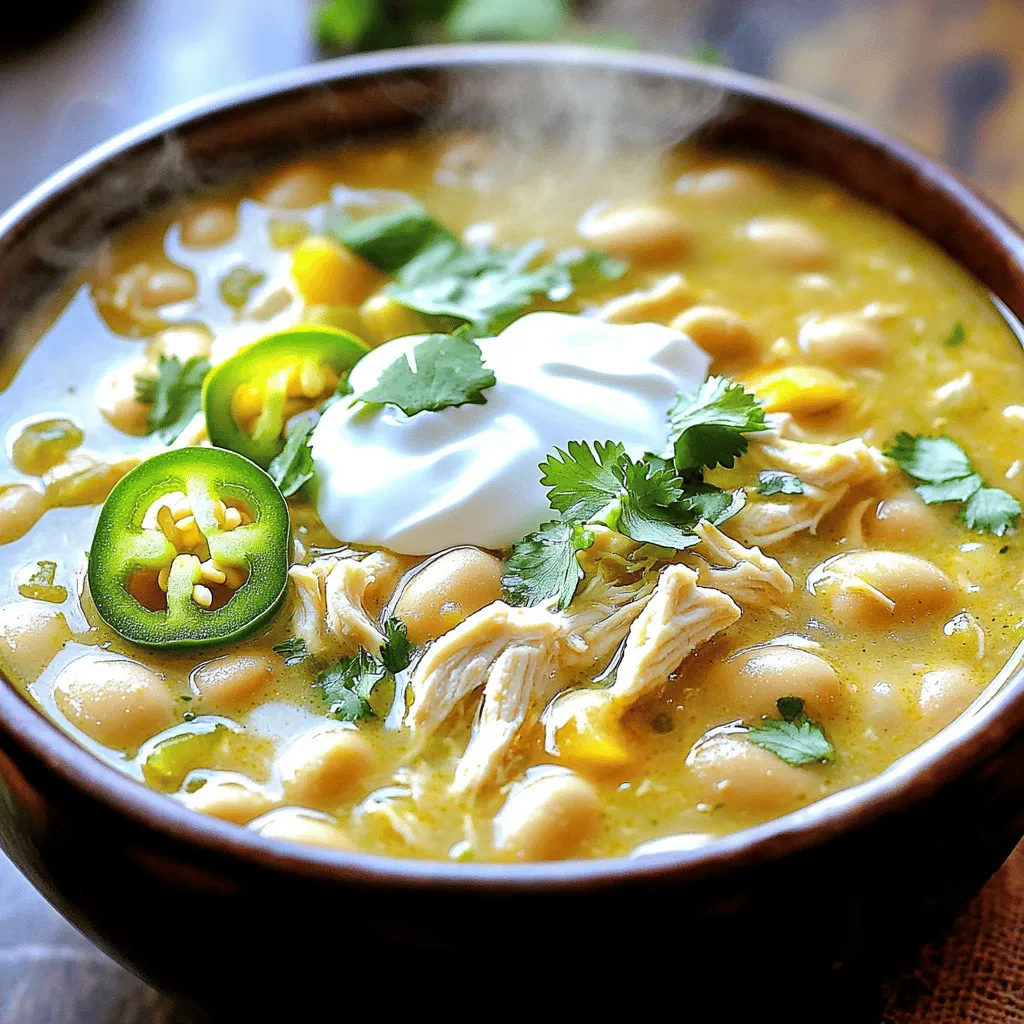
Slow Cooker White Chicken Chili Easy and Flavorful Recipe
Looking for a warm, comforting meal that’s easy to make? My Slow Cooker White Chicken Chili is just what you Read Full Recipe -
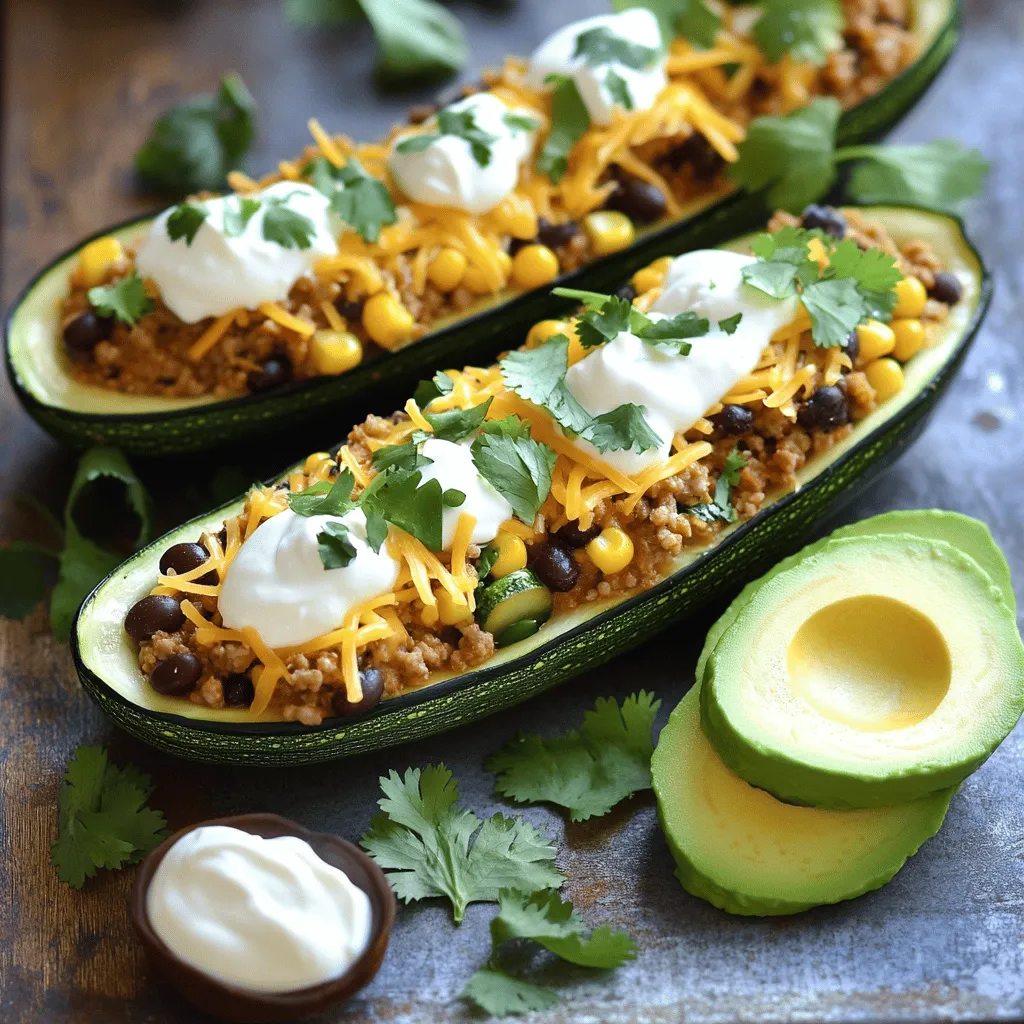
Taco Stuffed Zucchini Boats Flavorful and Simple Dish
Looking for a fun, flavorful dish that packs a punch? Taco Stuffed Zucchini Boats are the answer! This easy recipe Read Full Recipe -
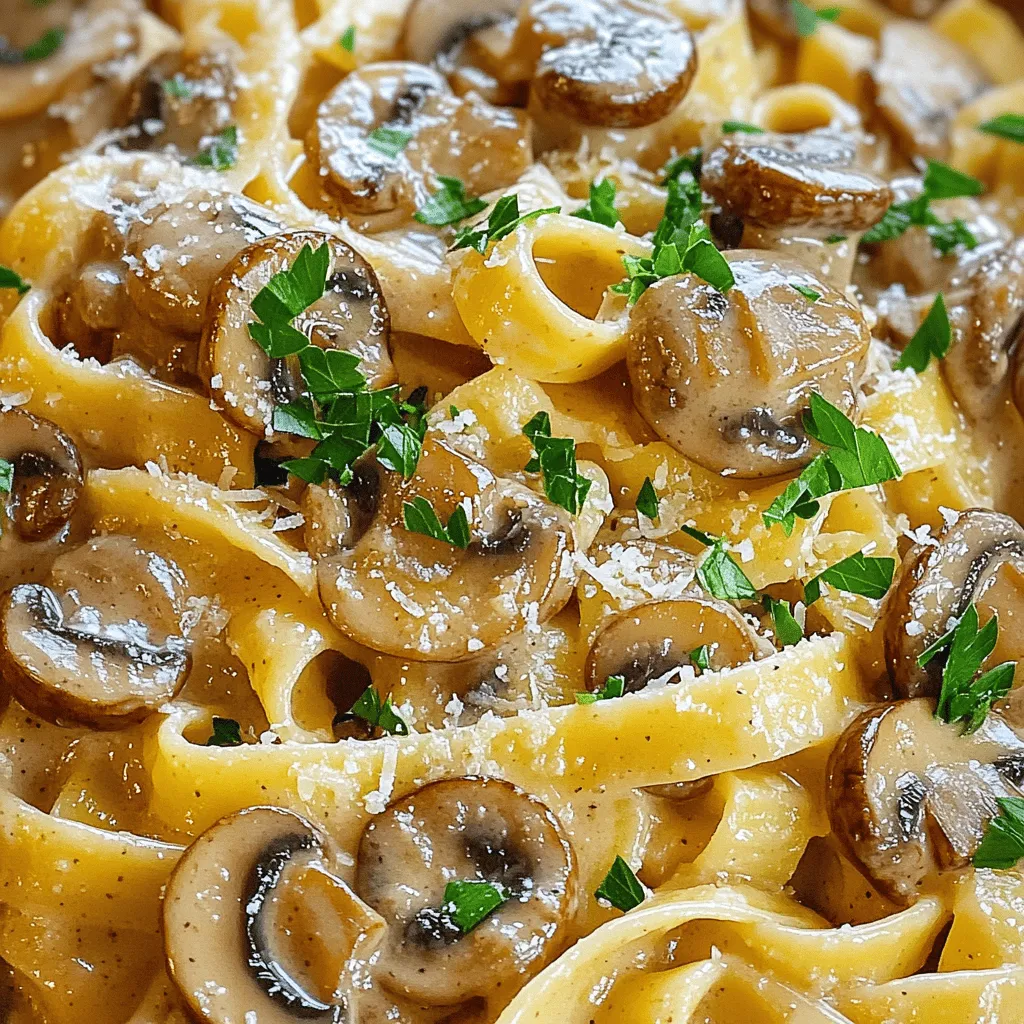
Creamy Mushroom Marsala Flavorful Dinner Delight
Are you ready to impress at dinner tonight? My Creamy Mushroom Marsala is a flavorful delight that will wow your Read Full Recipe -
Coconut Curry Chickpeas Flavorful and Easy Recipe
If you’re seeking a simple, tasty meal, look no further! My Coconut Curry Chickpeas recipe is a delightful blend of Read Full Recipe -
One-Pot Taco Rice Flavorful and Simple Dinner Delight
Looking for an easy and tasty dinner? Try my One-Pot Taco Rice! This simple dish combines savory flavors and requires Read Full Recipe


hey,
i’m !
I’m so happy you’re here!
Every dish I share is made with love and care. I hope they bring you the same comfort and joy they bring me. Let’s make memories, one recipe at a time.


![The berry smoothie bowl is a tasty treat that packs a punch. It takes only ten minutes to make. This recipe serves two and is perfect for breakfast or a snack. You will blend fruit, yogurt, and milk to create a creamy base. Then, you can add your favorite toppings for extra flavor and fun. Check out the full recipe above for all the details. To make a great berry smoothie bowl, you need the following key ingredients: - 1 cup frozen mixed berries (strawberries, blueberries, raspberries) - 1 banana, sliced - ½ cup Greek yogurt (or dairy-free alternative) - ½ cup almond milk (or any milk of choice) - 1 tablespoon honey or maple syrup (optional) These ingredients give you a smooth and creamy base, full of flavor and nutrients. The berries add sweetness and vibrant color. The banana helps thicken the mix while adding a natural sweetness. Greek yogurt gives it a creamy texture and adds protein. Almond milk makes the mix easy to blend. You can also use some optional ingredients to boost your smoothie bowl: - Fresh berries for topping - Sliced banana for extra sweetness - Granola for crunch - Chia seeds for added nutrition - Shredded coconut for a tropical twist - Mint leaves for a fresh touch These extras allow you to customize your bowl. You can create a different flavor or texture with each topping you choose. Enjoy mixing and matching to find your favorite combination! To make your berry smoothie bowl, start with the right ingredients. Gather these items: - 1 cup frozen mixed berries (strawberries, blueberries, raspberries) - 1 banana, sliced - ½ cup Greek yogurt (or a dairy-free alternative) - ½ cup almond milk (or any milk you like) - 1 tablespoon honey or maple syrup (optional) In a high-speed blender, add the frozen mixed berries, sliced banana, Greek yogurt, almond milk, and honey or maple syrup. Ensure the blender is clean for the best taste. Blend the mixture on high until it is smooth and creamy. You want no lumps. If the smoothie is too thick, add a little more almond milk. This will help you reach the perfect consistency. You can stop and scrape down the sides to mix everything well. Pour the smoothie mixture into a bowl. This is where you can show your creativity. Use your favorite toppings to make it look nice. I recommend adding fresh berries, sliced banana, granola, chia seeds, or shredded coconut. You can even use mint leaves for a pop of color. The Full Recipe provides all the steps and tips to make your bowl look great! When selecting berries, freshness is key. Look for bright colors and no soft spots. Choose berries that smell sweet. They should feel firm and plump. Frozen berries are great if fresh ones are not available. They keep their taste and nutrients well. Always wash fresh berries before use. This step helps remove dirt and pesticides. A good blender makes a big difference. Look for a high-speed blender that crushes ice easily. Brands like Vitamix or Ninja are popular choices. They blend smoothly and quickly. If you want to save money, a personal blender will work too. Just ensure it has enough power to mix frozen fruits. Presentation can make your bowl special. Use a wide bowl for easy topping placement. Pour the smoothie mixture gently to avoid splashing. Arrange your toppings in sections for a colorful look. Use fresh fruits, nuts, and seeds for texture. A sprinkle of chia seeds adds a nice touch. Finish with a mint leaf for a pop of color. Enjoy the beauty as much as the taste! {{image_2}} You can easily make this berry smoothie bowl dairy-free and vegan. To do this, just swap the Greek yogurt for a dairy-free alternative. Almond, coconut, or cashew yogurt works great. Use plant-based milk, like almond or oat milk, to keep it vegan. This way, you enjoy all the creamy goodness without any dairy. Get creative with flavor! For a tropical twist, add pineapple or mango to the mix. Blend these fruits with your berries for a sunny vibe. If you love chocolate, stir in cocoa powder or chocolate protein powder. You can also add nut butter, like almond or peanut, for a nutty flavor. These options keep your smoothie bowl exciting and fun! Seasonal toppings bring freshness and variety to your smoothie bowl. In summer, use fresh strawberries, blueberries, and peaches. In fall, consider pumpkin seeds or sliced apples. Winter can welcome pomegranate seeds or citrus slices. You can also add nuts, seeds, or granola for a crunchy texture. This keeps your bowl not only tasty but also colorful and appealing. Check out the Full Recipe for more ideas! If you have leftover smoothie bowl, store it in the fridge. Use an airtight container to keep it fresh. Smoothie bowls are best eaten within a day. After that, the texture may change. If you want to save it longer, freezing is a better option. You can freeze smoothie ingredients in advance to save time. Just prepare your fruit and yogurt. Place them in a freezer bag. Push out as much air as you can to avoid freezer burn. This makes it easy to blend your smoothie bowl later. When you’re ready, simply grab the bag and blend it frozen. It’s quick and easy! To keep your smoothie bowl fresh, store it properly. Always use clean tools when serving. This helps prevent spoilage. If you add toppings, keep them separate until you eat. Fresh fruit, nuts, or seeds can go bad quickly. Enjoy your delicious berry smoothie bowl from the [Full Recipe] with these easy tips! Smoothie bowls are great for your health. They pack a lot of nutrients. Here are some key benefits: - Vitamins and Minerals: Frozen mixed berries are rich in vitamins C and K. - Fiber: The fruit and yogurt add fiber, which helps digestion. - Protein: Greek yogurt boosts protein, keeping you full longer. - Antioxidants: Berries contain antioxidants that help your body fight free radicals. Eating a smoothie bowl can give you energy and improve your mood. Plus, they can help you reach your daily fruit intake. Yes, you can! Customizing your toppings makes your smoothie bowl unique. Here are some ideas for toppings: - Fresh Berries: Strawberries, blueberries, and raspberries add color and flavor. - Sliced Banana: Bananas add sweetness and creaminess. - Granola: Granola gives a nice crunch and adds fiber. - Chia Seeds: Chia seeds are rich in omega-3 fatty acids. - Shredded Coconut: Coconut adds a tropical taste. - Mint Leaves: Mint gives a fresh flavor and brightens the bowl. Feel free to mix and match. Use what you love! You can control the thickness of your smoothie bowl easily. Here’s how: - To Make Thicker: Use less liquid, like almond milk. You can also add more frozen fruit. - To Make Thinner: Add more liquid, like almond milk or water. Blend until you reach your desired consistency. Adjusting the thickness lets you enjoy your smoothie bowl just how you like it. For the full recipe, check out the Berry Bliss Smoothie Bowl! This blog post covered the right ingredients and steps for a tasty berry smoothie bowl. You learned essential ingredients, blending tips, and how to serve it nicely. I shared ways to pick the best berries and ideas for flavor twists. Remember, you can store leftovers and freeze extras for later. Smoothie bowls are healthy and fun to make. Enjoy creating your perfect blend and topping it just how you like! With practice, your smoothie bowls will impress everyone.](https://easycookingbite.com/wp-content/uploads/2025/05/b5c6bc92-ab02-44e1-b8b7-9023eda8c976-300x300.webp)

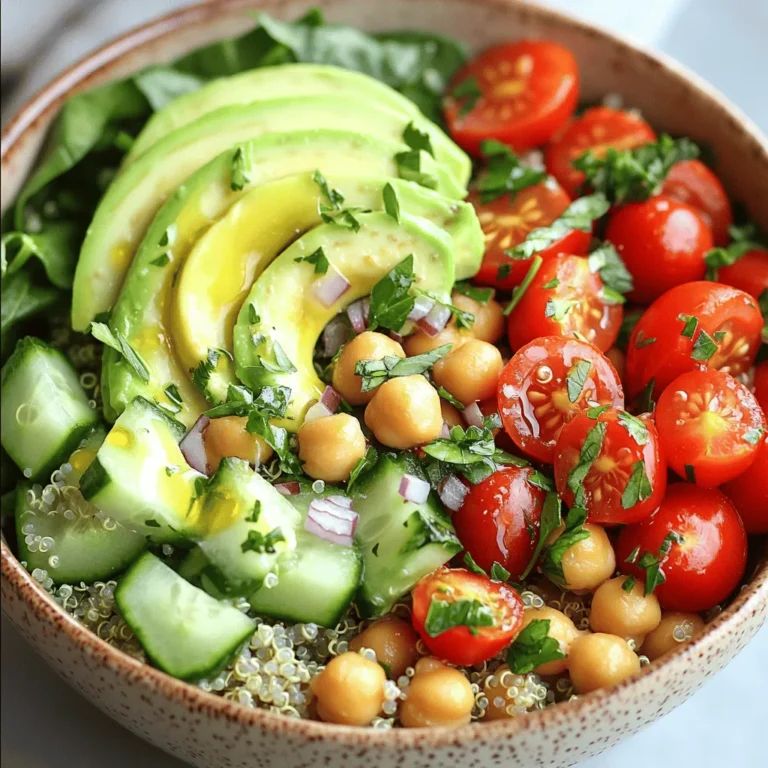
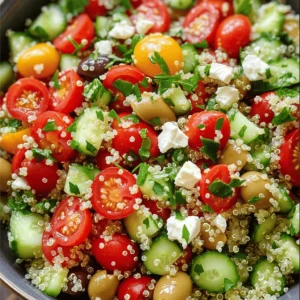
Mediterranean Quinoa Salad Fresh and Flavorful Dish
Are you craving a dish that’s both fresh and packed with flavor? Look no further than this Mediterranean Quinoa Salad! It’s not just tasty;…
![To make a delicious Mediterranean quinoa salad, gather these fresh ingredients: - 1 cup quinoa, rinsed - 2 cups vegetable broth or water - 1 cup cherry tomatoes, halved - 1 cucumber, diced - 1 bell pepper (red or yellow), diced - 1/2 red onion, finely chopped - 1/2 cup kalamata olives, pitted and halved - 1/2 cup feta cheese, crumbled (optional for a vegan version) - 1/4 cup fresh parsley, chopped - 1/4 cup olive oil - 2 tablespoons lemon juice - 1 teaspoon dried oregano - Salt and pepper to taste You can swap some ingredients for different flavors. Try these options: - Use quinoa blend instead of plain quinoa for a nutty taste. - Replace vegetable broth with chicken broth for richer flavor. - Use black olives instead of kalamata olives for a milder taste. - Substitute feta cheese with avocado for a creamy vegan twist. Want to make your salad even tastier? Add these extras: - Sun-dried tomatoes for a sweet and tangy kick. - Chickpeas for added protein and heartiness. - Arugula or spinach for extra greens and nutrients. - Nuts like pine nuts or walnuts for crunch and flavor. This Mediterranean quinoa salad is easy to make and packed with fresh flavors. Check out the Full Recipe for more details! To cook the quinoa, start by boiling two cups of vegetable broth or water in a medium pan. Once it boils, add one cup of rinsed quinoa. Lower the heat to low, cover the pan, and let it simmer for about 15 minutes. The quinoa will absorb the liquid and become fluffy. After cooking, take it off the heat and set it aside to cool slightly. While the quinoa cools, prepare your vegetables. Halve one cup of cherry tomatoes and set them aside. Dice one cucumber and one bell pepper, either red or yellow. Finely chop half a red onion and a quarter cup of fresh parsley. These fresh veggies add great flavor and color to the salad. In a large bowl, combine the cooled quinoa, cherry tomatoes, cucumber, bell pepper, red onion, and kalamata olives. For a special touch, add a quarter cup of chopped parsley. In a small bowl, whisk together a quarter cup of olive oil, two tablespoons of lemon juice, one teaspoon of dried oregano, and a pinch of salt and pepper. Pour this dressing over the quinoa salad and toss it gently until everything is mixed well. If you like, sprinkle crumbled feta cheese on top just before serving. Let the salad sit for about 10 minutes. This helps the flavors come together nicely. For the full recipe, refer to the previous sections. To make perfect quinoa, start with rinsed grains. Rinsing removes bitter saponins. Use two cups of water or broth for each cup of quinoa. Bring it to a boil, then lower the heat. Cover and let it simmer for about 15 minutes. When done, the quinoa should look fluffy. If you see little white tails, that’s normal. Let it cool before mixing it into the salad. The dressing is key to flavor. A mix of olive oil and lemon juice works well. Add a pinch of salt and pepper for taste. If you like herbs, try adding fresh basil or dill. For a kick, add minced garlic or a dash of red pepper flakes. You can also swap lemon juice for balsamic vinegar for a different taste. Serve the salad in a big bowl for sharing. A platter with extra parsley and lemon wedges looks great. You can also pair it with grilled chicken or fish for a hearty meal. For a picnic, pack it in a jar with layers. This keeps everything fresh and tasty. You can find the full recipe for Mediterranean Quinoa Salad [Full Recipe]. {{image_2}} To make this salad vegan, simply leave out the feta cheese. You can also add a bit of nutritional yeast for a cheesy flavor. The rest of the ingredients are already plant-based. This dish is colorful and fresh, making it perfect for any meal. If you want more protein, add chickpeas or black beans. These legumes not only boost protein but also add texture. You can toss in grilled chicken or shrimp if you prefer animal protein. Just be sure to chop them into bite-sized pieces. Using seasonal ingredients keeps the salad fresh and exciting. In summer, add ripe peaches or strawberries for sweetness. In fall, try roasted butternut squash or apples for a warm touch. You can swap out the bell pepper for roasted red peppers or even use different herbs like basil or mint for a twist. Store leftover Mediterranean quinoa salad in an airtight container. Keep it in the fridge. It stays fresh for up to three days. If you know you won't eat it all, hold off on adding feta cheese. This keeps it from getting soggy. Use glass or plastic containers with tight-fitting lids. These help keep air out and flavors in. If you have smaller portions, use smaller containers. This makes it easy to grab a quick snack. You can enjoy this salad cold or at room temperature. If you prefer it warm, use the microwave. Heat it in 30-second bursts to avoid overheating. Stir between bursts for even warmth. Do not reheat it too much to maintain texture and taste. For the complete recipe, check out the Full Recipe section. Mediterranean Quinoa Salad is packed with nutrients. It provides protein, fiber, and healthy fats. One serving contains: - Calories: About 220 - Protein: 6 grams - Carbohydrates: 30 grams - Fiber: 5 grams - Fat: 10 grams (mainly from olive oil and olives) This salad is a great choice for a balanced meal. Quinoa adds plant-based protein. Fresh vegetables boost vitamins and minerals. Feta cheese adds calcium but is optional. Yes, you can make this salad ahead of time. In fact, it tastes even better after sitting. Prepare it up to a day in advance. Just store it in the fridge in an airtight container. When ready to serve, give it a quick stir. Add more dressing if needed. If you use feta, add it just before serving to keep it fresh. Yes, Mediterranean Quinoa Salad is gluten-free. Quinoa itself is a gluten-free grain. Ensure that all other ingredients are also gluten-free, like the vegetable broth. This makes it a safe choice for those with gluten sensitivities. Enjoy this fresh and flavorful dish without worry. For the full recipe, check out the earlier section. This blog post explored how to make a delicious Mediterranean Quinoa Salad. We discussed ingredients, cooking tips, and variations to fit your taste. I shared how to cook quinoa perfectly and prepare fresh veggies, plus suggestions for dressings. Storing your leftovers was also covered for tasty meals later. Embrace this easy, healthy dish and make it your own! You'll enjoy every bite.](https://easycookingbite.com/wp-content/uploads/2025/05/5e6ae6df-1cc8-45b1-9db8-73ed8e74861c.webp)
