Latest & Greatest
Easy Italian Baked Chicken Flavorful and Simple Meal
Are you ready to enjoy a warm, flavorful meal that’s easy to make? I’m excited to share my Easy Italian
Read more…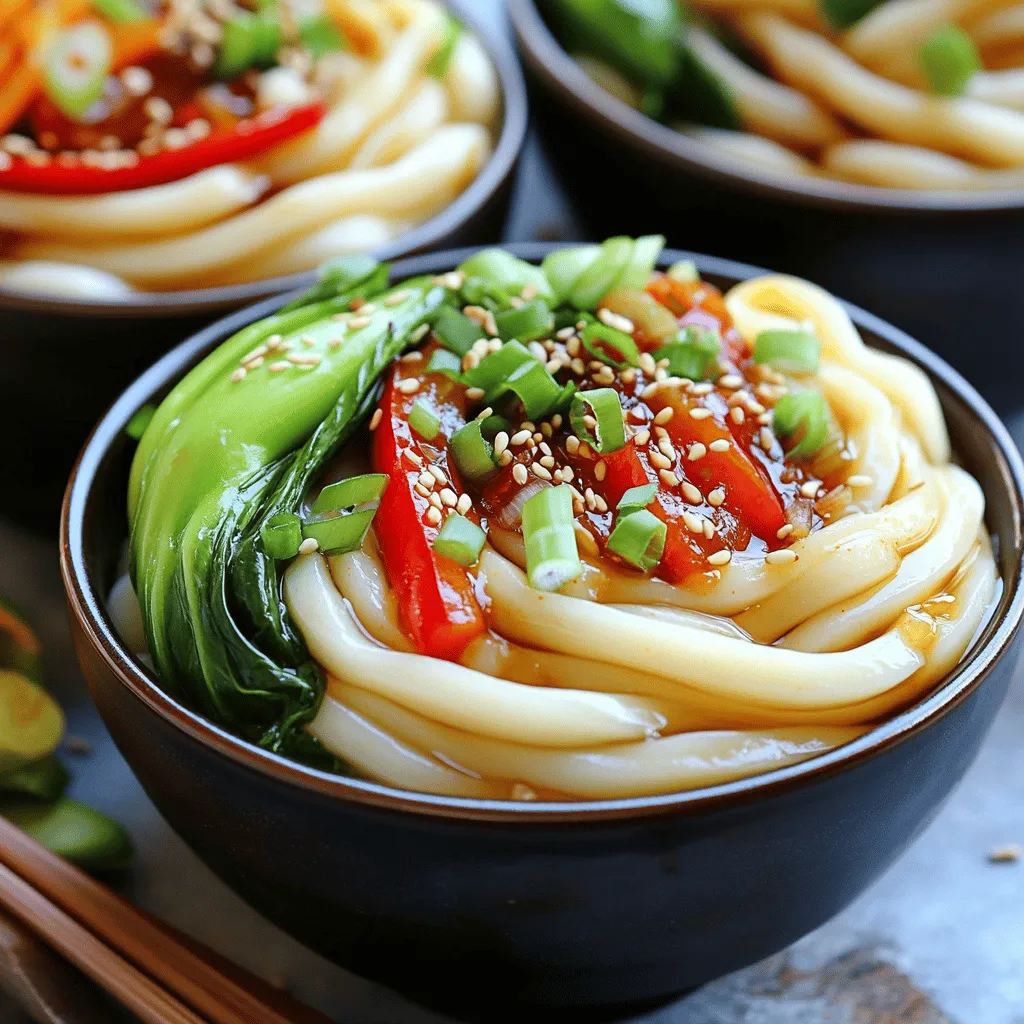
Chili Oil Udon Noodles Quick and Flavorful Stir-Fry
Are you ready to spice up your dinner routine? Chili Oil Udon Noodles are quick, tasty, and perfect for a
Read more…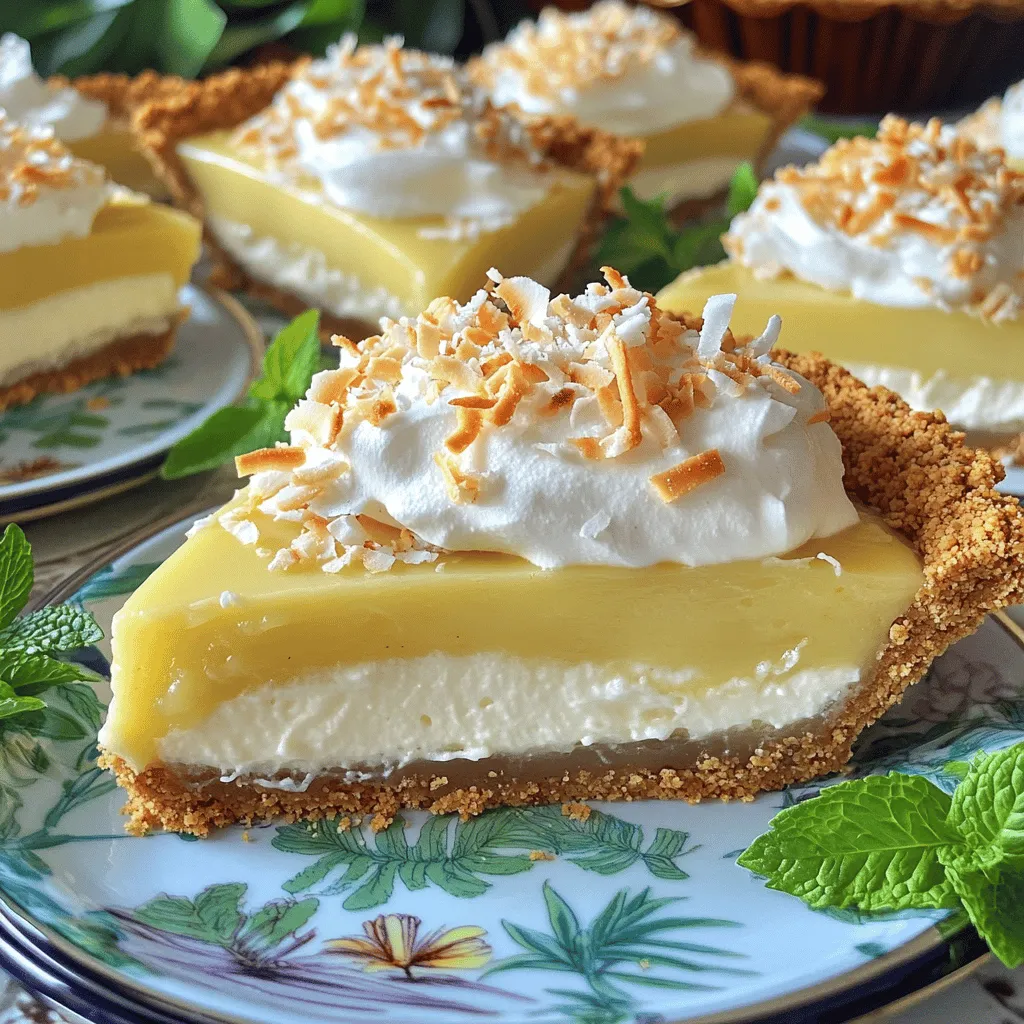
Coconut Cream Pie Scrumptious and Simple Recipe
If you love desserts that are sweet and creamy, you will adore this Coconut Cream Pie recipe. It’s easy to
Read more…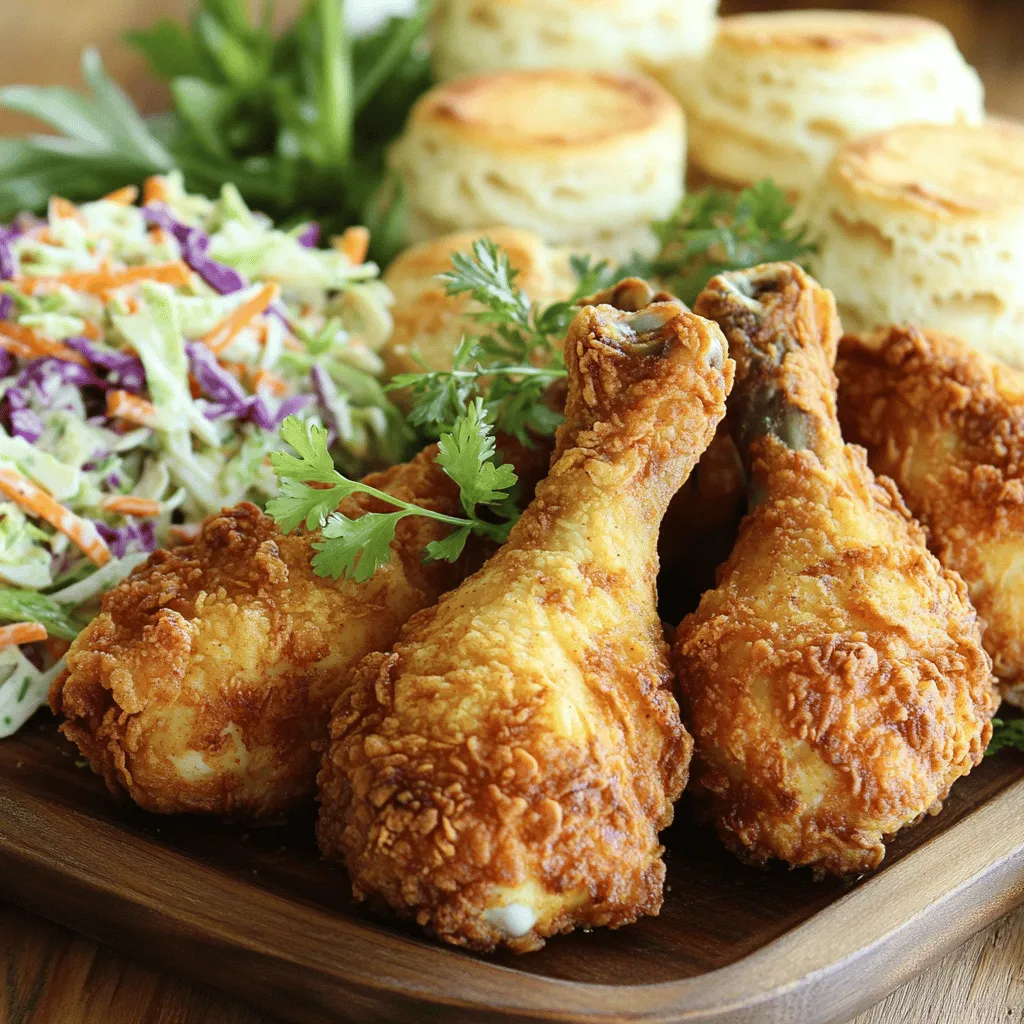
Crispy Fried Chicken Delightfully Easy to Prepare
Do you crave crunchy, juicy fried chicken that’s easy to make? You’re in the right place! I’ll guide you through
Read more…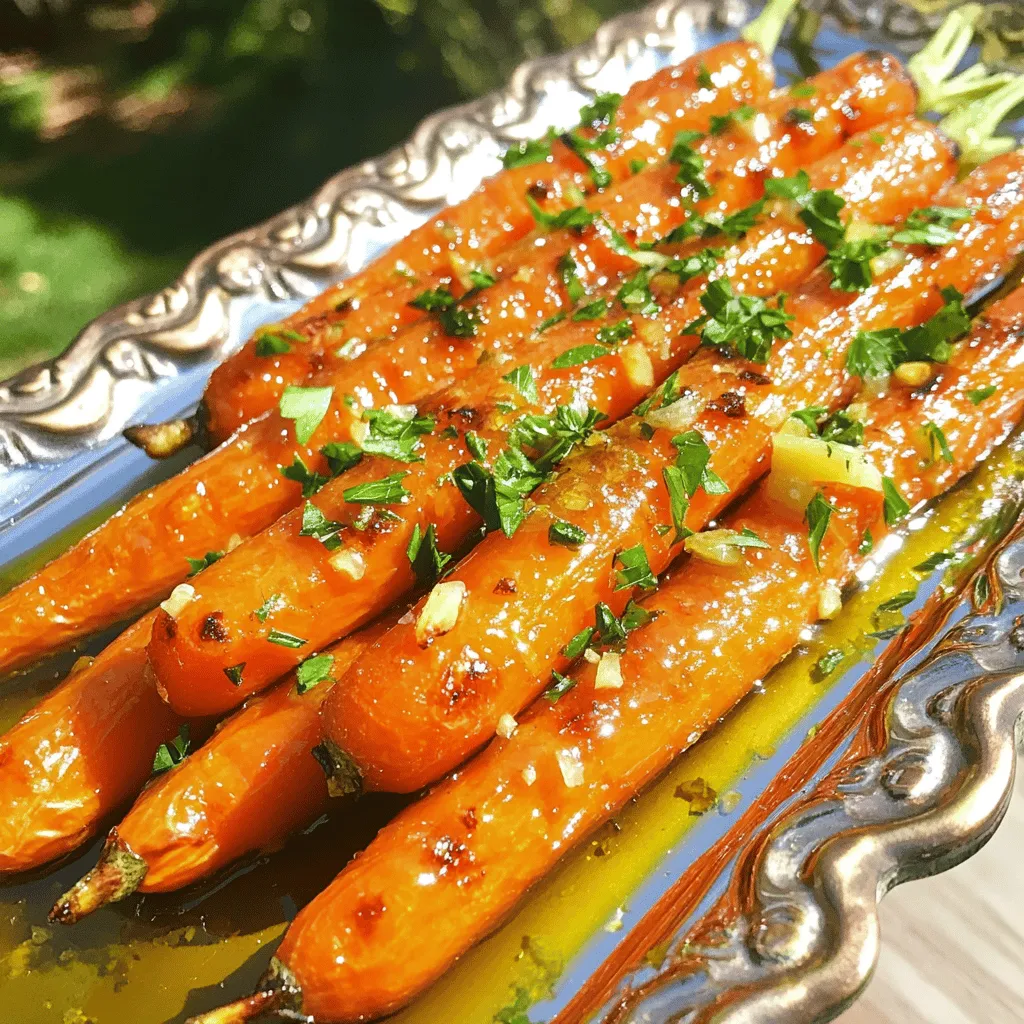
Tangy Lemon Garlic Roasted Carrots Flavorful Side Dish
Are you ready to elevate your dinner game with a vibrant, delicious side dish? Tangy Lemon Garlic Roasted Carrots are
Read more…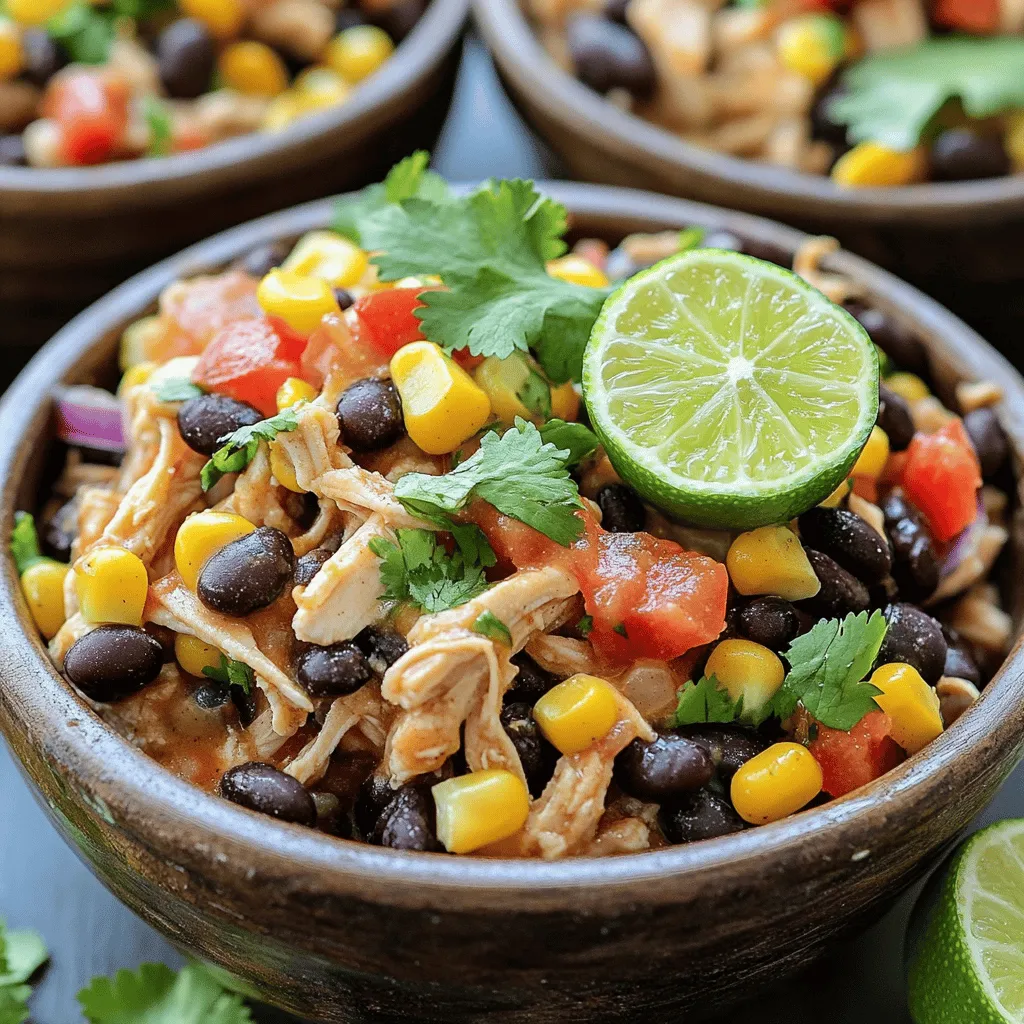
Crockpot Mexican Chicken Flavorful and Easy Recipe
Looking for a simple, tasty dinner idea? This Crockpot Mexican Chicken recipe is your answer. With just a few easy
Read more…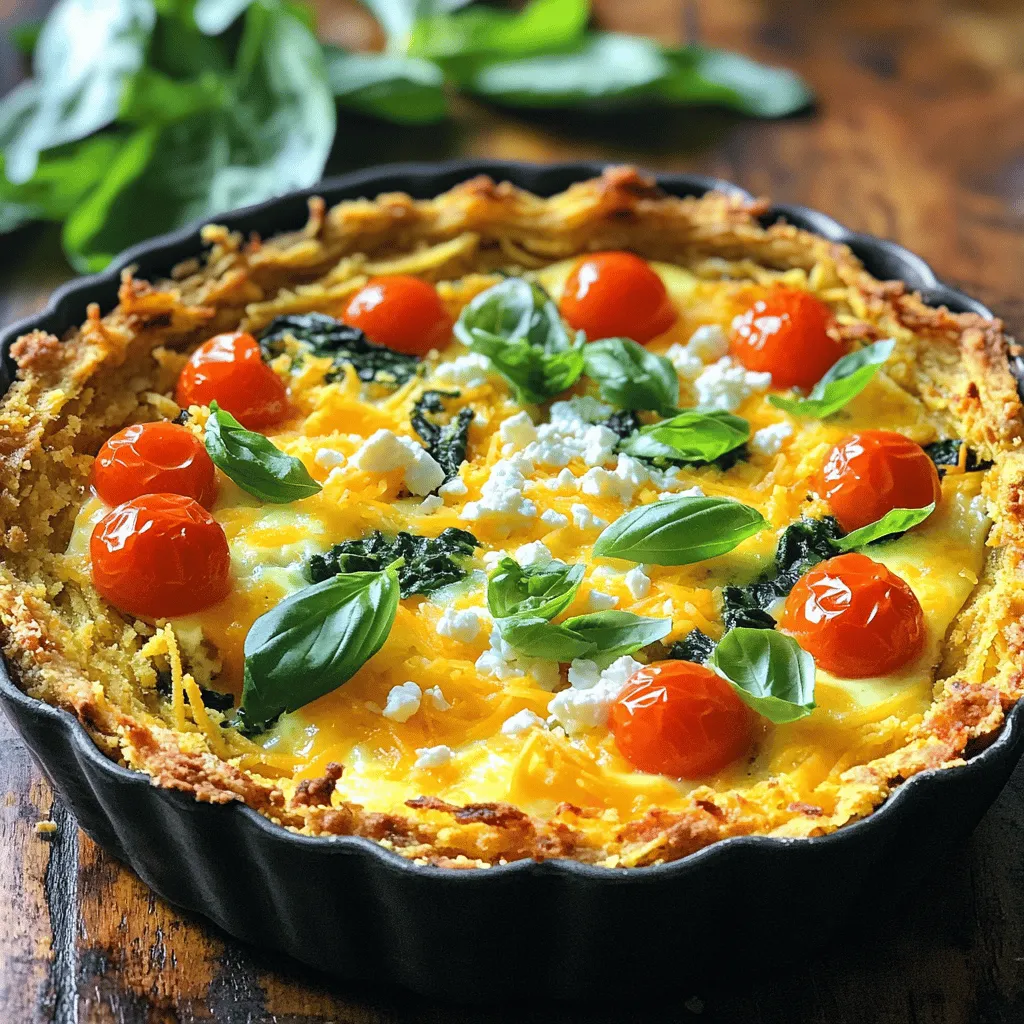
Spring Hash Brown Crust Quiche Flavorful and Easy Meal
Spring Hash Brown Crust Quiche offers a fresh twist on an easy classic. With crispy hash browns as the crust,
Read more…browse recipes

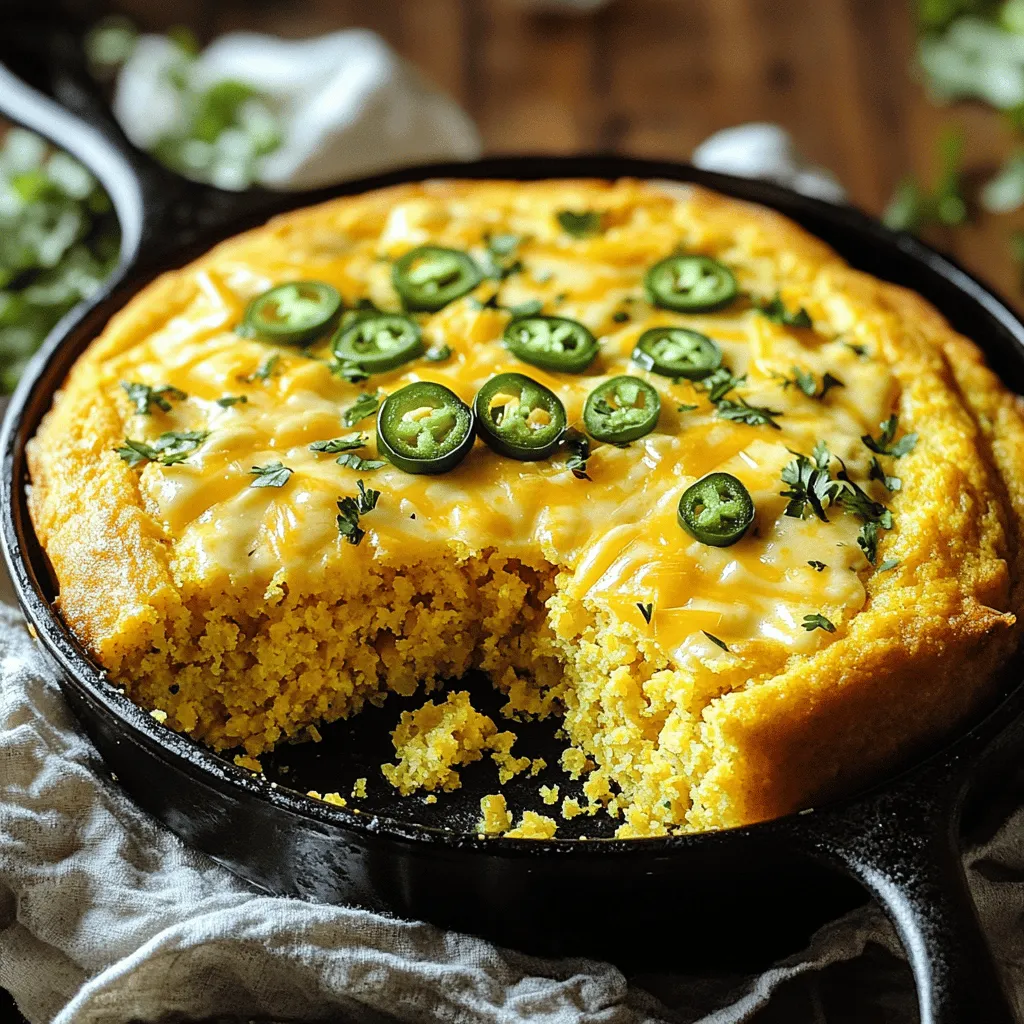
Cheddar Jalapeño Cornbread Flavorful and Easy Recipe
Are you ready to spice up your meals? This Cheddar Jalapeño Cornbread recipe promises bold flavors and easy steps. You’ll learn the perfect mix…
My Latest Drinks

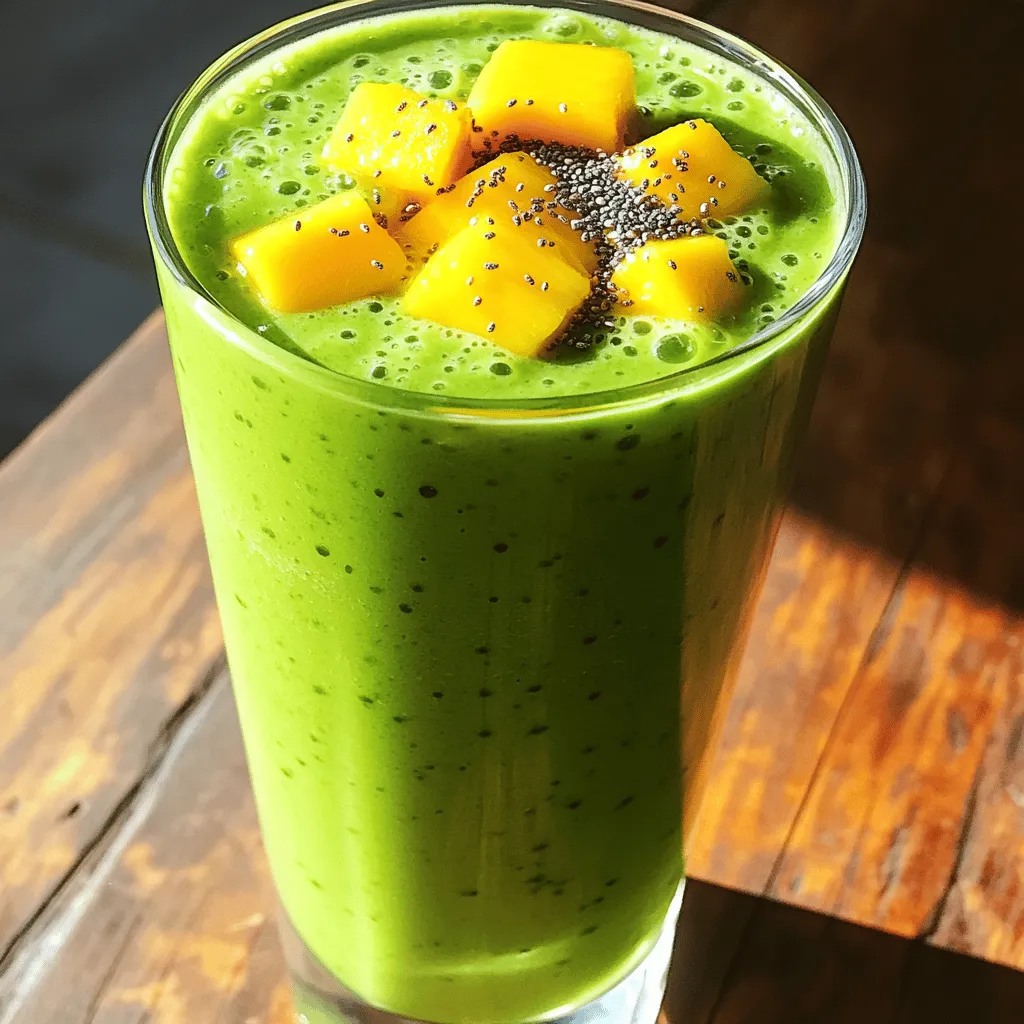
Tropical Green Smoothie Refreshing Health Boost Recipe
Looking for a refreshing drink that packs a health punch? My Tropical Green Smoothie is the perfect blend of fruits Read Full Recipe-
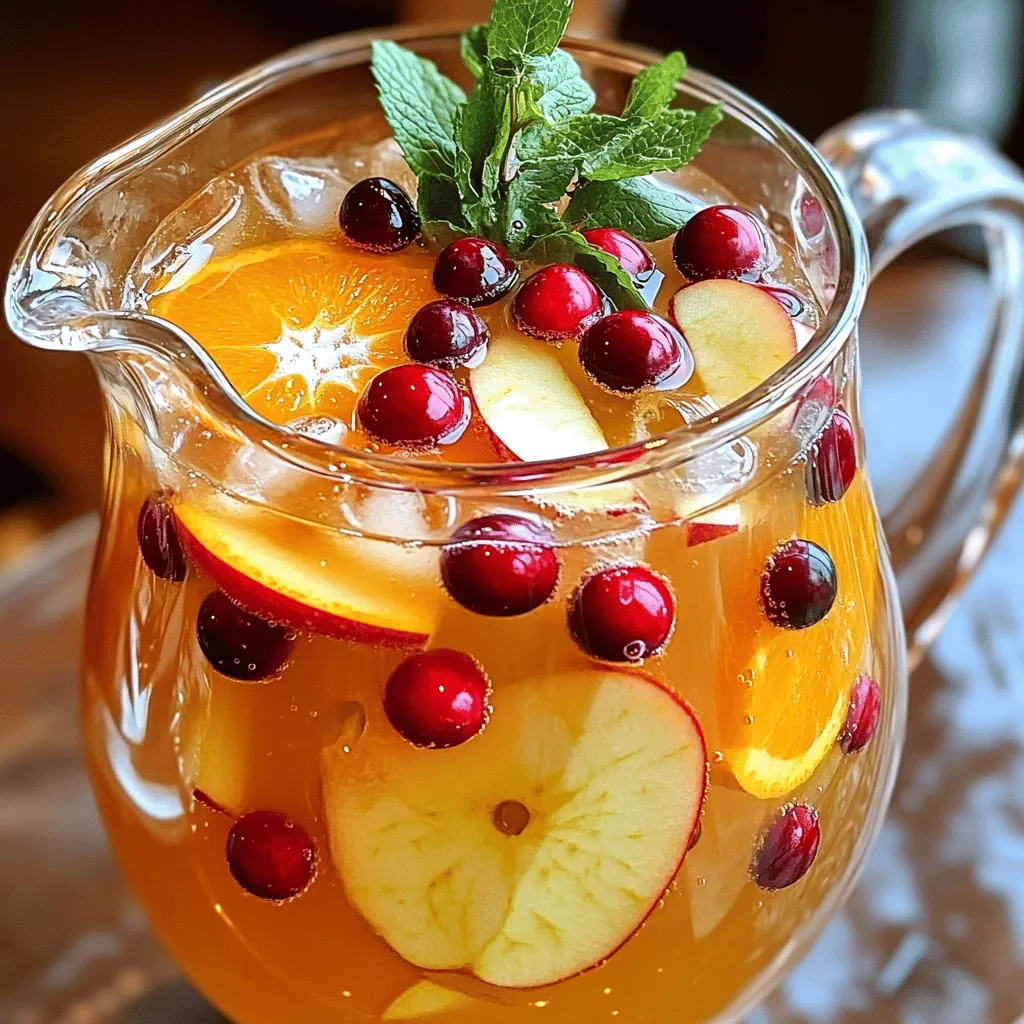
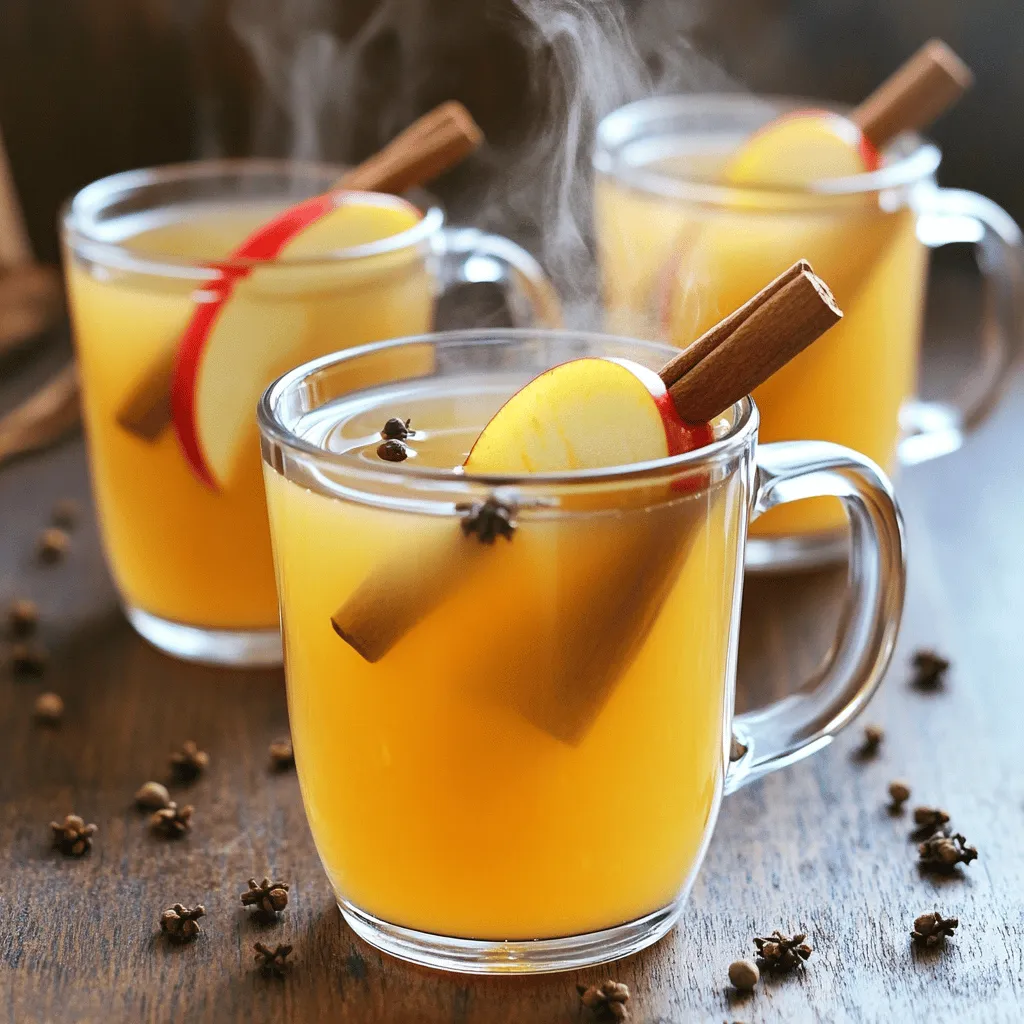
Apple Cider Harvest Punch Refreshing Fall Delight
Get ready for fall with my delicious Apple Cider Harvest Punch! This easy recipe blends fresh flavors that celebrate the Read Full Recipe -
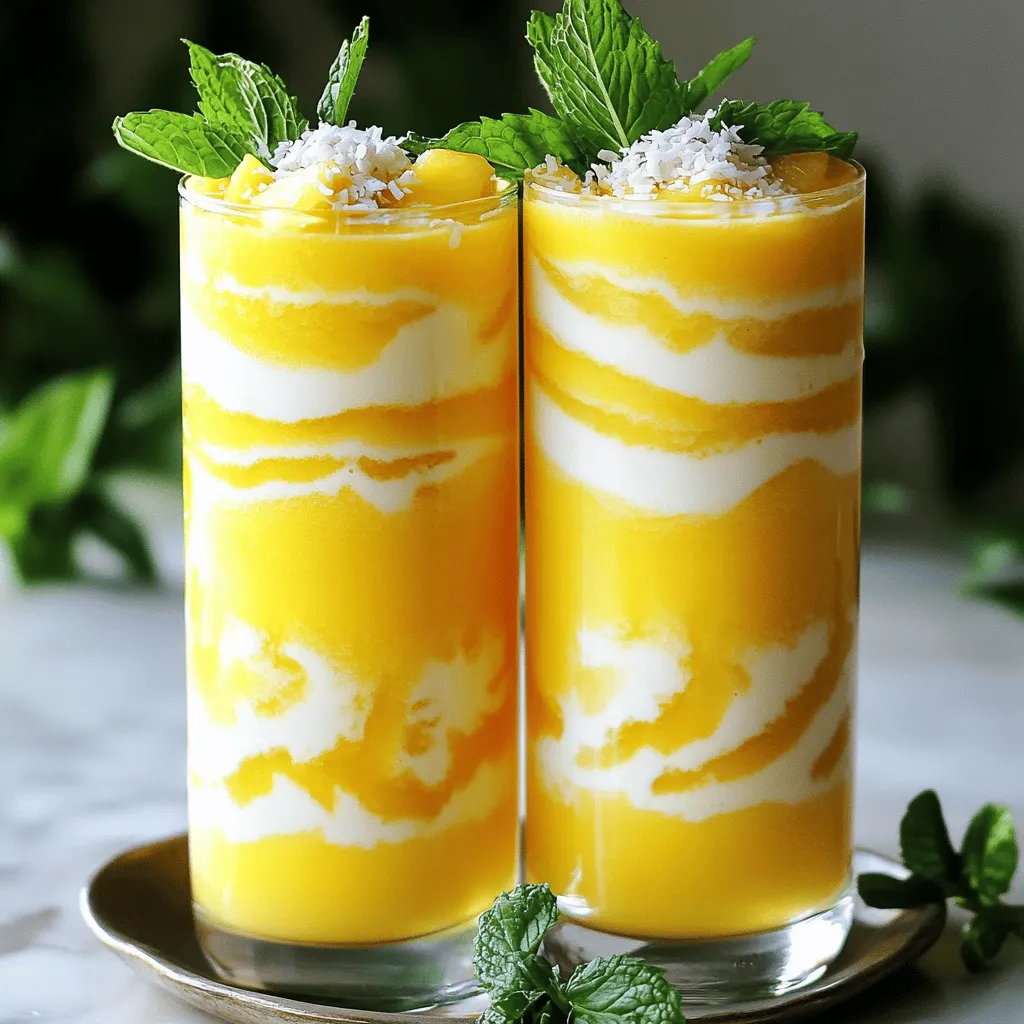
Pineapple Coconut Smoothie Creamy and Refreshing Drink
Are you craving a drink that’s both creamy and refreshing? Look no further than my Pineapple Coconut Smoothie! This easy-to-make Read Full Recipe -
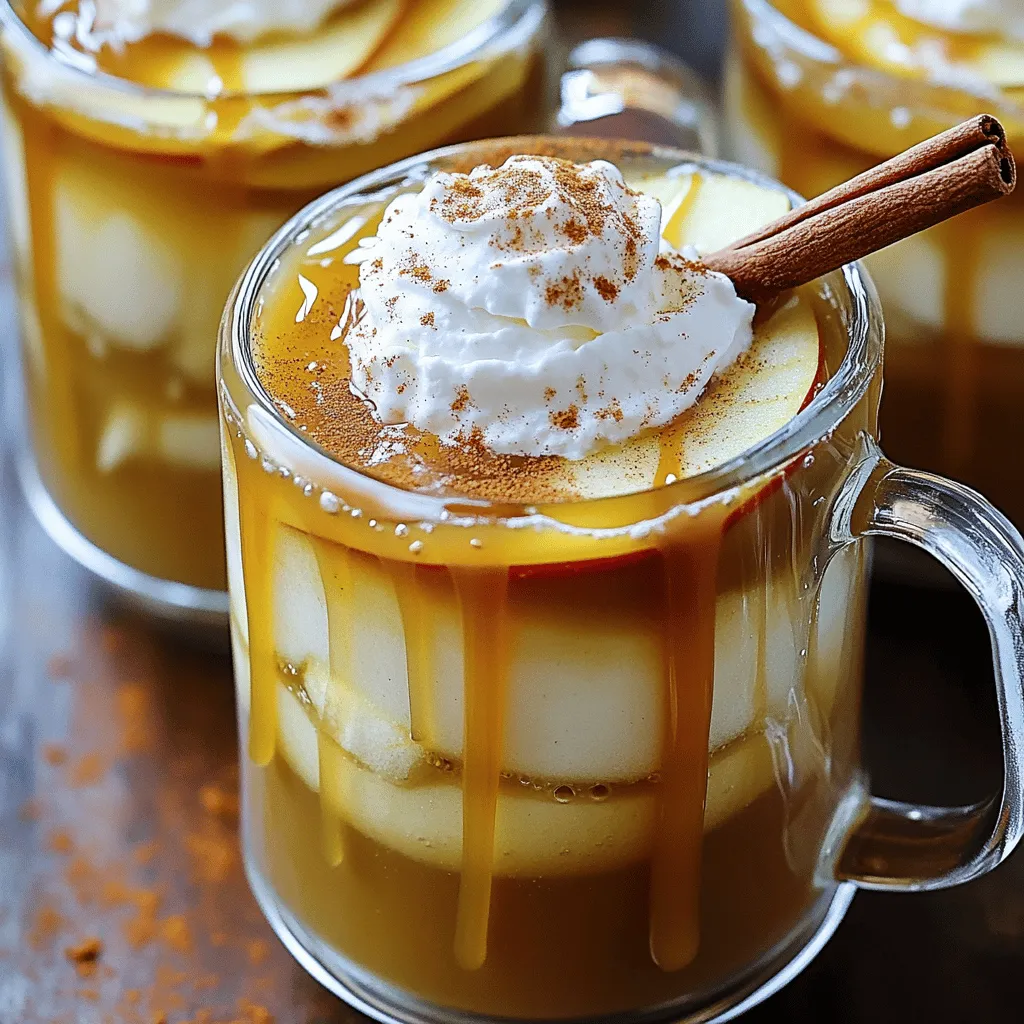
Delicious Caramel Apple Cider Cozy Fall Drink Recipe
Fall is here, and nothing says cozy like a warm cup of Caramel Apple Cider. This drink combines the sweet Read Full Recipe -
Instant Pot Apple Cider Quick and Flavorful Recipe
Looking for a quick and delicious way to make apple cider? The Instant Pot is your best friend! I’ll share Read Full Recipe -
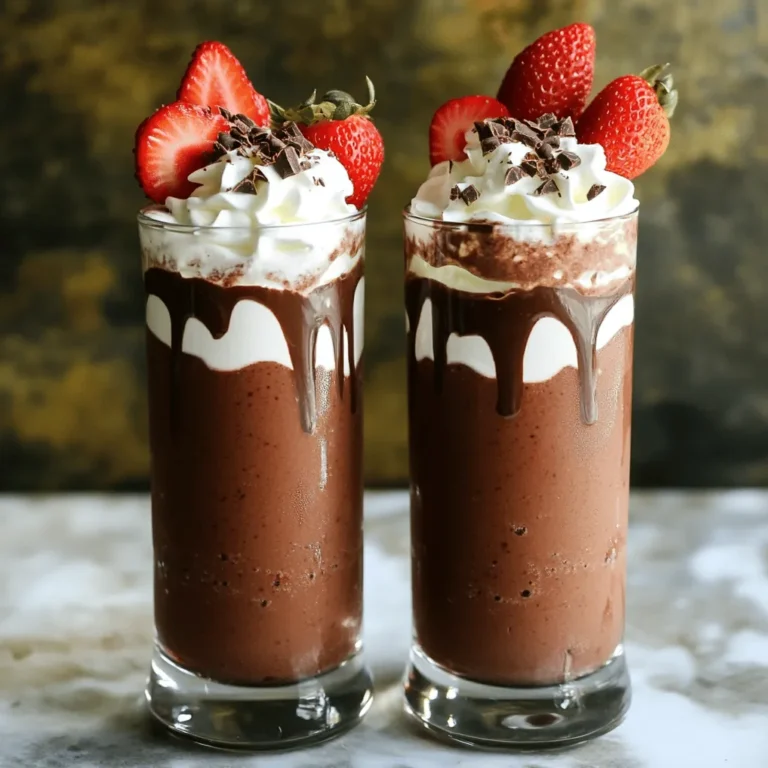
Chocolate Covered Strawberry Smoothie Delicious Treat
Craving something delicious and healthy? The Chocolate Covered Strawberry Smoothie is the perfect treat! With fresh strawberries, cocoa powder, and Read Full Recipe

My Latest Dinners
-
Coconut Curry Chickpeas Flavorful and Easy Recipe
If you’re seeking a simple, tasty meal, look no further! My Coconut Curry Chickpeas recipe is a delightful blend of Read Full Recipe -
One-Pot Taco Rice Flavorful and Simple Dinner Delight
Looking for an easy and tasty dinner? Try my One-Pot Taco Rice! This simple dish combines savory flavors and requires Read Full Recipe -
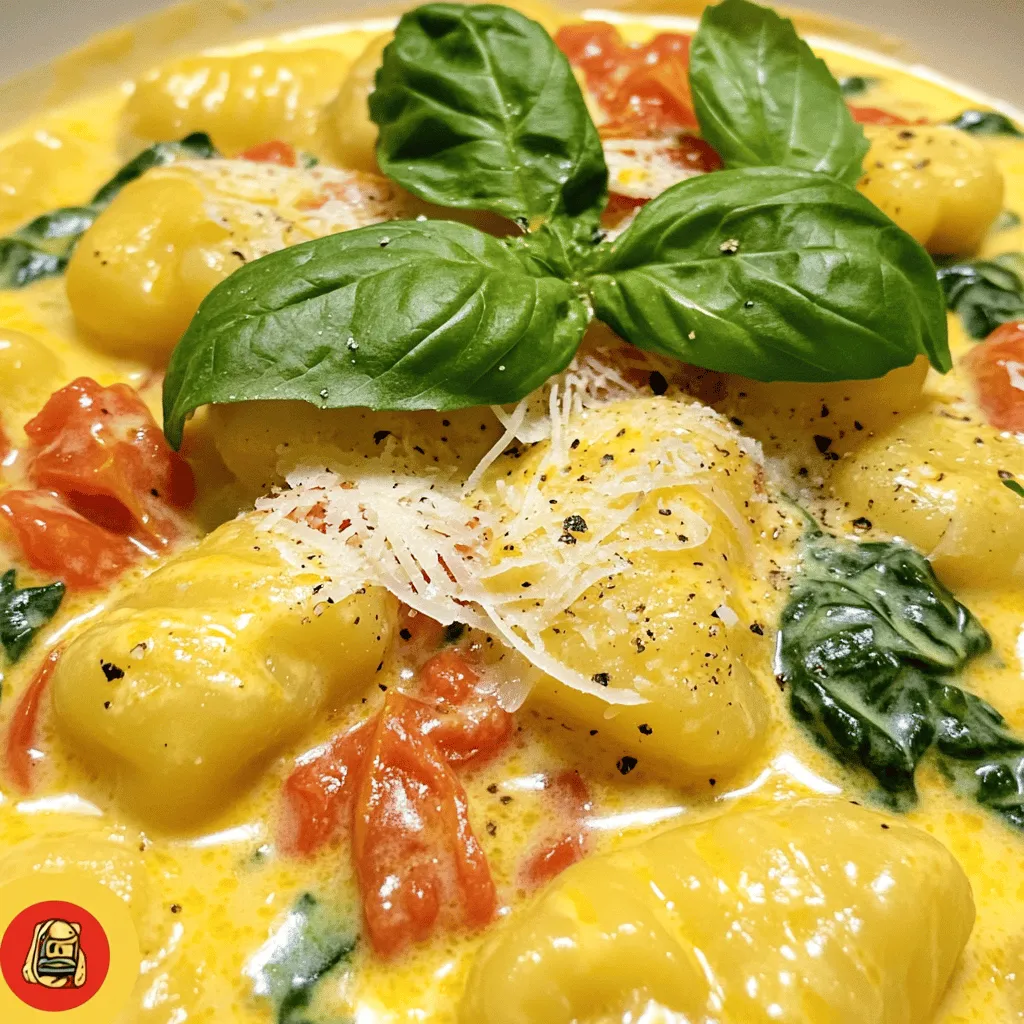
Creamy Tomato Spinach Gnocchi Easy and Flavorful Dish
Are you ready to whip up a cozy meal that bursts with flavor? This Creamy Tomato Spinach Gnocchi is just Read Full Recipe -
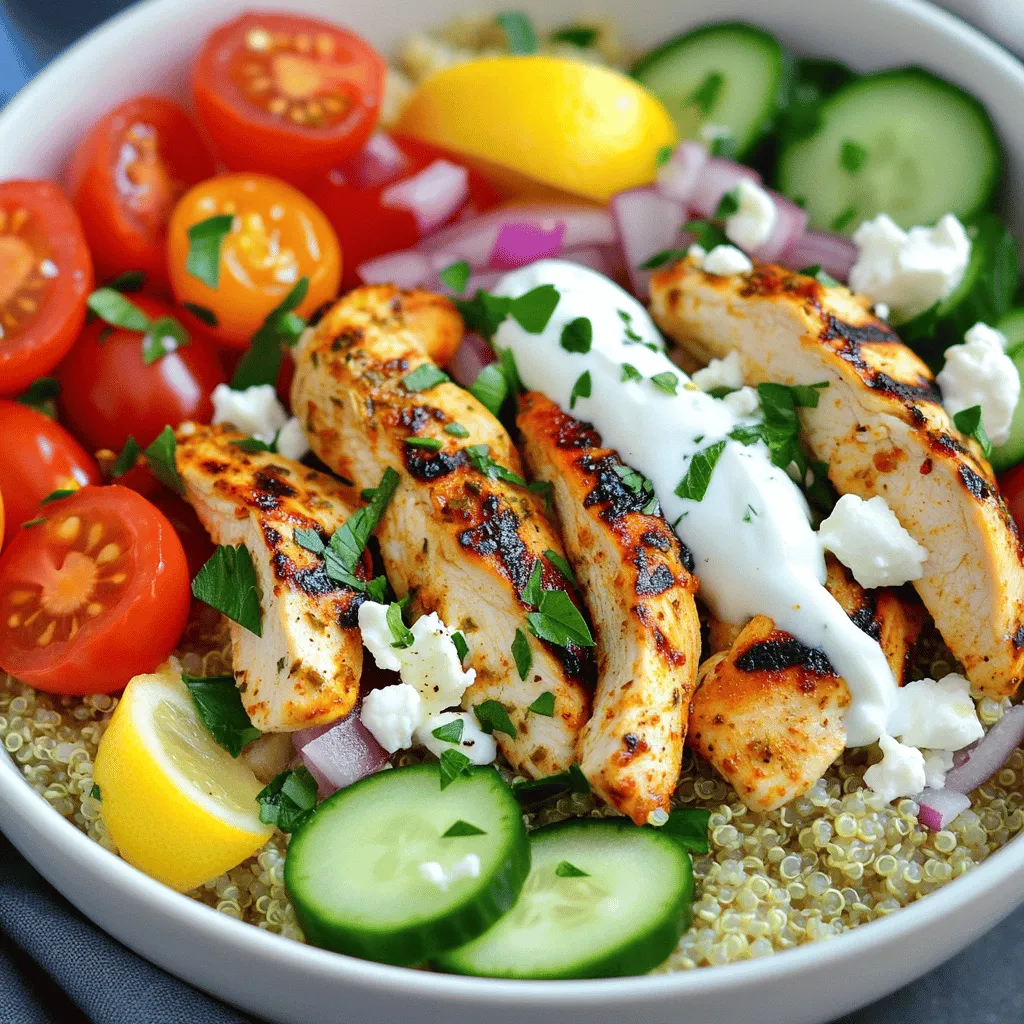
Greek Chicken Gyro Bowls Flavorful and Easy Recipe
Looking for a fresh and tasty meal idea? You’ll love Greek Chicken Gyro Bowls! This simple recipe combines juicy chicken Read Full Recipe -
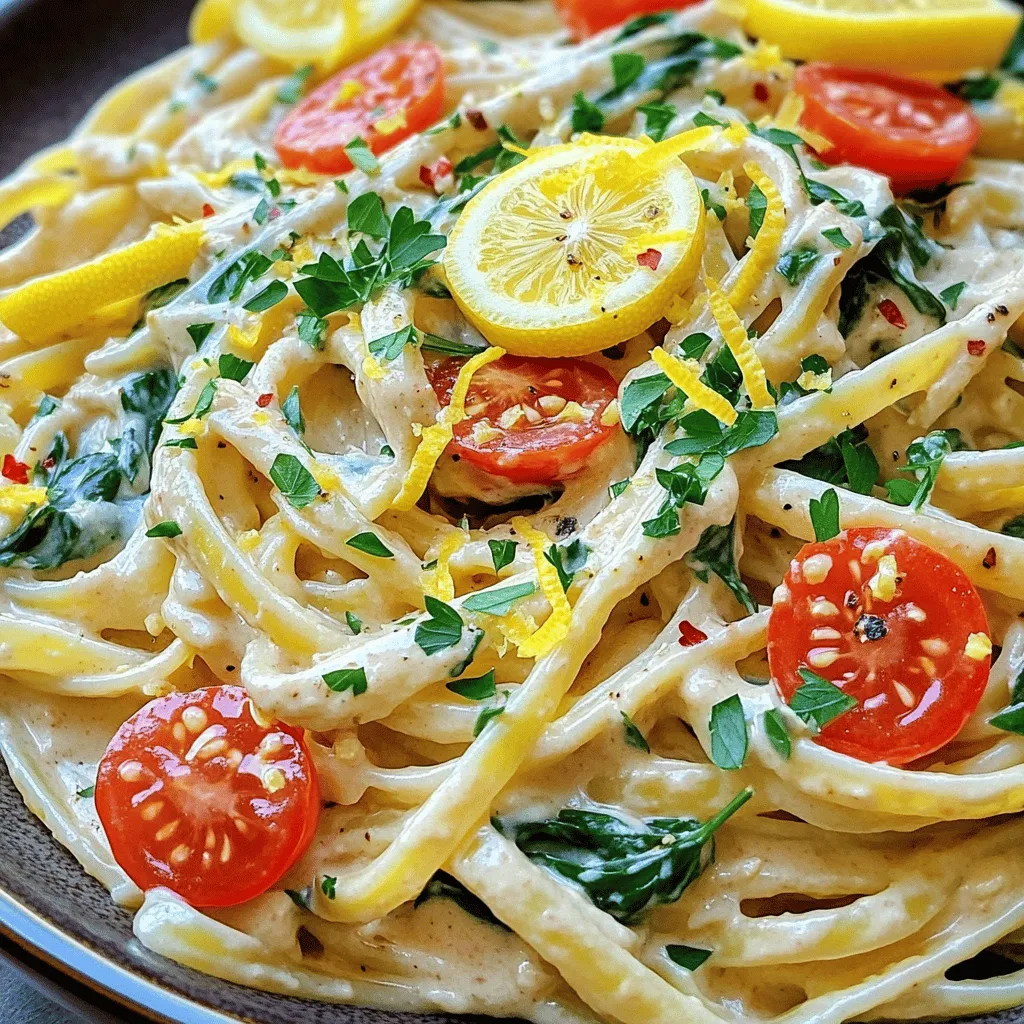
Creamy Lemon Garlic Hummus Pasta Delightful Dish
If you’re craving a simple yet flavorful dish, try my Creamy Lemon Garlic Hummus Pasta. This delightful recipe combines creamy Read Full Recipe -
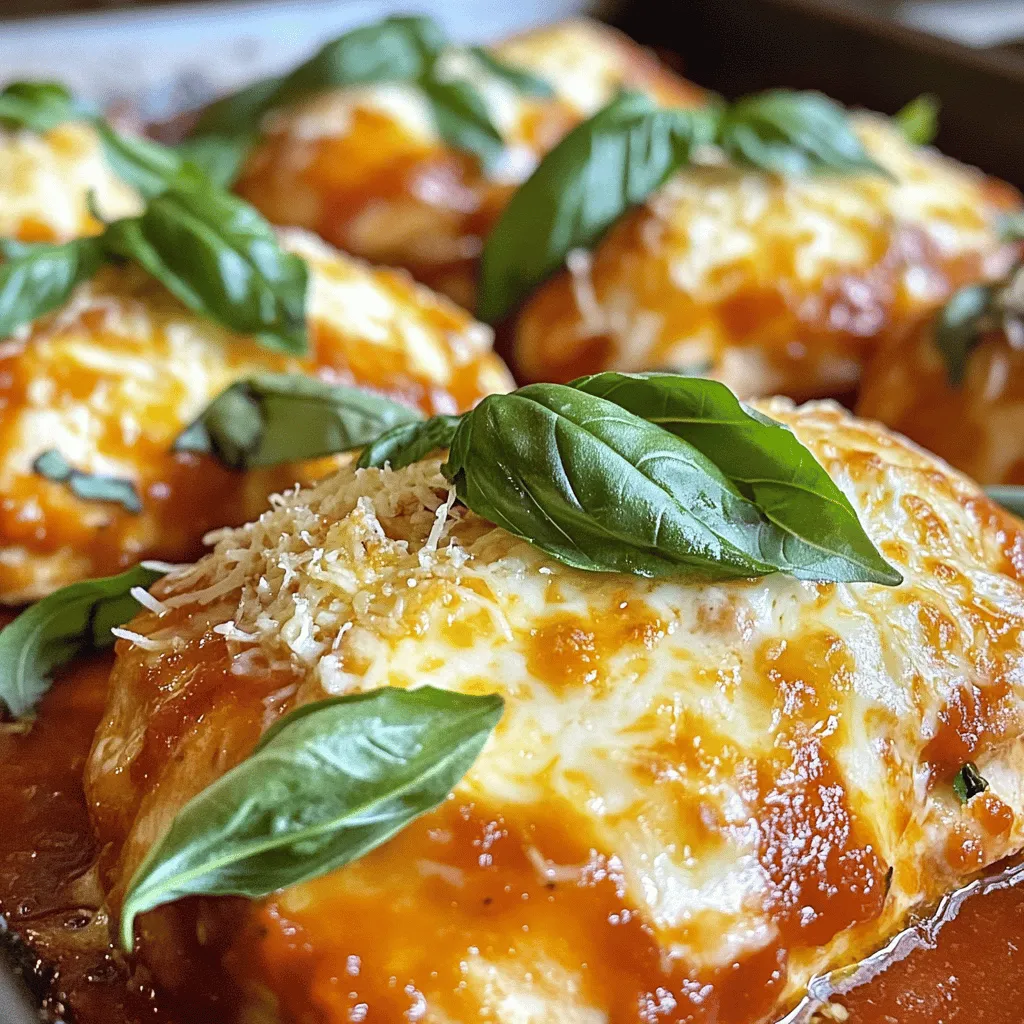
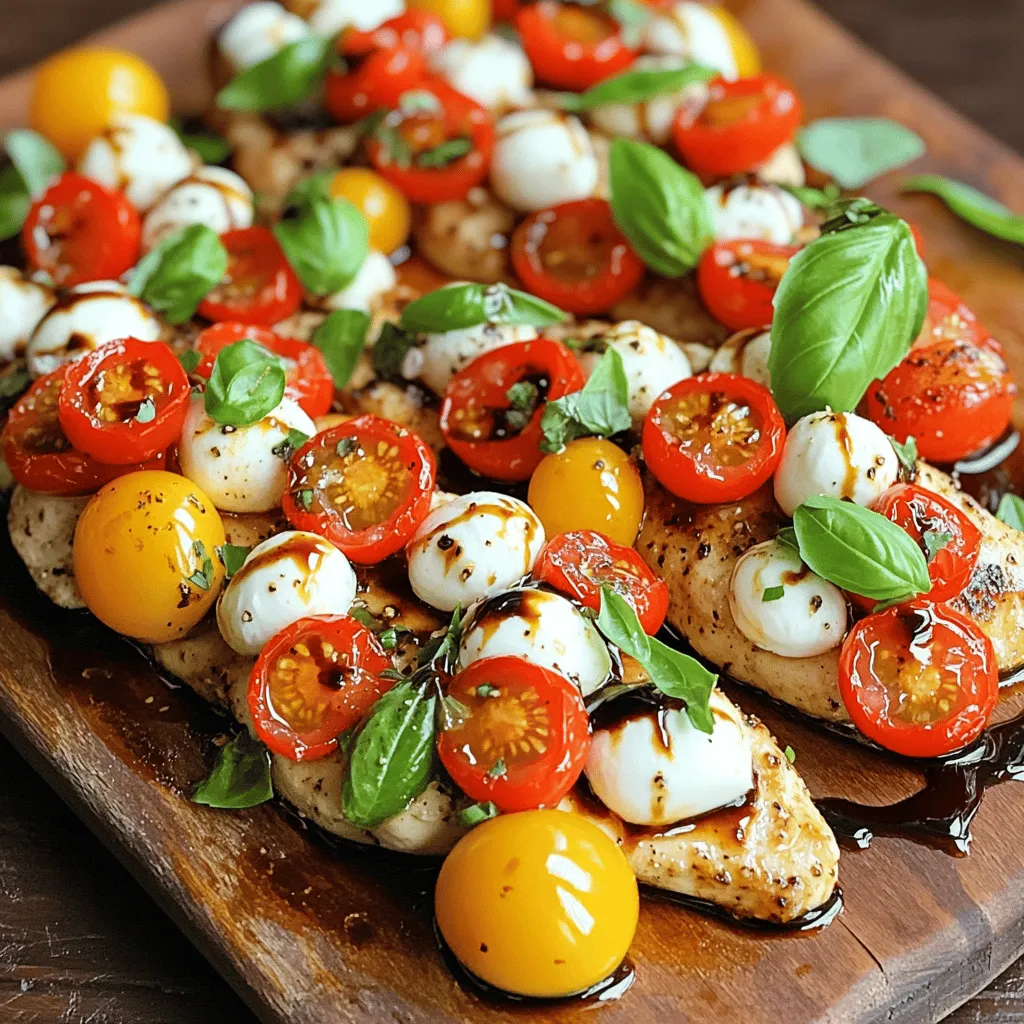
Balsamic Glazed Caprese Chicken for a Flavorful Meal
Looking for a tasty way to spice up dinner? Balsamic Glazed Caprese Chicken is your answer! This dish brings together Read Full Recipe


hey,
i’m !
I’m so happy you’re here!
Every dish I share is made with love and care. I hope they bring you the same comfort and joy they bring me. Let’s make memories, one recipe at a time.
![To make Cherry Coconut Chia Pudding, you need: - 1 cup coconut milk (canned or carton) - 1/4 cup chia seeds - 2 tablespoons maple syrup (or honey) - 1 teaspoon vanilla extract - 1 cup fresh or frozen cherries, pitted and halved - 1/4 cup shredded coconut, unsweetened - Fresh mint leaves for garnish (optional) These ingredients are simple yet flavorful. The coconut milk gives a creamy base, while chia seeds add a nice texture. You can sweeten it with maple syrup or honey. The cherries add a burst of flavor and a bright color. You can change some of these ingredients if you want. Try almond or oat milk instead of coconut milk for a different taste. You can use agave syrup or stevia in place of maple syrup. If you want, swap cherries for berries like blueberries or strawberries. These changes can create a new twist on this dish. You can use either fresh or frozen cherries. Fresh cherries are juicy and sweet. They work well in the pudding, but they might not always be in season. Frozen cherries are just as good. They are picked at the peak of ripeness and freeze well. They can also save you time, as you won’t need to pit them. Both options will give you a tasty pudding. It just depends on what you prefer and what you have on hand. To start making your Cherry Coconut Chia Pudding, gather your ingredients first. You need: - 1 cup coconut milk (canned or carton) - 1/4 cup chia seeds - 2 tablespoons maple syrup (or honey) - 1 teaspoon vanilla extract - 1 cup fresh or frozen cherries, pitted and halved - 1/4 cup shredded coconut, unsweetened - Fresh mint leaves for garnish (optional) First, take a mixing bowl. Pour in the coconut milk, then add the chia seeds, maple syrup, and vanilla extract. Use a whisk to mix them well. Make sure the chia seeds spread evenly in the liquid. Next, cover the bowl with plastic wrap or a lid. Place it in the fridge for at least four hours. I recommend chilling it overnight. This step is key because the chia seeds need time to absorb the liquid. They will turn into a gel-like texture, making your pudding thick and creamy. After the chilling period, check the pudding. Stir the mixture gently to break up any clumps of chia seeds. Then, fold in the pitted cherries and shredded coconut. Save a few cherries for topping later. Now, it’s time to serve. Use serving glasses or bowls to spoon in the chia pudding. Top with the reserved cherries and add extra shredded coconut on top. If you like, garnish with fresh mint leaves for a nice touch. This Cherry Coconut Chia Pudding is not only easy to make but also a delightful, energizing snack. For the full recipe, feel free to check the details above. Achieving the Perfect Consistency To get that creamy texture, use a good ratio of chia seeds to liquid. I recommend 1/4 cup of chia seeds for every cup of coconut milk. Stir the mix well before chilling. This helps the seeds distribute evenly. After chilling, stir again to break up clumps. If it’s too thick, add a splash of coconut milk. Sweetening Options: Maple Syrup vs. Honey You can sweeten your pudding with either maple syrup or honey. Maple syrup is great for a vegan option. It adds a rich flavor. Honey is sweeter and has a floral note. Start with two tablespoons, then taste and adjust. Remember, the cherries will also add sweetness! Presentation Ideas for Serving Make your pudding look as good as it tastes. Use clear glasses to show off the layers. Add fresh cherries on top for a pop of color. Sprinkle shredded coconut for texture. If you want a fresh touch, add mint leaves. It’s all about making your dish inviting and fun to eat. For the full recipe, check out the Cherry Coconut Chia Pudding recipe section. {{image_2}} You can change the flavor of your cherry coconut chia pudding easily. Here are some fun ideas: - Use Different Fruits in Chia Pudding Instead of cherries, try mango, berries, or banana. Each fruit brings its own taste and color. For example, blueberries add a sweet and tart punch. Strawberries give a bright look and a juicy bite. - Adding Nuts or Seeds for Texture Toss in some nuts like almonds or walnuts. They add a nice crunch. You can also use seeds like pumpkin or sunflower seeds. This gives your pudding extra nutrition and texture. - Chocolate or Cocoa Infusion Options If you love chocolate, mix in cocoa powder. This makes the pudding rich and decadent. You can add a little more maple syrup to balance the taste. Just stir in the cocoa after mixing the base. These variations keep your chia pudding exciting! You can make it new each time. For the full recipe, check out the Cherry Coconut Chia Pudding section. To keep your cherry coconut chia pudding fresh, use airtight containers. Glass jars or plastic containers work great. Make sure the lid seals tightly to prevent air from getting in. This keeps your pudding safe from spoilage. The shelf life of chia pudding is about five days in the fridge. You can enjoy it throughout the week as a healthy snack. If you want to save it longer, consider freezing it. Chia pudding can last up to three months in the freezer. Just remember to leave a little space at the top of your container. It expands when frozen. When reheating leftovers, simply take out the amount you want. You can use a microwave or a small pot. If it feels too thick, add a splash of coconut milk to loosen it up. Stir well and warm it gently. Enjoy it either cold or warm, based on your preference. For the complete recipe, check out the [Full Recipe]. Yes, chia pudding is very healthy. Chia seeds are packed with fiber, protein, and omega-3 fatty acids. These nutrients help keep you full and energized. Coconut milk adds healthy fats and a creamy texture. Overall, this cherry coconut chia pudding is a great choice for a snack or breakfast. Absolutely! This recipe is already vegan-friendly. Use maple syrup as your sweetener. It’s a great alternative to honey. Just follow the [Full Recipe] for easy steps to make it vegan. Chia pudding can last up to five days in the fridge. Store it in an airtight container to keep it fresh. If you notice any change in smell or texture, it's best to toss it. If you don’t have coconut milk, try almond milk or oat milk. Both options work well and still keep the pudding creamy. You can also use soy milk for a richer taste. Adjust sweetness to your liking when using different milk types. Cherry coconut chia pudding is easy and fun to make. We covered key ingredients, including fresh cherries and coconut milk. You learned the best ways to prepare and serve it. Tips helped you achieve the right texture and sweetness. We explored tasty variations and smart storage options. In the end, this pudding is a healthy treat you can enjoy. Try different fruits to find your favorite mix. Get creative and have fun making it!](https://easycookingbite.com/wp-content/uploads/2025/07/cb4be32f-bede-4c5c-a15a-7a6a11abc318-300x300.webp)
. - Peel and cut potatoes into fries. - Soak in cold water for 30 minutes. Start by peeling the russet potatoes. If you like the skin, you can leave it on. Cut them into long, even strips. This step helps the fries cook at the same rate. Soaking them in cold water for 30 minutes is key. This gets rid of extra starch, making them crispier when cooked. - Combine olive oil, garlic, salt, pepper, and paprika. In a large bowl, mix olive oil, minced garlic, salt, black pepper, and paprika. Stir well until you form a smooth seasoning paste. This mixture adds a great flavor to your fries. You can taste it to see if you want to add more salt or spice. - Coat fries with seasoning. - Preheat air fryer to 380°F (190°C). - Air fry for 15-20 minutes, shaking halfway. Add the soaked and dried fries to the bowl with the seasoning. Toss them well until they are fully coated. While you coat the fries, preheat your air fryer to 380°F (190°C). Place the fries in the basket in a single layer. Air fry them for 15 to 20 minutes. Remember to shake the basket halfway through for even cooking. - Sprinkle Parmesan onto fries. - Cook for an additional 2-3 minutes. When the fries turn golden and crispy, open the air fryer. Sprinkle grated Parmesan cheese over the fries. Cook them for an additional 2 to 3 minutes. This melts the cheese and gives it a nice, crispy texture. For the full recipe, check out the details above. Enjoy your delicious Air Fryer Garlic Parmesan Fries! Soaking potatoes is key. It removes excess starch and helps fries crisp up. Start by cutting your russet potatoes into even fries. Then, soak them in cold water for about 30 minutes. This simple step makes a big difference. After soaking, drain the fries and pat them dry with a towel. Less moisture means more crunch! Frying in a single layer is vital for crisp fries. When fries are too crowded, they steam instead of fry. This leads to soggy fries. Make sure to spread the fries out in the air fryer basket. You can cook in batches if needed. This way, each fry gets its chance to become golden and crispy. Adjusting flavors is easy and fun. Start with the basic seasoning mix of garlic, salt, pepper, and paprika. Feel free to taste and add more salt or spices if desired. You can also experiment with other flavors. Try adding chili powder for heat or herbs for freshness. Personalize your fries to match your taste buds! For the full recipe, check out the cooking steps mentioned earlier. {{image_2}} While Parmesan cheese shines in this recipe, you can mix it up. Try using mozzarella for a gooey bite. Feta adds a nice tang, while cheddar brings a sharp flavor. You could even experiment with vegan cheese if you want a plant-based twist. Each cheese gives fries a unique taste. Don’t be afraid to spice things up! You can add chili powder for heat or smoked paprika for a deep flavor. Garlic powder works well too, boosting the garlic taste. For something fresh, sprinkle in some dried herbs like oregano or thyme. A pinch of cayenne can really wake up the dish. If you're craving variety, switch out the potatoes. Sweet potatoes offer a sweet flavor and vibrant color. They also bring extra nutrients. Other root veggies like carrots or parsnips can also work great. Just cut them into fry shapes and follow the same steps for seasoning and cooking. Each choice gives you a new taste experience. For the complete recipe, check out the [Full Recipe]. After making Air Fryer Garlic Parmesan Fries, let them cool down first. Place the fries in an airtight container. Store them in the fridge for up to three days. This keeps them fresh and tasty. If you want to keep them longer, consider freezing them. To reheat fries and keep them crispy, use your air fryer again. Preheat the air fryer to 350°F (175°C). Place the fries in the basket and heat them for about 5-7 minutes. This method helps restore their crunch. If you use a microwave, the fries may become soggy. You can freeze both uncooked and cooked fries. For uncooked fries, spread them out on a baking sheet. Freeze them for about 1 hour. Once frozen, transfer the fries to a freezer bag. This prevents them from sticking together. For cooked fries, let them cool completely. Then, follow the same steps as uncooked fries. When you're ready to eat, just air fry them straight from the freezer. To make Air Fryer Garlic Parmesan Fries, follow these steps: 1. Prep the Potatoes: Peel and cut four large russet potatoes into fries. Soak them in cold water for 30 minutes. This helps remove extra starch and makes them crispier. 2. Seasoning Mixture: In a bowl, mix three tablespoons of olive oil, four minced garlic cloves, one teaspoon of salt, half a teaspoon of black pepper, and half a teaspoon of paprika. Stir until combined. 3. Coat the Fries: Drain and pat dry the soaked fries. Toss them in the seasoning mix until well-coated. 4. Preheat Air Fryer: Set your air fryer to 380°F (190°C). 5. Air Fry the Fries: Place the fries in a single layer in the basket. Fry for 15 to 20 minutes, shaking halfway through. 6. Add Parmesan: Once golden, sprinkle half a cup of grated Parmesan cheese on top. Cook for 2 to 3 more minutes until the cheese melts. 7. Serve: Remove the fries and garnish with two tablespoons of chopped fresh parsley before serving. Yes, you can use frozen fries! Just make sure they are not coated in extra oil or seasoning. Follow the same cooking steps but adjust the cooking time. Frozen fries may need a few extra minutes to get crispy. These fries pair well with many dips and dishes. Try serving them with: - Ketchup - Ranch dressing - Garlic aioli - Barbecue sauce - Burgers - Grilled chicken - Salads To make these fries healthier, consider these tips: - Use less olive oil. You can cut the amount in half for fewer calories. - Choose sweet potatoes for added nutrients. - Bake the fries instead of air frying for even less oil. - Skip the cheese or use a lighter cheese option. - Add more herbs and spices instead of oil for flavor. For the full recipe, check the details above! To make Air Fryer Garlic Parmesan Fries, we used simple ingredients, like russet potatoes and spices. Soaking the potatoes helps them crisp up. A few tips, such as avoiding overcrowding, enhance taste and texture. You can switch up the cheese or spices to keep things interesting. In the end, these fries are easy, tasty, and fun to make. Try them tonight!](https://easycookingbite.com/wp-content/uploads/2025/07/803b86d2-a7e6-4f31-b7dc-c58f03e8549c-300x300.webp)
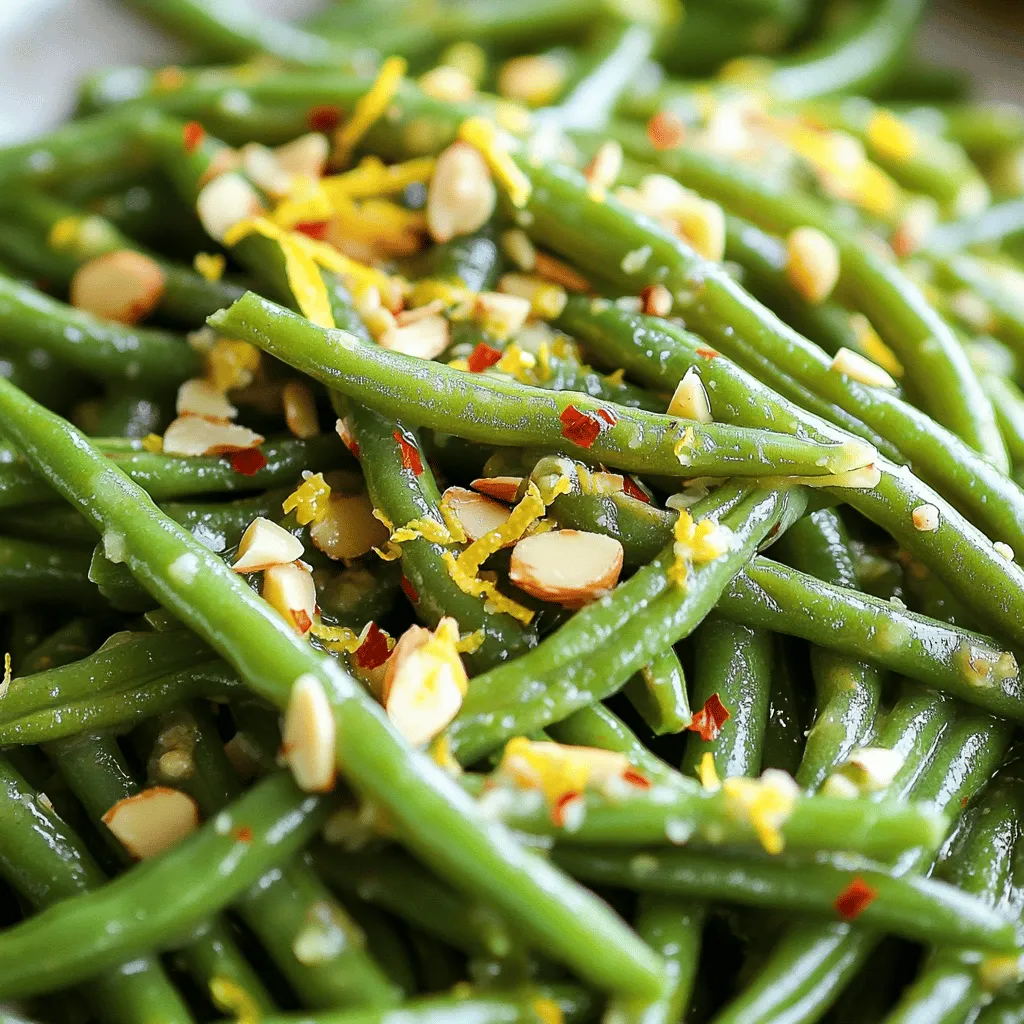
Garlic Butter Green Beans Simple and Flavorful Side
Looking for a side dish that’s simple yet bursting with flavor? Garlic Butter Green Beans are the answer! These fresh green beans bring together…