Latest & Greatest

browse recipes

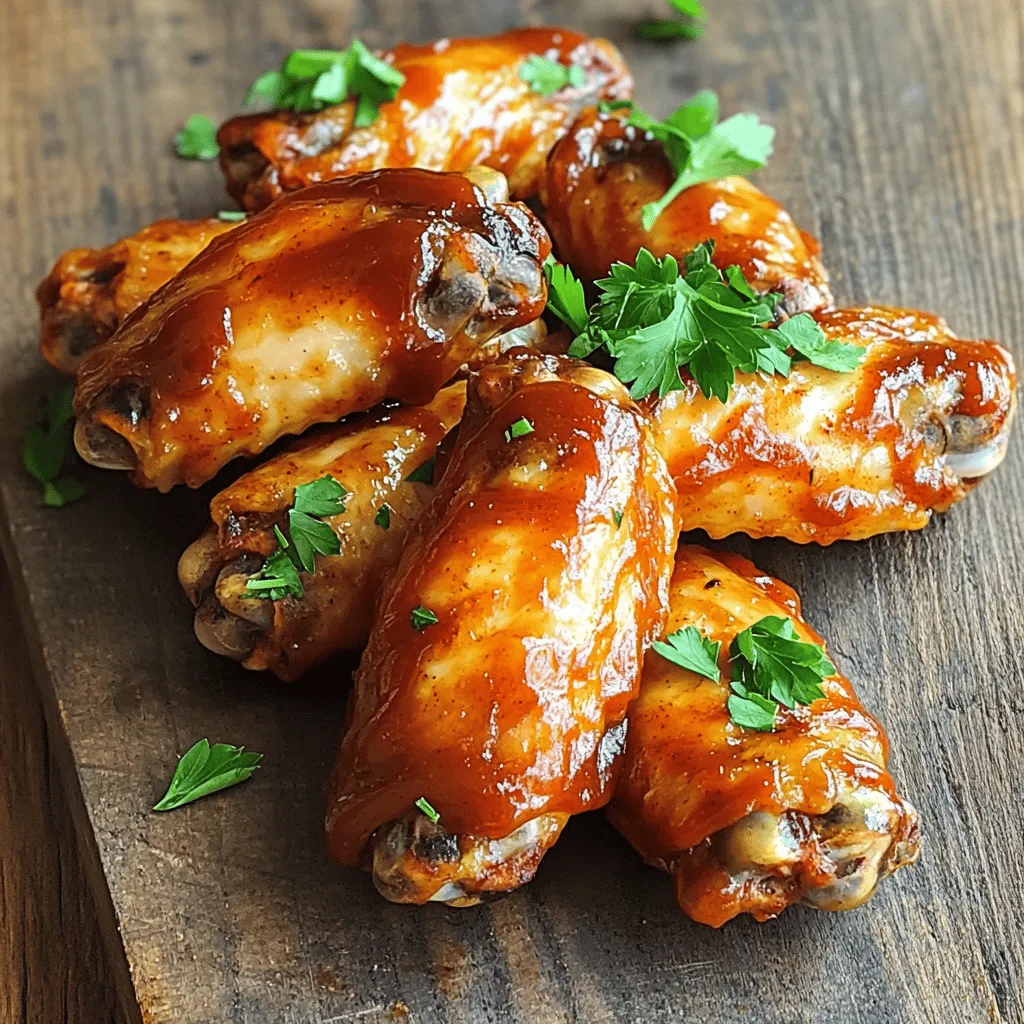
- 2 pounds chicken wings - 1 tablespoon olive oil - 1 cup BBQ sauce (your favorite variety) - 1 teaspoon garlic powder - 1 teaspoon onion powder - 1 teaspoon smoked paprika - 1 teaspoon black pepper - 1 teaspoon sea salt - Fresh parsley or cilantro for garnish When making crispy air fryer BBQ chicken wings, the right ingredients matter a lot. Start with fresh chicken wings, as they give the best taste. You need about 2 pounds. Olive oil helps the wings get that nice, crispy texture. Just one tablespoon is enough. Now, let's talk about the seasoning blend. Garlic powder adds flavor without being too strong. Onion powder gives a nice touch too. Smoked paprika adds a warm, smoky taste. Black pepper and sea salt enhance the overall flavor. Each seasoning plays a role in making your wings delicious. Finally, don’t forget the BBQ sauce! Pick your favorite kind to coat the wings after cooking. It brings everything together with a sweet and tangy kick. For a nice finish, use fresh parsley or cilantro as a garnish. It adds color and freshness to your dish. Enjoy crafting these tasty wings! Start by patting the chicken wings dry. This helps them get really crispy. Use paper towels to remove extra moisture. Next, take a large bowl and add the wings. Pour in 1 tablespoon of olive oil. Then, add 1 teaspoon each of garlic powder, onion powder, smoked paprika, black pepper, and sea salt. Mix it well. You want every wing covered with the tasty seasoning. Now, preheat your air fryer to 375°F (190°C). This step is key for even cooking. Let it warm up for about 5 minutes. After that, place the wings in the fryer basket. Make sure they are in a single layer. If you have lots of wings, cook them in batches. Air fry them for 25-30 minutes. Remember to shake the basket halfway through. This helps them cook evenly. When done, they should look golden brown and crispy. Once the wings are cooked, move them to a big bowl. Pour 1 cup of your favorite BBQ sauce over them. Toss the wings well to coat them in the sauce. Next, return the wings to the fryer. Turn the temperature up to 400°F (200°C) and cook for another 5 minutes. This will caramelize the BBQ sauce and make them extra crispy. Finally, take them out and let them rest for a couple of minutes. You can garnish with fresh parsley or cilantro for a nice touch before serving. To get your wings crispy, drying them is key. Use paper towels to pat them dry before seasoning. This step removes excess moisture. If the wings are dry, they will crisp better in the air fryer. Set your air fryer to 375°F (190°C). This temperature cooks the wings evenly and creates that perfect golden crust. Cook the wings in batches if needed. Overcrowding makes it hard for the air to circulate. If you have a lot of wings, cook them a few at a time. This ensures even cooking and crispiness. Wing sizes can vary. Smaller wings may cook faster than larger ones. Check their doneness around the 20-minute mark. You want them golden brown and fully cooked. Choose a BBQ sauce that you love. This makes a big difference in flavor. Sweet, spicy, or smoky BBQ sauces all work well. If you want to make your own, use simple ingredients. Combine ketchup, brown sugar, vinegar, and spices. Mix until smooth for a tasty homemade sauce. {{image_2}} You can switch up the taste of your BBQ chicken wings in fun ways. Here are two ideas: - Spicy BBQ chicken wings: Add hot sauce or cayenne pepper to your seasoning mix. This gives the wings a nice kick. You can mix in some extra black pepper for added heat. - Honey garlic version: Replace BBQ sauce with a mix of honey and minced garlic. This sweet and savory mix will make your wings shine with a tasty glaze. If you don't have an air fryer, no worries! You can still make great wings using these methods: - Using an oven for baking: Preheat your oven to 400°F (200°C). Spread the wings on a baking sheet. Bake for about 40 minutes, flipping halfway through. This will give you crispy wings without an air fryer. - Grilling as an alternative method: Heat your grill to medium-high. Grill the wings for about 20 minutes, turning them often. This adds a nice smoky flavor that is hard to beat. Serving your wings can be just as fun as cooking them. Here are some ideas: - Pairing with sides and dips: Serve your wings with ranch or blue cheese dressing. Fresh veggies like carrots and celery make great sides. You can also add fries or a simple salad for a nice balance. - Creative plating ideas: Arrange wings on a large platter. Garnish with fresh parsley or cilantro for a pop of color. You can even add lemon wedges for a fresh touch. This makes your dish look as good as it tastes! To keep your leftover wings fresh, follow these tips: - Refrigeration: Place the wings in an airtight container. Store them in the fridge. They last for up to 3 days. - Freezing: For longer storage, freeze the wings. Lay them flat in a single layer on a baking sheet. Once frozen, transfer them to a freezer bag. They can last up to 3 months in the freezer. To enjoy crispy wings again, use these reheating methods: - Oven Method: Preheat your oven to 375°F (190°C). Spread wings on a baking sheet. Heat for about 10-15 minutes until hot and crispy. - Air Fryer Method: Set your air fryer to 375°F (190°C). Heat wings for about 5-7 minutes. This keeps them crispy and tasty. These tips will help you enjoy your Air Fryer BBQ Chicken Wings even after the first meal! Cook chicken wings for 25-30 minutes at 375°F (190°C). The time can change based on wing size and quantity. If you use larger wings, add a few minutes. For small wings, check them at 20 minutes. Always shake the basket halfway through for even cooking. Yes, you can use frozen wings. If you cook from frozen, it may take longer. Start by cooking them at 375°F (190°C) for about 30-35 minutes. Check them near the end to see if they are cooked through. You may want to add extra seasoning after the first cook. You can try different sauces for your wings. Hot sauce gives a spicy kick. Teriyaki sauce adds a sweet flavor. You can also mix honey with mustard for a tangy taste. Experiment with your favorite flavors to find what you love best! This post shows you how to make tasty air-fried BBQ chicken wings. We covered key ingredients like chicken, olive oil, and BBQ sauce. You learned step-by-step instructions for preparing, cooking, and garnishing your wings. We shared tips for crispiness and variations to suit your taste. Lastly, we discussed storage and reheating methods. Enjoy your wings with confidence. You can impress friends and family with your new cooking skills. Happy cooking!

Air Fryer BBQ Chicken Wings Crispy and Flavorful Dish

Get ready for a crispy, flavorful delight with Air Fryer BBQ Chicken Wings! These wings are quick to make and perfect for any gathering…

My Latest Drinks

My Latest Dinners

hey,

i’m !

I’m so happy you’re here!

Every dish I share is made with love and care. I hope they bring you the same comfort and joy they bring me. Let’s make memories, one recipe at a time.

Chocolate Zucchini Bread Bakery Delightful Recipe

Welcome to your new favorite treat: Chocolate Zucchini Bread! This delightful recipe combines the rich taste of chocolate with the moist goodness of zucchini.…
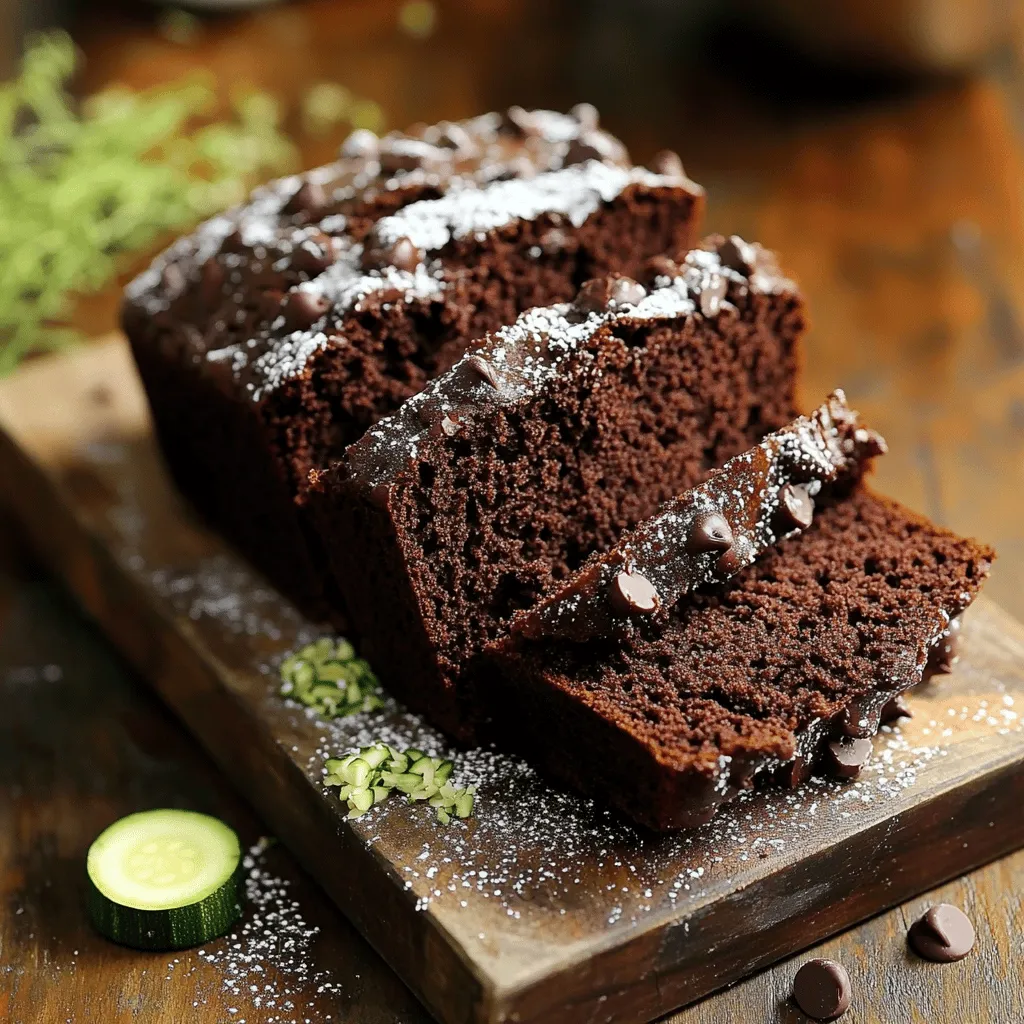
- Zucchini: Use one medium zucchini, grated. It adds moisture without a strong taste. This keeps the bread soft and fluffy. The water in zucchini helps the bread stay fresh longer. - Sweeteners: I use both brown sugar and granulated sugar. Brown sugar gives a deep flavor and moisture. Granulated sugar adds sweetness. Mixing both creates the best taste and texture. - Optional add-ins: You can add semi-sweet chocolate chips for extra chocolatey goodness. Chopped walnuts or pecans give a nice crunch. Both are great options to boost flavor and texture. 1. Preheat your oven and prepare the pan. Set your oven to 350°F (175°C). Grease a 9x5-inch loaf pan with oil or line it with parchment paper. This helps the bread come out easily. 2. Mix the dry ingredients. In a medium bowl, add 1 cup of all-purpose flour, 1/2 cup of cocoa powder, 1/2 teaspoon of baking soda, 1/2 teaspoon of baking powder, and 1/4 teaspoon of salt. Whisk these together well. This step ensures no lumps are in your dry mix. 3. Combine the wet ingredients. Use a large mixing bowl to mix 1/3 cup of vegetable oil, 1/2 cup of brown sugar, and 1/4 cup of granulated sugar. Beat these together until they blend well. 4. Add eggs and vanilla. Add 2 large eggs, one at a time. Mix well after each egg. Stir in 1 teaspoon of vanilla extract. This adds great flavor to your batter. 5. Fold in the zucchini. Carefully add 1 cup of grated zucchini to the wet mix. Gently fold it in until it is well combined. The zucchini adds moisture and makes the bread soft. 6. Combine the mixtures. Gradually add the dry ingredients to the wet mix. Stir gently until just combined. Do not overmix, or your bread may become dense. 1. Pour and smooth the batter. Pour the batter into your prepared loaf pan. Use a spatula to smooth the top of the batter. 2. Bake. Place the pan in the preheated oven. Bake for 50 to 60 minutes. 3. Check for doneness. Insert a toothpick into the center. It should come out clean when the bread is done. If it has wet batter, bake for a few more minutes. 1. Cool in the pan. Once baked, take the pan out of the oven. Let it cool in the pan for about 10 minutes. This keeps the bread from breaking apart. 2. Transfer to a wire rack. Carefully move the bread to a wire rack to cool completely. This helps air circulate around it, keeping it from getting soggy. 3. Presentation tips. Slice the bread and serve it on a wooden board. Dust with powdered sugar for a fancy touch. You can also add a dollop of whipped cream or a scoop of vanilla ice cream for an extra treat. - Avoiding a dense texture: To keep your bread light, do not overmix the batter. Mix just until the dry and wet ingredients blend together. Overmixing can add too much air and cause a dense texture. - Importance of using fresh zucchini: Fresh zucchini adds moisture and flavor to the bread. Look for firm, shiny zucchini without soft spots. Grate it right before use to keep it fresh. - How to properly store leftovers: Let the bread cool completely before storing. Wrap it tightly in plastic wrap or foil. You can keep it at room temperature for up to three days. For longer storage, place it in the fridge or freezer. - Serving suggestions for enhanced flavor: Serve slices warm with a dusting of powdered sugar. A dollop of whipped cream or a scoop of vanilla ice cream adds a nice touch. Enjoy your slice with a cup of coffee or tea for a delightful treat! {{image_2}} You can make your chocolate zucchini bread healthier with a few swaps. Use honey or maple syrup instead of granulated sugar. These options add sweetness and a unique flavor. They also bring moisture to the bread. Another great change is to use whole wheat flour. Whole wheat flour adds fiber and nutrients. It gives your bread a nutty taste. This small tweak makes your treat even better. To spice things up, consider adding cinnamon or nutmeg. These spices bring warmth and a cozy aroma to your bread. Just a teaspoon can make a big difference! You can also play with chocolate types. Try dark chocolate for a rich, intense flavor. Milk chocolate is sweeter and creamier. Mixing both gives you the best of both worlds. Enjoy experimenting with these fun flavor twists! To keep your Chocolate Zucchini Bread fresh, use an airtight container. You can also wrap it tightly in plastic wrap. This helps keep moisture in and air out. If you want to freeze it, slice the bread first. Place the slices in a freezer bag or wrap them separately. This way, you can grab just what you need. When you are ready to eat, thaw the slices at room temperature or heat them in the microwave for a few seconds. At room temperature, your bread lasts about 3 to 5 days. Just make sure it stays in a cool, dry place. If you store it in the fridge, it may last a bit longer, but the texture might change. Cold air can make the bread dry and tough. Enjoy it fresh for the best taste! Can I use frozen zucchini for this recipe? Yes, you can use frozen zucchini. Just thaw it first and drain the excess water. This keeps your bread from being too wet. Frozen zucchini works well, but fresh is best if you can find it. What is the best way to measure zucchini? Grate the zucchini and then pack it into a measuring cup. Use a standard cup for accuracy. Make sure to remove excess water to avoid a soggy bread. If you notice a lot of liquid, try to squeeze out some before you mix it in. How do I know when the bread is done baking? Insert a toothpick into the center of the loaf. If it comes out clean, the bread is done. You might see some melted chocolate, but that’s fine. If it comes out wet, give it more time in the oven. Check every few minutes until it’s ready. In this blog post, we explored how to make chocolate zucchini bread. We covered the key ingredients, like zucchini's moisture and sweetener choices. I shared step-by-step instructions, from mixing to cooling. We discussed tips for baking and storing your bread. Plus, I gave ideas for healthy and flavor variations. Enjoying this treat can be easy and fun. With these tips, you’ll bake successful chocolate zucchini bread every time. Happy baking!