
Latest & Greatest
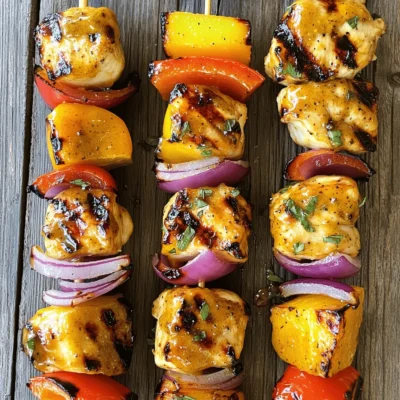
Honey Mustard Chicken Skewers Flavorful Grilling Recipe
Looking to spice up your grilling game? Try my Honey Mustard Chicken Skewers! This easy, flavorful recipe combines juicy chicken
Read more…
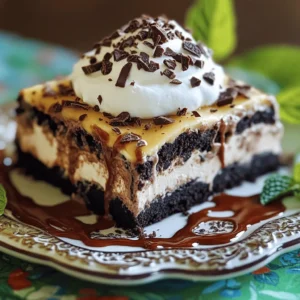
S’mores Dip in the Oven Easy and Fun Dessert Recipe
If you love the classic taste of s’mores, you’ll adore this easy oven-baked s’mores dip. It combines melted chocolate and
Read more…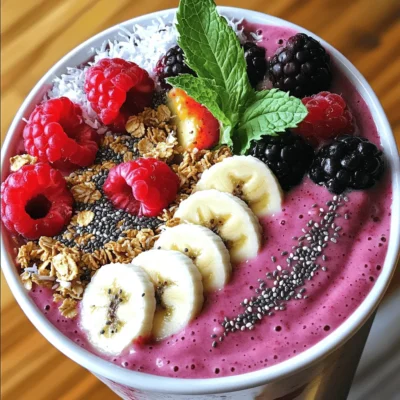
Berry Smoothie Bowl Energizing and Nutritious Recipe
Looking for a quick, tasty way to boost your energy? You’re in the right place! My Berry Smoothie Bowl recipe
Read more…
Orange Glazed Carrots Simple and Delicious Recipe
Are you ready to transform ordinary carrots into a sweet, tangy delight? This simple Orange Glazed Carrots recipe elevates baby
Read more…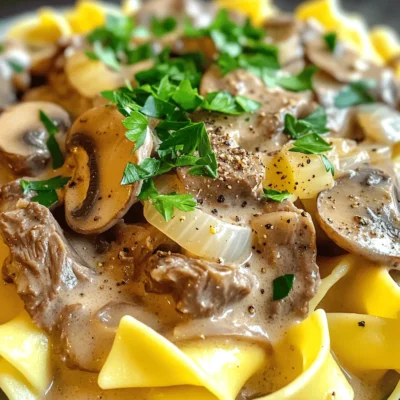
Classic Beef Stroganoff Hearty Comforting Dish
If you’re craving a warm, hearty meal, look no further than Classic Beef Stroganoff. This comforting dish blends tender beef
Read more…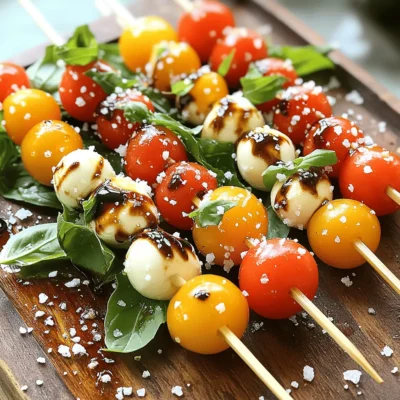
Caprese Salad Skewers Tasty and Simple Recipe
Caprese Salad Skewers are a fresh and fun twist on the classic salad. They burst with flavor and are easy
Read more…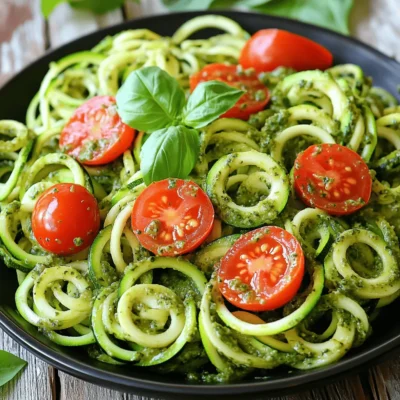
Zucchini Noodles with Pesto Fresh and Flavorful Dish
Looking for a fresh and flavorful dish that’s quick to make? Zucchini Noodles with Pesto is your answer! You’ll love
Read more…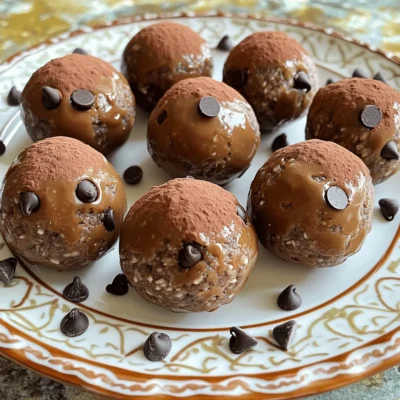
Chocolate Peanut Butter Protein Balls Energizing Treat
Fuel your day with my delicious Chocolate Peanut Butter Protein Balls! These tasty treats combine rich chocolate and smooth peanut
Read more…browse recipes


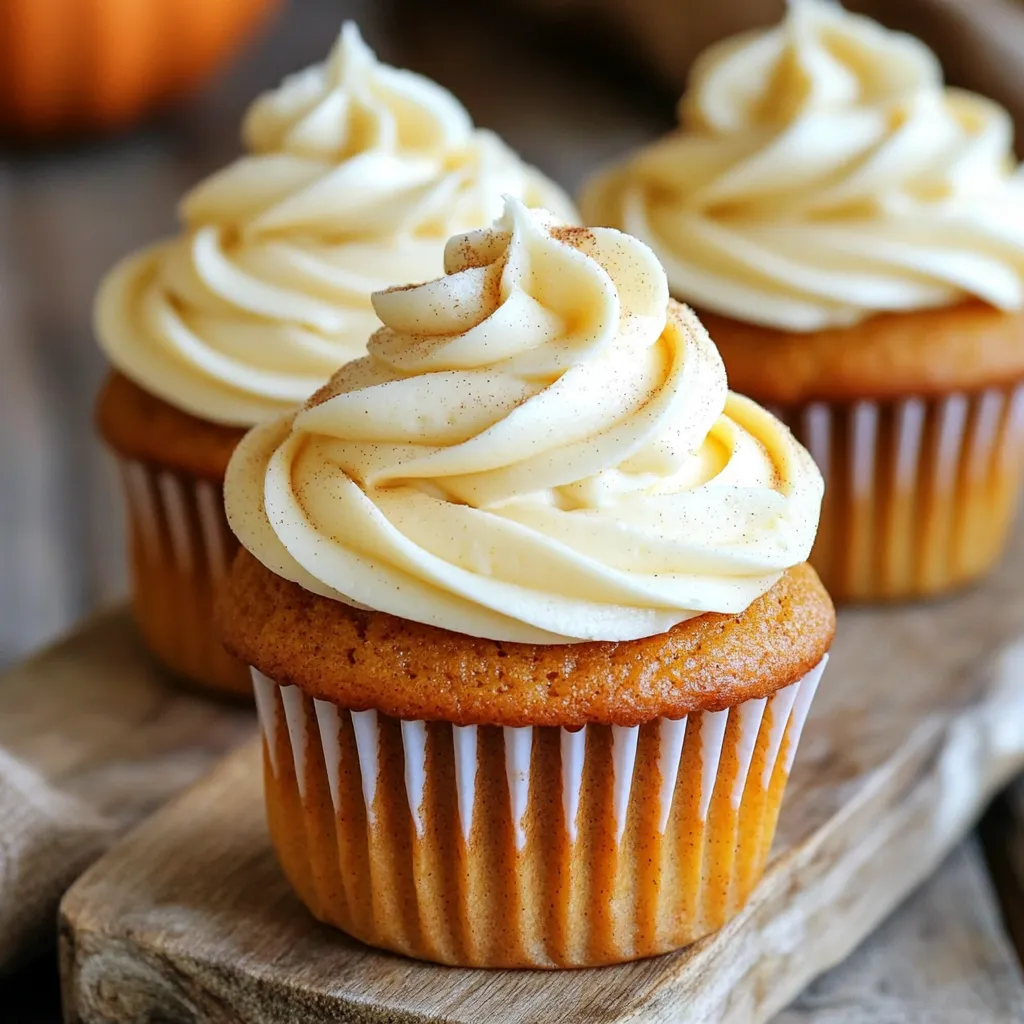
Pumpkin Spice Latte Cupcakes Delightful Fall Treat
If you’re craving a sweet treat that captures the essence of fall, look no further! My Pumpkin Spice Latte Cupcakes blend cozy pumpkin flavors…
My Latest Drinks

Strawberry Cheesecake Smoothie Creamy Refreshing Treat
Craving something delicious and cool? The Strawberry Cheesecake Smoothie is your answer! It blends creamy cheesecake flavors with sweet strawberries Read Full Recipe-
Mocktail Pink Punch Refreshing and Easy Recipe
Are you ready to impress your guests with a delightful drink? This Mocktail Pink Punch recipe is both refreshing and Read Full Recipe -
Blue Lagoon Tropical Lemonade Refreshing and Zesty Drink
Looking for a drink that’s both refreshing and fun? Say hello to Blue Lagoon Tropical Lemonade! This colorful beverage packs Read Full Recipe -
Pumpkin Spice Coffee Creamer Flavorful Fall Treat
Are you ready to embrace the cozy vibes of autumn? In this blog post, I’ll guide you through making your Read Full Recipe -
Apple Cider Margarita Mocktail Refreshing Fall Drink
Fall is here, and that means it’s the perfect time for a cozy drink! The Apple Cider Margarita Mocktail offers Read Full Recipe -
Pumpkin Spice Latte Copycat Cozy and Comforting Recipe
Craving that warm, cozy feeling of fall? You can enjoy a delicious Pumpkin Spice Latte at home! In this article, Read Full Recipe


My Latest Dinners
-
White Bean Soup Simple and Hearty Delight
Looking for a warm and filling meal? Let me introduce you to white bean soup! This simple and hearty delight Read Full Recipe -
Garlic Herb Roasted Sweet Potatoes Flavorful Side Dish
Looking for a side dish that’s both tasty and easy to make? Garlic Herb Roasted Sweet Potatoes are the answer! Read Full Recipe -
One Pot Beef Taco Pasta Easy and Flavorful Meal
Looking for a quick and tasty meal? One Pot Beef Taco Pasta is the perfect dish! This recipe packs bold Read Full Recipe -
Garlic Chicken Zucchini Noodles Stir Fry Delight
Are you ready for a tasty twist on dinner? My Garlic Chicken Zucchini Noodles Stir Fry is a quick and Read Full Recipe -
Stuffed Italian Meatloaf Easy and Tasty Recipe
Are you ready to elevate your dinner game? This Stuffed Italian Meatloaf is both easy and tasty! In this article, Read Full Recipe -
One Pot French Onion Pasta Flavorful Comfort Dish
Looking for a cozy dinner that warms your soul? Try my One Pot French Onion Pasta! This creamy, rich dish Read Full Recipe


hey,
i’m !
I’m so happy you’re here!
Every dish I share is made with love and care. I hope they bring you the same comfort and joy they bring me. Let’s make memories, one recipe at a time.
![- 2 ¾ cups all-purpose flour - 1 teaspoon baking soda - ½ teaspoon baking powder - 1 teaspoon salt - 1 cup unsalted butter, softened - 1 ½ cups granulated sugar - 1 large egg - 1 tablespoon lemon zest (from about 2 lemons) - 2 tablespoons fresh lemon juice - 1 teaspoon vanilla extract - 1 ½ cups powdered sugar (for glazing) - 2 tablespoons fresh lemon juice (for glazing) - Lemon slices and zest for garnish (optional) You will need some basic items for these cookies. Start with the flour, baking soda, baking powder, and salt. These dry ingredients give the cookies structure. Next, get butter and sugar. The butter should be soft. This helps it mix well, making the cookies light. You also need an egg, lemon zest, lemon juice, and vanilla extract. These add flavor and moisture to the dough. For the glaze, gather powdered sugar and more lemon juice. This glaze gives the cookies a sweet and tart finish. If you like, use lemon slices or extra zest for a pretty touch on top. With all these ingredients ready, you will make a tasty treat! For the full recipe, check the cooking instructions later. 1. Preheat the oven and line baking sheets: Start by preheating your oven to 350°F (175°C). Line your baking sheet with parchment paper. This helps the cookies not stick. 2. Combine dry ingredients and cream butter/sugar mixture: In a bowl, mix together 2 ¾ cups of flour, 1 teaspoon of baking soda, ½ teaspoon of baking powder, and 1 teaspoon of salt. In a separate bowl, beat 1 cup of softened butter and 1 ½ cups of granulated sugar until fluffy. This takes about 3 minutes. 3. Add egg and flavorings to the mixture: Add 1 large egg, 1 tablespoon of lemon zest, 2 tablespoons of fresh lemon juice, and 1 teaspoon of vanilla extract to the butter mixture. Beat until mixed well. 1. Combine wet and dry ingredients, shape cookies, and set on baking sheet: Slowly add the dry mixture to the wet mixture. Mix on low until combined. Do not overmix! Use a cookie scoop to drop dough onto the prepared baking sheet. Space them 2 inches apart. 2. Baking time and tips for doneness: Bake the cookies for 8-10 minutes. Look for lightly golden edges. The middle may seem soft, but it will firm up while cooling. 1. How to make the glaze: In a small bowl, whisk together 1 ½ cups of powdered sugar and 2 tablespoons of fresh lemon juice. Mix until smooth and pourable. 2. Techniques for glazing cookies: Once the cookies are cool, drizzle the glaze over each cookie. You can use a spoon or a piping bag for neat lines. 3. Optional garnishing ideas: If you want, add small lemon slices or more lemon zest on top of the glaze while it is still wet. This adds a nice touch! For the full recipe and additional tips, check out the [Full Recipe]. Enjoy making your glazed lemon sugar cookies! To make the best glazed lemon sugar cookies, start with measuring flour correctly. Use a spoon to scoop flour into your measuring cup. Then level it off with a knife. This method helps avoid too much flour, which can make cookies dry. Room temperature butter is key. It blends well with sugar, creating a light and fluffy mixture. If your butter is cold, it won’t mix properly. Leave it out for about 30 minutes before use. Avoid overmixing the dough. Once you add dry ingredients, mix just until combined. Overmixing can make cookies tough. You want a soft and tender cookie, so stop mixing as soon as everything blends. To enhance lemon flavor, add more lemon zest. This gives a bright, zesty taste. You can also mix in a bit of lemon extract for an extra kick. For alternate glazes, try a simple vanilla glaze. Just mix powdered sugar with milk and vanilla. This adds sweetness without the tartness of lemon. You can also sprinkle in chopped nuts or shredded coconut for added texture. {{image_2}} You can switch up the flavor of your glazed lemon sugar cookies with different citrus. Try using lime zest for a fresh twist. Lime adds a bright and tangy taste that pairs well with the sweetness. Orange zest is another great option. It brings a sweet, fruity aroma that brightens the cookies. For seasonal variations, think about adding blood orange zest in winter. It gives a lovely color and flavor that stands out. If you need to make your cookies gluten-free, use a gluten-free flour blend. Many blends work well in cookies. Look for one that includes xanthan gum for a better texture. If you want a vegan option, replace the butter with coconut oil or a plant-based butter. You can use a flax egg instead of a regular egg. Just mix one tablespoon of ground flaxseed with two and a half tablespoons of water. Let it sit until it thickens. These changes keep the cookies tasty while fitting different diets. Store your glazed lemon sugar cookies at room temperature in an airtight container. This keeps them soft and fresh for about a week. Avoid placing them in direct sunlight. You can add a piece of bread to the container. This helps keep cookies moist. You can separate layers of cookies with parchment paper. This method prevents them from sticking together. If you want to keep the glaze intact, wait until the cookies cool completely before storing them. This ensures the glaze sets properly. For long-term storage, you can freeze both unbaked dough and baked cookies. To freeze unbaked dough, scoop the dough onto a lined baking sheet. Freeze the dough balls until firm, then transfer them to a freezer bag. This method saves space and keeps the dough fresh for up to three months. If you prefer to freeze baked cookies, let them cool completely. Then, place them in an airtight container or freezer bag. They can last up to three months in the freezer. To thaw, simply take them out and let them sit at room temperature for about 30 minutes. If you want to enjoy them warm, pop them in a preheated oven at 350°F (175°C) for a few minutes. This will bring back their fresh-baked goodness. You can tell when cookies are done by looking at their edges. The edges should be lightly golden. If the center looks a bit soft, don’t worry. They will firm up as they cool. Gently touch the center with your finger. If it springs back, they are ready to come out. Yes, you can make the dough ahead of time! Just shape it into a ball and wrap it in plastic. Store it in the fridge for up to three days. If you want to keep it longer, freeze the dough for up to three months. When ready to bake, let it thaw in the fridge overnight and then scoop and bake as usual. If you lack fresh lemons, you can use bottled lemon juice. About two tablespoons of bottled juice works well. You can also use lemon extract as an option. One teaspoon of extract can replace the zest and juice. Just remember, the flavor may not be as bright as fresh lemons, but it will still taste good! Baking cookies is simple with the right ingredients and steps. You learned about the key components like flour, butter, and eggs. I shared tips for perfect texture and flavor. Don’t forget to experiment with different citrus and dietary options. Storing cookies properly keeps them fresh longer. I hope you feel excited to try these recipes. Happy baking!](https://easycookingbite.com/wp-content/uploads/2025/04/ad0cd104-3f95-4117-9de1-68bbc0782b91-300x300.webp)


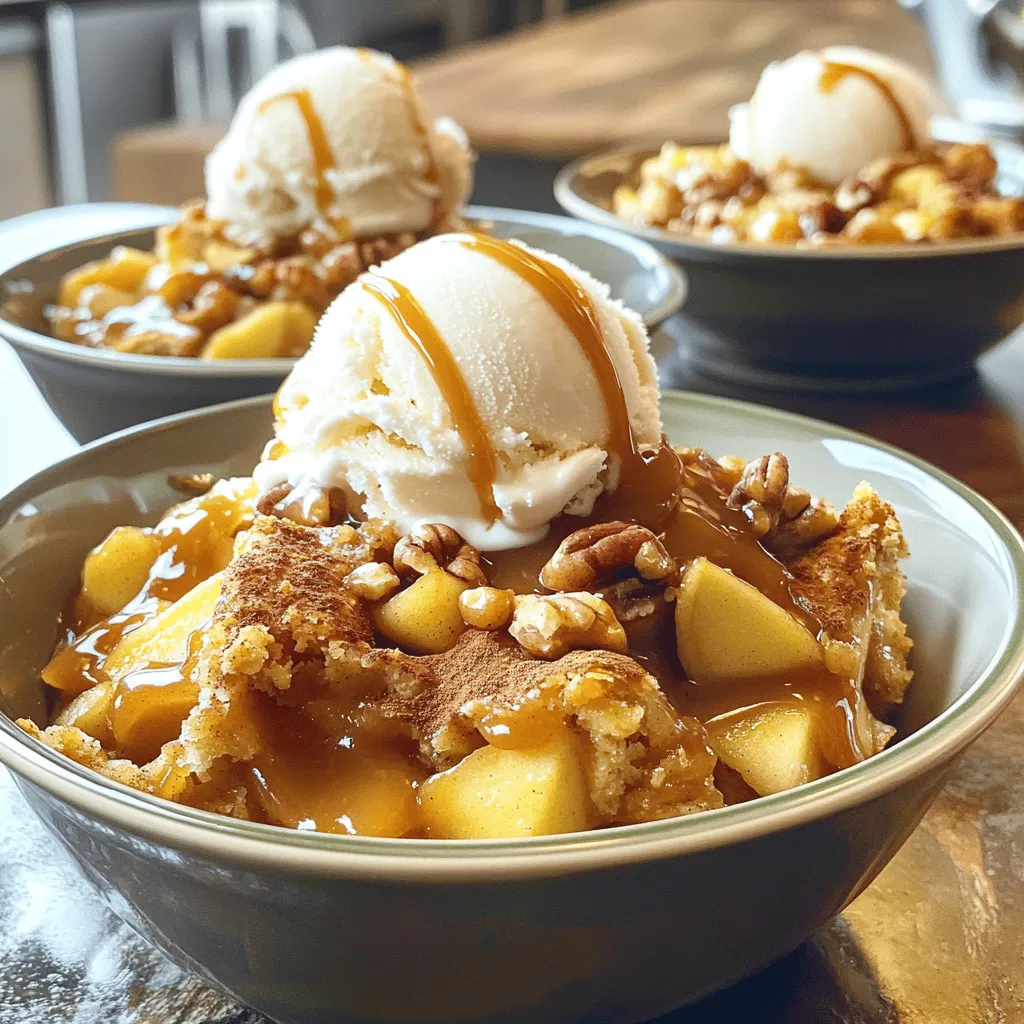
Caramel Apple Dump Cake Delightful and Easy Treat
If you’re craving a quick and delightful dessert, you’ve stumbled upon the perfect recipe! Caramel Apple Dump Cake combines warm, spiced apples with gooey…