Latest & Greatest

browse recipes

- 1 lb chicken breast - 1 cup buttermilk - 1 teaspoon garlic powder - 1 teaspoon onion powder - 1 teaspoon paprika - 1 teaspoon salt - ½ teaspoon black pepper - 1 cup breadcrumbs (preferably panko for extra crunch) - ½ cup all-purpose flour - 2 large eggs, beaten - Air fryer - Mixing bowls - Shallow bowls for breading - Cooking spray or olive oil Gathering your ingredients is the first step to making crispy air fryer chicken tenders. Start with 1 pound of chicken breast. Cut them into strips to ensure even cooking. Next, you will need 1 cup of buttermilk. This will help make the chicken moist and tender. For seasonings and coatings, I like to use simple spices. You will need garlic powder, onion powder, paprika, salt, and black pepper. Each spice adds flavor without being overwhelming. Next, gather your breading ingredients. Panko breadcrumbs provide a great crunch. You will also need all-purpose flour and eggs to help the breadcrumbs stick to the chicken. Finally, make sure you have your tools ready. An air fryer is key for this recipe. Mixing bowls help you combine your ingredients, and shallow bowls make the breading process easier. Don't forget cooking spray or olive oil to keep things from sticking in the air fryer. For the full recipe, check the section that details the steps to create these delightful chicken tenders. To start, take your chicken strips and place them in a large bowl. Add 1 cup of buttermilk. Then, mix in 1 teaspoon garlic powder, 1 teaspoon onion powder, 1 teaspoon paprika, 1 teaspoon salt, and ½ teaspoon black pepper. Stir well to coat each piece. Cover the bowl and place it in the fridge for at least 1 hour. For more flavor, marinate overnight. Next, set up your breading station. Grab three shallow bowls. Fill one bowl with ½ cup of all-purpose flour. In the second bowl, add 2 beaten eggs. In the third bowl, put 1 cup of breadcrumbs. I like to use panko for extra crunch. Stir a pinch of salt into the breadcrumbs for added flavor. Now, let’s bread those chicken strips! Take each marinated strip and dip it into the flour first. Shake off any extra flour. Next, dip it into the beaten eggs, letting the excess drip off. Finally, coat the chicken in the breadcrumbs. Press gently to make sure the crumbs stick well. Preheat your air fryer to 400°F (200°C) for about 5 minutes. While it heats up, lightly spray the air fryer basket with cooking spray. Place the breaded chicken tenders in a single layer in the basket. Make sure not to overcrowd them. If needed, cook in batches. Lightly spray the tops of the chicken tenders with cooking spray. Cook the chicken tenders at 400°F (200°C) for 10-12 minutes. Be sure to flip them halfway through. They should turn golden brown and crispy. Check that the internal temperature reaches 165°F (75°C). To get the best crispy chicken tenders, do not overcrowd the air fryer. If you pack too many pieces in, they can steam instead of crisp. This can ruin the texture. Make sure to leave space between each tender for the hot air to circulate. I recommend spraying the chicken tenders with cooking spray before cooking. This helps to create a golden, crunchy crust. Marinating your chicken is key for great flavor. I suggest marinating for at least 1 hour. If you have time, letting it sit overnight in the fridge makes it even better. The buttermilk tenderizes the chicken and adds a rich taste. To know if your chicken tenders are done, check the internal temperature. It should reach 165°F (75°C). You can also look for a nice golden color on the outside. If they look crispy and smell amazing, you’re on the right track! {{image_2}} You can boost the flavor of your crispy air fryer chicken tenders in fun ways. Try adding spices or herbs to the breadcrumb mix. Here are some ideas: - Parmesan Cheese: Add grated Parmesan for a cheesy twist. - Italian Herbs: Mix in dried oregano or basil for an herbaceous kick. - Cayenne Pepper: A pinch of cayenne can add heat and depth. These small changes can make a big difference! For buttermilk, you have many options. If you don’t have buttermilk, try these substitutes: - Milk and Vinegar: Mix one cup of milk with one tablespoon of vinegar. Let it sit for five minutes. - Yogurt: Thin plain yogurt with a bit of water or milk. - Sour Cream: Like yogurt, thin it out for best results. These alternatives keep the chicken tender and juicy. If you want a healthier option, you can bake the chicken tenders in the oven. Here’s how: 1. Preheat your oven to 425°F (220°C). 2. Place the breaded chicken on a baking sheet lined with parchment paper. 3. Bake for 15-20 minutes, flipping halfway through. This method still gives you crispy chicken but with less oil. You can also pan-fry the chicken tenders. Here’s how to do it: 1. Heat a skillet over medium heat and add oil. 2. Once hot, add the breaded chicken strips in a single layer. 3. Cook for about 4-5 minutes on each side until golden brown. Pan-frying gives a great crust but uses more oil than air frying. Each method has its perks, so you can choose what fits your meal best. For the full recipe, check out the Crispy Air Fryer Chicken Tenders section. To keep your chicken tenders fresh, first let them cool. Place them in an airtight container. They will stay good for about 3 to 4 days in the fridge. If you want to store them longer, freezing is the best option. Wrap each tender in plastic wrap, then place them in a freezer bag. This helps prevent freezer burn. You can freeze them for up to 3 months. When ready to eat, just thaw them overnight in the fridge. Reheating chicken tenders can be tricky. You want to keep them crispy. The best way is to use the air fryer again. Preheat it to 350°F (175°C). Place the tenders in the basket for about 5 to 7 minutes. This will help them regain their crunch. You can also use an oven. Set it to 375°F (190°C) and bake for about 10 to 12 minutes. Avoid using the microwave. It makes the tenders soggy and chewy. For the best flavor, serve with your favorite dipping sauces. If you want the full details, check out the Full Recipe. Cooking chicken tenders in an air fryer takes about 10 to 12 minutes. The exact time depends on the chicken's thickness. Thin strips cook faster than thick ones. Always check the internal temperature. It should reach 165°F (75°C) for safety. If your strips are thicker, you may need an extra few minutes. Flip the chicken halfway through for even cooking. Yes, you can use frozen chicken breast, but some adjustments are needed. First, cook the chicken from frozen for about 15 to 20 minutes. You should still check the internal temperature. It must reach 165°F (75°C). You might want to add a few more minutes if the chicken is thick. To ensure crispiness, make sure to space the pieces well in the air fryer. Many sauces taste great with chicken tenders. Here are some suggestions: - Honey mustard - Barbecue sauce - Ranch dressing - Buffalo sauce - Ketchup You can also make homemade sauces. Mix Greek yogurt with herbs for a fresh dip. Experiment with flavors to find your favorite! Marinating the chicken is not necessary, but it boosts flavor. Buttermilk adds tenderness and taste. If you're short on time, you can skip it. You can still achieve great flavor with spices and a good breading. For a quick option, coat the chicken in garlic powder and paprika before breading. In this post, we explored how to make crispy air fryer chicken tenders. You learned about the main ingredients, seasonings, and tools needed. The step-by-step guide showed how to marinate, bread, and cook the chicken. Tips helped you achieve maximum crispiness and ensure safe cooking. Variations let you customize flavors or try different cooking methods. Finally, I shared storage tips and answered common questions. With these insights, you can create perfect chicken tenders every time. Enjoy your cooking journey!

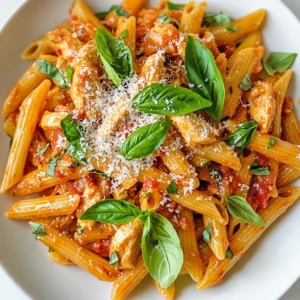
Crispy Air Fryer Chicken Tenders Quick and Tasty Meal

Craving a quick and tasty meal? Look no further than crispy air fryer chicken tenders! These golden bites are juicy on the inside and…

My Latest Desserts

My Latest Recipes

hey,

i’m !

I’m so happy you’re here!

Every dish I share is made with love and care. I hope they bring you the same comfort and joy they bring me. Let’s make memories, one recipe at a time.

Garlic Parmesan Roasted Broccoli Flavorful Side Dish

Are you ready to elevate your vegetable game? Garlic Parmesan Roasted Broccoli is the perfect side dish that combines crunchy broccoli with rich garlic…

- Broccoli florets - Minced garlic - Olive oil To make this dish, start with fresh broccoli florets. I love vibrant green ones. Next, use minced garlic for a strong flavor. Finally, drizzle in olive oil to add richness. - Parmesan cheese - Red pepper flakes - Lemon zest and juice Grated Parmesan cheese brings a savory taste. If you like heat, add red pepper flakes. Zest and juice from a lemon will brighten the dish. - Salt and pepper to taste Don’t forget salt and pepper! These simple seasonings help enhance all the flavors. For the full recipe, check the details above. First, you need to preheat your oven to 425°F (220°C). This step is key for the perfect roast. Next, take a large mixing bowl and combine your broccoli florets with the minced garlic. This mix will create a great flavor base. Then, drizzle the olive oil over the broccoli and garlic. Don't forget to season with salt, pepper, and red pepper flakes if you want some heat. Toss everything well so that each piece gets coated nicely. Now, it’s time to spread the broccoli mixture onto a baking sheet. Make sure to lay it out in a single layer. This allows even cooking and browning. Roast your broccoli in the preheated oven for about 15 minutes. This initial roasting helps soften the broccoli and develop flavor. After 15 minutes, remove the baking sheet from the oven. Here comes the best part! Sprinkle grated Parmesan cheese over the broccoli. This will melt and create a delicious crust. Return the baking sheet to the oven for another 10 minutes. The cheese should become golden brown, and the broccoli should be tender. Once done, drizzle lemon juice over the top and sprinkle some lemon zest for a fresh finish. Enjoy your Garlic Parmesan Roasted Broccoli as a tasty side dish! For the complete recipe, check the Full Recipe section. To get the best texture for your Garlic Parmesan Roasted Broccoli, focus on a few key steps. First, cut the broccoli into even florets. This helps them roast evenly. Aim for pieces about the same size. Next, don’t overcrowd the baking sheet. Give each floret space to roast. This allows hot air to circulate and gives you that crispy edge we all love. When it comes to seasoning, adjust to your taste. I recommend starting with salt and pepper. You can always add more later. If you enjoy a bit of heat, try adding red pepper flakes. Just a pinch can elevate the dish. You can prepare broccoli in advance, making it easier for busy days. Simply wash and cut the broccoli into florets. Store them in an airtight container in the fridge. This way, they stay fresh for up to two days. When you're ready to cook, just toss them with garlic and oil. For reheating, the oven is your best friend. Preheat it to 350°F (175°C). Spread the broccoli on a baking sheet and heat for about 10 minutes. This helps maintain that nice crispness. Garlic Parmesan Roasted Broccoli pairs well with many main dishes. Try it alongside roasted chicken or grilled fish. It also makes a great side for pasta dishes. For presentation, think about color and texture. Use a nice plate and arrange the broccoli in a circle. Drizzle some extra lemon juice on top for a fresh look. You can even sprinkle a bit of extra Parmesan for a fancy touch. For more ideas, check out the Full Recipe and get inspired! {{image_2}} You can make Garlic Parmesan Roasted Broccoli even more exciting. Try adding other vegetables like: - Cauliflower - Carrots - Bell peppers - Asparagus This mix adds colors and flavors. You can also change the cheese. Instead of Parmesan, use: - Pecorino Romano for a sharper taste - Cheddar for a creamier flavor - Nutritional yeast for a vegan option These choices can really change the dish. If you want a vegan version, there are great alternatives for Parmesan. Use: - Nutritional yeast for a cheesy flavor - Vegan Parmesan cheese, which you can buy or make at home For gluten-free adjustments, just make sure your cheese and spices are gluten-free. Most of them already are! Using seasonal ingredients can add a special touch. In spring, try adding fresh peas or asparagus. In fall, consider roasted squash or sweet potatoes. These ingredients will enhance the flavor. If you can't find broccoli, you can substitute it with: - Green beans for a crunchy texture - Brussels sprouts for a hearty option These variations keep the dish fresh and fun! For the full recipe, check out the Garlic Parmesan Roasted Broccoli section. To keep Garlic Parmesan Roasted Broccoli fresh, store it in an airtight container. Place it in the fridge within two hours of cooking. This helps prevent bacteria growth. The broccoli will stay fresh for about 3 to 5 days. When you are ready to eat, check for any signs of spoilage. If it looks or smells off, it's best to throw it away. You can freeze Garlic Parmesan Roasted Broccoli for longer storage. First, let the broccoli cool completely. Then, spread the pieces on a baking sheet in a single layer. Freeze them for about 1 to 2 hours until firm. After that, transfer the broccoli to a freezer bag or container. Make sure to remove as much air as possible. To reheat, thaw the broccoli in the fridge overnight. Then, you can warm it in the oven or microwave until heated through. In the fridge, you can expect Garlic Parmesan Roasted Broccoli to last for about 3 to 5 days. In the freezer, it can last up to 3 months. After that, the taste and texture may decline. For the best quality, use it within these time frames. Enjoy your delicious side dish at its best by following these storage tips! For the full recipe, check the previous section. Roasting broccoli is quick and easy. At 425°F (220°C), it takes about 25 minutes. First, roast it for 15 minutes. Then, add the cheese and roast for another 10 minutes. This timing gives you tender broccoli with a nice crunch. Yes, you can use frozen broccoli. Just remember to adjust the cooking time. Frozen broccoli takes a bit longer to roast. Roast it for about 30 to 35 minutes at 425°F (220°C). Check for tenderness before serving. To reheat, use the oven for the best flavor. Preheat the oven to 350°F (175°C). Spread the broccoli on a baking sheet. Heat for about 10 minutes. This method keeps it crisp and tasty. You can also use a microwave, but it may lose some crunch. Enjoy your Garlic Parmesan Roasted Broccoli! For the full recipe, check out the earlier section. In this blog post, we explored how to make Garlic Parmesan Roasted Broccoli. We covered the main ingredients, preparation steps, and roasting process. I shared tips for the best texture and serving ideas. You can even make it ahead or use variations for different diets. Remember, storing leftovers properly helps keep them fresh. This dish is both simple and delicious, making it a great addition to any meal. Try these steps, and enjoy the great taste of roasted broccoli!