
Latest & Greatest

Cinnamon Sugar Apple Chips Crunchy and Irresistible Snack
Are you looking for a healthy snack that’s both crunchy and sweet? Look no further! This recipe for Cinnamon Sugar
Read more…
Sweet Potato Black Bean Chili Hearty and Filling Meal
Are you ready for a meal that warms your soul? Sweet potato black bean chili is not just hearty; it’s
Read more…
Carrot Cake Energy Bites Tasty and Healthy Treats
Looking for a tasty snack that’s both healthy and easy to make? Try these Carrot Cake Energy Bites! Packed with
Read more…
Creamy Garlic Mashed Potatoes Simple and Delicious Dish
If you’re ready to elevate your dinner game, you’ve come to the right place! Creamy garlic mashed potatoes are not
Read more…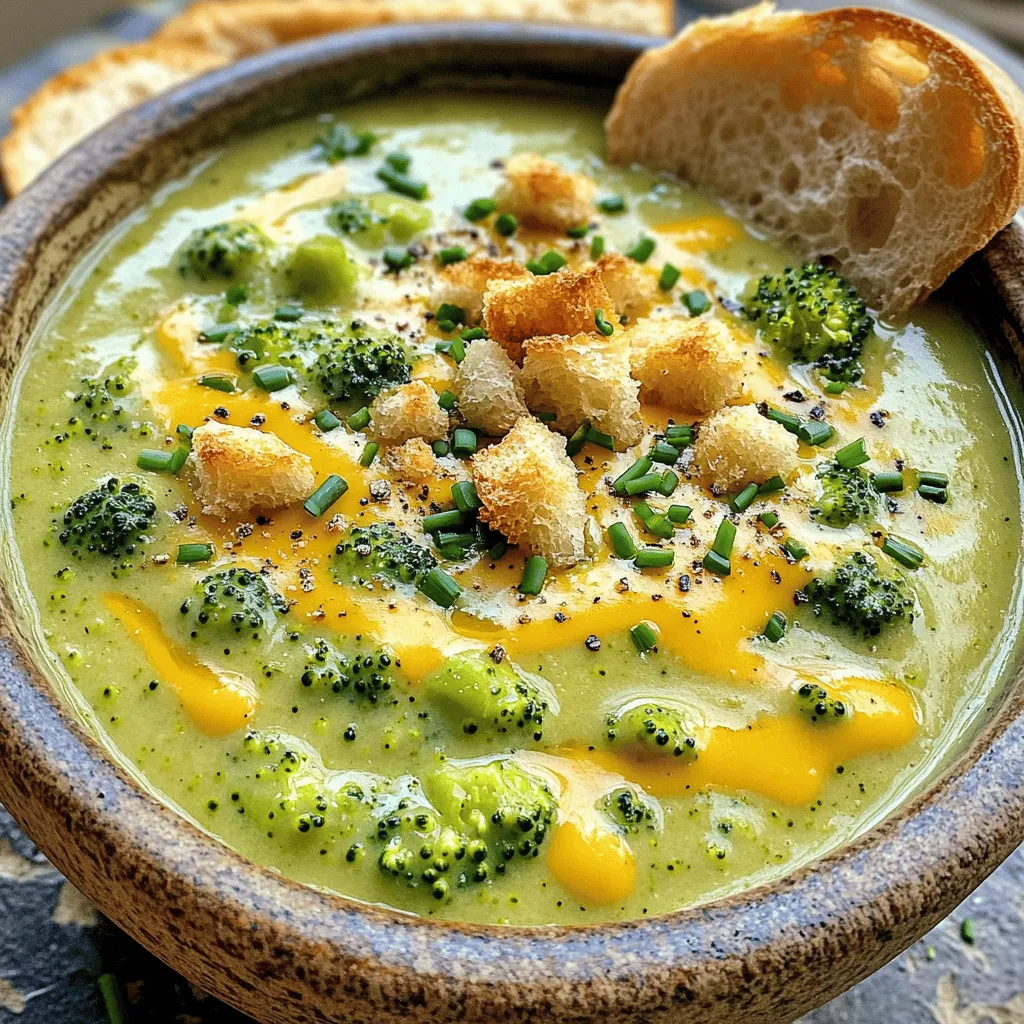
Cheddar Broccoli Soup Flavorful Creamy Comfort Food
Looking for a bowl of warm, creamy comfort? This Cheddar Broccoli Soup is rich and flavorful, perfect for a cozy
Read more…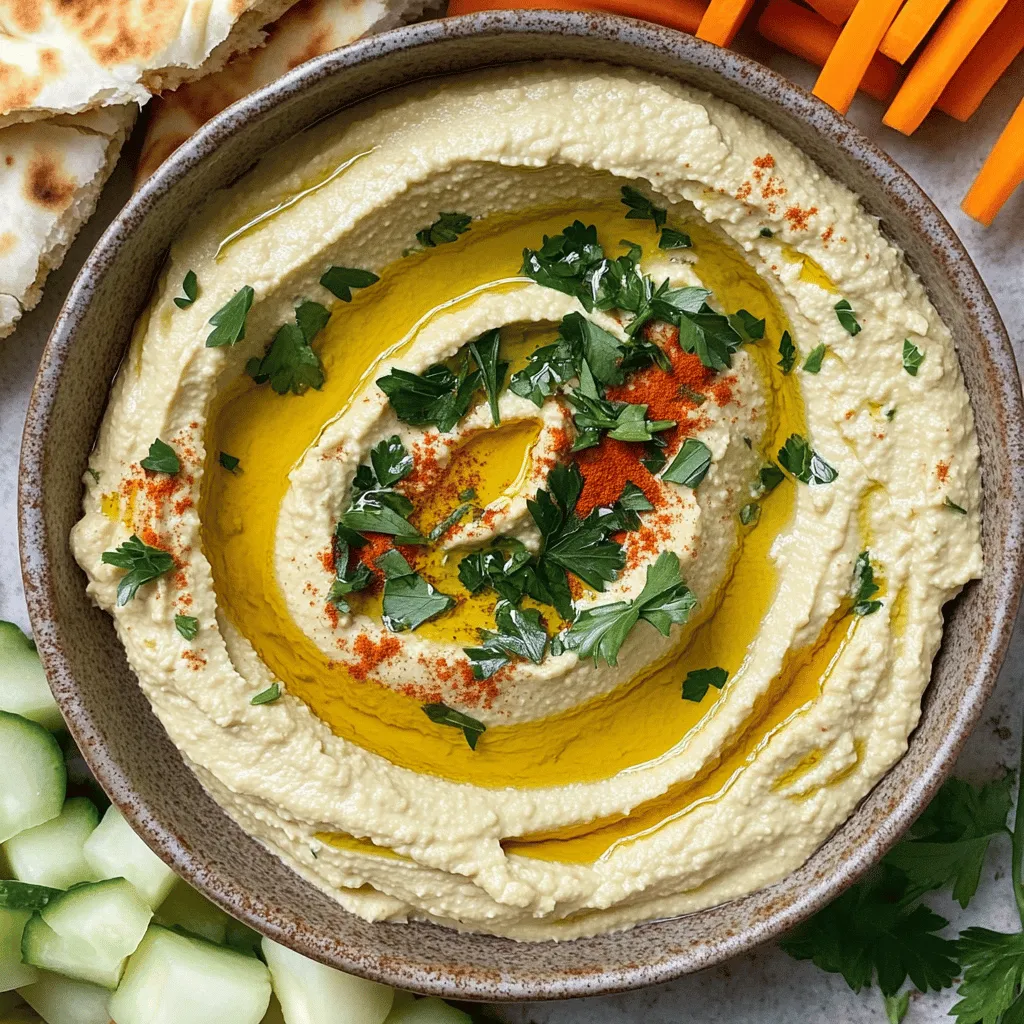
Classic Hummus Recipe Simple and Creamy Delight
Are you ready to make the ultimate classic hummus? My Classic Hummus Recipe Simple and Creamy Delight is perfect for
Read more…
Honey Garlic Chicken Thighs Simple and Tasty Meal
Are you ready to savor a dish that delights your taste buds? Honey Garlic Chicken Thighs are both simple to
Read more…
Air Fryer Veggie Spring Rolls Crisp and Flavorful Snack
If you love crispy snacks that burst with flavor, you’re in for a treat! Today, I’ll show you how to
Read more…browse recipes


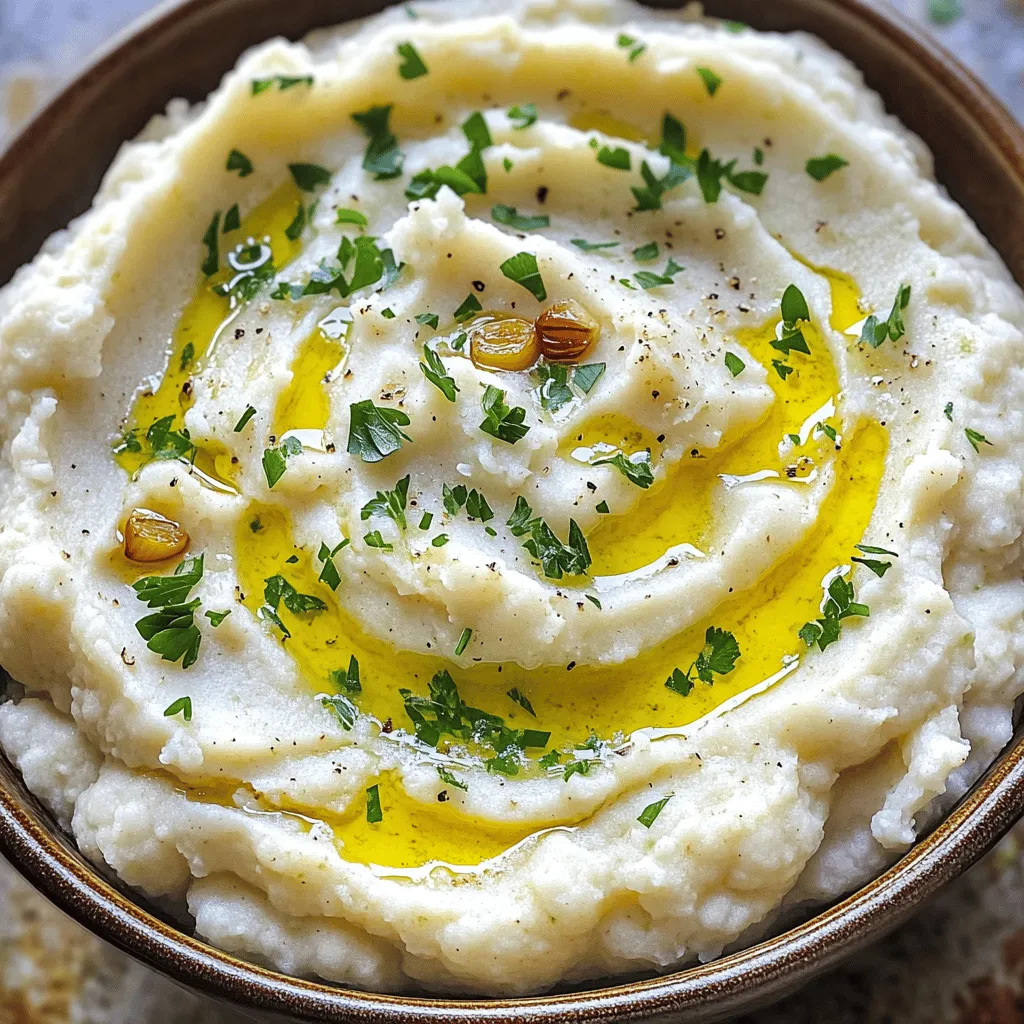
Roasted Garlic Mashed Cauliflower Creamy Delight
If you’re ready to transform your meals, let’s talk about Roasted Garlic Mashed Cauliflower. This creamy delight is a healthier twist on classic mashed…
My Latest Drinks

Strawberry Cheesecake Smoothie Creamy Refreshing Treat
Craving something delicious and cool? The Strawberry Cheesecake Smoothie is your answer! It blends creamy cheesecake flavors with sweet strawberries Read Full Recipe-
Mocktail Pink Punch Refreshing and Easy Recipe
Are you ready to impress your guests with a delightful drink? This Mocktail Pink Punch recipe is both refreshing and Read Full Recipe -
Blue Lagoon Tropical Lemonade Refreshing and Zesty Drink
Looking for a drink that’s both refreshing and fun? Say hello to Blue Lagoon Tropical Lemonade! This colorful beverage packs Read Full Recipe -
Pumpkin Spice Coffee Creamer Flavorful Fall Treat
Are you ready to embrace the cozy vibes of autumn? In this blog post, I’ll guide you through making your Read Full Recipe -
Apple Cider Margarita Mocktail Refreshing Fall Drink
Fall is here, and that means it’s the perfect time for a cozy drink! The Apple Cider Margarita Mocktail offers Read Full Recipe -
Pumpkin Spice Latte Copycat Cozy and Comforting Recipe
Craving that warm, cozy feeling of fall? You can enjoy a delicious Pumpkin Spice Latte at home! In this article, Read Full Recipe


My Latest Dinners
-
White Bean Soup Simple and Hearty Delight
Looking for a warm and filling meal? Let me introduce you to white bean soup! This simple and hearty delight Read Full Recipe -
Garlic Herb Roasted Sweet Potatoes Flavorful Side Dish
Looking for a side dish that’s both tasty and easy to make? Garlic Herb Roasted Sweet Potatoes are the answer! Read Full Recipe -
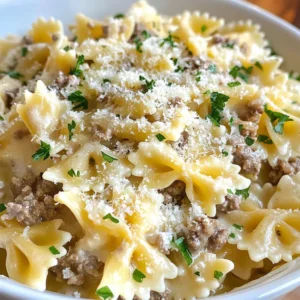
One Pot Beef Taco Pasta Easy and Flavorful Meal
Looking for a quick and tasty meal? One Pot Beef Taco Pasta is the perfect dish! This recipe packs bold Read Full Recipe -
Garlic Chicken Zucchini Noodles Stir Fry Delight
Are you ready for a tasty twist on dinner? My Garlic Chicken Zucchini Noodles Stir Fry is a quick and Read Full Recipe -
Stuffed Italian Meatloaf Easy and Tasty Recipe
Are you ready to elevate your dinner game? This Stuffed Italian Meatloaf is both easy and tasty! In this article, Read Full Recipe -
One Pot French Onion Pasta Flavorful Comfort Dish
Looking for a cozy dinner that warms your soul? Try my One Pot French Onion Pasta! This creamy, rich dish Read Full Recipe


hey,
i’m !
I’m so happy you’re here!
Every dish I share is made with love and care. I hope they bring you the same comfort and joy they bring me. Let’s make memories, one recipe at a time.
. Use these ingredients to create a salad that is both fresh and healthy. To start, you need to prepare the apple and pecans. Here’s how: - Dicing the Apple: First, wash the apple. Then, cut it into quarters and remove the core. Slice each quarter into thin strips. Next, turn the strips and chop them into small cubes. I like using Granny Smith for a tart taste, but Honeycrisp works great too. - Chopping the Pecans: Take the pecans and place them on a cutting board. Use a sharp knife to chop them into smaller pieces. Aim for a rough chop to keep some crunch in the salad. Now for the chicken: - Shredding or Dicing Cooked Chicken: If you have cooked chicken, you can shred it with two forks or dice it. Just cut the chicken into small, bite-sized pieces. This makes it easier to mix with other ingredients later. Once your ingredients are ready, it’s time to mix: - Combining Chicken and Produce: In a large bowl, add the shredded or diced chicken. Then, toss in the diced apple, chopped pecans, finely chopped celery, and red onion. Mix gently to avoid crushing the apple. - Preparing the Dressing: In a smaller bowl, whisk together Greek yogurt, honey, Dijon mustard, lemon juice, salt, and pepper. Make sure it’s smooth and well-blended. This dressing adds a creamy touch to the salad. Now that everything is combined, let’s finish up: - Tossing Ingredients and Chilling: Pour the dressing over the chicken mixture. Fold gently until all pieces are coated. Then, cover the bowl and refrigerate the salad for at least 30 minutes. This chilling time helps the flavors blend well. - Serving Suggestions over Greens: When you’re ready to serve, place a generous scoop of the chicken salad over a bed of fresh greens like spinach or mixed greens. For a nice touch, sprinkle extra pecans and apple slices on top. For the complete recipe, check out the [Full Recipe]. Use the right apples in your salad. I recommend Granny Smith or Honeycrisp apples. They add a nice crunch and a tart flavor. The tartness works well with the creamy dressing. Chill the salad for at least 30 minutes. This time helps the flavors blend and become more tasty. Chilling also makes the salad refreshing. You want a creamy dressing, but not too thick. If your dressing seems too thick, add a splash of lemon juice or water. This will help it coat the chicken and apples evenly. Balance the flavors by tasting as you mix. Adjust with more salt, pepper, or honey if needed. This way, each bite will have a great taste. Prep your chicken ahead of time. Cook it and shred or dice it the day before. This saves you time when making the salad. You can also use rotisserie chicken as a shortcut. It is cooked and seasoned perfectly, saving you effort. Just shred and mix it in; it’s quick and easy. {{image_2}} If you want to switch things up, you can change the Greek yogurt. Use sour cream for a creamier texture. You can also try cottage cheese, which adds protein and a different taste. When it comes to nuts, pecans are great, but you can use walnuts or almonds too. Each nut brings its own flavor. Walnuts have a rich taste, while almonds add a nice crunch. To add more sweetness or tartness, consider dried cranberries or grapes. They enhance the flavor and add a pop of color. You can also mix in fresh herbs like parsley or dill. These herbs freshen up the dish and make it even tastier. For a fun twist, serve the chicken salad as a sandwich or wrap. Use whole grain bread or a tortilla for a healthy choice. If you have guests, you can get creative with plating. Use lettuce leaves as cups or stack the salad in a clear glass. This gives a nice view of the colorful layers. For the full recipe, check out the detailed instructions above! Apple Pecan Chicken Salad stays fresh in the fridge for up to three days. Store it in an airtight container to keep it crisp. Glass containers work well because they don’t stain and are easy to clean. Plastic containers are fine too, but ensure they are safe for food storage. You can freeze Apple Pecan Chicken Salad, but it may change texture. The apples and celery might get mushy. If you still want to freeze it, pack it in a freezer-safe bag or container. When ready to eat, thaw it in the fridge overnight. Serve it cold for the best taste. Look for signs of spoilage. If the salad smells off or has a slimy texture, throw it away. Always keep leftovers in the fridge and eat them within three days. This way, you stay safe and enjoy every bite. For more detailed steps, check the Full Recipe. The best apple for chicken salad is often a crisp variety. I recommend using Granny Smith or Honeycrisp apples. - Granny Smith: These apples are tart and crunchy. They add a nice zing to the salad. - Honeycrisp: These are sweet and juicy. They provide a lovely contrast to the savory chicken. Using the right apple can really boost the taste and texture of your salad. Think about what flavor you want to highlight in your dish! Yes, you can easily add more protein to this salad! Here are some great options: - Nuts: Add more pecans or try walnuts. They give a nice crunch and flavor. - Tofu: For a vegetarian option, use firm or extra-firm tofu. It can soak up flavors well. - Chickpeas: These are a tasty way to add protein and fiber. They mix well with the other ingredients. Each of these options can enhance your salad and make it even more filling. Making this salad lighter is simple! Here are a few tips: - Use less dressing: Start with half the amount of Greek yogurt or mayonnaise. - Swap yogurt: Use a low-fat yogurt or even a plant-based yogurt. - Skip the nuts: This will cut down on fat and calories. You can still get crunch from celery. These changes will keep the salad fresh and tasty while reducing calories. Enjoy your healthy twist! This blog post walked you through making a tasty Apple Pecan Chicken Salad. We discussed the key ingredients and how to prepare each one. Mixing and chilling the salad enhances its flavor. Remember, you can swap ingredients or serve it in different ways. This salad is great for meal prep and easy to store. You can enjoy it fresh or chilled, satisfying your taste buds with every bite. Have fun experimenting with flavors and make this dish your own!](https://easycookingbite.com/wp-content/uploads/2025/07/4ff088ce-55dc-4552-bcc5-7735468b7378-300x300.webp)

![- 1 cup red lentils, rinsed - 1 can (14 oz) coconut milk - 4 cups vegetable broth - 1 medium onion, chopped - 2 cloves garlic, minced - 1 tablespoon fresh ginger, grated - 1 tablespoon curry powder - 1 teaspoon turmeric powder - 1 teaspoon cumin powder - 1 red bell pepper, diced - 1 cup chopped kale or spinach - 2 tablespoons olive oil - Salt and black pepper to taste - Fresh cilantro for garnish - Juice of 1 lime When you gather these ingredients, you set the stage for a warm and cozy dish. Red lentils bring protein and fiber, making this soup filling. Coconut milk adds a creamy texture and a touch of sweetness. Using vegetable broth boosts the flavor without meat. Onions, garlic, and ginger create a rich base. The spices—curry, turmeric, and cumin—bring warmth and depth. Fresh greens like kale or spinach add color and nutrients, while the lime juice brightens every bite. I love how these ingredients come together to create a soup that is not just tasty but also healthy. You can find the full recipe for Coconut Curry Lentil Soup above, which guides you in crafting this dish step by step. - Step 1: Heat 2 tablespoons of olive oil in a large pot over medium heat. - Step 2: Add 1 medium chopped onion and sauté for about 5 minutes until it turns soft. - Step 3: Stir in 2 minced garlic cloves and 1 tablespoon of grated ginger. Cook for another 1-2 minutes until you smell the aroma. Then, sprinkle in 1 tablespoon of curry powder, 1 teaspoon of turmeric, and 1 teaspoon of cumin. Mix well for 1 minute. - Step 4: Toss in 1 diced red bell pepper along with 1 cup of rinsed red lentils. Stir until everything mixes well. - Step 5: Pour in 4 cups of vegetable broth and 1 can of coconut milk. Stir again to combine all the flavors. - Step 6: Bring the pot to a gentle simmer. Cover it and cook for 20-25 minutes until the lentils become tender. - Step 7: Once the lentils are soft, add 1 cup of chopped kale or spinach. Stir until the greens wilt, which takes about 2-3 minutes. - Step 8: Just before serving, add the juice of 1 lime. This gives a fresh kick to the dish. - Step 9: Ladle the soup into bowls and top with fresh cilantro for a beautiful touch. Enjoy your warm, nourishing Coconut Curry Lentil Soup! For the complete recipe, check out the [Full Recipe]. - How to prevent lentils from overcooking: To keep lentils firm, watch the cooking time. Red lentils cook fast, about 20-25 minutes. Check them often. If they start to break down, take them off the heat. - Best methods for sautéing vegetables: Use a large pot and heat oil on medium. Add onions first. Sauté until they turn soft and clear. Then toss in garlic and ginger. Stir for just a minute to keep them fresh and fragrant. - Suggested spices for extra flavor: Besides curry powder, you can add a pinch of cayenne for heat. Try adding garam masala or coriander for more depth. Fresh herbs like basil or mint can brighten the soup. - Add-ins for protein or heartiness: For more protein, mix in cooked chicken, shrimp, or chickpeas. If you want a heartier soup, add diced sweet potatoes or carrots. These will cook well and add sweetness. - How to serve and garnish the soup: Serve the soup hot in bowls. Garnish with fresh cilantro and a squeeze of lime. A swirl of coconut cream on top looks nice too. - Pairing suggestions with sides: This soup works well with crusty bread or rice. A simple green salad can also add freshness to the meal. Enjoy it with a side of naan for an extra treat. Find the full recipe for Coconut Curry Lentil Soup to make this delightful dish! {{image_2}} You can switch greens or veggies in this soup. Instead of kale, try spinach or Swiss chard. If you want more crunch, add diced carrots or zucchini. For a fun twist, use butternut squash or sweet potatoes. If you need a substitute for coconut milk, consider almond or cashew milk. Use a bit of coconut cream for a richer taste, or blend silken tofu for creaminess. These swaps keep the soup tasty and creamy. This soup works well for both vegans and vegetarians. If you want it vegan, use vegetable broth and coconut milk. For vegetarians, you can add dairy, like yogurt, for creaminess. If you need gluten-free options, this recipe is naturally gluten-free. Just ensure that your vegetable broth is also gluten-free. There are plenty of tasty options available at stores. Want to add heat? Toss in chopped chilies or jalapeños. Start with a small amount, then taste as you go. This way, you control the spice level just right for you. You can also choose how creamy or chunky you want your soup. For a creamier texture, blend part of the soup before adding greens. If you like it chunky, leave it as is and add more veggies. Adjust the recipe to fit your taste! You can find the full recipe for Coconut Curry Lentil Soup [here](#). Store leftover soup in the fridge. Use an airtight container to keep it fresh. Make sure the soup cools down before sealing it. This keeps the flavor and texture intact. You can freeze the soup for later. For best results, let it cool completely. Use freezer-safe containers or bags. Leave space at the top of the container for expansion. To thaw, place it in the fridge overnight. Reheat on the stove over medium heat. Stir often to heat evenly. Coconut Curry Lentil Soup lasts about 4 to 5 days in the fridge. Look for signs of spoilage. If the soup smells off or has a strange color, throw it out. Always trust your senses when it comes to food safety. Can I make Coconut Curry Lentil Soup in a slow cooker? Yes, you can! Start by sautéing the onion, garlic, and ginger in a pan. Then, add them to the slow cooker. Toss in the rest of the ingredients, cover, and cook on low for 6-8 hours. This method gives the flavors time to blend well. Is this recipe suitable for meal prep? Absolutely! This soup stores well. You can make a big batch and keep it in the fridge for up to five days. Just store it in airtight containers for easy grab-and-go lunches. What is the best type of lentils to use? Red lentils work best for this soup. They cook quickly and break down to create a creamy texture. You can also use green or brown lentils, but they take longer to cook and won't be as smooth. What to do if the soup is too thick or thin? If your soup is too thick, add more vegetable broth or water until you reach the desired consistency. If it’s too thin, let it simmer uncovered for a few extra minutes. This will help it thicken. How to adjust flavors if too spicy? If your soup is too spicy, add a bit more coconut milk or a spoonful of sugar. This will cool down the heat and balance the flavors nicely. What to serve with Coconut Curry Lentil Soup? This soup pairs well with warm naan bread or rice. You can also serve it with a simple salad for a fresh touch. Best toppings to elevate the dish Try adding fresh cilantro, a squeeze of lime, or sliced avocado on top. A dollop of yogurt can add creaminess too. These toppings bring extra flavor and texture to your bowl. This blog post showed you how to make Coconut Curry Lentil Soup from scratch. We covered the essential ingredients, easy steps, and helpful tips for flavor and presentation. You saw variations to suit different diets and learned how to store leftovers to keep them fresh. Enjoy your soup and impress others with your cooking skills! Now, share it with friends and family for smiles around the table.](https://easycookingbite.com/wp-content/uploads/2025/05/397df62a-7371-403e-bd79-c9e3bb34b9e3-300x300.webp)
Savory BLT Pasta Salad Easy and Flavorful Recipe
If you’re craving a fresh twist on the classic BLT, this Savory BLT Pasta Salad adds a delicious flair. Picture tender rotini pasta, crisp…
![- 8 ounces rotini pasta - 6 strips turkey bacon - 1 cup cherry tomatoes - 1 cup romaine lettuce - 1/2 cup red onion - Dressing components: - 1/2 cup mayonnaise - 2 tablespoons apple cider vinegar - 1 teaspoon Dijon mustard - Salt and pepper to taste Choosing fresh ingredients makes a big difference. Look for bright, firm tomatoes. For lettuce, select crisp romaine. Fresh herbs add flavor, too. For mayonnaise, I recommend brands like Hellmann's or Duke's. They create a rich and creamy dressing. Always check for freshness dates on all products. Start by boiling a large pot of salted water. Once it boils, add 8 ounces of rotini pasta. Cook the pasta until it is al dente, following the package instructions. Usually, this takes about 8 to 10 minutes. After cooking, drain the pasta well. Rinse it under cold water to stop the cooking process. This helps the pasta stay firm and not gummy. In a large mixing bowl, combine the cooled pasta with the other ingredients. Add 6 strips of crumbled turkey bacon, 1 cup of halved cherry tomatoes, 1 cup of chopped romaine lettuce, and 1/2 cup of finely chopped red onion. Mix gently with a spatula or wooden spoon. This ensures all the ingredients blend well without crushing them. For the dressing, take a separate bowl and whisk together 1/2 cup of mayonnaise, 2 tablespoons of apple cider vinegar, and 1 teaspoon of Dijon mustard. Mix until the dressing is smooth and creamy. It should not be too thick. Season it with salt and pepper to taste. Pour the dressing over the pasta mixture and toss gently to coat everything evenly. For full details, check the Full Recipe. To make your BLT pasta salad shine, adjust the seasoning. Start with salt and pepper. Taste your salad after mixing in the dressing. Add more salt or pepper if needed. You can also try adding garlic powder or smoked paprika for a twist. These small changes can make a big difference in flavor. Garnishing makes your salad look great. Use fresh basil leaves on top for color. You can also add more halved cherry tomatoes around the edges. This adds visual appeal. A sprinkle of black pepper can finish the look nicely. Serve it in a clear bowl to show off the colors. Timing is key for the best taste. Prepare the salad at least 30 minutes before serving. This helps the flavors blend well. If you can, let it chill longer in the fridge. This extra time makes the salad even better. If you want to serve it later, keep the dressing separate until just before eating. This keeps everything fresh and crunchy. For the full recipe, see the [Full Recipe]. {{image_2}} For your BLT Pasta Salad, you can switch up the pasta. Try penne or farfalle for fun shapes. They will still hold the dressing well. For a gluten-free option, use chickpea or quinoa pasta. Changing the protein is also easy. You can swap turkey bacon for regular bacon. If you want a vegetarian dish, use chickpeas or lentils instead. They add protein and a nice texture. The dressing is key for flavor. You can try ranch or vinaigrette for a twist. A zesty Italian dressing gives a nice kick too. Adding fresh herbs can change the taste. Try parsley, dill, or even chives. A sprinkle of garlic powder or smoked paprika can add depth. Experiment with what you like. In summer, add fresh corn or diced cucumbers. They bring a refreshing crunch. You can also use ripe avocado for creaminess. For fall or winter, think about roasted vegetables. Roasted red peppers or butternut squash will warm the dish. You can even add nuts for extra crunch and flavor. For the full recipe, check out the [Full Recipe]. To keep your BLT pasta salad fresh, use an airtight container. Glass or plastic containers work well. Make sure to store it in the fridge. This will help keep the flavors strong and the texture intact. If you want to keep the lettuce crisp, store it separately. Mix it in just before serving. Pasta salad is best cold, but you can serve it at room temp too. If you heat it, do so gently. Use a microwave and heat for short bursts. Stir it often to avoid hot spots. You can also add a splash of dressing to refresh the flavors. Your BLT pasta salad lasts about 3 to 5 days in the fridge. Always check for changes in smell or texture. If it looks or smells off, it's best to toss it. To enjoy the best taste, eat it within the first few days. For the full recipe, you can refer back to the earlier section. Yes, you can make BLT Pasta Salad ahead of time. This is great for events. Just prepare the salad and store it in the fridge. Let the flavors mix for a few hours. For best taste, serve it cold after chilling. You can make it a day ahead. This saves time on busy days. Absolutely, this recipe works well for meal prep. You can batch cook the pasta and bacon. Store them in separate containers. Mix the salad just before serving. This keeps everything fresh. To store, use airtight containers. The salad stays good in the fridge for up to four days. Just remember to add fresh lettuce right before eating. If you want a different option, try regular bacon or leave it out. You can also use veggie bacon for a meatless version. Another option is diced ham or chicken for added protein. If you prefer a lighter choice, use smoked tofu. Each of these gives a unique flavor to the salad. Experiment with what you like best! This blog post covered making a tasty BLT Pasta Salad. You learned about key ingredients like rotini pasta and turkey bacon, along with how to mix them correctly. I shared storage tips to keep your salad fresh and variations to try based on seasons or personal taste. In the end, making this salad offers fun and flavor. Enjoy experimenting with different ingredients and watching your loved ones enjoy it!](https://easycookingbite.com/wp-content/uploads/2025/06/f3cefba7-3b06-45bd-baef-fac7dd60a52f.webp)
