


Latest & Greatest
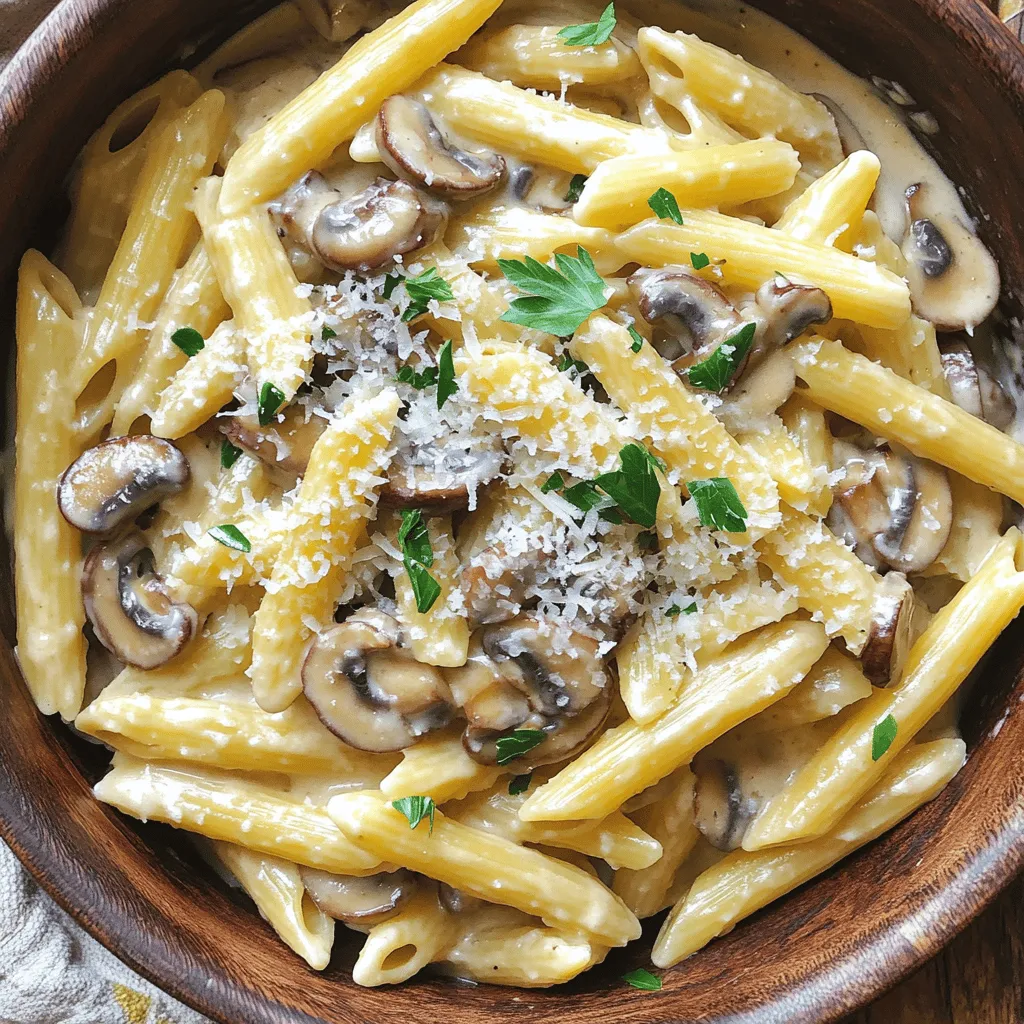
One-Pot Creamy Mushroom Pasta Delight in Minutes
Welcome to the quick and delicious world of One-Pot Creamy Mushroom Pasta! In just minutes, you can create a rich,
Read more…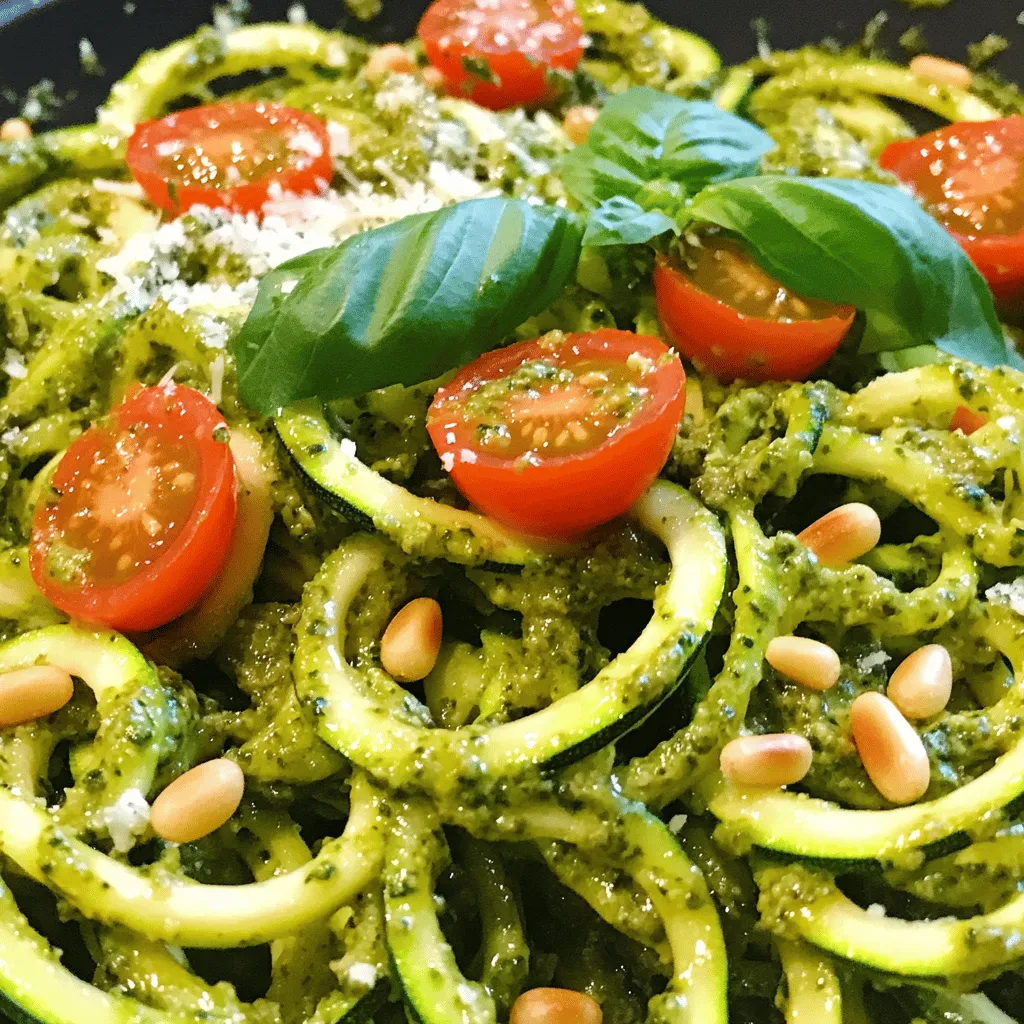
Zucchini Noodles with Pesto Flavorful and Fresh Dish
Are you ready to enjoy a fresh, flavorful dish that’s both easy and healthy? Zucchini Noodles with Pesto bring together
Read more…
Peanut Butter Chocolate Chip Blondies Easy Treat Delight
Are you ready to whip up a sweet treat that combines your favorite flavors? Peanut Butter Chocolate Chip Blondies are
Read more…
Eggnog Cake Delightful Holiday Dessert Recipe
If you’re looking for a holiday dessert that will impress everyone, try this Eggnog Cake! It’s moist, flavorful, and perfectly
Read more…
Crispy Garlic Parmesan Potatoes Easy Flavorful Treat
Are you ready for a flavor explosion? Crispy Garlic Parmesan Potatoes are simple to make and packed with taste! These
Read more…
Cheese Pizza Monkey Bread Flavorful and Fun Dish
Are you ready for a dish that’s both fun and tasty? Cheese Pizza Monkey Bread combines all your favorite pizza
Read more…
Wild Blueberry Coffee Cake Danishes Irresistible Treat
Are you ready to indulge in a sweet treat that’s hard to resist? Wild Blueberry Coffee Cake Danishes combine tender
Read more…
Pistachio Filled Croissants Tasty and Simple Recipe
If you’re craving a delightful treat, pistachio-filled croissants are a must-try! This simple recipe combines buttery flaky pastry with creamy,
Read more…browse recipes


![- 1 ½ cups all-purpose flour - ½ cup unsalted butter, softened - 1/3 cup powdered sugar - 1 large egg yolk - 1 tablespoon cold water - 1/4 teaspoon salt - 1 cup granulated sugar - 1/2 cup fresh lemon juice (about 3-4 lemons) - Zest of 2 lemons - 4 large eggs - 1/2 cup unsalted butter, cut into cubes - 1/4 teaspoon turmeric (for color, optional) - Fresh berries (such as raspberries or blueberries) - Mint leaves The tart shell forms the base of this dessert. The butter and sugar mix gives it a sweet flavor. The egg yolk helps bind the dough. The cold water keeps it moist. When you add flour, mix until it forms a soft dough. The lemon curd is the star of this dish. The sugar and lemon juice balance the tartness. The zest adds a bright flavor. The eggs create a creamy texture. The butter makes it rich. You can add turmeric for a sunny hue, but it's not needed. For garnish, fresh berries add color and taste. Mint leaves provide a hint of freshness. This recipe is simple yet elegant. You can find the full recipe to guide you through every step. - Combine softened butter and powdered sugar in a bowl. - Add the egg yolk, cold water, and salt; mix well until smooth. - Gradually incorporate the flour to form a soft dough. - Press the dough evenly into the tart pan. Prick it with a fork. - Refrigerate the tart shell for 30 minutes before baking. - Bake at 350°F (175°C) for 20-25 minutes until lightly golden. - Whisk together the granulated sugar, lemon juice, lemon zest, and eggs in a saucepan. - Cook over medium-low heat, stirring continuously until thickened, about 8-10 minutes. - Stir in the butter until melted and smooth. Adjust color with turmeric if you want. - Pour the lemon curd into the cooled tart shell and smooth the top. - Refrigerate for at least 2 hours to set the curd. - Garnish with fresh berries and mint leaves just before serving. For the full recipe and detailed instructions, check out the [Full Recipe]. - Use butter that is at room temperature for easier mixing. - Chill the dough in the fridge for the best texture. - Stir the mixture continuously to avoid scrambling the eggs. - If you want a sweeter taste, add more sugar to the mix. - Serve the tart with a dollop of whipped cream or fresh fruit. - Pair it with a light dessert wine for a nice touch. {{image_2}} To make meringue, start with egg whites. Whip them until soft peaks form. Gradually add sugar, mixing until stiff peaks form. This means the mixture stands tall. Spread the meringue over the lemon curd. Use a spatula to create peaks for a nice look. Bake at 350°F until golden, about 10 minutes. For perfect meringue, make sure your bowl is clean and dry. Any grease can stop the meringue from rising. Use room temperature egg whites for the best results. Also, avoid overbeating. The texture should be glossy and smooth. Fresh berries add color and flavor. I love using raspberries or blueberries. They work well with the tartness of the lemon curd. You can also use strawberries for a sweet touch. Layer the berries on top of the lemon curd after it sets. Arrange them in a pattern for a beautiful look. You can mix them in the curd if you want a fruity twist. Just be gentle to keep the colors bright. Want to change up the flavor? Substitute lime juice or orange juice for a citrus twist. Both add a new taste while keeping it fresh. You can also add herbs like basil or mint. Try finely chopping basil and mixing it into the lemon curd. This adds a unique flavor that surprises your guests. Each bite will be a fun mix of sweet and herb. To keep your lemon curd tart fresh, wrap it tightly in plastic wrap. You can also use an airtight container. This keeps the tart safe from odors in the fridge. If you have leftovers, store them in the fridge for up to five days. If you want to save it for later, you can freeze it. Just slice the tart, wrap each piece, and place it in a freezer bag. This way, you can enjoy a slice anytime! In the fridge, the lemon curd tart lasts about five days. If frozen, it can last for up to three months. Check for signs of spoilage before eating. If the tart smells off or has a strange color, toss it. If you notice mold, it's best to discard it right away. Most people enjoy lemon curd tart cold, as the flavors shine. If you prefer it warm, gently reheat it. Use an oven set to 300°F (150°C). Heat for about 10 minutes. Keep an eye on it to avoid overcooking. You can serve it warm, but chilling it first enhances its tangy taste. Yes, you can make lemon curd tart ahead of time. I often prepare it a day before serving. This allows the flavors to blend well. Just store it in the fridge until you are ready to enjoy it. If you lack fresh lemons, you can use bottled lemon juice. Use it in a 1:1 ratio. However, fresh lemon juice gives the best flavor. You can also try lime juice for a different taste. A runny lemon curd tart often comes from undercooked lemon curd. Make sure to cook it until it thickens. It should coat the back of a spoon. You can also add more eggs to help it set better. Absolutely! Store-bought pie crust can save you time. Just make sure it fits your tart pan well. This option is perfect for quick prep without losing flavor. You can add fresh berries or mint leaves on top. This gives the tart a pop of color. You could also dust it with powdered sugar for an elegant touch. A drizzle of cream can enhance its beauty too. Traditional lemon curd tart is not gluten-free due to the flour in the crust. To make it gluten-free, use a gluten-free flour blend. You can also find pre-made gluten-free crusts that work well. This lemon curd tart recipe gives you a delightful treat from scratch. We covered the shell, filling, and garnishes. You learned tips for perfecting both the tart and curd. I shared delicious variations to keep it fresh and exciting. Remember, you can decorate with berries or meringue to impress. Enjoy the process of baking, and let your creativity shine. This tart is sure to please any crowd. Happy baking!](https://easycookingbite.com/wp-content/uploads/2025/06/5736d119-188b-4a60-b1fa-3e8de9ae5fbe.webp)
Lemon Curd Tart Tangy and Refreshing Dessert Delight
Craving a dessert that’s both tangy and refreshing? Look no further! In this guide, I’ll take you through making a delightful Lemon Curd Tart.…
My Latest Drinks

Strawberry Cheesecake Smoothie Creamy Refreshing Treat
Craving something delicious and cool? The Strawberry Cheesecake Smoothie is your answer! It blends creamy cheesecake flavors with sweet strawberries Read Full Recipe-
Mocktail Pink Punch Refreshing and Easy Recipe
Are you ready to impress your guests with a delightful drink? This Mocktail Pink Punch recipe is both refreshing and Read Full Recipe -
Blue Lagoon Tropical Lemonade Refreshing and Zesty Drink
Looking for a drink that’s both refreshing and fun? Say hello to Blue Lagoon Tropical Lemonade! This colorful beverage packs Read Full Recipe -
Pumpkin Spice Coffee Creamer Flavorful Fall Treat
Are you ready to embrace the cozy vibes of autumn? In this blog post, I’ll guide you through making your Read Full Recipe -
Apple Cider Margarita Mocktail Refreshing Fall Drink
Fall is here, and that means it’s the perfect time for a cozy drink! The Apple Cider Margarita Mocktail offers Read Full Recipe -
Pumpkin Spice Latte Copycat Cozy and Comforting Recipe
Craving that warm, cozy feeling of fall? You can enjoy a delicious Pumpkin Spice Latte at home! In this article, Read Full Recipe


My Latest Dinners
-
White Bean Soup Simple and Hearty Delight
Looking for a warm and filling meal? Let me introduce you to white bean soup! This simple and hearty delight Read Full Recipe -
Garlic Herb Roasted Sweet Potatoes Flavorful Side Dish
Looking for a side dish that’s both tasty and easy to make? Garlic Herb Roasted Sweet Potatoes are the answer! Read Full Recipe -
One Pot Beef Taco Pasta Easy and Flavorful Meal
Looking for a quick and tasty meal? One Pot Beef Taco Pasta is the perfect dish! This recipe packs bold Read Full Recipe -
Garlic Chicken Zucchini Noodles Stir Fry Delight
Are you ready for a tasty twist on dinner? My Garlic Chicken Zucchini Noodles Stir Fry is a quick and Read Full Recipe -
Stuffed Italian Meatloaf Easy and Tasty Recipe
Are you ready to elevate your dinner game? This Stuffed Italian Meatloaf is both easy and tasty! In this article, Read Full Recipe -
One Pot French Onion Pasta Flavorful Comfort Dish
Looking for a cozy dinner that warms your soul? Try my One Pot French Onion Pasta! This creamy, rich dish Read Full Recipe


hey,
i’m !
I’m so happy you’re here!
Every dish I share is made with love and care. I hope they bring you the same comfort and joy they bring me. Let’s make memories, one recipe at a time.


![To make a tasty Loaded Veggie Frittata, you need fresh and vibrant ingredients. Here are the main items: - 6 large eggs - 1 cup milk (or plant-based milk) - 1 cup diced bell peppers (red, yellow, green) - 1 cup spinach, chopped - 1 small zucchini, diced - 1/2 cup cherry tomatoes, halved - 1/2 onion, finely chopped - 1 cup shredded cheese (cheddar or mozzarella) - 1 teaspoon olive oil - Salt and pepper to taste - Fresh herbs (basil or parsley) for garnish These ingredients create a colorful frittata that is full of flavor and nutrition. The eggs provide protein, while the veggies add vitamins and minerals. For an extra kick, consider adding some additional flavors. You can use: - Garlic (minced or powder) - Red pepper flakes for spice - Fresh herbs like thyme or oregano - A splash of hot sauce These ingredients enhance the taste of your frittata. They make every bite exciting and full of life. You can easily swap ingredients based on what you have at home. Here are some ideas: - Instead of spinach, try kale or arugula. - Use different cheeses like feta or goat cheese. - If you want more protein, add cooked ham, bacon, or tofu. - Use any seasonal veggies you like, such as asparagus or broccoli. These swaps keep your frittata fresh and fun. Experiment with flavors to find your perfect mix. For the full recipe, check out the Loaded Veggie Frittata details. To start, gather all your veggies. I love using bell peppers, zucchini, spinach, and cherry tomatoes. Wash them well. Dice the bell peppers and zucchini into small pieces. Chop the spinach into smaller bits. Halve the cherry tomatoes for a nice touch. Next, finely chop the onion. This gives the frittata great flavor. In a large bowl, crack the six eggs. Add one cup of milk. You can use plant-based milk if you prefer. Whisk them together. Make sure to mix in salt and pepper to taste. This adds a nice flavor. Set the egg mixture aside for now. Heat one teaspoon of olive oil in an oven-safe skillet over medium heat. Once hot, add the chopped onion. Sauté for two to three minutes until it becomes clear. Then, add the diced bell peppers and zucchini. Cook these for three to four minutes. Stir well until they soften. Finally, toss in the chopped spinach and halved cherry tomatoes. Cook until the spinach wilts. Pour the egg mixture over the cooked veggies in the skillet. Gently shake the pan to spread the eggs evenly. Now, sprinkle one cup of shredded cheese on top. Cook on the stovetop for three to four minutes until the edges set. Then, transfer the skillet to your preheated oven at 375°F (190°C). Bake for 15 to 20 minutes until the eggs are set and the top is golden. Allow it to cool slightly before slicing. Garnish with fresh herbs for a bright finish. Enjoy this Loaded Veggie Frittata as a delightful meal! For the complete process, check the full recipe. Start with a good non-stick skillet. This helps the frittata slide out easily. Use medium heat when cooking the veggies. This cooks them well without burning. When the edges of your frittata begin to set, gently shake the pan. This helps the eggs mix well with the veggies. Remember to bake the frittata until it is golden on top. This gives it a nice look and taste. Add spices to your egg mix for more flavor. A pinch of paprika or chili powder works well. Fresh herbs, like basil or parsley, can brighten the dish. Stir them into the egg mixture or sprinkle them on top before serving. You may also try different cheeses. Goat cheese or feta can add a tangy twist. Lastly, consider adding a splash of hot sauce for a kick. Slice the frittata into wedges for easy serving. A colorful platter makes it look great on any table. For a nice touch, garnish each slice with herbs. This adds color and freshness. You can also serve it with a side salad. This adds crunch and balances the meal. Enjoy warm or at room temperature to savor the flavors. For the full recipe, see the section above. {{image_2}} You can add protein to your Loaded Veggie Frittata in many ways. Ham or bacon gives a savory flavor. Both work well with the veggies. If you prefer plant-based options, tofu is a great choice. Crumble firm tofu and cook it with the veggies. This adds protein without meat. You can also use smoked tofu for a richer taste. Just remember to adjust the seasoning to keep it tasty. The beauty of a frittata is its versatility with vegetables. You can mix and match based on what you have. Try mushrooms for a hearty bite. Broccoli adds a nice crunch and color. Carrots can give a sweet touch. You can also use kale instead of spinach for a stronger flavor. The key is to chop the veggies small so they cook evenly. Feel free to experiment with what’s in season! Cheese adds creaminess to your frittata, but you can switch it up. If you don’t like cheddar or mozzarella, try goat cheese. It brings a tangy flavor that pairs well with veggies. Feta is another great option; it crumbles nicely and adds a salty kick. For a dairy-free choice, use vegan cheese. Just make sure it melts well. Whatever cheese you choose, it will add richness to your dish. For the full recipe, check out the Loaded Veggie Frittata section. Enjoy your cooking adventure! After making the Loaded Veggie Frittata, let it cool completely. Wrap individual slices tightly in plastic wrap. You can also place the slices in an airtight container. Store the frittata in the fridge for up to 4 days. Keeping it well-sealed helps maintain its flavor and texture. To freeze, slice the frittata into wedges. Wrap each piece in plastic wrap and then in aluminum foil. This extra layer prevents freezer burn. Place the wrapped slices in a freezer bag. You can freeze the frittata for up to 2 months. Label the bag with the date for easy tracking. Reheating your frittata is easy. For the best texture, use the oven. Preheat the oven to 350°F (175°C). Place the frittata slice on a baking sheet. Heat for about 10-15 minutes until warm. You can also use the microwave. Place the slice on a microwave-safe plate and cover it with a damp paper towel. Heat for about 1-2 minutes. Enjoy your frittata warm or at room temperature! For the full recipe, check out Loaded Veggie Frittata. A veggie frittata can last up to five days in the fridge. To keep it fresh, store it in an airtight container. This helps lock in flavor and moisture. If you notice any change in smell or texture, it’s best to toss it. Yes, you can make a Loaded Veggie Frittata ahead of time. It holds well in the fridge. This makes it perfect for meal prep. Just follow the [Full Recipe] and cool it before storing. You can slice it into portions for easy servings. The best way to reheat a frittata is in the oven. Preheat your oven to 350°F (175°C). Place the frittata on a baking sheet and cover it with foil. Heat for about 10-15 minutes. This keeps the frittata moist and prevents it from drying out. To make the frittata gluten-free, simply use certified gluten-free ingredients. For a dairy-free option, swap regular milk with plant-based milk like almond or oat milk. You can also use dairy-free cheese. These swaps keep the frittata tasty and healthy for everyone. In this blog post, we explored how to make a Loaded Veggie Frittata. We covered key ingredients, from veggies to flavor boosters and possible swaps. You learned step-by-step instructions for prepping, cooking, and baking to get the best texture. We shared tips for perfecting your technique and enhancing flavor, plus how to present your dish nicely. With these ideas, you can enjoy a delicious, healthy meal. Get creative with variations and enjoy this dish any way you like!](https://easycookingbite.com/wp-content/uploads/2025/07/4602b032-462a-44a8-8398-2369a71a4aa5-300x300.webp)

White Bean Soup Simple and Hearty Delight
Looking for a warm and filling meal? Let me introduce you to white bean soup! This simple and hearty delight is packed with flavor…

