

Latest & Greatest

Pumpkin Cream Cold Foam Delightful and Simple Recipe
Are you ready to elevate your fall drinks game? My Pumpkin Cream Cold Foam recipe is not only delightful, but
Read more…
Mocha Cottage Cheese Mousse Creamy and Tasty Delight
Craving something creamy and tasty? Let me introduce you to Mocha Cottage Cheese Mousse! This dessert is simple, quick, and
Read more…
Sweet & Sour Meatballs Sheet Pan Easy Family Dinner
If you’re searching for a quick and tasty dinner, look no further! My Sweet & Sour Meatballs Sheet Pan recipe
Read more…
No-Bake Maple Pecan Pie Bars Easy and Delicious Treat
Looking for an easy and tasty dessert? You’ve found it with these No-Bake Maple Pecan Pie Bars! They combine rich
Read more…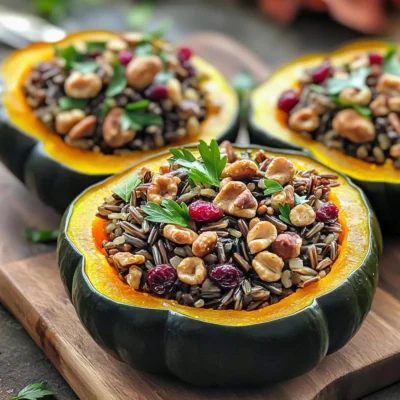
Wild Rice Stuffed Squash Flavorful Fall Delight
Fall flavors come alive in this Wild Rice Stuffed Squash dish! Imagine a tender acorn squash filled with a savory
Read more…
Caramel Swirl Hot Chocolate Indulgent Cozy Drink
Craving a cozy drink that warms your heart and satisfies your sweet tooth? Look no further! This Caramel Swirl Hot
Read more…
Savory Slow Cooker Tuscan Chicken Flavorful and Easy
Are you ready for a dish that’s easy to make and full of flavor? This Savory Slow Cooker Tuscan Chicken
Read more…
Air Fryer Lemon Pepper Wings Tasty and Crispy Delight
Are you ready to enjoy a tasty and crispy treat? Air fryer lemon pepper wings are the perfect snack for
Read more…browse recipes


Easy Teriyaki Chicken Bowls Quick and Flavorful Meal
Craving a quick and tasty meal? Look no further! These Easy Teriyaki Chicken Bowls are perfect for busy weeknights. With juicy chicken, colorful veggies,…
My Latest Drinks

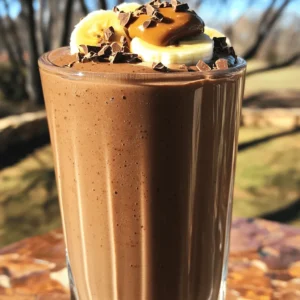
Strawberry Cheesecake Smoothie Creamy Refreshing Treat
Craving something delicious and cool? The Strawberry Cheesecake Smoothie is your answer! It blends creamy cheesecake flavors with sweet strawberries Read Full Recipe-
Mocktail Pink Punch Refreshing and Easy Recipe
Are you ready to impress your guests with a delightful drink? This Mocktail Pink Punch recipe is both refreshing and Read Full Recipe -
Blue Lagoon Tropical Lemonade Refreshing and Zesty Drink
Looking for a drink that’s both refreshing and fun? Say hello to Blue Lagoon Tropical Lemonade! This colorful beverage packs Read Full Recipe -
Pumpkin Spice Coffee Creamer Flavorful Fall Treat
Are you ready to embrace the cozy vibes of autumn? In this blog post, I’ll guide you through making your Read Full Recipe -
Apple Cider Margarita Mocktail Refreshing Fall Drink
Fall is here, and that means it’s the perfect time for a cozy drink! The Apple Cider Margarita Mocktail offers Read Full Recipe -
Pumpkin Spice Latte Copycat Cozy and Comforting Recipe
Craving that warm, cozy feeling of fall? You can enjoy a delicious Pumpkin Spice Latte at home! In this article, Read Full Recipe


My Latest Dinners
-
White Bean Soup Simple and Hearty Delight
Looking for a warm and filling meal? Let me introduce you to white bean soup! This simple and hearty delight Read Full Recipe -
Garlic Herb Roasted Sweet Potatoes Flavorful Side Dish
Looking for a side dish that’s both tasty and easy to make? Garlic Herb Roasted Sweet Potatoes are the answer! Read Full Recipe -
One Pot Beef Taco Pasta Easy and Flavorful Meal
Looking for a quick and tasty meal? One Pot Beef Taco Pasta is the perfect dish! This recipe packs bold Read Full Recipe -
Garlic Chicken Zucchini Noodles Stir Fry Delight
Are you ready for a tasty twist on dinner? My Garlic Chicken Zucchini Noodles Stir Fry is a quick and Read Full Recipe -
Stuffed Italian Meatloaf Easy and Tasty Recipe
Are you ready to elevate your dinner game? This Stuffed Italian Meatloaf is both easy and tasty! In this article, Read Full Recipe -
One Pot French Onion Pasta Flavorful Comfort Dish
Looking for a cozy dinner that warms your soul? Try my One Pot French Onion Pasta! This creamy, rich dish Read Full Recipe


hey,
i’m !
I’m so happy you’re here!
Every dish I share is made with love and care. I hope they bring you the same comfort and joy they bring me. Let’s make memories, one recipe at a time.


![- 4 cups chicken broth (or vegetable broth for vegetarian option) - 1 tablespoon fresh ginger, grated - 2 green onions, finely chopped (plus extra for garnish) - 2 large eggs, beaten - 2 tablespoons cornstarch - 3 tablespoons water - Salt and pepper to taste - Sesame oil, for drizzling - Optional: A handful of fresh spinach or kale To make Easy Egg Drop Soup, you need simple, fresh ingredients. Start with chicken or vegetable broth for a warm base. Fresh ginger adds a nice zing. Green onions give it a bright flavor. The eggs will create those lovely silky ribbons in the soup. Cornstarch and water help thicken it slightly. Don’t forget salt and pepper for seasoning, along with a drizzle of sesame oil for depth. If you want, toss in some fresh spinach or kale for added nutrition. This recipe is not just quick; it’s also flexible. You can mix and match based on what you have on hand. For the full recipe, check out the details provided above. 1. First, grab a medium pot. Pour in 4 cups of chicken or vegetable broth. 2. Heat the broth over medium heat. Add 1 tablespoon of grated ginger. 3. Bring this mix to a gentle boil. Now it’s time for the next step! 4. In a small bowl, mix 2 tablespoons of cornstarch with 3 tablespoons of water. Stir until smooth. 5. Slowly whisk this mix into the boiling broth. This will help thicken the soup. 6. Let the broth simmer for about 5 minutes. Season with salt and pepper to taste. 1. If you want extra greens, add a handful of fresh spinach or kale. Let it wilt for a minute. 2. Next, reduce the heat to low. Slowly drizzle in the beaten eggs while stirring gently. 3. This creates silky ribbons of egg in the soup. Watch as they swirl beautifully! 1. Once the eggs are mixed in, remove the pot from heat. 2. Stir in 2 finely chopped green onions for added flavor. 3. Drizzle a few drops of sesame oil on top. This gives a nice finish to your soup. 4. Serve hot and enjoy your warm bowl of Easy Egg Drop Soup! For the complete recipe, check out the [Full Recipe]. To bring more flavor to your egg drop soup, try adding spices. A pinch of white pepper can add warmth. You can also mix in a dash of chili oil for some heat. Fresh herbs like cilantro or parsley can brighten the soup. If you want deeper flavor, use low-sodium chicken broth. For a vegetarian option, vegetable broth works well too. You might even try adding a splash of soy sauce for umami. When you add eggs, whisk them gently in a circular motion. This helps create lovely ribbons in your soup. If you pour too quickly, you could end up with clumps. For the right thickness, add cornstarch slowly. If your soup seems too thick, just add a bit more broth. No need to worry; you can always adjust the thickness as you cook. Egg drop soup is best served hot. A simple bowl works fine, but a nice china bowl can elevate the meal. Add extra green onions on top for a burst of color. You can also serve it with crispy wontons or rice. For a full meal, pair it with a light salad or some steamed dumplings. This adds both taste and texture to your meal. {{image_2}} For a vegetarian egg drop soup, use vegetable broth instead of chicken broth. This choice keeps the flavor light and fresh. If you want a vegan option, consider using silken tofu or chickpea flour mixed with water as an egg substitute. Silken tofu gives a creamy texture, while chickpea flour creates a similar consistency to eggs. If you want to make your soup heartier, add shredded chicken or tofu. Shredded chicken brings a nice protein boost, making the soup filling. Tofu is a great choice for a plant-based meal and absorbs the broth's flavors. For seafood lovers, try adding shrimp or crab. These ingredients bring a new taste and texture to the dish. To enhance the taste, you can add Asian-inspired flavors. A splash of soy sauce or a sprinkle of sesame seeds will elevate the soup. If you like spice, consider adding chili oil or red pepper flakes. These options give the soup a warm kick, making it exciting and flavorful. Store your egg drop soup in the fridge. Use an airtight container to keep it fresh. Let the soup cool before sealing the container. This helps avoid extra moisture. You can keep it in the fridge for up to three days. Reheat your soup gently on the stove. Use low heat to avoid overcooking the eggs. Stir the soup often to keep the texture smooth. You can also use the microwave, but do it in short bursts. Stir in between to ensure even heating. You can freeze egg drop soup, but it may change texture. To freeze, let it cool completely. Pour it into a freezer-safe container, leaving space for expansion. It can last for up to three months. When ready to eat, thaw it in the fridge overnight. Reheat gently to restore its flavor. Egg drop soup can last about 3 to 4 days in the fridge. Store it in an airtight container. If you see any signs of spoilage, like a sour smell or mold, do not eat it. Always check the soup before you eat it again. Yes, you can use egg substitutes if you have an egg allergy. Silken tofu works well to mimic the texture of eggs. You can also try flaxseed meal mixed with water. Another option is to use commercial egg replacers. Each substitute can change the final taste, so pick one that you like best. Egg drop soup pairs well with many dishes. Try serving it with steamed rice or dumplings for a hearty meal. You can also add a fresh salad or some spring rolls. These options will make your meal more complete and tasty. You can make egg drop soup easily with basic ingredients like broth, eggs, and ginger. Follow the steps for adding flavors and egg ribbons for a perfect texture. Don’t forget to try variations for different diets, and enjoy your delicious soup with the right sides. Store leftovers properly to keep them fresh. With this guide, you can impress your family and friends with your cooking skills. Enjoy creating your own bowls of comfort!](https://easycookingbite.com/wp-content/uploads/2025/06/c2e32b75-3f87-4cbc-b297-4e3cc569c19b-300x300.webp)

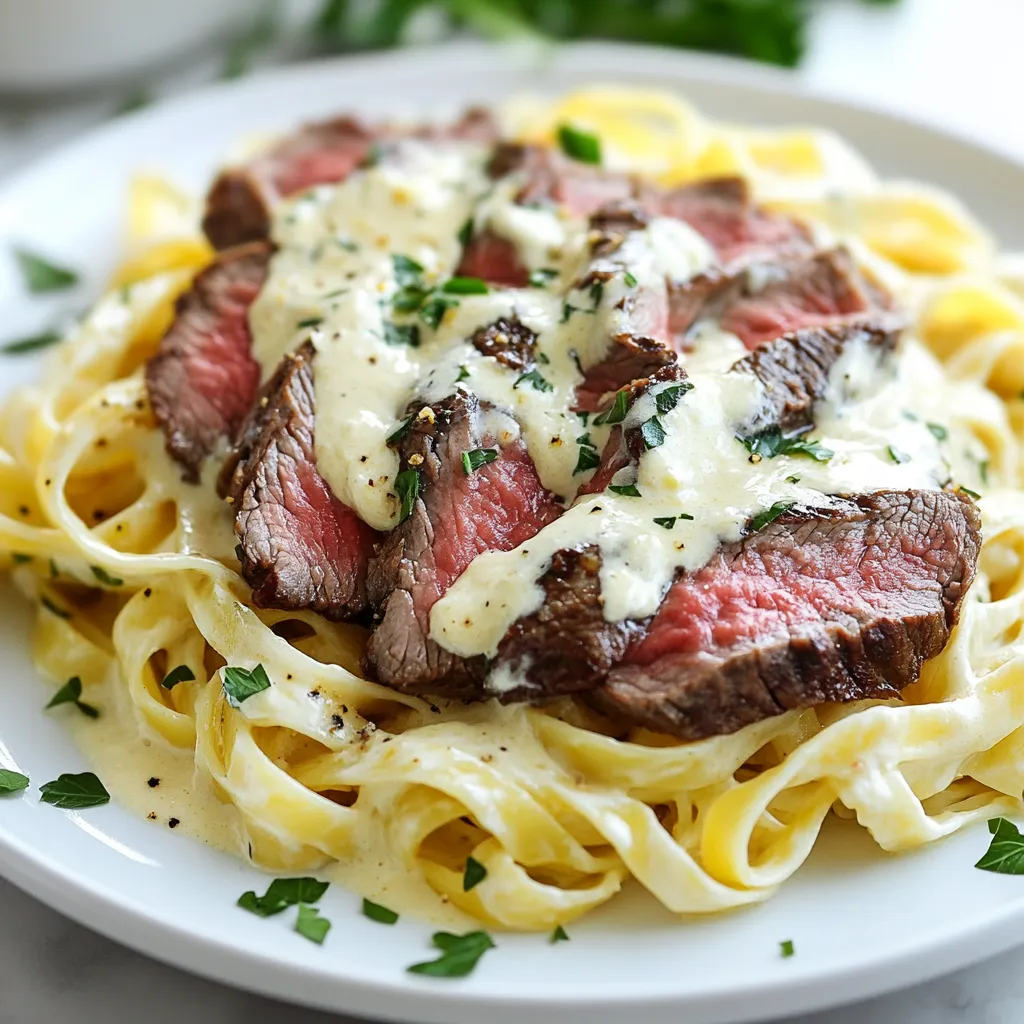
Savory Steak Pasta with Cream Sauce Delight
Are you ready to elevate your dinner game? My Savory Steak Pasta with Cream Sauce combines tender flank steak and creamy goodness for a…