Latest & Greatest

browse recipes

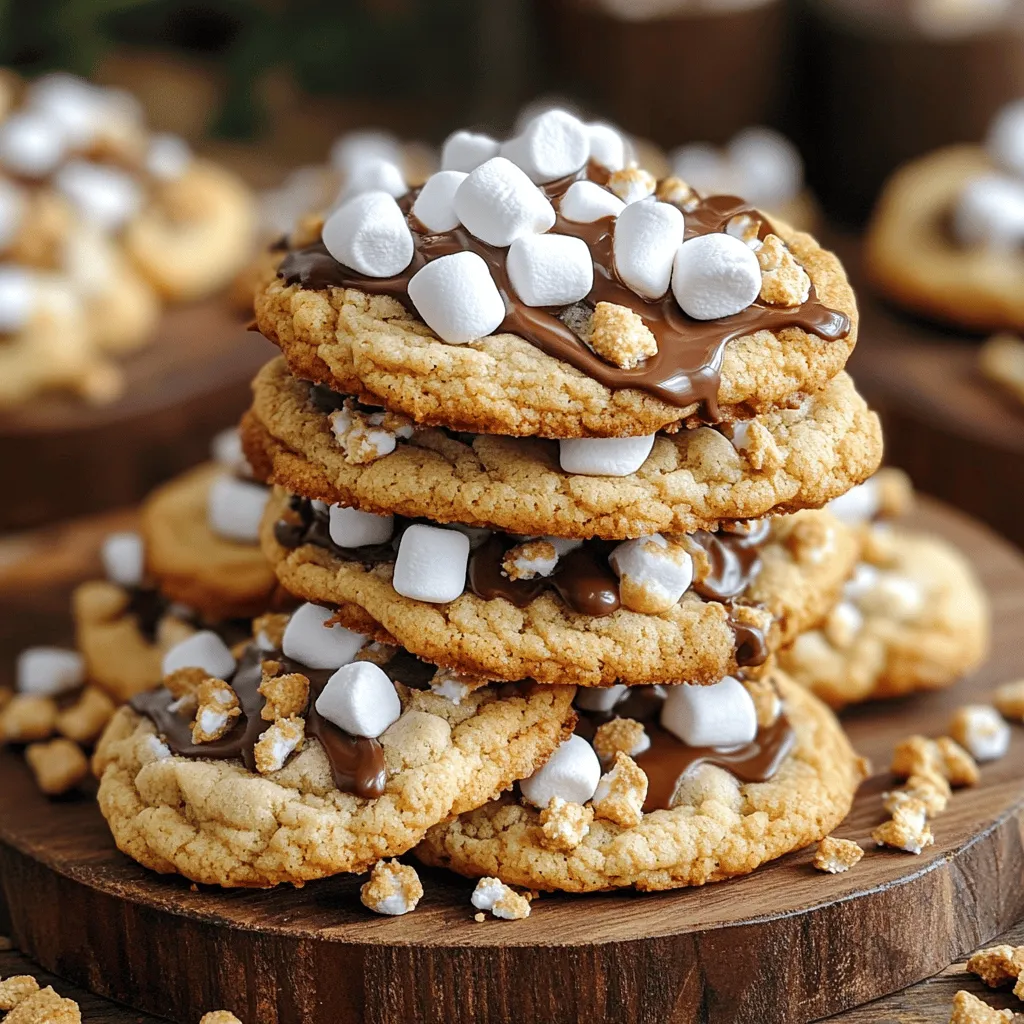
Let's gather all the tasty ingredients you need to make S'mores Cookies. Each part plays a vital role in creating that delicious flavor you crave. - Butter, sugars, and eggs - 1 cup unsalted butter, softened - 1 cup brown sugar - 1/2 cup granulated sugar - 2 large eggs - 1 teaspoon vanilla extract These ingredients form the base of your cookie dough. The butter adds richness, while the sugars provide sweetness. Eggs help bind the dough and give it a nice texture. - Dry ingredients: flour, baking soda, and salt - 3 cups all-purpose flour - 1 teaspoon baking soda - 1/2 teaspoon salt The flour gives your cookies structure. Baking soda helps them rise, and salt balances the sweetness. - Mix-ins: mini marshmallows, chocolate chips, and crushed graham crackers - 1 cup mini marshmallows - 1 cup chocolate chips (semi-sweet or milk chocolate) - 1 cup crushed graham crackers These fun mix-ins create that classic s'mores flavor. The marshmallows add chewiness, while the chocolate brings a sweet, melty goodness. The graham crackers add a nice crunch and flavor, making each bite unforgettable. For the full recipe, be sure to check the detailed instructions. Now, let’s get ready to bake those amazing cookies! To start, you need to preheat your oven to 350°F (175°C). This temperature helps the cookies bake evenly. While the oven heats, line two baking sheets with parchment paper. This step stops the cookies from sticking. You will need a few essential tools. A large mixing bowl, measuring cups, and a cookie scoop are key. A whisk and a spatula will also help mix your ingredients well. Begin by mixing your wet ingredients. In a large bowl, cream together the softened butter, brown sugar, and granulated sugar. Mix until the mixture looks light and fluffy. Add the eggs, one at a time. Make sure to mix well after each egg. Finally, stir in the vanilla extract. In a separate bowl, whisk together your dry ingredients: flour, baking soda, and salt. This step makes sure everything blends well. Gradually add the dry mix to the wet mix. Be careful not to overmix. You want to combine them until just mixed. Now it's time to scoop your cookies. Use a cookie scoop or a tablespoon to drop rounded balls of dough onto your baking sheets. Make sure to leave about 2 inches of space between each cookie. This space allows them to spread. Bake your cookies in the preheated oven for about 10 to 12 minutes. Look for lightly golden edges. The centers may seem soft, but they will firm up as they cool. When done, let the cookies cool on the baking sheets for 5 minutes before moving them to a wire rack. This helps them set perfectly. For the full recipe, check out the details above. To get the right cookie texture, start with your butter. Use softened butter at room temperature. This helps it blend smoothly with sugars. The sugar ratios matter too. Use more brown sugar for chewiness and granulated sugar for crispness. This mix gives you a nice balance. Do not overmix your dough. Once you add the dry ingredients, mix just until combined. Overmixing can make your cookies tough and dry, which is not what we want. You can add fun flavors to your cookies. A pinch of cinnamon or a dash of almond extract can enhance the taste. Experiment with spices, but do not overpower the s'mores flavor. Let’s talk about chocolate. Semi-sweet chocolate chips work well, but milk chocolate is sweeter. Pair them with mini marshmallows for that classic s'mores taste. You can also try flavored marshmallows for a twist! Baking cookies can be tricky. One common mistake is not measuring ingredients correctly. Always use the right tools to measure flour and sugar. Too much flour can lead to dry cookies. If your cookies are underbaked, put them back in the oven for a few minutes. For overbaked cookies, you can try to soften them by adding a slice of bread in the container. This can help them retain moisture. When you follow these tips, you will bake amazing s'mores cookies. For the full recipe, check out the details above. Enjoy the process! {{image_2}} You can easily make gluten-free s'mores cookies. Start by using gluten-free flour. Options like almond flour or coconut flour work well. Look for a blend that mimics regular flour. This helps keep the taste and texture similar to the classic version. When you swap flours, you may need to adjust your recipe a bit. Sometimes, gluten-free flour absorbs more moisture. Add a little extra butter or an egg. This will keep your cookies soft and chewy. Making vegan s'mores cookies is fun and simple. Replace the butter with vegan margarine or coconut oil. Use flaxseed or chia seeds mixed with water instead of eggs. This creates a great binding effect. For the chocolate chips, look for dairy-free options. Brands like Enjoy Life offer tasty plant-based chocolate that pairs well with the other flavors. You won’t miss the dairy in your cookies! Want to switch things up? Try adding nuts or dried fruits. Chopped pecans or walnuts add a nice crunch. Dried cranberries or cherries bring some sweetness. You can also experiment with flavored marshmallows or chocolate chips. Try mint or caramel flavored options for a fun twist. Combining these flavors can take your s'mores cookies to a whole new level! For the full recipe, check out the complete instructions above. To keep your s'mores cookie dough fresh, you can refrigerate or freeze it. If you plan to bake later, shape the dough into balls and place them on a baking sheet. Freeze the balls for about 30 minutes. Once firm, transfer them to a zip-top bag. This method keeps the dough fresh for up to three months. When refrigerating dough, wrap it tightly in plastic wrap. This prevents it from drying out. Use the dough within one week for the best taste. Once your cookies are baked, let them cool completely. Store them in an airtight container to keep them soft. A glass jar or a plastic container works well. If you want the cookies to last longer, freeze them. Layer the cookies with parchment paper in an airtight bag. They can stay fresh for up to three months. To enjoy your cookies warm, reheat them in the oven. Set your oven to 300°F (150°C) and bake for about 5 minutes. You can also microwave a cookie for about 10-15 seconds. This warms them up nicely. For a fun twist, try making s'mores ice cream sandwiches. Take two cookies and add a scoop of your favorite ice cream in between. Press gently and enjoy a delicious treat. For more ideas, check out the Full Recipe for s'mores cookies. S'mores cookies stay fresh for about five days at room temperature. Store them in an airtight container to keep them soft and chewy. If you want them to last longer, freeze them. Just place them in a freezer bag and remove as much air as possible. They can last up to three months in the freezer. When you're ready to eat them, let them thaw at room temperature. Yes! You can prepare the dough a day in advance. Just cover the bowl with plastic wrap and place it in the fridge. This helps the flavors blend well. If you want to freeze the dough, scoop the cookie balls onto a baking sheet and freeze until solid. Then, transfer them to a freezer bag. You can bake them straight from the freezer, just add a minute or two to the baking time. If you're not a fan of chocolate, try using peanut butter chips or butterscotch chips instead. You can also mix in dried fruits like cranberries or cherries for a fruity twist. For a fun crunch, add some toffee bits or crushed Oreos. Customize your s'mores cookies to fit your taste! Absolutely! To make nut-free s'mores cookies, simply skip any nuts in your mix-ins. Use chocolate chips that are labeled nut-free. If you want added crunch, consider using sunflower seeds or pumpkin seeds instead. Always check labels to ensure your ingredients are free from cross-contamination. Enjoy your nut-free treat without worry! In this post, I shared how to make delicious s'mores cookies. You learned about key ingredients, step-by-step baking steps, and helpful tips. I also covered fun variations, storage advice, and answers to common questions. Remember, the perfect cookie texture comes from careful mixing and baking times. Experimenting with flavors can create unique treats. Whether you choose classic or gluten-free options, enjoy baking these goodies. Your kitchen will soon smell amazing!

S’mores Cookies Irresistible and Simple Treat Recipe

Get ready to indulge in a sweet treat that combines all your favorite campfire flavors! My S’mores Cookies recipe is easy and fun, perfect…

My Latest Drinks

My Latest Dinners

hey,

i’m !

I’m so happy you’re here!

Every dish I share is made with love and care. I hope they bring you the same comfort and joy they bring me. Let’s make memories, one recipe at a time.

Garlic Pan Steak Recipe Quick and Satisfying Meal

If you’re craving a quick and hearty meal, you’ll love my Garlic Pan Steak recipe. It’s fast, simple, and packed with flavor! This dish…
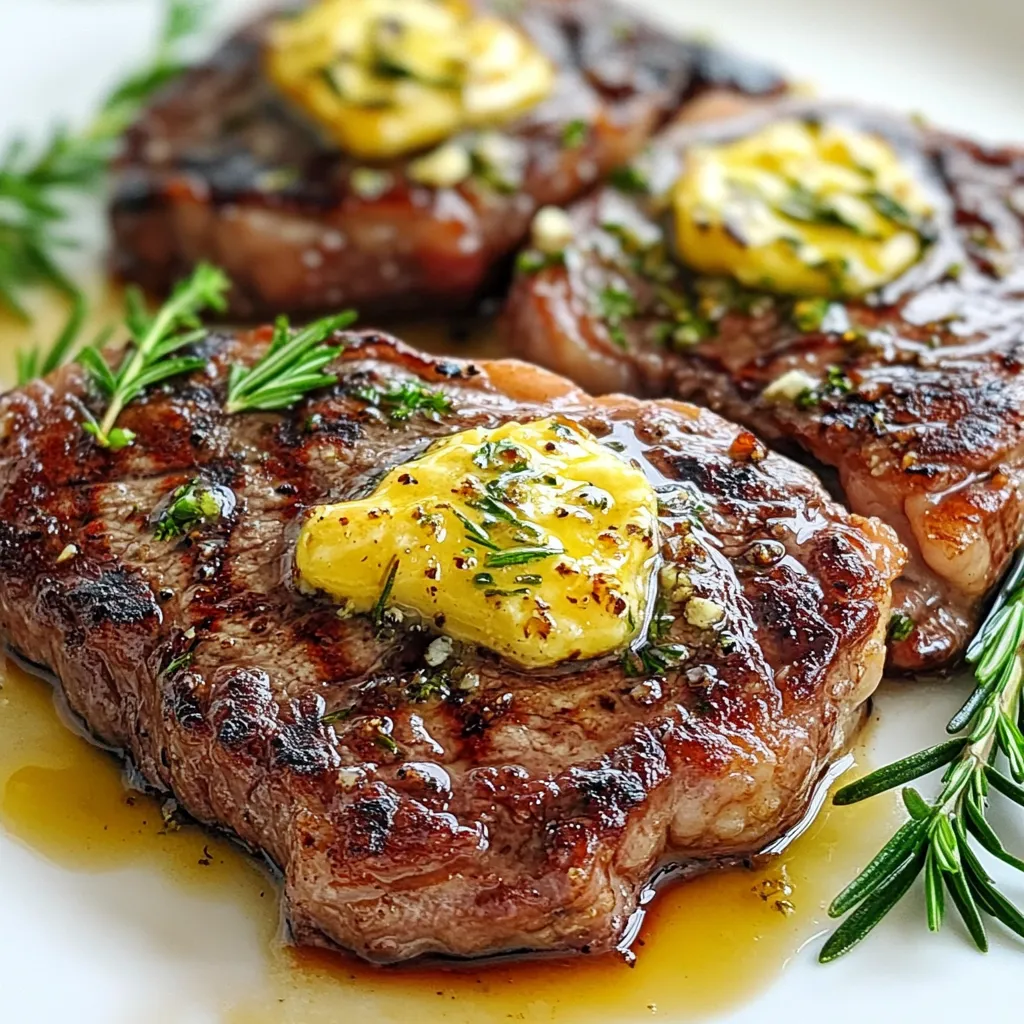
- 2 ribeye steaks (about 1 inch thick) - 3 tablespoons unsalted butter - 5 cloves garlic, crushed - 1 tablespoon olive oil These main ingredients create a tasty and rich flavor. The ribeye steaks have a good amount of fat, which makes them juicy. The butter adds a creamy touch, while garlic gives it a strong, bold taste. - Salt and pepper to taste Salt and pepper are key to enhancing the steak's natural flavor. Use a good amount to ensure each bite is packed with taste. Always season both sides well for the best results. - 1 tablespoon fresh rosemary, chopped - 1 tablespoon fresh thyme, chopped Fresh herbs boost the flavor and aroma of the dish. Rosemary adds a woodsy note, while thyme brings a subtle earthiness. You can mix these herbs into the butter for a delightful garlic herb sauce. {{ingredient_image_1}} Start by taking the ribeye steaks out of the fridge. Let them sit for about 30 minutes. This step helps the steaks cook evenly. Next, pat the steaks dry with paper towels. Dry steaks will sear better and form a tasty crust. Generously sprinkle salt and pepper on both sides. This seasoning adds flavor to the meat. Heat a large cast-iron skillet on medium-high heat. Add a tablespoon of olive oil to the pan. Once you see the oil shimmer, it’s time to add the steaks. Place them gently in the skillet. Cook the steaks for about 4 to 5 minutes without moving them. This gives you a nice crust. After that, flip the steaks to cook the other side. When you flip the steaks, add 3 tablespoons of unsalted butter. Then, add 5 crushed garlic cloves, 1 tablespoon of chopped rosemary, and 1 tablespoon of chopped thyme. As the butter melts, use a spoon to baste the steaks. This adds flavor and keeps the meat juicy. Cook for another 3 to 4 minutes for a perfect medium-rare. If you want it more done, cook a little longer. After cooking, take the steaks out and let them rest for 5 to 10 minutes. This helps the juices settle back into the meat. Finally, slice the steaks and drizzle the garlic butter on top before serving. To get a great sear, start with dry steaks. After taking them out of the fridge, let them rest for about 30 minutes. This helps them cook evenly. Pat them dry with paper towels to remove any moisture. Season both sides with salt and pepper. This not only adds flavor but also helps form that nice crust. Heat your skillet until it's hot and shimmering. When you add the steak, don’t move it. Let it cook for 4-5 minutes before flipping. You can cook the steak in different ways if you don't have a skillet. Grilling is a great option. It gives a nice smoky flavor. You can also broil the steak in the oven. Just make sure to watch it closely. Each method has its charm, so try what you like best. To check if your steak is done, use a meat thermometer. For medium-rare, aim for about 130°F. If you prefer medium, look for around 140°F. Remember, the steak will cook a bit more while it rests. After cooking, let the steak rest for 5-10 minutes. This keeps the juices inside, making each bite tasty and juicy. Pro Tips Resting is Key: Allow your steaks to rest after cooking. This helps the juices redistribute, ensuring a more flavorful and juicy steak. Use a Meat Thermometer: For perfect doneness, use a meat thermometer. Aim for 130°F (54°C) for medium-rare, and adjust according to your preference. Don’t Crowd the Pan: Cook one or two steaks at a time in the skillet. This maintains the temperature of the pan and ensures a nice sear. Choose Quality Meat: Opt for well-marbled ribeye steaks for the best flavor and tenderness. Quality ingredients make a noticeable difference in the final dish. {{image_2}} You can use many cuts for garlic pan steak. Ribeye is juicy and tender, but you can try others. New York strip offers a great flavor. Filet mignon is soft and buttery. Sirloin is a leaner option. Each cut has its own taste. Just adjust the cook time for thickness. While rosemary and thyme shine in this dish, feel free to experiment. Try parsley, basil, or even oregano for fresh flavor. For a spicier kick, add crushed red pepper flakes. You can swap garlic for shallots if you want a milder taste. Mix and match to find what you love. Garlic pan steak pairs well with many sides. Mashed potatoes or roasted veggies are great choices. You can also serve it with a fresh salad. A rich red wine sauce enhances the meal's flavor. For a zesty twist, consider chimichurri or a garlic aioli. These sides and sauces make the meal even better. After cooking, let your steak cool first. Place it in a clean, airtight container. This keeps the meat fresh. You can store it in the fridge for 3 to 4 days. If you want, wrap it tightly in plastic wrap before putting it in the container. This adds extra protection against air and moisture. To reheat steak, use a low heat. This helps keep it juicy. You can use a skillet or an oven. If using a skillet, add a little butter. Heat it over medium-low. Cook the steak for about 2-3 minutes on each side. For the oven, set it to 250°F. Place the steak on a baking sheet. Heat for about 20 minutes or until warm. For longer storage, freeze your leftovers. Wrap each piece in plastic wrap. Then, place it in a freezer bag. Make sure to squeeze out all the air. Label the bag with the date. You can freeze it for up to 3 months. To thaw, move the steak to the fridge overnight. This keeps the texture nice. Avoid thawing at room temperature to prevent bacteria. The best cut for pan-searing is ribeye. Ribeye has great fat marbling. This makes it tender and flavorful. You can also use sirloin or New York strip. Both cuts work well and provide good taste. Choose steaks that are about one inch thick. This thickness helps them cook evenly in the pan. To make this dish dairy-free, replace the butter with olive oil. Use about three tablespoons of olive oil instead. You can also try vegan butter as a substitute. This gives you a similar flavor without dairy. The garlic and herbs still add great taste to the dish. Yes, you can grill this steak recipe easily. Prepare the steaks the same way as for pan-searing. Season them well and let them rest. Preheat your grill to medium-high heat. Grill the steaks for about 4-5 minutes per side. Use a meat thermometer to check for doneness. Enjoy the smoky flavor from the grill! To sum up, you now know the key ingredients for garlic pan steak and how to prepare them. I shared cooking steps for perfect results and tips for that ideal sear. We explored variations to suit your taste and how to store leftovers. Remember, the right cut and seasonings can make a big difference. Whether you're a beginner or a pro, these tips will help you make a fantastic meal. With this knowledge, you’re ready to impress with your cooking!