
Latest & Greatest
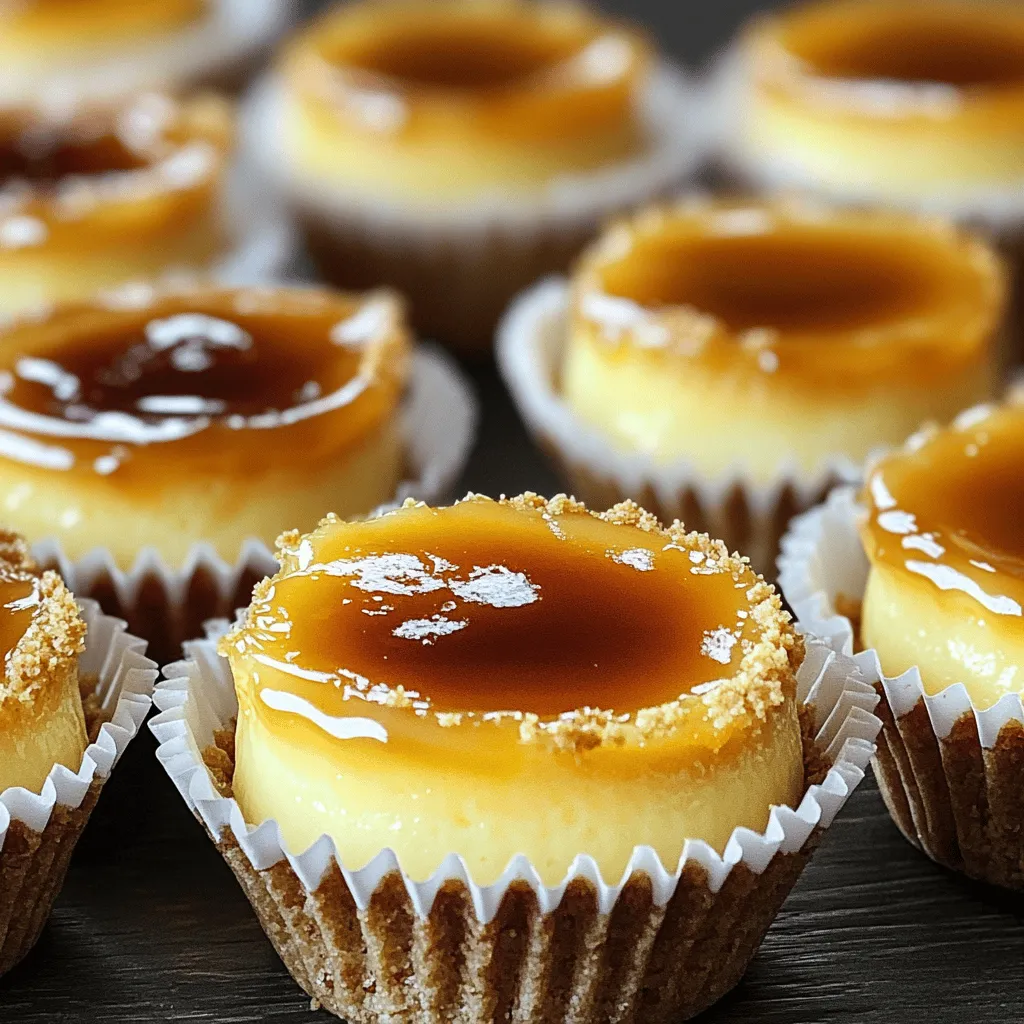
Mini Crème Brûlée Cheesecakes Delicious Dessert Recipe
If you love creamy desserts, you’ll adore my Mini Crème Brûlée Cheesecakes! This recipe combines the rich, creamy texture of
Read more…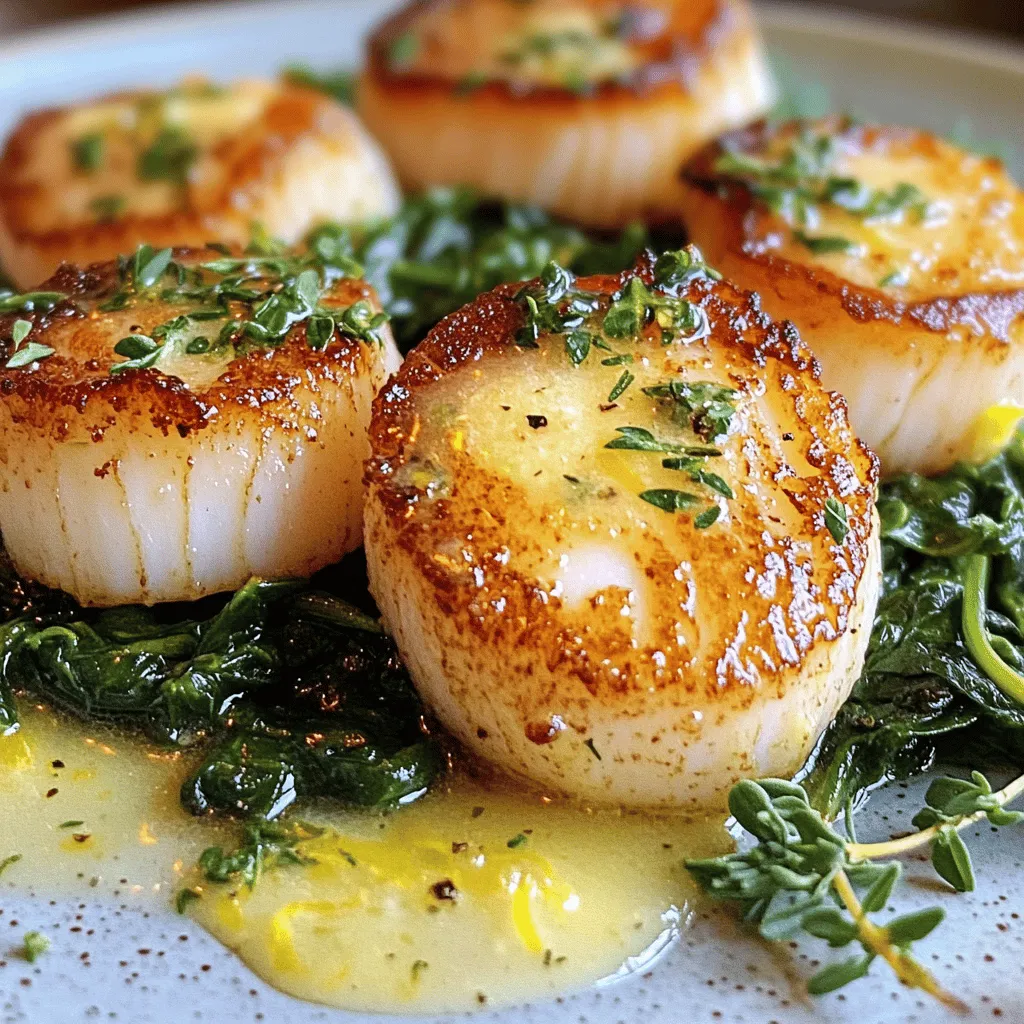
Crispy Pan-Seared Scallops Flavorful Delight Recipe
If you’re ready to elevate your dinner game, crispy pan-seared scallops are a must-try! With a golden crust and a
Read more…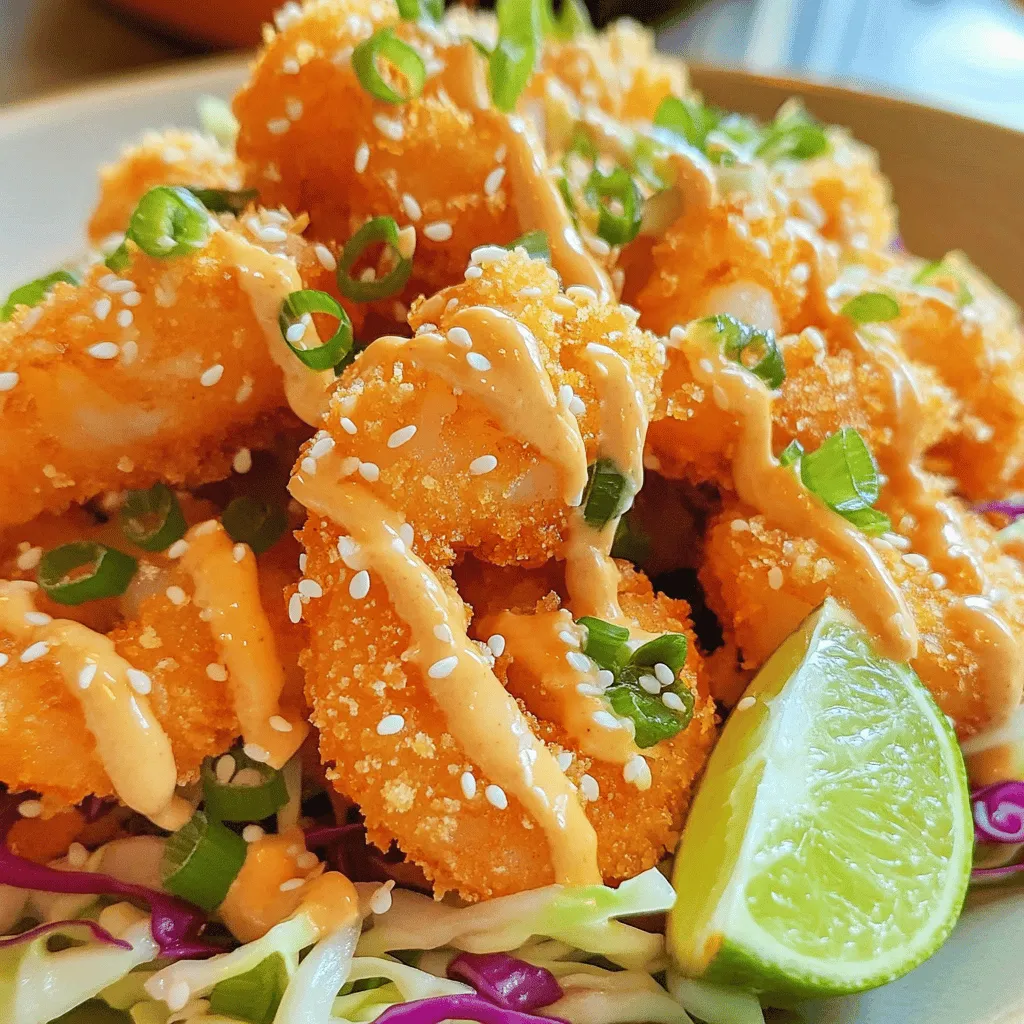
Bang Bang Shrimp Crispy and Flavorful Delight
If you love bold flavors and crispy textures, Bang Bang Shrimp is your new favorite dish! This tasty treat is
Read more…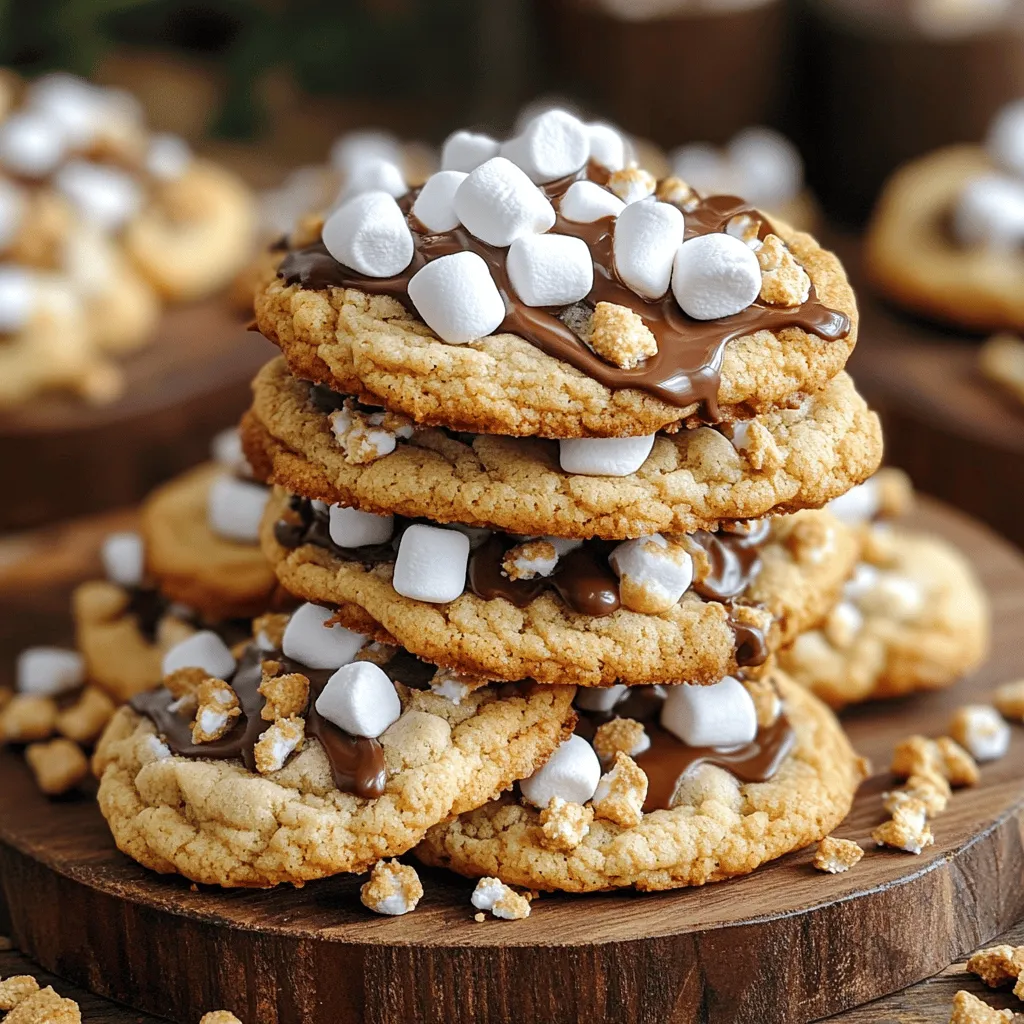
S’mores Cookies Irresistible and Simple Treat Recipe
Get ready to indulge in a sweet treat that combines all your favorite campfire flavors! My S’mores Cookies recipe is
Read more…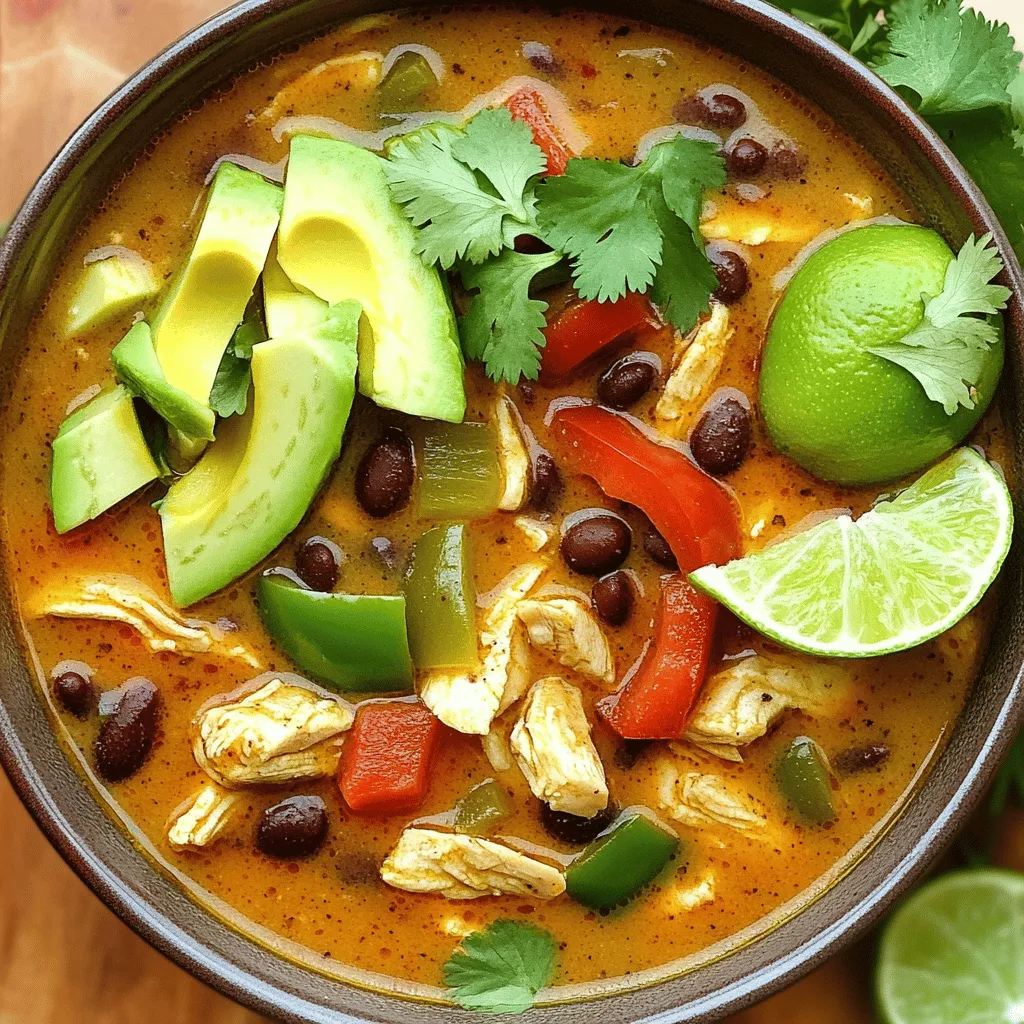
Southwest Chicken Soup Hearty and Flavorful Recipe
Are you ready for a warm and hearty dish that packs a punch of flavor? This Southwest Chicken Soup recipe
Read more…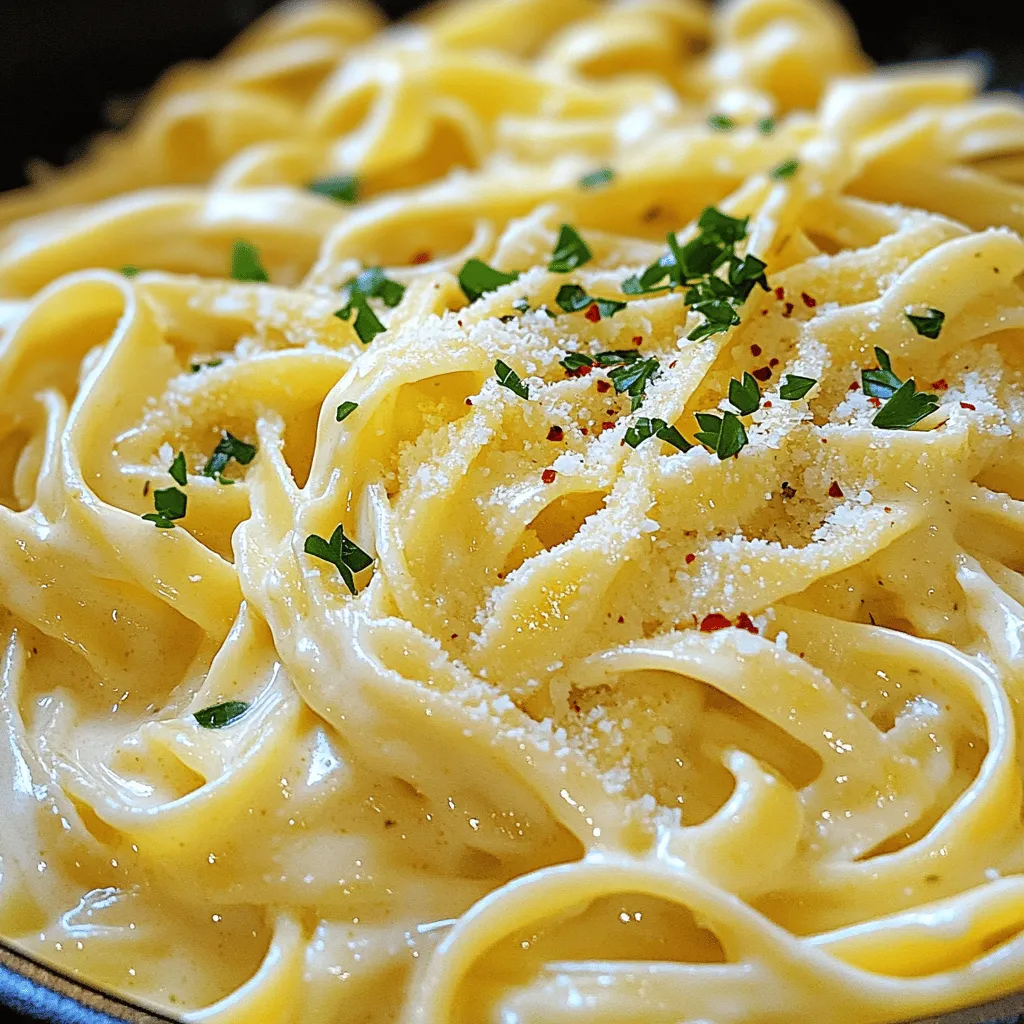
Creamy Garlic Parmesan Pasta Quick and Simple Meal
Are you looking for a quick and tasty meal that’s easy to make? My Creamy Garlic Parmesan Pasta recipe is
Read more…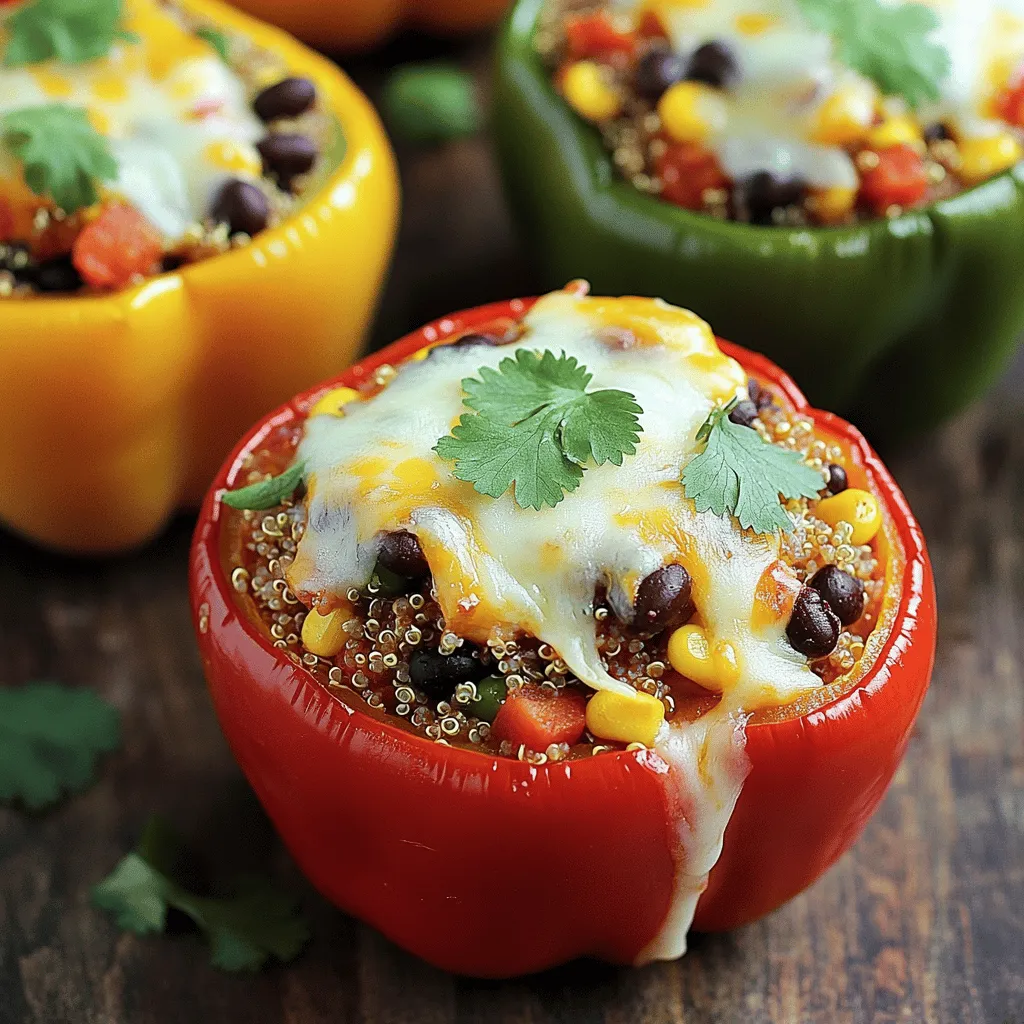
Delicious Stuffed Bell Peppers with Quinoa Recipe
Are you ready to impress your taste buds? In this post, I’ll guide you through making delicious stuffed bell peppers
Read more…
Lemon Blueberry Muffins Simple and Delicious Recipe
Are you ready to bake the perfect lemon blueberry muffins? This simple and delicious recipe will brighten your day with
Read more…browse recipes


![- 2 tablespoons matcha green tea powder - 1 cup milk (dairy or non-dairy) - 1 cup coconut milk - 2-3 tablespoons honey or maple syrup - 1 teaspoon vanilla extract - A pinch of sea salt - Optional ingredients: chia seeds or chopped nuts To make the best Iced Matcha Latte Popsicles, gather your ingredients first. I love starting with the matcha powder. Choose a high-quality matcha for a vibrant color and rich flavor. The milk can be dairy or non-dairy, like almond or oat milk, based on your taste. Next, combine coconut milk for a creamy base that adds a tropical twist. Sweeten your mixture with honey or maple syrup. Adjust the sweetness according to your taste. A touch of vanilla extract boosts the flavor, while the sea salt helps balance the sweetness. If you want a fun texture, consider adding chia seeds or chopped nuts. These extras give your popsicles a nice crunch. Ensure you have everything ready before moving to the next steps. Each ingredient plays a vital role in creating a refreshing treat that’s both delicious and visually appealing. Enjoy the process, and have fun experimenting! 1. Sift matcha powder to remove clumps. This helps make your popsicles smooth. If you skip this step, you might have lumps in your mix. 2. Combine all liquid ingredients in a bowl. This includes milk, coconut milk, honey or maple syrup, vanilla extract, and sea salt. Mixing them well ensures great flavor. 3. Whisk until smooth and lump-free. Use a whisk for best results. It takes only a minute or two. 1. Stir in optional texture ingredients. You can add chia seeds or chopped nuts here. These give your popsicles a nice crunch. 2. Pour the mixture into molds. Fill them up but leave a little room at the top. The liquid will expand as it freezes. 3. Insert popsicle sticks and freeze. Make sure the sticks are centered. Freeze for at least 4-6 hours or until solid. 1. Tips for easy unmolding. When ready, run warm water over the outside of the molds. This helps release the popsicles without breaking them. 2. Recommended freezing time. For best results, freeze your popsicles for at least 6 hours. The longer, the better! These steps will guide you to make refreshing Iced Matcha Latte Popsicles. For the Full Recipe, check the ingredients and instructions above. To make the best iced matcha latte popsicles, start with high-quality matcha powder. Look for a vibrant green color, which means it is fresh. Ceremonial grade matcha is great for this recipe. It has a smooth taste that works well in popsicles. Next, adjust the sweetness to fit your taste. You can use honey or maple syrup. Start with less and add more if needed. This way, your popsicles will not be too sweet. Remember, the flavor of matcha should shine through! Adding texture can make these popsicles even better. Consider stirring in chia seeds or chopped nuts. Chia seeds add a fun crunch, while nuts give a lovely bite. They help make every lick interesting. Think about how texture affects enjoyment. A smooth popsicle can be nice, but adding bits makes it exciting. It breaks up the creaminess and gives you a tasty surprise. When it's time to serve, make your popsicles look great! Try placing them on a rustic wooden board or a bright plate. You can sprinkle some matcha powder on top or add fresh mint leaves. Both add a nice touch. Pair these popsicles with other desserts or drinks. They go well with fruity sorbets or a cold brew coffee. Enjoying them together makes for a fun treat! For the full recipe, check out the section above. {{image_2}} If you want to skip dairy, many options exist. Almond milk is a great choice. It has a light flavor that pairs well with matcha. Oat milk is thicker and creamier. It enhances the popsicle's texture. Coconut milk is another fantastic option. It adds a rich, tropical taste. Plus, it helps keep the popsicles creamy. Coconut milk is rich in healthy fats. These fats help your body absorb vitamins. They also provide a nice, smooth mouthfeel. Using coconut milk can make your popsicles more filling. It’s a perfect way to enjoy a treat without dairy. Want to spice up your popsicles? Adding fruit puree is a fun way to do it! You can use berries, mango, or even pineapple. Just blend your fruit and mix it into the matcha base. This gives your popsicles a fruity twist. It’s refreshing on hot days! You can also try different sweeteners. Honey and maple syrup are common, but there are more. Agave syrup is a great choice for a light sweetness. Coconut sugar adds a unique flavor. Experiment with what you like best. This way, you can create a popsicle that suits your taste. Popsicles reflect trends and seasons. You might see seasonal flavors like pumpkin spice in fall. Or how about a peppermint matcha during winter? These seasonal twists keep things exciting! Matcha itself has global roots. It comes from Japan, where it is a key part of tea ceremonies. Pop culture now embraces matcha in many treats. From lattes to cakes, matcha is everywhere! By blending global flavors, you can create unique popsicles. Try adding spices like ginger or cardamom for a twist. The possibilities are endless! For the full recipe to create these delightful treats, be sure to check out the [Full Recipe]. To keep your Iced Matcha Latte Popsicles fresh, always store them in the freezer. Wrap each popsicle in plastic wrap. This helps prevent freezer burn. You can also place them in an airtight container. This adds an extra layer of protection. If you have many popsicles, use a freezer-safe bag. Make sure to remove as much air as possible before sealing. The best temperature for freezing popsicles is 0°F (-18°C) or lower. This helps them freeze faster and stay solid. To avoid ice crystals, freeze your popsicles quickly. Pour the mixture into molds and freeze as soon as possible. Avoid opening the freezer door too often. Each time you open it, warm air enters and can affect the freezing process. These popsicles can last about 2 to 3 months in the freezer. However, for the best taste, enjoy them within a month. Signs of spoilage include off smells, discoloration, or ice crystals on the surface. If you notice any of these, it's best to toss them. Enjoy your popsicles while they're fresh for the best flavor and texture. The best matcha powder for popsicles is ceremonial grade. This type is bright green and smooth. It offers a rich flavor and vibrant color. Look for brands that are organic and finely ground. Higher quality matcha gives your popsicles a nice taste. Yes, you can make these popsicles vegan. Just use non-dairy milk instead of regular milk. Coconut milk works great and adds creaminess. For sweetener, use maple syrup or agave nectar. Both are vegan-friendly and tasty. You need to freeze the popsicles for at least 4-6 hours. This ensures they freeze solid. If they are not fully frozen, they will be hard to unmold. For best results, leave them overnight. Yes, you can use other sweeteners. Agave nectar and coconut sugar are good options. You can also use stevia for a low-calorie choice. Adjust the amount based on your taste. Each sweetener may change the flavor slightly. Check the Full Recipe for more details. This blog post has walked you through making delicious matcha popsicles. We covered ingredients, preparation steps, and tips for the best flavor and texture. You can customize them with fun add-ins and flavors. Remember to store them properly to keep them fresh for longer. Enjoy making these treats at home! With simple steps, you'll impress friends and family. Dive in and explore these tasty popsicle variations whenever you crave something cool and refreshing.](https://easycookingbite.com/wp-content/uploads/2025/07/9b519993-1baf-4061-b845-5ee4d9f7be97.webp)
Iced Matcha Latte Popsicles Refreshing Cool Treat
Looking for a cool treat that is both refreshing and healthy? Iced Matcha Latte Popsicles are the answer! With just a few simple ingredients,…
My Latest Drinks

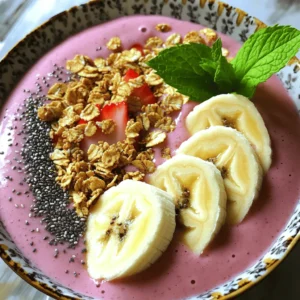
Strawberry Cheesecake Smoothie Creamy Refreshing Treat
Craving something delicious and cool? The Strawberry Cheesecake Smoothie is your answer! It blends creamy cheesecake flavors with sweet strawberries Read Full Recipe-
Mocktail Pink Punch Refreshing and Easy Recipe
Are you ready to impress your guests with a delightful drink? This Mocktail Pink Punch recipe is both refreshing and Read Full Recipe -
Blue Lagoon Tropical Lemonade Refreshing and Zesty Drink
Looking for a drink that’s both refreshing and fun? Say hello to Blue Lagoon Tropical Lemonade! This colorful beverage packs Read Full Recipe -
Pumpkin Spice Coffee Creamer Flavorful Fall Treat
Are you ready to embrace the cozy vibes of autumn? In this blog post, I’ll guide you through making your Read Full Recipe -
Apple Cider Margarita Mocktail Refreshing Fall Drink
Fall is here, and that means it’s the perfect time for a cozy drink! The Apple Cider Margarita Mocktail offers Read Full Recipe -
Pumpkin Spice Latte Copycat Cozy and Comforting Recipe
Craving that warm, cozy feeling of fall? You can enjoy a delicious Pumpkin Spice Latte at home! In this article, Read Full Recipe


My Latest Dinners
-
White Bean Soup Simple and Hearty Delight
Looking for a warm and filling meal? Let me introduce you to white bean soup! This simple and hearty delight Read Full Recipe -
Garlic Herb Roasted Sweet Potatoes Flavorful Side Dish
Looking for a side dish that’s both tasty and easy to make? Garlic Herb Roasted Sweet Potatoes are the answer! Read Full Recipe -
One Pot Beef Taco Pasta Easy and Flavorful Meal
Looking for a quick and tasty meal? One Pot Beef Taco Pasta is the perfect dish! This recipe packs bold Read Full Recipe -
Garlic Chicken Zucchini Noodles Stir Fry Delight
Are you ready for a tasty twist on dinner? My Garlic Chicken Zucchini Noodles Stir Fry is a quick and Read Full Recipe -
Stuffed Italian Meatloaf Easy and Tasty Recipe
Are you ready to elevate your dinner game? This Stuffed Italian Meatloaf is both easy and tasty! In this article, Read Full Recipe -
One Pot French Onion Pasta Flavorful Comfort Dish
Looking for a cozy dinner that warms your soul? Try my One Pot French Onion Pasta! This creamy, rich dish Read Full Recipe


hey,
i’m !
I’m so happy you’re here!
Every dish I share is made with love and care. I hope they bring you the same comfort and joy they bring me. Let’s make memories, one recipe at a time.

![To make a delicious roasted garlic hummus, gather these key ingredients: - 1 cup dried chickpeas or 2 cans (15 oz) of chickpeas, drained and rinsed - 1 whole bulb of garlic - 1/4 cup tahini - 3 tablespoons lemon juice - 1/4 cup extra virgin olive oil, plus more for serving - 1 teaspoon ground cumin - 1/2 teaspoon smoked paprika - Salt to taste - Water (as needed for consistency) - Fresh parsley, for garnish These ingredients work together to create a rich and creamy dip. You can enhance your hummus with some fun garnishes. Try these options: - Extra virgin olive oil drizzle - Smoked paprika sprinkle - Pine nuts or walnuts - Fresh herbs like cilantro or mint These add a pop of color and flavor to your dish. Roasted garlic hummus is not only tasty but also healthy. Here’s a quick overview of its nutrition per serving (about 2 tablespoons): - Calories: 70 - Protein: 2 grams - Carbohydrates: 5 grams - Fat: 5 grams - Fiber: 1 gram This dip is packed with nutrients from chickpeas and healthy fats from olive oil. Enjoy your hummus with pride, knowing it's good for you! For the full recipe, check out the details above. Start by preheating your oven to 400°F (200°C). Take a whole bulb of garlic. Slice off the top to expose the cloves. Drizzle a bit of olive oil over it. Wrap the bulb in aluminum foil. Place it in the oven and roast for about 30 to 35 minutes. The garlic should become soft and caramelized. After roasting, let it cool a bit before you handle it. This step adds a rich flavor to your hummus. You can choose between dried or canned chickpeas. If you go with dried chickpeas, soak them overnight in plenty of water. The next day, drain them. Place the soaked chickpeas in a pot. Cover them with fresh water. Bring it to a boil, then simmer for about 1 to 1.5 hours until they are soft. If time is tight, use canned chickpeas. Just drain and rinse them before adding to your recipe. Both options work great in making hummus. Now it’s time to blend! In a food processor, add the roasted garlic cloves. Squeeze out the soft garlic from their skins. Then, add tahini, lemon juice, and ground cumin. Blend these together until smooth. Next, add the chickpeas to the food processor. Blend again, adding olive oil and water to reach a creamy texture. Taste your hummus and add salt and smoked paprika as you like. Blend once more for a smooth finish. For the full recipe, check the details above! To make your hummus creamy, blend it well. Start with a food processor. Add roasted garlic, tahini, and lemon juice. Blend until smooth. Then, add chickpeas. If it's too thick, add water, one tablespoon at a time. Blend again until it reaches your desired creaminess. Using canned chickpeas can also help with texture, as they are softer. You can boost the flavor of your hummus in many ways. Add a pinch of ground cumin for warmth. Smoked paprika gives a nice smoky touch. Don’t forget fresh herbs like parsley or cilantro for freshness. You can also add a dash of lemon zest to brighten the taste. Experiment with flavors like roasted red peppers or sun-dried tomatoes for a twist. Avoid over-blending; it can make your hummus too runny. Check your seasoning early. Salt can be added later, but taste as you go. If you use dried chickpeas, ensure they are cooked enough. Undercooked chickpeas can result in a grainy texture. Lastly, remember to store your hummus in an airtight container, so it stays fresh longer. For the full recipe, check out the instructions above. {{image_2}} You can spice up roasted garlic hummus easily. Add jalapeños or red pepper flakes. This gives heat and depth. Start with a pinch and taste as you go. If you love heat, add more! This variation pairs well with fresh veggies and chips. Adding herbs makes hummus vibrant and fresh. Try adding fresh basil, cilantro, or dill. Blend them in with the other ingredients. This adds flavor and color to your dish. Each herb brings a unique taste. Experiment with your favorites for a personal touch. Seasonal ingredients can take your hummus to the next level. In summer, add fresh tomatoes or roasted peppers. In fall, try pumpkin or butternut squash. These add sweetness and nutrition. Each season brings new tastes to explore. Get creative and let your palate guide you. Enjoy the adventure! To store your roasted garlic hummus, place it in an airtight container. Make sure to cover the surface with a little olive oil. This keeps the hummus fresh and prevents it from drying out. Store the container in your fridge. Homemade hummus lasts about five to seven days in the fridge. If you want to keep it longer, you can freeze it. Use a freezer-safe container and leave some space at the top. Hummus expands when frozen. It can last up to three months in the freezer. When you’re ready to eat your hummus, thaw it in the fridge overnight. If it seems thick, add a little water or olive oil to restore its creamy texture. Blend it again to mix well. This will refresh your hummus and keep it tasty. For more details on making this dip, check the Full Recipe. Making roasted garlic hummus vegan is easy! The main ingredients are already plant-based. Use dried chickpeas or canned ones. Ensure your tahini is pure and free from additives. For creaminess, you add olive oil and lemon juice. All these ingredients are vegan. Just follow the [Full Recipe] to enjoy a tasty dip. Hummus is not just tasty; it is healthy too! It is rich in protein and fiber. Chickpeas help with digestion and keep you full. Olive oil is heart-healthy and adds good fats. Garlic boosts your immune system and adds flavor. Overall, hummus is a great snack or meal addition. You can find roasted garlic hummus at many grocery stores. Look in the deli or refrigerated section. Some health stores also carry it. If you want a fresh option, try local markets. Many places sell homemade versions too. Roasted garlic hummus is a simple and tasty dish. You learned about key ingredients, cooking steps, and how to store it. I shared tips to make your hummus creamy and flavors pop. You can try fun variations, like spicy or herb-infused hummus. Remember, homemade is best! With this guide, you can create a delicious dip that impresses anyone. Enjoy making your hummus and sharing it with friends and family!](https://easycookingbite.com/wp-content/uploads/2025/07/d77fd610-eac1-4c82-baa7-f2b9c52eea4a-300x300.webp)

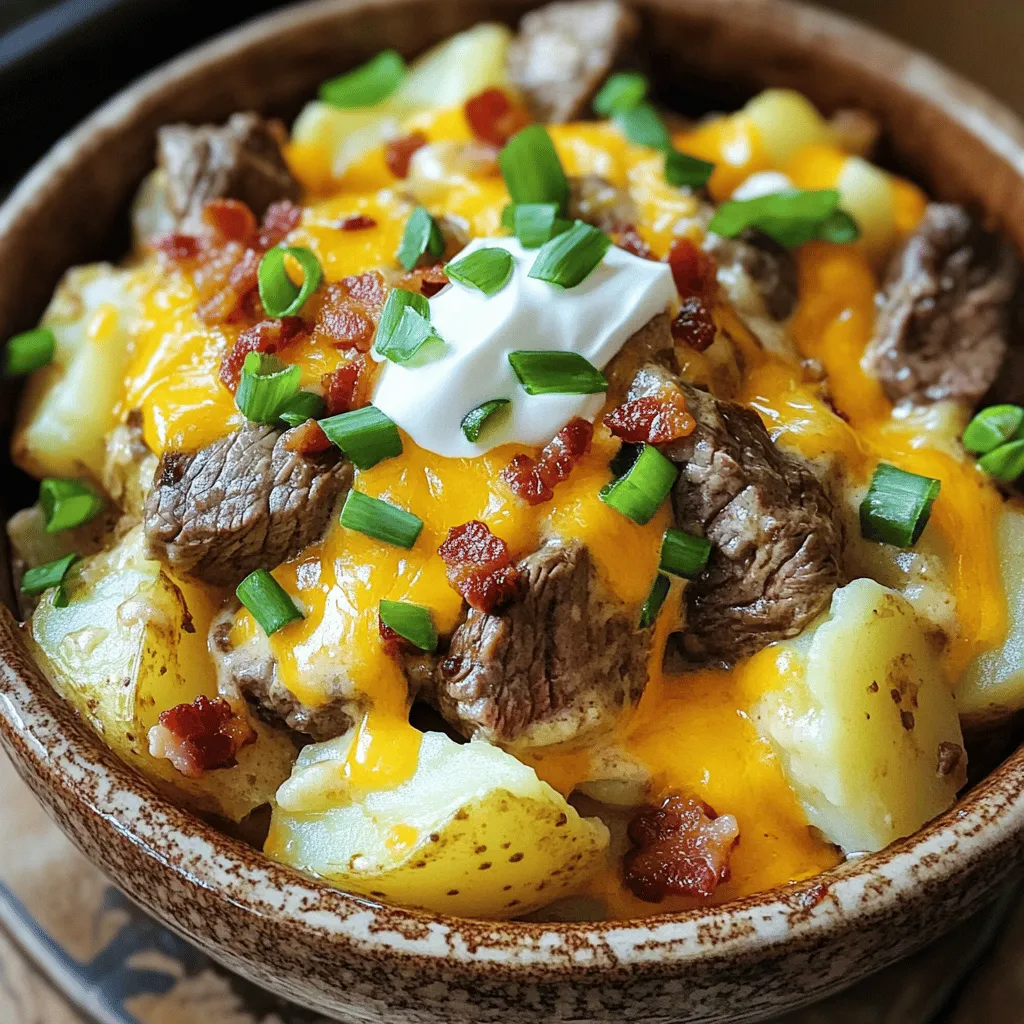
Crockpot Loaded Steak and Potato Bake Easy Comfort Dish
Are you craving a warm, comforting meal that practically cooks itself? Look no further! This Crockpot Loaded Steak and Potato Bake is packed with…