

Latest & Greatest
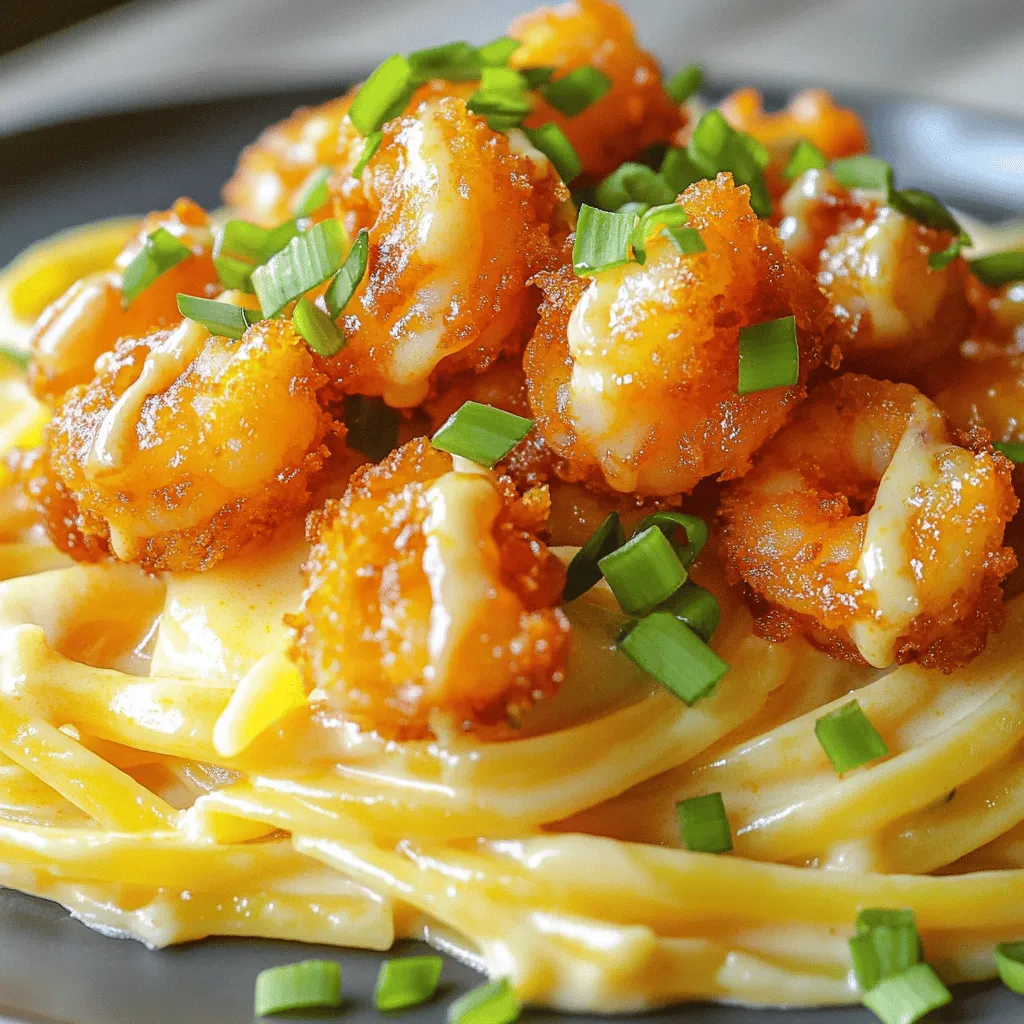
Bang Bang Shrimp Pasta Quick and Tasty Recipe
Craving a quick and tasty dinner? Look no further! This Bang Bang Shrimp Pasta recipe combines the perfect blend of
Read more…
Chorizo & Potato Egg Casserole Flavorful Comfort Dish
If you’re after a warm, filling dish that delights your taste buds, you’ve found it! The Chorizo & Potato Egg
Read more…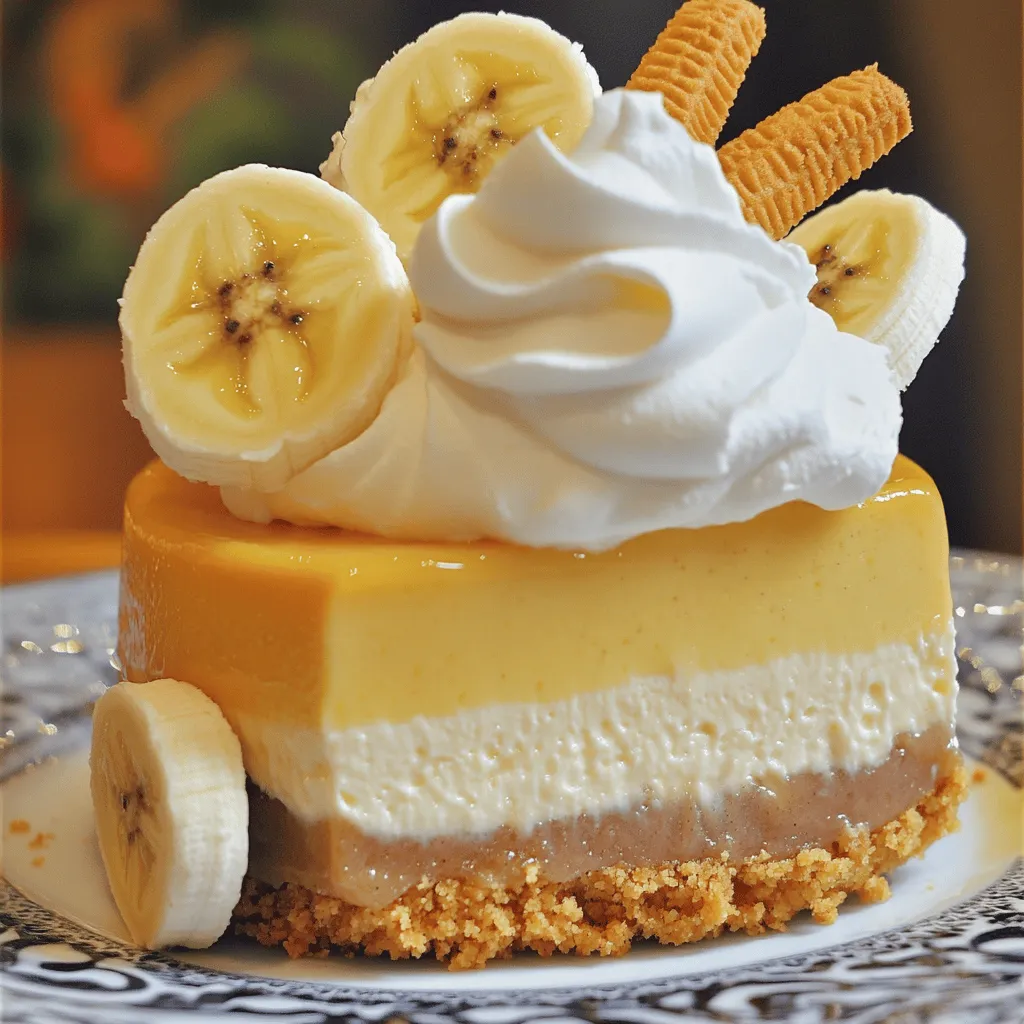
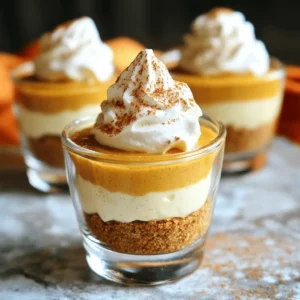
Banana Pudding Cheesecake Irresistible Dessert Recipe
Are you ready to indulge in a dessert that combines the best of two worlds? This Banana Pudding Cheesecake is
Read more…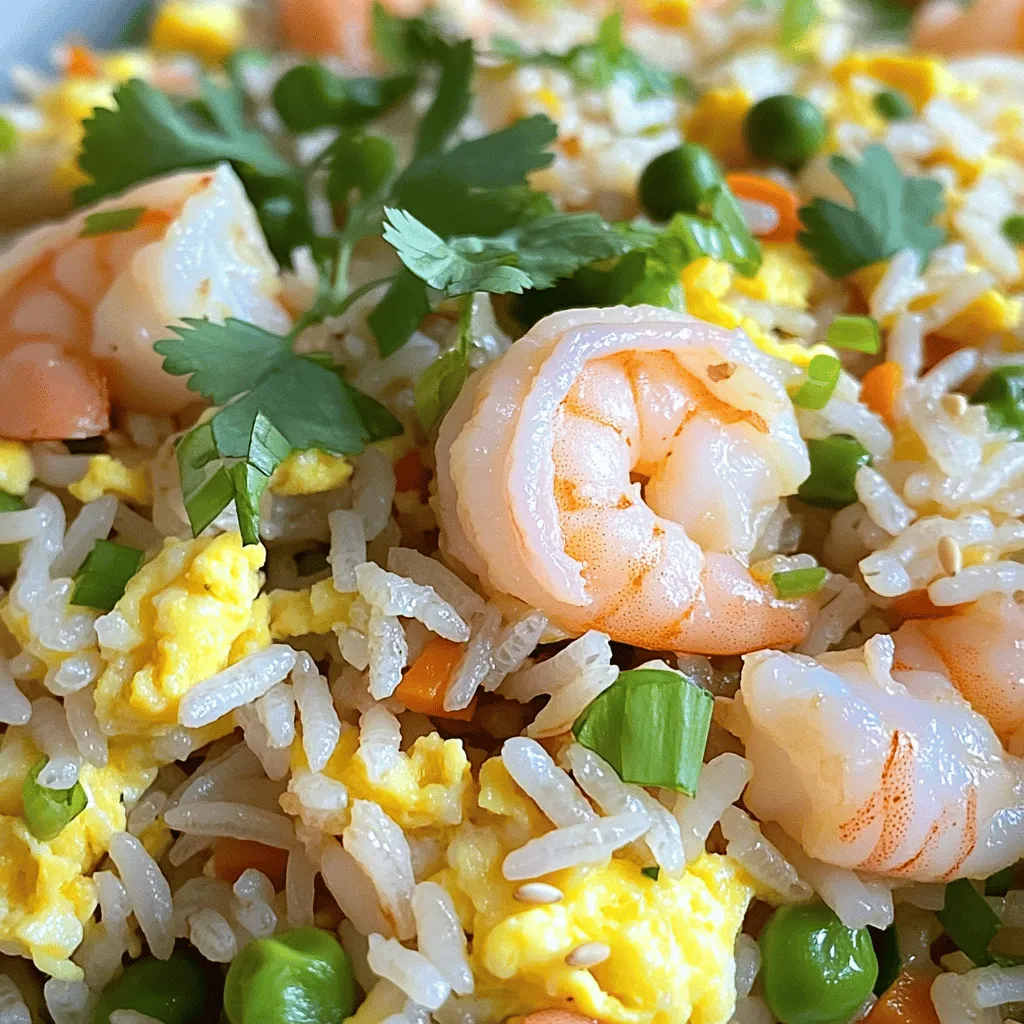
Chinese Style Shrimp Fried Rice Flavorful Dinner Dish
If you’re craving a quick and tasty dinner, you’ve come to the right place! Chinese Style Shrimp Fried Rice is
Read more…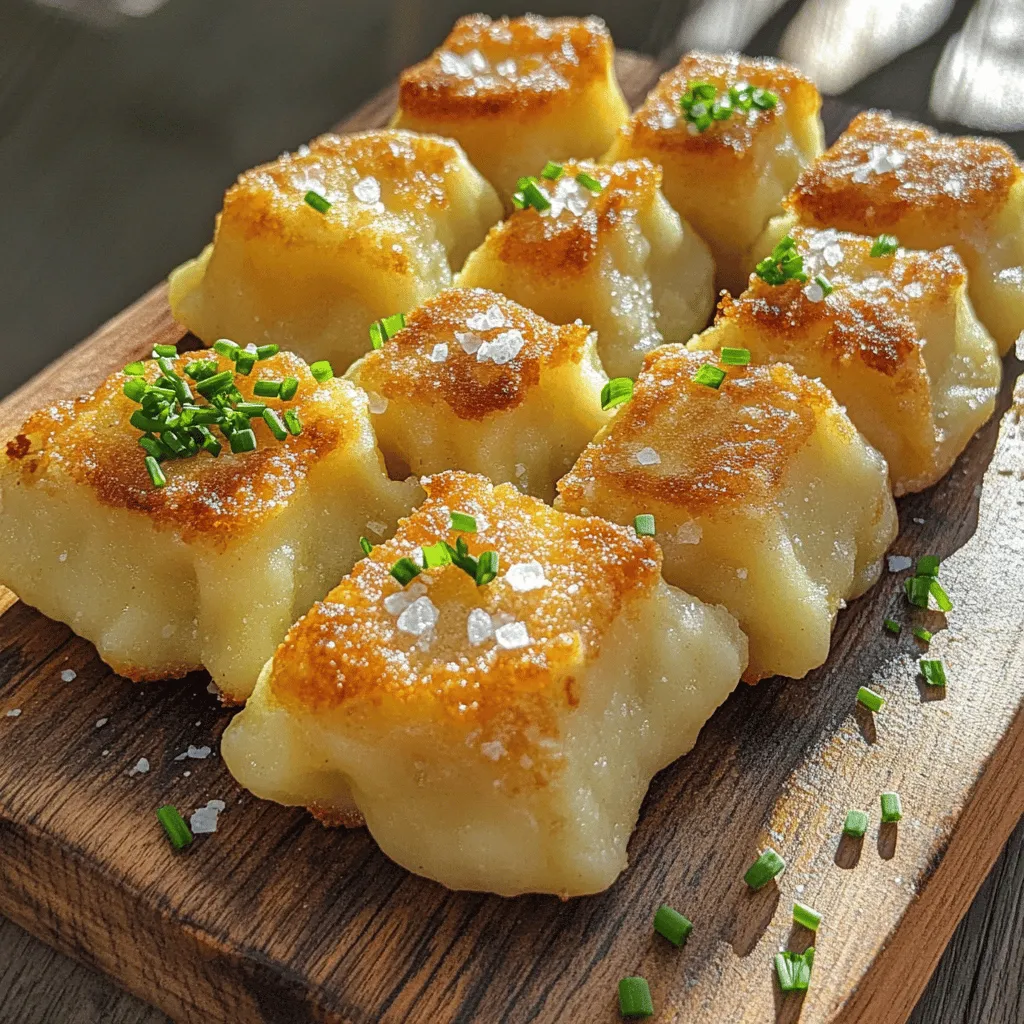
German Potato Dumplings Easy Recipe for Beginners
Are you ready to master a classic dish with ease? German potato dumplings are a warm and filling delight that
Read more…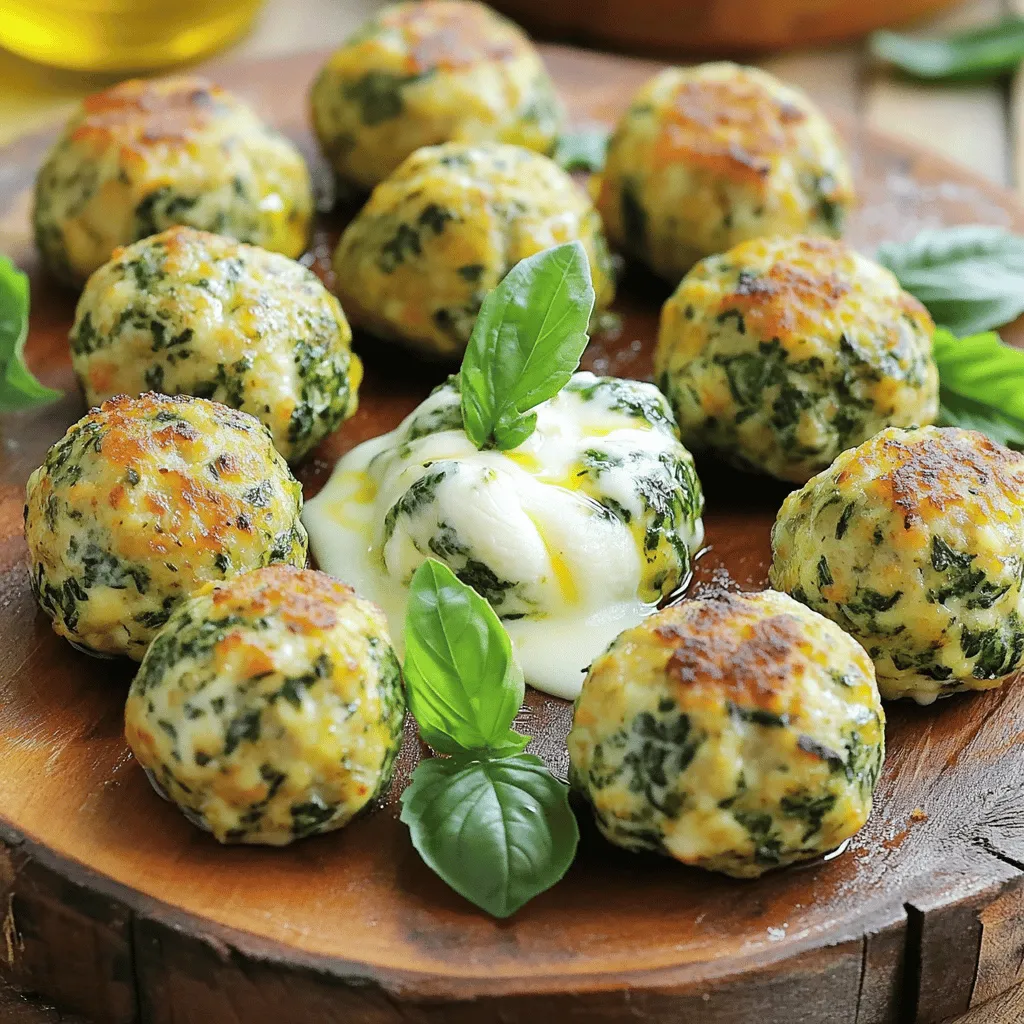
Spinach Garlic Mozzarella Meatballs Tasty and Simple
Are you ready to spice up your dinner routine? Discover my Spinach Garlic Mozzarella Meatballs, a simple and tasty way
Read more…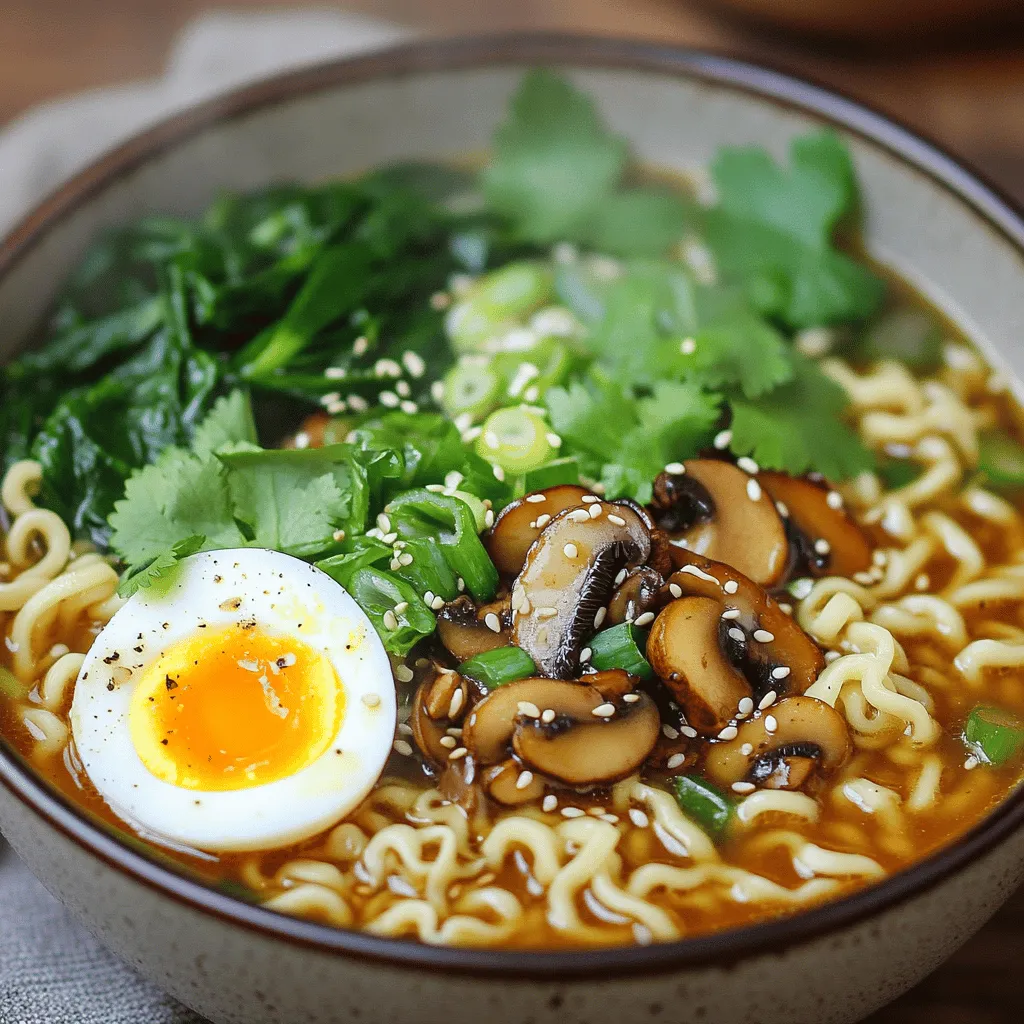
Asian Mushroom Ramen Noodles Flavorful and Simple Dish
Are you ready to dive into a bowl of comfort? Asian Mushroom Ramen Noodles offer you a tasty and simple
Read more…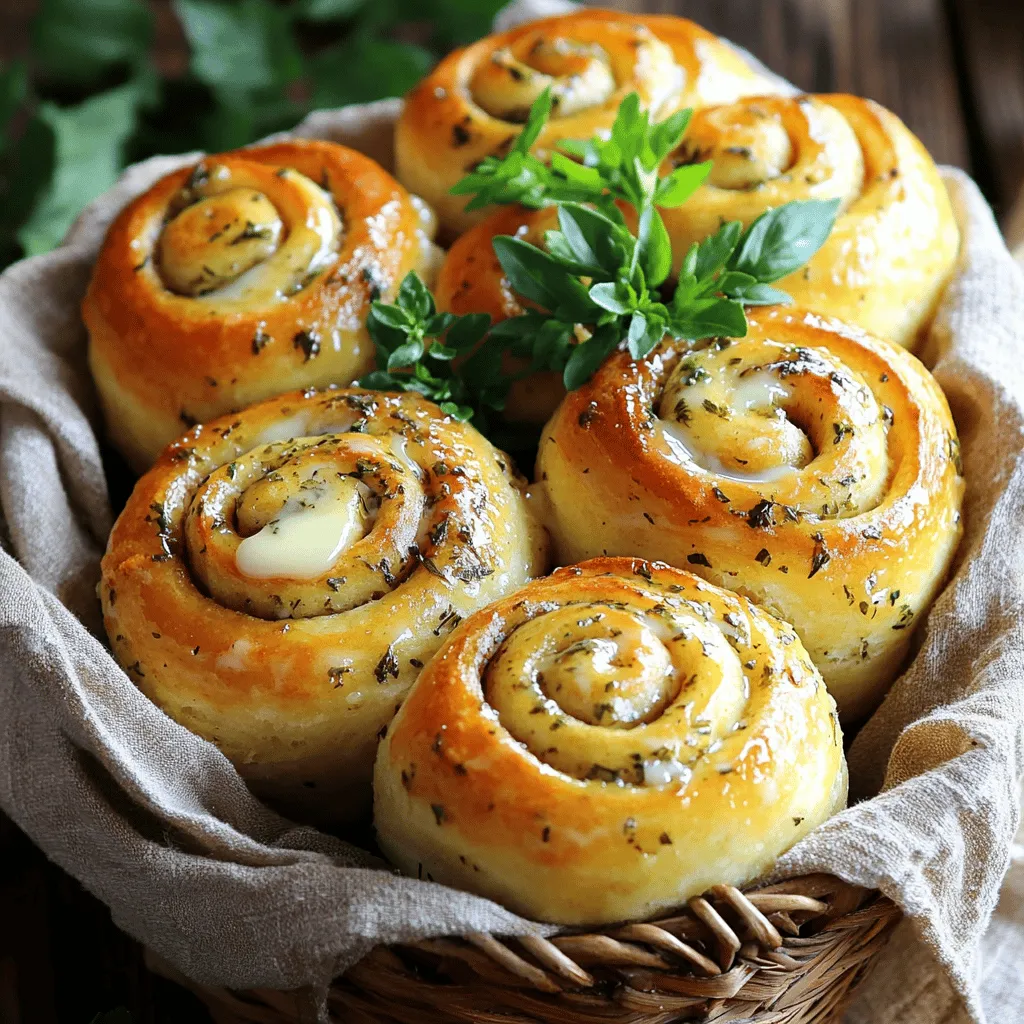
Herb & Garlic Swirl Rolls Fluffy and Flavorful Delight
Welcome to your new favorite recipe: Herb & Garlic Swirl Rolls! These rolls are light, fluffy, and packed with flavor.
Read more…browse recipes


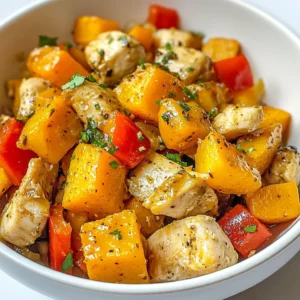
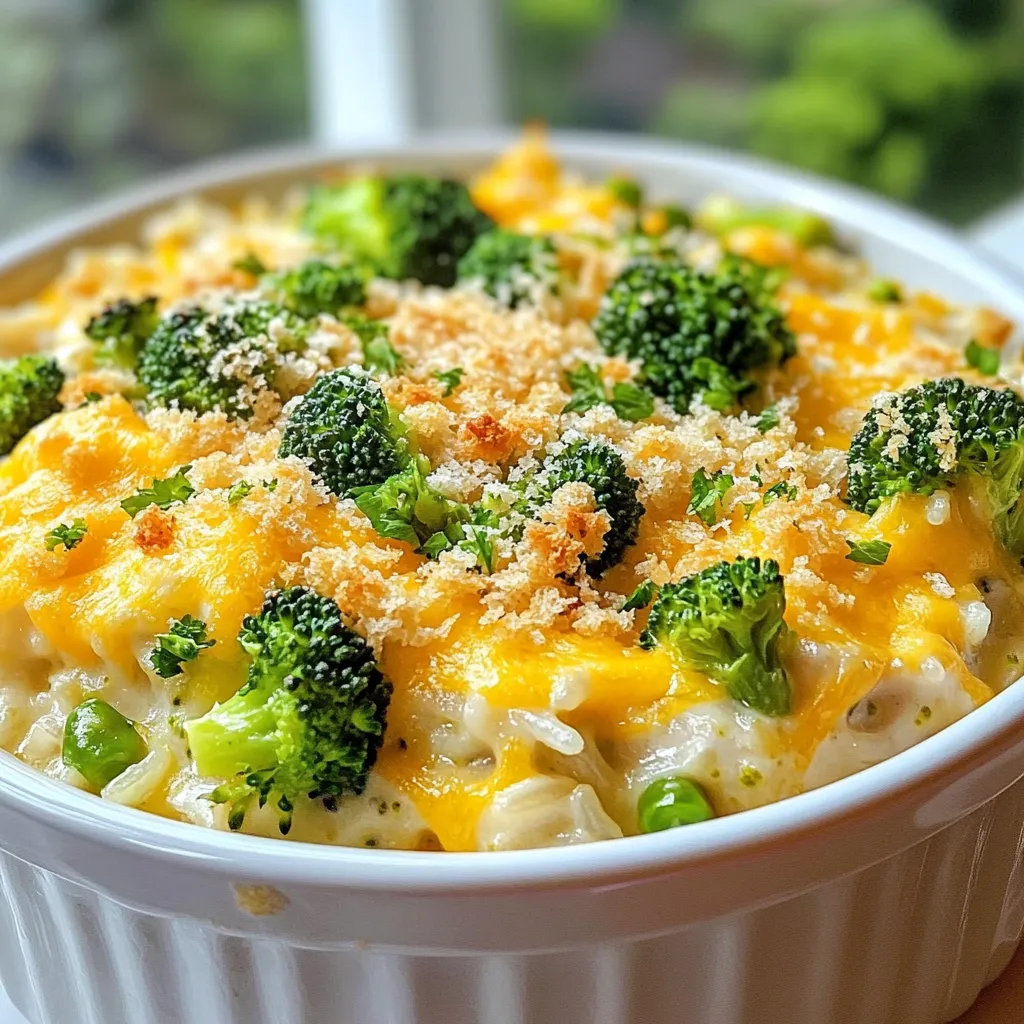
Cheesy Broccoli Chicken Rice Casserole Delight
If you’re craving a warm and hearty meal, this Cheesy Broccoli Chicken Rice Casserole is your answer! With tender chicken, fresh broccoli, and gooey…
My Latest Drinks

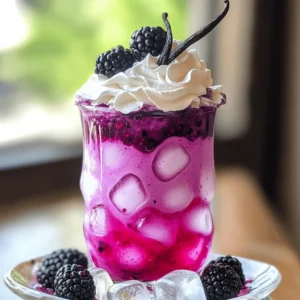
Strawberry Cheesecake Smoothie Creamy Refreshing Treat
Craving something delicious and cool? The Strawberry Cheesecake Smoothie is your answer! It blends creamy cheesecake flavors with sweet strawberries Read Full Recipe-
Mocktail Pink Punch Refreshing and Easy Recipe
Are you ready to impress your guests with a delightful drink? This Mocktail Pink Punch recipe is both refreshing and Read Full Recipe -
Blue Lagoon Tropical Lemonade Refreshing and Zesty Drink
Looking for a drink that’s both refreshing and fun? Say hello to Blue Lagoon Tropical Lemonade! This colorful beverage packs Read Full Recipe -
Pumpkin Spice Coffee Creamer Flavorful Fall Treat
Are you ready to embrace the cozy vibes of autumn? In this blog post, I’ll guide you through making your Read Full Recipe -
Apple Cider Margarita Mocktail Refreshing Fall Drink
Fall is here, and that means it’s the perfect time for a cozy drink! The Apple Cider Margarita Mocktail offers Read Full Recipe -
Pumpkin Spice Latte Copycat Cozy and Comforting Recipe
Craving that warm, cozy feeling of fall? You can enjoy a delicious Pumpkin Spice Latte at home! In this article, Read Full Recipe


My Latest Dinners
-
White Bean Soup Simple and Hearty Delight
Looking for a warm and filling meal? Let me introduce you to white bean soup! This simple and hearty delight Read Full Recipe -
Garlic Herb Roasted Sweet Potatoes Flavorful Side Dish
Looking for a side dish that’s both tasty and easy to make? Garlic Herb Roasted Sweet Potatoes are the answer! Read Full Recipe -
One Pot Beef Taco Pasta Easy and Flavorful Meal
Looking for a quick and tasty meal? One Pot Beef Taco Pasta is the perfect dish! This recipe packs bold Read Full Recipe -
Garlic Chicken Zucchini Noodles Stir Fry Delight
Are you ready for a tasty twist on dinner? My Garlic Chicken Zucchini Noodles Stir Fry is a quick and Read Full Recipe -
Stuffed Italian Meatloaf Easy and Tasty Recipe
Are you ready to elevate your dinner game? This Stuffed Italian Meatloaf is both easy and tasty! In this article, Read Full Recipe -
One Pot French Onion Pasta Flavorful Comfort Dish
Looking for a cozy dinner that warms your soul? Try my One Pot French Onion Pasta! This creamy, rich dish Read Full Recipe


hey,
i’m !
I’m so happy you’re here!
Every dish I share is made with love and care. I hope they bring you the same comfort and joy they bring me. Let’s make memories, one recipe at a time.
![- 2 medium sweet potatoes, peeled and diced - 1 can (15 oz) black beans, drained and rinsed - 1 tablespoon olive oil - 1 teaspoon ground cumin - 1 teaspoon smoked paprika - 1/2 teaspoon cayenne pepper (optional for heat) - Salt and pepper, to taste Sweet potatoes are the star. They bring a sweet taste and creamy texture to the dish. Black beans add protein and fiber, making these tacos filling. Use good spices to enhance the flavors. Cumin gives warmth, while smoked paprika adds depth. If you like spice, cayenne pepper adds a nice kick. Just adjust salt and pepper to your taste. - 8 small corn tortillas - Alternative Options Corn tortillas are my favorite. They are soft and perfect for these tacos. You can also try flour tortillas if you prefer. Some even use lettuce wraps for a lighter option. Choose what you love! - 1 avocado, sliced - Fresh cilantro, chopped, for garnish - Lime wedges, for serving Toppings make your tacos shine. Avocado adds creaminess and healthy fats. Fresh cilantro brings a burst of flavor. Lime wedges offer a zesty twist. Squeeze some lime on top right before you eat. It brightens up every bite! For the full recipe, check out the details above. - Preheating the Oven Set your oven to 400°F (200°C). This heat helps the sweet potatoes roast evenly. - Preparing the Sweet Potatoes Peel and dice 2 medium sweet potatoes. Put them in a bowl. Pour in 1 tablespoon of olive oil. Add 1 teaspoon of ground cumin, 1 teaspoon of smoked paprika, and 1/2 teaspoon of cayenne pepper if you like heat. Season with salt and pepper. Toss until every piece is coated. - Roasting Sweet Potatoes Spread the sweet potatoes on a baking sheet. Make sure they are in a single layer. Roast for 25-30 minutes. Turn them halfway through. They should be tender and a bit caramelized when done. - Warming Black Beans While the sweet potatoes roast, open a can of black beans. Drain and rinse them. Heat a small pot over medium heat. Add the beans with a splash of water. Season with salt and pepper. Warm them for 5-7 minutes until hot. - Toasting Corn Tortillas Take a dry skillet and set it over medium heat. Add your corn tortillas. Toast each one for about 30 seconds on each side. They should be warm and slightly charred. - Layering Ingredients Grab a tortilla. Add a generous spoonful of roasted sweet potatoes. Next, spoon on the warm black beans. Top with avocado slices and fresh cilantro. - Serving Suggestions Serve the tacos with lime wedges on the side. Squeezing lime adds a fresh kick to each bite. For the full recipe, check the previous section. Enjoy your meal! - Ensuring Even Roasting To get sweet potatoes just right, cut them into even pieces. This way, they cook at the same time. Toss them in olive oil and spices before spreading them out on a baking sheet. This helps them roast evenly without sticking. - Perfectly Warm Tortillas For warm tortillas, heat a skillet over medium heat. Place each tortilla in the skillet for about 30 seconds on each side. This makes them soft and tasty for your tacos. - Adding Heat with Spices If you like heat, add cayenne pepper to your sweet potatoes. This spice gives a nice kick. You can also mix in chili powder for more flavor. - Using Fresh Ingredients Fresh cilantro and ripe avocado make your tacos pop. Use fresh lime juice to brighten the flavors. These ingredients bring your tacos to life. - Pairing with Sides Serve your tacos with a side of rice or a fresh salad. This adds balance to the meal and makes it more filling. - Accompanying Dips Guacamole and salsa are great dips for these tacos. They add creaminess and extra flavor. You can even try a yogurt sauce for a cool twist. For the full recipe, check out [Full Recipe]. {{image_2}} You can switch up your proteins if you want. Here are some great options: - Lentils: They are hearty and packed with protein. - Chickpeas: These add a nice texture and flavor. - Tofu: A great option for extra protein and a different taste. For vegetables, feel free to get creative. You can try: - Zucchini: It adds moisture and a mild taste. - Bell peppers: They bring sweetness and crunch. - Spinach: It adds nutrients and a fresh twist. These tacos are vegan and gluten-free, making them a hit for many diets. Use corn tortillas to keep it gluten-free. If you want to make it low-carb, try lettuce wraps instead of tortillas. This keeps the great taste while cutting carbs. Adding salsa or hot sauce can really boost the flavor. I love a fresh tomato salsa for a bright taste. Hot sauce adds heat; just use it to your liking. Experimenting with herbs can also change the game. Try adding: - Cilantro: It adds freshness. - Oregano: This gives a nice earthy flavor. - Basil: It adds sweetness and a unique twist. These variations let you enjoy Sweet Potato Black Bean Tacos in new and exciting ways. Check out the Full Recipe for the base that you can customize! To store leftover sweet potato black bean tacos, follow these steps: - Refrigerator Storage Tips Place the tacos in an airtight container. This keeps them fresh. Store them in the fridge for up to three days. If you have the filling separate, store it in a different container. This helps maintain the tortilla's texture. - Freezing Instructions If you want to keep these tacos longer, freeze the filling. Place it in a freezer-safe bag. Remove as much air as possible. This way, it'll last for about three months. When ready to eat, thaw it in the fridge overnight. To enjoy your tacos again, here are the best methods: - Best Methods for Reheating For the filling, heat it in a pot over medium heat. Stir occasionally until warm. For the tortillas, warm them in a dry skillet for about 30 seconds on each side. This keeps them soft and tasty. Knowing how long your tacos last is key: - How Long They Last In the fridge, they last for about three days. If frozen, the filling is good for three months. Always check for any off smell or color before eating. Fresh food is always best! Can I make these tacos ahead of time? Yes, you can make these tacos ahead. Roast the sweet potatoes and warm the black beans. Store them in separate containers in the fridge. When ready to eat, simply warm them up and assemble the tacos. This method saves time on busy days. What can I use instead of sweet potatoes? If you don’t have sweet potatoes, try regular potatoes or butternut squash. Both options work well. They will change the flavor slightly but still taste great. Caloric Content and Nutritional Breakdown Each serving of these tacos has around 350 calories. You get healthy fiber from the black beans and sweet potatoes. This dish provides protein, vitamins, and minerals. Sweet potatoes are rich in Vitamin A, while black beans add iron and magnesium. What to serve with Sweet Potato Black Bean Tacos? These tacos pair well with a fresh salad or roasted veggies. You could also serve them with rice or quinoa for extra texture. If you like a kick, add salsa or hot sauce on the side. Enjoy your meal with a refreshing drink, like iced tea or lemonade. For the full recipe, check out the Sweet Potato Black Bean Tacos section above. To wrap up, we explored the joy of making Sweet Potato Black Bean Tacos. We covered key ingredients like sweet potatoes and black beans, plus tasty toppings. I shared step-by-step cooking instructions and valuable tips to enhance your dish. Don't forget the variations to suit your diet! Storing leftovers is easy, so enjoy them later. Remember, simplicity and fresh flavors make these tacos a favorite. Now, get cooking and enjoy your delicious tacos with friends and family!](https://easycookingbite.com/wp-content/uploads/2025/07/a2ee9693-28f2-4c53-99b9-9ee6cd167243-300x300.webp)


Orange Glazed Carrots Simple and Delicious Recipe
Are you ready to transform ordinary carrots into a sweet, tangy delight? This simple Orange Glazed Carrots recipe elevates baby carrots with bright flavors.…
![- 1 lb baby carrots - 1/2 cup freshly squeezed orange juice - 2 tablespoons honey or maple syrup - 2 tablespoons unsalted butter or coconut oil For the best orange glazed carrots, you need fresh and bright ingredients. I love using baby carrots because they are sweet and tender. If you can't find them, regular carrots work, too. Just peel and cut them into sticks. Fresh orange juice gives a bright flavor that pairs so well with the carrots. You can use honey or maple syrup for sweetness. The butter or coconut oil adds a rich flavor and helps the glaze stick. - 1 teaspoon orange zest - 1/2 teaspoon ground cinnamon - Salt and pepper to taste Adding orange zest brings out the citrus flavor, making the dish pop. A little ground cinnamon adds warmth and depth. Don't forget to season with salt and pepper to balance the sweetness and enhance the taste. - Fresh parsley or mint Garnishing with fresh herbs makes the dish look nice and adds a touch of freshness. You can use parsley for a mild flavor or mint for something a bit different. This adds color and makes your dish more appealing. For the full recipe, check out the details above! Start by washing your carrots. If you use baby carrots, they are ready to go. If you pick regular carrots, peel them first. Cut them into sticks that are 2-3 inches long. This size helps them cook evenly. Baby carrots stay sweet and tender, while regular carrots give a great crunch. Both options are tasty, so choose what you like best. Next, let’s get cooking! In a medium saucepan, melt the butter or coconut oil over medium heat. This will add rich flavor to our dish. Once melted, add the carrots to the pan. Sauté them for about 5 minutes. You want them to become slightly tender but not mushy yet. Now, pour in the freshly squeezed orange juice and honey or maple syrup. Mix it well to coat all the carrots. Add the orange zest and ground cinnamon. These ingredients will create a lovely glaze. Finally, season with salt and pepper to taste. Allow the mixture to simmer for 10-15 minutes. Stir occasionally to keep the glaze from sticking. You want the carrots to become tender and the glaze to thicken. Once cooked, remove the pan from heat. Transfer the carrots to a serving dish. For a pop of color, garnish with fresh parsley or mint. This step makes your dish look even better! For the full recipe, check out the complete guide above. To get the right glaze, aim for a syrupy texture. You want it to coat the carrots, not drown them. If your glaze is too runny, let it simmer longer to thicken. Adding more orange juice can help, but it may need extra time to cook down. For sweetness, adjust honey or maple syrup to your taste. Start with the amounts in the recipe and add more if you like. You can boost flavor with spices and herbs. Try adding a pinch of nutmeg or a dash of ginger for warmth. Fresh herbs like thyme or rosemary can also add depth. For extra zing, squeeze in more orange juice or add lemon juice. This will help balance sweetness with a bright acidity. Roasting is a great alternative to sautéing. It gives a nice caramelization to the carrots. Just toss them in oil, salt, and pepper before roasting. Use a different variety of carrots, like rainbow or purple ones, for a colorful twist. Each variety adds its own unique taste and texture. Enjoy experimenting with different methods and flavors. For the full recipe, check the earlier section. {{image_2}} You can switch up sweeteners to fit your taste. Brown sugar adds a rich flavor. Agave syrup is a great substitute too. For a fruitier touch, try using apple or pineapple juice. These options will change the taste while keeping it sweet. Spice things up by adding ginger or nutmeg. They give warmth and depth. If you want a savory twist, add a bit of minced garlic. This will balance the sweetness of the glaze. Experimenting with these flavors can lead to new favorites. If you want a vegan dish, swap butter for coconut oil. Use maple syrup instead of honey to keep it plant-based. This recipe is also gluten-free. All the ingredients are naturally gluten-free, making it a great choice for everyone. To keep your orange glazed carrots fresh, use airtight containers. Glass or plastic containers work well. Let the carrots cool before sealing. This helps avoid steam build-up, which can lead to sogginess. You can reheat your carrots in the oven or microwave. For the oven, place them in a baking dish. Heat at 350°F until warm, about 10 minutes. This method keeps the glaze thick. If using a microwave, place carrots in a bowl. Heat for 1-2 minutes, stirring halfway. It’s quick, but may make them a bit softer. To freeze, let the carrots cool completely. Pack them in freezer bags, removing as much air as possible. Label the bags with the date. When ready to eat, thaw overnight in the fridge. Reheat using the oven or microwave to restore their flavor. Yes, you can use frozen carrots. They are easy and quick to use. However, fresh carrots taste better. Fresh carrots have a nice crunch and bright flavor. Frozen carrots can be softer and lose some taste. If you use frozen, thaw them first. Then, cook them just like fresh carrots. The orange glaze will still be tasty. Orange glazed carrots pair well with many main dishes. Try serving them with roasted chicken or grilled fish. They also go great with pork chops or steak. The sweet flavor of the carrots balances well with savory meats. You can even enjoy them with a grain dish like quinoa or rice. They add color and flavor to any plate. If you find the glaze too sweet, there are simple ways to fix this. First, cut back on the honey or maple syrup. You can also add a splash of vinegar or lemon juice. This will add acidity and balance the sweetness. Another option is to add more salt. A pinch of salt can help tone down the sweet flavor. Taste as you go to find the right balance for you. Orange glazed carrots can last up to four days in the fridge. Make sure to store them in an airtight container. This helps keep them fresh and tasty. When you're ready to eat them, reheat gently. You can use the microwave or a pan on low heat. This keeps them tender and flavorful. For the full recipe, check here: [Full Recipe]. You learned how to make orange glazed carrots with simple ingredients. We covered prep and cooking steps to get tender, sweet carrots. I shared tips for perfect glazing and fun variations for everyone. Remember, cooking should be enjoyable and easy. Feel free to adjust flavors to match your taste. With these tips, you can create a colorful and tasty side dish that impresses. Enjoy your cooking journey!](https://easycookingbite.com/wp-content/uploads/2025/05/db6a3c3c-f35b-4f3a-82e0-0fb04fd78de6.webp)
