


Latest & Greatest

Cinnamon Roll Cake Soft and Flavorful Delight Recipe
Have you ever craved a soft, warm cinnamon roll but wanted a quicker option? I’ve got just the treat for
Read more…
Garlic Butter Chicken Bites Savory and Simple Recipe
Are you ready for a dish that’s simple, savory, and packed with flavor? Garlic Butter Chicken Bites are a quick
Read more…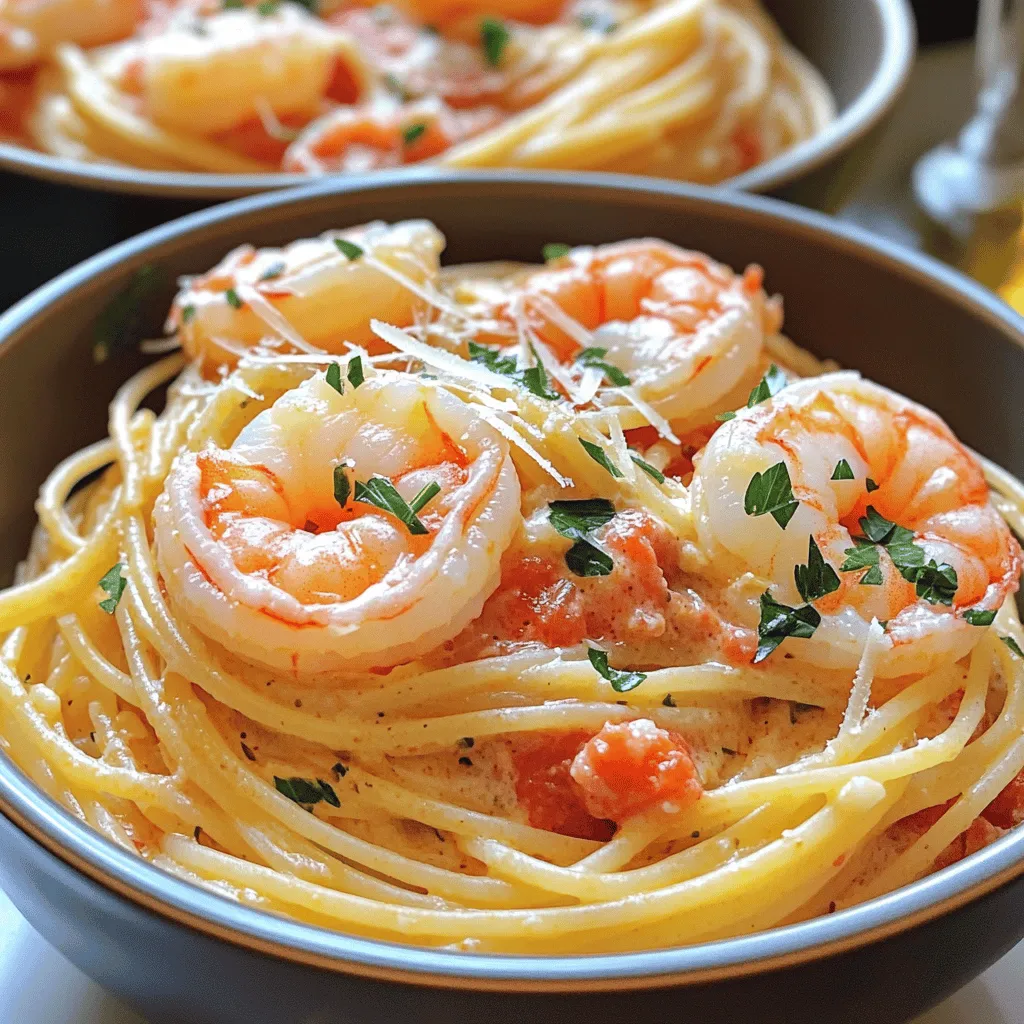
Spaghetti with Shrimp in Creamy Tomato Sauce Delight
Are you ready to elevate your pasta game? In this article, we dive into a delicious recipe for Spaghetti with
Read more…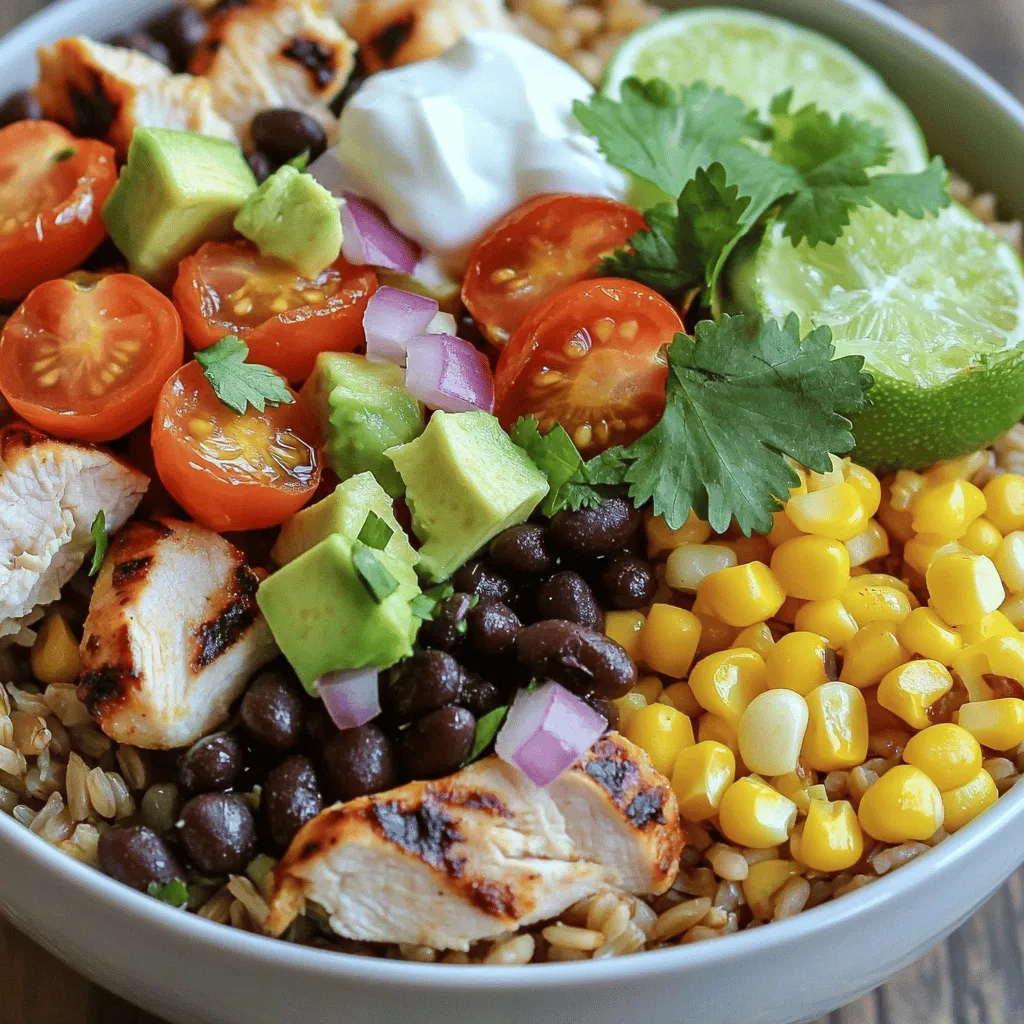
Chicken Burrito Bowl Flavorful and Simple Recipe
Are you ready to enjoy a delicious Chicken Burrito Bowl that’s packed with flavor and super easy to make? In
Read more…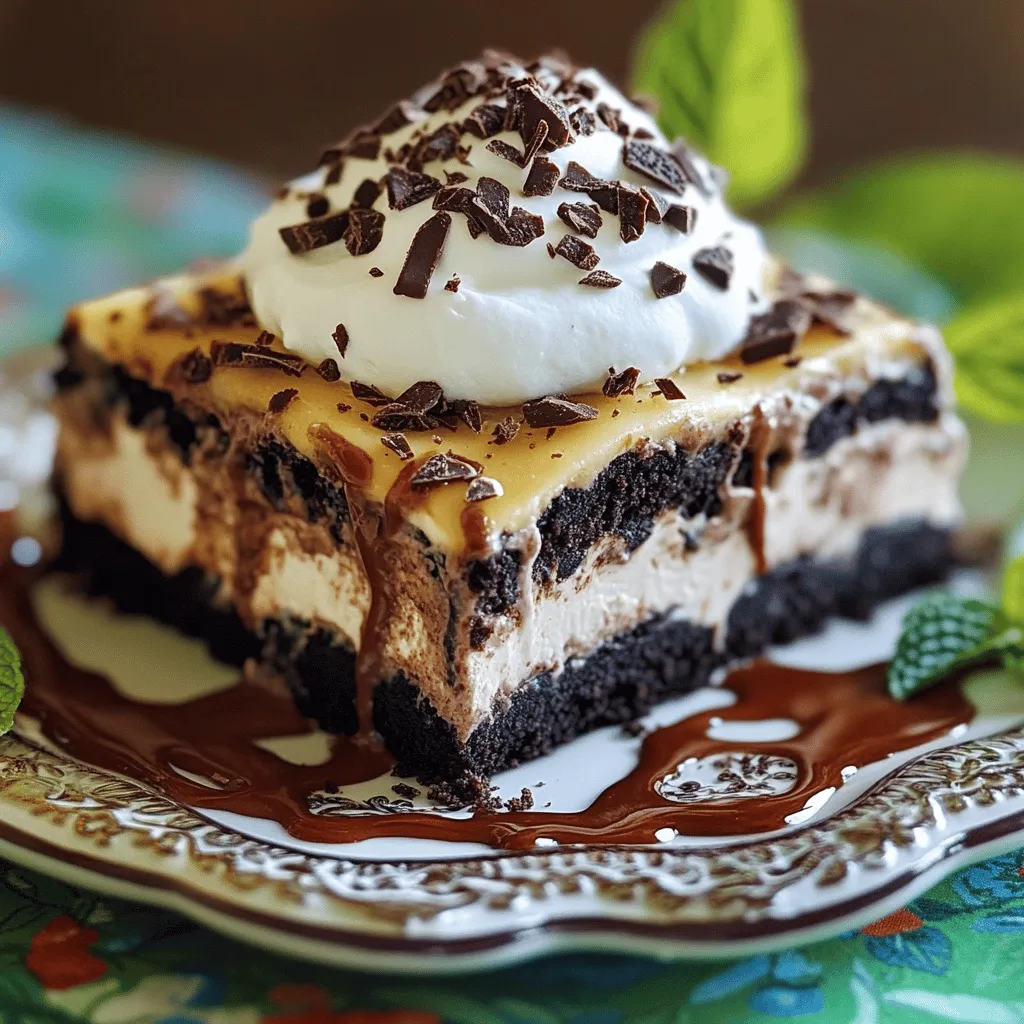
Chocolate Lasagna Delightful Dessert for Everyone
Are you ready to indulge in a sweet treat that dazzles every palate? Chocolate lasagna is a layered dessert that
Read more…
Soft and Chewy Snickerdoodle Cookies Dessert Delight
Are you ready to bake the most irresistible Soft and Chewy Snickerdoodle Cookies? With their warm cinnamon flavor and perfect
Read more…
Street Corn Chicken Rice Bowl Flavorful and Filling Meal
Ready for a tasty meal? This Street Corn Chicken Rice Bowl packs tons of flavor and fills you up! With
Read more…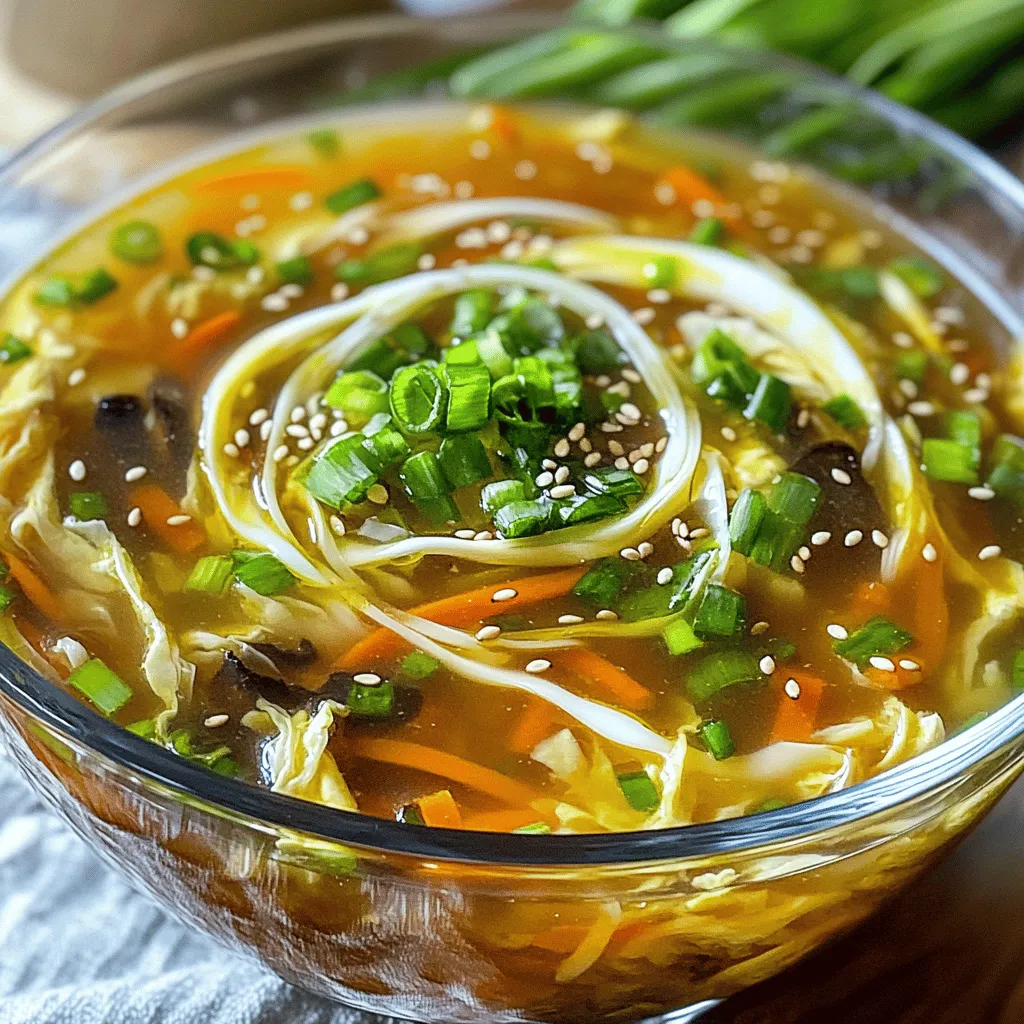
Egg Roll Soup Tasty and Simple Comfort Food Recipe
Welcome to the cozy world of Egg Roll Soup—your new go-to comfort food! With its warm broth and fresh veggies,
Read more…browse recipes


. You can use other grains if you don’t have quinoa. Here are some options: - Brown rice - Couscous - Barley - Farro These grains cook well and add texture. You can also use protein if you prefer. Some good choices include: - Cooked lentils - Chickpeas - Ground turkey - Shredded chicken Each substitute brings a unique flavor. Experiment with what you like best! You can tell zucchini boats are done by their look and feel. Here are some signs: - They should be slightly golden. - The edges may curl a bit. You can also test with a fork. Insert it into the zucchini. If it goes in easily, the boats are ready. If not, give them a few more minutes. Yes, you can prep zucchini boats ahead of time. Here are some tips: - Cut and scoop the zucchinis a day before. - Store them in the fridge in an airtight container. For the filling, mix all ingredients and store them separately. Here’s how to store: - Keep the filling in a sealed container. - It can last up to two days in the fridge. Just assemble and bake when ready! We explored a tasty zucchini boat recipe packed with healthy ingredients. You learned how to prepare, fill, and bake these delicious boats. Tips on flavors, presentation, and dietary options enhance your cooking. Storage advice ensures you enjoy leftovers safely. Embrace the variations and find what suits you best. Cooking should be fun, so get creative and enjoy every bite!](https://easycookingbite.com/wp-content/uploads/2025/06/20e3ded3-93c8-4928-aac6-21861bb3c6f9.webp)
Baked Zucchini Boats Flavorful and Easy Recipe Guide
Craving a fresh, healthy meal that’s easy to make? Baked Zucchini Boats are the answer! This flavorful recipe packs a punch with hearty ingredients…
My Latest Drinks

Strawberry Cheesecake Smoothie Creamy Refreshing Treat
Craving something delicious and cool? The Strawberry Cheesecake Smoothie is your answer! It blends creamy cheesecake flavors with sweet strawberries Read Full Recipe-
Mocktail Pink Punch Refreshing and Easy Recipe
Are you ready to impress your guests with a delightful drink? This Mocktail Pink Punch recipe is both refreshing and Read Full Recipe -
Blue Lagoon Tropical Lemonade Refreshing and Zesty Drink
Looking for a drink that’s both refreshing and fun? Say hello to Blue Lagoon Tropical Lemonade! This colorful beverage packs Read Full Recipe -
Pumpkin Spice Coffee Creamer Flavorful Fall Treat
Are you ready to embrace the cozy vibes of autumn? In this blog post, I’ll guide you through making your Read Full Recipe -
Apple Cider Margarita Mocktail Refreshing Fall Drink
Fall is here, and that means it’s the perfect time for a cozy drink! The Apple Cider Margarita Mocktail offers Read Full Recipe -
Pumpkin Spice Latte Copycat Cozy and Comforting Recipe
Craving that warm, cozy feeling of fall? You can enjoy a delicious Pumpkin Spice Latte at home! In this article, Read Full Recipe


My Latest Dinners
-
White Bean Soup Simple and Hearty Delight
Looking for a warm and filling meal? Let me introduce you to white bean soup! This simple and hearty delight Read Full Recipe -
Garlic Herb Roasted Sweet Potatoes Flavorful Side Dish
Looking for a side dish that’s both tasty and easy to make? Garlic Herb Roasted Sweet Potatoes are the answer! Read Full Recipe -
One Pot Beef Taco Pasta Easy and Flavorful Meal
Looking for a quick and tasty meal? One Pot Beef Taco Pasta is the perfect dish! This recipe packs bold Read Full Recipe -
Garlic Chicken Zucchini Noodles Stir Fry Delight
Are you ready for a tasty twist on dinner? My Garlic Chicken Zucchini Noodles Stir Fry is a quick and Read Full Recipe -
Stuffed Italian Meatloaf Easy and Tasty Recipe
Are you ready to elevate your dinner game? This Stuffed Italian Meatloaf is both easy and tasty! In this article, Read Full Recipe -
One Pot French Onion Pasta Flavorful Comfort Dish
Looking for a cozy dinner that warms your soul? Try my One Pot French Onion Pasta! This creamy, rich dish Read Full Recipe


hey,
i’m !
I’m so happy you’re here!
Every dish I share is made with love and care. I hope they bring you the same comfort and joy they bring me. Let’s make memories, one recipe at a time.
![- 2 cups almond flour - 1/4 cup coconut oil, melted (or unsalted butter) - 4 medium-ripe peaches, sliced The base of our galette comes from almond flour. It gives a nutty taste and a tender texture. You can use coconut oil or unsalted butter for the fat. I like coconut oil for its rich flavor. Fresh peaches are key for a juicy filling. Pick ripe peaches for the best taste. - 2 tablespoons brown sugar - 1 teaspoon cinnamon - 1/4 teaspoon vanilla extract Brown sugar adds sweetness and a slight caramel flavor. Cinnamon brings warmth and spice. A splash of vanilla extract rounds out the flavors beautifully. These three together create a delightful mix that enhances the peaches. - 1 tablespoon cornstarch for thickening - Additional almond flakes for topping - 1 egg, beaten (for egg wash) Cornstarch helps thicken the peach juices, making the filling less runny. Almond flakes on top give a nice crunch and extra nutty flavor. If you want a shiny crust, brush it with a beaten egg. This step makes the galette look golden and inviting. For the complete recipe, check out the [Full Recipe]. - Preheat the Oven: Start by preheating your oven to 375°F (190°C). This helps the galette cook evenly. - Line the Baking Sheet: Take a baking sheet and line it with parchment paper. This prevents sticking and makes cleanup easy. - Combine Dry Ingredients: In a mixing bowl, add 2 cups of almond flour and 1/4 teaspoon of salt. Mix them well. - Add Wet Ingredients: Next, pour in 1/4 cup of melted coconut oil, 2 tablespoons of maple syrup, and 1/4 teaspoon of vanilla extract. Mix until you have a smooth dough. - Shape the Crust: Place the dough between two sheets of parchment paper. Roll it out into a 12-inch circle, about 1/4 inch thick. Transfer this to your lined baking sheet. - Prepare the Peach Filling: In another bowl, take 4 sliced peaches. Toss them with 2 tablespoons of brown sugar, 1 teaspoon of cinnamon, and 1 tablespoon of cornstarch until they are well coated. - Fold and Assemble: Spoon the peach filling into the center of the rolled crust. Leave a 2-inch border around the edges. Fold the crust over the peaches, making pleats as you go to create a rustic look. Now you're ready to bake your Peach Galette with Almond Crust! For the full recipe, check the previous section. To get a great almond crust, use chilled coconut oil or butter. Cold fat makes the crust flaky. If your fat is warm, the crust may turn out dense. Mix your dough just enough to combine the ingredients. Overmixing can make your crust tough. Aim for a soft dough that holds together well. Choosing ripe peaches is key for the best flavor. Look for peaches that feel slightly soft and smell sweet. If fresh peaches are not available, you can use canned or frozen peaches. Just make sure to drain any excess liquid before adding them to your galette. This will keep the crust from getting soggy. Keep an eye on your baking time. Each oven is different, so start checking around 30 minutes. You want a golden crust and bubbling peaches. If the crust browns too fast, cover it with foil. Adjust your oven temperature if needed. If your galette browns too quickly, lower the heat slightly. This will help your galette bake evenly. {{image_2}} You can switch up the fruit for fun. Berries like blueberries or strawberries work great. They add a nice color and taste to the galette. Tropical fruits are awesome too! Think mangoes or pineapples for a sunny twist. Just remember to adjust the sugar based on the fruit's sweetness. If you need gluten-free options, almond flour is perfect. It makes a great base for the crust. For a vegan option, swap the egg wash for a plant-based milk. You can also replace the coconut oil with a vegan butter substitute. These changes keep the flavors rich and satisfying. Want to make your galette stand out? Try adding herbs like thyme or mint. They can add a fresh taste to the sweet peaches. You can also fold in nuts, like walnuts or pecans, into the filling for added crunch. This gives your galette an interesting texture and flavor. To keep your peach galette fresh, store it in the refrigerator. Place it in an airtight container or cover it with plastic wrap. This method keeps it safe from drying out. If you want to freeze it, slice the galette first. Wrap each slice in plastic wrap, then place them in a freezer bag. This way, you can enjoy a slice anytime. When you're ready to eat your galette, you can use the oven or microwave. For the oven, preheat it to 350°F (175°C). Place the galette on a baking sheet and heat for about 10-15 minutes. This method helps keep the crust crisp. If you choose the microwave, heat it for about 30 seconds to 1 minute. The crust may become a bit soft, so the oven is best for texture. In the fridge, your peach galette lasts about 3-4 days. After that, it may spoil. Look for signs like a change in color or an off smell. If the peaches look mushy or the crust is hard, it’s time to toss it. Enjoy your peach galette while it’s fresh for the best taste! For the full recipe, check out the detailed instructions above. The Peach Galette takes about 55 minutes to make. You will spend around 20 minutes prepping the ingredients. The baking time is about 30 to 35 minutes. This makes it a quick and easy dessert to enjoy. Yes, you can use frozen peaches for the galette. Just make sure to thaw them first. Drain any excess liquid to keep the crust from getting soggy. Frozen peaches may be softer than fresh ones, so adjust your baking time if needed. You can serve the Peach Galette with many tasty options. A scoop of vanilla ice cream adds a creamy touch. Whipped cream also works well for a light and fluffy addition. You could even drizzle some honey for extra sweetness! For a fun twist, try serving it with yogurt or a dollop of mascarpone cheese. Peach galette combines simple ingredients and steps to create a delicious dessert. Using fresh peaches, almond flour, and flavor enhancers like cinnamon elevates the dish. Remember to pick ripe peaches for the best taste. Store leftovers properly to keep them fresh. These tips ensure a perfect peach galette every time. Enjoy experimenting with different fruits and flavors. Your kitchen can be filled with tasty aromas and smiles. Make this dessert your own, and savor each bite.](https://easycookingbite.com/wp-content/uploads/2025/05/bb9b2aaf-3006-4f78-ab06-9f9fafd441c6-300x300.webp)

![To make a hearty Lentil Vegetable Soup, you'll need simple, fresh ingredients. These items come together to create a warm and comforting bowl of goodness. Here’s what you need: - Green or brown lentils (1 cup, rinsed) - Olive oil (1 tablespoon) - Medium onion (1, diced) - Garlic cloves (2, minced) - Carrots (3, diced) - Celery stalks (2, diced) - Red bell pepper (1, diced) - Zucchini (1, diced) - Canned diced tomatoes (1 can, 14 oz) - Vegetable broth (6 cups) - Dried thyme (1 teaspoon) - Cumin (1 teaspoon) - Bay leaf (1) - Salt and pepper (to taste) - Fresh parsley (for garnish) Each ingredient plays a key role. The lentils add protein and fiber. The vegetables bring color and flavor. Olive oil helps to sauté and enrich the taste. Canned tomatoes add a sweet and tangy touch. Broth brings depth to the soup. Fresh herbs like parsley not only make the dish pretty but also add a fresh taste. You can find all these ingredients easily at your local store. For the full recipe, check out the details on how to prepare this delicious dish. 1. Sautéing onions and garlic Start by heating the olive oil in a large pot over medium heat. When the oil is warm, add the diced onion. Cook it for about five minutes, stirring often. The onion should turn translucent. Then, add the minced garlic and stir for one more minute. This step adds a strong and tasty base to the soup. 2. Adding vegetables Next, toss in the diced carrots and celery. Sauté these for about five minutes. They will soften and blend well with the onion and garlic. After that, add the red bell pepper and zucchini. Cook for another three to four minutes. The goal is to make the vegetables tender but still crisp. 3. Incorporating lentils and liquids Now, it’s time for the star ingredient: lentils! Add the rinsed lentils to the pot along with the canned tomatoes and their juice. Pour in the vegetable broth, and stir in the dried thyme, cumin, bay leaf, salt, and pepper. Mix everything well to ensure all the flavors combine. 1. Bringing to a boil Turn up the heat and bring the mixture to a boil. This step will help all the flavors meld together. 2. Simmering the soup Once boiling, reduce the heat to low. Cover the pot and let it simmer for about 30 to 35 minutes. Stir occasionally. You want the lentils to be tender and the soup to thicken slightly. 3. Final seasoning adjustments After 30 minutes, taste the soup. You might want to add more salt or pepper. Remove the bay leaf before serving. This ensures a smooth and enjoyable texture. - Best ways to serve Lentil Vegetable Soup Serve the soup hot, straight from the pot. It pairs well with crusty bread or a simple salad. - Garnishing tips Sprinkle fresh parsley on top for a bright color and fresh flavor. You can also add a swirl of olive oil for richness. - Pairing options For a full meal, enjoy it with a slice of whole grain bread or a side of roasted veggies. This soup is comforting and healthy, making it a perfect choice for any day. To boost the flavor of your lentil vegetable soup, I recommend using spices and herbs like thyme, cumin, and bay leaves. These add depth to your dish. You can also try adding smoked paprika or a pinch of cayenne for a warm kick. Balancing seasoning is key. Always taste your soup as it cooks. A little salt or pepper can elevate the dish. Don't forget to finish with fresh herbs like parsley for a bright touch. Getting the perfect lentils is easy. Rinse them well before cooking. This removes dirt and helps them cook evenly. I suggest simmering the lentils just right. If you cook them too long, they may turn mushy. To keep your vegetables firm, add them at different times. Start with heartier veggies like carrots and celery. Add softer ones like zucchini and bell peppers later. This keeps them vibrant and tender. Simmering time is important. Let your soup cook gently for 30-35 minutes. This melds the flavors and allows the lentils to soften. Lentils are powerhouses of nutrition. They are high in protein and fiber. They also pack essential vitamins and minerals. Pair them with colorful vegetables for even more health benefits. This soup is vegan and gluten-free, making it a great choice for many diets. You can even serve smaller portions as a side dish. This way, you can enjoy it with other meals too. For the full recipe, check out the [Full Recipe]. {{image_2}} You can switch the lentils for different types. Red lentils cook faster and turn soft. French green lentils hold their shape better and add texture. For vegetables, use what is fresh and in season. In summer, try yellow squash or fresh peas. In winter, consider adding sweet potatoes or kale for warmth. If you want more protein, add cooked chicken, turkey, or sausage. You can also use beans like chickpeas or kidney beans. These options make the soup heartier. Want some heat? Add a pinch of red pepper flakes or diced jalapeños. This will give your soup a nice kick. You can also explore different cuisines. For an Italian twist, add basil and oregano. For Indian flavors, toss in curry powder and coconut milk. Each version brings a new taste experience. If you like a creamy soup, blend part of it until smooth. You can also stir in some cream or coconut cream for richness. For low-sodium options, use low-sodium broth. You can also skip added salt until the end. Taste it first to see if it needs more. To make it kid-friendly, use mild spices. You can add cheese on top as a fun touch. Kids may love it more with some bread on the side. For extra health benefits, you can include superfoods like spinach or chia seeds. They boost nutrition without changing the flavor much. To store leftover soup, let it cool first. Pour the soup into an airtight container. Make sure to leave some space at the top for expansion. Seal the container tightly and place it in the fridge. This way, you keep it fresh for up to five days. For proper cooling methods, divide large amounts into smaller containers. This helps the soup cool down faster. Remember, never leave hot soup out for more than two hours. For freezing soup, use freezer-safe containers or bags. Leave space for the soup to expand as it freezes. Label each container with the date. This helps you track how long it has been stored. When you want to eat the soup, thaw it in the fridge overnight. You can also use the microwave for quick thawing. When ready to eat, heat it on the stove. Stir occasionally to ensure even heating. This soup lasts about five days in the fridge. If you freeze it, it can last up to three months. Look for signs of spoilage to avoid eating bad soup. Foul smells, mold, or off colors mean it’s time to toss it. Always trust your senses; if it seems off, it probably is. For a delightful experience, follow the Full Recipe and enjoy your hearty lentil veggie delight! How long does it take to make Lentil Vegetable Soup? It takes about 45 minutes to make this soup. You spend 10 minutes prepping and 35 minutes cooking. This makes it a quick and tasty meal. Can I use dried herbs instead of fresh? Yes, you can use dried herbs. Use about one-third the amount. Dried herbs pack a strong flavor, so adjust to your taste. What can I add to make this soup heartier? You can add more vegetables like potatoes or sweet potatoes. Adding cooked grains, like rice or quinoa, also boosts heartiness. What do I do if my soup is too thick? If your soup is too thick, add more vegetable broth or water. Stir well and heat until warm. This will help get the right consistency. How to reduce the acidity of the soup? To reduce acidity, add a pinch of sugar. This helps balance the flavors. Stir well and taste again to adjust as needed. Tips for making the soup ahead of time You can make the soup a day ahead. Let it cool, then store it in the fridge. Reheat on the stove when ready to serve. Is Lentil Vegetable Soup gluten-free? Yes, Lentil Vegetable Soup is gluten-free. All the ingredients are gluten-free, making it safe for those with gluten sensitivities. What are the best types of lentils for soup? Green and brown lentils work best for soup. They hold their shape and add a nice texture. Red lentils can become mushy, so use them with care. Can I use frozen vegetables in this recipe? Yes, you can use frozen vegetables. They are a great time saver. Just add them during the cooking phase and adjust the cooking time as needed. For the complete cooking instructions, check out the Full Recipe. Lentil Vegetable Soup is a simple, healthy choice. We covered ingredients, step-by-step instructions, and tips to enhance flavor. You learned about variations and how to store leftovers properly. Embrace this recipe as a satisfying meal that you can tweak to your tastes. With practice, you’ll master it and impress others. Enjoy creating your own delicious bowl today!](https://easycookingbite.com/wp-content/uploads/2025/06/e64a3995-a7c6-41d2-83cb-922b6fd5a484-300x300.webp)
![- 2 ripe bananas, frozen - 2 tablespoons creamy or crunchy peanut butter - 1 cup almond milk (or any milk of your choice) - 1 tablespoon honey or maple syrup (to taste) - 1/4 cup Greek yogurt (optional for creaminess) - 1/2 teaspoon cinnamon (optional) - A pinch of sea salt To make a Peanut Butter Banana Smoothie, you need a few key ingredients. Frozen bananas are the star of this smoothie. They add creaminess and chill to your drink. If you don’t have frozen bananas, just slice fresh ones and freeze them for a couple of hours. Next, choose your peanut butter. You can use creamy or crunchy, depending on your taste. Both add a rich, nutty flavor. Finally, add almond milk or your choice of milk to blend everything together. You can also make it sweeter by adding honey or maple syrup. Greek yogurt gives it a nice thickness. If you want to spice it up, toss in some cinnamon and a pinch of sea salt. All of these ingredients together create a delicious drink. For the full recipe, check out the Peanut Butter Banana Bliss Smoothie. - Peel and slice bananas. - Freeze bananas for optimal texture. Start by peeling your ripe bananas. I like to slice them into small pieces. This helps them freeze faster. Place the banana slices in a single layer on a plate or tray. Then, pop them in the freezer for about two hours. Frozen bananas add creaminess to the smoothie and make it taste amazing. - Combine all ingredients in the blender. - Tips for achieving a smooth consistency. Once your bananas are frozen, grab your blender. Add the frozen banana slices, peanut butter, and almond milk. I also like adding honey or maple syrup for sweetness. If you want a richer taste, add Greek yogurt. For extra flavor, a splash of vanilla extract and a pinch of sea salt work wonders. Blend everything on high until smooth. If the mix is too thick, add more almond milk slowly until you reach your desired texture. - Adjust sweetness if necessary. - Pour and serve immediately. After blending, taste your smoothie. If you want it sweeter, add a little more honey or maple syrup. Pour the smoothie into glasses and enjoy it right away. The flavors are best when it’s fresh! For the best peanut butter, I recommend using natural varieties. Look for options with just peanuts and salt. These types have rich flavor and smooth texture. You can choose creamy or crunchy based on your preference. If you want alternatives to almond milk, try oat milk or coconut milk. Both add great taste and creaminess. To achieve a creamy texture, use frozen bananas. They make the smoothie thick and smooth. Blend on high until everything is mixed well. If you see lumps, keep blending. You can also add more almond milk if the mix is too thick. A little at a time helps perfect the consistency. For an ideal presentation, use tall glasses. This showcases the beautiful color of your smoothie. You can garnish with a sprinkle of cinnamon or a few banana slices on top. This adds a nice touch and makes the drink more inviting. Enjoy your Peanut Butter Banana Bliss Smoothie right away for the best taste! {{image_2}} You can boost flavor in your peanut butter banana smoothie in fun ways. Try adding chocolate or cocoa powder for a rich taste. Just one tablespoon can transform your drink into a chocolate delight. If you want greens, spinach is a great choice. It blends well and adds nutrients without changing the flavor. A handful of fresh spinach gives you a healthy twist. If you're vegan, you can swap regular yogurt for a plant-based one. Almond milk works well here too. You can also use maple syrup instead of honey for sweetness. For those allergic to nuts, try using sunflower seed butter. It gives a similar flavor and is nut-free. Oat milk is another good choice for a creamy base. Want to make your smoothie more filling? You can add protein powder. Vanilla or chocolate flavors work best. Just a scoop can help you stay full longer. Other protein-rich ingredients include Greek yogurt or silken tofu. Both blend nicely and add creaminess to your smoothie. This way, your peanut butter banana smoothie becomes a great post-workout treat. For the complete recipe, check out the [Full Recipe]. To store leftover smoothie, pour it into a sealed jar. Make sure to leave some space at the top. This helps to prevent the smoothie from spilling as it expands. Keep it in the fridge for up to 24 hours. When ready to drink, shake the jar well. The smoothie might separate, but that’s normal. You can make smoothie packs for busy mornings. Just gather your ingredients and portion them into freezer bags. Include frozen bananas, peanut butter, and any extras you want. Label each bag with the date and contents. When you're ready to blend, just grab a pack. Add almond milk and blend while still frozen for a quick meal. A freshly made peanut butter banana smoothie is best enjoyed right away. However, if stored, it lasts about 24 hours in the fridge. If you freeze it, it can stay fresh for about one month. After that, the taste and texture might change. For the best flavor, enjoy it soon after making. Check out the Full Recipe for more details on making this delicious drink! You can use fresh bananas instead. Fresh bananas will work, but they will change the texture. To make it creamier, add some ice cubes. Just blend them with the other ingredients. You can also freeze fresh bananas ahead of time for later use. Peel and slice them first before freezing. Yes, you can easily make this smoothie dairy-free. Use almond milk, soy milk, or oat milk. These options taste great and keep the smoothie creamy. You can also try coconut milk for a tropical twist. Just pick your favorite non-dairy milk. To thicken your smoothie, add more frozen bananas or some Greek yogurt. You can also try adding a spoonful of oats. This will give your smoothie a nice, thick texture. If you want it creamier, use less milk when blending. Yes! This smoothie is great for meal prep. You can store it in the fridge for up to a day. Use a sealed jar to keep it fresh. If you want to freeze it, pour it into ice cube trays. You can blend the frozen cubes later for a quick treat. To lower the sugar, skip the honey or maple syrup. Use a sugar substitute like stevia or erythritol. You can also add a few drops of vanilla extract for extra flavor without the sugar. Be sure to taste as you go to find the right balance. This blog post covered how to make a tasty smoothie with simple ingredients. We discussed the main ingredients, like frozen bananas and peanut butter. I shared helpful steps for blending and serving, plus tips for choosing ingredients. You learned flavor variations and storage methods for your smoothies. Experiment and find what you love. Enjoy creating delicious smoothies that fit your tastes and needs!](https://easycookingbite.com/wp-content/uploads/2025/06/76736e51-e2ca-499c-ac70-b8434138c6f9-300x300.webp)
Chocolate Chip Banana Bread Cookies Delightful Treat
Are you ready to discover a sweet treat that combines banana bread and cookies? My Chocolate Chip Banana Bread Cookies are soft, chewy, and…