


Latest & Greatest

Slow Cooker French Dip Sandwiches Juicy and Flavorful
Are you ready to create a meal that will wow your family and friends? Slow Cooker French Dip Sandwiches are
Read more…
Cheeseburger Wrap Hack Flavorful and Simple Recipe
Are you craving a tasty, easy meal that’s packed with flavor? The Cheeseburger Wrap Hack is your new go-to recipe!
Read more…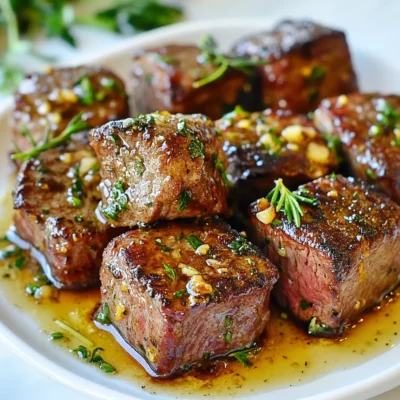
Garlic Butter Steak Bites Savory Quick Dinner Treat
If you’re craving a quick and tasty dinner, garlic butter steak bites are a game changer. These juicy steak pieces,
Read more…
High Protein Breakfast Bagels Easy and Delicious Option
Looking for a simple way to boost your morning protein? Try these High Protein Breakfast Bagels! Packed with egg whites
Read more…
Maple Chicken with Coconut Rice Flavorful Dish Guide
Looking for a tasty meal that combines sweet and savory? Try my Maple Chicken with Coconut Rice! This delightfully simple
Read more…
Polish Potato Soup Rich and Comforting Recipe Guide
Are you ready for a warm and hearty meal? Polish potato soup is the perfect dish for cozy nights. This
Read more…
Honey Garlic Turkey Meatballs Tasty and Simple Recipe
Craving a quick and tasty meal? You’re in the right place! This Honey Garlic Turkey Meatballs recipe is simple and
Read more…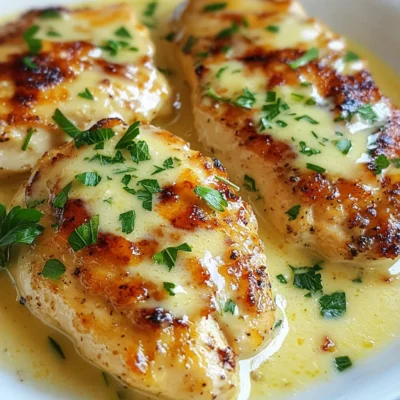
Creamy Asiago Chicken Perfectly Savory Dinner Delight
Looking for a quick, tasty dinner? You’ll love my Creamy Asiago Chicken! This dish offers tender chicken breasts drizzled with
Read more…browse recipes


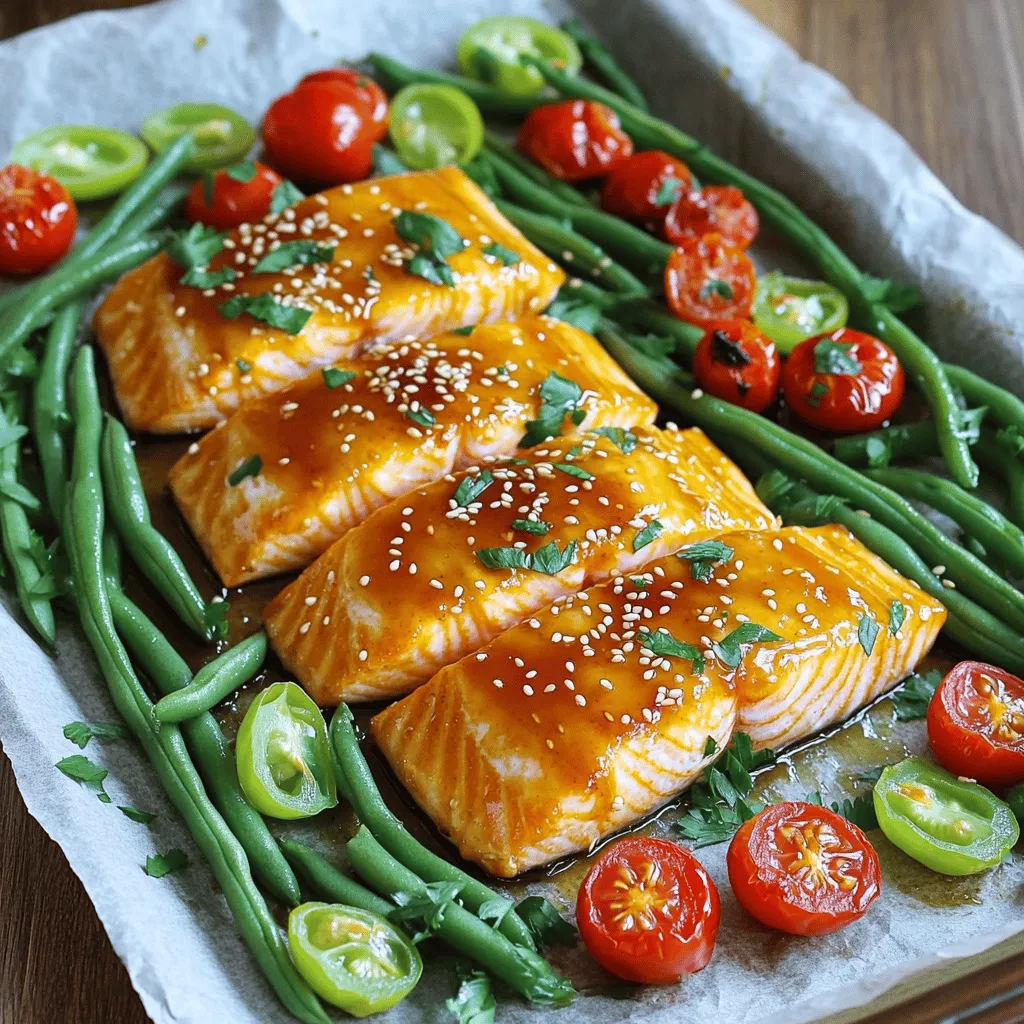
Sheet Pan Honey Garlic Salmon Easy and Flavorful Recipe
Looking for a quick, tasty dinner? Try my Sheet Pan Honey Garlic Salmon! This dish offers juicy salmon with a sweet garlic sauce, all…
My Latest Drinks

Strawberry Cheesecake Smoothie Creamy Refreshing Treat
Craving something delicious and cool? The Strawberry Cheesecake Smoothie is your answer! It blends creamy cheesecake flavors with sweet strawberries Read Full Recipe-
Mocktail Pink Punch Refreshing and Easy Recipe
Are you ready to impress your guests with a delightful drink? This Mocktail Pink Punch recipe is both refreshing and Read Full Recipe -
Blue Lagoon Tropical Lemonade Refreshing and Zesty Drink
Looking for a drink that’s both refreshing and fun? Say hello to Blue Lagoon Tropical Lemonade! This colorful beverage packs Read Full Recipe -
Pumpkin Spice Coffee Creamer Flavorful Fall Treat
Are you ready to embrace the cozy vibes of autumn? In this blog post, I’ll guide you through making your Read Full Recipe -
Apple Cider Margarita Mocktail Refreshing Fall Drink
Fall is here, and that means it’s the perfect time for a cozy drink! The Apple Cider Margarita Mocktail offers Read Full Recipe -
Pumpkin Spice Latte Copycat Cozy and Comforting Recipe
Craving that warm, cozy feeling of fall? You can enjoy a delicious Pumpkin Spice Latte at home! In this article, Read Full Recipe


My Latest Dinners
-
White Bean Soup Simple and Hearty Delight
Looking for a warm and filling meal? Let me introduce you to white bean soup! This simple and hearty delight Read Full Recipe -
Garlic Herb Roasted Sweet Potatoes Flavorful Side Dish
Looking for a side dish that’s both tasty and easy to make? Garlic Herb Roasted Sweet Potatoes are the answer! Read Full Recipe -
One Pot Beef Taco Pasta Easy and Flavorful Meal
Looking for a quick and tasty meal? One Pot Beef Taco Pasta is the perfect dish! This recipe packs bold Read Full Recipe -
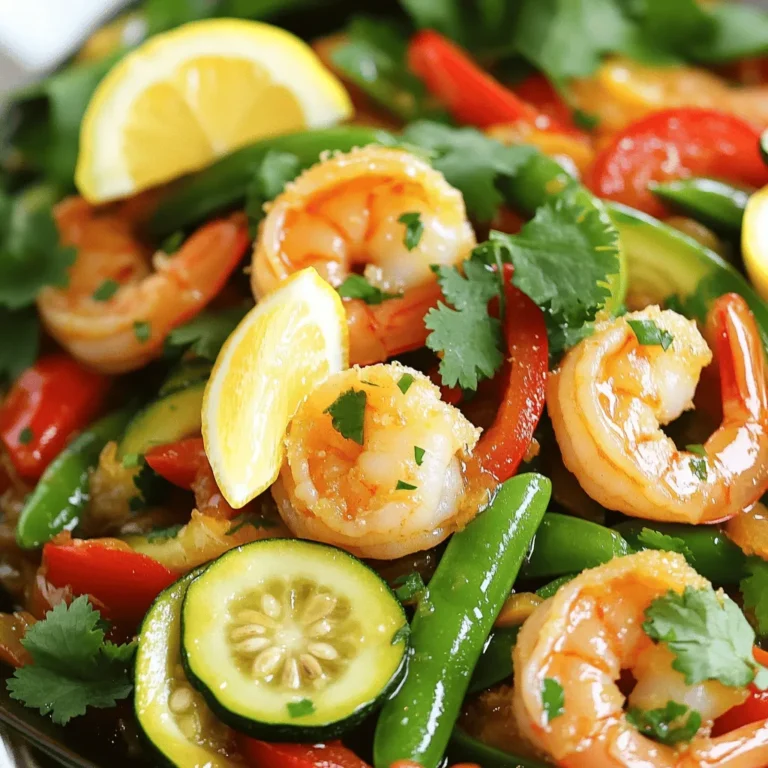
Garlic Chicken Zucchini Noodles Stir Fry Delight
Are you ready for a tasty twist on dinner? My Garlic Chicken Zucchini Noodles Stir Fry is a quick and Read Full Recipe -
Stuffed Italian Meatloaf Easy and Tasty Recipe
Are you ready to elevate your dinner game? This Stuffed Italian Meatloaf is both easy and tasty! In this article, Read Full Recipe -
One Pot French Onion Pasta Flavorful Comfort Dish
Looking for a cozy dinner that warms your soul? Try my One Pot French Onion Pasta! This creamy, rich dish Read Full Recipe


hey,
i’m !
I’m so happy you’re here!
Every dish I share is made with love and care. I hope they bring you the same comfort and joy they bring me. Let’s make memories, one recipe at a time.

![To make garlic butter steak bites, you need: - 1 pound sirloin steak, cut into 1-inch cubes - 4 tablespoons unsalted butter, divided - 4 cloves garlic, minced - 1 teaspoon fresh thyme leaves (or ½ teaspoon dried thyme) - 1 teaspoon fresh rosemary, chopped (or ½ teaspoon dried rosemary) - Salt and pepper, to taste - 2 tablespoons olive oil - Optional: Fresh parsley, chopped for garnish Choosing the right cut of steak is key. I love using sirloin for its great flavor and tenderness. You can also use ribeye or tenderloin if you want something richer. These cuts cook well and stay juicy. Always pick a steak with good marbling. This means it has some fat, which adds flavor and keeps it moist. Garlic and butter are the stars here. They make the steak bites rich and tasty. Fresh herbs like thyme and rosemary add a nice touch. You can adjust these herbs based on what you like. If you want a pop of color, sprinkle chopped parsley on top before serving. This not only looks good but adds freshness to the dish. Mixing flavors is fun, so feel free to experiment! For more details, check the Full Recipe. First, gather all your ingredients. You need sirloin steak, butter, garlic, thyme, rosemary, salt, pepper, and olive oil. Cut the sirloin steak into 1-inch cubes. Pat the steak cubes dry with paper towels. This step helps the meat brown well. Next, season the cubes with salt and pepper on all sides. Make sure each piece is well coated. Heat a large skillet over medium-high heat. Add 2 tablespoons of olive oil. Wait until the oil shimmers before adding the steak bites. Add them in a single layer, avoiding overcrowding. Sear the steak for 2-3 minutes on each side. This will help you reach your desired doneness. For medium-rare, aim for about 130°F. Once cooked, remove the steak from the skillet and set it aside. In the same skillet, lower the heat to medium. Add 2 tablespoons of butter and let it melt. Then, add minced garlic, thyme, and rosemary. Sauté the mix for about 30 seconds. Be careful not to burn the garlic. Finally, return the cooked steak bites to the skillet. Toss gently to coat them in the garlic butter. Cook for an extra 1-2 minutes until heated through. Once done, remove the skillet from heat. If you like, garnish with chopped fresh parsley. For serving, use a large platter or individual plates. Drizzle any remaining garlic butter sauce on top. This adds flavor and looks great. Pair your steak bites with mashed potatoes or a fresh salad for a full meal. For the complete recipe, check the [Full Recipe]. To get the best flavor, dry the steak cubes first. Use paper towels to remove moisture. This helps the steak sear better. Heat your skillet on medium-high until hot. Add olive oil, then place the steak bites in one layer. Avoid overcrowding the pan. Sear for 2-3 minutes on each side. This creates that nice brown crust. Perfectly seared steak bites take your dish to the next level. One mistake is not drying the steak before cooking. Another common error is overcrowding the pan. This causes steam instead of searing. Make sure to season well with salt and pepper. Do not rush the cooking time; let them brown properly. Lastly, don’t forget to let them rest after cooking. This keeps the juices inside, making them tender and juicy. You can boost flavor in many ways. Adding different herbs like oregano or basil can change the taste. Try a splash of Worcestershire sauce for extra depth. You can also mix in some red pepper flakes for heat. If you love cheese, sprinkle some grated Parmesan before serving. These small tweaks can create a unique twist on the classic dish. For the full recipe, check out the earlier section. {{image_2}} You can use different cuts of steak for your bites. Sirloin is great, but try ribeye for extra fat and flavor. Filet mignon offers a tender bite, while flank steak gives a nice chew. Each cut brings its own taste and texture. Switch up the flavors to keep things fresh. Try using soy sauce for a savory twist. You can add a splash of balsamic vinegar for a tangy kick. For a spicy touch, mix in red pepper flakes or chili powder. Fresh herbs like oregano or basil can also brighten the dish. Pair steak bites with vegetables for a complete meal. Bell peppers and onions roast well and add color. You can sauté mushrooms in the garlic butter for extra flavor. Serve with mashed potatoes or a fresh salad to create a balanced dish. After cooking, let the garlic butter steak bites cool down. Use an airtight container to keep them fresh. Store them in the fridge for up to three days. To keep the flavor, avoid using a shallow dish. The deeper the container, the better the taste stays. When you are ready to eat the leftovers, reheat them on the stove. Place the steak bites in a skillet over low heat. Add a small amount of butter or olive oil to keep them moist. Heat for about 5 minutes, stirring gently. This helps to revive their juicy flavor. You can also use a microwave, but it may dry them out. You can freeze the steak bites for later. First, let them cool completely. Then, place them in a freezer-safe bag. Try to remove as much air as possible. They will stay good for up to three months. To thaw, leave them in the fridge overnight. Reheat them the next day for a quick meal. For the full recipe, check the steps above! To make garlic butter steak bites, start with high-quality sirloin steak. Cut it into 1-inch cubes. Pat the cubes dry with paper towels. This step helps the steak brown well. Season the steak generously with salt and pepper. Next, heat 2 tablespoons of olive oil in a skillet over medium-high heat. When the oil shimmers, add the steak bites in a single layer. Sear for 2-3 minutes on each side. This gives a nice crust and flavor. Remove the steak bites and set them aside. Lower the heat and add 2 tablespoons of butter to the skillet. Once it melts, add minced garlic, thyme, and rosemary. Sauté for about 30 seconds, until fragrant. Then, return the steak bites to the skillet. Toss them gently in the garlic butter mixture. Heat everything through for 1-2 minutes. For the full recipe, refer to the detailed instructions above. The best way to season steak bites is with simple ingredients. Start with salt and pepper. Use a good amount to enhance the flavor. Fresh herbs like thyme and rosemary add depth. You can also add garlic for a rich taste. If you want more kick, try adding a pinch of red pepper flakes. Remember, seasoning enhances the natural flavor of the meat. Yes, garlic butter steak bites can be made ahead of time. Cook them as directed and let them cool. Once cooled, store them in an airtight container in the fridge. They can last for up to three days. When you're ready to eat, simply reheat them in a skillet. Add a splash of water or broth to keep them moist. This will bring back their juicy flavor and texture. In this article, we explored how to make delicious garlic butter steak bites. We covered ingredient choices, best cuts of steak, and the right seasonings. I shared step-by-step cooking methods to ensure perfect bites every time. You learned tips to enhance flavor and avoid common mistakes. Finally, we discussed ways to store and reheat your leftovers. Enjoy making these tasty bites and let your creativity shine in the kitchen!](https://easycookingbite.com/wp-content/uploads/2025/07/e565d76c-41f3-4540-8813-f9fb6546e62f-300x300.webp)

Best Banana Pudding Delightful and Easy Recipe Guide
Welcome to my guide for the best banana pudding! This delightful treat is creamy, sweet, and oh-so-easy to make. You’ll discover all the essential…
![To create the best banana pudding, you need a few key ingredients. Here’s a simple list: - 4 ripe bananas, sliced - 1 cup granulated sugar - 1/4 cup cornstarch - 1/4 teaspoon salt - 2 3/4 cups whole milk - 4 large egg yolks - 2 tablespoons unsalted butter - 2 teaspoons pure vanilla extract - 1 box (about 12 oz) vanilla wafers - Whipped cream for topping - Optional: crushed vanilla wafers for garnish Each ingredient plays a vital role. The ripe bananas add natural sweetness and creaminess. Granulated sugar enhances the flavor. Cornstarch thickens the pudding, giving it that perfect texture. Whole milk makes it rich and creamy, while egg yolks help bind everything together. Unsalted butter adds a velvety finish, and pure vanilla extract gives a warm flavor. Vanilla wafers provide a crunchy layer and contrast to the smooth pudding. Finally, whipped cream adds a light and airy touch on top. For added flair, use crushed vanilla wafers as a garnish. This gives your pudding an extra crunch and looks pretty too. You can find the full recipe to guide you through the steps for making this delicious treat. 1. Mixing dry ingredients In a medium saucepan, combine the granulated sugar, cornstarch, and salt. Use a whisk to mix these dry ingredients well. This step sets the base for your pudding. 2. Incorporating the milk Slowly add the whole milk to the dry mix. Keep whisking to prevent lumps. This will create a smooth mixture that is essential for a creamy pudding. 3. Tempering the egg yolks In a separate bowl, whisk the egg yolks until they become slightly thick. Gradually add a few spoonfuls of the heated milk mixture into the egg yolks. Whisk as you add to avoid cooking the eggs. This process, called tempering, helps keep the pudding smooth. 1. Combining mixtures on the stove Pour the tempered egg mixture back into the saucepan with the remaining milk. Place it on medium heat. Keep stirring constantly to ensure it cooks evenly. 2. Achieving the right thickness Continue to cook until the mixture thickens and starts to bubble, about 5-7 minutes. This is when your pudding transforms into a rich, creamy delight. 1. Layering ingredients in a serving dish In a 2-quart serving dish or individual cups, start layering your ingredients. Begin with a layer of vanilla wafers. Then, add a layer of sliced bananas. Pour a layer of the creamy pudding over the top. Repeat this process until all ingredients are used, finishing with pudding on top. 2. Covering and refrigerating Cover the dish with plastic wrap. Make sure the wrap touches the pudding to avoid a skin. Refrigerate for at least 4 hours, or overnight for best results. This chilling time allows the flavors to meld beautifully. Choosing ripe bananas for flavor Use ripe bananas for the best taste. They should be yellow with a few brown spots. These bananas are sweet and soft, which enhances the pudding's flavor. Avoiding lumps in the pudding To avoid lumps, whisk the dry ingredients well before adding milk. When you add milk, do it slowly and keep whisking. This helps create a smooth mixture. Techniques for optimal layering Layering is key for a beautiful pudding. Start with vanilla wafers at the bottom. Then, add sliced bananas and creamy pudding. Repeat these layers until you reach the top. End with pudding for a nice finish. Creative serving ideas Serve banana pudding in parfait cups for a fun twist. This makes it easy for guests to enjoy. You can also layer it in a glass dish for a stunning view. Pairing with beverages Banana pudding pairs well with sweet tea or coffee. A light dessert wine can also enhance the flavors. Choose a drink that complements the sweetness. Enhancing presentation with garnishes Top your pudding with whipped cream and crushed vanilla wafers. Add a few banana slices on top for color. This makes your banana pudding not just tasty but also pretty to look at. For the full recipe, check the details above. {{image_2}} Want to jazz up your banana pudding? You can easily add flavors. Chocolate or peanut butter can take your dessert to new heights. Just mix in chocolate pudding or smooth peanut butter into the creamy base. These flavors blend well with the bananas and make it unique. You might also think about nuts or dried fruits. Adding chopped walnuts or pecans gives a nice crunch. Dried fruits like raisins or cranberries add sweetness. These add-ins create layers of flavor and texture. If you need a vegan version of banana pudding, you can swap out a few ingredients. Use plant-based milk like almond or coconut. Instead of eggs, try silken tofu or vegan pudding mix. This way, you keep it creamy and delicious. For gluten-free options, look for gluten-free vanilla wafers. You can also thicken your pudding with gluten-free cornstarch. This way, everyone can enjoy this delightful dessert without worry. Explore these variations to find your favorite twist on the classic banana pudding. Check out the full recipe to make this treat your own! To keep your banana pudding fresh, store it in the fridge. Use an airtight container. If you have leftovers, cover them tightly with plastic wrap. This keeps moisture in and prevents drying out. Make sure the wrap touches the pudding’s surface. This stops a skin from forming on top. When storing assembled pudding, layer it just like you would for serving. Start with vanilla wafers, then bananas, and finish with pudding. Cover it well. This method keeps all flavors intact and ready for later. In the fridge, your banana pudding stays good for about 3-4 days. After this, the bananas may brown and the texture can change. For the best taste and look, enjoy it fresh. You can freeze banana pudding, but it changes in texture. If you freeze it, eat it within a month. To thaw, place it in the fridge overnight. Stir gently before serving to smooth it out. Remember, once thawed, do not refreeze. Enjoy the deliciousness of your banana pudding! For the full recipe, check it out here: [Full Recipe]. How to prevent browning of bananas? To stop bananas from turning brown, you can use lemon juice. Just squeeze a little over the sliced bananas. The acid helps keep them fresh and bright. Can I make banana pudding ahead of time? Yes, you can make banana pudding a day before serving. Just layer it and chill it in the fridge. This gives the flavors time to blend together, making it even better. What are the best alternatives for vanilla wafers? If you don’t have vanilla wafers, try using graham crackers or shortbread cookies. Both add a nice crunch and flavor to your pudding. Is it possible to make banana pudding without eggs? Absolutely! You can skip the eggs by using a cornstarch-based pudding. This keeps the texture creamy without using eggs. What makes this the best banana pudding recipe? This recipe brings together fresh bananas, creamy pudding, and crunchy wafers. The balance of flavors makes it a crowd favorite. Plus, it’s easy to make! How do I adjust the recipe for larger servings? To make more servings, simply double the ingredients. For instance, use 8 bananas instead of 4. Make sure you have a larger dish to hold everything. You can follow the Full Recipe for the complete guide. We covered all the key elements to make the best banana pudding. You learned about essential ingredients, step-by-step instructions, and creative variations. Remember to pick ripe bananas and layer carefully for the best flavor. With a few simple tips, like avoiding lumps, your pudding will shine. Don't forget about storage; properly refrigerating keeps it fresh longer. Enjoy making this treat, and feel free to get creative with flavors. Your homemade banana pudding will impress everyone!](https://easycookingbite.com/wp-content/uploads/2025/04/8cb8648c-23ce-4107-aac7-6fcfb2285484.webp)
