Latest & Greatest

browse recipes

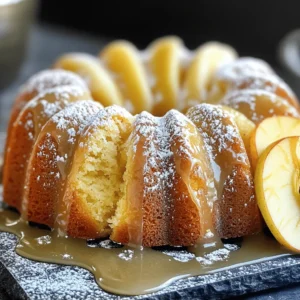
To make these tasty Lemon Ricotta Pancakes, gather the following key ingredients: - 1 cup ricotta cheese - 1 cup all-purpose flour - 1/4 cup sugar - 1/2 teaspoon baking powder - 1/4 teaspoon baking soda - 1/4 teaspoon salt - 2 large eggs - 1 cup milk (whole or 2%) - Zest of 1 lemon - 2 tablespoons fresh lemon juice - 1 teaspoon vanilla extract - Butter or oil for cooking These ingredients come together to create a fluffy, rich pancake. The ricotta cheese adds creaminess, while the lemon zest and juice bring bright flavor. You can enhance your pancakes with a few optional ingredients. Consider adding: - Fresh berries (like blueberries or strawberries) - Chopped nuts (such as walnuts or pecans) - A sprinkle of cinnamon or nutmeg - A dollop of Greek yogurt or whipped cream These additions can add texture and flavor. They also make your pancakes look delightful. To ensure your Lemon Ricotta Pancakes are the best they can be, pick quality ingredients. Here are some tips: - Ricotta Cheese: Look for fresh, creamy ricotta. Avoid dry or grainy types. - Milk: Use whole or 2% milk for a rich texture. - Lemons: Choose firm, bright lemons. Fresh zest makes a big difference. - Eggs: Use large, fresh eggs for the best rise. Using high-quality ingredients elevates your pancake game. Good ingredients lead to delicious results, so choose wisely! For the full recipe, check the details above. To make the batter, start by gathering your ingredients. In a large bowl, whisk together the ricotta cheese, eggs, milk, lemon juice, lemon zest, and vanilla extract. Mix until it is smooth. In another bowl, sift the flour, sugar, baking powder, baking soda, and salt. This process helps to mix the dry ingredients well and adds air, making your pancakes light. Next, slowly add the dry mixture to the wet mixture. Use a spatula to fold them together gently. Stop mixing when you still see a few lumps. This helps keep the pancakes fluffy. Heat a non-stick skillet over medium heat. Add a small amount of butter or oil to the pan. Pour about 1/4 cup of batter onto the skillet for each pancake. Cook until bubbles form on the surface, and the edges look set, which takes about 3–4 minutes. When ready, flip the pancake. Cook the other side for 2–3 minutes until it turns golden brown. Repeat this process with the remaining batter, adding more butter or oil as needed. Serve your lemon ricotta pancakes warm. They taste great with fresh berries, a drizzle of maple syrup, or a light dusting of powdered sugar. You can also add a side of yogurt for creaminess. If you want to try something different, mix in some nuts or granola on top for added crunch. For the full recipe, check out the complete details above. Enjoy every bite! To make your pancakes light and fluffy, focus on the batter. Start by mixing the wet and dry ingredients separately. When you combine them, mix gently. Over-mixing can make pancakes dense. You want a few lumps in the batter. This will keep them airy. Add the ricotta at the start for creamy texture. The ricotta adds richness and moisture. The lemon zest brightens the flavor. This combination creates a delightful pancake. One common mistake is cooking on too high heat. If the heat is too high, pancakes can burn on the outside and stay raw inside. Keep the heat at medium. Another mistake is not letting the batter rest. Letting it sit for about 5 minutes helps the gluten relax. This results in a softer pancake. Also, don’t skip the baking powder. It helps the pancakes rise. Without it, they will be flat and dense. To keep your pancakes warm, use an oven. Preheat it to 200°F (90°C). Place cooked pancakes on a baking sheet in the oven. This keeps them warm while you cook the rest. You can also cover them with a clean kitchen towel. This traps heat and prevents them from drying out. Serve them warm with your favorite toppings. For more details, check the Full Recipe. {{image_2}} You can easily switch up the flavors in your lemon ricotta pancakes. For example, adding blueberries makes them fruity and sweet. Just fold in a cup of fresh or frozen blueberries into the batter. If you like chocolate, mix in some chocolate chips. They melt and create little pockets of goodness. Nuts, like chopped walnuts or pecans, add crunch to each bite. You can even add spices like cinnamon for warmth. Let your taste buds guide you! To make gluten-free lemon ricotta pancakes, simply swap the all-purpose flour. Use a gluten-free flour blend instead. These blends often include rice flour and tapioca starch. They give a similar taste and texture. Be sure to check the blend for best results. This will keep your pancakes fluffy while keeping gluten away. You won’t lose any of the deliciousness. If you want a dairy-free option, use dairy-free ricotta. You can find this in stores, or you can make your own using tofu and lemon juice. For the milk, almond or oat milk works well. Just remember to choose unsweetened versions to control the sweetness. These small changes can help you enjoy lemon ricotta pancakes without dairy. They remain delicious and enjoyable! For the complete recipe, you can refer to the Full Recipe mentioned earlier. After enjoying your lemon ricotta pancakes, you may have some left. To store them, let the pancakes cool completely. Stack them with a piece of parchment paper between each pancake. Place the stack in an airtight container. Store it in the fridge for up to three days. This way, they stay fresh and tasty. When you want to eat the pancakes again, reheating is simple. You can use a microwave or a skillet. For the microwave, place a pancake on a plate and heat it for about 20-30 seconds. If you prefer a skillet, heat it on low with a little butter. Cook each side for about a minute until warm. This keeps the pancakes fluffy and moist. Freezing pancakes is a great option for later. After cooling, stack the pancakes with parchment paper in between. Wrap the stack tightly in plastic wrap and then place it in a freezer bag. You can freeze them for up to two months. When you're ready to eat, thaw them overnight in the fridge. Then, reheat them as mentioned above. Enjoy your delicious lemon ricotta pancakes anytime! For the full recipe, check out the Lemon Ricotta Pancakes section above. You can serve lemon ricotta pancakes with many tasty options. Fresh berries add color and flavor. Try strawberries, blueberries, or raspberries for a sweet touch. Maple syrup is a classic choice. It pairs well with the lemon flavor. You might also enjoy whipped cream for extra creaminess. A dusting of powdered sugar makes them look fancy. For a health boost, add a dollop of yogurt or some nuts. Yes, you can make this recipe ahead of time. You can prepare the batter and store it in the fridge. Just cover it tightly with plastic wrap. This keeps it fresh for up to 24 hours. When you're ready to cook, just stir the batter gently. If the batter is too thick, add a bit of milk. You can also make the pancakes and store them. Just let them cool and place them in an airtight container. Lemon ricotta pancakes are special because they use ricotta cheese. This cheese adds creaminess and a rich taste. The lemon zest and juice give them a bright flavor. Regular pancakes are usually made with just flour, eggs, and milk. Lemon ricotta pancakes are lighter and fluffier. The ricotta helps them rise, making them soft. They are a delicious twist on a classic breakfast favorite. For the full recipe, check out the section above. In this post, I explored how to make lemon ricotta pancakes. I covered key ingredients and helpful tips for choosing quality items. You learned step-by-step instructions, from preparing the batter to serving ideas. I shared tricks to perfect pancake texture and how to avoid mistakes. I discussed variations, storage methods, and answered common questions. Lemon ricotta pancakes offer a tasty twist on a classic dish. Try them today for a delightful breakfast or brunch option.

Lemon Ricotta Pancakes Fluffy and Flavorful Delight

Ready to elevate your breakfast game? Lemon Ricotta Pancakes are a fluffy, flavorful delight that will impress anyone. They’re light, refreshing, and packed with…

My Latest Drinks

My Latest Dinners

hey,

i’m !

I’m so happy you’re here!

Every dish I share is made with love and care. I hope they bring you the same comfort and joy they bring me. Let’s make memories, one recipe at a time.

One Pan Greek Chicken and Potatoes Easy Dinner Meal

Are you looking for a simple yet delicious meal? One Pan Greek Chicken and Potatoes is the answer. This easy dinner meal combines juicy…
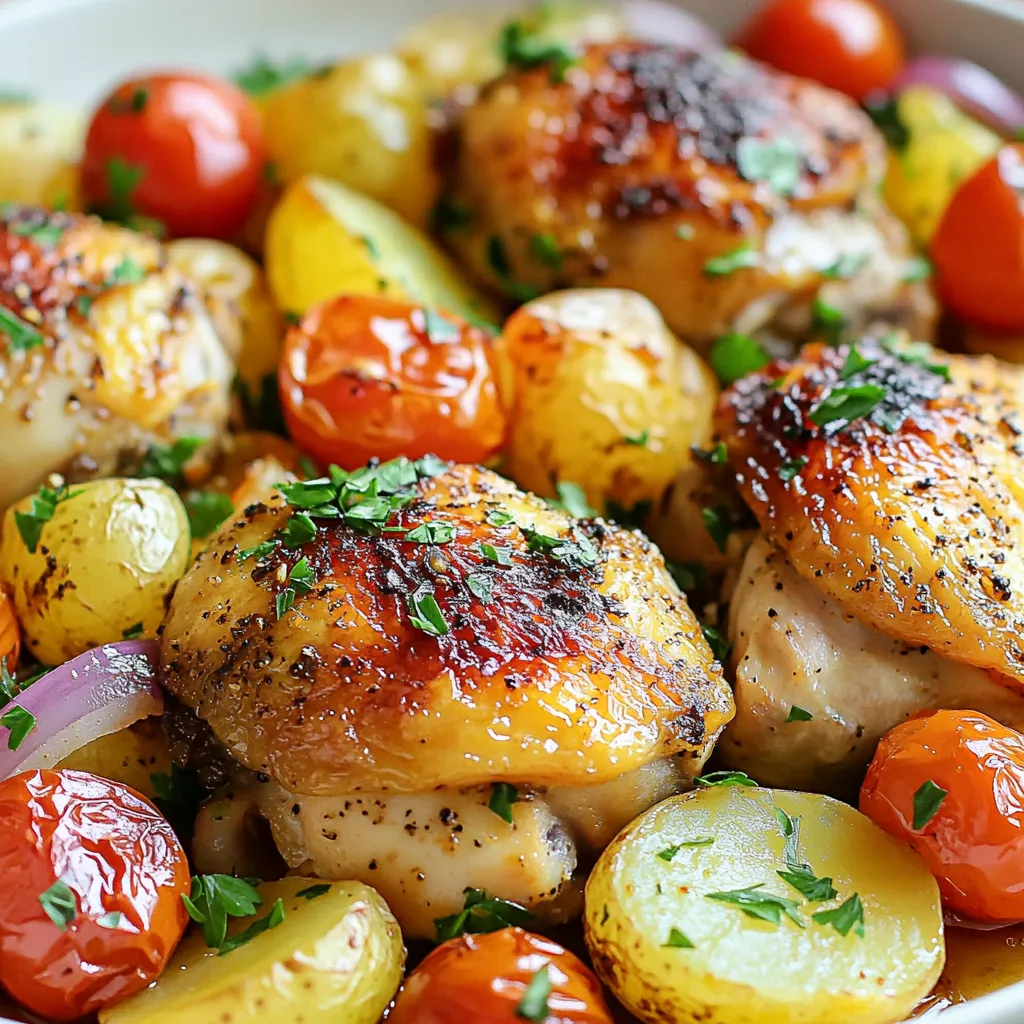
- 4 bone-in, skin-on chicken thighs - 1 pound baby potatoes, halved - 1 large red onion, cut into wedges - 3 cloves garlic, minced - 1 cup cherry tomatoes, halved These main ingredients create a hearty base for the dish. The chicken thighs give great flavor and moisture. Baby potatoes add texture and soak up the juices. Red onion brings a bit of sweetness. Garlic adds depth, while cherry tomatoes provide a burst of freshness. - 2 teaspoons dried oregano - 1 teaspoon dried thyme - 1 lemon, zested and juiced - 3 tablespoons olive oil - Salt and pepper to taste The herbs and seasonings elevate the dish. Oregano and thyme offer that classic Greek taste. Lemon zest and juice brighten up the flavors. Olive oil adds richness. Salt and pepper balance everything out, making the dish pop. - Fresh parsley Fresh parsley brings a nice color and a hint of earthiness. It also adds a final touch that makes the dish look beautiful. You can sprinkle it on before serving for that perfect finish. {{ingredient_image_1}} - Marinating Process Start by mixing olive oil, lemon juice, lemon zest, minced garlic, oregano, thyme, salt, and pepper in a large bowl. This creates a tasty marinade. Add the chicken thighs to the bowl, making sure they are fully coated. Let the chicken marinate for at least 15 minutes. If you can wait longer, it will taste even better! - Chicken Skin Preparation The skin on the chicken helps keep it moist and adds flavor. Make sure it's intact and clean. You can score the skin lightly with a knife. This helps the marinade soak in and gives you crispier skin when cooked. - Cutting and Tossing Potatoes Take your baby potatoes and cut them in half. This helps them cook faster. In a large baking sheet or oven-safe skillet, put the potatoes. Drizzle a little olive oil, and add salt and pepper. Toss them well to coat every piece. - Onion and Tomato Assembly Cut the red onion into wedges. Add these to the baking sheet with the potatoes. Then, halve the cherry tomatoes and scatter them around the potatoes. The tomatoes will add sweetness and color to your dish. - Baking Temperature and Time Preheat your oven to 400°F (200°C). Place the pan with the chicken and vegetables in the oven. Bake for about 40-45 minutes. Make sure the chicken reaches an internal temperature of 165°F (75°C). The potatoes should be fork-tender. - Final Touches for Crispy Skin For crispy skin, turn on the broiler for the last 3-5 minutes. Watch closely to avoid burning. This step makes the chicken skin golden brown and crispy, adding a nice texture to your meal. Marinating is key for great flavor. Let the chicken soak up the marinade for at least 15 minutes. If you have more time, aim for an hour or overnight. This time allows the chicken to absorb all those tasty herbs and spices. If you lack some ingredients, don't worry! You can swap lemon juice for vinegar or use any favorite oil. Try different herbs like basil or rosemary. Just keep the main idea: you want a mix of acid, oil, and spices. A meat thermometer is your best friend. Insert it into the thickest part of the chicken. You want it to read 165°F (75°C) for the chicken to be safe. This tool helps you avoid any guesswork. For the potatoes, avoid overcooking by cutting them into even halves. This ensures they cook through at the same time as the chicken. Check them around the 30-minute mark. If they're fork-tender, you're good to go! Want to add more flavor? Consider sprinkling in some paprika or garlic powder. These can change the dish and add depth. When it comes to herbs, fresh is often best. Fresh parsley brightens the dish. However, dried herbs work fine too. Just remember, dried herbs are stronger than fresh. Use about a third of the amount if you're switching. This way, you keep the flavor balanced and bright! Pro Tips Marinate Longer: For deeper flavor, marinate the chicken thighs for at least 1 hour or overnight in the refrigerator. Crispier Skin: To achieve an extra crispy skin, pat the chicken dry with paper towels before marinating and use a higher oven temperature. Add More Veggies: Feel free to add other vegetables like bell peppers or zucchini for more color and nutrition. Leftover Magic: Leftovers make a great addition to salads or wraps the next day—just shred the chicken and mix it in! {{image_2}} - Using Chicken Breasts You can swap chicken thighs for chicken breasts. Chicken breasts cook faster, so check them early. Marinate them the same way. They will still soak up that lovely lemon and herb flavor. - Substituting with Salmon Salmon works great too! Use skin-on fillets for a crispy finish. Place the salmon on the sheet for the last 15 minutes of cooking. This way, it stays tender and juicy. - Carrots and Zucchini Carrots add sweetness, and zucchini brings moisture. Slice carrots into sticks and cut zucchini into half-moons. Toss them with oil, salt, and pepper before adding to the pan. They cook nicely with the chicken. - Bell Peppers and Olives Add bell peppers for color and flavor. Use any color you like! Olives add a briny kick. Slice the peppers and mix in pitted olives. This combo brightens the dish and adds great taste. - Mediterranean Spice Variations Try different spices to change the flavor. Add sumac or cumin for warmth. A pinch of cinnamon can also add a unique twist. Just mix these spices into your marinade for a new taste. - Adding Spice with Green Chilies If you like heat, add green chilies. Chop them up and toss them in with the tomatoes. They will give a nice kick that pairs well with the chicken and potatoes. Adjust the amount based on your spice level preference. After your meal, let the chicken and potatoes cool down. Place leftovers in airtight containers. This keeps the flavors fresh. I recommend using glass containers. They do not stain and are easy to clean. Store in the fridge for up to three days. For reheating, use the oven for best results. Preheat your oven to 350°F (175°C). Place the leftovers in a baking dish. Cover with foil to avoid drying out. Heat for about 20 minutes or until warm. You can also use a microwave, but oven reheating keeps the skin crispy. If you want to freeze leftovers, let them cool completely. Use freezer-safe bags or containers. Remove as much air as possible to prevent freezer burn. Label the bags or containers with the date. You can freeze them for up to three months. When you’re ready to eat, thaw in the fridge overnight. For quick thawing, place the sealed bag in cold water for about an hour. Once thawed, reheat as mentioned before. For fresh ingredients, always check for signs of spoilage. Chicken should smell fresh and not have a slimy texture. Potatoes should be firm with no sprouting. If stored well, cooked chicken lasts in the fridge for three days. Potatoes can stay fresh for about a week if kept cool and dry. Remember, the sooner you eat your leftovers, the better they taste! Yes, you can prepare One Pan Greek Chicken and Potatoes ahead of time. Marinate the chicken and chop the veggies a few hours in advance. Store them in the fridge until you are ready to cook. This helps the flavors mix well. Just remember to bring everything to room temperature before baking for the best results. This dish pairs well with several sides. Here are some ideas: - Greek salad with cucumbers and feta - Tzatziki sauce for a cool dip - Crusty bread to soak up the juices - Steamed green beans for a fresh crunch These options enhance the meal and add more flavors to your plate. Yes, this recipe is great for meal prep. You can make a batch and store it for later. Here’s how to adjust servings for larger families: - Double the chicken and potatoes for more servings. - Use a larger baking sheet or two pans to fit everything. - For fewer servings, cut the chicken and potatoes in half. - Adjust the seasoning as needed, keeping the same ratios. - Always check the internal temperature of the chicken to ensure it's cooked through. Meal prepping this dish saves time and gives you quick, tasty meals for busy days. This blog covered a tasty One Pan Greek Chicken and Potatoes recipe. You learned about the main ingredients, like chicken thighs and baby potatoes, and the vital herbs and seasonings. We discussed prep steps, cooking tips, and variations to try. In closing, don't hesitate to experiment with flavors or use different proteins. Storing tips ensure your meal stays fresh. Enjoy making this dish, and share your results! Happy cooking!