Latest & Greatest

browse recipes

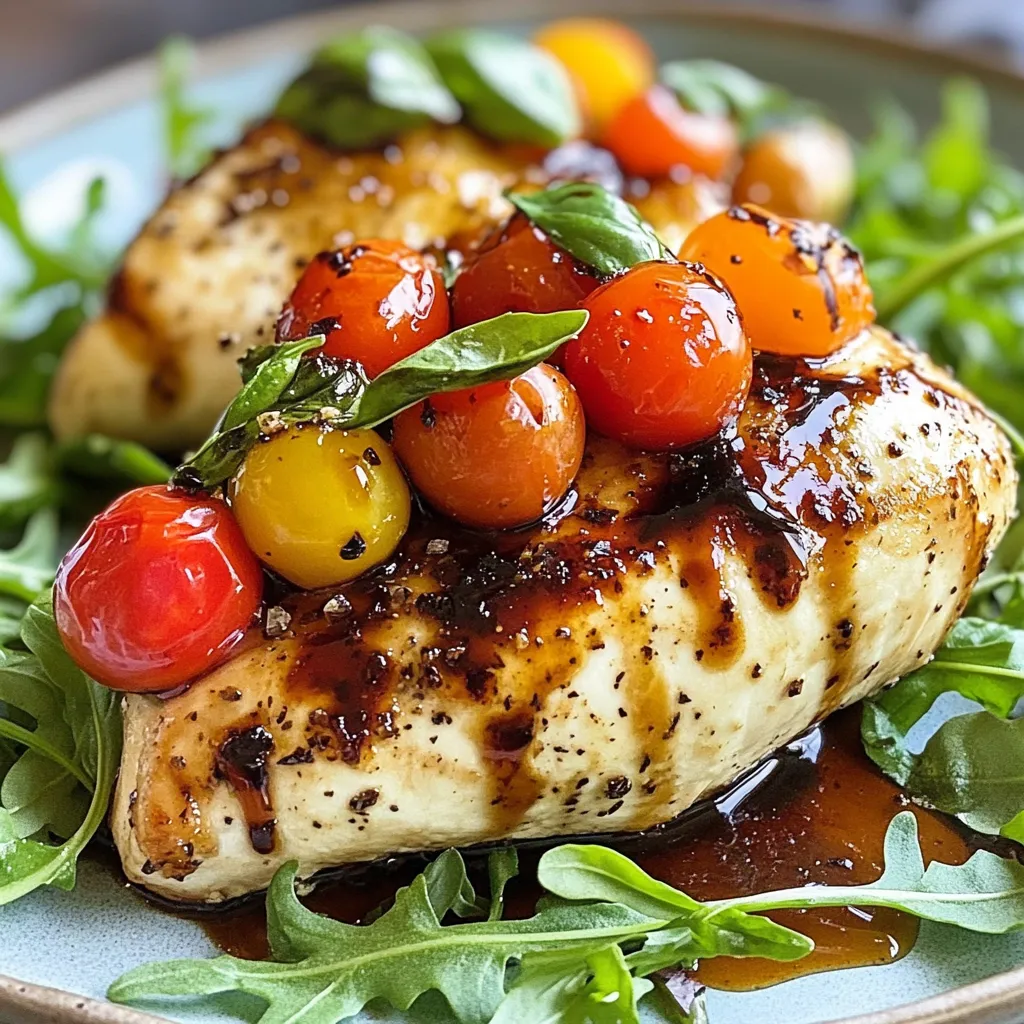
To make Caprese stuffed chicken breast, gather these key ingredients: - 4 boneless, skinless chicken breasts - 1 cup fresh mozzarella cheese, cubed - 1 cup cherry tomatoes, halved - 1/4 cup fresh basil leaves, chopped - 2 tablespoons balsamic glaze - 2 tablespoons olive oil - Salt and pepper to taste - 1 teaspoon garlic powder - 1/2 teaspoon dried oregano These ingredients create a flavorful and juicy dish that bursts with fresh taste. You can enhance the dish with a few optional ingredients: - Fresh spinach for extra greens - Red pepper flakes for heat - Parmesan cheese for a savory kick - Lemon zest for brightness Adding these can change the taste and make it your own. If you need to swap some items, here are some ideas: - Use chicken thighs instead of breasts for more flavor. - Try goat cheese instead of mozzarella for a tangy twist. - Use any herb you love, like parsley or thyme. - Substitute balsamic glaze with a homemade reduction for a fresh touch. These substitutions keep the dish exciting and tailored to your taste. {{ingredient_image_1}} To start, you need to prepare the chicken. Take each chicken breast and place it on a cutting board. Use a sharp knife to carefully butterfly each breast. Slice it horizontally, but don’t cut all the way through. This creates a pocket for the filling. Make sure the pocket is deep enough to hold the delicious mixture. Now, let's make the Caprese filling. In a mixing bowl, combine these ingredients: - 1 cup fresh mozzarella cheese, cubed - 1 cup cherry tomatoes, halved - 1/4 cup fresh basil leaves, chopped - 1 tablespoon balsamic glaze - salt and pepper to taste - 1 teaspoon garlic powder Mix everything well until it is nicely combined. This filling brings fresh flavors to your chicken. Next, it’s time to cook the chicken. First, stuff each chicken pocket with the Caprese filling. Pack it in tightly. If you need to, use toothpicks to secure the openings. Drizzle olive oil over the stuffed chicken breasts. Season with salt, pepper, and dried oregano. Heat a large oven-safe skillet on medium-high heat. Once it’s hot, add the stuffed chicken breasts. Sear each side for about 3 to 4 minutes until they turn golden brown. After searing, transfer the skillet to a preheated oven at 375°F (190°C). Bake for 20 to 25 minutes, or until the chicken reaches an internal temperature of 165°F (75°C). When it’s done, remove the chicken and let it rest for 5 minutes. Drizzle with the remaining balsamic glaze before serving. Enjoy this flavorful and juicy dish! To keep your chicken moist, start with good quality meat. Choose boneless, skinless chicken breasts for even cooking. Butterfly each breast to create a pocket. This helps hold in the stuffing. Sear the chicken in a hot skillet first. This gives it a nice brown crust. After searing, bake it in the oven to finish cooking. Let the chicken rest before slicing. This helps keep the juices inside. For the best flavor, use fresh ingredients. Fresh mozzarella adds creaminess. Cherry tomatoes bring sweetness and acidity. Basil gives a fragrant touch. Mix these well before stuffing. Add balsamic glaze for a tangy kick. Season your filling with salt, pepper, and garlic powder. This enhances all the flavors. Taste the filling before stuffing the chicken. Use a large oven-safe skillet for this recipe. It helps sear and bake the chicken evenly. A sharp knife is key for butterflying the chicken breast. Make sure to have a meat thermometer handy. This tool ensures the chicken reaches 165°F. It helps prevent overcooking. A good cutting board makes prep easy and safe. Pro Tips Use Fresh Ingredients: Fresh mozzarella and ripe cherry tomatoes will elevate the flavor of your dish significantly. Always opt for the freshest produce you can find. Secure Your Filling: If you're worried about the stuffing spilling out, use toothpicks to secure the openings of the chicken breasts after stuffing them. This will help keep everything intact while cooking. Let It Rest: After baking, allow the chicken to rest for about 5 minutes. This helps the juices redistribute, ensuring the chicken remains moist and flavorful. Experiment with Herbs: While basil is traditional, feel free to experiment with other herbs like thyme or parsley for a unique twist on this classic dish. {{image_2}} You can easily add spinach to the Caprese stuffing. Spinach gives a nice color and boosts nutrients. Just chop about one cup of fresh spinach and mix it with the mozzarella, tomatoes, and basil. The added greens create a lovely balance with the cheese. This change adds flavor and makes it feel light. If you need a gluten-free dish, you can skip the balsamic glaze or choose a gluten-free brand. For a low-carb option, you can replace the chicken with zucchini or eggplant. Slice them thick and stuff them like chicken. This keeps the taste bold while being friendly to your diet. To give your dish a twist, try adding different herbs. You can use thyme, rosemary, or even cilantro for a unique taste. Swap the basil in the original recipe for these herbs. Each herb will change the flavor profile, making it exciting and different every time you cook it. To keep leftover Caprese stuffed chicken fresh, place it in an airtight container. Make sure the chicken cools down first. This helps prevent moisture loss. Store it in the fridge for up to three days. If you plan to eat it later, do not add the balsamic glaze yet. You can freeze this dish for later use. Wrap each stuffed chicken breast tightly in plastic wrap. Then, place them in a freezer-safe bag. Label the bag with the date. This way, you know when to use it. The chicken can stay fresh for up to three months in the freezer. When ready to cook, thaw it overnight in the fridge. To reheat your chicken, use the oven for best results. Preheat your oven to 350°F (175°C). Place the chicken on a baking sheet. Cover it loosely with foil to keep it moist. Heat for about 20-25 minutes or until warm throughout. You can also use a microwave, but the oven gives a better texture. Just heat for 2-3 minutes, checking frequently. The best type of chicken for this dish is boneless, skinless chicken breasts. They cook evenly and create a great pocket for stuffing. Look for fresh chicken that is firm and pink. If you prefer, you can also use chicken thighs, but they may take a bit longer to cook. Yes, you can make this dish ahead of time. Prepare the stuffed chicken breasts and store them in the fridge for up to 24 hours. When you are ready to cook, just sear and bake as directed. This helps save time on busy days and can enhance the flavors. You can serve Caprese stuffed chicken with several tasty sides. Here are some great options: - Fresh arugula salad with lemon vinaigrette - Garlic bread for a crunchy texture - Roasted vegetables for a healthy touch - Quinoa or rice for a filling meal These pairings balance the flavors of the chicken and make your meal complete. You’ve learned how to make delicious Caprese Stuffed Chicken. We covered all the ingredients you need, as well as fun variations. Remember to prep the chicken right and use good cooking techniques. Keeping the chicken juicy is key to great taste. By storing leftovers properly, you can enjoy this dish later. With these tips, you are ready to impress at any meal. Now get cooking and enjoy your tasty creation!

Caprese Stuffed Chicken Breast Flavorful and Juicy Dish

If you’re craving a dish that is both flavorful and juicy, look no further! Caprese Stuffed Chicken Breast combines the classic Italian flavor of…

My Latest Drinks

My Latest Dinners

hey,

i’m !

I’m so happy you’re here!

Every dish I share is made with love and care. I hope they bring you the same comfort and joy they bring me. Let’s make memories, one recipe at a time.

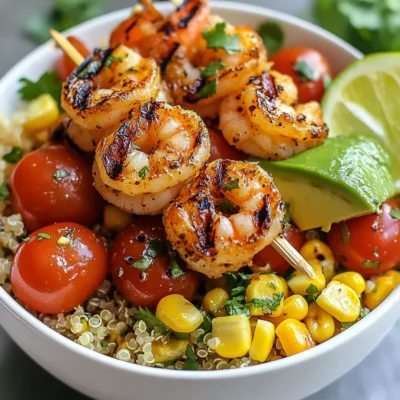
Grilled Shrimp Bowl Fresh and Flavorful Delight

Dive into the fresh and flavorful world of my Grilled Shrimp Bowl! This dish combines juicy shrimp, colorful veggies, and vibrant spices for a…
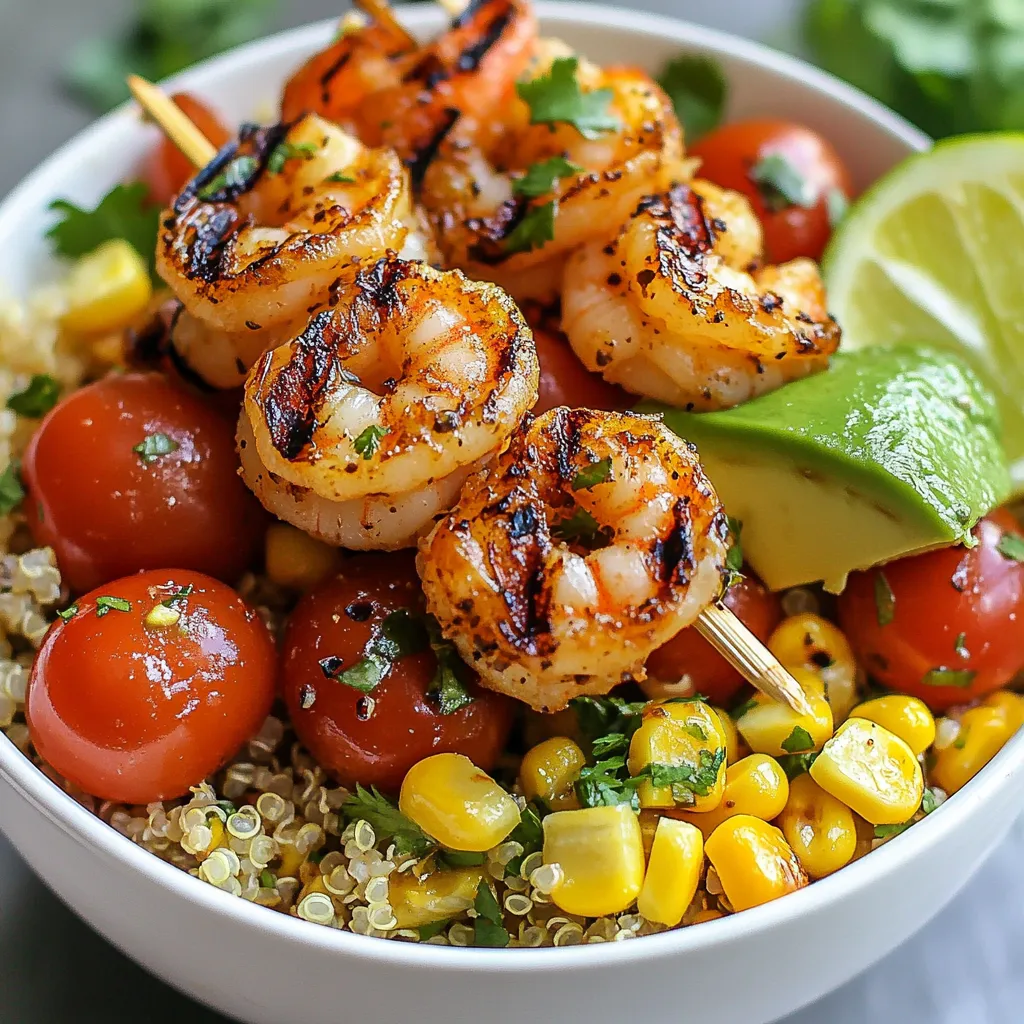
For a tasty grilled shrimp bowl, you need these main ingredients: - 1 pound large shrimp, peeled and deveined - 2 tablespoons olive oil - 2 teaspoons smoked paprika - 1 teaspoon garlic powder - 1 teaspoon cumin - Salt and black pepper to taste - 2 cups cooked quinoa - 1 cup cherry tomatoes, halved - 1 cup corn (fresh, frozen, or canned) - 1 avocado, diced - 1/4 cup fresh cilantro, chopped - Juice of 1 lime These ingredients work well together. The shrimp brings protein, while the quinoa adds fiber. The veggies give color and crunch. You can add some extra flavors with these optional ingredients: - Crumbled feta cheese for topping Feta cheese adds a salty flavor. It also gives the dish a creamy texture. Here’s a quick look at the nutrition: - Shrimp: Low in calories and high in protein. Great for muscle health. - Quinoa: Packed with protein and fiber. It keeps you full longer. - Avocado: Offers healthy fats and vitamins. Good for heart health. - Cilantro: Adds flavor with very few calories. These key ingredients make the bowl not just delicious but also nutritious. Enjoying this dish helps you eat balanced meals! {{ingredient_image_1}} First, grab a large bowl. In this bowl, mix together the olive oil, smoked paprika, garlic powder, cumin, salt, and black pepper. This mix will be your marinade. Next, add the shrimp to the marinade. Use a spoon to coat each shrimp well. Let them sit for at least 15 minutes. This helps the flavors soak in. While you wait, you can prepare your grill. Preheat your grill to medium-high heat. If you use wooden skewers, soak them in water for 30 minutes. This helps them not to burn. Now, thread the marinated shrimp onto the skewers. Place them on the grill. Cook for about 2-3 minutes on each side. Watch for the shrimp to turn pink and slightly charred. Once done, remove them from the grill. Set them aside to cool slightly. In a large mixing bowl, add the cooked quinoa, halved cherry tomatoes, corn, diced avocado, chopped cilantro, and lime juice. Toss these ingredients gently to mix. Now, to serve, create a base with the quinoa mixture in a bowl. Top it with the grilled shrimp. If you like, sprinkle some crumbled feta cheese on top. For a fun touch, serve the bowls with lime wedges and extra cilantro. Enjoy your fresh and flavorful Grilled Shrimp Bowl! To grill shrimp well, start with fresh shrimp. Look for large, firm, and bright shrimp. Peel and devein them to keep the flavors strong. Marinate shrimp for at least 15 minutes. Use olive oil, smoked paprika, garlic powder, cumin, salt, and black pepper for taste. When grilling, preheat your grill to medium-high heat. This ensures the shrimp cook evenly. Thread shrimp onto skewers for easy flipping. If using wooden skewers, soak them in water first. This stops them from burning. Grill shrimp for just 2 to 3 minutes on each side. You want them pink and slightly charred. Overcooking makes them tough. A great bowl looks as good as it tastes. Start with a base of quinoa. Layer in cherry tomatoes, corn, and diced avocado. Add the grilled shrimp on top. For a pop of color, sprinkle chopped cilantro. Use lime wedges on the side for a fresh touch. If you like cheese, crumbled feta adds a nice finish. Play with colors and textures to make it fun. A beautiful bowl invites everyone to dig in. Making this dish ahead saves time. Start with the shrimp. Marinate them in advance and store in the fridge. They will soak up the flavors well. Grill them just before serving for the best taste. Cook your quinoa ahead and keep it in an airtight container. You can also chop the veggies early. Store them in the fridge to keep them fresh. When you’re ready to eat, just assemble the bowl. It will be quick and easy, and still delicious! Pro Tips Marinate Longer for Flavor: For even more flavor, let the shrimp marinate for 30 minutes to an hour. This allows the spices to penetrate deeper into the shrimp. Perfectly Grilled Shrimp: Keep an eye on the shrimp while grilling. They cook quickly, and overcooking can make them tough. Aim for a nice pink color and slight char. Fresh Ingredients Matter: Using fresh vegetables and herbs will enhance the flavor and presentation of your Fiesta Bowl. Opt for in-season produce whenever possible. Customize Your Bowl: Feel free to add other toppings like black beans, jalapeños, or salsa to make your bowl even more flavorful and personalized! {{image_2}} You can swap shrimp for tasty proteins. Chicken is a great choice. It works well with the same marinade. Just cut it into cubes before marinating. Fish like salmon or tilapia also taste amazing grilled. If you want a plant-based option, use firm tofu. Make sure to press it to remove water. Then, cut it into cubes and marinate just like the shrimp. Changing the sauce can change the whole bowl. A zesty lime vinaigrette adds brightness. Mix olive oil, lime juice, and a pinch of salt. You can also try a creamy avocado dressing. Simply blend avocado, Greek yogurt, and lime juice until smooth. If you love heat, add some hot sauce or sriracha. Each sauce gives a unique twist to your bowl! Seasonal veggies can add crunch and color. In spring, try asparagus or snap peas. Just grill them for a few minutes. In summer, zucchini and bell peppers shine. For fall, add roasted butternut squash or Brussels sprouts. In winter, use hearty greens like kale or Swiss chard. These veggies not only taste great but also boost the nutrition of your bowl! To store your leftover grilled shrimp bowl, first cool it down. Place the bowl in the fridge within two hours of serving. Use an airtight container to keep the flavors fresh. You can store the shrimp and quinoa mixture separately if you prefer. This will help maintain their textures. When you're ready to enjoy your leftovers, heat them gently. For the best results, use a skillet on low heat. Add a splash of water or olive oil to keep the shrimp moist. Stir occasionally until heated through. Avoid using the microwave, as it can make the shrimp rubbery. Leftover grilled shrimp bowls will last about three days in the fridge. If you want to freeze them, pack the shrimp and quinoa in freezer-safe bags. They can last up to three months in the freezer. When you're ready to eat, thaw in the fridge overnight before reheating. This ensures the best taste and texture. The best shrimp for grilling are large shrimp. They hold up well on the grill. Look for shrimp that are fresh or frozen, peeled and deveined. Wild-caught shrimp often have better flavor. If you can, choose shrimp that are 16 to 20 count per pound. This means there are about 16 to 20 shrimp in a pound, making them the right size for grilling. Yes, you can easily make this dish gluten-free. The ingredients in the grilled shrimp bowl are already gluten-free. Quinoa, shrimp, and fresh veggies are all safe choices. Just be sure to check any sauces you might add. Always look for gluten-free labels on packaged items to be safe. Many sides go well with a grilled shrimp bowl. Here are a few ideas: - Grilled vegetables: Bell peppers and zucchini add color and taste. - Coleslaw: A crunchy slaw can bring a nice contrast. - Cilantro lime rice: It adds a fresh twist to the meal. - Garlic bread: A warm slice can complement the flavors. These sides can enhance your meal and make it more filling. In this post, we explored how to create a delicious grilled shrimp bowl. We covered essential ingredients, preparation steps, and helpful tips to perfect your dish. Variations let you customize flavors and use different proteins or veggies. You also learned how to store leftovers and the best ways to reheat them. Grilled shrimp bowls are easy and fun to make. With practice, you’ll find your favorite twist. Enjoy cooking and get creative with your meals!