
Latest & Greatest
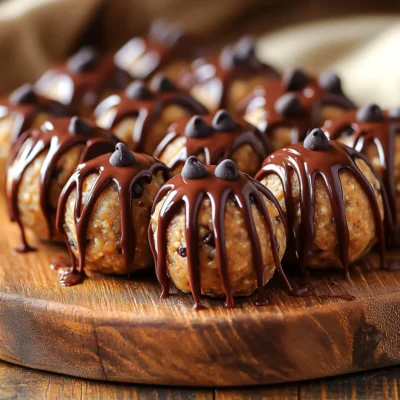
No-Bake Peanut Butter Chocolate Protein Balls Delight
Are you craving a tasty snack that won’t ruin your diet? Look no further! My No-Bake Peanut Butter Chocolate Protein
Read more…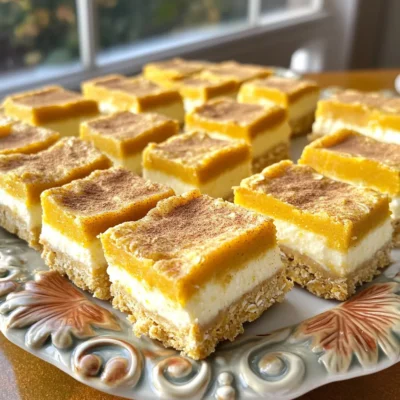
Pumpkin Cheesecake Oatmeal Bars Irresistibly Delicious
If you crave a cozy dessert that combines the best of fall flavors, these Pumpkin Cheesecake Oatmeal Bars are for
Read more…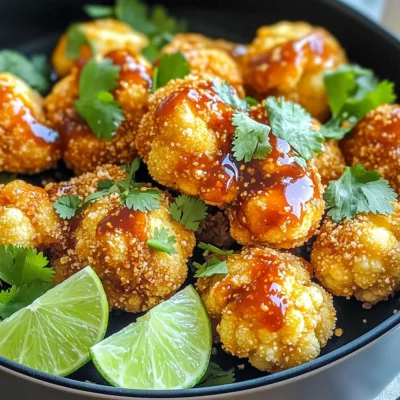
Air Fryer Sweet Chili Cauliflower Wings Delight
Are you ready to transform your snack game? With these Air Fryer Sweet Chili Cauliflower Wings, you can enjoy a
Read more…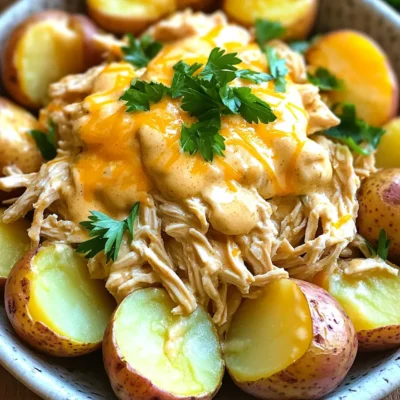
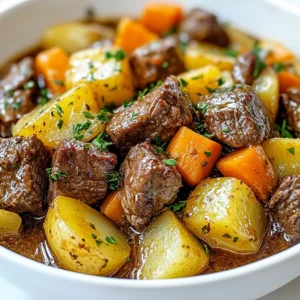
Slow Cooker Creamy Ranch Chicken Irresistible Recipe
Are you craving a hearty meal that requires minimal effort? You’re in luck! My Slow Cooker Creamy Ranch Chicken is
Read more…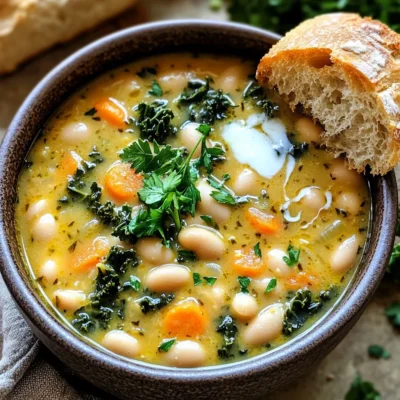
Creamy One-Pot Tuscan White Bean Soup Delight
Welcome to a comforting bowl of goodness! Today, I’ll show you how to make a creamy, one-pot Tuscan white bean
Read more…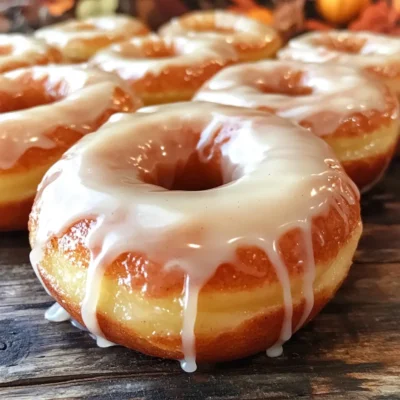
Apple Cider Glazed Donuts Irresistible Homemade Treat
If you’re craving a sweet fall treat, look no further! In this guide, I’ll show you how to make Apple
Read more…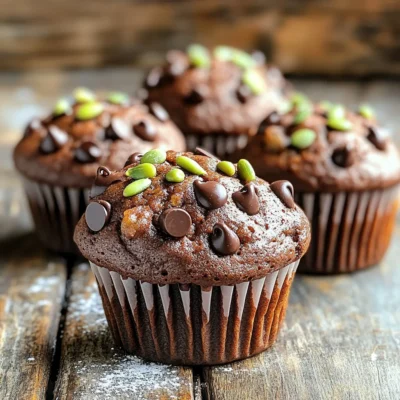
Bakery-Style Chocolate Pumpkin Muffins Easy Recipe
Are you ready to bake some bliss? These Bakery-Style Chocolate Pumpkin Muffins combine the cozy taste of fall with rich
Read more…
Chocolate Chip Cookie Dough Truffles No Bake Delight
Are you ready to indulge in a sweet treat that requires no baking? In this post, I’ll show you how
Read more…browse recipes


Peach Cobbler Dump Cake Easy Sweet Dessert Delight
If you crave something sweet and easy to make, peach cobbler dump cake is for you! This dessert combines juicy peaches and a crunchy…
My Latest Drinks

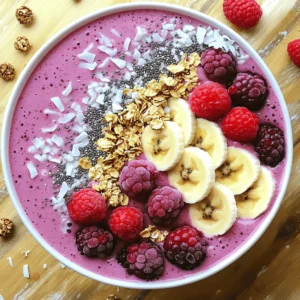
Strawberry Cheesecake Smoothie Creamy Refreshing Treat
Craving something delicious and cool? The Strawberry Cheesecake Smoothie is your answer! It blends creamy cheesecake flavors with sweet strawberries Read Full Recipe-
Mocktail Pink Punch Refreshing and Easy Recipe
Are you ready to impress your guests with a delightful drink? This Mocktail Pink Punch recipe is both refreshing and Read Full Recipe -
Blue Lagoon Tropical Lemonade Refreshing and Zesty Drink
Looking for a drink that’s both refreshing and fun? Say hello to Blue Lagoon Tropical Lemonade! This colorful beverage packs Read Full Recipe -
Pumpkin Spice Coffee Creamer Flavorful Fall Treat
Are you ready to embrace the cozy vibes of autumn? In this blog post, I’ll guide you through making your Read Full Recipe -
Apple Cider Margarita Mocktail Refreshing Fall Drink
Fall is here, and that means it’s the perfect time for a cozy drink! The Apple Cider Margarita Mocktail offers Read Full Recipe -
Pumpkin Spice Latte Copycat Cozy and Comforting Recipe
Craving that warm, cozy feeling of fall? You can enjoy a delicious Pumpkin Spice Latte at home! In this article, Read Full Recipe


My Latest Dinners
-
White Bean Soup Simple and Hearty Delight
Looking for a warm and filling meal? Let me introduce you to white bean soup! This simple and hearty delight Read Full Recipe -
Garlic Herb Roasted Sweet Potatoes Flavorful Side Dish
Looking for a side dish that’s both tasty and easy to make? Garlic Herb Roasted Sweet Potatoes are the answer! Read Full Recipe -
One Pot Beef Taco Pasta Easy and Flavorful Meal
Looking for a quick and tasty meal? One Pot Beef Taco Pasta is the perfect dish! This recipe packs bold Read Full Recipe -
Garlic Chicken Zucchini Noodles Stir Fry Delight
Are you ready for a tasty twist on dinner? My Garlic Chicken Zucchini Noodles Stir Fry is a quick and Read Full Recipe -
Stuffed Italian Meatloaf Easy and Tasty Recipe
Are you ready to elevate your dinner game? This Stuffed Italian Meatloaf is both easy and tasty! In this article, Read Full Recipe -
One Pot French Onion Pasta Flavorful Comfort Dish
Looking for a cozy dinner that warms your soul? Try my One Pot French Onion Pasta! This creamy, rich dish Read Full Recipe


hey,
i’m !
I’m so happy you’re here!
Every dish I share is made with love and care. I hope they bring you the same comfort and joy they bring me. Let’s make memories, one recipe at a time.

![- 1 medium head of cauliflower - 1 cup all-purpose flour (or gluten-free option) - 1 cup water - Garlic powder - Onion powder - Smoked paprika - Cayenne pepper - Salt - Buffalo sauce - Chopped green onions - Celery sticks To make Buffalo cauliflower bites, you start with a fresh head of cauliflower. Cut it into bite-sized florets. Cauliflower is great for this dish since it absorbs flavors well. You'll also need flour and water to create a tasty batter. For seasonings, I suggest adding garlic powder, onion powder, and smoked paprika. These spices give a warm, savory touch. A bit of cayenne pepper will add heat, so adjust it to your taste. Finally, salt enhances all the flavors. Buffalo sauce is the star of this dish. You can use store-bought or make your own. Either way, it brings that classic tangy flavor. Don’t forget the optional garnishes! Chopped green onions add color and crunch. Celery sticks make a perfect side. They cool down the heat and add a fresh bite. This simple list of ingredients makes it easy to create a crispy and flavorful snack. You can find the Full Recipe for more detailed steps and tips. Enjoy your cooking! 1. Preheat your oven to 450°F (230°C). This heat will help the bites get crispy. 2. Line a baking sheet with parchment paper. This makes cleanup easy later. 3. In a large bowl, mix together these ingredients: - 1 cup all-purpose flour (or gluten-free flour) - 1 cup water - 1 teaspoon garlic powder - 1 teaspoon onion powder - 1 teaspoon smoked paprika - ½ teaspoon cayenne pepper - ½ teaspoon salt Whisk until smooth. 1. Take each cauliflower floret and dip it into the batter. Let the excess batter drip off. 2. Place the coated florets on the baking sheet. Make sure to leave space between each piece. This helps them cook evenly. 1. Bake the cauliflower for 25 minutes. Flip the pieces halfway through to ensure they get golden and crispy. 2. While the cauliflower bakes, melt 2 tablespoons of unsalted butter in a small pan over low heat. 3. Once melted, add 1 cup of buffalo sauce and stir well. Set this aside for later. 1. After the first baking phase, take out the cauliflower. Drizzle the buffalo sauce over the hot florets. 2. Toss gently to coat each piece evenly in the sauce. 3. Return the bites to the oven and bake for another 10 minutes. This will make them extra crispy. 4. Once done, let them cool a bit before serving. You can garnish with chopped green onions and serve with celery sticks. For the full recipe, check [Full Recipe]. Enjoy your delicious Buffalo Cauliflower Bites! To make your Buffalo Cauliflower Bites crispy, start with a hot oven. Preheat to 450°F (230°C) for the best results. Use parchment paper on your baking sheet. This prevents sticking and helps with crispiness. Flipping the florets halfway through baking is key. This ensures even cooking and browning. Use tongs to turn them carefully without breaking apart. To boost flavor, consider adding more spices. Try smoked paprika or extra garlic powder. Experiment with cumin or chili powder for a twist. You can choose between homemade and store-bought buffalo sauce. Homemade sauce is simple and fresh. Mix melted butter with hot sauce for a quick version. Store-bought is faster but may lack depth. Choose what fits your time and taste. Pair these bites with your favorite dips. Ranch or blue cheese dressing works great. Celery sticks add freshness and crunch. For plating, use a large platter. Arrange the cauliflower bites in a circle. Garnish with chopped green onions for color. You can even drizzle extra sauce on top for a nice touch. Try serving with craft beers or fizzy drinks. The flavors balance well, making your snack even better. Enjoy these bites with friends for a fun gathering! {{image_2}} You can make buffalo cauliflower bites fit your taste. To control the heat, adjust the cayenne pepper. Use less cayenne for a milder flavor. If you like it hot, add more. You can also swap out the buffalo sauce. Try different hot sauces for varied flavors. Each one brings a unique kick. Not everyone can use regular flour. You can use gluten-free flour as a great option. This keeps it tasty for those with dietary needs. For a dairy-free option, swap butter for vegan butter. You can also explore other vegetables. Try using broccoli or Brussels sprouts for a twist. Each vegetable brings its own fun flavor. Get creative with how you serve buffalo cauliflower bites. You can make a buffalo cauliflower salad. Toss the bites with fresh greens and your favorite dressing. Another fun idea is buffalo cauliflower tacos. Place the bites in soft tortillas and add toppings. Try avocado, salsa, or cabbage. These options keep it fresh and exciting. For the full recipe, you can refer back to the main section. To store leftover Buffalo Cauliflower Bites, let them cool first. Place them in an airtight container. They will stay fresh for about three days in the fridge. Make sure to keep them in a single layer if possible. This helps to keep them from getting too soggy. If you want to freeze these bites, let them cool completely. Place them in a freezer-safe bag or container. They can last up to three months in the freezer. For best results, freeze them in single layers, so they don’t stick together. When you're ready to enjoy the bites again, use the oven for the best texture. Preheat your oven to 375°F (190°C). Place the bites on a baking sheet and heat for about 10-15 minutes. This keeps them crispy. If you use a microwave, they might get soggy. For a quicker method, you can use the microwave, but the texture won't be the same. To keep the bites crispy, try to reheat them in the oven after microwaving. For the full recipe, click [here](#). For a gluten-free option, you can use several kinds of flour. Here are a few great choices: - Almond flour - Coconut flour - Chickpea flour - Rice flour Each flour has its own taste and texture. Almond flour gives a nutty flavor, while coconut flour adds a slight sweetness. Chickpea flour is hearty and works well for binding. Rice flour is light and crispy. Yes, you can make Buffalo Cauliflower Bites ahead of time. Here’s how: 1. Prepare the cauliflower as usual but do not bake it yet. 2. After coating the florets with batter, place them on a baking sheet. 3. Cover and refrigerate for up to 24 hours. 4. When ready to cook, bake them straight from the fridge. 5. Follow the baking instructions, adding a few extra minutes if needed. You can also bake them ahead and store in the fridge. To reheat, place them in the oven at 375°F (190°C) for about 10 minutes. Making homemade buffalo sauce is easy and quick. Here’s a simple recipe: 1. In a small saucepan, melt ½ cup of unsalted butter over low heat. 2. Once melted, remove from heat and stir in 1 cup of hot sauce. 3. Add a splash of vinegar for extra tang. 4. Mix well until smooth. Feel free to adjust the heat level by adding more hot sauce or cayenne pepper. This sauce works great with Buffalo Cauliflower Bites. You can find the full recipe for the bites above! In this post, we explored how to make delicious Buffalo Cauliflower Bites. We covered main ingredients, seasonings, preparation steps, and cooking tips. We also discussed variations and storage methods for your bites. Remember, you can customize the spice level and try different sauces. With a few simple steps, you can enjoy a fun, tasty snack. Enjoy your cooking, and share this recipe with friends for a great culinary experience!](https://easycookingbite.com/wp-content/uploads/2025/05/2be581d7-d8ae-4e0c-bb98-6a3eef3d95cc-300x300.webp)
Chicken Alfredo Stuffed Garlic Bread Simple Delight
Are you ready for a dish that will wow your taste buds? Chicken Alfredo Stuffed Garlic Bread is a fun twist on two classic…