

Latest & Greatest
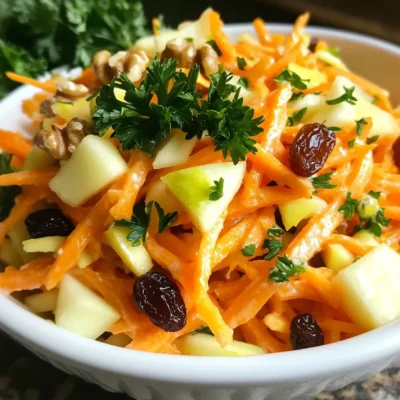
Carrot Apple Slaw Vibrant and Crunchy Salad Recipe
Looking for a fresh and tasty salad? This Carrot Apple Slaw is just what you need! With crunchy carrots, tart
Read more…
Minute Lemon Butter Ricotta Pasta Quick and Tasty Meal
Looking for a quick and tasty meal? You’ve found it! This Minute Lemon Butter Ricotta Pasta is both easy and
Read more…
Greek Turkey Meatballs Flavorful and Easy to Make
If you’re craving a tasty dish that’s simple to make, you’ve come to the right place. Greek turkey meatballs are
Read more…
Chicken Zucchini Bake Flavorful and Easy Recipe
Are you looking for a healthy and tasty meal that’s quick to prepare? Look no further than my Chicken Zucchini
Read more…
Keto Peanut Butter Chocolate Fat Bombs Easy Recipe
Craving a sweet treat that fits your keto diet? Look no further than these Keto Peanut Butter Chocolate Fat Bombs!
Read more…
Peach Cobbler Pound Cake Delightful and Easy Recipe
Are you ready to indulge in a sweet, warm treat? This Peach Cobbler Pound Cake is simple and packed with
Read more…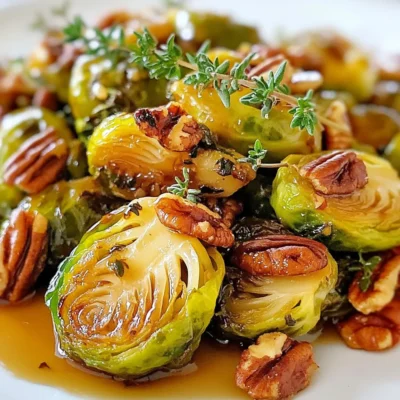
Maple Glazed Brussels Sprouts Savory and Simple Dish
Looking for a tasty side dish that shines at any meal? Maple Glazed Brussels Sprouts are simple yet delicious! In
Read more…
Creamy Tomato Twenty Minute Pasta Simple and Quick Meal
Looking for a quick and tasty dinner? Try my Creamy Tomato Twenty Minute Pasta! This dish is simple, using just
Read more…browse recipes


Taco Stuffed Zucchini Boats Flavorful and Simple Dish
Looking for a fun, flavorful dish that packs a punch? Taco Stuffed Zucchini Boats are the answer! This easy recipe combines the freshness of…
My Latest Drinks

Strawberry Cheesecake Smoothie Creamy Refreshing Treat
Craving something delicious and cool? The Strawberry Cheesecake Smoothie is your answer! It blends creamy cheesecake flavors with sweet strawberries Read Full Recipe-
Mocktail Pink Punch Refreshing and Easy Recipe
Are you ready to impress your guests with a delightful drink? This Mocktail Pink Punch recipe is both refreshing and Read Full Recipe -
Blue Lagoon Tropical Lemonade Refreshing and Zesty Drink
Looking for a drink that’s both refreshing and fun? Say hello to Blue Lagoon Tropical Lemonade! This colorful beverage packs Read Full Recipe -
Pumpkin Spice Coffee Creamer Flavorful Fall Treat
Are you ready to embrace the cozy vibes of autumn? In this blog post, I’ll guide you through making your Read Full Recipe -
Apple Cider Margarita Mocktail Refreshing Fall Drink
Fall is here, and that means it’s the perfect time for a cozy drink! The Apple Cider Margarita Mocktail offers Read Full Recipe -
Pumpkin Spice Latte Copycat Cozy and Comforting Recipe
Craving that warm, cozy feeling of fall? You can enjoy a delicious Pumpkin Spice Latte at home! In this article, Read Full Recipe


My Latest Dinners
-
Greek Yogurt Chicken Salad Fresh and Flavorful Meal
Looking for a tasty meal that’s both fresh and quick to make? Greek Yogurt Chicken Salad is your answer! This Read Full Recipe -
Jalapeño Cheddar Cornbread Simple and Savory Recipe
If you’re craving a warm, savory treat, this Jalapeño Cheddar Cornbread recipe is for you! It’s easy to make and Read Full Recipe -
One-Bowl Banana Oat Pancakes Easy and Tasty Recipe
Do you crave a simple yet delicious breakfast? Try my One-Bowl Banana Oat Pancakes! They are easy to make and Read Full Recipe -
Garlic Herb Roasted Vegetables Flavorful and Easy Recipe
If you want a delicious side dish that’s easy to make, try Garlic Herb Roasted Vegetables. This vibrant mix of Read Full Recipe -
White Bean Soup Simple and Hearty Delight
Looking for a warm and filling meal? Let me introduce you to white bean soup! This simple and hearty delight Read Full Recipe -
Garlic Herb Roasted Sweet Potatoes Flavorful Side Dish
Looking for a side dish that’s both tasty and easy to make? Garlic Herb Roasted Sweet Potatoes are the answer! Read Full Recipe


hey,
i’m !
I’m so happy you’re here!
Every dish I share is made with love and care. I hope they bring you the same comfort and joy they bring me. Let’s make memories, one recipe at a time.

![- Baby spinach - Fresh strawberries - Red onion The main part of this salad is the fresh produce. Baby spinach adds a nice crunch and a bright green color. I love using fresh strawberries because they bring sweetness and a pop of red. Slicing the strawberries lets their juice mix in with the salad. Red onion adds a bit of sharpness that balances the sweet strawberries. Together, these ingredients create a fresh and tasty mix. - Pecans - Feta cheese Next, we have the nuts and cheese. Chopped pecans give a nice crunch and a nutty flavor. They pair well with the sweetness of strawberries. Feta cheese adds creaminess and a salty kick. Crumbling the feta on top makes it easy to enjoy in every bite. These ingredients bring a variety of textures and flavors to the salad. - Olive oil - Apple cider vinegar - Honey, salt, and pepper Finally, we need the dressing components. Olive oil is the base of the dressing. It adds richness and helps mix everything together. Apple cider vinegar gives a tangy taste that brightens the salad. Adding honey brings a touch of sweetness, which balances the vinegar. Don’t forget to add salt and pepper to taste. This dressing ties all the flavors together perfectly. For the full recipe, check out the complete instructions. First, grab a small bowl. In it, whisk together the olive oil, apple cider vinegar, honey, salt, and pepper. Make sure these blend well to form a smooth dressing. Taste it and adjust the seasoning if you need more salt or sweetness. This dressing adds a sweet and tangy kick to your salad. Now, take a large salad bowl. Combine the washed baby spinach and sliced strawberries in it. Next, sprinkle in the chopped pecans, crumbled feta cheese, and thinly sliced red onion. Each ingredient brings its own flavor and texture. You will see bright colors and feel excited to eat this fresh mix. Drizzle your prepared dressing over the salad mixture. Use just enough to coat everything lightly. Gently toss the salad. This helps mix all the ingredients and dressing together. Finally, sprinkle poppy seeds on top. They add a delightful crunch and look beautiful. Serve the salad right away for the freshest taste. For detailed instructions, refer to the [Full Recipe]. When making Strawberry Spinach Poppy Seed Salad, I focus on fresh ingredients. Selecting ripe strawberries is key. Look for berries that are bright red with no green spots. They should smell sweet and feel firm but not hard. The taste of ripe strawberries adds a burst of flavor to the salad. Using fresh spinach is just as important. Choose baby spinach that is vibrant green and crisp. Avoid spinach that is wilted or yellowing. Fresh spinach serves as the perfect base. It pairs well with the sweetness of strawberries and the crunch of pecans. Presentation is important in this salad. I like to serve it in a large glass bowl. This way, the bright colors shine through. You can garnish with extra strawberry slices and a sprinkle of poppy seeds. This adds an elegant touch. Pairing the salad with protein can make it a meal. Grilled chicken or shrimp works well. Both add a nice contrast to the salad’s flavors. If you want something lighter, try adding sliced hard-boiled eggs. They provide protein without overpowering the dish. Prepping ingredients in advance makes serving easy. I often wash and slice the strawberries a few hours ahead. You can also chop the pecans and red onion early. Keep these in separate containers in the fridge. For storing salad components, I recommend using airtight containers. This keeps the spinach fresh and crisp. Don’t mix the salad until you’re ready to serve. This way, the salad stays crunchy and delicious. {{image_2}} You can make this salad even better with a few extra ingredients. - Adding grilled chicken: This option gives you added protein. Simply grill some chicken breast, slice it, and place it on top of the salad. It adds a nice touch and makes the dish more filling. - Incorporating other nuts or seeds: If you want a different crunch, try using walnuts or almonds. You can also swap in sunflower seeds for a nut-free option. Each choice gives the salad a unique flavor and texture. The dressing is key to this salad's success. You can switch it up for different tastes. - Balsamic vinaigrette: This dressing adds a sweet, tangy flavor that pairs well with strawberries. Just replace the olive oil and apple cider vinegar with balsamic vinegar, olive oil, and a dash of honey. - Yogurt-based dressings: For a creamy option, try a yogurt-based dressing. Mix plain yogurt with lemon juice, salt, and pepper. This gives the salad a rich taste, plus it's a bit lighter. You can easily adapt this salad to fit different diets. - Vegan alternatives: To make it vegan, skip the feta cheese and honey. Instead, try using a vegan cheese or avocado for creaminess. - Gluten-free options: This salad is already gluten-free! Just ensure that any dressings or added ingredients are also gluten-free. This way, everyone can enjoy it. For more ideas, check out the Full Recipe to explore all the options! To keep your salad fresh, store leftovers right away. Place the salad in an airtight container. This helps keep moisture out. Use a glass or plastic container with a tight lid. If you have dressing left, store it separately. This stops the salad from getting soggy. For long-term storage, you can freeze some parts. Freeze the pecans and feta cheese. Avoid freezing the spinach and strawberries, as they can get mushy. To maintain freshness, seal items in freezer bags. Remove as much air as you can. This helps prevent freezer burn. Knowing how long ingredients last is key. Fresh spinach stays good for about 5 to 7 days in the fridge. Strawberries last around 3 to 5 days. Check for signs of spoilage, like mold or squishy spots. If you see these signs, it’s time to toss them. Always trust your eyes and nose! For the full recipe, you can refer to the mentioned section. To wash spinach, start by filling a large bowl with cold water. Submerge the spinach leaves in the water. Swirl the leaves gently to loosen any dirt. Let the spinach sit for a few minutes. This helps dirt sink to the bottom. Afterward, lift the spinach out of the water. Do not pour the water out, as it will carry dirt. Rinse the spinach under cool running water. Pat the leaves dry with a clean towel. This method keeps the leaves fresh and clean. Yes, you can use other fruits in this salad. Some great options include blueberries, raspberries, or sliced peaches. You can also try apples or oranges for a different taste. Each fruit adds its unique flavor and texture. Feel free to mix and match based on what you enjoy. Just make sure the fruits are ripe and fresh for the best results. This salad lasts about 2 days in the fridge. However, the spinach may wilt over time. To keep it fresh longer, store the dressing separately. Add it just before serving. This way, the salad stays crisp and tasty. If you notice any signs of spoilage, like slimy spinach, it’s best to discard it. Yes, this salad is great for meal prep! You can prep the ingredients ahead of time. Wash and dry the spinach and fruits. Chop the nuts and cheese, and store them in separate containers. Keep the dressing in a small jar. When you are ready to eat, combine everything. This method keeps your salad fresh and delicious. You can enjoy a healthy meal without much fuss. This salad blends fresh produce, nuts, and cheese for a tasty meal. You learned how to prepare the dressing, assemble the salad, and add variations. Always choose ripe fruits and fresh greens for the best taste. Consider pairing your salad with grilled chicken for added protein. Remember, you can store it well to keep it fresh. With these tips, you can create a satisfying dish that fits your needs. Enjoy experimenting and sharing your delicious salad adventures!](https://easycookingbite.com/wp-content/uploads/2025/07/dca32f17-6f1d-441c-9319-7a4ca4a83513-300x300.webp)


Creamy Jalapeño Mac and Cheese Easy Comfort Dish
If you crave comfort food, let me share my favorite dish: Creamy Jalapeño Mac and Cheese. This dish combines rich, velvety cheese with a…