
Latest & Greatest
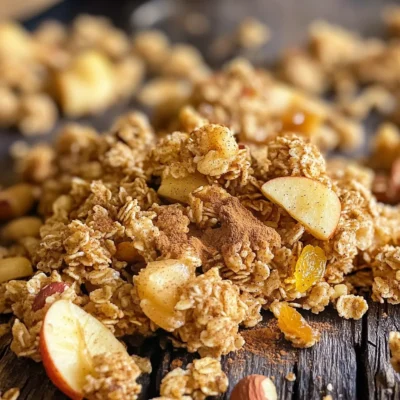
Apple Cinnamon Granola Clusters Healthy Snack Idea
Looking for a tasty yet healthy snack idea? Let me introduce you to my Apple Cinnamon Granola Clusters! Packed with
Read more…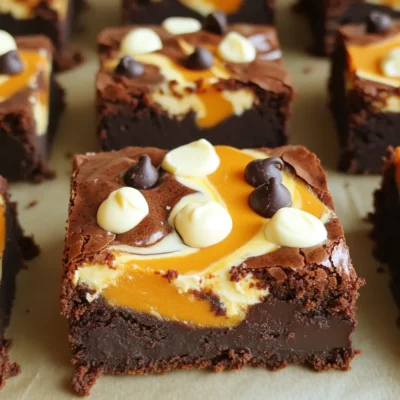
Pumpkin Cream Cheese Brownies Delightful and Rich Treat
Are you ready to indulge in a treat that blends the cozy flavors of fall with rich sweetness? These Pumpkin
Read more…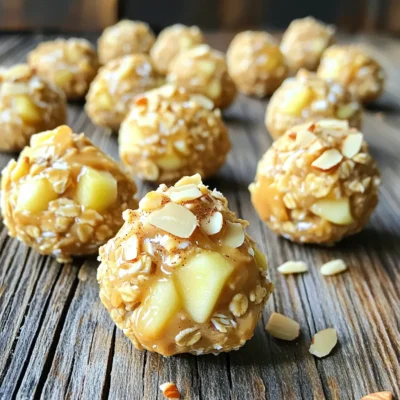
No-Bake Peanut Butter Apple Oat Bites Delightful Treat
Looking for a quick treat that’s both yummy and healthy? These No-Bake Peanut Butter Apple Oat Bites are just what
Read more…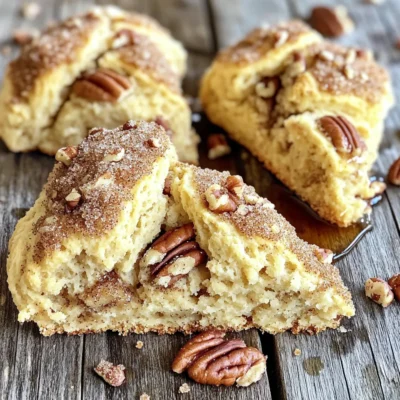
Bakery-Style Brown Sugar Maple Scones Irresistible Treat
If you’re craving the warm, sweet comfort of a bakery treat, these Brown Sugar Maple Scones are for you! I’ll
Read more…
Sheet-Pan BBQ Chicken Flatbreads Simple and Tasty
Looking for a quick and tasty meal? These Sheet-Pan BBQ Chicken Flatbreads are perfect for busy nights! With just a
Read more…
No-Bake Chocolate Hazelnut Cheesecake Cups Delight
Are you ready to indulge in a sweet treat that requires no baking? These No-Bake Chocolate Hazelnut Cheesecake Cups are
Read more…
Apple Cinnamon Overnight Oats Simple and Tasty Recipe
Are you ready to kickstart your mornings with something delicious? My Apple Cinnamon Overnight Oats are simple to whip up
Read more…
Pumpkin Cream Cheese Swirl Muffins Irresistible Recipe
Are you ready to indulge in fall’s favorite treat? My Pumpkin Cream Cheese Swirl Muffins are a game-changer for breakfast
Read more…browse recipes

. To start, grab your ripe peaches. You want them sweet and juicy. Cut the peaches and take out the pits. Place the diced peaches in a bowl. Now, sprinkle half of the sugar over them. Let the peaches sit for about 30 minutes. This process is called macerating. It draws out the juices and boosts their flavor. Next, it’s time to blend the peaches. Move the macerated peaches into a blender. Add a tablespoon of fresh lemon juice for a zesty kick. Blend until smooth, but leave some small chunks. This gives your ice cream a nice texture. Now, let’s whip up the cream base. In a large bowl, combine the heavy cream, whole milk, and the rest of the sugar. Whisk it all together until the sugar dissolves. This part is key for a smooth ice cream. Then, add the vanilla extract and salt. These flavors balance the sweetness and make your ice cream rich. Mix gently until everything is well combined. It’s time to churn! Pour your peach mixture into an ice cream maker. Follow the manufacturer’s instructions for churning. This usually takes about 20 to 25 minutes. You want it to reach a soft, creamy consistency. If you like your ice cream firmer, transfer it to an airtight container. Freeze it for an additional 2 to 4 hours. This helps it set up nicely. When you’re ready to dig in, scoop it into bowls. You can sprinkle some chopped pecans or almonds on top for a crunchy finish. For the full recipe, see the provided section. To get the best texture for your peach ice cream, pay close attention to the churning time. Churning the ice cream mixes air into the base and makes it fluffy. Typically, it takes about 20-25 minutes in your ice cream maker. If you want a firmer ice cream, freeze it for an extra 2-4 hours after churning. This step helps set the texture and makes it scoopable. Choosing the right peaches is key. Look for ripe, sweet peaches. They should smell fragrant and feel slightly soft. The flavor of your ice cream will depend on their quality. You can adjust the sweetness to your liking. If you prefer it sweeter, add more sugar to the cream mixture. Taste as you go for the best flavor. For making ice cream, I recommend a good-quality ice cream maker. It should have a sturdy bowl that freezes well. Some great options include compressor machines or traditional churners. You will also need a few helpful tools. A blender or food processor is great for mixing the peaches. Use a whisk for the cream mixture, and have ice cream scoops ready for serving. Enjoy your delicious homemade peach ice cream with these tips! For the full recipe, check out the detailed steps above. {{image_2}} You can make your peach ice cream even better by adding other fruits. Strawberries and raspberries pair well with peaches. Just mix them in with the peach blend. This adds layers of flavor and color. You can also try adding spices. A pinch of cinnamon or nutmeg can enhance the taste. These spices bring warmth and a hint of spice to the sweet peaches. If you want a dairy-free version, use coconut cream or almond milk. Both options make a creamy base. They add a unique flavor that works well with peaches. You can also choose non-dairy sweeteners. Maple syrup or agave nectar are great substitutes. These sweeteners blend beautifully into the ice cream without dairy. Serving peach ice cream can be fun and creative. Drizzle some vanilla or chocolate sauce on top. This adds a sweet touch and looks great on the dish. You can also pair the ice cream with cakes or pies. A slice of peach pie or pound cake makes a perfect match. It creates a lovely dessert experience. For extra crunch, sprinkle chopped pecans or almonds on top. This adds texture and makes each bite special. For the complete recipe, check out the *Full Recipe* section! To keep your homemade peach ice cream fresh, choose the right container. I recommend using an air-tight container. This type of container keeps ice crystals from forming. If you use a regular container, ice cream can get freezer burn. Make sure the lid fits tightly. Label the container with the date you made it. This will help you remember when to eat it. How long can homemade peach ice cream last in the freezer? Typically, it will stay good for about two weeks. After that, it might lose flavor and texture. Signs to know when ice cream should be discarded include ice crystals on the surface or an off smell. If it tastes off or has changed color, throw it away. Cleaning your ice cream maker is easy. Rinse the bowl and blade with warm water. Use a soft cloth to wipe the outer parts. Avoid using harsh cleaners. For best practices, dry all parts well before storing. When you use it again, ensure all parts are dry to prevent sticking. This will help your ice cream maker last longer. Yes, you can use frozen peaches. Here’s how to do it right: - Thaw first: Let the frozen peaches sit out for about 30 minutes. This helps them soften. - Drain excess liquid: After thawing, drain any liquid that collects. This keeps your ice cream from being too runny. - Blend as usual: Blend the thawed peaches until smooth. You can leave some small pieces for texture. - Macerate with sugar: Just like with fresh peaches, sprinkle sugar on the thawed peaches. This draws out their natural juices. Using frozen peaches can still give you that sweet peachy flavor in your ice cream. You can tell your ice cream is ready by looking for a few signs: - Soft serve texture: When it looks thick and creamy, it’s close to done. - Increased volume: The mixture will expand as air gets mixed in. - Stiffness: Test it with a spoon. If it holds its shape, it's ready. Churning usually takes about 20-25 minutes. If it looks and feels right, it’s time to freeze it for a firmer texture. Absolutely! Here are some easy methods to make ice cream without one: - Freezer method: Pour the mixture into a shallow dish. Stir every 30 minutes for about 2-3 hours. This helps break up ice crystals. - Zip-top bag method: Pour the mixture into a zip-top bag. Seal it and place it in a larger bag filled with ice and salt. Shake for about 10-15 minutes until it thickens. - Blender method: Freeze the mixture in a container. After a few hours, blend it again to break up ice. Refreeze until it’s your desired texture. These methods may take a bit longer but will still give you a tasty treat! For a full recipe, check out the Peachy Paradise Ice Cream recipe. You learned how to make delicious homemade peach ice cream. We covered fresh ingredients, including ripe peaches and dairy, and shared tips for the best texture. I also explained fun variations and how to store your ice cream properly. Making ice cream at home is rewarding and fun. With these steps, you can enjoy great ice cream anytime. Enjoy experimenting and perfecting your flavors!](https://easycookingbite.com/wp-content/uploads/2025/06/105db894-a65a-44c2-a55b-fd53c8bc6f56.webp)
Homemade Peach Ice Cream Creamy and Refreshing Treat
Looking for a sweet treat to cool off on a sunny day? You’ve found it! Homemade peach ice cream is a creamy, refreshing delight…
My Latest Drinks

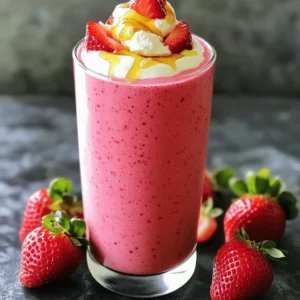
Strawberry Cheesecake Smoothie Creamy Refreshing Treat
Craving something delicious and cool? The Strawberry Cheesecake Smoothie is your answer! It blends creamy cheesecake flavors with sweet strawberries Read Full Recipe-
Mocktail Pink Punch Refreshing and Easy Recipe
Are you ready to impress your guests with a delightful drink? This Mocktail Pink Punch recipe is both refreshing and Read Full Recipe -
Blue Lagoon Tropical Lemonade Refreshing and Zesty Drink
Looking for a drink that’s both refreshing and fun? Say hello to Blue Lagoon Tropical Lemonade! This colorful beverage packs Read Full Recipe -
Pumpkin Spice Coffee Creamer Flavorful Fall Treat
Are you ready to embrace the cozy vibes of autumn? In this blog post, I’ll guide you through making your Read Full Recipe -
Apple Cider Margarita Mocktail Refreshing Fall Drink
Fall is here, and that means it’s the perfect time for a cozy drink! The Apple Cider Margarita Mocktail offers Read Full Recipe -
Pumpkin Spice Latte Copycat Cozy and Comforting Recipe
Craving that warm, cozy feeling of fall? You can enjoy a delicious Pumpkin Spice Latte at home! In this article, Read Full Recipe


My Latest Dinners
-
White Bean Soup Simple and Hearty Delight
Looking for a warm and filling meal? Let me introduce you to white bean soup! This simple and hearty delight Read Full Recipe -
Garlic Herb Roasted Sweet Potatoes Flavorful Side Dish
Looking for a side dish that’s both tasty and easy to make? Garlic Herb Roasted Sweet Potatoes are the answer! Read Full Recipe -
One Pot Beef Taco Pasta Easy and Flavorful Meal
Looking for a quick and tasty meal? One Pot Beef Taco Pasta is the perfect dish! This recipe packs bold Read Full Recipe -
Garlic Chicken Zucchini Noodles Stir Fry Delight
Are you ready for a tasty twist on dinner? My Garlic Chicken Zucchini Noodles Stir Fry is a quick and Read Full Recipe -
Stuffed Italian Meatloaf Easy and Tasty Recipe
Are you ready to elevate your dinner game? This Stuffed Italian Meatloaf is both easy and tasty! In this article, Read Full Recipe -
One Pot French Onion Pasta Flavorful Comfort Dish
Looking for a cozy dinner that warms your soul? Try my One Pot French Onion Pasta! This creamy, rich dish Read Full Recipe


hey,
i’m !
I’m so happy you’re here!
Every dish I share is made with love and care. I hope they bring you the same comfort and joy they bring me. Let’s make memories, one recipe at a time.


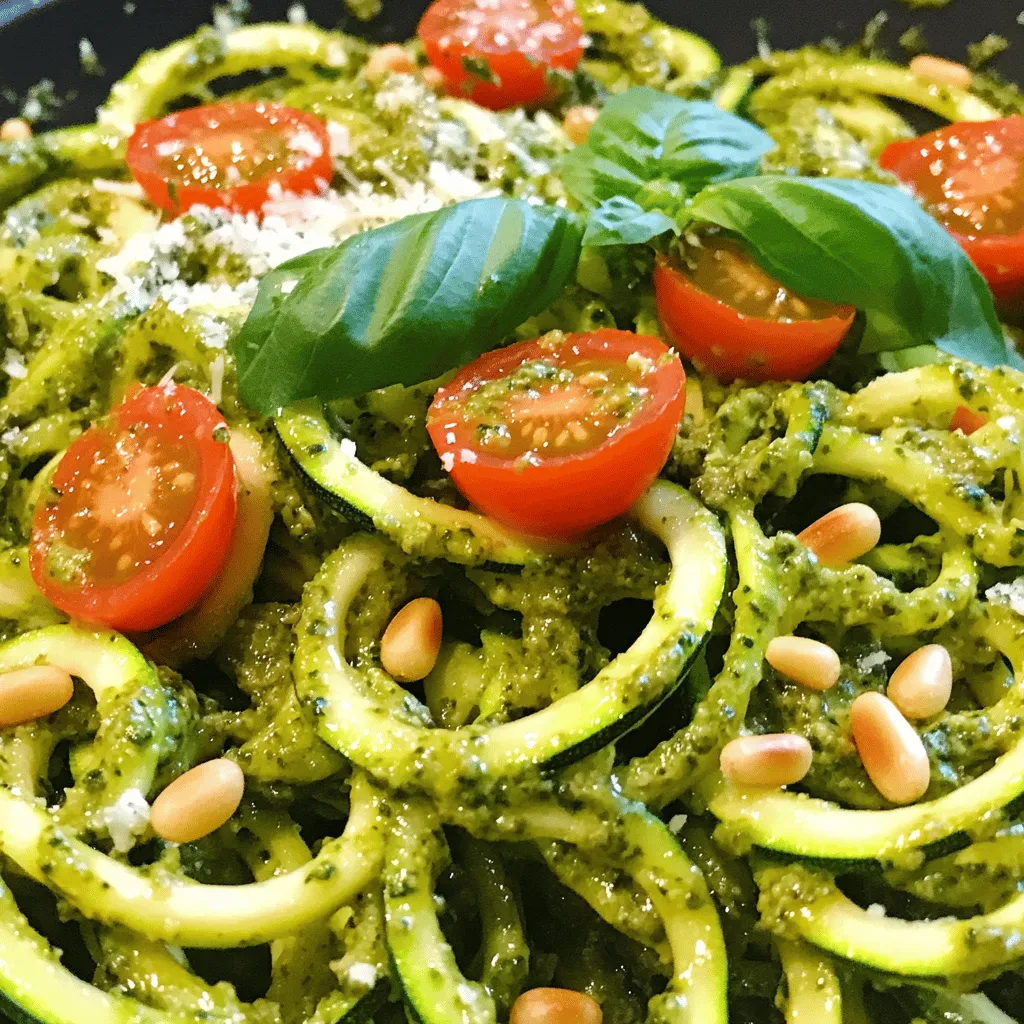
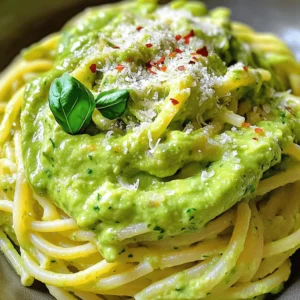
Zucchini Noodles with Pesto Flavorful and Fresh Dish
Are you ready to enjoy a fresh, flavorful dish that’s both easy and healthy? Zucchini Noodles with Pesto bring together simple ingredients for a…