


Latest & Greatest
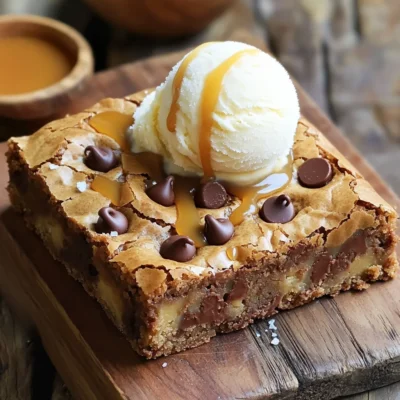
Brown Butter Blondies Rich and Decadent Treat
If you’re craving a sweet treat that packs a punch, look no further! Today, I’m sharing my recipe for Brown
Read more…
Air Fryer Sweet and Spicy Chicken Bites Recipe
Looking for an easy and tasty dish that packs a punch? Try my Air Fryer Sweet and Spicy Chicken Bites!
Read more…
Slow Cooker Creamy Garlic Mashed Potatoes Delight
If you love creamy, flavorful mashed potatoes, this recipe is just for you! My Slow Cooker Creamy Garlic Mashed Potatoes
Read more…
Sheet-Pan Teriyaki Salmon Rice Bowls Simple Recipe
Looking for a quick and tasty dinner idea? Try my Sheet-Pan Teriyaki Salmon Rice Bowls! This simple recipe packs healthy
Read more…
One Pot Creamy Garlic Shrimp Pasta Quick and Simple
Looking for a quick and tasty meal that impresses? You’ve found the right dish! This One Pot Creamy Garlic Shrimp
Read more…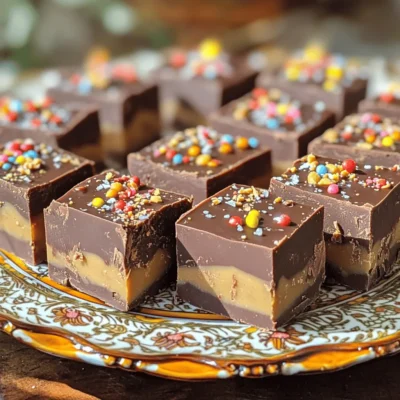
No Bake Chocolate Peanut Butter Fudge Delight
Indulge in the sweet and creamy bliss of No Bake Chocolate Peanut Butter Fudge. With just a few simple ingredients,
Read more…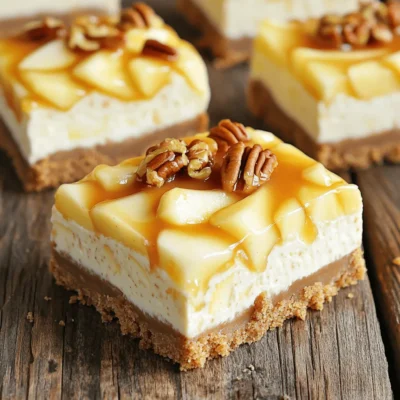
Caramel Apple Cheesecake Bars Delightful Dessert Treat
Are you ready to indulge in a sweet, creamy treat? These Caramel Apple Cheesecake Bars are the perfect dessert for
Read more…
Mushroom Spinach Quiche Savory and Simple Recipe
Are you ready to impress your taste buds with a delicious Mushroom Spinach Quiche? This savory and simple recipe is
Read more…browse recipes


Raspberry Lemonade Popsicles Refreshing Summer Treat
Looking for the perfect way to cool off this summer? You’ve found it! These Raspberry Lemonade Popsicles are a delicious blend of tart and…
My Latest Drinks

Strawberry Cheesecake Smoothie Creamy Refreshing Treat
Craving something delicious and cool? The Strawberry Cheesecake Smoothie is your answer! It blends creamy cheesecake flavors with sweet strawberries Read Full Recipe-
Mocktail Pink Punch Refreshing and Easy Recipe
Are you ready to impress your guests with a delightful drink? This Mocktail Pink Punch recipe is both refreshing and Read Full Recipe -
Blue Lagoon Tropical Lemonade Refreshing and Zesty Drink
Looking for a drink that’s both refreshing and fun? Say hello to Blue Lagoon Tropical Lemonade! This colorful beverage packs Read Full Recipe -
Pumpkin Spice Coffee Creamer Flavorful Fall Treat
Are you ready to embrace the cozy vibes of autumn? In this blog post, I’ll guide you through making your Read Full Recipe -
Apple Cider Margarita Mocktail Refreshing Fall Drink
Fall is here, and that means it’s the perfect time for a cozy drink! The Apple Cider Margarita Mocktail offers Read Full Recipe -
Pumpkin Spice Latte Copycat Cozy and Comforting Recipe
Craving that warm, cozy feeling of fall? You can enjoy a delicious Pumpkin Spice Latte at home! In this article, Read Full Recipe


My Latest Dinners
-
White Bean Soup Simple and Hearty Delight
Looking for a warm and filling meal? Let me introduce you to white bean soup! This simple and hearty delight Read Full Recipe -
Garlic Herb Roasted Sweet Potatoes Flavorful Side Dish
Looking for a side dish that’s both tasty and easy to make? Garlic Herb Roasted Sweet Potatoes are the answer! Read Full Recipe -
One Pot Beef Taco Pasta Easy and Flavorful Meal
Looking for a quick and tasty meal? One Pot Beef Taco Pasta is the perfect dish! This recipe packs bold Read Full Recipe -
Garlic Chicken Zucchini Noodles Stir Fry Delight
Are you ready for a tasty twist on dinner? My Garlic Chicken Zucchini Noodles Stir Fry is a quick and Read Full Recipe -
Stuffed Italian Meatloaf Easy and Tasty Recipe
Are you ready to elevate your dinner game? This Stuffed Italian Meatloaf is both easy and tasty! In this article, Read Full Recipe -
One Pot French Onion Pasta Flavorful Comfort Dish
Looking for a cozy dinner that warms your soul? Try my One Pot French Onion Pasta! This creamy, rich dish Read Full Recipe


hey,
i’m !
I’m so happy you’re here!
Every dish I share is made with love and care. I hope they bring you the same comfort and joy they bring me. Let’s make memories, one recipe at a time.


. Enjoy your delicious Peach Streusel Coffee Cake! For a great peach streusel coffee cake, use room temperature ingredients. When butter and eggs are warm, they mix better. This helps the cake rise nicely. Next, check if the cake is done by inserting a toothpick. If it comes out clean, your cake is ready. Don’t open the oven door often, as this can cause the cake to sink. Serve your coffee cake warm for the best taste. A light dusting of powdered sugar adds charm. You can pair it with whipped cream or vanilla ice cream. These toppings bring extra flavor and fun to the dish. For a beautiful presentation, serve slices on a nice plate with fresh peach slices next to them. If your cake sinks, it may be from overmixing or too much liquid. Ensure you follow the recipe closely. If your cake does not rise, check if your baking powder is fresh. For different oven types, you might need to adjust the baking time. Always keep an eye on the cake as it bakes. This will help you catch any issues early. {{image_2}} You can change up the fruit in this coffee cake. Try using blueberries for a burst of freshness. Apples also work well and bring a nice crunch. You can even mix fruits for a fun twist. If you want to add some texture, consider tossing in nuts. Chopped walnuts or pecans add a lovely crunch. For a decadent touch, you can also mix in chocolate chips. They melt into the cake, giving you sweet bites of chocolate. If you need a gluten-free version, swap the all-purpose flour. Use a gluten-free blend that works well in baking. This keeps the cake light and fluffy without the gluten. For dairy-free options, replace the sour cream and butter. Use coconut oil or vegan butter for the cake. Almond milk or soy yogurt can replace the sour cream. These swaps keep the flavor rich while being kind to your diet. Want to spice things up? Add some nutmeg or ginger to your batter. These spices give the cake warmth and depth. Just a pinch can change the whole flavor profile. You can also add citrus zest to brighten the cake. Try lemon or orange zest for a fresh taste. It adds a lovely aroma and enhances the peach flavor. For the full recipe, check out the details above. To keep your cake fresh, store it in an airtight container. This helps keep moisture in and air out. Place it in a cool, dry spot. Avoid heat and sunlight, which can dry it out. You can also use a cake dome for added protection. If you want to freeze your cake, first let it cool completely. Wrap it tightly in plastic wrap. Then, place it in a freezer bag or container. This keeps ice crystals from forming. When you are ready to eat it, thaw the cake in the fridge overnight. You can also leave it out at room temperature for a few hours. At room temperature, the cake lasts about three days. If you store it in the fridge, it can last up to a week. The cold helps keep it fresh longer. Keep an eye on it for any signs of spoilage, like mold or an off smell. Enjoy your Peach Streusel Coffee Cake at its best with the right storage! To make Peach Streusel Coffee Cake from scratch, follow these steps: 1. Preheat your oven to 350°F (175°C). Grease a 9-inch round cake pan or line it with parchment paper for easy removal. 2. In a large bowl, mix 2 cups of all-purpose flour, 1 cup of sugar, 1 tablespoon of baking powder, 1/2 teaspoon of baking soda, and 1/2 teaspoon of salt. 3. Add 1/2 cup of softened butter, 1/2 cup of sour cream, 2 large eggs, and 1 teaspoon of vanilla extract to the dry mix. Beat on medium speed for about 2-3 minutes until smooth. 4. Gently fold in 2 cups of diced peaches and 1 teaspoon of cinnamon. 5. Pour the batter into your prepared pan. Smooth the top with a spatula. 6. For the streusel topping, mix 1/3 cup of flour, 1/3 cup of brown sugar, 1/3 cup of rolled oats, 1/4 cup of melted butter, and 1 teaspoon of ground cinnamon until crumbly. 7. Sprinkle the streusel topping over the batter. 8. Bake for 35-40 minutes. A toothpick should come out clean when inserted in the center. 9. Let the cake cool in the pan for 10 minutes, then transfer it to a wire rack to cool completely. For the complete ingredients and instructions, check the Full Recipe. Yes, you can use frozen peaches! Just remember these tips: - Thaw the peaches first to remove excess moisture. - Pat them dry with a paper towel to avoid a soggy cake. - The peach flavor will be less fresh but still tasty. Frozen peaches work well and save time, especially when fresh peaches aren't in season. You can enjoy this delightful coffee cake with various beverages and sides. Here are some ideas: - Brewed coffee or a cappuccino pairs well. - Try a refreshing iced tea for a summer vibe. - Serve it warm with whipped cream for a sweet treat. - A scoop of vanilla ice cream adds a creamy touch. Feel free to mix and match to find your favorite combination! Peach Streusel Coffee Cake is simple and fun to make. You learned about key ingredients, preparation steps, and tips for success. You also found ways to adapt this recipe for different diets and flavors. Remember, using fresh ingredients boosts taste. Proper storage keeps your cake tasty longer. Whether you share it with friends or enjoy it solo, this cake brings joy. Now it’s your turn to bake and savor. Enjoy every bite!](https://easycookingbite.com/wp-content/uploads/2025/07/1bdfd131-4c9b-4103-b74d-4c880d168153-300x300.webp)
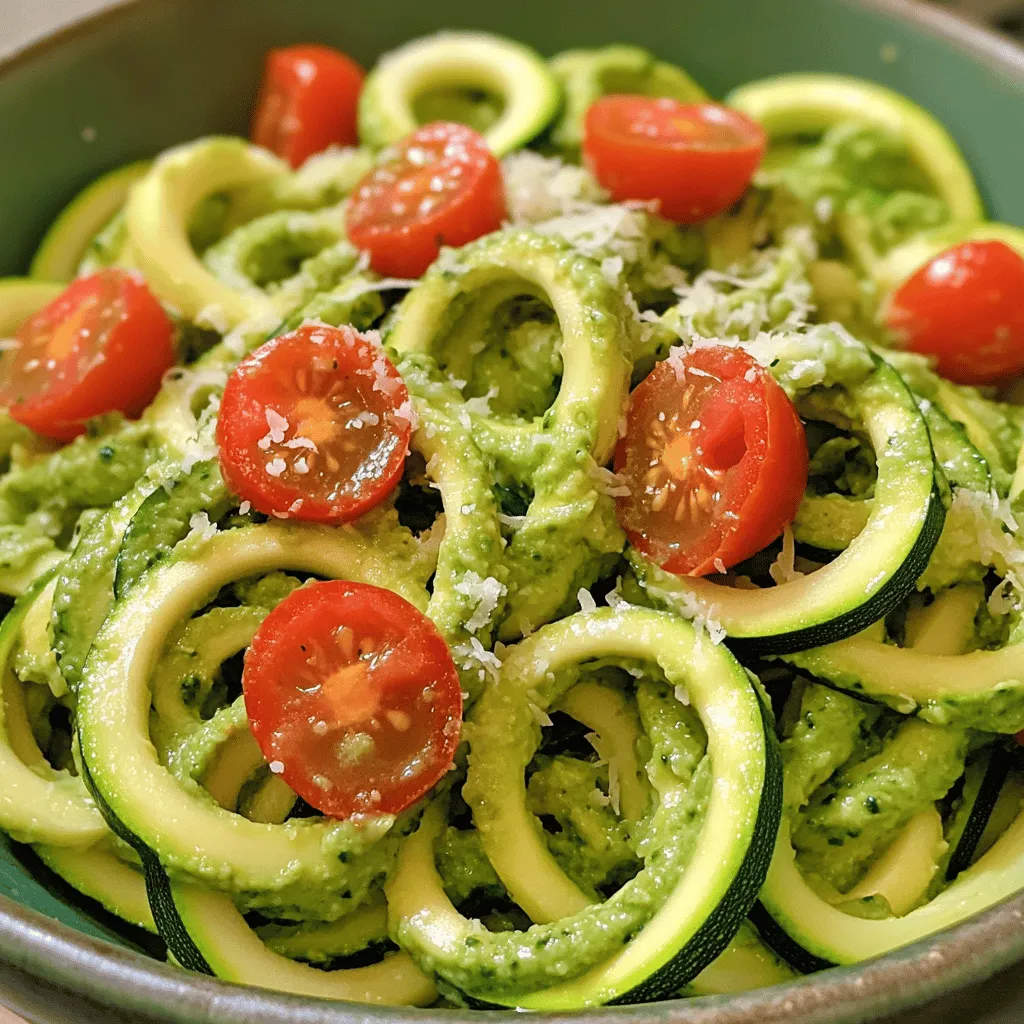
Zucchini Noodles with Pesto Fresh and Flavorful Dish
Are you looking for a fresh and flavorful dish that impresses? Zucchini noodles with pesto might be your answer! This simple meal combines tender…