Latest & Greatest
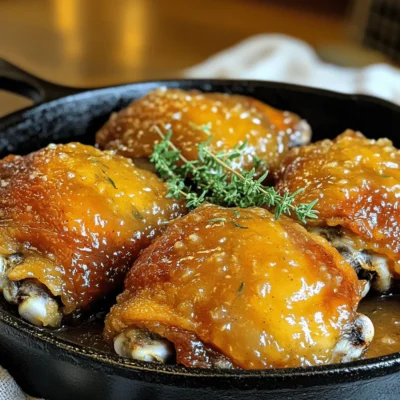
Savory Apple Butter Glazed Chicken Thighs Delight
Are you ready to elevate your dinner game? This Savory Apple Butter Glazed Chicken Thighs Delight is the answer. With
Read more…
Air Fryer S’mores Hand Pies Tasty and Easy Recipe
Get ready for a treat! Air Fryer S’mores Hand Pies combine your favorite campfire snack with easy prep. You’ll love
Read more…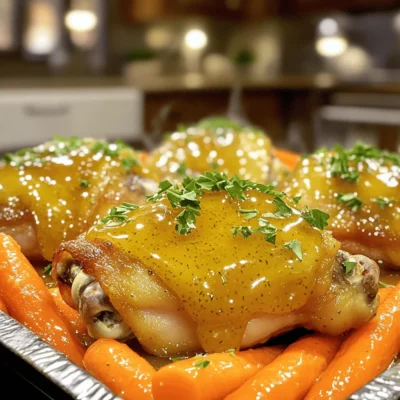
Honey Mustard Chicken and Carrots Sheet Pan Delight
Looking for an easy and tasty meal? Try my Honey Mustard Chicken and Carrots Sheet Pan Delight! In just a
Read more…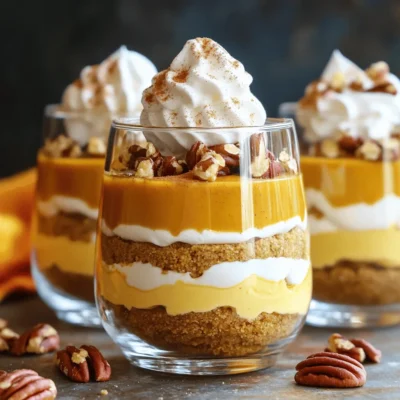
Pumpkin Cheesecake Parfaits Delightful Layered Treat
Are you ready to indulge in a tasty fall treat? These Pumpkin Cheesecake Parfaits are a simple yet delightful way
Read more…
Savory Slow Cooker Beef Chili Hearty Meal Recipe
Are you ready to warm up your kitchen with a delicious bowl of Slow Cooker Beef Chili? This hearty meal
Read more…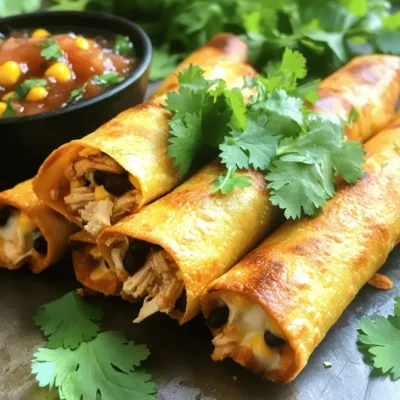
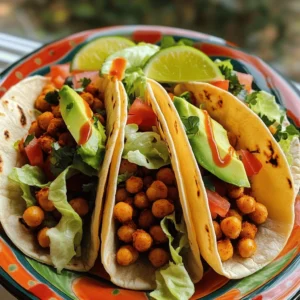
Air Fryer Chicken Taquitos Crispy and Delicious Snack
Craving a tasty snack? Look no further than these Air Fryer Chicken Taquitos! They’re crispy, flavorful, and easy to make.
Read more…
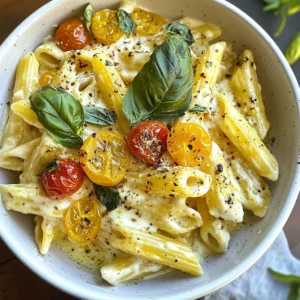
Garlic Parmesan Orzo Chicken One-Pot Delight
Welcome to Garlic Parmesan Orzo Chicken One-Pot Delight! If you’re looking for a simple yet delicious meal, you’ve come to
Read more…
Irresistible Apple Cider Donut Pound Cake Recipe
If you love the warm, cozy flavors of fall, you’ll adore my Irresistible Apple Cider Donut Pound Cake. This cake
Read more…browse recipes
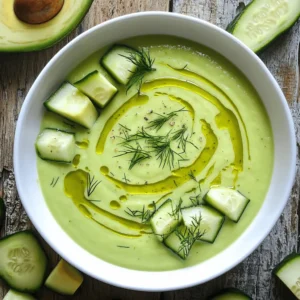
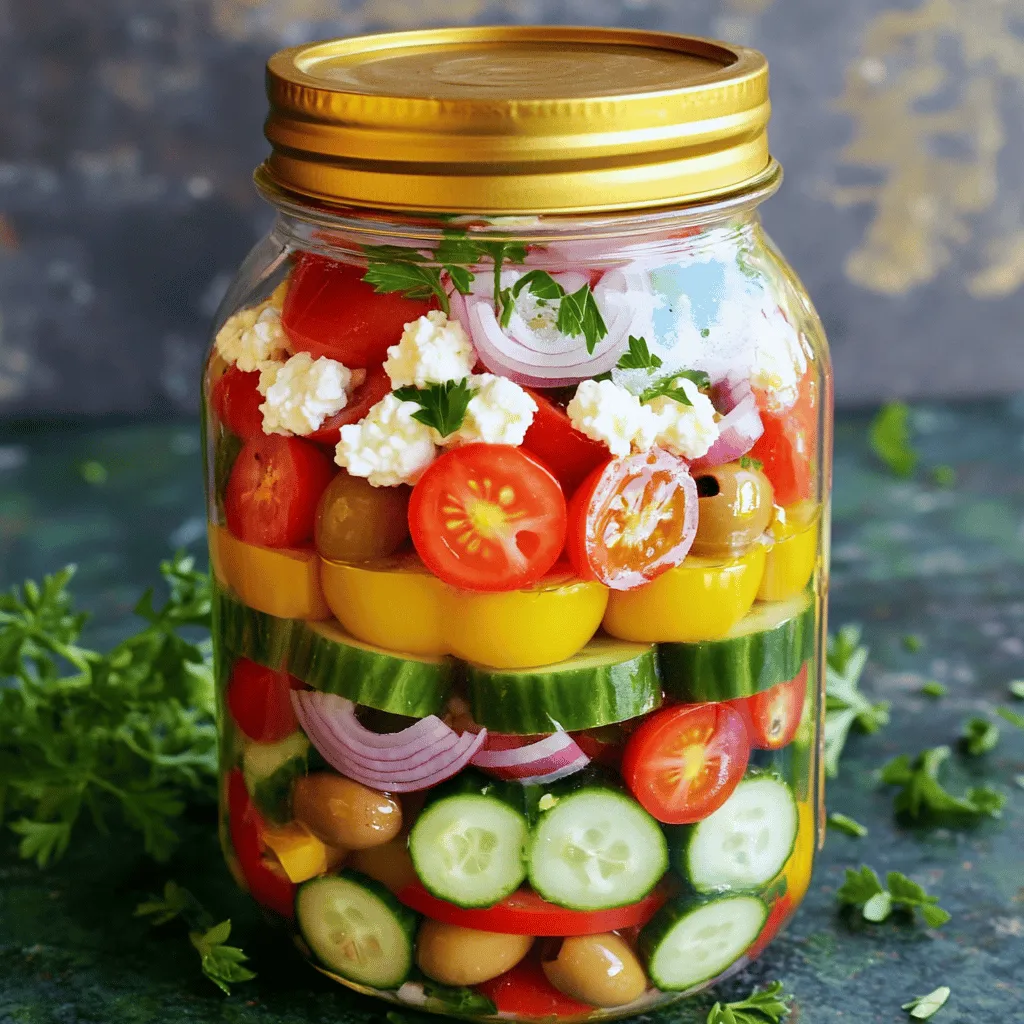
Mason Jar Greek Salad Tasty and Fresh Meal Idea
Looking for a fresh, tasty meal idea? Try a Mason Jar Greek Salad! It combines vibrant veggies with tangy feta, creating a healthy dish…
My Latest Drinks

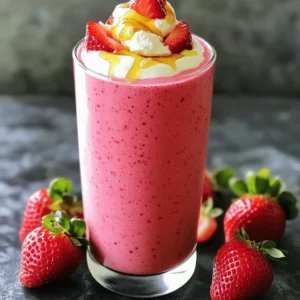
Strawberry Cheesecake Smoothie Creamy Refreshing Treat
Craving something delicious and cool? The Strawberry Cheesecake Smoothie is your answer! It blends creamy cheesecake flavors with sweet strawberries Read Full Recipe-
Mocktail Pink Punch Refreshing and Easy Recipe
Are you ready to impress your guests with a delightful drink? This Mocktail Pink Punch recipe is both refreshing and Read Full Recipe -
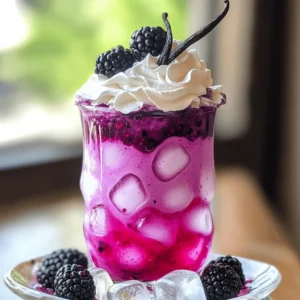
Blue Lagoon Tropical Lemonade Refreshing and Zesty Drink
Looking for a drink that’s both refreshing and fun? Say hello to Blue Lagoon Tropical Lemonade! This colorful beverage packs Read Full Recipe -
Pumpkin Spice Coffee Creamer Flavorful Fall Treat
Are you ready to embrace the cozy vibes of autumn? In this blog post, I’ll guide you through making your Read Full Recipe -
Apple Cider Margarita Mocktail Refreshing Fall Drink
Fall is here, and that means it’s the perfect time for a cozy drink! The Apple Cider Margarita Mocktail offers Read Full Recipe -
Pumpkin Spice Latte Copycat Cozy and Comforting Recipe
Craving that warm, cozy feeling of fall? You can enjoy a delicious Pumpkin Spice Latte at home! In this article, Read Full Recipe


My Latest Dinners
-
White Bean Soup Simple and Hearty Delight
Looking for a warm and filling meal? Let me introduce you to white bean soup! This simple and hearty delight Read Full Recipe -
Garlic Herb Roasted Sweet Potatoes Flavorful Side Dish
Looking for a side dish that’s both tasty and easy to make? Garlic Herb Roasted Sweet Potatoes are the answer! Read Full Recipe -
One Pot Beef Taco Pasta Easy and Flavorful Meal
Looking for a quick and tasty meal? One Pot Beef Taco Pasta is the perfect dish! This recipe packs bold Read Full Recipe -
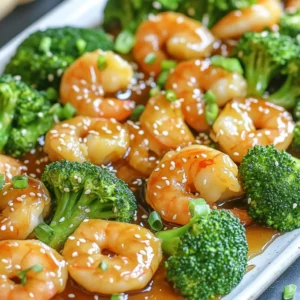
Garlic Chicken Zucchini Noodles Stir Fry Delight
Are you ready for a tasty twist on dinner? My Garlic Chicken Zucchini Noodles Stir Fry is a quick and Read Full Recipe -
Stuffed Italian Meatloaf Easy and Tasty Recipe
Are you ready to elevate your dinner game? This Stuffed Italian Meatloaf is both easy and tasty! In this article, Read Full Recipe -
One Pot French Onion Pasta Flavorful Comfort Dish
Looking for a cozy dinner that warms your soul? Try my One Pot French Onion Pasta! This creamy, rich dish Read Full Recipe


hey,
i’m !
I’m so happy you’re here!
Every dish I share is made with love and care. I hope they bring you the same comfort and joy they bring me. Let’s make memories, one recipe at a time.
Loaded Chicken Nachos Tasty and Easy Game Day Snack
Looking for a game day snack that packs flavor and fun? Loaded Chicken Nachos are your answer! With crispy tortilla chips, savory shredded chicken,…
![- 2 cups cooked chicken, shredded - 1 bag (12 oz) tortilla chips - 1 cup black beans, drained and rinsed - 1 cup corn kernels (fresh or canned) - 1 cup diced tomatoes - 1 cup shredded cheddar cheese - 1 cup shredded Monterey Jack cheese These ingredients form the base of your loaded chicken nachos. The shredded chicken adds protein and flavor. Tortilla chips provide the crunchy base. Black beans and corn add texture and nutrition. The cheese varieties melt beautifully, creating a gooey topping. - 1 jalapeño, sliced (optional) - 1 avocado, diced - ½ cup sour cream - ¼ cup fresh cilantro, chopped These toppings elevate your nachos. Jalapeños give heat, while avocado adds creaminess. Sour cream offers a cool contrast to the spices. Cilantro brings freshness and color. - Spices: 1 tablespoon olive oil, 1 teaspoon cumin, 1 teaspoon chili powder, salt and pepper to taste Adding spices makes a big difference. Olive oil helps cook the chicken mixture. Cumin and chili powder enhance the overall flavor. Adjust salt and pepper to your taste, making your nachos truly yours. - Calories per Serving: Approximately 400-500 - Protein: About 25 grams - Fiber: Around 6 grams - Allergen Information: Contains dairy and may have gluten This dish is filling and tasty, making it a great game day snack. The protein and fiber help keep you satisfied. Just be mindful of allergens if you're serving guests with dietary restrictions. For the full recipe, check out the [Full Recipe]. - Cooking the Chicken Start by heating olive oil in a skillet over medium heat. Add 2 cups of shredded chicken, along with 1 cup of black beans and 1 cup of corn. Sprinkle in 1 teaspoon of cumin and 1 teaspoon of chili powder. Add salt and pepper to taste. Stir the mixture for about 5 minutes. Cook until everything is hot and well mixed. This step builds the tasty base for your nachos. - Blending in Other Ingredients Next, mix in 1 cup of diced tomatoes. This adds freshness and color to the chicken mixture. Stir gently to avoid breaking the tomatoes. Be sure to blend all the ingredients well. This step is key to ensuring every bite of nachos is full of flavor. - Layering Chips and Chicken Take a large baking sheet and spread out 1 bag (12 oz) of tortilla chips in an even layer. This gives a good base. Next, evenly distribute the chicken mixture over the chips. Make sure every chip gets some chicken. This ensures every bite is loaded with goodness. - Cheese Distribution Now comes the fun part! Sprinkle 1 cup of shredded cheddar cheese and 1 cup of Monterey Jack cheese over the chicken. This melty goodness is what makes nachos irresistible. Do not hold back on the cheese; it’s a star player in this dish. - Oven Temperature and Timing Preheat your oven to 350°F (175°C). Once your nachos are assembled, place the baking sheet in the oven. Bake for 10-15 minutes. You want the cheese to melt and get bubbly. Keep an eye on them to avoid burning. - Checking for Doneness After about 10 minutes, check the nachos. The cheese should look melted and slightly golden. If it looks good, remove the baking sheet from the oven. This is where the magic happens; the whole kitchen will smell amazing! Now you can add your favorite toppings like diced avocado, sour cream, and cilantro, and enjoy your cheesy fiesta! For full details on the recipe, check the Full Recipe. Preventing Sogginess To keep your nachos crispy, layer them right. Start with a base of chips. Spread the chicken mixture evenly over them. This helps the chips stay dry. Add cheese last to create a barrier. It melts and protects the chips from moisture. Ensuring Even Melting For even melting, use a mix of cheeses. I like using cheddar and Monterey Jack. They melt well together. Spread the cheese in a thin, even layer. This way, every bite has cheese goodness. Ideal Sides and Accompaniments Pair your nachos with fresh sides. I recommend guacamole and salsa. They add great flavor. You can also serve them with a side of beans. This makes your meal even heartier. Presentation Tips For a nice look, use a large, colorful platter. Scatter fresh cilantro on top for a pop of green. Place the sour cream in a bowl on the side. This makes it easy for everyone to dip. Overloading Toppings Less is often more. Avoid piling on too many toppings. This can make your nachos soggy and hard to eat. Focus on a few key toppings for best flavor and texture. Skipping the Broiling Step Don’t skip the broiling step! This is key for melting the cheese. Broil for a few minutes at the end. Watch closely to prevent burning. Broiling gives you that perfect, gooey texture. For the full recipe, check out the Cheesy Fiesta Loaded Chicken Nachos. {{image_2}} Substituting Protein If you want a meat-free option, swap the chicken for black beans or lentils. These add protein and taste great. You can also use tofu or tempeh for a hearty bite. Alternative Cheese Options Try different cheeses like pepper jack or smoked gouda for a fun twist. Vegan cheese can work well too. Look for options that melt nicely to keep your nachos creamy. Southwest Style Add some roasted corn, diced red onion, and a sprinkle of lime juice for a fresh twist. You can also mix in some salsa verde for a zesty kick. This gives your nachos a bright, vibrant taste. BBQ Chicken Nachos Use BBQ sauce instead of spices for a sweet and tangy flavor. Mix shredded chicken with the sauce before layering it on your chips. Top with coleslaw for crunch and extra flavor. Taco Night Variation Load your nachos with taco toppings like seasoned ground beef, pico de gallo, and guacamole. This makes a perfect taco night meal and is easy to share. Game Day Loaded Nachos For game day, add extra toppings like sliced olives, pickled jalapeños, or even a drizzle of ranch dressing. This creates a fun, crowd-pleasing snack everyone will love. Feel free to explore these variations to create your own loaded chicken nachos masterpiece! For a full recipe, check out the details above. To keep your loaded chicken nachos fresh, store them in an airtight container. Make sure to cover them tightly to avoid air exposure. You can keep them in the fridge for up to three days. After that, the chips may become too soggy. When reheating nachos, I recommend using an oven. Preheat it to 350°F (175°C). Place the nachos on a baking sheet for about 10 minutes. This helps restore their crispiness. If you use a microwave, they may turn soft. If you have no other choice, heat them for 30 seconds at a time until warm. You can prep some ingredients ahead of time. Cook and shred your chicken a day before. Store it in the fridge. You can also chop your veggies and mix the spices in advance. Just assemble the nachos right before serving for the best taste. Store any assembled nachos in the fridge for up to two days. For the freshest crunch, it’s best to add chips just before serving. For the complete journey to flavor, refer to the Full Recipe. You can make Loaded Chicken Nachos healthier with simple swaps. Try these ingredient substitutions: - Use whole grain tortilla chips for more fiber. - Swap regular cheese for low-fat cheese options. - Add more veggies like bell peppers or spinach. - Use Greek yogurt instead of sour cream. - Opt for grilled chicken instead of fried. These changes help cut calories and boost nutrition without losing flavor. Yes, you can freeze Loaded Chicken Nachos. Follow these best practices: - Assemble the nachos without toppings like avocado and sour cream. - Wrap them tightly in plastic wrap and place in a freezer bag. - Label the bag with the date for easy tracking. - To thaw, move them to the fridge overnight. When ready to eat, bake them until hot and add fresh toppings. Loaded Chicken Nachos pair well with many dishes and drinks. Here are some ideas: - Serve with a side of fresh salsa or guacamole. - Pair with a chilled beer or a fruity mocktail. - Offer a light salad to balance the meal. - Try a bowl of chili for a hearty combo. These sides enhance your nacho experience and keep the game day fun! You now have all the tools to make perfect loaded chicken nachos. We covered essential ingredients, cooking steps, and best practices. Remember to balance toppings to keep your nachos crispy. Try not to overload them, and follow our serving tips for a standout dish. Get creative with variations like vegetarian options and fun themes. With these tips, you can impress everyone at your next gathering. Enjoy every bite and share your nacho journey with friends!](https://easycookingbite.com/wp-content/uploads/2025/06/84126e0f-a8fc-483d-9483-da30c6c23e1e.webp)
