Latest & Greatest
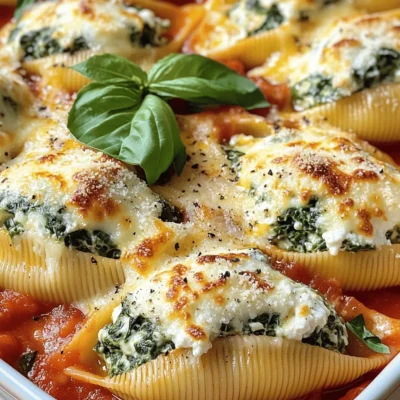
Spinach Ricotta Stuffed Shells Flavorful and Easy Dish
Looking for a quick, tasty dish that everyone will love? Spinach Ricotta Stuffed Shells might be your answer. These jumbo
Read more…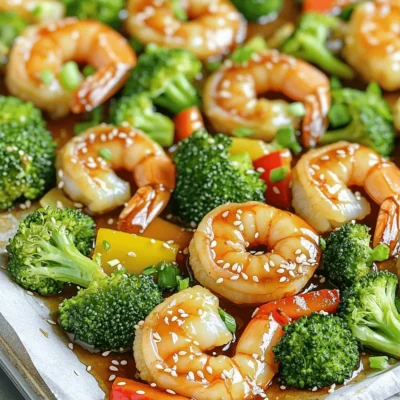
Honey Garlic Shrimp & Broccoli Sheet Pan Delight
Are you ready to transform your dinner routine? In this Honey Garlic Shrimp & Broccoli Sheet Pan Delight, I’ll guide
Read more…
Pumpkin Spice Granola Bars Nourishing Fall Treat
As the fall chill sets in, nothing feels cozier than a delicious treat that captures the season’s spirit. Pumpkin Spice
Read more…
Slow Cooker Chicken Noodle Soup Comforting and Easy
When you want a warm hug in a bowl, slow cooker chicken noodle soup is the answer. This easy recipe
Read more…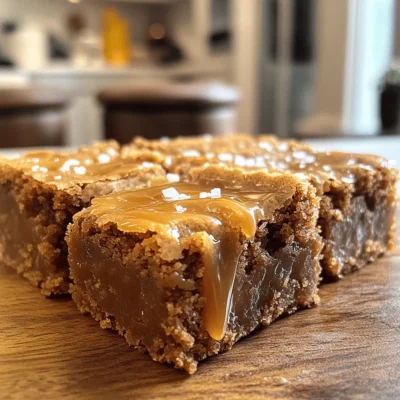
Brown Butter Salted Caramel Blondies Delightful Treat
If you crave a sweet treat that’s both rich and easy to make, you’re in luck! These Brown Butter Salted
Read more…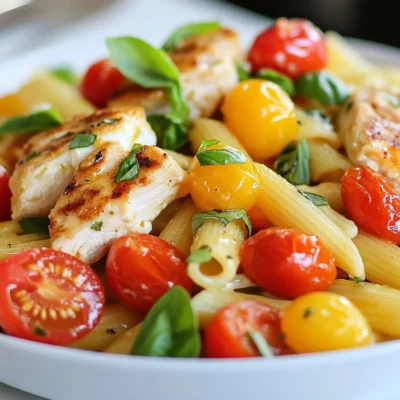
Bruschetta Chicken Pasta Delightful and Easy Meal
Looking for a tasty and simple meal? Bruschetta Chicken Pasta is here to impress! With just a few fresh ingredients,
Read more…
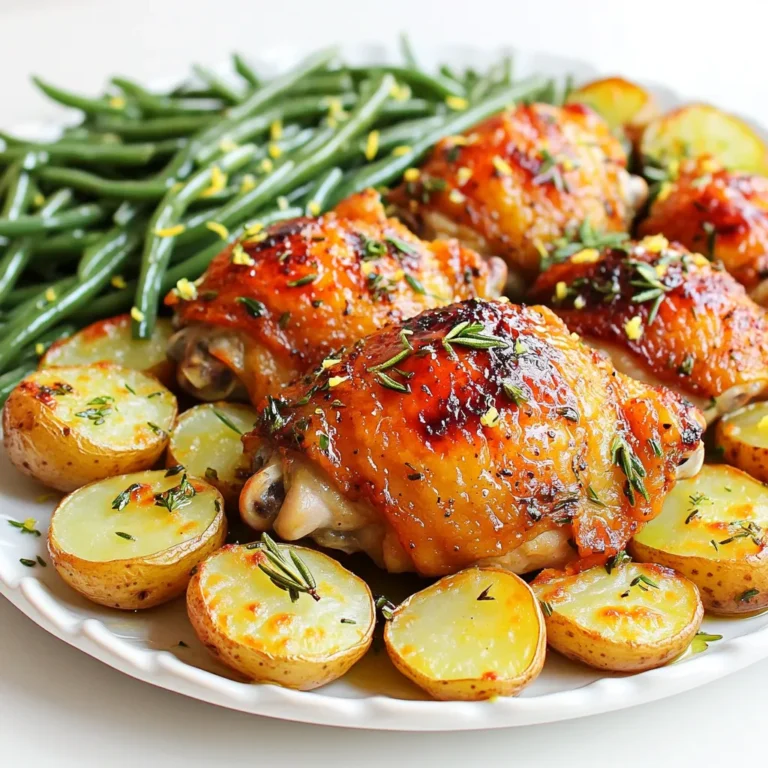
Garlic Butter Chicken and Potatoes Tasty Dinner Idea
Looking for a simple and tasty dinner idea? This Garlic Butter Chicken and Potatoes recipe is perfect for you! With
Read more…
No-Bake Oreo Cheesecake Bars Delightful and Easy Treat
Are you ready to indulge in a sweet treat without turning on the oven? These No-Bake Oreo Cheesecake Bars are
Read more…browse recipes

![- 1 cup all-purpose flour - 1/2 teaspoon baking powder - 1/2 teaspoon baking soda - 1/4 teaspoon salt - 1 tablespoon pumpkin spice blend - 1/2 cup unsalted butter, softened - 1 cup granulated sugar - 2 large eggs - 1/2 cup pure pumpkin puree - 1/2 cup brewed coffee, cooled - 1 teaspoon vanilla extract - 1/4 cup milk (or dairy-free alternative) - 1/2 cup cream cheese, softened - 1/4 cup butter, softened - 2 cups powdered sugar - 1 tablespoon brewed coffee - Additional pumpkin spice for garnish I love using fresh ingredients for my Pumpkin Spice Latte Cupcakes. The dry ingredients create a soft base. The flour, baking powder, and pumpkin spice blend add warmth and flavor. The baking soda helps the cupcakes rise, giving them a light texture. The wet ingredients are where the magic happens. Unsalted butter makes the cupcakes rich. Granulated sugar adds sweetness. Eggs provide structure and moisture. Pure pumpkin puree gives a cozy fall flavor. Brewed coffee enhances the taste, making it a true latte experience. Finally, vanilla extract and milk round out the mix for a creamy finish. For the frosting, I use cream cheese and butter, which create a rich and tangy topping. Powdered sugar adds sweetness, while a splash of brewed coffee brings out the latte flavor. Don't forget to sprinkle extra pumpkin spice on top for that perfect fall touch. You can find the full recipe [here]. Enjoy baking! 1. Preheat your oven to 350°F (175°C). Line a muffin tin with cupcake liners. 2. In a bowl, whisk together the all-purpose flour, baking powder, baking soda, salt, and pumpkin spice blend. Set this aside. 3. In another large bowl, cream the softened butter and granulated sugar until it looks light and fluffy. 4. Add the eggs one at a time. Mix well after each egg. Then, stir in the pumpkin puree, brewed coffee, and vanilla extract until they are well combined. 1. Gradually mix the dry ingredients into the wet ingredients. Be gentle to keep it light. 2. Alternate adding milk to the batter to reach a smooth consistency. 1. Divide the batter evenly among the cupcake liners. Fill each about two-thirds full. 2. Bake for 18-20 minutes. Check if a toothpick inserted in the center comes out clean. 3. Let the cupcakes cool in the pan for 5 minutes. Then, transfer them to a wire rack to cool completely before frosting. Once you have your cupcakes ready, you can move on to the frosting for your Pumpkin Spice Latte Cupcakes. For the full recipe, check out the details above! Using pumpkin puree and brewed coffee keeps these cupcakes moist and soft. Pumpkin puree adds a rich texture and a lovely flavor. Brewed coffee brings out the spices and enhances the pumpkin taste. It is important to avoid overmixing the batter. Mix just until the ingredients combine. This helps keep the cupcakes light and fluffy. For cream cheese frosting, start with softened cream cheese and butter. Beat them together until smooth. Gradually add powdered sugar for sweetness and brewed coffee for flavor. You can frost your cupcakes using a piping bag or a knife. A piping bag gives a pretty swirl, while a knife allows for a quick spread. Both methods work well, so choose what you like best. To make these cupcakes, you need some basic baking tools. A good muffin tin, cupcake liners, and mixing bowls are key. Measuring cups and spoons should be accurate for best results. Using the right tools helps ensure your cupcakes come out perfect every time. Remember to have fun while baking! For the complete recipe, refer to the Full Recipe section. {{image_2}} You can customize your Pumpkin Spice Latte Cupcakes to suit your taste. Here are two fun ideas: - Adding Chocolate or Caramel Drizzle: Drizzle melted chocolate or rich caramel on top of the frosting. This adds a sweet twist and makes the cupcakes even more decadent. - Incorporating Nuts or Chocolate Chips: Add chopped nuts like walnuts or pecans for a crunchy texture. You can also mix in chocolate chips for extra sweetness and a surprise in every bite. Not everyone can enjoy regular cupcakes. Here are ways to adapt this recipe: - Gluten-Free Options: Use a gluten-free all-purpose flour blend instead of regular flour. This keeps the cupcakes soft and tasty. - Vegan Substitutes for Eggs and Dairy: Replace eggs with flax eggs (1 tablespoon flaxseed meal and 2.5 tablespoons water). Use almond milk or coconut milk in place of regular milk and vegan butter for the frosting. Make your cupcakes look as good as they taste. Here are some creative suggestions: - Decorating with Seasonal Toppings: Top each cupcake with whipped cream and a sprinkle of pumpkin spice. You can also add candy corn or mini pumpkins for a festive touch. - Creative Serving Suggestions for Fall-Themed Gatherings: Serve your cupcakes on a wooden board with small pumpkins and autumn leaves. This fun display will impress your guests and fit the fall theme perfectly. To keep your pumpkin spice latte cupcakes fresh, use a few simple methods. For short-term storage, place them in an airtight container. This keeps moisture in and air out. Store at room temperature for up to three days. If you want to keep them longer, freezing is a great option. Wrap each cupcake in plastic wrap and place them in a freezer-safe bag. They can last up to three months in the freezer. If you have leftover frosting, store it in an airtight container. You can keep it in the fridge for up to a week. When you want to use it again, let it sit at room temperature for about 30 minutes. Then, mix it well before applying. If the frosting is too stiff, add a little milk or brewed coffee to loosen it up. These delicious cupcakes stay fresh for about three days at room temperature. After that, they start to lose taste and texture. Signs of spoilage include a dry texture or a sour smell. If you notice any of these signs, it’s best to toss them out. Enjoy these treats while they’re at their best! To make gluten-free Pumpkin Spice Latte Cupcakes, you can use a gluten-free flour blend. Look for blends that include xanthan gum. Just replace all-purpose flour with the gluten-free blend in the Full Recipe. The rest of the ingredients remain the same. This swap will help you keep the same texture. You can use pumpkin pie filling, but it will change the taste. Pumpkin pie filling has added spices and sugar. If you prefer a sweeter cupcake, this might work for you. Just remember to reduce the pumpkin spice in the recipe. Using pure pumpkin puree gives a more natural flavor. You can add nutmeg, cloves, or allspice for extra flavor. Each spice will bring its unique taste. Just add a pinch or two, based on your liking. This addition can make your cupcakes even more special. Experimenting with spices can lead to delightful surprises. Yes, you can make these cupcakes a day ahead. Just store them in an airtight container. If you plan to frost them, wait until the day of the party. This keeps the frosting fresh and beautiful. Your guests will love the taste. Store leftovers in an airtight container at room temperature. If your kitchen is warm, place them in the fridge. They will stay fresh for about three days. You can also freeze them for longer storage. Just remember to wrap them well before freezing. In this post, we covered how to make delicious Pumpkin Spice Latte Cupcakes. We started with the right ingredients and detailed each step from batter preparation to baking. I shared tips for keeping your cupcakes moist and creating perfect frosting. Don’t forget to explore fun variations and storage tips to enjoy later. With these guidelines, you can easily impress friends and family with your baking skills. Enjoy every bite of your pumpkin spice creations!](https://easycookingbite.com/wp-content/uploads/2025/05/8ecb6e3d-416f-454a-bf8c-ff8726831ded.webp)
Pumpkin Spice Latte Cupcakes Delightful Fall Treat
Get ready to treat your taste buds! Pumpkin Spice Latte Cupcakes combine fall’s favorite flavors into one delightful bite. With moist pumpkin goodness and…
My Latest Drinks

Strawberry Cheesecake Smoothie Creamy Refreshing Treat
Craving something delicious and cool? The Strawberry Cheesecake Smoothie is your answer! It blends creamy cheesecake flavors with sweet strawberries Read Full Recipe-
Mocktail Pink Punch Refreshing and Easy Recipe
Are you ready to impress your guests with a delightful drink? This Mocktail Pink Punch recipe is both refreshing and Read Full Recipe -
Blue Lagoon Tropical Lemonade Refreshing and Zesty Drink
Looking for a drink that’s both refreshing and fun? Say hello to Blue Lagoon Tropical Lemonade! This colorful beverage packs Read Full Recipe -
Pumpkin Spice Coffee Creamer Flavorful Fall Treat
Are you ready to embrace the cozy vibes of autumn? In this blog post, I’ll guide you through making your Read Full Recipe -
Apple Cider Margarita Mocktail Refreshing Fall Drink
Fall is here, and that means it’s the perfect time for a cozy drink! The Apple Cider Margarita Mocktail offers Read Full Recipe -
Pumpkin Spice Latte Copycat Cozy and Comforting Recipe
Craving that warm, cozy feeling of fall? You can enjoy a delicious Pumpkin Spice Latte at home! In this article, Read Full Recipe


My Latest Dinners
-
White Bean Soup Simple and Hearty Delight
Looking for a warm and filling meal? Let me introduce you to white bean soup! This simple and hearty delight Read Full Recipe -
Garlic Herb Roasted Sweet Potatoes Flavorful Side Dish
Looking for a side dish that’s both tasty and easy to make? Garlic Herb Roasted Sweet Potatoes are the answer! Read Full Recipe -
One Pot Beef Taco Pasta Easy and Flavorful Meal
Looking for a quick and tasty meal? One Pot Beef Taco Pasta is the perfect dish! This recipe packs bold Read Full Recipe -
Garlic Chicken Zucchini Noodles Stir Fry Delight
Are you ready for a tasty twist on dinner? My Garlic Chicken Zucchini Noodles Stir Fry is a quick and Read Full Recipe -
Stuffed Italian Meatloaf Easy and Tasty Recipe
Are you ready to elevate your dinner game? This Stuffed Italian Meatloaf is both easy and tasty! In this article, Read Full Recipe -
One Pot French Onion Pasta Flavorful Comfort Dish
Looking for a cozy dinner that warms your soul? Try my One Pot French Onion Pasta! This creamy, rich dish Read Full Recipe


hey,
i’m !
I’m so happy you’re here!
Every dish I share is made with love and care. I hope they bring you the same comfort and joy they bring me. Let’s make memories, one recipe at a time.
. To make a great cabbage roll casserole, start with fresh cabbage. Choose a large head that feels heavy. This will give you enough leaves to layer. Cut the cabbage into even pieces for uniform cooking. Cooking the meat until it browns adds flavor. Mix the rice well with the meat. This helps each bite have the same taste. Be sure to season the layers with salt and pepper. This step is key for a tasty dish. For this recipe, you need a few basic tools. A large skillet helps with browning the meat. A 9x13 inch baking dish is perfect for layering. Use a sharp knife and a cutting board for chopping. A spoon or spatula is great for stirring. If you have one, a meat thermometer can help ensure the meat is cooked well. Cabbage roll casserole tastes great on its own. You can serve it with a side salad for freshness. Add some crusty bread to soak up the sauce. For a special touch, sprinkle fresh parsley on top before serving. If you want a twist, try adding hot sauce for heat. This dish is perfect for family dinners or meal prep. For the full recipe, check out the detailed steps above! {{image_2}} You can easily make a vegetarian version. Start with a mix of veggies. Use mushrooms, bell peppers, and zucchini for a hearty base. Replace the meat with lentils or beans for protein. You can use quinoa instead of rice for extra texture. The flavors will still shine through. Add your favorite spices for a boost. If you prefer different meats, go ahead! Ground chicken or pork works great. You can also try sausage for a spicy kick. Each meat adds its own flavor. Just ensure it is cooked well before mixing it with the other ingredients. This flexibility keeps the dish exciting. To enhance the flavor, consider adding fresh herbs. Chopped basil or cilantro can freshen up the layers. A sprinkle of crushed red pepper will add a nice heat. You can also mix in a splash of soy sauce for depth. Experimenting with spices can create new tastes. Each tweak makes this meal your own! For the full recipe, check out the detailed instructions. After you enjoy your Cabbage Roll Casserole, let it cool. Once cool, store it in an airtight container. Place it in the fridge. Leftovers can stay fresh for up to four days. I recommend dividing it into smaller portions. This way, it’s easy to heat up later. To reheat, place the casserole in the microwave. Heat it on medium power. This usually takes about 3 to 5 minutes. Stir it halfway through to warm it evenly. You can also reheat it in the oven. Set the oven to 350°F (175°C). Bake until it is hot, usually around 20 minutes. Cover it with foil to keep it moist. You can freeze Cabbage Roll Casserole for later. Make sure it is fully cooled first. Transfer it to a freezer-safe container. Seal it tightly to prevent freezer burn. It can last up to three months in the freezer. When ready to eat, let it thaw overnight in the fridge. Then, reheat as described above. For the best taste, eat it within a month. Enjoy the full recipe for more tips! Cabbage Roll Casserole lasts about 3 to 5 days in the fridge. Make sure to store it in an airtight container. This keeps it fresh and tasty for a few days. When you reheat it, ensure it reaches a safe temperature to enjoy it fully. Yes, you can make Cabbage Roll Casserole in advance. Prepare the dish up to the baking step. Cover it well and place it in the fridge for up to 24 hours. When you're ready to bake, just add a few extra minutes to the cooking time. This makes it a great option for busy weeknights. You can use quinoa or cauliflower rice as a rice substitute. Both options provide a great texture. Quinoa adds protein, while cauliflower rice keeps it low-carb. Adjust the cooking time to ensure they mix well with the other ingredients. Enjoy experimenting with these options in the full recipe! Cabbage roll casserole is easy to make and packed with flavor. We covered key ingredients, step-by-step cooking methods, and helpful tips. You can also explore tasty variations, from vegetarian options to flavor boosts. Plus, you learned how to store leftovers and how long they last. These insights help ensure a delicious meal every time. Enjoy creating your perfect casserole and make it your own!](https://easycookingbite.com/wp-content/uploads/2025/06/6f8c2664-d69a-4f25-b3a8-2101981a13da-300x300.webp)

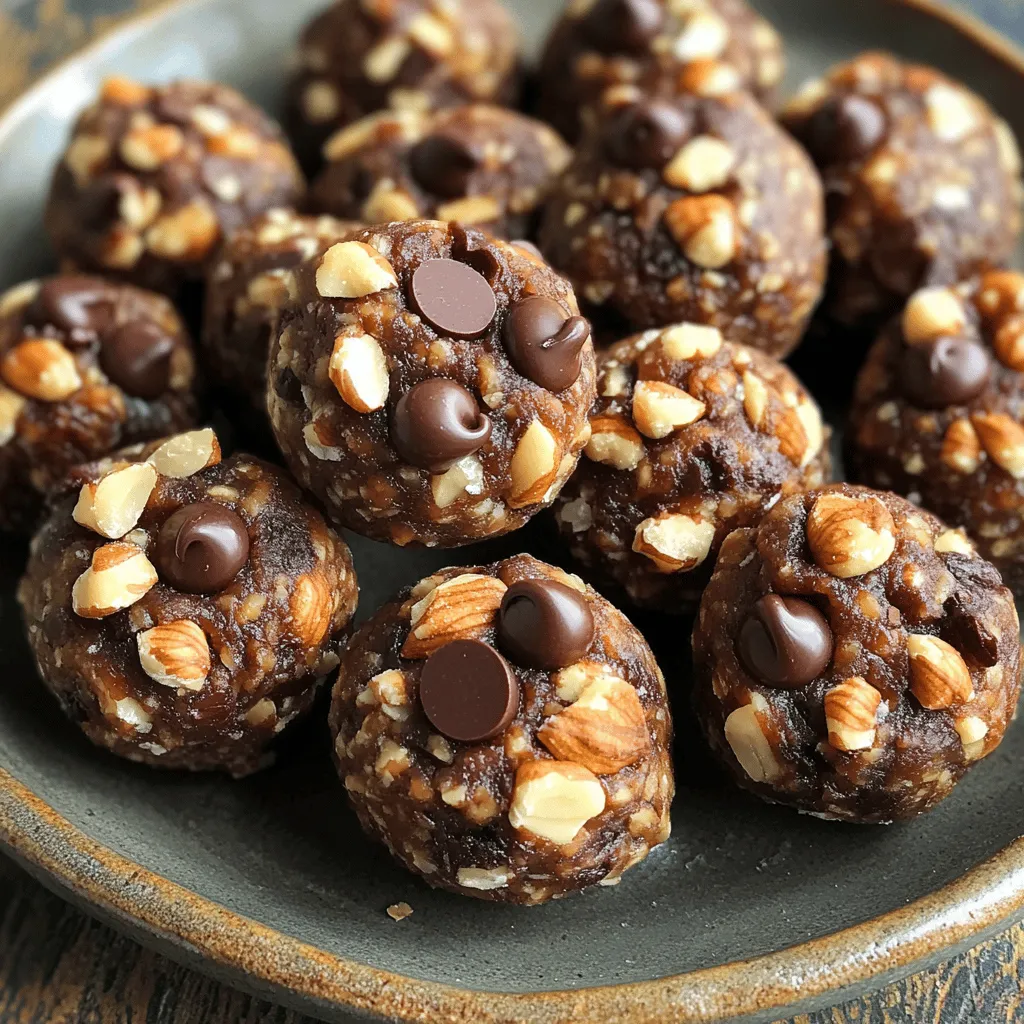
No-Bake Energy Bites Simple and Flavorful Snack
Looking for a quick and tasty snack? You’ll love these No-Bake Energy Bites! Made with simple ingredients like oats, peanut butter, and honey, they…