


Latest & Greatest

Honey Garlic Tofu Nuggets Flavorful and Easy Recipe
If you crave a tasty yet easy meal, you’ll love these Honey Garlic Tofu Nuggets! This simple recipe packs sweet
Read more…
Pumpkin Spice Coffee Cake Muffins Simple and Delicious
Get ready to savor the cozy flavors of fall with my Pumpkin Spice Coffee Cake Muffins! These muffins blend the
Read more…
Cottage Cheese Cookie Dough Dip Tasty and Simple Treat
If you’re looking for a fun and tasty way to enjoy cottage cheese, you’ve come to the right place! This
Read more…
Chocolate Peanut Butter Rice Krispie Treats Delight
Get ready for a sweet treat that’s easy to make and hard to resist! My Chocolate Peanut Butter Rice Krispie
Read more…
Air Fryer Buffalo Cauliflower Bites Delicious Snack
Looking for a tasty snack that’s full of flavor and easy to make? These Air Fryer Buffalo Cauliflower Bites are
Read more…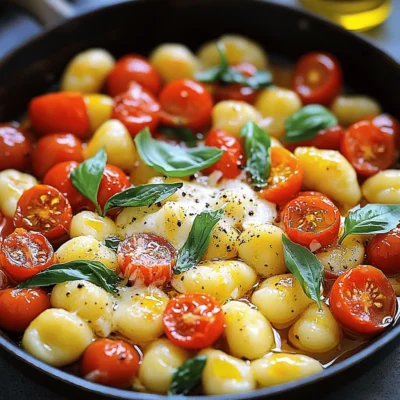
Tomato Basil Gnocchi Skillet Easy Savory Comfort Meal
Looking for a cozy, easy meal that warms your heart? You’ve found it! My Tomato Basil Gnocchi Skillet is a
Read more…
Creamy Parmesan Spinach Dip Delight for Any Gathering
Craving a dip that wows your guests? Look no further! My Creamy Parmesan Spinach Dip is a hit at any
Read more…
Triple Chocolate Chip Skillet Cookie Decadent Delight
Are you ready for a sweet adventure? The Triple Chocolate Chip Skillet Cookie is a treat you won’t forget! This
Read more…browse recipes


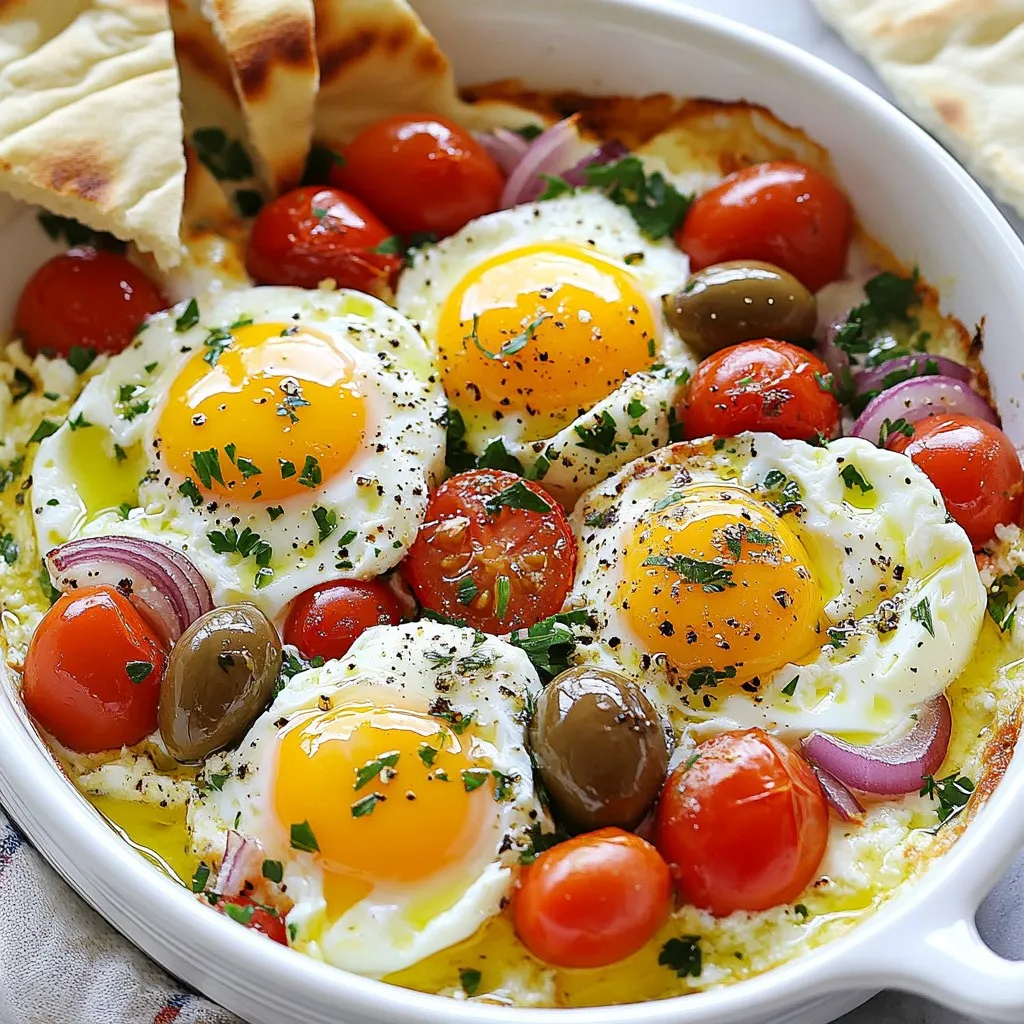
Mediterranean Baked Feta Eggs Flavorful Breakfast Dish
Start your day with a burst of Mediterranean flavor! Mediterranean Baked Feta Eggs is a delightful breakfast dish that combines rich feta, fresh veggies,…
My Latest Drinks

Strawberry Cheesecake Smoothie Creamy Refreshing Treat
Craving something delicious and cool? The Strawberry Cheesecake Smoothie is your answer! It blends creamy cheesecake flavors with sweet strawberries Read Full Recipe-
Mocktail Pink Punch Refreshing and Easy Recipe
Are you ready to impress your guests with a delightful drink? This Mocktail Pink Punch recipe is both refreshing and Read Full Recipe -
Blue Lagoon Tropical Lemonade Refreshing and Zesty Drink
Looking for a drink that’s both refreshing and fun? Say hello to Blue Lagoon Tropical Lemonade! This colorful beverage packs Read Full Recipe -
Pumpkin Spice Coffee Creamer Flavorful Fall Treat
Are you ready to embrace the cozy vibes of autumn? In this blog post, I’ll guide you through making your Read Full Recipe -
Apple Cider Margarita Mocktail Refreshing Fall Drink
Fall is here, and that means it’s the perfect time for a cozy drink! The Apple Cider Margarita Mocktail offers Read Full Recipe -
Pumpkin Spice Latte Copycat Cozy and Comforting Recipe
Craving that warm, cozy feeling of fall? You can enjoy a delicious Pumpkin Spice Latte at home! In this article, Read Full Recipe


My Latest Dinners
-
White Bean Soup Simple and Hearty Delight
Looking for a warm and filling meal? Let me introduce you to white bean soup! This simple and hearty delight Read Full Recipe -
Garlic Herb Roasted Sweet Potatoes Flavorful Side Dish
Looking for a side dish that’s both tasty and easy to make? Garlic Herb Roasted Sweet Potatoes are the answer! Read Full Recipe -
One Pot Beef Taco Pasta Easy and Flavorful Meal
Looking for a quick and tasty meal? One Pot Beef Taco Pasta is the perfect dish! This recipe packs bold Read Full Recipe -
Garlic Chicken Zucchini Noodles Stir Fry Delight
Are you ready for a tasty twist on dinner? My Garlic Chicken Zucchini Noodles Stir Fry is a quick and Read Full Recipe -
Stuffed Italian Meatloaf Easy and Tasty Recipe
Are you ready to elevate your dinner game? This Stuffed Italian Meatloaf is both easy and tasty! In this article, Read Full Recipe -
One Pot French Onion Pasta Flavorful Comfort Dish
Looking for a cozy dinner that warms your soul? Try my One Pot French Onion Pasta! This creamy, rich dish Read Full Recipe


hey,
i’m !
I’m so happy you’re here!
Every dish I share is made with love and care. I hope they bring you the same comfort and joy they bring me. Let’s make memories, one recipe at a time.

![- 2 pounds Yukon Gold potatoes - 1 head of garlic - 1/2 cup heavy cream - 1/2 cup unsalted butter - Salt and pepper to taste - Fresh chives for garnish - Optional: 1/4 cup cream cheese What can I use instead of Yukon Gold potatoes? You can use Russet potatoes or red potatoes. Russets give a fluffier texture, while reds add a bit of creaminess. What are some dairy-free options? Try using almond milk or coconut milk. For a buttery flavor, use vegan butter. Can I change the herbs? Yes! Use rosemary or thyme for a different taste. You can also add some parsley for freshness. Roasted garlic mashed potatoes are not just a side dish; they are a warm hug on a plate. The rich flavors and creamy texture will make you go back for seconds. For the full recipe, check out the details above. To make roasted garlic, you first need to cut the top off a head of garlic. This exposes the cloves. Drizzle a little olive oil on top and wrap it in foil. Place it in a preheated oven at 400°F (200°C). Roast for about 30-35 minutes. You know it's ready when the garlic is soft and smells amazing. While the garlic roasts, fill a large pot with salted water and bring it to a boil. Add 2 pounds of peeled and cubed Yukon Gold potatoes. Cook them for about 15-20 minutes. Check for doneness by poking a potato with a fork. It should be fork-tender and easy to mash. Once the garlic is cool, squeeze the soft cloves into the pot with the potatoes. In a separate small saucepan, heat 1/2 cup of heavy cream and 1/2 cup of unsalted butter until warm. Pour this mixture over the potatoes and garlic. Add salt and pepper to taste. Use a potato masher to combine everything. Mash until smooth and creamy. If you want it creamier, add more cream or even 1/4 cup of cream cheese. Taste and adjust seasoning if needed. Transfer to a bowl and garnish with chopped fresh chives. Enjoy your Roasted Garlic Mashed Potatoes! For the full recipe, refer to the detailed instructions above. To get the best creamy mashed potatoes, start with warm ingredients. Cold cream or butter will cool down your potatoes. This can make them less creamy. So, heat your cream and butter before adding them. It helps create that smooth texture you want. Using the right tools also makes a huge difference. A potato masher or a ricer gives you the best results. Avoid using a food processor. It can make your potatoes gummy. I like to mash by hand for great control. You can boost the flavor of your mashed potatoes with herbs and spices. Fresh chives and garlic add a nice touch. You can also try rosemary or thyme for something different. Just remember to chop them finely to mix well. Adding cheese is another tasty option. Cream cheese makes your mashed potatoes extra creamy. Parmesan or cheddar can add a savory flavor too. Just mix it in when you combine the other ingredients. Roasted garlic mashed potatoes pair well with many dishes. They go great with roasted meats like chicken or beef. You can also serve them with grilled vegetables for a lighter meal. For presentation, use a large serving bowl. Scoop the potatoes in and make a nice swirl on top. Then, sprinkle some fresh chives for color. You can even drizzle a bit of olive oil for shine. For the full recipe, check the detailed instructions above. {{image_2}} You can use many types of potatoes for your mashed dish. Yukon Gold potatoes are great for their creamy texture. Russet potatoes offer a fluffy finish. For a mix, try combining the two. This blend gives you the best of both worlds. Each type adds its unique flavor and texture to your dish. Get creative with flavors by adding roasted vegetables. Think of carrots, bell peppers, or even mushrooms. These can add a nice touch and extra taste. You can also infuse your mashed potatoes with truffle oil. Just a little goes a long way. It gives your dish a rich, earthy flavor that many love. If you're looking for vegan options, substitute butter with olive oil or vegan butter. Use almond or coconut milk instead of cream. This keeps your dish rich but plant-based. For low-carb alternatives, consider using cauliflower. It mashes well and has a similar texture. You can find more details in the Full Recipe for Roasted Garlic Mashed Potatoes. After making roasted garlic mashed potatoes, let them cool. Place leftovers in an airtight container. This keeps them fresh and safe to eat. Store them in the fridge for up to four days. When you're ready to enjoy them again, reheat in a pot on low heat. Stir often to avoid scorching. You can also use a microwave. Heat in short bursts, stirring in between, until warm. To freeze roasted garlic mashed potatoes, start by cooling them completely. Use a spoon to pack them into a freezer-safe container. Leave some space at the top for expansion. Seal them tightly and label with the date. They can last for about two months in the freezer. When you're ready to eat them, thaw overnight in the fridge. To reheat, place them in a pot with a splash of milk. Heat on low, stirring gently until creamy. You might need to add more milk to get the right texture. In the fridge, roasted garlic mashed potatoes can last about four days. If you freeze them, they stay good for about two months. Always check for any off smells or changes in texture before eating. If they seem off, it's best to toss them. Keeping track of how long they’ve been stored helps you enjoy them at their best. The best potato for mashed potatoes is the Yukon Gold. This potato has a creamy texture and a buttery flavor. They mash well and become smooth and fluffy. I recommend using Yukon Gold for the best results. You can use pre-made garlic, but fresh is best. Roasting fresh garlic brings out its sweet, nutty flavor. Pre-made garlic lacks that depth. If you must use it, adjust the amount to your taste. To make your mashed potatoes fluffier, use warm ingredients. Heat your cream and butter before mixing. Also, mash the potatoes gently. Over-mashing can lead to gummy potatoes. A potato ricer can help achieve a light texture. Yes, you can make mashed potatoes ahead of time. Prepare them and keep them warm in a slow cooker. Stir them occasionally and add a bit more cream if needed. They can also be stored in the fridge and reheated later. If your mashed potatoes are gummy, don't worry. Add a bit of warm cream or milk while mixing. Stir gently to loosen them up. If they are too sticky, you can fold in some extra butter to help improve the texture. For a full recipe, check out the [Full Recipe]. In this post, we covered how to make delicious roasted garlic mashed potatoes. You learned about key ingredients, preparation steps, and tips for creamy results. We also explored variations and storage options. Remember, you can customize this dish easily by trying different potatoes and flavors. Keep experimenting to find what you love best. These mashed potatoes can elevate any meal and impress your guests. Enjoy every bite!](https://easycookingbite.com/wp-content/uploads/2025/07/d7920b03-0cbc-4c76-9460-c3717efa38af-300x300.webp)
![- 1 lb Brussels sprouts, trimmed and halved - 3 tablespoons olive oil - 4 cloves garlic, minced Brussels sprouts are the star of this dish. They have a lovely, nutty flavor when roasted. Olive oil adds healthy fat and helps them crisp up. Garlic gives a punch of flavor that makes each bite delicious. - 1/2 cup grated Parmesan cheese - 1 teaspoon garlic powder - 1/2 teaspoon red pepper flakes (optional) Parmesan cheese adds a nice savory taste. It melts perfectly and creates a cheesy crust. Garlic powder gives an extra garlic kick without needing more fresh garlic. Red pepper flakes are optional but offer a nice heat that balances the flavors. - Salt - Pepper - Fresh parsley, chopped (for garnish) Salt and pepper enhance all the other flavors. Fresh parsley adds color and freshness to the dish. It looks pretty and brightens the taste. You can find the full recipe for these crispy garlic Parmesan Brussels sprouts to create this dish at home! 1. First, preheat your oven to 400°F (200°C). This is key for crispy sprouts. 2. Next, trim and halve the Brussels sprouts. Make sure they are fresh and firm. 1. In a large bowl, mix the halved Brussels sprouts with 3 tablespoons of olive oil. 2. Add 4 cloves of minced garlic, 1 teaspoon of garlic powder, and 1/2 teaspoon of red pepper flakes if you want some heat. 3. Season with salt and pepper to taste. Toss everything well until the sprouts are coated. 4. Spread the seasoned sprouts evenly on a baking sheet. They should be in a single layer for the best crispiness. 1. Roast your sprouts for 20-25 minutes. Flip them halfway through for even cooking. 2. When they turn golden brown and crispy, take them out of the oven. 3. Immediately sprinkle 1/2 cup of grated Parmesan cheese over the hot sprouts. The heat helps it melt slightly. 4. Gently toss the Brussels sprouts to mix the cheese. Taste and adjust seasoning if needed. 5. Transfer the sprouts to a serving platter and garnish with fresh parsley before serving. This simple recipe is a crowd-pleaser that highlights the flavors of Brussels sprouts! You can find the full recipe for more details. To get that perfect crunch, spread the Brussels sprouts in a single layer. If they overlap, they will steam instead of roast. This step is key for crispiness. For the best results, preheat your oven to 400°F (200°C). This high heat helps create that golden, crispy exterior. Feel free to switch up the oil if you prefer. Avocado oil works well and adds a nice flavor. If you want a dairy-free option, try nutritional yeast instead of Parmesan cheese. It gives a cheesy taste without dairy. You can prep the Brussels sprouts ahead of time. Cut and season them, then store in the fridge for up to a day. When you’re ready, just roast them as usual. If you have leftovers, store them in an airtight container. To reheat, use the oven for about 10 minutes at 350°F (175°C). This keeps them crispy and delicious. For the full process, check out the Full Recipe. {{image_2}} You can change the flavor of your Crispy Garlic Parmesan Brussels Sprouts. Try adding different spices. For example, paprika gives a nice smoky taste. You can also use cumin for a warm flavor. If you want heat, add cayenne pepper. You can mix in other cheese options too. Feta adds a tangy kick. Cheddar gives a sharper taste. For a creamy touch, try goat cheese. Each cheese offers a new twist to the dish. For those on a vegan diet, you can make easy swaps. Use nutritional yeast instead of Parmesan. It gives a cheesy taste without dairy. You can also use olive oil for cooking. If you need gluten-free options, this recipe is already great. All the ingredients are naturally gluten-free. Just check your spices to ensure they are safe. These Brussels sprouts work well with many main dishes. They pair nicely with roasted chicken or fish. You can also serve them with pasta for a hearty meal. They make great appetizers too. Serve them at parties or family gatherings. Your guests will love the crispy, tasty bites. Enjoy them as a side dish for any meal. For the full recipe with step-by-step instructions, check out the [Full Recipe]. To keep your crispy garlic Parmesan Brussels sprouts fresh, store them in an airtight container. This will protect them from moisture and odors. Place the container in the fridge. You can enjoy them for up to three days. After that, they may lose their crispiness and flavor. If you want to save Brussels sprouts for later, freezing is a great option. Spread the cooked sprouts on a baking sheet. Freeze them for about an hour. Once frozen, transfer them to a freezer bag. Remove as much air as possible before sealing. They can last for up to three months in the freezer. To keep their texture and flavor, thaw them in the fridge overnight before reheating. To enjoy your leftovers, reheating is key for keeping them crispy. The best way is to use an oven. Preheat your oven to 375°F (190°C). Spread the Brussels sprouts on a baking sheet and heat for about 10-15 minutes. This method maintains their crunch. If you are in a hurry, you can use the microwave, but they may not be as crispy. Heat in short bursts, about 30 seconds at a time. Check often to avoid sogginess. For the best results, the oven is always my top choice. For the full recipe, check the details above. To make Brussels sprouts crispy, you need a few key tips: - Use a hot oven: Preheat your oven to 400°F (200°C). This high heat helps them crisp up. - Single layer: Spread the Brussels sprouts in a single layer on the baking sheet. This allows hot air to circulate around them. - Toss with oil: Coat them well with olive oil. This helps achieve that golden crunch. - Flip halfway: Turn them halfway through cooking to ensure even browning. These tips will give you that perfect crispy texture. You can use frozen Brussels sprouts, but fresh is best. Frozen sprouts have more water, which can make them soggy when cooked. If using frozen, thaw them first, then pat them dry. This step helps reduce moisture. Crispy Garlic Parmesan Brussels Sprouts pair well with many dishes. Here are some great options: - Main dishes: They go wonderfully with roasted chicken or grilled salmon. - Side dishes: Try serving them with creamy mashed potatoes or a fresh salad. These pairings enhance your meal and highlight the sprouts' flavor. Leftovers of Crispy Garlic Parmesan Brussels Sprouts last about 3-5 days in the fridge. Store them in an airtight container. To keep them crispy, reheat in the oven. Avoid using the microwave, as it can make them soggy. Enjoy the leftover flavor! For the full recipe, check out the Crispy Garlic Parmesan Brussels Sprouts recipe. In this article, we explored how to create crispy garlic Parmesan Brussels sprouts. We covered essential ingredients, step-by-step cooking instructions, and helpful tips for the best texture. I shared ways to tailor the recipe to your taste, including ingredient substitutions and storage info. Remember, roasting them in a single layer is key for crispiness. With these guidelines, you can make a tasty side dish or snack that everyone will enjoy! Try these methods, and enjoy your delicious Brussels sprouts creation.](https://easycookingbite.com/wp-content/uploads/2025/06/409be7e9-ba04-47f4-840b-fb72f664cee0-300x300.webp)
Mocktail Pink Punch Refreshing and Easy Recipe
Are you ready to impress your guests with a delightful drink? This Mocktail Pink Punch recipe is both refreshing and simple to make. With…

