

Latest & Greatest

Apple Cinnamon Cheesecake Bars Delightful Dessert Recipe
Craving a sweet treat that’s easy to make? You’re in the right place! My Apple Cinnamon Cheesecake Bars are the
Read more…
Air Fryer Honey Mustard Chicken Wings Delight
If you love crispy chicken wings, you’re in for a treat! My Air Fryer Honey Mustard Chicken Wings will make
Read more…
Garlic Parmesan Shrimp Pasta 15-Minute Delight
Craving a quick, tasty meal? Let’s make Garlic Parmesan Shrimp Pasta in just 15 minutes! This dish combines tender shrimp,
Read more…
Loaded Baked Potato Soup (Slow Cooker) Cozy Delight
Nothing warms the soul like a warm bowl of Loaded Baked Potato Soup. With your slow cooker, you can create
Read more…
Caramel Apple Cheesecake Milkshake Flavorful Delight
Get ready for a sweet treat! This Caramel Apple Cheesecake Milkshake is a perfect blend of flavors. Imagine creamy vanilla
Read more…
Pumpkin Spice Energy Muffins Nourishing and Tasty Snack
Craving a snack that’s both tasty and healthy? You’re in the right place! These Pumpkin Spice Energy Muffins pack a
Read more…
Cinnamon Apple Puff Pastry Tart Flaky and Delicious Treat
Craving a dessert that’s both flaky and delicious? This Cinnamon Apple Puff Pastry Tart is your answer! I’ll guide you
Read more…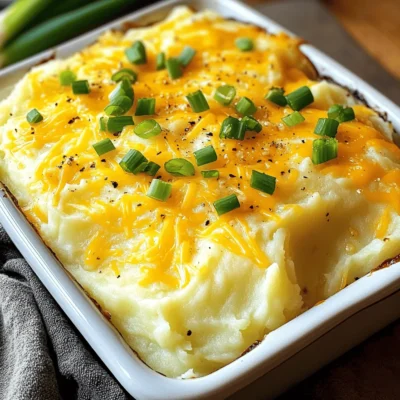
Cheesy Garlic Mashed Potato Casserole Savory Delight
Are you ready to make a dish that steals the show at any meal? My Cheesy Garlic Mashed Potato Casserole
Read more…browse recipes


Crockpot Birria Tacos Flavorful and Easy Recipe
If you’re craving a delicious meal that’s both flavorful and easy, look no further than Crockpot Birria Tacos! This recipe brings tender beef chuck…
My Latest Drinks

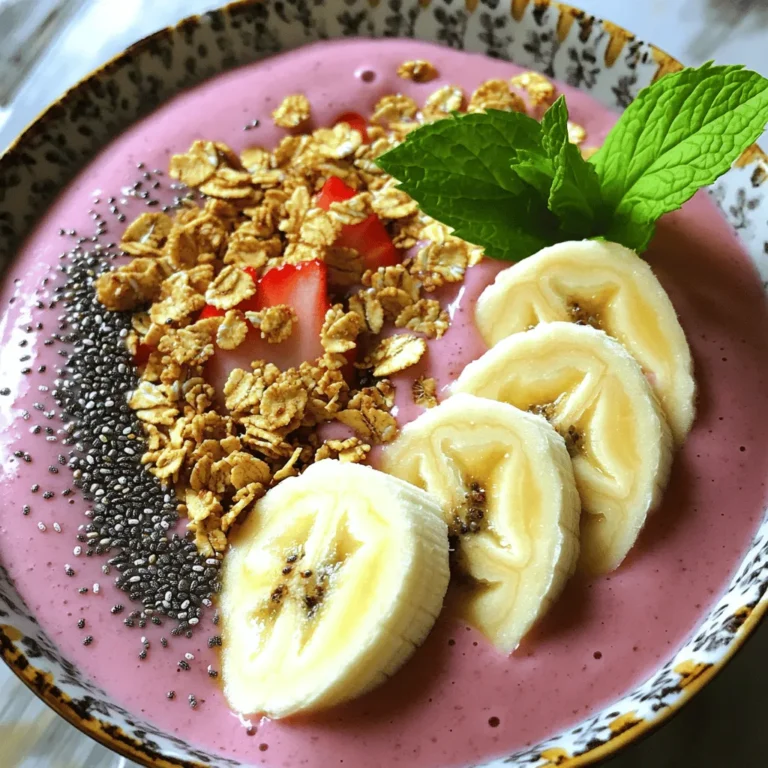
Strawberry Cheesecake Smoothie Creamy Refreshing Treat
Craving something delicious and cool? The Strawberry Cheesecake Smoothie is your answer! It blends creamy cheesecake flavors with sweet strawberries Read Full Recipe-
Mocktail Pink Punch Refreshing and Easy Recipe
Are you ready to impress your guests with a delightful drink? This Mocktail Pink Punch recipe is both refreshing and Read Full Recipe -
Blue Lagoon Tropical Lemonade Refreshing and Zesty Drink
Looking for a drink that’s both refreshing and fun? Say hello to Blue Lagoon Tropical Lemonade! This colorful beverage packs Read Full Recipe -
Pumpkin Spice Coffee Creamer Flavorful Fall Treat
Are you ready to embrace the cozy vibes of autumn? In this blog post, I’ll guide you through making your Read Full Recipe -
Apple Cider Margarita Mocktail Refreshing Fall Drink
Fall is here, and that means it’s the perfect time for a cozy drink! The Apple Cider Margarita Mocktail offers Read Full Recipe -
Pumpkin Spice Latte Copycat Cozy and Comforting Recipe
Craving that warm, cozy feeling of fall? You can enjoy a delicious Pumpkin Spice Latte at home! In this article, Read Full Recipe


My Latest Dinners
-
White Bean Soup Simple and Hearty Delight
Looking for a warm and filling meal? Let me introduce you to white bean soup! This simple and hearty delight Read Full Recipe -
Garlic Herb Roasted Sweet Potatoes Flavorful Side Dish
Looking for a side dish that’s both tasty and easy to make? Garlic Herb Roasted Sweet Potatoes are the answer! Read Full Recipe -
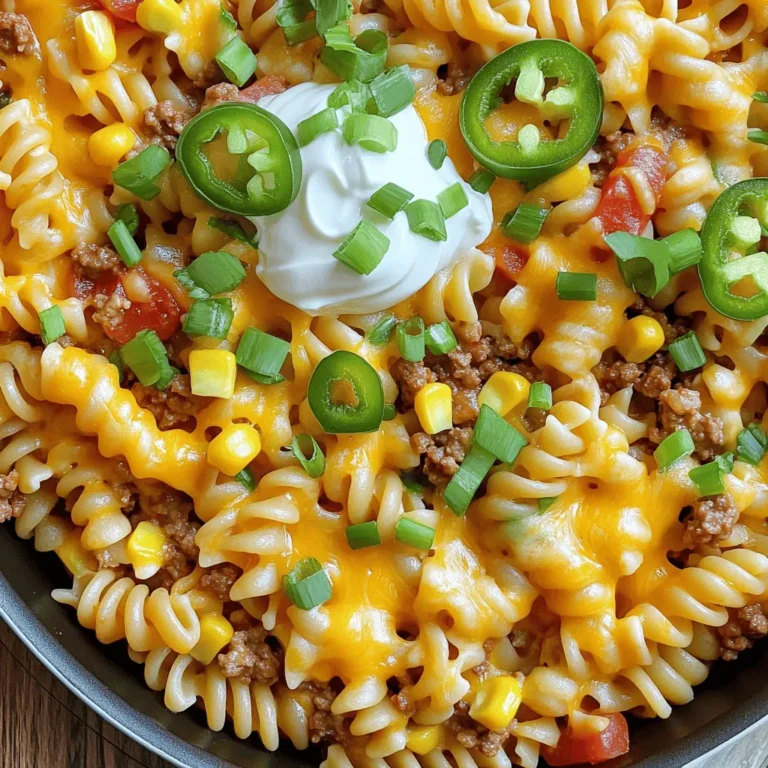
One Pot Beef Taco Pasta Easy and Flavorful Meal
Looking for a quick and tasty meal? One Pot Beef Taco Pasta is the perfect dish! This recipe packs bold Read Full Recipe -
Garlic Chicken Zucchini Noodles Stir Fry Delight
Are you ready for a tasty twist on dinner? My Garlic Chicken Zucchini Noodles Stir Fry is a quick and Read Full Recipe -
Stuffed Italian Meatloaf Easy and Tasty Recipe
Are you ready to elevate your dinner game? This Stuffed Italian Meatloaf is both easy and tasty! In this article, Read Full Recipe -
One Pot French Onion Pasta Flavorful Comfort Dish
Looking for a cozy dinner that warms your soul? Try my One Pot French Onion Pasta! This creamy, rich dish Read Full Recipe


hey,
i’m !
I’m so happy you’re here!
Every dish I share is made with love and care. I hope they bring you the same comfort and joy they bring me. Let’s make memories, one recipe at a time.


. Enjoy creating this creamy and simple delight! - Preheat oven to 400°F (200°C). - Grab a large baking dish. Place it on your counter. - Place the feta cheese in the center of the dish. - Surround it with halved cherry tomatoes and sliced bell pepper. - Sprinkle minced garlic over the top. - Drizzle olive oil across the dish. - Season with oregano, red pepper flakes, salt, and pepper. - Bake for 25-30 minutes. The feta should be soft and tomatoes burst. - Boil pasta according to the package instructions. - Cook until it is al dente. - Reserve 1 cup of pasta water before draining the rest. - Remove the baking dish from the oven. - Use a fork to mash the baked feta and tomatoes. - This creates a creamy sauce. - Add the cooked pasta to the baking dish. - Toss to coat the pasta in the creamy sauce. - If the sauce is too thick, add reserved pasta water. - Stir until you reach your desired consistency. Enjoy your creamy and delicious baked feta pasta! For the full details, check out the Full Recipe. To make the sauce just right, you can adjust its thickness easily. If your sauce is too thick, add a bit of the reserved pasta water. This water has starch that helps create a smooth texture. Start with a small amount and stir until you reach the perfect creaminess. Reserving pasta water is very important. It holds the key to a rich sauce. The starchy water helps bind your pasta and sauce together. Always set aside a cup before you drain your pasta. It makes a big difference in the final dish. If you can't find feta cheese, don't worry! You can use goat cheese or ricotta. Both will give you a nice flavor. Cream cheese also works well if you want a milder taste. You can also switch up the pasta type. While penne or fusilli is great, you can use spaghetti or even gluten-free pasta. Just follow the package directions for cooking time. Plating Baked Feta Pasta can enhance its appeal. Start by placing the pasta in a large bowl. Spoon the creamy sauce on top to make it look inviting. To make it even better, add fresh herbs like basil or parsley. A sprinkle of grated Parmesan cheese adds a nice touch. It gives a lovely flavor and looks beautiful on the plate. {{image_2}} You can make Baked Feta Pasta vegan. Replace the feta cheese with a plant-based cheese. Look for options made from nuts or tofu. They melt well and give a creamy texture. You can also use nutritional yeast for a cheesy flavor. For pasta, choose whole grain or lentil pasta. These add fiber and protein, making your meal heartier. To boost the flavors, add more vegetables. Spinach, zucchini, or mushrooms work great. You can even toss in some olives for a briny touch. Herbs also elevate the dish. Try adding fresh parsley, thyme, or basil. A pinch of chili flakes gives a nice kick. Experiment with your favorite spices to find your perfect blend. Baked Feta Pasta pairs well with many side dishes. Garlic bread is a classic choice. It’s great for soaking up the creamy sauce. A light salad with cucumbers and tomatoes complements the meal. You can also serve it with roasted vegetables for added nutrition. These sides balance the rich flavors, making your meal complete. To keep your Baked Feta Pasta fresh, use airtight containers. Glass or plastic containers work well. Make sure to let the pasta cool before sealing. This helps prevent moisture build-up. You can store leftovers in the fridge for up to three days. If you want to keep it longer, consider freezing it. Frozen pasta can last up to two months, but the texture may change. When it's time to reheat, avoid the microwave if you can. Instead, warm it in a skillet over low heat. Add a splash of water or olive oil to keep it moist. Stir often to prevent sticking. You can also use an oven. Preheat it to 350°F (175°C). Place the pasta in an oven-safe dish and cover it with foil. Bake for about 15-20 minutes. This method helps keep the creaminess intact. Enjoy your creamy Baked Feta Pasta again! Baked feta pasta is a simple dish that combines creamy feta cheese with pasta. You bake the feta and tomatoes together, which makes a rich sauce. The dish went viral on social media, making it popular worldwide. It’s easy to make and tastes amazing! Yes, you can make baked feta pasta in advance! To do this, cook the pasta and bake the feta and tomatoes. Let it cool, then store it in the fridge. When you’re ready to eat, just reheat it in the oven or microwave. Add a little pasta water to keep it creamy. Penne and fusilli are great choices for baked feta pasta. They hold the sauce well and add good texture. You can also use other types, like rotini or bowtie pasta. Just make sure to cook it al dente for the best results. For the full recipe and more tips, check the [Full Recipe]. Baked Feta Pasta is a simple and tasty dish you can make at home. We covered key ingredients like feta cheese, pasta, and fresh vegetables. You learned how to bake, cook pasta, and combine everything for a creamy sauce. Remember to try variations and tips for the best results. Whether you're a novice or a seasoned cook, this dish offers room for creativity. Enjoy personalizing it to fit your taste buds. You'll love impressing friends and family with this easy yet flavorful meal.](https://easycookingbite.com/wp-content/uploads/2025/06/a710df7b-a2c9-4640-b327-15fc00ad29a0-300x300.webp)

Crispy Garlic Chicken Sandwich Crunchy Flavor Boost
Are you ready to take your sandwich game to the next level? The Crispy Garlic Chicken Sandwich packs a crunch and rich flavor that…