Latest & Greatest

browse recipes

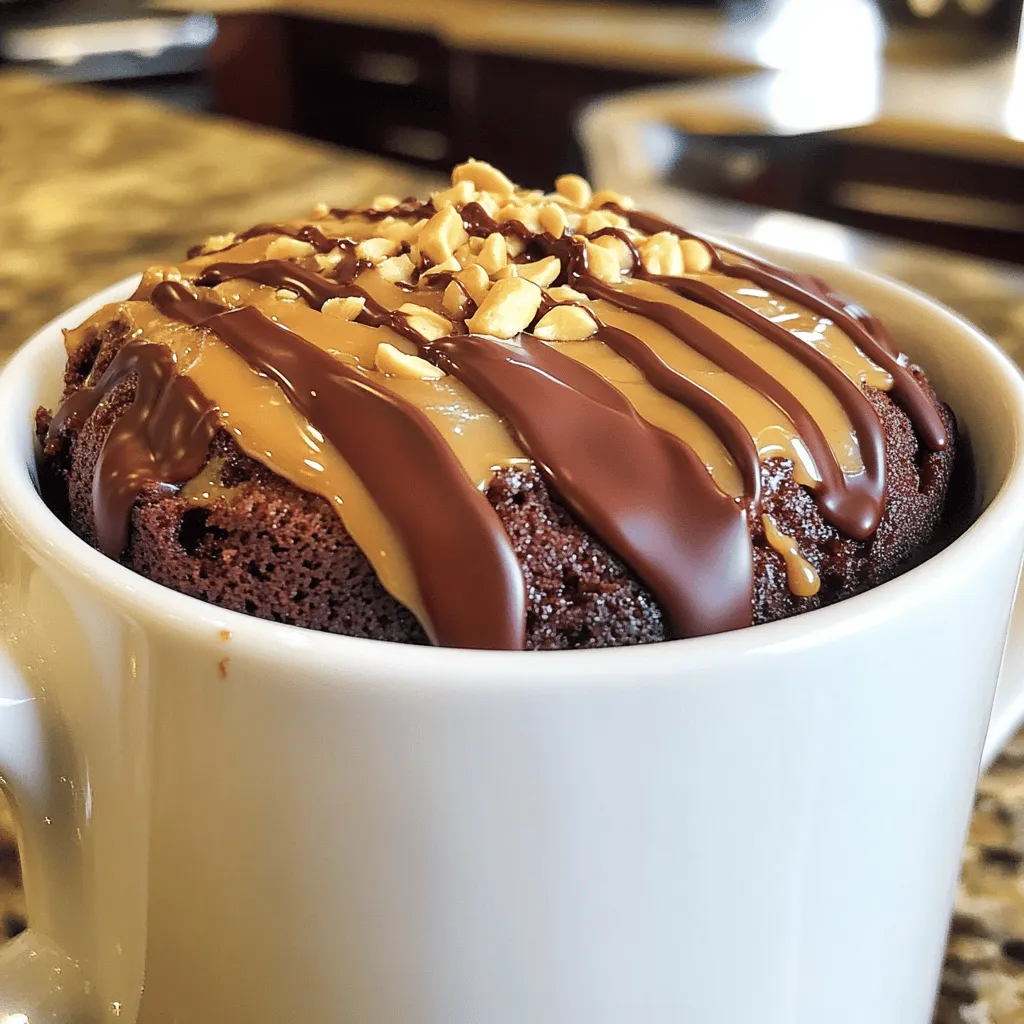
This mug cake needs some simple items. Here are the key ingredients: - 4 tablespoons all-purpose flour - 4 tablespoons granulated sugar - 2 tablespoons unsweetened cocoa powder - 1/8 teaspoon baking powder - 1/8 teaspoon salt - 3 tablespoons milk (dairy or plant-based) - 2 tablespoons peanut butter (creamy or chunky) - 1 tablespoon vegetable oil - 1/4 teaspoon vanilla extract These ingredients create a soft, rich cake. The flour gives it structure, while sugar adds sweetness. Cocoa powder brings chocolate flavor. Peanut butter adds creaminess and a nutty taste. To make your mug cake even better, you can add some optional items: - Chocolate chips for extra chocolatey goodness - A sprinkle of crushed peanuts for crunch - Whipped cream for a creamy topping Adding chocolate chips makes it richer. Crushed peanuts add a nice texture. Whipped cream brings a light sweetness. If you have dietary needs, there are easy swaps: - Use almond or oat milk for a dairy-free option. - Replace all-purpose flour with almond or coconut flour for gluten-free. - Swap peanut butter for sunflower seed butter if allergies are a concern. These swaps keep the taste while meeting different diets. You still get a delicious treat! For the full recipe, check out the details above. Start by choosing a microwave-safe mug. This will hold your cake. Add the dry ingredients first. You need: - 4 tablespoons all-purpose flour - 4 tablespoons granulated sugar - 2 tablespoons unsweetened cocoa powder - 1/8 teaspoon baking powder - 1/8 teaspoon salt Mix these ingredients well. Make sure there are no lumps. A fork works great for this. Now, it’s time for the wet ingredients. Add: - 3 tablespoons milk (you can use dairy or plant-based) - 2 tablespoons peanut butter (creamy or chunky works) - 1 tablespoon vegetable oil - 1/4 teaspoon vanilla extract Stir until the batter is smooth. You can use a fork or whisk for this. If you want, fold in some chocolate chips for an even sweeter treat. Place your mug in the microwave. Cook it on high for 1 minute and 15 seconds. Check it often. The cake should rise and be set but still moist inside. If it looks wet, microwave for an extra 10 seconds. Let it cool for a minute before eating. You can serve it right in the mug or on a plate. Add whipped cream, chocolate syrup, or crushed peanuts for extra fun. Enjoy your delicious Chocolate Peanut Butter Mug Cake! For the full recipe, check the section above. One common mistake is overmixing the batter. Mixing too much can make the cake tough. Another mistake is not measuring ingredients accurately. This can lead to a dry or dense cake. Lastly, cooking it for too long can make it chewy. Keep a close eye on the time to avoid this. To get a soft and fluffy mug cake, use room temperature ingredients. Cold milk can cool down the batter. Also, make sure to stir gently. This helps keep air in the batter. If you want a richer cake, add a few extra chocolate chips. They melt and create gooey pockets of chocolate. Toppings can take your mug cake to a new level. I love adding whipped cream on top. It adds creaminess and a nice contrast. You can also drizzle chocolate syrup for a sweet touch. Crushed peanuts give a crunchy texture. Try fresh strawberries or bananas for a fruity twist. For the full experience, check out the Full Recipe. {{image_2}} You can switch peanut butter for other nut butters. Almond butter brings a light, nutty taste. Cashew butter offers a creamy texture that's hard to resist. Sunflower seed butter is a great choice for nut-free diets. Each option changes the flavor and feel of your mug cake. To make this mug cake vegan, use plant-based milk and replace the egg with flaxseed meal. Mix one tablespoon of flaxseed with three tablespoons of water, then let it sit for a few minutes. For gluten-free options, swap all-purpose flour with almond flour or gluten-free flour blends. This keeps the cake soft and delicious. Add your favorite mix-ins for a personal twist. Chocolate chips boost the chocolate flavor. You can also try nuts like walnuts or pecans for a crunchy bite. Dried fruit, like raisins or cranberries, adds sweetness and texture. Feel free to experiment and find your perfect combination. For the full recipe, check here. After making your chocolate peanut butter mug cake, you might have some leftovers. If so, let the cake cool completely. Then, cover it tightly with plastic wrap or place it in an airtight container. Store it in the fridge for up to two days. This keeps the cake moist and tasty. If you don’t plan to eat it soon, you can freeze it. When you're ready to enjoy your leftover mug cake, the microwave is your best friend. Place the cake in the microwave for about 10 to 15 seconds. Check if it's warm enough. If it needs more heat, add a few more seconds. Watch closely to avoid overcooking. You want it warm, not dried out. Enjoy it plain or add a scoop of ice cream for a special treat. For meal prep, you can freeze your mug cake. Wrap it well in plastic wrap, then place it in a freezer bag. It can stay good for up to a month. When you want to eat it, let it thaw in the fridge overnight. Then, reheat it in the microwave like mentioned above. This makes it easy to have a sweet treat ready anytime! If you follow the Full Recipe, you’ll have a delightful dessert waiting for you. You can bake a mug cake in an oven. Use an oven-safe mug. Preheat your oven to 350°F (175°C). Mix the dry and wet ingredients as usual. Pour the batter into the mug. Place the mug on a baking sheet. Bake for about 20 minutes. Check if it’s done by inserting a toothpick. If it comes out clean, your cake is ready! Yes, you can prepare the dry mix ahead of time. Store it in an airtight container. When you’re ready to bake, just add the wet ingredients. Mix them in a mug, and cook. This way, you save time and still enjoy a warm treat. You can also store the baked cake for a day. Just cover it and keep it in the fridge. You can try almond butter or cashew butter. These nut butters work well in this recipe. If you need a nut-free option, use sunflower seed butter. It gives a nice flavor too. You could also use a chocolate spread for a sweet twist. Just remember to adjust the sweetness if needed. This blog post covered everything you need for a delicious chocolate peanut butter mug cake. We looked at key and optional ingredients, plus how to make substitutions for dietary needs. The step-by-step instructions guide you through mixing and cooking your cake. I shared tips to avoid mistakes and enhance flavor with toppings. You can also try fun variations and storage tips to keep it fresh. Remember, a mug cake is quick and easy, so experiment to find your perfect version! Enjoy every bite!

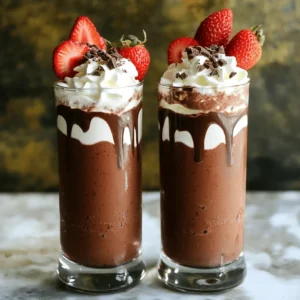
Chocolate Peanut Butter Mug Cake Easy and Tasty Treat

If you’re craving a quick and tasty dessert, you need to try this Chocolate Peanut Butter Mug Cake! It’s simple, satisfying, and ready in…

My Latest Drinks

My Latest Dinners

hey,

i’m !

I’m so happy you’re here!

Every dish I share is made with love and care. I hope they bring you the same comfort and joy they bring me. Let’s make memories, one recipe at a time.

Baked Zucchini Fries Crispy and Healthy Snack Option

Looking for a crispy snack that’s both healthy and delicious? Baked zucchini fries are your answer! They’re easy to prepare and make a perfect…
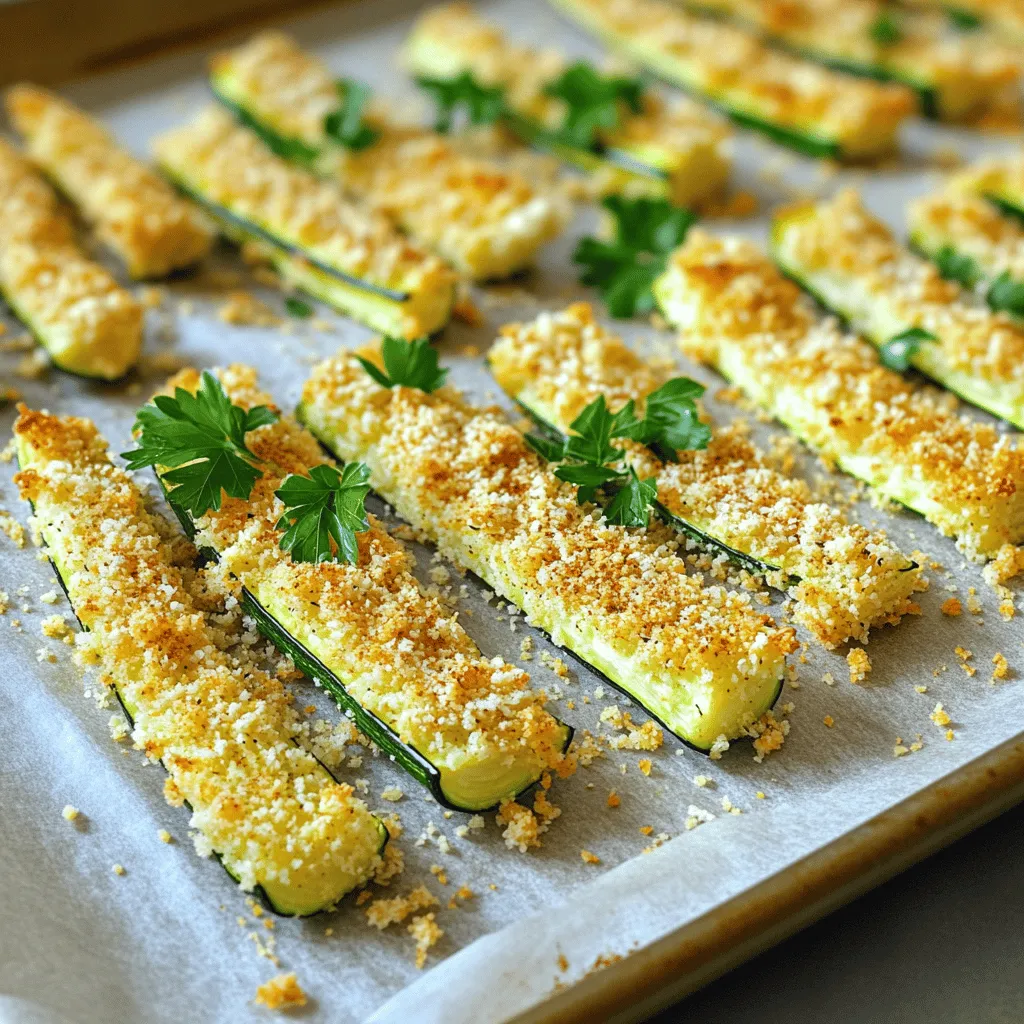

- 2 medium zucchini, cut into fries - 1 cup breadcrumbs (panko for extra crunch) - 1/2 cup grated Parmesan cheese - 1 teaspoon garlic powder - 1 teaspoon paprika - 1/2 teaspoon salt - 1/4 teaspoon black pepper - 1 large egg - 1 tablespoon olive oil - Baking sheet and parchment paper - Shallow bowls for mixing - Whisk for egg mixture - Calories: 150 - Total Fat: 6g - Protein: 6g - Carbohydrates: 18g Baked zucchini fries are a great snack. They taste great and are easy to make. You need simple ingredients, which you likely have in your kitchen. The zucchini adds a fresh crunch. The breadcrumbs and cheese give the fries a nice flavor. When you gather your ingredients, remember to choose medium zucchini. They are the perfect size for fries. Panko breadcrumbs add extra crunch. They help make the fries crispy. Each serving has about 150 calories. They have 6 grams of fat and 6 grams of protein. This makes them a healthy choice for snacking. With these ingredients and tools, you are ready to make your baked zucchini fries. For the full recipe, you can check the details above! To start, preheat your oven to 425°F (220°C). This temperature helps the fries get crispy. Next, line a baking sheet with parchment paper. This makes cleanup easy and keeps the fries from sticking. Now, let’s cut the zucchini into fries. Take two medium zucchinis and wash them well. Cut off both ends. Then, slice each zucchini in half lengthwise. After that, cut each half into sticks, about 1/2 inch thick. Try to keep them even for uniform cooking. In a shallow bowl, mix together your dry ingredients. Combine 1 cup of breadcrumbs, 1/2 cup of grated Parmesan cheese, 1 teaspoon of garlic powder, 1 teaspoon of paprika, 1/2 teaspoon of salt, and 1/4 teaspoon of black pepper. Stir well to blend all flavors. In another bowl, beat one large egg and add 1 tablespoon of olive oil. Whisk these together until smooth. This mixture helps the coating stick to the zucchini. Now, let’s dip and coat the fries. Take a zucchini fry and dip it into the egg mixture. Allow any excess egg to drip off. Next, coat it in the breadcrumb mix. Press gently to ensure it sticks well. Place each coated fry on the prepared baking sheet in one layer. Bake the zucchini fries in your preheated oven. Set a timer for 20 to 25 minutes. Halfway through baking, flip the fries for even cooking. You know they’re done when they turn golden brown and crispy. Once baked, remove the fries from the oven and let them cool for a couple of minutes. Garnish with fresh, chopped parsley for a nice touch. For the full recipe, check out the cooking instructions above. Enjoy your crispy and healthy snack! To get the best crunch, I always use panko breadcrumbs. They create a light and airy crust that makes the fries extra crispy. Another key tip is to place the fries in a single layer on the baking sheet. This allows hot air to flow around each fry, helping them cook evenly. One common mistake is overcrowding the baking sheet. If the fries are too close together, they will steam instead of bake. This means they won’t get crispy. Another mistake is not drying the zucchini before dipping it. Wet zucchini can make the coating soggy. For dips, ranch and marinara work great. You can also try a spicy aioli for a kick. These fries pair well with grilled chicken or a fresh salad. They make a fun side dish for any meal. You can find the full recipe for these crispy baked zucchini fries to get started! {{image_2}} You can change the flavor of your zucchini fries easily. Start by switching up the spices. Try adding cayenne for heat or oregano for an Italian flair. You might also swap the Parmesan cheese for cheddar or nutritional yeast for a different taste. Adding herbs like Italian seasoning can brighten the dish. Just sprinkle them in with the other dry ingredients. The key is to have fun and explore flavors you love. If you need a gluten-free option, don’t worry. You can use ground almonds or crushed cornflakes instead of breadcrumbs. Panko breadcrumbs can also be found gluten-free. These alternatives will still give you that great crunch. You can even use crushed seeds like sunflower seeds for a nutty flavor. Experiment to find what you like best! For a vegan version, you can replace the egg. Try using flaxseed meal mixed with water. Just mix 1 tablespoon of flaxseed meal with 2.5 tablespoons of water. Let it sit for a few minutes until it thickens. This gives a nice texture and helps the coating stick. You can also use silken tofu blended until smooth. This will keep your zucchini fries moist and tasty. You can store leftover zucchini fries in the fridge. Place them in an airtight container. This keeps them fresh and tasty. Make sure they cool down before sealing. If you want to freeze them, let them cool first. Spread the fries on a baking sheet to freeze individually. After they are frozen, transfer them to a freezer bag. This way, they won't stick together. To enjoy your zucchini fries again, you can reheat them in different ways. The oven works best. Preheat it to 400°F (200°C). Place the fries on a baking sheet and heat for 10-15 minutes. This keeps them crispy. You can also use an air fryer. Set it to 375°F (190°C) and cook for about 5-7 minutes. If you're short on time, the microwave works too. Heat them in 30-second bursts, but they won’t be as crispy. You can keep baked zucchini fries in the fridge for about 3-4 days. If you notice any mold or off smells, it’s time to toss them. Frozen fries can last up to 3 months. After that, they may lose flavor and texture. Always check for signs of spoilage before eating. Enjoy your crispy fries while they are fresh! Yes! You can use many other veggies for fries. Some great options include: - Eggplant - Sweet potatoes - Carrots - Parsnips - Butternut squash These vegetables can create fun and tasty variations. Just cut them into fry shapes and follow the same baking method. To make zucchini fries without breading, slice the zucchini into sticks. 1. Toss the sticks with olive oil, salt, and pepper. 2. Place them on a baking sheet in a single layer. 3. Bake at 425°F (220°C) for 15-20 minutes, flipping halfway. This method keeps the fries low-carb and healthy while still being delicious. Dipping sauces can enhance your zucchini fries. Some popular sauces are: - Ranch dressing - Marinara sauce - Garlic aioli - Honey mustard You can make them easily at home. For ranch, mix yogurt, herbs, and spices. For marinara, just heat up store-bought sauce. No, you don't have to peel the zucchini. The skin adds nutrients and color. Leaving the skin on helps the fries hold their shape. However, if you prefer a softer bite, feel free to peel them. It's all about your taste! You now have a solid plan for making crispy zucchini fries. We covered the key ingredients, essential tools, and step-by-step instructions. I shared tips for perfect fries and ways to mix up flavors. Whether you prefer gluten-free options or vegan tweaks, there are choices for everyone. Don't forget about storage and reheating advice for leftovers. Enjoy your cooking, and remember that experimentation can lead to even tastier results. Dive in and get frying!