Latest & Greatest

browse recipes

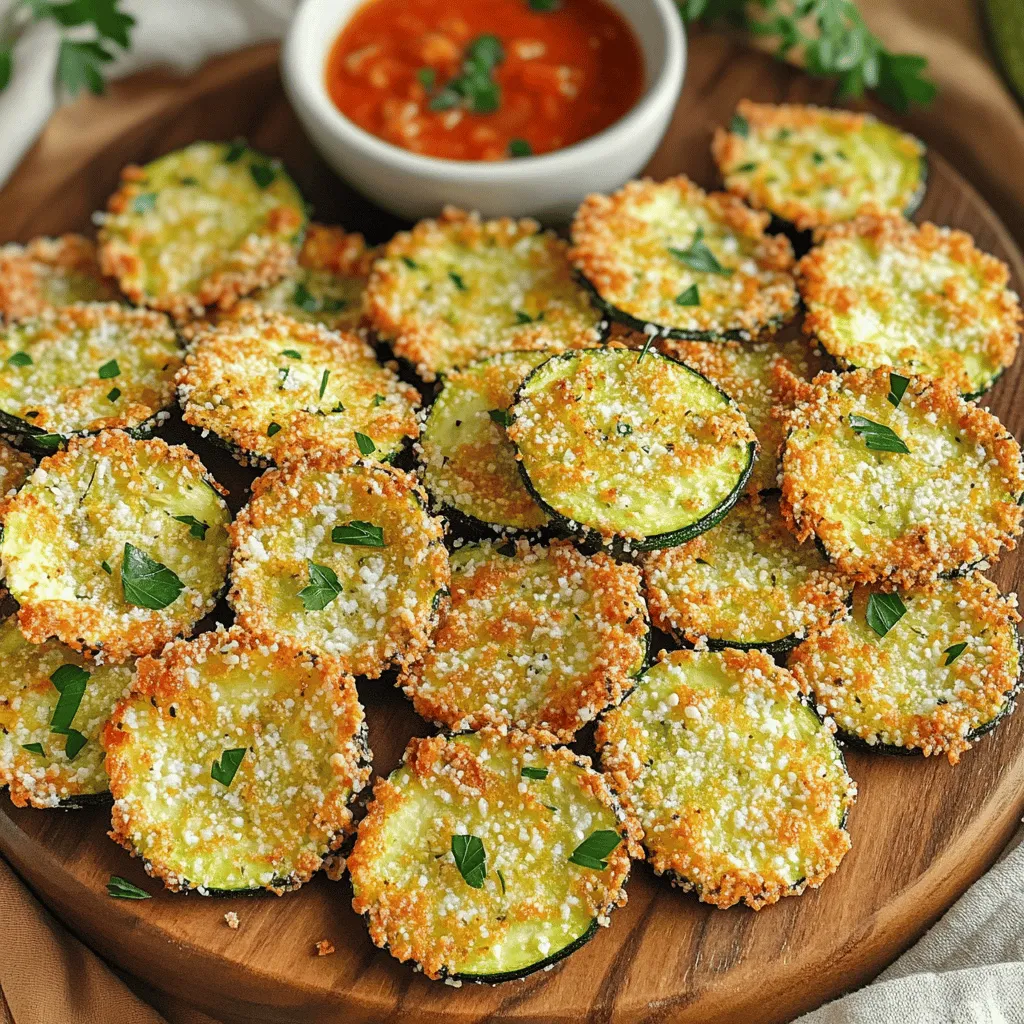
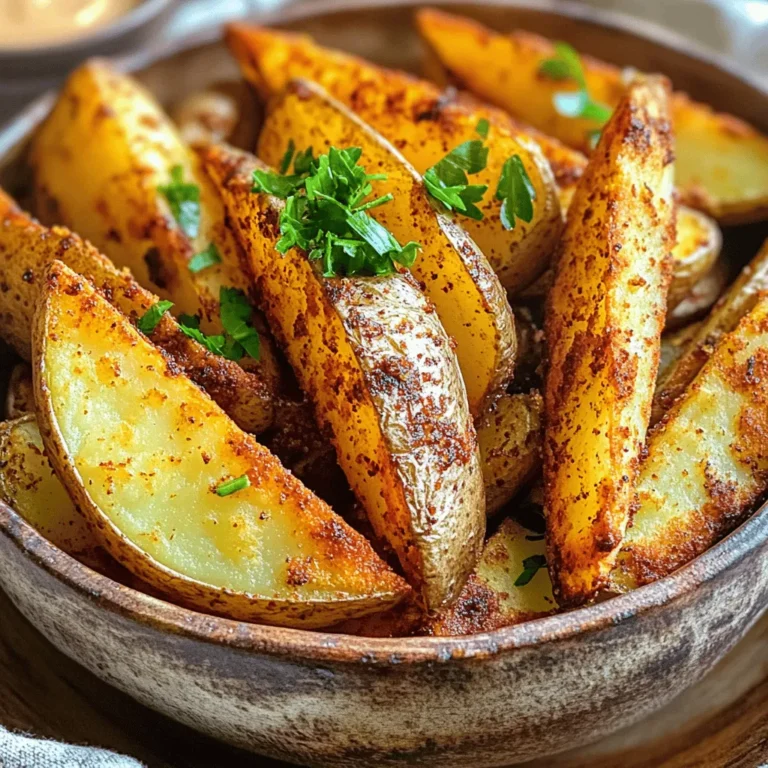
- 2 medium zucchinis - 1 cup grated Parmesan cheese - 1 cup panko breadcrumbs - 2 large eggs - 1 teaspoon garlic powder - 1 teaspoon onion powder - 1 teaspoon dried Italian herbs - Salt and pepper to taste - Cooking spray To make the best Air Fryer Parmesan Crusted Zucchini Chips, gather these fresh ingredients. Start with two medium zucchinis. Slice them into 1/4-inch rounds. This size helps them cook evenly and get that perfect crunch. Next, you need one cup of grated Parmesan cheese. This cheese adds a rich flavor and helps the chips become golden brown. The panko breadcrumbs are key too. Use one cup for extra crunch. They give a light, crispy texture. You'll also need two large eggs for the coating. Beat them in a bowl until frothy. This makes the zucchini slices stick well to the breadcrumbs. Add one teaspoon each of garlic powder and onion powder. These spices boost the flavor of your chips. Dried Italian herbs will bring in a nice herby taste, so grab one teaspoon of those as well. Don’t forget salt and pepper to taste. These simple seasonings make a big difference. Lastly, keep cooking spray handy. It helps the chips crisp up nicely in the air fryer. With these ingredients ready, you’ll be set to create a delightful snack that everyone will love! - Preheat the air fryer to 400°F (200°C). - Slice the zucchinis into 1/4-inch rounds. - In a bowl, beat the eggs until frothy to create your egg wash. - Dip each zucchini slice in the egg wash. Make sure it’s fully coated. - Transfer the egg-coated zucchini to the breadcrumb mix. Press down gently for a good layer. - Arrange the coated zucchini in a single layer in the air fryer basket. Avoid overcrowding. - Spray the tops lightly with cooking spray for extra crispiness. - Air fry for 8-10 minutes, flipping halfway through for even cooking. When they are golden brown and crispy, they are done. - Avoiding overcrowding in the air fryer: It is key to space out the zucchini chips. If you stack them, they will steam instead of crisp. Cook them in batches if needed. This helps each chip get nice and crunchy. - Proper seasoning techniques: Always season your coating mix well. The blend of garlic, onion, and Italian herbs adds great flavor. Don’t forget to taste your seasoning mix. Adjust salt and pepper to your liking. - Recommended cook times and temperatures: Set your air fryer to 400°F (200°C). Cook the zucchini chips for 8-10 minutes. Flip them halfway through cooking. This helps both sides cook evenly and get that golden color. - Importance of cooking spray: A light spray of cooking spray is important. It helps the chips crisp up nicely. Without it, your chips may turn out soft. Make sure to coat the tops before starting the air fryer. {{image_2}} You can switch cheeses to change the flavor. Try using mozzarella for a milder taste. Aged cheddar also adds a nice kick. If you want something sharper, go for pecorino Romano. Each cheese brings its own unique touch. You can also swap out the breadcrumbs. For a lighter crunch, use crushed rice cereal. If you like a nutty flavor, try almond flour. Different textures can make the chips more fun. Spice up your zucchini chips with extra seasonings. For heat, add cayenne pepper or red pepper flakes. This will give your chips a nice kick. If you love smoky flavors, try smoked paprika. It adds depth without overpowering the dish. Herbs can also create new taste profiles. Fresh thyme or rosemary pairs well with the zucchini. You can also mix in a bit of parsley for freshness. Experiment with herbs to find your perfect flavor blend. After enjoying your Air Fryer Parmesan Crusted Zucchini Chips, you may have some left. To store them, let the chips cool to room temperature. Place them in an airtight container. Keep them in the fridge for up to three days. This helps maintain their flavor. Avoid stacking them too high to keep them crisp. You can add a paper towel inside the container to absorb moisture. When you want to reheat the chips, use your air fryer again. Preheat it to 350°F (175°C). Arrange the zucchini chips in a single layer. Heat them for about 3-4 minutes. This will help them regain their crunch. You can also use an oven for reheating. Place the chips on a baking sheet and heat them at the same temperature. This method also keeps them crispy. Avoid using a microwave, as it can make them soggy. How do I know when zucchini chips are done? Zucchini chips are done when they turn golden brown and crispy. Check them after 8 minutes. Flip them halfway to ensure even cooking. If they look dry and crisp, they are ready to eat. Can I make these zucchini chips gluten-free? Yes, you can make these chips gluten-free. Use gluten-free breadcrumbs instead of regular ones. Ensure your Parmesan cheese is also gluten-free. This way, everyone can enjoy them! What is the best dipping sauce to serve with zucchini chips? The best dipping sauce is marinara or ranch. Marinara adds a tangy flavor, while ranch gives a creamy taste. You can also try a spicy aioli for a fun twist! This blog post covered how to make delicious zucchini chips in an air fryer. You learned about the ingredients needed, such as zucchinis and Parmesan cheese, and the step-by-step process to prepare and cook them. I shared tips to ensure perfect crispiness and variations to suit your taste. Storing and reheating methods will keep your leftovers tasty. By following these steps, you can create a healthy snack that everyone will enjoy. Give it a try, and enjoy crispy zucchini chips anytime!

Air Fryer Parmesan Crusted Zucchini Chips Delight

Are you ready to enjoy a tasty and healthy snack? My Air Fryer Parmesan Crusted Zucchini Chips recipe is a must-try! With a crispy…

My Latest Drinks

My Latest Dinners

hey,

i’m !

I’m so happy you’re here!

Every dish I share is made with love and care. I hope they bring you the same comfort and joy they bring me. Let’s make memories, one recipe at a time.

Firecracker Ground Chicken Lettuce Wraps Simple Recipe

Are you ready to spice up your dinner routine? Firecracker Ground Chicken Lettuce Wraps are here to save the day! This simple recipe delivers…
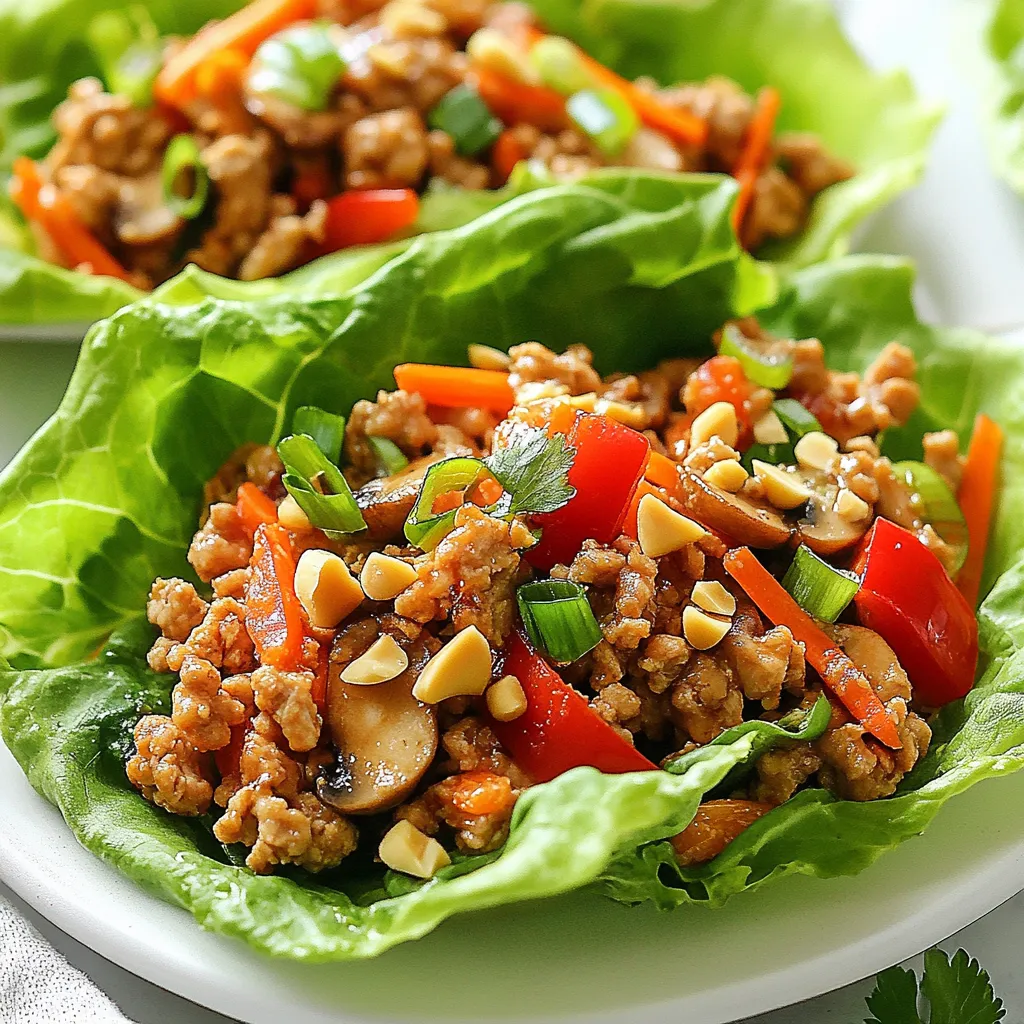
For this tasty dish, you need the following main ingredients: - 1 lb ground chicken - 1 tablespoon sesame oil - 3 garlic cloves, minced - 1 inch ginger, grated - 1 red bell pepper, finely diced - 1 cup mushrooms, finely chopped - 1 carrot, shredded - ¼ cup soy sauce (or tamari for gluten-free) - 1 tablespoon rice vinegar - 1 tablespoon honey or agave syrup - 2 teaspoons sriracha (adjust to taste) - 1 tablespoon cornstarch mixed with 2 tablespoons water - 12 large lettuce leaves (butter or romaine) These ingredients come together to create a flavorful filling. The ground chicken offers protein, while the veggies add crunch and color. You can enhance your wraps with optional garnishes: - Chopped green onions - Crushed peanuts These toppings add texture and flavor. They give your wraps a nice crunch and freshness. If you have special dietary needs, you can make some swaps: - Use ground turkey or tofu instead of chicken for a different protein. - Switch soy sauce for coconut aminos to avoid gluten. - Replace honey with maple syrup for a vegan option. These substitutions keep the dish tasty while catering to your needs. Enjoy experimenting with flavors that suit your taste! {{ingredient_image_1}} First, gather all the ingredients. You will need: - 1 lb ground chicken - 1 tablespoon sesame oil - 3 garlic cloves, minced - 1 inch ginger, grated - 1 red bell pepper, finely diced - 1 cup mushrooms, finely chopped - 1 carrot, shredded - ¼ cup soy sauce (or tamari for gluten-free) - 1 tablespoon rice vinegar - 1 tablespoon honey or agave syrup - 2 teaspoons sriracha (adjust to taste) - 1 tablespoon cornstarch mixed with 2 tablespoons water - 12 large lettuce leaves (butter or romaine) - Chopped green onions and crushed peanuts for garnish Make sure your workspace is clean and organized. This helps you cook faster and easier. Heat a large skillet over medium-high heat. Pour in the sesame oil. Add minced garlic and grated ginger. Sauté for about 30 seconds. You want them fragrant, not browned. Next, raise the heat to high. Add the ground chicken to the skillet. Cook it until it’s brown. Break it apart with a spatula as it cooks. Once the chicken is cooked, toss in the diced red bell pepper, chopped mushrooms, and shredded carrot. Stir-fry for 3 to 4 minutes. The veggies should be tender but still bright. In a small bowl, mix the soy sauce, rice vinegar, honey, and sriracha. Pour this mixture into the skillet. Stir well to combine the flavors. Add the cornstarch-water mix to the skillet. Stir constantly for about 2 to 3 minutes. The sauce will thicken nicely. Remove the skillet from heat and let it cool for a few minutes. To serve, take a large lettuce leaf. Spoon the chicken mixture onto the leaf. Garnish it with chopped green onions and crushed peanuts. Enjoy these wraps right away for a fresh, light meal. They are perfect for lunch or dinner! To get the best flavor, use fresh ingredients. Fresh garlic and ginger make a big difference. Sauté them in sesame oil, and enjoy the aroma. When you add ground chicken, cook it until it is fully browned. This adds depth and a nice texture. Mix in the veggies like red bell pepper and mushrooms. They should be tender but still crunchy. This keeps your dish lively and fresh. One common mistake is overcooking the chicken. If you cook it too long, it can become dry. Avoid using too much soy sauce, as it can make the dish salty. Also, don’t skip the cornstarch-water mix. This helps thicken your sauce nicely. Lastly, don't forget to let the mixture cool before serving. This helps the flavors meld together before you enjoy it. This recipe serves four, but you can easily adjust it. If you want to serve more, just double the ingredients. If you’re cooking for two, cut the recipe in half. Use smaller lettuce leaves if you want bite-sized wraps. You can also prepare extra filling and save it for later. This way, you have a quick meal ready whenever you want. Pro Tips Tip Title: Use Fresh Ingredients: Fresh garlic, ginger, and vegetables will enhance the flavor of your dish significantly. Tip Title: Adjust Spice Levels: Feel free to adjust the amount of sriracha according to your heat preference for a milder or spicier dish. Tip Title: Prepare in Advance: You can prepare the chicken mixture ahead of time and store it in the fridge for up to 2 days before serving. Tip Title: Use Different Greens: Experiment with different types of lettuce or greens, like iceberg or collard greens, for unique flavors and textures. {{image_2}} To make this dish vegetarian or vegan, swap the ground chicken for crumbled tofu or tempeh. Both options soak up flavors well. You can also try using lentils or chickpeas for added protein. Adjust the soy sauce and sriracha based on taste. Adding veggies like zucchini or bell peppers can enhance the mix. If you love heat, add extra sriracha or chili flakes to the meat mixture. You can also use hot chili oil for more spice. For a milder taste, reduce the sriracha or skip it altogether. Sweet chili sauce can offer a nice flavor twist without heat. Feel free to play with proteins! Ground turkey or beef works great as a substitute. You can also use shrimp or fish for a unique twist. Each protein brings its own flavor and texture. Just adjust cooking times to ensure everything is cooked through. To store leftover firecracker ground chicken, let it cool first. Place it in an airtight container. It will stay fresh for up to four days in the fridge. Keep the lettuce leaves separate. This keeps them crisp and fresh. When ready to eat, take the chicken out of the fridge. Heat it in a skillet over medium heat. Stir it often until it's warm. You can also use a microwave. Just heat it for 1-2 minutes, stirring halfway through. Make sure it’s hot all the way through. You can freeze leftover chicken too. Place it in a freezer-safe bag or container. It can last for up to three months in the freezer. When you want to eat it, thaw it overnight in the fridge. Reheat it as described above. This way, you can enjoy your wraps later! Yes, you can make the filling ahead. Cook the ground chicken and veggies as directed. Let it cool and store it in the fridge. When ready to eat, just reheat the filling and serve in fresh lettuce leaves. This saves time and keeps the wraps crisp. Butter lettuce is my top choice. Its leaves are soft and easy to fold. Romaine is another great option. It has a nice crunch and holds the filling well. Both types make your wraps fun and tasty. Yes, you can easily make this recipe gluten-free. Swap regular soy sauce for tamari. Tamari is a gluten-free soy sauce that tastes great. Check other ingredients too, like vinegar and sweeteners, to ensure they are gluten-free. To change the spice level, add more or less sriracha. Start with a small amount if you want it mild. You can always add more later. For extra heat, try adding red pepper flakes or fresh chili. Taste as you go to find what you like. This blog post covered everything you need for Firecracker Ground Chicken Lettuce Wraps. We looked at key ingredients, cooking steps, and how to serve them. I shared tips to boost flavor and avoid common mistakes. You also learned about fun variations based on your diet. Storing and reheating the wraps is easy, too. In the end, these wraps are tasty and versatile. Feel free to get creative and enjoy your meal!