
Latest & Greatest
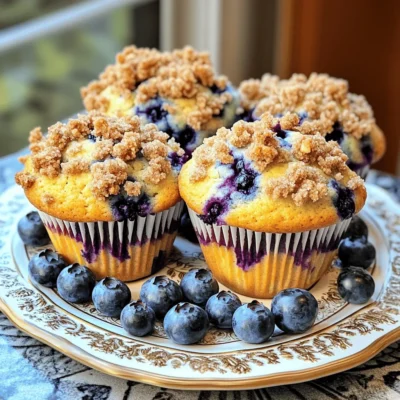
Blueberry Streusel Muffins Bakery Tasty Muffin Recipe
Welcome to your new favorite baking adventure! These Blueberry Streusel Muffins are soft, sweet, and topped with a crunchy layer
Read more…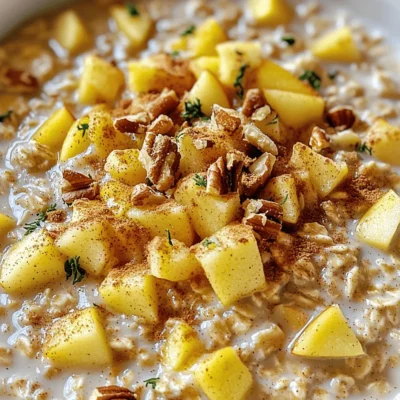
Slow Cooker Cinnamon Apple Oats Tasty Breakfast Delight
Start your day right with a warm bowl of Slow Cooker Cinnamon Apple Oats. This simple recipe combines rolled oats,
Read more…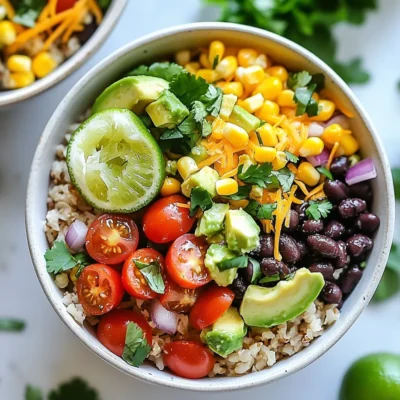
Minute Family Burrito Bowls Quick and Tasty Meal
Are you busy but still want a family meal that’s quick, tasty, and satisfying? Look no further than my Minute
Read more…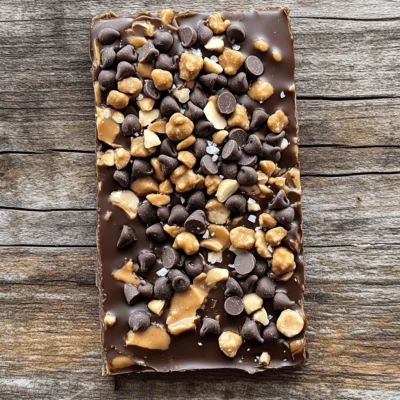
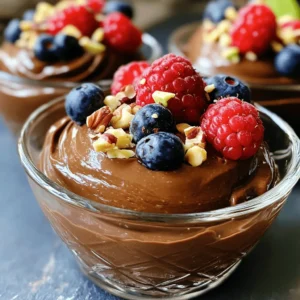
High-Protein Chocolate Peanut Butter Greek Yogurt Bark
Craving a sweet treat that’s both delicious and packed with protein? You’re in the right place! My High-Protein Chocolate Peanut
Read more…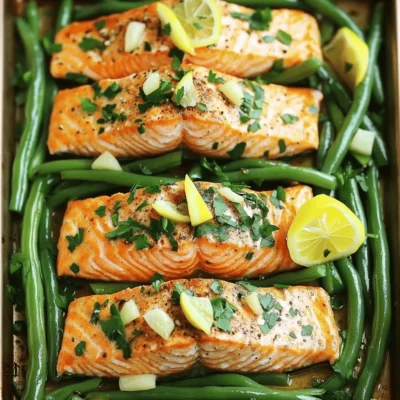
Sheet-Pan Garlic Lemon Salmon with Green Beans Delight
Get ready for a tasty and simple dinner with my Sheet-Pan Garlic Lemon Salmon with Green Beans! This dish combines
Read more…
Butternut Squash Black Bean Quesadillas Flavor Fusion
Craving a delicious meal that’s both filling and healthy? Look no further! My Butternut Squash Black Bean Quesadillas are a
Read more…
Air Fryer Honey Chipotle Chicken Wings Delight
Get ready to transform your next meal with my Air Fryer Honey Chipotle Chicken Wings! These wings pack a sweet
Read more…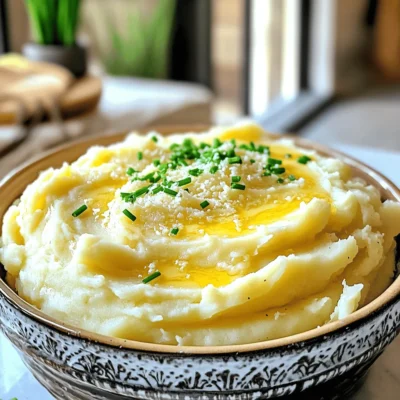
Slow Cooker Garlic Parmesan Mashed Potatoes Magic
Are you ready to elevate your meals with a creamy, savory side dish? In this post, I’ll share my secret
Read more…browse recipes


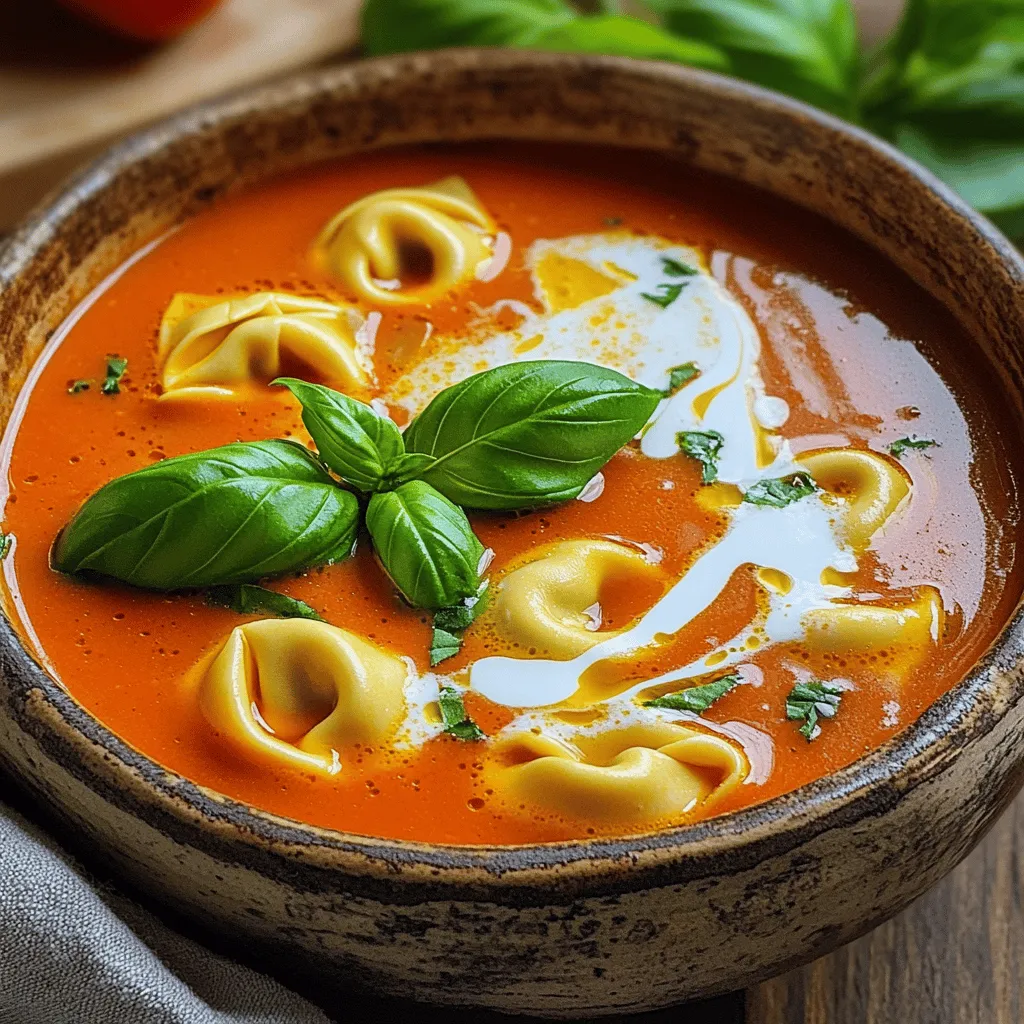
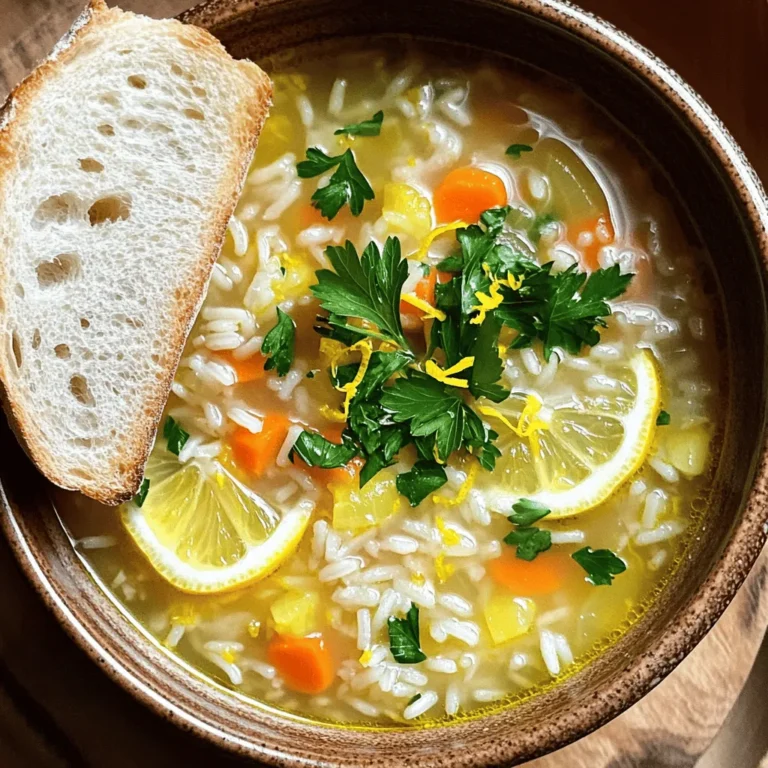
Creamy Tomato Tortellini Soup Satisfying and Easy Meal
If you crave a warm, hearty dish that’s quick to make, you need to try my Creamy Tomato Tortellini Soup. This recipe combines rich…
My Latest Drinks

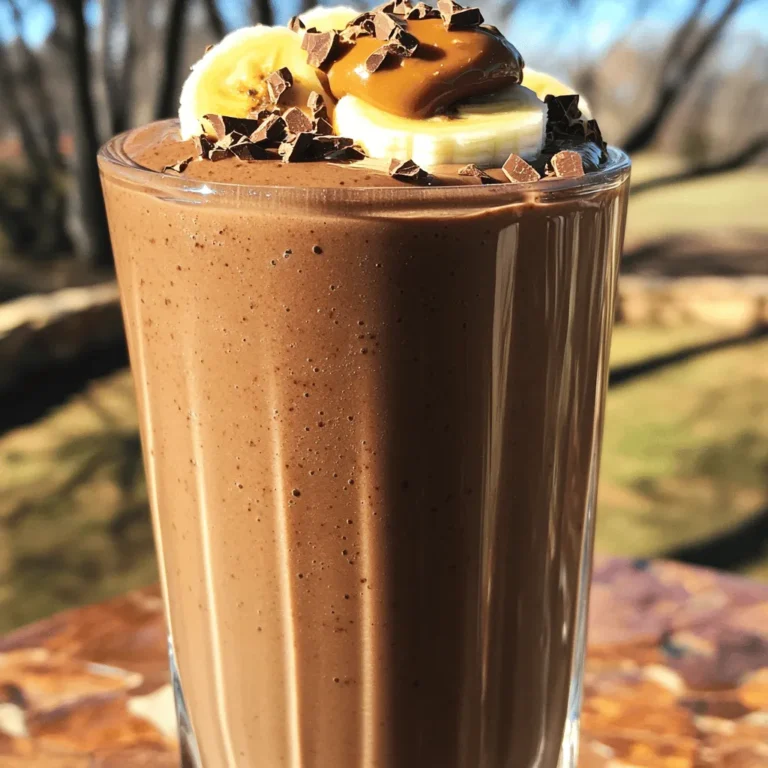
Strawberry Cheesecake Smoothie Creamy Refreshing Treat
Craving something delicious and cool? The Strawberry Cheesecake Smoothie is your answer! It blends creamy cheesecake flavors with sweet strawberries Read Full Recipe-
Mocktail Pink Punch Refreshing and Easy Recipe
Are you ready to impress your guests with a delightful drink? This Mocktail Pink Punch recipe is both refreshing and Read Full Recipe -
Blue Lagoon Tropical Lemonade Refreshing and Zesty Drink
Looking for a drink that’s both refreshing and fun? Say hello to Blue Lagoon Tropical Lemonade! This colorful beverage packs Read Full Recipe -
Pumpkin Spice Coffee Creamer Flavorful Fall Treat
Are you ready to embrace the cozy vibes of autumn? In this blog post, I’ll guide you through making your Read Full Recipe -
Apple Cider Margarita Mocktail Refreshing Fall Drink
Fall is here, and that means it’s the perfect time for a cozy drink! The Apple Cider Margarita Mocktail offers Read Full Recipe -
Pumpkin Spice Latte Copycat Cozy and Comforting Recipe
Craving that warm, cozy feeling of fall? You can enjoy a delicious Pumpkin Spice Latte at home! In this article, Read Full Recipe


My Latest Dinners
-
White Bean Soup Simple and Hearty Delight
Looking for a warm and filling meal? Let me introduce you to white bean soup! This simple and hearty delight Read Full Recipe -
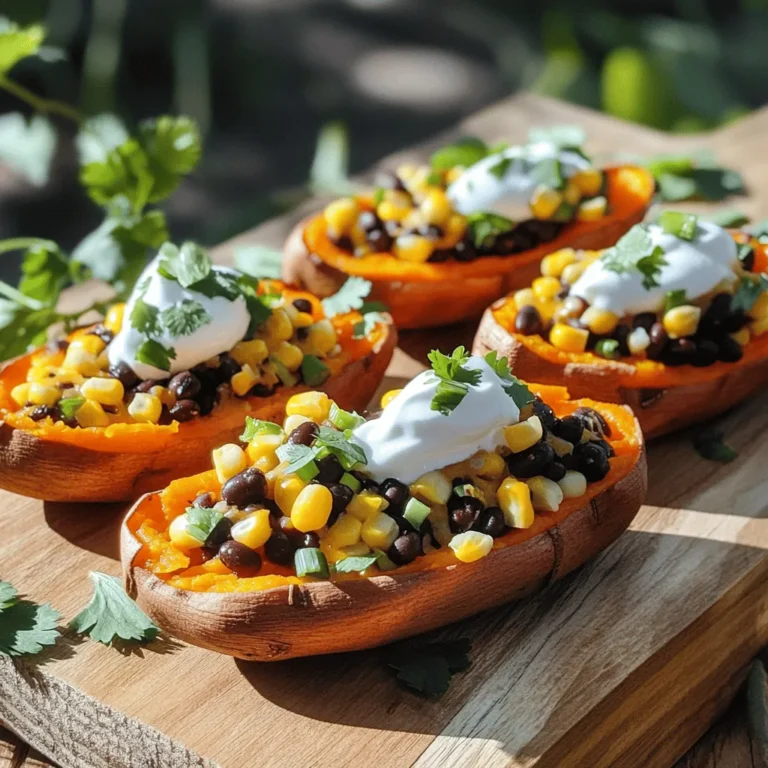
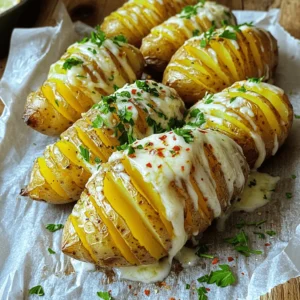
Garlic Herb Roasted Sweet Potatoes Flavorful Side Dish
Looking for a side dish that’s both tasty and easy to make? Garlic Herb Roasted Sweet Potatoes are the answer! Read Full Recipe -
One Pot Beef Taco Pasta Easy and Flavorful Meal
Looking for a quick and tasty meal? One Pot Beef Taco Pasta is the perfect dish! This recipe packs bold Read Full Recipe -
Garlic Chicken Zucchini Noodles Stir Fry Delight
Are you ready for a tasty twist on dinner? My Garlic Chicken Zucchini Noodles Stir Fry is a quick and Read Full Recipe -
Stuffed Italian Meatloaf Easy and Tasty Recipe
Are you ready to elevate your dinner game? This Stuffed Italian Meatloaf is both easy and tasty! In this article, Read Full Recipe -
One Pot French Onion Pasta Flavorful Comfort Dish
Looking for a cozy dinner that warms your soul? Try my One Pot French Onion Pasta! This creamy, rich dish Read Full Recipe


hey,
i’m !
I’m so happy you’re here!
Every dish I share is made with love and care. I hope they bring you the same comfort and joy they bring me. Let’s make memories, one recipe at a time.

![To make a delicious Quinoa Vegetable Pilaf, gather these simple ingredients: - 1 cup quinoa, rinsed - 2 cups vegetable broth - 1 medium onion, diced - 2 garlic cloves, minced - 1 medium carrot, diced - 1 bell pepper (any color), diced - 1 zucchini, diced - 1 cup frozen peas - 1 teaspoon cumin - 1 teaspoon turmeric - 2 tablespoons olive oil - Salt and pepper to taste - Fresh parsley, chopped (for garnish) This list includes wholesome items. Quinoa is a protein powerhouse. The vegetables provide color and crunch. Spices add depth and warmth. Olive oil gives a rich flavor, while parsley brightens the dish. For the full recipe, check the section above. 1. First, boil the vegetable broth in a medium saucepan. 2. Rinse the quinoa under cold water to remove its natural coating. 3. Add the rinsed quinoa to the boiling broth. 4. Cover the pot, reduce the heat, and simmer for 15 minutes. 5. Once done, fluff the quinoa with a fork and set it aside. 1. In a large skillet, heat the olive oil over medium heat. 2. Add the diced onion. Cook for 3 to 4 minutes until it turns translucent. 3. Stir in the minced garlic and cook for one more minute. 4. Next, add the diced carrot, bell pepper, and zucchini to the skillet. 5. Cook the veggies for 5 to 6 minutes. Stir occasionally until they become tender. 1. Sprinkle in the cumin, turmeric, salt, and pepper. Mix well to blend the spices. 2. Once the veggies are ready, add the frozen peas and cooked quinoa to the skillet. 3. Stir gently to combine all the ingredients. Heat for another 2 to 3 minutes. 4. Taste the pilaf and adjust the seasoning if needed. 5. Garnish with fresh chopped parsley before serving. You can find the full recipe details in the [Full Recipe]. - Rinsing quinoa properly: Rinse quinoa under cold water before cooking. This step removes the natural coating, called saponin, which can make quinoa taste bitter. Use a fine mesh strainer for the best results. - Adjusting water ratio: The water-to-quinoa ratio is key. Use 2 cups of liquid for every cup of quinoa. This helps achieve a fluffy texture. Too much water can make it mushy, so stick to the right measure. - Suggestions for additional spices: Spice it up! Add a pinch of smoked paprika or a dash of cayenne for a kick. You can also try a sprinkle of coriander for a fresh twist. - Using fresh herbs: Fresh herbs can brighten the dish. Add chopped cilantro, basil, or dill right before serving. It will enhance the meal with vibrant flavors. - Variations on sautéing methods: You can use a wok for an even cooking process. The high sides help toss the ingredients well. This method allows flavors to mix and develop nicely. - Alternative cooking equipment: If you have a rice cooker, use it! Just follow the same water-to-quinoa ratio. It makes cooking easy and hassle-free. Just set it and forget it until it’s done. These tips will help you create a quinoa vegetable pilaf that is not only tasty but also packed with nutrients. For the full recipe, check out the Quinoa Veggie Delight Pilaf 🥗 section. {{image_2}} You can make this pilaf vegan by choosing non-dairy alternatives for garnish. Use avocado or nuts like almonds for a creamy touch. If you want more protein, add beans or tofu. Both options work great and keep the dish hearty. You don't have to stick with quinoa. Try brown rice or couscous instead. Both grains add a nice twist to the dish. You can also blend quinoa with other grains for texture. Mixing gives a unique bite and makes it more interesting. Choosing the right vegetables can enhance your pilaf. In spring, use asparagus and peas. Summer's best options include zucchini and bell peppers. For fall, think about squash and carrots. You can use frozen veggies too. They work well and save time, but fresh offers the best flavor. For the complete dish, refer to the Full Recipe. To keep your quinoa vegetable pilaf fresh, use airtight containers. Glass or plastic containers work well. Make sure to let the pilaf cool before sealing. This helps prevent moisture buildup. Store in the fridge for up to five days. Label your containers with the date to keep track. For longer storage, freezing is a great option. Place the pilaf in freezer-safe bags or containers. Remove as much air as possible to prevent freezer burn. You can freeze it for up to three months. When you're ready to eat, thaw the pilaf in the fridge overnight. This keeps it safe and tasty. To reheat your pilaf, you have several options. You can use the microwave, stovetop, or oven. For the microwave, place it in a bowl and cover it. Heat on medium for 1-2 minutes. For stovetop, add a splash of broth and heat in a pan. Stir often to avoid sticking. If using the oven, cover it with foil and heat at 350°F for about 15 minutes. These methods help keep the flavor and texture intact. Enjoy your meal! Quinoa is a tiny seed that acts like a grain. It is rich in protein and fiber. Quinoa has all nine essential amino acids. This makes it a complete protein source. Other grains, like rice, lack some amino acids. Quinoa also contains many vitamins and minerals, such as magnesium and iron. It is gluten-free, making it safe for those with gluten allergies. To make your pilaf more filling, add beans or chickpeas. They provide extra protein and fiber. Nuts and seeds can also add healthy fats. Try adding avocado on the side for creaminess. Serve the pilaf with a salad or roasted vegetables for balance. This way, you create a hearty meal. One common mistake is not rinsing quinoa. Rinsing removes a bitter coating called saponin. Another mistake is cooking it with too little water. Always use a 2-to-1 ratio of water to quinoa. If your quinoa ends up mushy, you may have overcooked it. To fix overcooked quinoa, try adding it to a salad or stir-fry. For the full recipe, check out the Quinoa Veggie Delight Pilaf. This blog post offers a detailed guide to making quinoa vegetable pilaf. You learned about the key ingredients, step-by-step cooking methods, and storage tips. I shared useful tricks to enhance flavor and suggested variations for personalizing your dish. Remember, cooking quinoa can be simple and rewarding. With fresh ingredients and a few techniques, you can create a healthy meal. I hope you feel inspired to try this recipe and make it your own!](https://easycookingbite.com/wp-content/uploads/2025/05/7b4b6b5c-2155-49bd-b816-26c76bd210da-300x300.webp)
![- 2 cans (12.4 oz each) refrigerated cinnamon rolls - 6 large eggs - 1 cup milk The base of this casserole is the refrigerated cinnamon rolls. They create a soft and sweet texture. Use two cans for a hearty dish. Eggs add richness and bind the ingredients. They will puff up the casserole. Milk adds creaminess and moisture. - 1 teaspoon vanilla extract - 1 teaspoon ground cinnamon - 1/2 teaspoon nutmeg Vanilla extract gives a warm, sweet flavor. Ground cinnamon boosts the classic cinnamon taste. Nutmeg adds a hint of spice that makes each bite special. These flavors blend well and enhance your casserole. - 1/4 cup maple syrup - 1/2 cup chopped pecans - 1/2 cup powdered sugar (for icing) - 1-2 tablespoons milk (for icing consistency) Maple syrup adds sweetness and a hint of flavor. Chopped pecans give a nice crunch. For a sweet finish, make icing with powdered sugar and milk. You can drizzle this over the warm casserole for extra delight. Try adding these optional ingredients to make your dish unique. For the complete recipe, check the [Full Recipe]. 1. Preheat your oven to 350°F (175°C). Grease a 9x13 inch baking dish with cooking spray or butter. 2. Open the cans of cinnamon rolls. Cut each roll into quarters. Arrange the pieces evenly in the baking dish. 1. In a large bowl, whisk together: - 6 large eggs - 1 cup milk - 1 teaspoon vanilla extract - 1 teaspoon ground cinnamon - 1/2 teaspoon nutmeg - 1/4 cup maple syrup 2. Pour the egg mixture evenly over the cinnamon roll pieces. Make sure they all get coated. Gently press down with a spatula so they soak up the liquid. 1. Bake in the preheated oven for 25-30 minutes. Check for doneness by inserting a toothpick in the center. It should come out clean. 2. While the casserole bakes, prepare the icing. In a small bowl, whisk together: - 1/2 cup powdered sugar - 1-2 tablespoons milk Mix until smooth and reach your desired icing thickness. 3. Once the casserole is done, let it cool for about 5 minutes. Drizzle the icing over the top while it’s still warm. For a full recipe, refer to the detailed instructions above. Enjoy your delicious cinnamon roll casserole! To ensure even soaking of cinnamon rolls, cut each roll into quarters. Spread them out in the baking dish. Pour the egg mixture evenly over the pieces. Press down gently with a spatula. This helps the rolls soak up all the goodness. Bake at 350°F for 25 to 30 minutes. This temperature gives a nice golden brown color. For a lovely presentation, serve the casserole warm. Top it with a sprinkle of cinnamon. Add whole pecans for a nice touch. Accompany it with fresh fruit. A dollop of whipped cream adds a nice flair too. These simple additions make the dish feel special. Want to mix it up? Try different flavorings like almond extract or orange zest. You can also add fruit like apples or berries. They add a fresh taste. Nuts like walnuts or hazelnuts can give a nice crunch. Let your creativity shine! Experiment and find your favorite twist on this delightful dish. Check out the full recipe for more ideas! {{image_2}} To keep your cinnamon roll casserole fresh, store it in an airtight container. Place the casserole in the fridge within two hours of cooking. This helps prevent spoilage. When stored correctly, it stays fresh for about three to four days. If you plan to eat it later, don’t wait too long! For the best results, reheat your casserole in the oven. Preheat it to 350°F (175°C). Place the casserole in a baking dish, cover it with foil, and heat for about 15-20 minutes. This method keeps the texture soft and fluffy. You can also use the microwave, but it may make the edges tough. If you choose the microwave, heat it in short bursts of 30 seconds. If you want to freeze leftovers, start by letting the casserole cool completely. Cut it into pieces and wrap each piece tightly in plastic wrap. Place them in a freezer-safe bag. This way, they will stay fresh for up to three months. When you’re ready to eat, thaw the casserole in the fridge overnight. After that, reheat it in the oven or microwave. This keeps the delicious flavors intact. Enjoy this tasty treat anytime! Can I use homemade cinnamon rolls? Yes, you can use homemade cinnamon rolls. Fresh rolls add a nice touch. Just make sure they are soft and fluffy. Cut them into quarters like the store-bought ones. This helps them soak up the egg mixture well. How can I make it gluten-free? To make this dish gluten-free, use gluten-free cinnamon rolls. Many brands offer good options. Check your local store. You can also make your own rolls using gluten-free flour. Just follow your favorite gluten-free recipe. Dairy-free alternatives for milk and eggs For a dairy-free version, use almond milk or oat milk. They work well in this recipe. For eggs, try flaxseed meal or a commercial egg replacer. Mix one tablespoon of flaxseed meal with three tablespoons of water for each egg. Suggested replacements for sweeteners If you want to switch sweeteners, use honey or agave syrup instead of maple syrup. Both add a sweet flavor. You can also try coconut sugar for a lower glycemic index option. How to adjust servings for larger groups To serve more people, double the recipe. Use a larger baking dish, like a 12x18 inch pan. This will help ensure even cooking. Keep an eye on the baking time; it may take a bit longer. Modifying baking times for different dish sizes If you change the dish size, you may need to adjust baking times. A smaller dish may cook faster. Check for doneness by inserting a toothpick. If it comes out clean, your casserole is ready! - 2 cans (12.4 oz each) refrigerated cinnamon rolls - 6 large eggs - 1 cup milk - 1 teaspoon vanilla extract - 1 teaspoon ground cinnamon - 1/2 teaspoon nutmeg - 1/4 cup maple syrup - 1/2 cup chopped pecans (optional) - 1/2 cup powdered sugar (for icing) - 1-2 tablespoons milk (for icing consistency) 1. Preheat your oven to 350°F (175°C). Grease a 9x13 inch baking dish with cooking spray or butter. 2. Open the cans of cinnamon rolls and cut each roll into quarters. Arrange the pieces evenly in the baking dish. 3. In a large bowl, whisk together the eggs, milk, vanilla extract, ground cinnamon, nutmeg, and maple syrup until well combined. 4. Pour the egg mixture evenly over the cinnamon roll pieces, making sure they are all coated. Gently press down with a spatula to ensure they soak up the liquid. 5. If using, sprinkle the chopped pecans evenly on top of the mixture. 6. Bake in the preheated oven for 25-30 minutes, or until the casserole is puffed and lightly golden brown. A toothpick inserted in the center should come out clean. 7. While the casserole is baking, prepare the icing by whisking together the powdered sugar and milk in a small bowl until smooth and desired consistency is achieved. 8. Once the casserole is done, let it cool for about 5 minutes, then drizzle the icing over the top while it’s still warm. This recipe serves 8 people. Each serving is rich and satisfying. For nutrition, consider that this dish offers a balance of protein, carbs, and some healthy fats if you add nuts. Enjoy it warm, and feel free to add fresh fruit or whipped cream for a special touch! This casserole is simple to make and full of flavor. We explored the main ingredients like cinnamon rolls, eggs, and milk. Flavor enhancers added depth with vanilla, cinnamon, and nutmeg. You learned step-by-step instructions, helpful tips, and serving ideas. In the end, this dish is versatile and fun. Try different nuts or fruits to mix it up. Don't forget to store leftovers right and enjoy them later. Bake it, share it, and enjoy this delicious meal!](https://easycookingbite.com/wp-content/uploads/2025/05/f951db18-21ad-4f0b-9289-89d99c96ef69-300x300.webp)

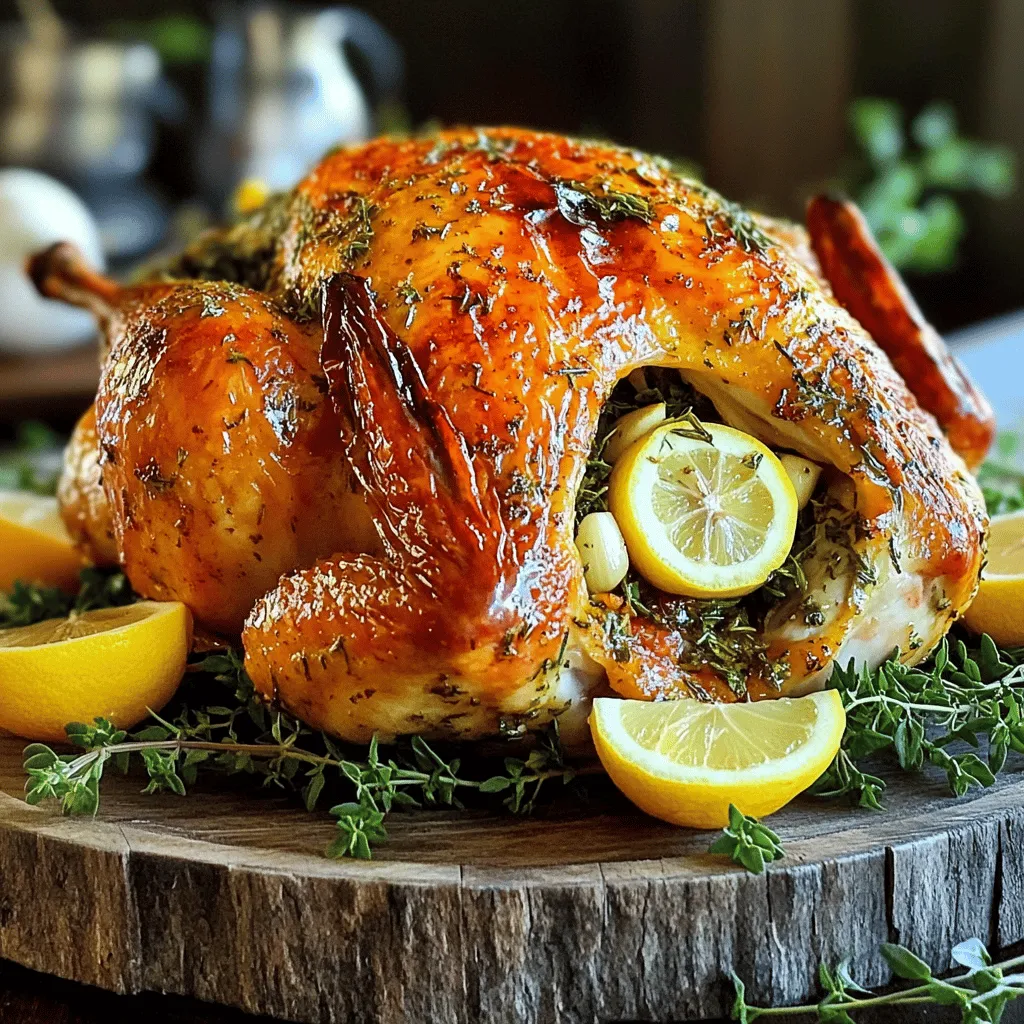
Savory Herb Roasted Chicken Flavorful Dinner Recipe
Looking for a tasty dinner idea? My Savory Herb Roasted Chicken recipe will wow your family. Using fresh herbs and simple seasonings, you’ll create…