Latest & Greatest

Creamy Sun-Dried Tomato Penne One Pot Delight
Welcome to my kitchen! If you crave a simple, tasty dish, this Creamy Sun-Dried Tomato Penne One Pot is for
Read more…
Creamy Tomato Ricotta Pasta Easy and Flavorful Delight
Craving a quick and tasty dinner? Look no further! My Creamy Tomato Ricotta Pasta is both easy and delicious. With
Read more…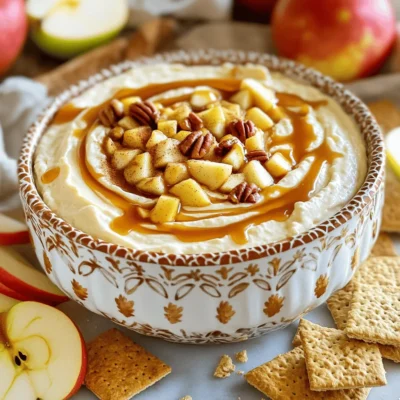
Caramel Apple Cheesecake Dip Easy and Delicious Treat
Get ready for a sweet treat that combines the best of fall flavors! My Caramel Apple Cheesecake Dip is easy
Read more…
Crispy Cajun Shrimp Tacos Flavorful and Easy Meal
Do you crave tacos that pack a punch? Look no further! My Crispy Cajun Shrimp Tacos are a delightful twist
Read more…
Honey Garlic Butter Roasted Mushrooms Delightful Side
Looking to elevate your dinner table with a scrumptious side? Honey Garlic Butter Roasted Mushrooms are where it’s at! This
Read more…
Bakery-Style Chocolate Pumpkin Marble Loaf Delight
If you’re looking for a treat that combines the flavors of fall and rich chocolate, you’re in the right place!
Read more…
Slow Cooker Chicken and Dumplings Simple and Tasty Dish
If you crave a warm, hearty meal, look no further than slow cooker chicken and dumplings! This simple and tasty
Read more…
No-Bake Pumpkin Spice Oreo Truffles Easy Delight Recipe
Are you ready to indulge in a sweet treat that requires no oven at all? Today, I’m sharing my easy
Read more…browse recipes

White Chocolate Trash Mix Irresistible Snack Recipe
Craving a sweet and salty treat? You’ll love my White Chocolate Trash Mix! This easy recipe gives you a fun, crunchy snack loaded with…
My Latest Drinks
Strawberry Cheesecake Smoothie Creamy Refreshing Treat
Craving something delicious and cool? The Strawberry Cheesecake Smoothie is your answer! It blends creamy cheesecake flavors with sweet strawberries Read Full RecipeMocktail Pink Punch Refreshing and Easy Recipe
Are you ready to impress your guests with a delightful drink? This Mocktail Pink Punch recipe is both refreshing and Read Full RecipeBlue Lagoon Tropical Lemonade Refreshing and Zesty Drink
Looking for a drink that’s both refreshing and fun? Say hello to Blue Lagoon Tropical Lemonade! This colorful beverage packs Read Full RecipePumpkin Spice Coffee Creamer Flavorful Fall Treat
Are you ready to embrace the cozy vibes of autumn? In this blog post, I’ll guide you through making your Read Full RecipeApple Cider Margarita Mocktail Refreshing Fall Drink
Fall is here, and that means it’s the perfect time for a cozy drink! The Apple Cider Margarita Mocktail offers Read Full RecipePumpkin Spice Latte Copycat Cozy and Comforting Recipe
Craving that warm, cozy feeling of fall? You can enjoy a delicious Pumpkin Spice Latte at home! In this article, Read Full Recipe
My Latest Dinners
White Bean Soup Simple and Hearty Delight
Looking for a warm and filling meal? Let me introduce you to white bean soup! This simple and hearty delight Read Full RecipeGarlic Herb Roasted Sweet Potatoes Flavorful Side Dish
Looking for a side dish that’s both tasty and easy to make? Garlic Herb Roasted Sweet Potatoes are the answer! Read Full RecipeOne Pot Beef Taco Pasta Easy and Flavorful Meal
Looking for a quick and tasty meal? One Pot Beef Taco Pasta is the perfect dish! This recipe packs bold Read Full RecipeGarlic Chicken Zucchini Noodles Stir Fry Delight
Are you ready for a tasty twist on dinner? My Garlic Chicken Zucchini Noodles Stir Fry is a quick and Read Full RecipeStuffed Italian Meatloaf Easy and Tasty Recipe
Are you ready to elevate your dinner game? This Stuffed Italian Meatloaf is both easy and tasty! In this article, Read Full RecipeOne Pot French Onion Pasta Flavorful Comfort Dish
Looking for a cozy dinner that warms your soul? Try my One Pot French Onion Pasta! This creamy, rich dish Read Full Recipe
hey,
i’m !
I’m so happy you’re here!
Every dish I share is made with love and care. I hope they bring you the same comfort and joy they bring me. Let’s make memories, one recipe at a time.
Veggie-Loaded Tortellini Soup Flavorful and Easy Meal
Are you ready to whip up a meal that bursts with flavor and nutrition? My Veggie-Loaded Tortellini Soup is a simple, hearty dish packed…











. First, I preheat my oven to 350°F (175°C). This step is key for even cooking. I lightly grease my loaf pan to prevent sticking. Next, I grab a large mixing bowl. In it, I combine the ground beef, mashed potatoes, shredded cheddar cheese, and chopped green onions. I also add milk, breadcrumbs, a beaten egg, Worcestershire sauce, garlic powder, and onion powder. I season the mixture with salt and pepper to taste. Mixing well is important; I want every bite to be full of flavor. Now, I transfer the mixture to the prepared loaf pan. It's time to shape it into a loaf. I want it to look nice and uniform. In a small bowl, I mix ketchup with a dash of Worcestershire sauce. This adds a tasty layer. I spread it generously over the top of the meatloaf. I bake it in my preheated oven for about 1 hour. I check that the internal temperature reaches 160°F (70°C), which means it’s done. Once baked, I take the meatloaf out and let it rest for about 10 minutes. This step helps keep it moist when I slice it. After resting, I slice it up and serve. For the full details, refer to the Full Recipe. Enjoy every bite of this loaded potato meatloaf! To make a great Loaded Potato Meatloaf, you need to focus on flavor and moisture. Use fresh ingredients for the best taste. Adding mashed potatoes keeps the meatloaf soft and moist. Avoid overmixing the meat mixture. Just stir it until everything combines well. This way, the meatloaf stays tender. When mixing, use your hands or a large spoon. This helps blend the ingredients without breaking the meat down too much. If you feel the mixture is too dry, add a bit more milk. If it is too wet, a bit more breadcrumbs will help. A good balance is key. For a beautiful finish, garnish your meatloaf with extra cheese and green onions. This adds color and makes it look more inviting. You can also drizzle some ketchup on top for extra flavor. When serving, slice the meatloaf into thick pieces. Place them on a plate and add a side of steamed veggies or a salad. This makes a complete meal. You can even serve it with a dollop of sour cream for an extra touch. Enjoy your delicious Loaded Potato Meatloaf! For the full recipe, check out the details above. {{image_2}} If you want to switch up the meat, you have options. Ground turkey or chicken works well. These meats are leaner and still tasty. You can also use a mix of ground pork and beef for a different flavor. For a vegetarian option, try using lentils or chickpeas. Mash them up to mimic the texture of meat. You can also use plant-based meat substitutes. These options give you a great taste and are healthier. To boost flavor, add spices like paprika or cumin. These spices add warmth and depth. You can also try a splash of hot sauce for some heat. If you love tang, mix in some mustard or barbecue sauce. Incorporating veggies can make your meatloaf even better. Chopped bell peppers or grated zucchini add moisture and nutrients. You can also use shredded carrots for a slight sweetness. These additions keep every bite exciting and fresh. For the full recipe, check out the details above. After you enjoy your loaded potato meatloaf, you may have some left. To keep it fresh, store it in the fridge. Use an airtight container. It will stay good for about three to four days. If you want to keep it longer, freezing is a great option. Wrap the meatloaf tightly in plastic wrap and then in foil. This helps avoid freezer burn. You can freeze it for up to three months. When you are ready to eat your leftovers, reheating is easy. The best way is to use the oven. Preheat it to 350°F (175°C). Place your meatloaf in a baking dish. Cover it with foil to keep it moist. Heat for about 20 to 30 minutes or until warm. You can also use a microwave for quick reheating. Just slice the meatloaf and place it on a microwave-safe plate. Heat it for 1 to 2 minutes, checking to make sure it warms evenly. For the full recipe and more tips, check out the loaded potato meatloaf recipe. What can I serve with Loaded Potato Meatloaf? You can serve loaded potato meatloaf with many sides. I like green beans, corn, or a fresh salad. Mashed potatoes or roasted veggies also pair well. How do I know when the meatloaf is cooked? Check the meatloaf's internal temperature. It should reach 160°F (70°C). You can also cut it open. The center should not be pink. Can I make Loaded Potato Meatloaf in advance? Yes, you can prepare it a day ahead. Just cover it tightly and store it in the fridge. Bake it when you're ready to eat. What other types of cheese can I use? You can use mozzarella, pepper jack, or even feta cheese. Each adds a unique flavor. Experiment with what you like best! How long does Loaded Potato Meatloaf last in the fridge? It lasts about three to four days. Make sure to store it in an airtight container. You can also freeze it for longer storage. For the Full Recipe, check the details above. This article covered how to make delicious Loaded Potato Meatloaf step by step. We looked at key ingredients, preparation methods, baking tips, and serving ideas. You learned how to keep your meatloaf moist and flavorful. Plus, there are helpful variations for different diets. Enjoy trying this recipe in your kitchen. It’s a fun dish that will please everyone. Don’t forget to experiment and make it your own!](https://easycookingbite.com/wp-content/uploads/2025/05/c8fee948-be42-41c1-8e72-3ab6b89dba04-300x300.webp)
