Latest & Greatest

browse recipes

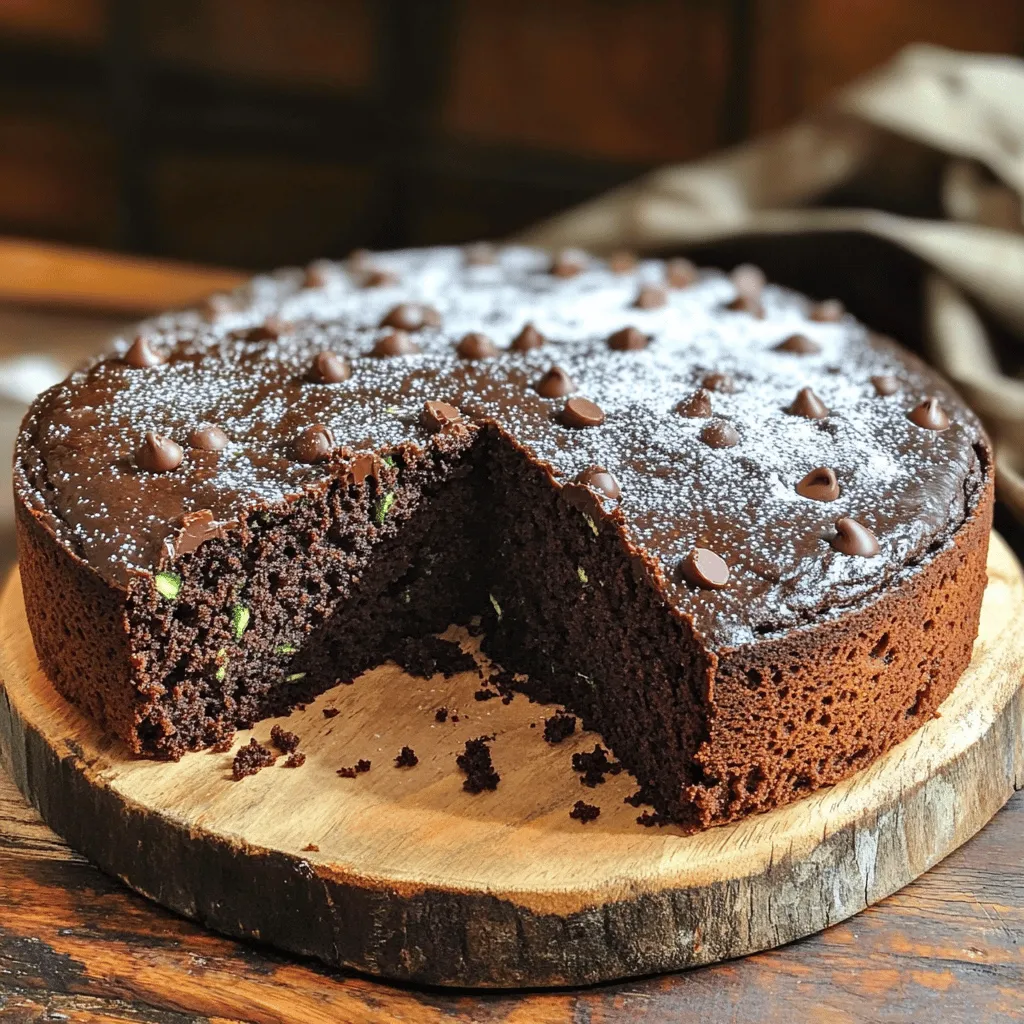
- 1 ½ cups grated zucchini - 1 cup all-purpose flour - 1 cup cocoa powder - 1 teaspoon baking powder - ½ teaspoon baking soda - ½ teaspoon salt - 1 cup granulated sugar - ½ cup brown sugar, packed - ½ cup vegetable oil - 3 large eggs - 2 teaspoons vanilla extract - 1 cup semi-sweet chocolate chips - Optional: Powdered sugar for dusting For the best chocolate zucchini cake, start with fresh, firm zucchini. Grate it finely for even mixing. This adds moisture without making the cake soggy. Use both granulated and brown sugar. The brown sugar adds a rich, caramel flavor. Cocoa powder gives the cake its deep chocolate taste. Choose high-quality cocoa for the best flavor. I prefer semi-sweet chocolate chips, as they balance the sweetness perfectly. Don't skip the baking powder and baking soda. They help the cake rise and keep it light. Salt enhances the flavors, making each bite even better. You can adjust the recipe as needed. For less sweetness, reduce the sugars slightly. If you want more chocolate flavor, add extra cocoa powder or chocolate chips. This cake is rich and moist, perfect for any occasion. You can find the full recipe above to get started! How to prep zucchini for the cake Start by washing the zucchini. Then, grate it using a box grater. You need about 1 ½ cups of grated zucchini, which is about two medium zucchinis. After grating, place the zucchini in a bowl. Mix it with both granulated and brown sugar. Let it sit for about 10 minutes. This helps draw out moisture and sweetness. Mixing wet and dry ingredients In a separate bowl, combine your dry ingredients. Whisk together 1 cup of all-purpose flour, 1 cup of cocoa powder, 1 teaspoon of baking powder, ½ teaspoon of baking soda, and ½ teaspoon of salt. In another large bowl, beat together ½ cup of vegetable oil, 3 large eggs, and 2 teaspoons of vanilla extract. Once combined, add the sugar-zucchini mixture to this bowl. How to incorporate chocolate chips Gradually mix the dry ingredients into the wet mixture. Stir gently until just combined; avoid over-mixing. Finally, fold in 1 cup of semi-sweet chocolate chips. Make sure the chocolate chips are evenly distributed in the batter. Oven settings and timing Preheat your oven to 350°F (175°C). Grease and flour a 9x13 inch baking pan. Pour the batter into the prepared pan, spreading it evenly with a spatula. Checking for doneness Bake the cake for 30 to 35 minutes. To check if it's done, insert a toothpick into the center. If it comes out clean, the cake is ready. Cooling process before serving Once baked, let the cake cool in the pan for about 10 minutes. Then, transfer it to a wire rack to cool completely. This cooling step is important. It helps the cake set properly. - Avoid over-mixing for a light texture: Mix the batter gently. Over-mixing makes the cake dense. Stir just until you see no dry flour. - Best practices for greasing and flouring the pan: Use butter or oil to grease the pan. Then, sprinkle flour evenly. This helps the cake slide out easily after baking. - Variations in baking time based on oven types: If you use a convection oven, reduce the baking time by a few minutes. Keep an eye on the cake. Every oven is a bit different. - Underestimating the importance of ingredient temperatures: Use room-temperature eggs and oil. Cold ingredients can lead to uneven mixing and baking. - Ignoring the resting time for zucchini: Let the grated zucchini sit for about 10 minutes. This releases moisture and sweetness, which improves the cake. - How to fix a dense cake: If your cake turns out dense, check if you over-mixed. You can also add a splash of milk to the batter next time. This can help lighten it. These tips and tricks will help you create a delicious Chocolate Zucchini Cake. For the complete recipe, refer to the Full Recipe section. {{image_2}} You can switch up this recipe in fun ways. First, try using whole wheat flour instead of all-purpose flour. Whole wheat adds a nutty flavor and makes the cake a bit healthier. Next, look for alternatives to vegetable oil. You can use applesauce or melted coconut oil to change the taste. Both can keep the cake moist and add unique flavors. You might also want to add nuts or different types of chocolate. Chopped walnuts or pecans can give a nice crunch. You can also swap semi-sweet chocolate chips for dark or white chocolate. Each choice will give the cake a new twist. Change the flavor with spices like cinnamon or nutmeg. These spices can warm the cake up and make it perfect for fall. You can also incorporate fruits like bananas or strawberries. Mashed bananas add sweetness, while fresh strawberries can brighten up the cake. For holidays, adapt the cake with festive themes. Add red and green sprinkles for Christmas or use pumpkin spice in the fall. These small changes can make your cake special for any occasion. For the full recipe, check the detailed instructions above. To keep your cake fresh, use an airtight container. This method preserves moisture and flavor. You can also wrap the cake in plastic wrap for extra protection. For short-term storage, leave the cake at room temperature. Ensure it is away from direct sunlight or heat. For long-term storage, consider the fridge or freezer. Refrigerate in an airtight container for about one week. If you want it to last longer, freeze it. Wrap it tightly in plastic wrap and foil before freezing. This way, it can last for three months. At room temperature, your cake will stay good for about three days. After that, it may start to dry out. Refrigeration extends the shelf life. In the fridge, the cake can last about a week. If you freeze it, take it out and let it thaw overnight in the fridge when ready to eat. This Chocolate Zucchini Cake is rich and moist. You can enjoy it for days, which makes it a great treat. For the full recipe, check out the section above. Can you taste the zucchini in the cake? No, you cannot taste the zucchini. It blends well with cocoa. The zucchini adds moisture and helps keep the cake rich and soft. You get all the chocolate flavor without any veggie taste. Is this cake suitable for vegans? No, this cake is not vegan. It contains eggs and dairy. To make it vegan, use a flax egg and plant-based milk. Substitute vegetable oil with coconut oil for a rich flavor. How to tell if the cake is done baking? To check if the cake is done, insert a toothpick in the center. If it comes out clean, the cake is ready. If it has batter on it, bake for a few more minutes. Can I make this cake in advance? Yes, you can make this cake in advance. It keeps well in an airtight container. Store it at room temperature for up to three days. For longer storage, refrigerate it for up to a week. What to serve with Chocolate Zucchini Cake? You can serve this cake with many treats. A scoop of vanilla ice cream is a favorite. Whipped cream also makes a great topping. Fresh berries add a nice touch too! Can I substitute chocolate chips with other flavors? Yes, you can substitute chocolate chips. Try using white chocolate or butterscotch chips. You can also add nuts for some crunch. Just make sure to adjust the amount to keep the flavor balanced. You learned how to make a delicious chocolate zucchini cake. The right ingredients and steps lead to success. Remember to prep your zucchini and mix wisely. Avoid common baking errors to ensure a light and fluffy texture. Don’t forget the fun variations and storage tips for your cake. Ultimately, with these techniques and tricks, you can bake a treat everyone will love. Dive in and enjoy your baking adventure!

Chocolate Zucchini Cake Rich and Moist Delight

Looking for a unique dessert that combines the richness of chocolate with the health benefits of zucchini? This Chocolate Zucchini Cake is your answer!…

My Latest Drinks

My Latest Dinners

hey,

i’m !

I’m so happy you’re here!

Every dish I share is made with love and care. I hope they bring you the same comfort and joy they bring me. Let’s make memories, one recipe at a time.

Pumpkin Spice Cream Cheese Swirl Muffins Delight

Fall is here, and there’s no better way to celebrate than with Pumpkin Spice Cream Cheese Swirl Muffins! You’ll love how easy they are…
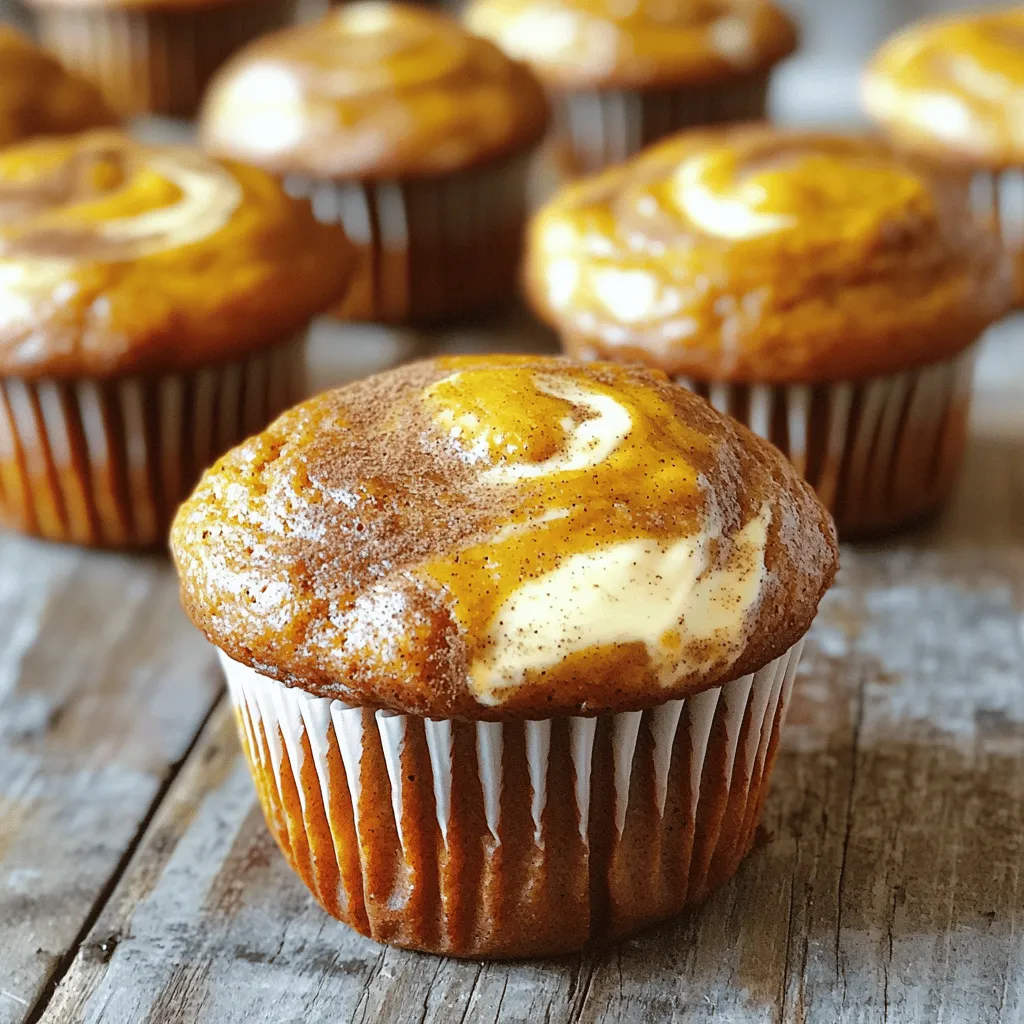

To make the delightful pumpkin spice cream cheese swirl muffins, gather these fresh ingredients: - 1 cup canned pumpkin puree - 1/2 cup vegetable oil - 1 cup brown sugar - 1/2 cup granulated sugar - 3 large eggs - 1 teaspoon vanilla extract - 1 3/4 cups all-purpose flour - 1 teaspoon baking powder - 1/2 teaspoon baking soda - 1 tablespoon pumpkin pie spice - 1/2 teaspoon salt - 8 oz cream cheese, softened - 1/4 cup powdered sugar - 1 egg yolk - 1 teaspoon cinnamon for sprinkling on top (optional) These ingredients come together to create a warm and cozy treat. The canned pumpkin puree gives the muffins a rich flavor and moisture. Vegetable oil keeps them soft and fluffy. Brown sugar adds depth, while granulated sugar provides sweetness. Using three eggs helps bind everything. Vanilla extract adds a lovely aroma. All-purpose flour is the base, and baking powder and baking soda help them rise. Pumpkin pie spice brings that classic fall flavor, while salt balances it all. The cream cheese and powdered sugar mix creates the dreamy swirl. An egg yolk makes this mixture smooth and rich. You can sprinkle cinnamon on top for extra warmth. This list gives you everything you need to bake these muffins. You can find the full recipe in our recipe section. Enjoy the fun of baking! First, set your oven to 350°F (175°C). This temperature helps the muffins rise perfectly. Next, prepare your muffin tin. You can use paper liners, or grease the tin with butter or oil. This step keeps the muffins from sticking. In a large bowl, combine the canned pumpkin puree, vegetable oil, brown sugar, and granulated sugar. Whisk them together until smooth. Then, add three large eggs and a teaspoon of vanilla extract. Mix again until everything is well combined. In another bowl, sift together the all-purpose flour, baking powder, baking soda, pumpkin pie spice, and salt. Sifting breaks up clumps and adds air. Slowly, add this dry mix to the wet ingredients. Stir gently until just combined. Be careful not to overmix; this keeps the muffins light. In a medium bowl, blend the softened cream cheese with powdered sugar and an egg yolk. Mix until creamy and smooth. This mixture adds a rich flavor to your muffins. Begin by spooning a small amount of pumpkin batter into each muffin cup, filling them about one-third full. Next, add a dollop of the cream cheese mixture on top. Then, finish with more pumpkin batter until each cup is about two-thirds full. This layering creates a beautiful swirl. Place the muffin tin in the preheated oven and bake for 18 to 20 minutes. To check if they are done, insert a toothpick into the center. It should come out clean. After baking, cool the muffins in the tin for five minutes. Finally, transfer them to a cooling rack to cool completely. Enjoy the delicious aroma filling your kitchen! To make great muffins, avoid overmixing. When you combine the wet and dry ingredients, mix just until you see no dry flour. This helps keep your muffins soft and fluffy. Overmixing can make them tough. Check for doneness using a toothpick. Insert it into the center of a muffin. If it comes out clean, your muffins are ready. If it has wet batter, bake them a little longer. You can add other spices for more flavor. Consider nutmeg or ginger to complement the pumpkin spice. Chopped nuts or chocolate chips also work well. Serve these muffins warm. A little butter on top makes them even better. You can also enjoy them with a cup of coffee or tea. One common mistake is measuring ingredients incorrectly. Use dry measuring cups for flour and sugar. Always level off the top to avoid using too much. Watch out for baking mishaps. Don't open the oven too soon. This can cause your muffins to sink. Trust the timer and let them bake undisturbed until they are done. For the full recipe, check out the Pumpkin Spice Cream Cheese Swirl Muffins. {{image_2}} You can easily make these muffins fit your diet. For gluten-free options, use a gluten-free flour blend. This swap keeps the taste and texture intact. Many brands offer great mixes that work well in baking. For vegan substitutions, replace the eggs with flax eggs. Just mix one tablespoon of ground flaxseed with two and a half tablespoons of water. Let it sit until it thickens. Use dairy-free cream cheese to keep the cream cheese swirl creamy and delicious. Want to add a twist? Chocolate chips can take these muffins to a new level. Just fold in half a cup of chocolate chips into the batter. The chocolate pairs well with pumpkin spice. You can also incorporate nuts or dried fruit. Chopped walnuts or pecans add a nice crunch. Dried cranberries or raisins give a sweet bite. Just mix in about a half cup of your choice to the batter for a fun surprise. Change up the spices for different seasons. Instead of pumpkin pie spice, try cinnamon, nutmeg, or even ginger. Each spice adds its own flair. You can adapt these muffins for holidays too. For Thanksgiving, add a sprinkle of nutmeg. For Halloween, use orange food coloring in the swirl for extra fun. Each change brings a new taste to enjoy. For the full recipe, check out the details above. To keep your Pumpkin Spice Cream Cheese Swirl Muffins fresh, store them at room temperature. Place them in an airtight container. This helps keep them moist and soft for up to three days. You can also use a zip-top bag. Just be sure to squeeze out as much air as possible. If you want to keep them even fresher, you can wrap each muffin in plastic wrap before placing them in the container or bag. If you want to save your muffins for later, freezing is a great option. To freeze, let the muffins cool completely. Then, wrap each muffin tightly in plastic wrap. Place them in a freezer-safe bag or container. This way, they can last for up to three months. When you're ready to eat one, take it out and let it thaw at room temperature. If you want a warm muffin, reheat it in the microwave for about 15-20 seconds. How long do these muffins last? When stored properly, they stay fresh for up to three days at room temperature and up to three months in the freezer. Watch for signs of spoilage. If you see mold or if they smell off, it’s best to throw them away. Enjoy your muffins while they’re fresh for the best taste and texture! For the full recipe, check out the original source. Yes, you can use fresh pumpkin! Fresh pumpkin gives a different taste and texture. It is often more moist and has a richer flavor. To use fresh pumpkin, cook and puree it first. Make sure to drain excess water for the best results. To make the muffins moist, try these tips: - Use more oil or add applesauce. - Avoid overmixing the batter; it can make them dry. - Bake them just until a toothpick comes out clean. - Let the muffins cool in the pan for a few minutes before moving them. If you're out of cream cheese, try these options: - Mascarpone cheese for a richer taste. - Greek yogurt for a tangy flavor. - Silken tofu for a dairy-free option. These substitutes change the taste and texture, but they still work well! To check if the muffins are done, use a toothpick. Insert it in the center of a muffin. If it comes out clean, they are ready. If the toothpick has wet batter on it, bake for a few more minutes. Yes, you can make these muffins ahead! Here’s how: - Bake the muffins and let them cool completely. - Store them in an airtight container for up to three days. - You can also freeze them for up to three months. Just thaw them before serving. For the full recipe, check out the details above! This blog post explored how to make delicious pumpkin muffins. We started with a list of ingredients, then moved through each step of mixing, baking, and cooling. I shared tips to enhance flavor and avoid common mistakes. You learned about variations to suit dietary needs and how to store your muffins for later. In conclusion, making pumpkin muffins is fun and rewarding. Follow these steps, and enjoy a tasty treat at home. You'll impress everyone with your baking skills!