

Latest & Greatest
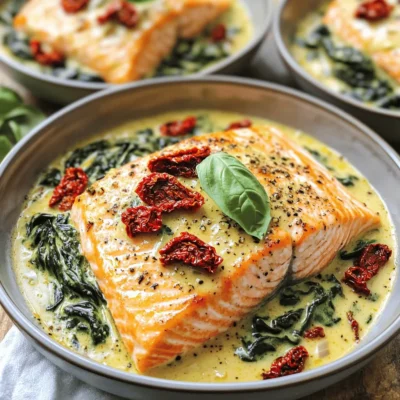
One-Skillet Tuscan Salmon Quick and Flavorful Meal
Looking for a quick and tasty meal? This One-Skillet Tuscan Salmon recipe checks all the boxes. With just a few
Read more…
Blueberry Lemon Ricotta Pancakes Fluffy and Delicious
Start your day with a burst of flavor! Blueberry Lemon Ricotta Pancakes are fluffy, light, and oh-so-delicious. Imagine biting into
Read more…
Creamy Sun-Dried Tomato Gnocchi Simple and Tasty Dish
Are you ready to impress your taste buds with a bowl of Creamy Sun-Dried Tomato Gnocchi? This quick, simple dish
Read more…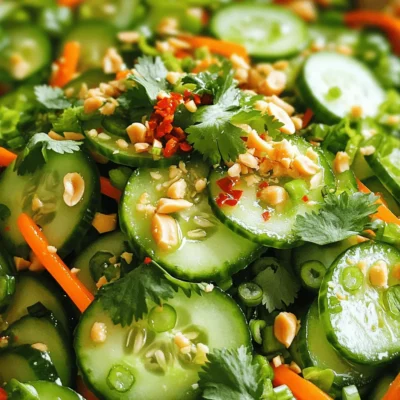
Spicy Thai Cucumber Salad Fresh and Zesty Delight
If you crave a fresh and zesty dish, try my Spicy Thai Cucumber Salad. This salad bursts with flavor and
Read more…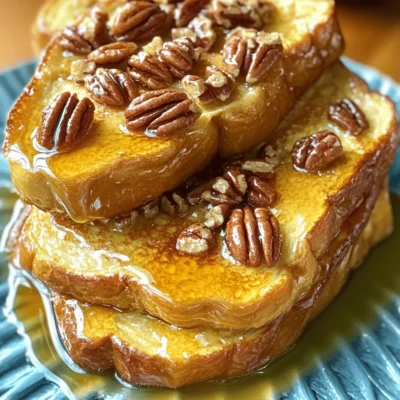
Maple Pecan Overnight French Toast Easy and Tasty Recipe
Wake up to the delightful aroma of Maple Pecan Overnight French Toast! This easy recipe gives you warm, sweet goodness
Read more…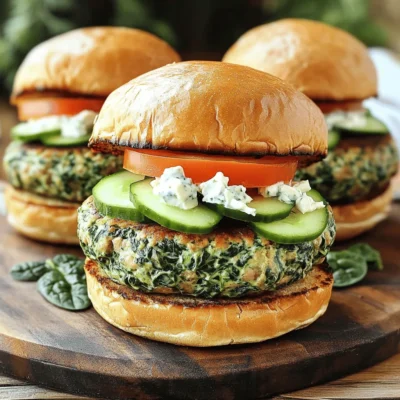
Greek Spinach Feta Turkey Burgers Flavorful Delight
Are you ready to take your burger game to the next level? These Greek Spinach Feta Turkey Burgers are packed
Read more…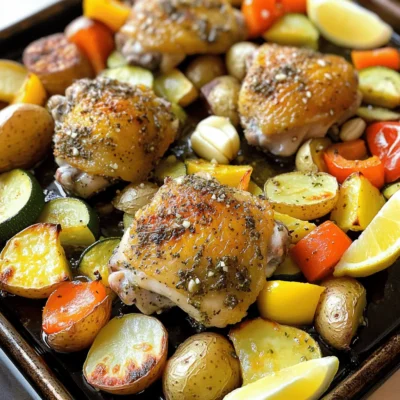
Garlic Herb Chicken Sheet Pan Dinner Packed with Flavor
Looking for a simple yet delicious dinner idea? This Garlic Herb Chicken Sheet Pan Dinner is packed with flavor and
Read more…
Cinnamon Sugar Air Fryer Donuts Simple and Quick Recipe
Who doesn’t love warm, fluffy donuts with a sweet cinnamon twist? In just a few simple steps, you can make
Read more…browse recipes


Vegetable Sushi Rolls Fresh and Flavorful Recipe
Are you ready to make fresh and flavorful vegetable sushi rolls? In this recipe, I’ll guide you step-by-step through creating delicious rolls that are…
My Latest Drinks

Strawberry Cheesecake Smoothie Creamy Refreshing Treat
Craving something delicious and cool? The Strawberry Cheesecake Smoothie is your answer! It blends creamy cheesecake flavors with sweet strawberries Read Full Recipe-
Mocktail Pink Punch Refreshing and Easy Recipe
Are you ready to impress your guests with a delightful drink? This Mocktail Pink Punch recipe is both refreshing and Read Full Recipe -
Blue Lagoon Tropical Lemonade Refreshing and Zesty Drink
Looking for a drink that’s both refreshing and fun? Say hello to Blue Lagoon Tropical Lemonade! This colorful beverage packs Read Full Recipe -
Pumpkin Spice Coffee Creamer Flavorful Fall Treat
Are you ready to embrace the cozy vibes of autumn? In this blog post, I’ll guide you through making your Read Full Recipe -
Apple Cider Margarita Mocktail Refreshing Fall Drink
Fall is here, and that means it’s the perfect time for a cozy drink! The Apple Cider Margarita Mocktail offers Read Full Recipe -
Pumpkin Spice Latte Copycat Cozy and Comforting Recipe
Craving that warm, cozy feeling of fall? You can enjoy a delicious Pumpkin Spice Latte at home! In this article, Read Full Recipe


My Latest Dinners
-
White Bean Soup Simple and Hearty Delight
Looking for a warm and filling meal? Let me introduce you to white bean soup! This simple and hearty delight Read Full Recipe -
Garlic Herb Roasted Sweet Potatoes Flavorful Side Dish
Looking for a side dish that’s both tasty and easy to make? Garlic Herb Roasted Sweet Potatoes are the answer! Read Full Recipe -
One Pot Beef Taco Pasta Easy and Flavorful Meal
Looking for a quick and tasty meal? One Pot Beef Taco Pasta is the perfect dish! This recipe packs bold Read Full Recipe -
Garlic Chicken Zucchini Noodles Stir Fry Delight
Are you ready for a tasty twist on dinner? My Garlic Chicken Zucchini Noodles Stir Fry is a quick and Read Full Recipe -
Stuffed Italian Meatloaf Easy and Tasty Recipe
Are you ready to elevate your dinner game? This Stuffed Italian Meatloaf is both easy and tasty! In this article, Read Full Recipe -
One Pot French Onion Pasta Flavorful Comfort Dish
Looking for a cozy dinner that warms your soul? Try my One Pot French Onion Pasta! This creamy, rich dish Read Full Recipe


hey,
i’m !
I’m so happy you’re here!
Every dish I share is made with love and care. I hope they bring you the same comfort and joy they bring me. Let’s make memories, one recipe at a time.

![To make this refreshing drink, you will need: - 4 cups ripe cantaloupe, cubed - 1 large cucumber, peeled and chopped - 2 cups water - 2 tablespoons fresh lime juice - 2 tablespoons agave syrup (or to taste) - Fresh mint leaves for garnish - Ice cubes Choosing ripe cantaloupe is key for great flavor. Look for a cantaloupe that feels heavy for its size. The skin should have a nice beige color and a slight give when you press it. A sweet smell at the stem end is a good sign too. For cucumbers, pick firm ones without soft spots. The skin should be bright green and smooth. If you can, choose organic cucumbers. They often taste better and are free from wax and pesticides. You can add a few fun twists to your agua fresca. Try adding: - A pinch of salt to enhance sweetness - A splash of coconut water for a tropical vibe - A few slices of jalapeño for a spicy kick - Basil leaves instead of mint for a unique taste These options can elevate your drink and make it special. Enjoy experimenting with different flavors! First, gather your ingredients. You need ripe cantaloupe, cucumber, water, lime juice, and agave syrup. Cut the cantaloupe into cubes and chop the cucumber. Put them in a blender with the water. Blend until the mix is smooth. Next, you will strain the mix. This step helps remove any pulp. Use a fine mesh sieve or cheesecloth. Press down with a spoon to get all the juice out. This gives you a clean drink. After straining, add fresh lime juice and agave syrup. Stir well and taste. Adjust the sweetness to your liking. Serve over ice in tall glasses. Don’t forget to garnish with mint leaves for a fresh touch. Using the blender correctly is key to a good texture. Start on low speed to combine the ingredients. Gradually increase to high speed. This helps break down the cantaloupe and cucumber. Blend for about 30 seconds until smooth. If your blender struggles, add a bit more water. This helps it blend evenly. Avoid adding too much water, as it may dilute the flavor. A well-blended mix ensures a refreshing drink. Straining is important for the final drink. It removes any solid bits, making it smooth. Use a fine mesh sieve for the best results. Pour the blended mix into the sieve slowly. Use the back of a spoon to press the pulp down. This action helps you get every drop of juice. Take your time with this step; it’s worth it. A silky texture makes your agua fresca more enjoyable. For the full recipe, refer to the provided instructions. Enjoy your refreshing drink! To make the best cantaloupe cucumber agua fresca, follow these tips: - Choose ripe cantaloupe. It should smell sweet and feel slightly soft. - Use a fresh cucumber. Look for smooth skin and firm texture. - Blend well. A smooth mix ensures a creamy drink. - Strain thoroughly. This removes pulp and gives a clean finish. - Chill your ingredients. Cold fruits make a refreshing drink. Avoid these common pitfalls: - Skipping the straining step can lead to a chunky drink. - Using too much sweetener can overpower the fresh flavors. - Not adjusting flavors. Always taste and tweak to your liking. - Forgetting to garnish. A sprig of mint adds flair and aroma. - Using warm ingredients can dull the drink's freshness. You can easily adjust sweetness and flavor: - Start with a small amount of agave syrup. Add more if needed. - Try adding lime zest for a zesty kick. - Consider a splash of coconut water for a tropical twist. - Experiment with fresh herbs like basil or cilantro for unique flavors. - Mix in other fruits like watermelon or strawberries for variety. For the full recipe, check the link above! {{image_2}} You can switch up the fruits and veggies in your agua fresca. Try using honeydew or watermelon instead of cantaloupe. These fruits have a similar sweetness that works well. You could also add mint or basil for a fresh twist. If you want crunch, grated carrots can add a nice texture. If you want a healthier drink, use honey or maple syrup instead of agave syrup. These options are natural and add unique flavors. You can also try using stevia or monk fruit for a low-calorie choice. Remember to adjust the amount since some sweeteners are sweeter than others. For a fun twist, turn your agua fresca into a cocktail. Add a splash of vodka or rum for an adult version. You can also mix in some sparkling water for fizz. Garnish with a lime wedge or cucumber slice to make it look fancy. Enjoy your drink on a hot summer day! For the full recipe, check out the [Full Recipe]. To store leftover agua fresca, pour it into a clean glass jar. Seal it tightly with a lid. Make sure the jar is not too full. Leave some room for expansion. This way, the drink stays fresh and tasty. Keep your agua fresca in the fridge. It tastes best when cold. Serve it with ice, but avoid adding ice to the jar. Ice melts and can water down the drink. Instead, add ice to each glass when serving. If you want to keep it fresh longer, consider not adding lime juice until serving. Acid can change the flavor over time. Cantaloupe cucumber agua fresca stays fresh for about three days in the fridge. After that, it may lose flavor. Check for signs of spoilage. If it smells sour or looks cloudy, it's time to toss it. Always use your senses. Better safe than sorry! Enjoy your refreshing drink, and don't forget the full recipe for more fun. Cantaloupe Cucumber Agua Fresca is a light, fruity drink. It mixes ripe cantaloupe and cucumber with water. This drink is refreshing and perfect for hot days. You blend the fruits and strain them for a smooth texture. You can sweeten it with lime juice and agave syrup. The result is a bright, tasty drink. Yes, you can make Cantaloupe Cucumber Agua Fresca ahead of time. It stays fresh in the fridge for up to three days. Just store it in a sealed pitcher. Before serving, add ice and a mint garnish. This makes it feel fresh and ready to enjoy. Yes, Cantaloupe Cucumber Agua Fresca is healthy. It has low calories and is hydrating. Cantaloupe is full of vitamins A and C. Cucumber adds extra hydration and nutrients. Agave syrup is a healthier sweetener than regular sugar. This drink is a great choice for hot days or a fun party. This recipe makes about four servings. Each serving is refreshing and light. You can easily double or halve the recipe. It’s perfect for sharing with friends or family. Yes, you can mix in other fruits or veggies. Watermelon, pineapple, or mint are great choices. Each adds a unique twist to the drink. It’s fun to experiment with flavors and find your favorite. Cantaloupe Cucumber Agua Fresca is a refreshing drink that's easy to make. We covered the best ingredients, tips for freshness, and step-by-step instructions. You learned how to blend and strain for the perfect texture. I shared tips to avoid common mistakes and ways to personalize your drink. With variations using different fruits and sweeteners, you can get creative. Plus, store leftovers properly for lasting freshness. Enjoy experimenting and finding your ideal flavor. This drink is sure to impress at any gathering or on a hot day.](https://easycookingbite.com/wp-content/uploads/2025/06/5d48b1b3-adbc-4e06-b10f-9b5654ba1983-300x300.webp)
. To cook chicken evenly, start with smaller pieces. Diced chicken cooks faster and more evenly. Use medium heat to avoid burning. Sauté until golden brown, about 5-7 minutes. This locks in flavor and keeps it juicy. For perfect vegetable tenderness, add your veggies based on their cooking time. Broccoli and bell peppers take longer than shredded carrots. Cook broccoli and peppers first. Add carrots in the last few minutes of cooking. This way, they stay crisp and colorful. Serve your casserole hot, right from the oven. It tastes best when warm and cheesy. For extra fun, offer chopsticks alongside forks. This adds a playful touch to your meal. Pair your casserole with simple sides. Steamed rice or a fresh salad complements it well. You can also serve it with pickled vegetables for a tangy crunch. To prepare in advance, cook the chicken and chop the veggies a day ahead. Store them in the fridge until you're ready to mix. This saves time on busy weeknights. For reheating, use the oven to keep the cheese melted. Cover the dish with foil to prevent drying out. Heat at 350°F (175°C) until warmed through, about 20-25 minutes. Enjoy your flavorful Teriyaki Chicken Casserole any night of the week! For the full recipe, check [Full Recipe]. {{image_2}} For those who need gluten-free options, swap the teriyaki sauce for a gluten-free brand. Use tamari or coconut aminos for great flavor. You can also use rice noodles instead of rice for a fun twist. If you want a vegetarian or vegan version, replace chicken with tofu or tempeh. Make sure to press the tofu first to remove excess water. Use a plant-based teriyaki sauce to keep it vegan-friendly. To add more depth to your teriyaki chicken casserole, consider introducing spices or herbs. Ginger, garlic, or even a dash of chili powder can enhance the flavor. A sprinkle of black sesame seeds can add a nice crunch and taste. Adjusting the sweet and savory balance can also elevate your dish. If you like it sweeter, add a bit of honey or brown sugar. For extra savory notes, add soy sauce or a splash of rice vinegar. You can serve the casserole in two styles: individual portions or family-style. For individual servings, use ramekins or small bowls. This makes for a fun and easy meal, especially for kids. For a family-style casserole, serve directly from the dish. Pair it with Asian-inspired side dishes like a simple cucumber salad or steamed edamame. This adds freshness and balances the rich flavors of the casserole. For the complete cooking process, check out the Full Recipe. After you enjoy your teriyaki chicken casserole, let it cool first. This step helps avoid moisture buildup. Once cool, pack the leftovers in an airtight container. Glass or plastic containers work well. Make sure the lid seals tightly to keep air out. You can freeze your casserole before or after baking. If you freeze it before baking, cover it tightly. Use aluminum foil or plastic wrap. When ready to bake, thaw it overnight in the fridge. If you bake first, cool it completely before freezing. Thaw the baked casserole in the fridge before you reheat it. In the fridge, your casserole lasts about 3 to 4 days. If you freeze it, it can stay good for up to 3 months. Always check for signs of spoilage. If you see mold or an off smell, throw it away. You can add hot sauce or red pepper flakes to your casserole. Start with a little, then taste. If you want more heat, add a bit more. This gives your dish a nice kick. You can also try using spicy teriyaki sauce. It adds flavor along with heat. Yes, you can! Cooking in a slow cooker is a great idea. First, brown the chicken in a pan. Then, add all ingredients to the slow cooker. Cook on low for 4 to 6 hours or high for 2 to 3 hours. Just check that the chicken is fully cooked before serving. Beyond sesame seeds and green onions, try these toppings: - Crushed peanuts for crunch - Chopped cilantro for freshness - Sliced jalapeños for heat - Avocado for creaminess These toppings add flavor and make your dish look great. Feel free to mix and match for a fun twist! For the full recipe, check out the earlier section. This Teriyaki Chicken Casserole is simple and tasty. You learned about the key ingredients and how to prepare them. I shared tips for ingredient swaps and ways to make it healthy. The cooking steps will help you create a flavorful meal. Lastly, I provided storage info and answers to common questions. Enjoy making this dish for busy nights or creating new flavors. Try your own ideas and share your results!](https://easycookingbite.com/wp-content/uploads/2025/05/457ab190-b4c0-4b09-90b4-eb72b6cb8770-300x300.webp)
Honey Mustard Chicken and Rice Skillet Delight
Looking for a quick and tasty meal? Honey Mustard Chicken and Rice Skillet Delight is your answer! This dish combines juicy chicken, fluffy rice,…

