Latest & Greatest

browse recipes

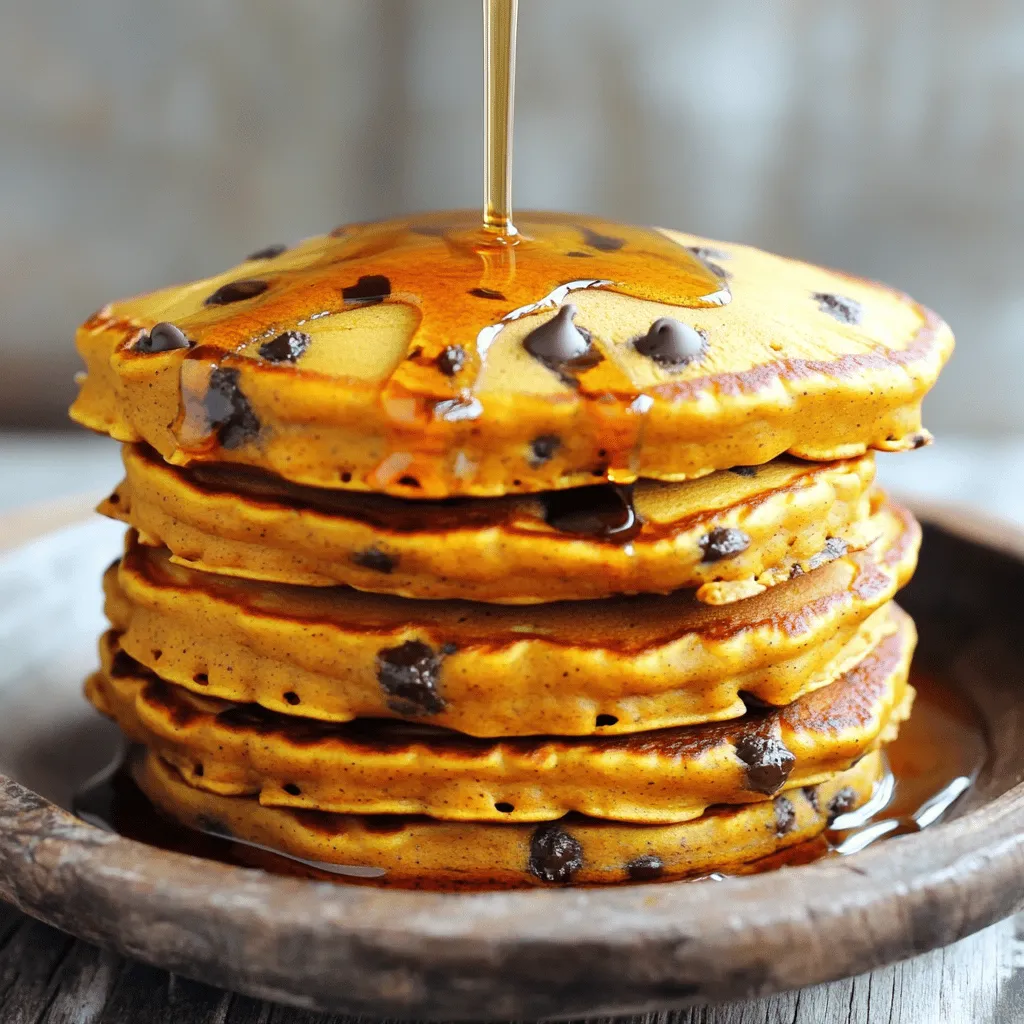
To make delicious chocolate chip pumpkin pancakes, gather these ingredients: - 1 cup all-purpose flour - 1 tablespoon baking powder - 1 teaspoon cinnamon - ½ teaspoon nutmeg - ¼ teaspoon salt - 1 cup pumpkin puree - 2 tablespoons sugar - 1 cup milk (dairy or non-dairy) - 1 large egg - 2 tablespoons melted butter (or coconut oil for a non-dairy option) - ½ cup chocolate chips - Maple syrup for serving You can add extra toppings to enhance your pancakes: - Whipped cream - Sliced bananas - Chopped nuts - More chocolate chips - A sprinkle of powdered sugar If you need swaps for any ingredients, here are some ideas: - Use whole wheat flour for a healthier option. - Replace sugar with maple syrup or honey. - Almond milk works well in place of regular milk. - For vegan pancakes, use flaxseed meal mixed with water instead of egg. - You can skip the chocolate chips or use dark chocolate for a richer taste. 1. Gather all your ingredients. You will need flour, baking powder, cinnamon, nutmeg, salt, pumpkin puree, sugar, milk, an egg, melted butter, and chocolate chips. 2. In a large bowl, whisk together the flour, baking powder, cinnamon, nutmeg, and salt. Mix them until they blend well. 3. In a separate bowl, mix the pumpkin puree, sugar, milk, egg, and melted butter. Stir until this mixture is smooth and uniform. 4. Pour the wet mix into the dry mix. Stir gently until just combined. Do not overmix; a few lumps are okay. 5. Carefully fold in the chocolate chips, ensuring they spread throughout the batter. 1. Heat a non-stick skillet or griddle on medium heat. Lightly grease it with butter or oil. 2. Pour ¼ cup of batter for each pancake onto the skillet. Cook until bubbles form and edges look set, about 2-3 minutes. 3. Flip the pancakes and cook for another 1-2 minutes. They should turn golden brown and be cooked through. 4. Repeat with the remaining batter. Adjust the heat if needed to avoid burning. 1. Serve the pancakes warm. Stack them high on a plate for a great look. 2. Drizzle maple syrup over the pancakes. Add more chocolate chips on top if you like. 3. For a festive touch, sprinkle a dash of cinnamon over the pancakes. Enjoy your tasty treat! To make perfect pancakes, start with a good mix. Combine your dry ingredients first. Whisk the flour, baking powder, cinnamon, nutmeg, and salt together. This helps spread the flavors well. When mixing the wet ingredients, make sure they are smooth. This includes pumpkin puree, sugar, milk, egg, and melted butter. Pour the wet mix into the dry mix. Stir gently, and don’t overmix. It’s okay to have lumps. Overmixing can make your pancakes tough. One common mistake is cooking on high heat. This can burn the pancakes outside and leave them raw inside. Keep your heat at medium. Another mistake is using too much batter. Use only ¼ cup for each pancake. This helps them cook evenly. Lastly, don’t skip the resting time. Let the batter sit for a few minutes. This allows the baking powder to work, making your pancakes fluffier. Serve your pancakes warm. Drizzle maple syrup over the top. Add extra chocolate chips for a sweet touch. You can also sprinkle cinnamon for added flavor. Pair these pancakes with fresh fruit like bananas or berries. A dollop of whipped cream can make them even more special. This breakfast treat is perfect for cozy mornings or special occasions. Enjoy your delightful chocolate chip pumpkin pancakes! {{image_2}} You can tailor these pancakes to fit different diets. If you're gluten-free, swap all-purpose flour for a gluten-free blend. Use a dairy-free milk like almond or oat milk to make it vegan. Replace the egg with a flax egg—mix one tablespoon of ground flaxseed with three tablespoons of water. Let it sit for five minutes to thicken. For a lower sugar option, reduce the sugar or use a sugar alternative like stevia or monk fruit. These pancakes are a great base for flavor twists. Add a teaspoon of vanilla extract to the wet mix for a richer taste. Try mixing in chopped nuts for crunch. For a spiced kick, include a dash of ginger or cloves. You can even use different chips like white chocolate or peanut butter chips. If you love fruit, fold in some blueberries or banana slices into the batter. Toppings can elevate your pancakes to new heights. Classic maple syrup is always a hit, but consider adding a dollop of whipped cream for creaminess. Fresh fruit like sliced bananas or strawberries adds color and flavor. Drizzle some chocolate sauce for a sweet treat. You can also sprinkle chopped nuts or a dash of cinnamon on top for extra texture and warmth. You can store leftover pancakes easily. Place them in an airtight container. Keep them in the fridge for up to three days. If you want them fresh for longer, freezing is best. Reheat pancakes for best taste. Use a microwave for quick heating. Warm them for 20-30 seconds. For a crispy finish, try a skillet. Heat on low for a few minutes. Flip them to warm both sides. Freezing pancakes is a smart choice. Let them cool completely first. Then, stack them with parchment paper in between. Place them in a freezer-safe bag. They can last up to two months in the freezer. When ready, thaw overnight in the fridge before reheating. Enjoy your tasty pancakes anytime! To stop pancakes from sticking, use a non-stick skillet. Heat it to medium before adding batter. Lightly grease the pan with butter or oil. This ensures a smooth flip. If you find them sticking, try lowering the heat slightly. Yes, you can make these pancakes ahead. Cook them, then let them cool. Place the pancakes in an airtight container. Store them in the fridge for up to three days. They will still taste great when reheated. If you don’t have pumpkin puree, use applesauce or mashed banana. Both add moisture and flavor. You can also try sweet potato puree for a similar taste. Each option adds a unique twist to the pancakes. You can substitute whole wheat flour for all-purpose flour. The pancakes will be denser but still tasty. You might need to adjust the liquid slightly. Use a little more milk if the batter seems too thick. Pancakes are done when they are golden brown and firm. Look for bubbles on the surface before flipping. The edges should also look set. Cook for another minute after flipping to ensure they are fully cooked. Maple syrup is a classic topping for these pancakes. You can also add whipped cream or yogurt. Fresh fruits like bananas or berries make great additions. Sprinkle nuts or extra chocolate chips for added crunch. In this post, we covered key ingredients for pancakes, cooking steps, and tips. You learned about optional toppings and ingredient swaps that suit your taste. I shared common mistakes to avoid for the perfect pancake. You also discovered how to store and reheat leftovers. With these insights, you can make delicious pancakes that fit your needs. Enjoy experimenting with flavors and toppings to make them your own!

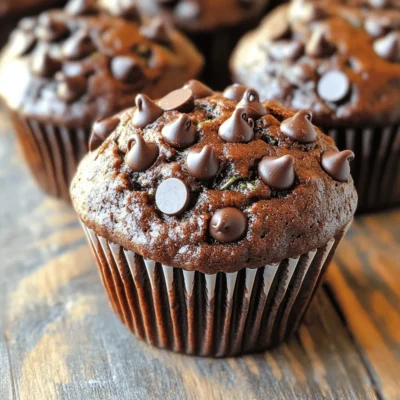
Chocolate Chip Pumpkin Pancakes Delightful Breakfast Treat

Who doesn’t love a warm stack of pancakes? In this blog post, I’ll share my favorite recipe for Chocolate Chip Pumpkin Pancakes, a delightful…

My Latest Drinks

My Latest Dinners

hey,

i’m !

I’m so happy you’re here!

Every dish I share is made with love and care. I hope they bring you the same comfort and joy they bring me. Let’s make memories, one recipe at a time.

Sheet Pan Chicken Fajitas Quick and Tasty Meal

Are you ready for a quick and tasty meal that makes cooking a breeze? Sheet Pan Chicken Fajitas are your answer! This one-pan dish…
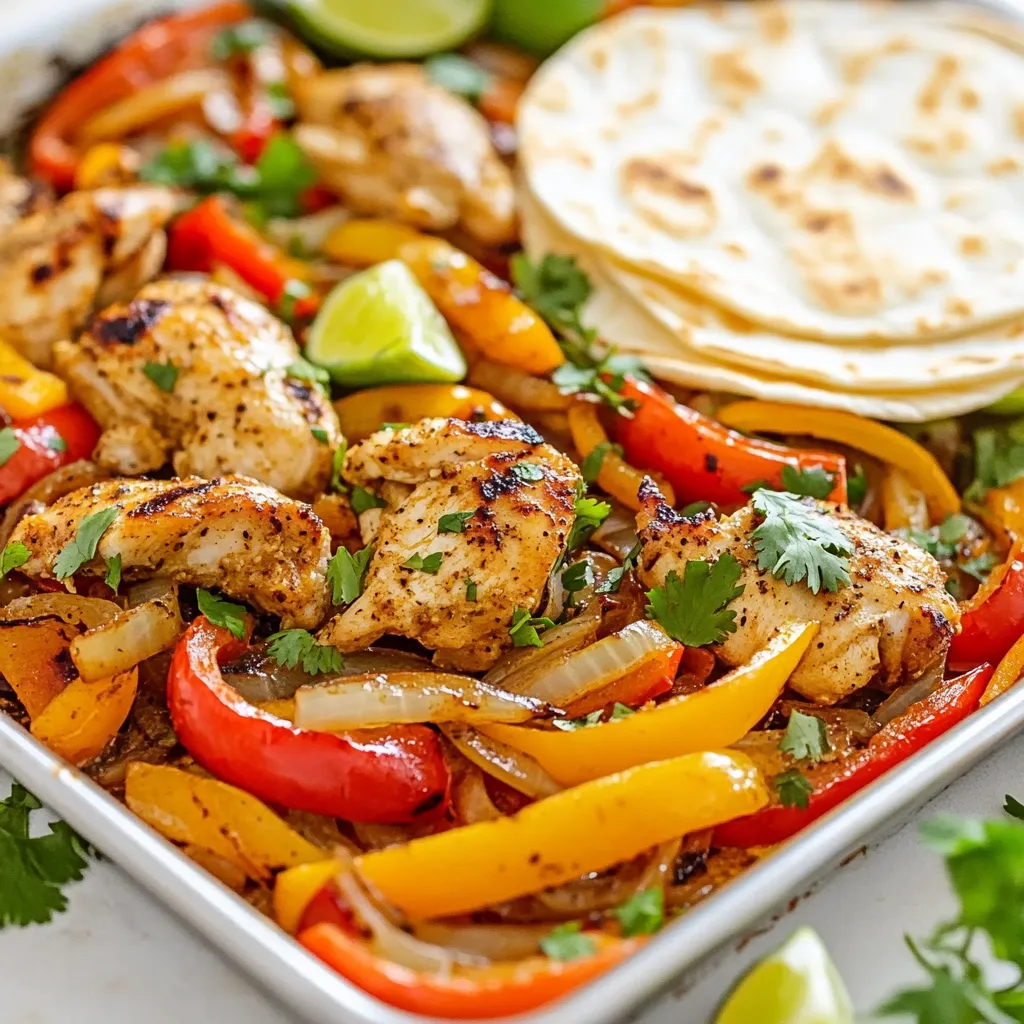
- 1.5 lbs boneless, skinless chicken thighs, sliced into strips - 2 bell peppers (red and yellow), sliced - 1 onion, sliced - 2 tablespoons olive oil - 1 tablespoon chili powder - 1 teaspoon cumin - 1 teaspoon paprika - 1/2 teaspoon garlic powder - 1/2 teaspoon onion powder - Salt and pepper to taste - 8 small tortillas (flour or corn) To make great fajitas, start with fresh chicken. I prefer boneless, skinless chicken thighs. They are tender and juicy after baking. Slice them into strips for even cooking. Next, add two bell peppers. I like the colors of red and yellow for a pop. Slice the onion to add sweetness. This mix of chicken and veggies makes the base of the dish. Now, let's talk about the seasonings. Olive oil adds richness. Chili powder gives heat. Cumin and paprika add depth and warmth. Garlic powder and onion powder enhance the flavors. Finally, season with salt and pepper to taste. This blend makes the fajitas flavorful and delicious. - Fresh cilantro - Lime wedges - Guacamole - Sour cream Toppings can make fajitas even better. Fresh cilantro adds brightness. A squeeze of lime juice gives a nice zing. Guacamole brings creaminess and flavor. Sour cream adds a cool touch. You can mix and match these toppings to suit your taste. Enjoy creating your own perfect fajitas! {{ingredient_image_1}} 1. Start by slicing the chicken thighs into strips. Aim for uniform pieces for even cooking. 2. Next, slice the bell peppers and onion. Use a mix of red and yellow peppers for color. 3. In a small bowl, mix the olive oil, chili powder, cumin, paprika, garlic powder, onion powder, salt, and pepper. This blend adds great flavor. 1. In a large mixing bowl, combine the sliced chicken, bell peppers, and onion. 2. Pour the seasoning mixture over the chicken and veggies. Toss everything well to coat. 3. Spread the seasoned mix evenly on a sheet pan. Make sure it is in a single layer for even baking. 4. Bake in a preheated oven at 400°F (200°C) for about 20-25 minutes. The chicken should be cooked through and the veggies tender. 1. While the chicken and veggies bake, warm the tortillas in a dry skillet or the oven for a few minutes. This makes them soft and pliable. 2. Once done, let the mixture cool slightly. You can serve it directly from the sheet pan for a fun, casual meal. 3. For plating, arrange warm tortillas on a plate. Serve the chicken and veggies alongside. Add toppings like cilantro, lime wedges, guacamole, or sour cream for a tasty finish. To ensure even cooking, slice the chicken and vegetables into uniform pieces. This helps everything cook at the same rate. A sharp knife makes cutting easier and safer. Keeping the chicken juicy is key. Marinating your chicken for at least 30 minutes adds flavor and moisture. Use olive oil and spices to coat the chicken well. Another tip is to check the chicken's internal temperature. It should reach 165°F (75°C) to be safe. This way, you avoid any dry bites. For a creative presentation, use a large wooden board. Arrange the fajitas with toppings around them. This makes it fun for everyone to build their own meal. When customizing fajitas for guests, set up a toppings bar. Offer options like fresh cilantro, lime wedges, guacamole, and sour cream. Let everyone choose what they like best! These tips will help you enjoy your Sheet Pan Chicken Fajitas even more. Happy cooking! Pro Tips Marinate for Extra Flavor: For enhanced flavor, marinate the chicken in the seasoning mix for at least 30 minutes or up to overnight in the refrigerator before cooking. Use Fresh Ingredients: Fresh bell peppers and onions add vibrancy and crunch to your fajitas. Choose vegetables that are firm and brightly colored. Don’t Overcrowd the Pan: Ensure there is enough space on the sheet pan for even cooking. Overcrowding can lead to steaming instead of roasting. Customize Your Toppings: Feel free to experiment with different toppings like diced tomatoes, jalapeños, or shredded cheese to personalize your fajitas. {{image_2}} You can switch out chicken for shrimp or tofu. Shrimp cooks fast and adds a nice texture. Tofu is great for a plant-based option. Make sure to press tofu to remove extra water. For veggies, try zucchini, mushrooms, or corn. Each adds a special flavor. You can mix and match based on what you have. Just remember to slice them thin for even cooking. You can play with spice levels. If you love heat, add more chili powder or a pinch of cayenne. For a milder taste, reduce the chili powder. Adding different seasonings is easy too. Try oregano, chili flakes, or even a splash of lime juice. These tweaks can change the whole dish. You can make it just right for your taste buds. To keep your fajitas fresh, use proper storage containers. I recommend airtight containers. They help prevent moisture loss and keep flavors intact. Place the fajitas in the container after they cool. Store them in the fridge. They can last for about 3 to 4 days this way. For the tortillas, keep them in a separate bag or container. This prevents them from getting soggy. If you wish to freeze the fajitas, use freezer-safe bags. Remove as much air as possible before sealing. This method keeps them good for up to 3 months. When it’s time to enjoy your leftovers, reheating is key. The best way to reheat fajitas is in a skillet. Heat it over medium heat and add a splash of water. Cover the skillet to steam the fajitas. This keeps them moist and warm. You can also use the microwave. Place the fajitas on a plate and cover them with a damp paper towel. Heat in short bursts, about 30 seconds each. Check often to avoid overheating. If you froze the fajitas, let them thaw in the fridge overnight. Then, reheat as mentioned above. Enjoying your fajitas again is a breeze! You can prep the chicken and veggies ahead of time. Slice the chicken thighs and vegetables. Place them in a bowl. Mix in the spices and olive oil. Cover the bowl and store it in the fridge for up to two days. When you’re ready to cook, spread the mixture on the sheet pan. Bake as directed. This makes for a quick meal on busy nights. Yes, you can add more vegetables for extra flavor and nutrition. Zucchini and mushrooms work well. You can also use corn or cherry tomatoes. Just make sure to cut them into similar sizes as the peppers and onions. This way, they will cook evenly. Many sides go great with chicken fajitas. Here are a few ideas: - Mexican rice - Refried beans - Black beans - Corn salad - Fresh guacamole - Chips and salsa These sides will make your meal colorful and satisfying. This article covered how to make tasty sheet pan chicken fajitas. You learned about the main ingredients, easy steps to prep and cook, and serving ideas. I hope the tips helped you achieve juicy chicken and creative presentations. You can mix up flavors with different proteins or veggies, too. With proper storage and reheating methods, you can enjoy these fajitas any time. Dive into this fun dish, and make it your own!