

Latest & Greatest
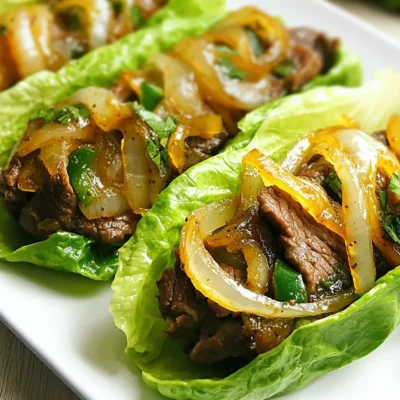
Keto Philly Cheesesteak Roll Ups for Quick Meals
If you’re craving something quick, tasty, and keto-friendly, let’s dive into Keto Philly Cheesesteak Roll Ups! These delicious wraps are
Read more…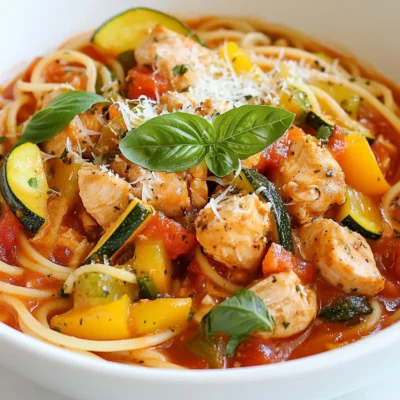
Savory Chicken One-Pot Spaghetti Easy Weeknight Meal
Looking for a quick and tasty dinner? You’ve come to the right place! My easy Chicken One-Pot Spaghetti packs tons
Read more…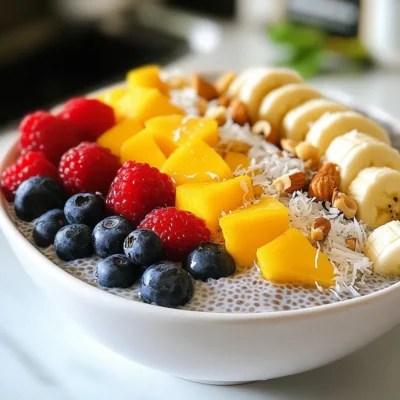
Overnight Chia Seed Pudding Simple and Tasty Recipe
Are you ready to whip up a delicious, healthy treat with minimal effort? Overnight chia seed pudding is the answer!
Read more…
Salted Caramel Pretzel Bark Irresistible Sweet Treat
Are you ready to indulge in a treat that combines sweet, salty, and crunchy? My Salted Caramel Pretzel Bark is
Read more…
Balsamic Glazed Caprese Chicken for a Flavorful Meal
Looking for a tasty way to spice up dinner? Balsamic Glazed Caprese Chicken is your answer! This dish brings together
Read more…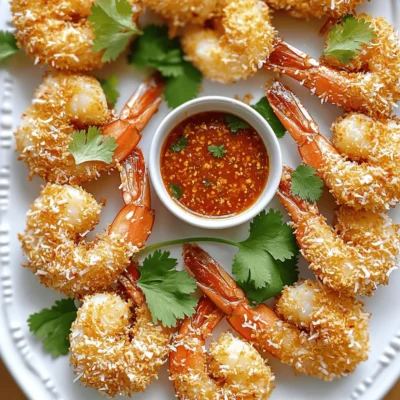
Air Fryer Coconut Shrimp Crispy and Flavorful Treat
Looking for a tasty dish that’s quick and easy? You’re in the right place! This Air Fryer Coconut Shrimp recipe
Read more…
BBQ Chicken Flatbread Pizza Flavorful and Easy Recipe
Are you ready to spice up your meal routine? Let me show you how to make a delicious BBQ Chicken
Read more…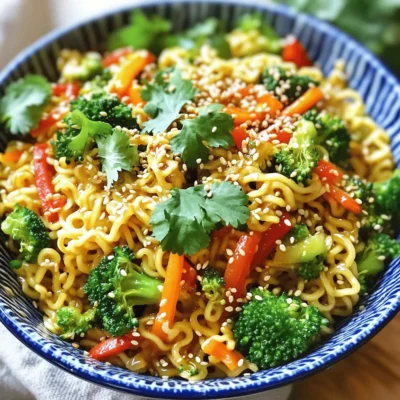
Savory Sesame Ginger Ramen Noodles Quick and Easy Meal
Craving a quick and tasty meal? These Savory Sesame Ginger Ramen Noodles are perfect for you! With fresh veggies, bold
Read more…browse recipes


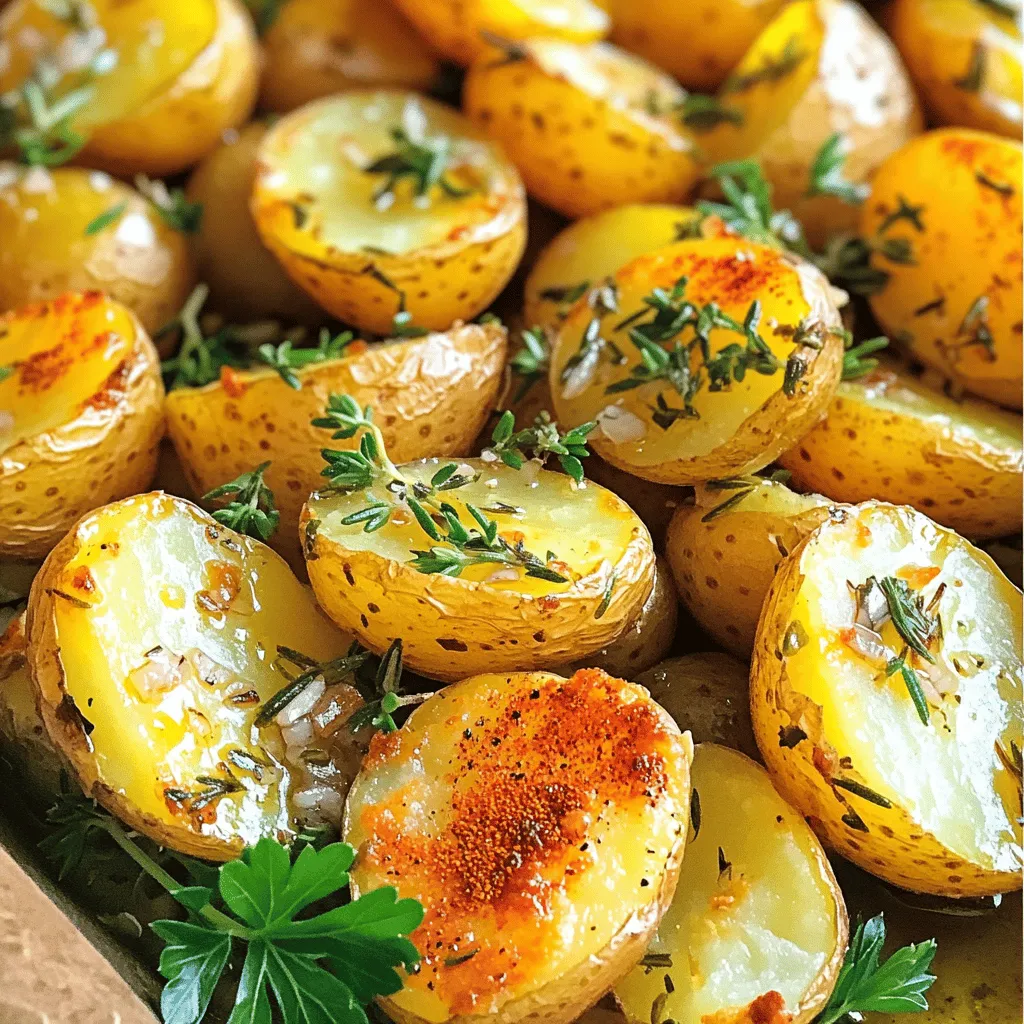
Garlic Herb Roasted Potatoes Flavorful Dinner Sides
If you’re looking for a tasty side dish, Garlic Herb Roasted Potatoes are your answer! These flavorful potatoes are easy to make and packed…
My Latest Drinks

Strawberry Cheesecake Smoothie Creamy Refreshing Treat
Craving something delicious and cool? The Strawberry Cheesecake Smoothie is your answer! It blends creamy cheesecake flavors with sweet strawberries Read Full Recipe-
Mocktail Pink Punch Refreshing and Easy Recipe
Are you ready to impress your guests with a delightful drink? This Mocktail Pink Punch recipe is both refreshing and Read Full Recipe -
Blue Lagoon Tropical Lemonade Refreshing and Zesty Drink
Looking for a drink that’s both refreshing and fun? Say hello to Blue Lagoon Tropical Lemonade! This colorful beverage packs Read Full Recipe -
Pumpkin Spice Coffee Creamer Flavorful Fall Treat
Are you ready to embrace the cozy vibes of autumn? In this blog post, I’ll guide you through making your Read Full Recipe -
Apple Cider Margarita Mocktail Refreshing Fall Drink
Fall is here, and that means it’s the perfect time for a cozy drink! The Apple Cider Margarita Mocktail offers Read Full Recipe -
Pumpkin Spice Latte Copycat Cozy and Comforting Recipe
Craving that warm, cozy feeling of fall? You can enjoy a delicious Pumpkin Spice Latte at home! In this article, Read Full Recipe


My Latest Dinners
-
White Bean Soup Simple and Hearty Delight
Looking for a warm and filling meal? Let me introduce you to white bean soup! This simple and hearty delight Read Full Recipe -
Garlic Herb Roasted Sweet Potatoes Flavorful Side Dish
Looking for a side dish that’s both tasty and easy to make? Garlic Herb Roasted Sweet Potatoes are the answer! Read Full Recipe -
One Pot Beef Taco Pasta Easy and Flavorful Meal
Looking for a quick and tasty meal? One Pot Beef Taco Pasta is the perfect dish! This recipe packs bold Read Full Recipe -
Garlic Chicken Zucchini Noodles Stir Fry Delight
Are you ready for a tasty twist on dinner? My Garlic Chicken Zucchini Noodles Stir Fry is a quick and Read Full Recipe -
Stuffed Italian Meatloaf Easy and Tasty Recipe
Are you ready to elevate your dinner game? This Stuffed Italian Meatloaf is both easy and tasty! In this article, Read Full Recipe -
One Pot French Onion Pasta Flavorful Comfort Dish
Looking for a cozy dinner that warms your soul? Try my One Pot French Onion Pasta! This creamy, rich dish Read Full Recipe


hey,
i’m !
I’m so happy you’re here!
Every dish I share is made with love and care. I hope they bring you the same comfort and joy they bring me. Let’s make memories, one recipe at a time.

 to see how these ingredients work together. To start, gather your ingredients for the teriyaki sauce. You will need soy sauce, honey, rice vinegar, grated fresh ginger, and minced garlic. In a small bowl, whisk these together until smooth. This tasty blend gives your salmon a sweet and savory flavor. Using fresh ginger and garlic makes a big difference in taste. Trust me, your taste buds will thank you! Next, heat sesame oil in a non-stick skillet over medium heat. Place your salmon fillets skin-side down in the skillet. Cook for about 4 to 5 minutes. This helps the skin get nice and crispy. After that, gently flip the fillets. Pour half of the teriyaki sauce over the salmon. Cook for another 3 to 4 minutes. Spoon some sauce over the salmon to keep it moist. When done, the salmon should flake easily with a fork. Now it’s time to put everything together! Start by adding a serving of rice to each bowl. I recommend using jasmine or brown rice for a nice touch. Next, add steamed broccoli, shredded carrots, and slices of avocado on top. Place the cooked salmon over the veggies and rice. Drizzle the remaining teriyaki sauce on everything. Finish by garnishing each bowl with sesame seeds and chopped green onions. This will make your dish look and taste amazing! For the full recipe, check out the section above. To cook salmon well, start with fresh fillets. Fresh salmon tastes better and is healthier. Always check for bright, shiny skin. When you cook, heat your pan before adding oil. Use medium heat for even cooking. Cook the salmon skin-side down for a nice crisp. Flip it gently to avoid breaking the fillets. Cook until it flakes easily with a fork. This usually takes about 8 to 10 minutes in total. To make your teriyaki salmon shine, think about layers of flavor. The teriyaki sauce is key; it’s sweet and salty. Add ginger and garlic for warmth and depth. You can also sprinkle a little chili flakes for heat. If you enjoy citrus, a squeeze of lime or lemon brightens the dish. Try using fresh herbs like cilantro or basil for a fresh twist. A beautiful plate makes the meal more enjoyable. Start with a base of rice in each bowl. Layer on the colorful veggies like broccoli and carrots. Place the salmon on top, then drizzle with extra teriyaki sauce. Garnish with sesame seeds and green onions for a nice touch. Use a small side of avocado for creaminess. This not only adds flavor but also makes your bowl look vibrant and inviting. For the full recipe, check the complete instructions above. {{image_2}} You can easily change some ingredients in your teriyaki salmon bowls. If you want a gluten-free option, try tamari instead of soy sauce. If honey is not your thing, maple syrup works well as a sweetener. You can also use coconut aminos for a lighter soy sauce alternative. For a tangy twist, swap rice vinegar for apple cider vinegar. Salmon is tasty, but you can use other proteins too. Chicken breast or thighs make great substitutes. They absorb flavors like salmon. Tofu is perfect for a vegetarian choice. Just press it to remove extra water, then marinate it in the teriyaki sauce. Shrimp is another fun option; it cooks quickly and adds a nice texture. The veggies in your bowl can change based on what you like. Instead of broccoli, use snap peas or bell peppers for crunch. Zucchini or squash will add a nice flavor and texture. You can even toss in some edamame for protein. Just remember to pick colorful veggies to make your bowl vibrant and tasty! For the full recipe, check out the [Full Recipe]. To store your leftover teriyaki salmon bowls, let them cool first. Place the bowls in airtight containers. Make sure to separate the salmon from the rice and veggies. This helps keep everything fresh. You can store them in the fridge for up to three days. When you're ready to eat, reheat the bowls gently. You can use a microwave or stovetop. If using a microwave, cover the bowl with a damp paper towel. Heat for 1-2 minutes, checking often to avoid overcooking. On the stovetop, warm them in a skillet over low heat. Add a splash of water if needed to steam the veggies. You can freeze the salmon and veggies for longer storage. Place them in freezer-safe bags or containers. Remove as much air as possible to prevent freezer burn. The teriyaki sauce can also be frozen. Just be aware that the texture of the veggies might change when thawed. For best quality, eat within one month. You can serve many sides with teriyaki salmon bowls. Some great options include: - Steamed edamame - Cucumber salad - Pickled vegetables - Seaweed salad - Miso soup These sides add fresh flavors and textures. They also balance the meal. Cooked salmon can last up to three days in the fridge. Make sure to store it in an airtight container. This keeps it fresh and safe to eat. If you want to keep it longer, freeze it. Frozen cooked salmon can last for about two to three months. Yes, you can make teriyaki sauce ahead of time. Store it in the fridge for up to a week. Just keep it in a sealed container. If you want to store it longer, you can freeze it. Thaw it before using it in your dishes. Absolutely! You can use any firm fish like tuna or halibut. These fish work well with teriyaki sauce. They also cook similarly to salmon. Just adjust the cooking time based on the thickness of the fillets. You can add many healthy toppings to your teriyaki salmon bowls. Consider these options: - Sliced radishes - Chopped cilantro - Sliced jalapeños - Sprouts These toppings boost flavor and nutrition. They also add a colorful touch to your meal. Yes, you can make a vegetarian version. Use tofu instead of salmon for protein. Tofu absorbs the teriyaki flavor well. You can also use grilled tempeh or seitan as alternatives. Just ensure to adjust cooking times for each option. Salmon is cooked when it flakes easily with a fork. The inside should be opaque and no longer translucent. You can also use a food thermometer. The internal temperature should reach 145°F. Yes! Meal prepping teriyaki salmon bowls is easy and convenient. Cook the salmon and veggies, then store them separately. Assemble the bowls when ready to eat. This keeps everything fresh and tasty. Jasmine and brown rice are both great options. Jasmine rice is fluffy and fragrant. Brown rice is nutty and whole grain. Both pair well with the teriyaki sauce and salmon. Choose based on your taste and health goals. Yes! You can add any veggies you like. Try bell peppers, snap peas, or zucchini. You can even add leafy greens like spinach or kale. More vegetables boost nutrition and flavor. They also make your bowl more colorful and fun. This article covered how to make delicious teriyaki salmon bowls. We looked at the ingredients, instructions, tips, and variations. You can easily customize these bowls to suit your taste. Remember to store leftovers properly for future meals. Cooking can be fun and creative. Enjoy your tasty creation and share it with friends and family. Simple dishes like this can bring joy to your table. Keep experimenting with flavors and ingredients. Happy cooking!](https://easycookingbite.com/wp-content/uploads/2025/06/8280051d-86f2-40e3-b815-2f4f395db67d-300x300.webp)

Easy Chicken Quesadillas Simple and Quick Recipe
Craving a quick and tasty meal? You’re in the right place! Easy chicken quesadillas are delicious, simple to make, and perfect for any occasion.…
![- 2 cups cooked chicken, shredded - 1 cup shredded cheddar cheese - 1 cup shredded mozzarella cheese - 1/2 cup bell pepper, finely chopped (any color) - 1/2 cup red onion, finely chopped - 1 tablespoon taco seasoning - 1 tablespoon olive oil - 4 large flour tortillas - 1/4 cup fresh cilantro, chopped (for garnish) - Salsa and sour cream (for dipping) - For a vegetarian option, use black beans or mushrooms instead of chicken. - Try pepper jack cheese for a spicy kick or goat cheese for creaminess. - Add cumin or smoked paprika for unique flavors. You can also mix in fresh herbs like basil or parsley. Using these ideas, you can make your quesadillas just how you like them. Enjoy the fun of mixing flavors! For a full recipe with step-by-step instructions, check out the [Full Recipe]. - Start with 2 cups of cooked chicken. Shred it into bite-sized pieces. - Chop 1/2 cup of bell pepper and 1/2 cup of red onion into small bits. - Gather these ingredients: shredded cheddar, mozzarella, taco seasoning, tortillas, and olive oil. - Heat 1 tablespoon of olive oil in a large skillet over medium heat. - Add the chopped bell pepper and onion. Sauté for 3–4 minutes until soft. - Mix in the shredded chicken and 1 tablespoon of taco seasoning. Stir for 2–3 minutes to heat. - Remove from heat and add 1 cup of shredded cheddar and 1 cup of mozzarella. Stir until melted. - In a separate skillet, place one large tortilla over medium heat. - Put a quarter of the chicken mixture on one half of the tortilla. - Fold the tortilla over the filling and press down gently. - Cook for 3–4 minutes until golden brown. Flip and cook for another 3–4 minutes until crispy. - Take out the quesadilla and let it cool for a minute. Slice it into wedges. - Repeat for the rest of the tortillas and filling. - For a perfect golden crust, keep the heat at medium. - To make many quesadillas at once, use a large griddle. - To melt cheese evenly, use a lid on the skillet for a minute. For the full recipe, check out the Cheesy Fiesta Chicken Quesadillas. To make your quesadillas pop, use spices like cumin and chili powder. These spices add depth and warmth. You can also sprinkle some garlic powder for a nice twist. Fresh herbs like cilantro brighten the dish. Add toppings such as sliced avocado or jalapeños for heat. You can even try a squeeze of lime juice to enhance the flavors. Use a non-stick skillet or a well-seasoned cast-iron pan for cooking. These surfaces help prevent sticking. If you use a griddle, make sure it is heated evenly. To flip the quesadillas easily, use a wide spatula. Slide it under the quesadilla gently and lift. This method keeps the filling intact. Pair your quesadillas with fresh salsa or creamy sour cream for dipping. You can also serve them with guacamole for a tasty treat. To make your dish look fancy, cut the quesadillas into wedges and arrange them on a plate. Add a sprinkle of fresh cilantro on top for color. This simple touch makes your meal feel special. For the full recipe, check out the complete guide. {{image_2}} You can switch up the chicken for many meats. Try beef, pork, or shrimp. Each adds a new taste. If you want a meatless option, use beans or tofu. You can also mix veggies like mushrooms or corn. For a twist, try BBQ chicken. The smoky flavor brings excitement to your meal. Cheese is key to a great quesadilla. You can use pepper jack for spice or feta for a tangy taste. Mixing cheeses creates depth. If you're gluten-free, look for rice or corn tortillas. They work well and taste great. Kids may prefer simpler flavors. Use just cheese or chicken without extra spices. You can cut quesadillas into fun shapes. Use cookie cutters for stars or hearts. Serving them with fruity dips can make them more appealing. Kids love to eat with their eyes! For more ideas, check the Full Recipe and explore new flavors! To keep your quesadillas fresh, store them right. First, let them cool to room temperature. Then, wrap each quesadilla in plastic wrap or foil. This helps keep moisture in and prevents them from drying out. Use airtight containers for extra protection. They work well to avoid spills in the fridge. Reheat quesadillas in a skillet for the best texture. Heat on medium-low for about 3-4 minutes on each side. This method keeps them crispy. You can also use an oven. Preheat it to 350°F and bake for 10-15 minutes. For added flavor, cover them with a damp paper towel while reheating in the microwave. To freeze quesadillas, follow these steps. First, let them cool completely. Then, wrap each one in plastic wrap. Place them in a freezer bag or container. Label with the date to track freshness. For reheating, remove them from the freezer and thaw overnight in the fridge. Reheat as mentioned above for the best taste. To make Easy Chicken Quesadillas, start by gathering your ingredients. You need cooked chicken, cheese, bell pepper, onion, and tortillas. First, heat olive oil in a skillet. Sauté the chopped bell pepper and onion for about 3–4 minutes. Then, add the shredded chicken and taco seasoning. Cook for another 2–3 minutes until it heats fully. Mix in the cheese until it melts. Next, place a tortilla in a separate skillet, fill it with the mixture, and fold it. Cook for 3–4 minutes on each side. Slice, garnish, and enjoy your delicious meal. For the full recipe, check out the section above. Yes, you can use rotisserie chicken. It saves time and adds great flavor. Rotisserie chicken is already cooked and seasoned. This makes your prep even easier and quicker. Just shred the chicken and mix it with the other ingredients. You will still get that great taste without all the work. It’s perfect for busy nights when you want a tasty meal fast. For dipping sauces, you have plenty of tasty options. Salsa is a classic choice, offering a fresh kick. Sour cream adds creaminess and balances the flavors. Guacamole pairs well, bringing a rich texture. If you like heat, try hot sauce or a spicy salsa. You can even mix yogurt with herbs for a cool dip. These sauces will make your quesadillas even more enjoyable. To make quesadillas in an air fryer, follow the same filling steps. Prepare your chicken and cheese mixture as usual. Then, assemble your quesadilla. Lightly spray the air fryer basket with oil. Place the quesadilla in the basket in a single layer. Cook at 375°F for about 5–7 minutes. Check for a golden brown color and melted cheese. Flip halfway through for even cooking. This method gives you a crispy texture with less oil. To reheat quesadillas, use a skillet for the best results. Heat the skillet over medium-low heat. Place the quesadilla in the pan and cover it with a lid. This keeps the moisture in and helps the cheese melt. Heat for about 3–5 minutes on each side. You can also use an oven at 350°F. Bake for about 10 minutes, flipping halfway. Avoid the microwave, as it can make them soggy. Enjoy your reheated quesadillas crisp and tasty! In this blog post, we explored making delicious chicken quesadillas from scratch. We covered ingredients, step-by-step instructions, and helpful tips to ensure great flavor and texture. You now have multiple options to customize your quesadillas, whether you prefer a classic style or something unique. Remember, storing leftovers properly keeps them tasty for later. Enjoy your cooking, and don’t be afraid to experiment with flavors!](https://easycookingbite.com/wp-content/uploads/2025/06/f511a845-b98b-444f-909e-30dd2854b95e.webp)
