
Latest & Greatest
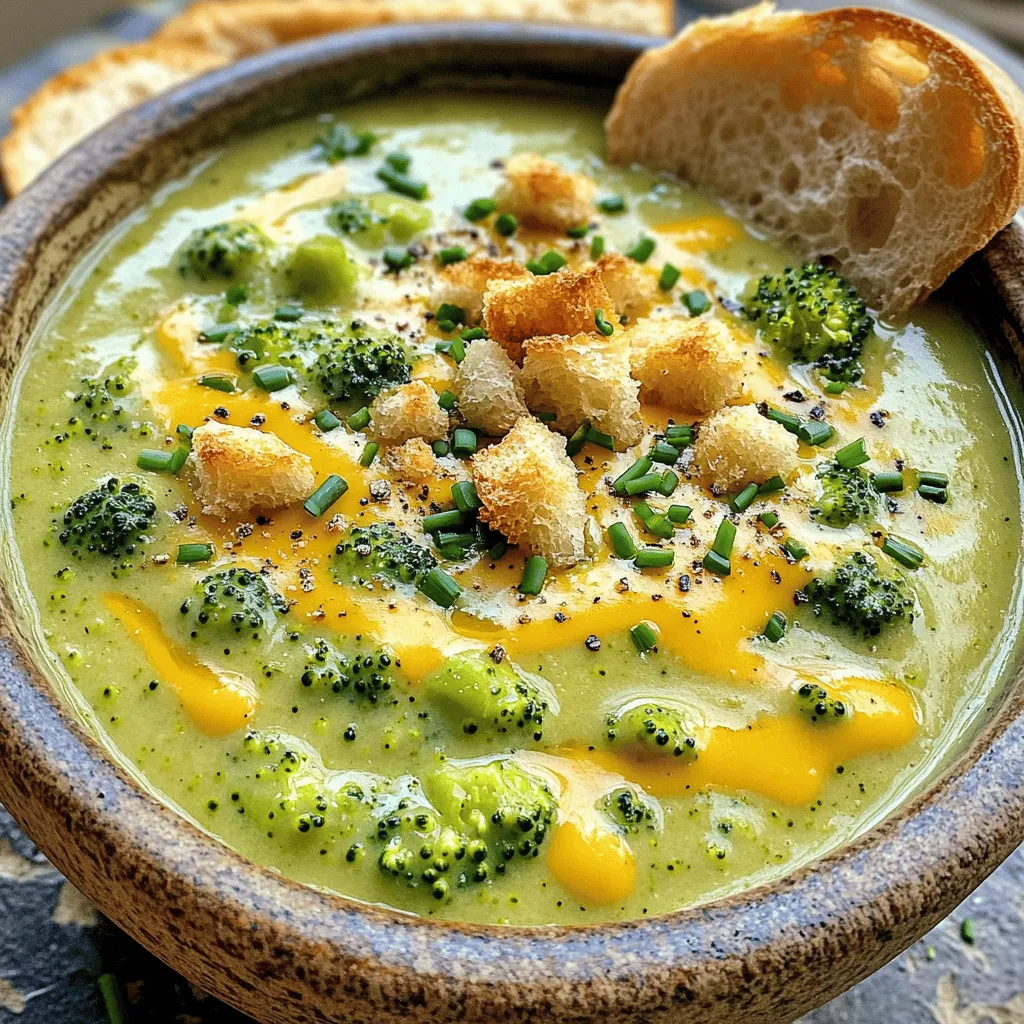
Cheddar Broccoli Soup Flavorful Creamy Comfort Food
Looking for a bowl of warm, creamy comfort? This Cheddar Broccoli Soup is rich and flavorful, perfect for a cozy
Read more…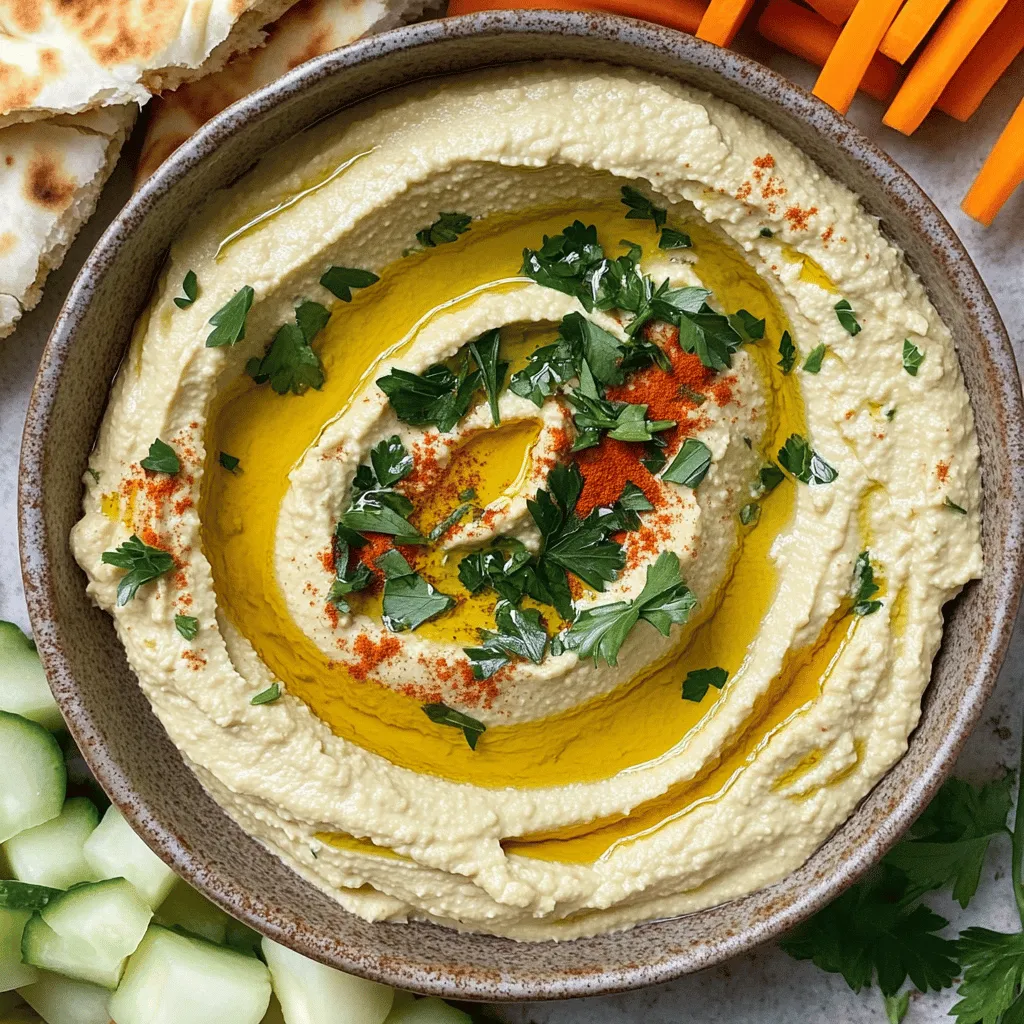
Classic Hummus Recipe Simple and Creamy Delight
Are you ready to make the ultimate classic hummus? My Classic Hummus Recipe Simple and Creamy Delight is perfect for
Read more…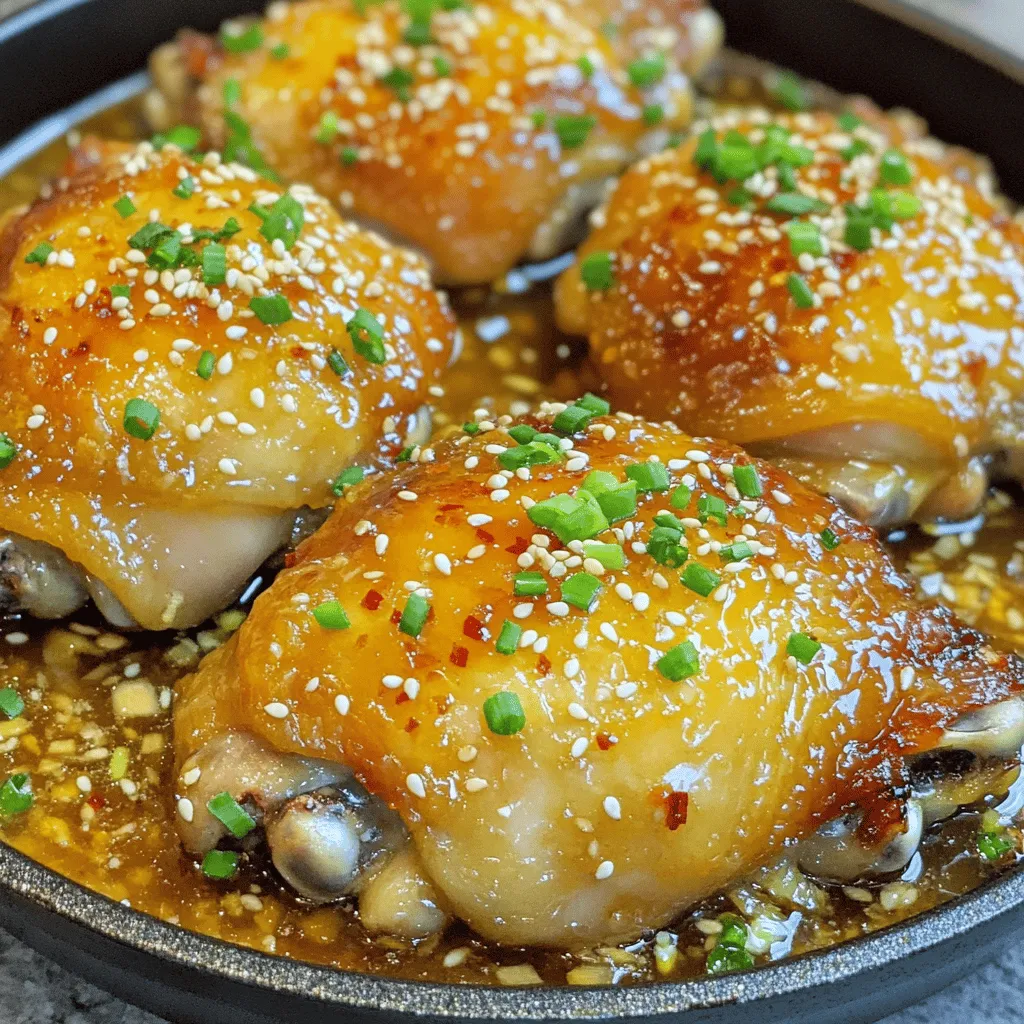
Honey Garlic Chicken Thighs Simple and Tasty Meal
Are you ready to savor a dish that delights your taste buds? Honey Garlic Chicken Thighs are both simple to
Read more…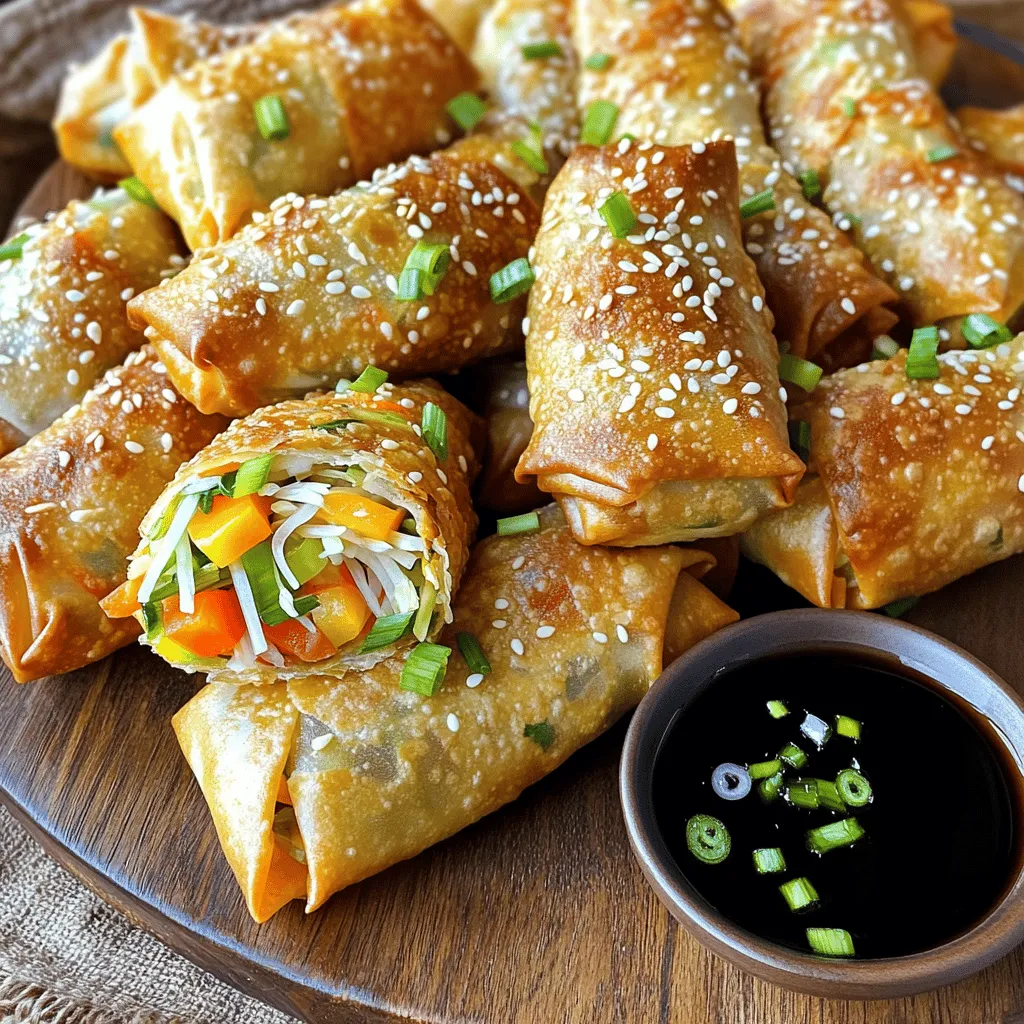
Air Fryer Veggie Spring Rolls Crisp and Flavorful Snack
If you love crispy snacks that burst with flavor, you’re in for a treat! Today, I’ll show you how to
Read more…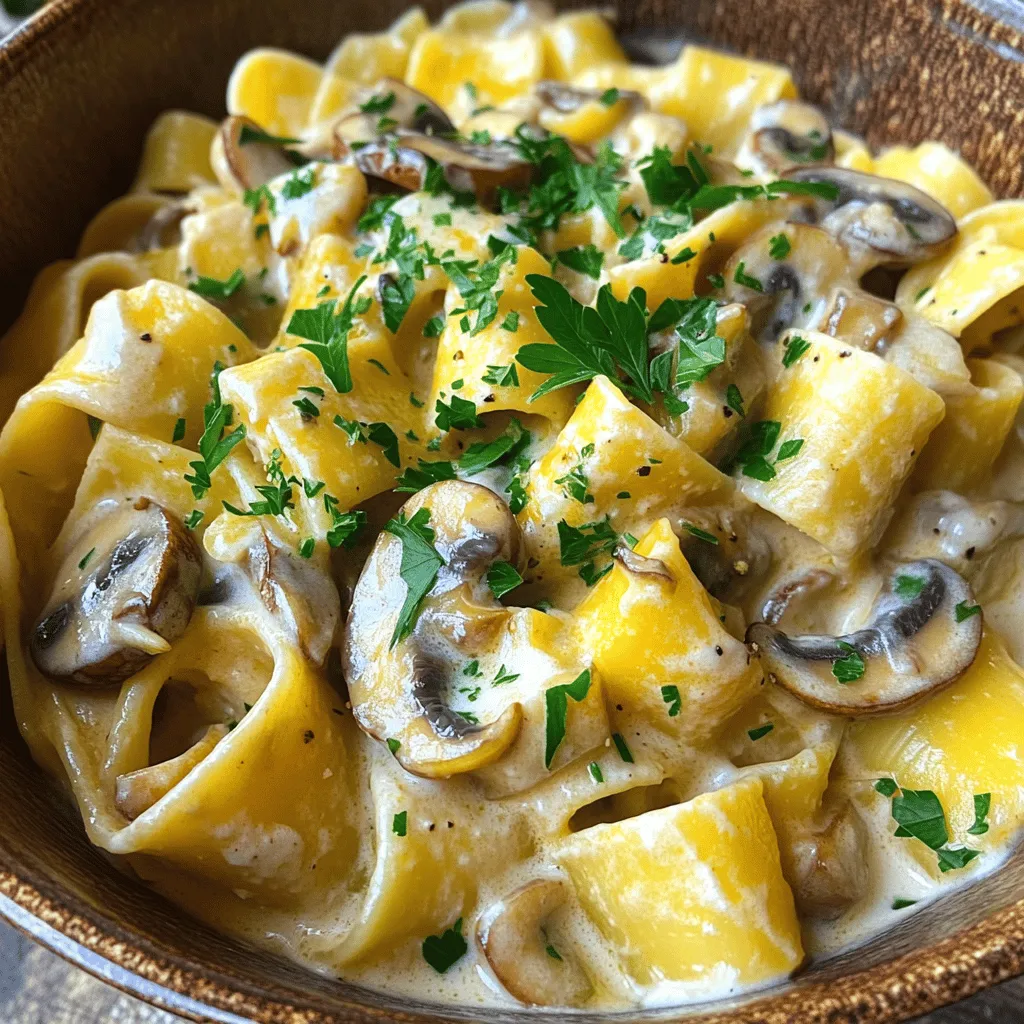
Vegan Mushroom Stroganoff Creamy Comfort Bowl
Are you ready for a delicious and creamy comfort bowl? Vegan Mushroom Stroganoff is your answer! This dish is rich,
Read more…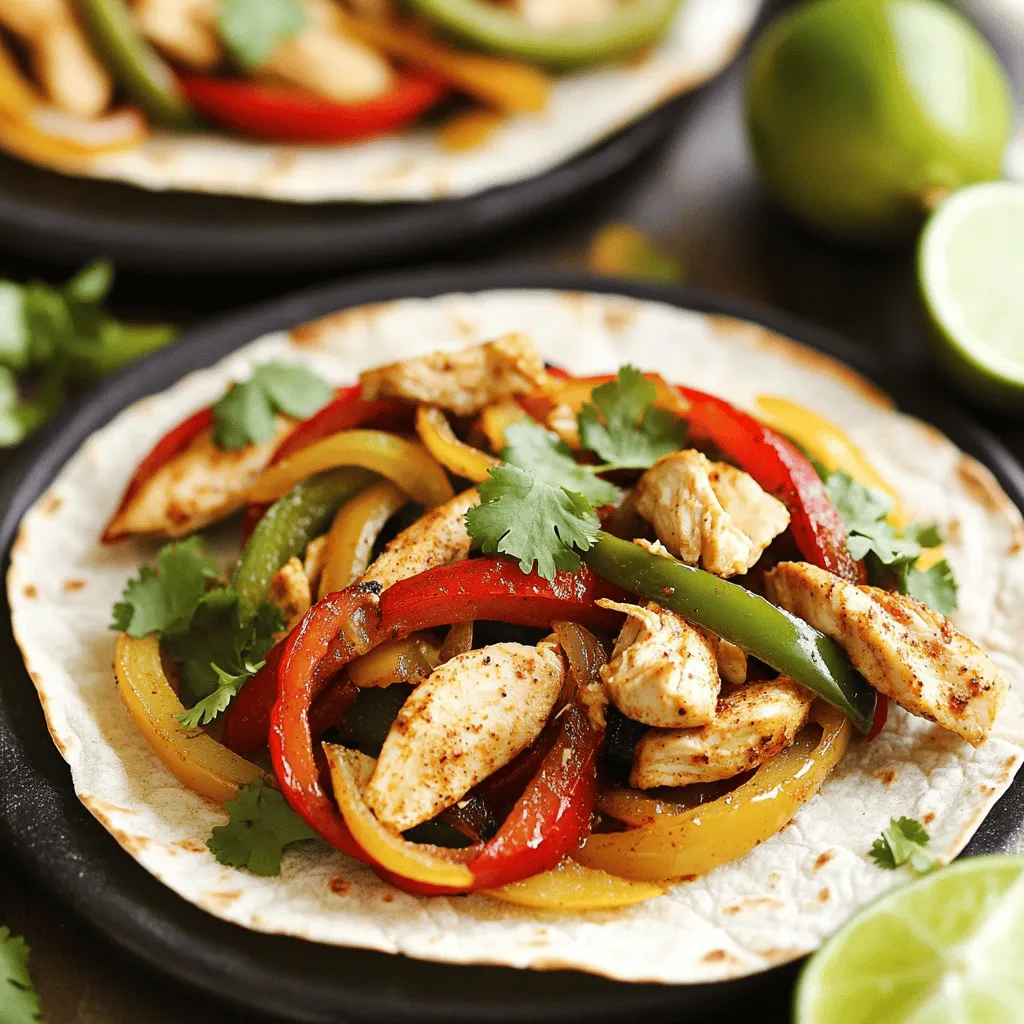
Easy Chicken Fajitas Simple and Tasty Recipe
Are you ready to spice up your dinner routine? This easy chicken fajitas recipe is simple, tasty, and perfect for
Read more…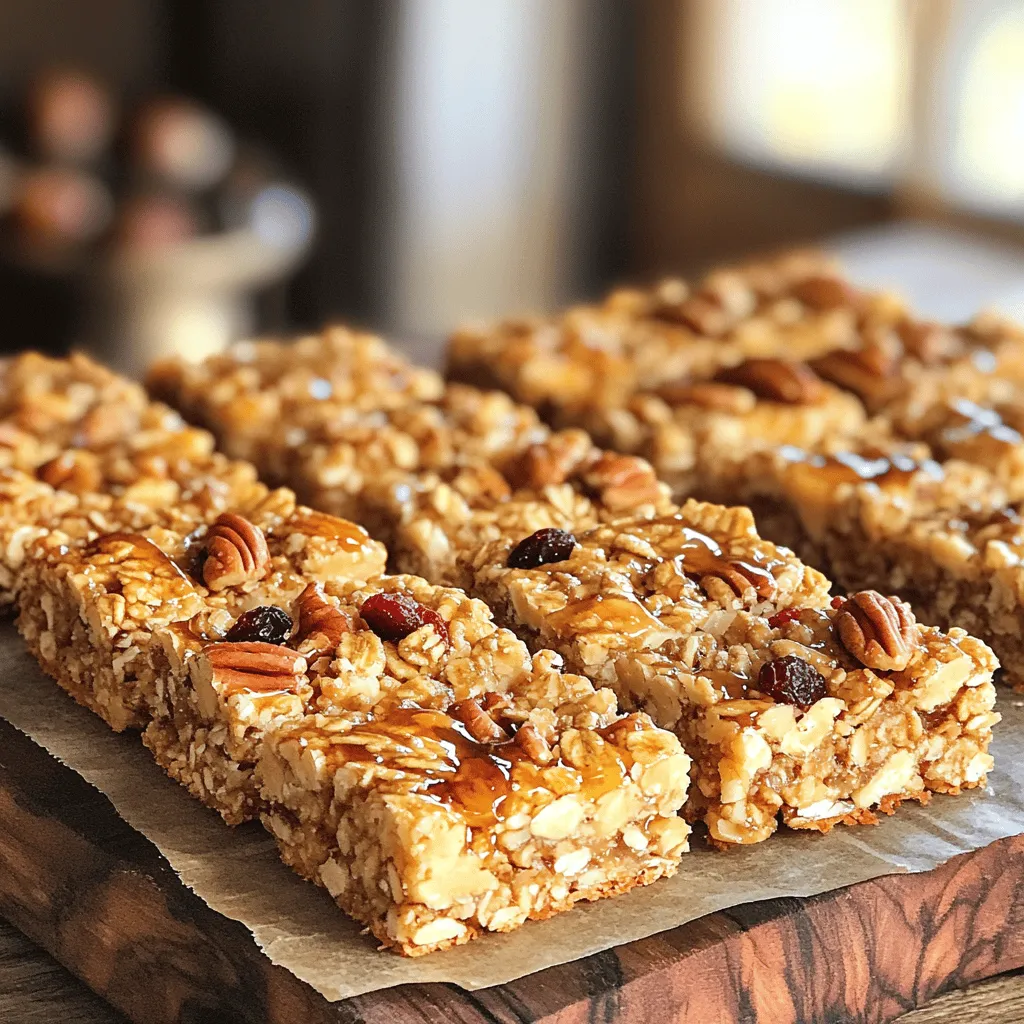
Maple Pecan Granola Bars Tasty and Easy Recipe
Are you craving a crunchy snack that’s both tasty and easy to make? Look no further! My Maple Pecan Granola
Read more…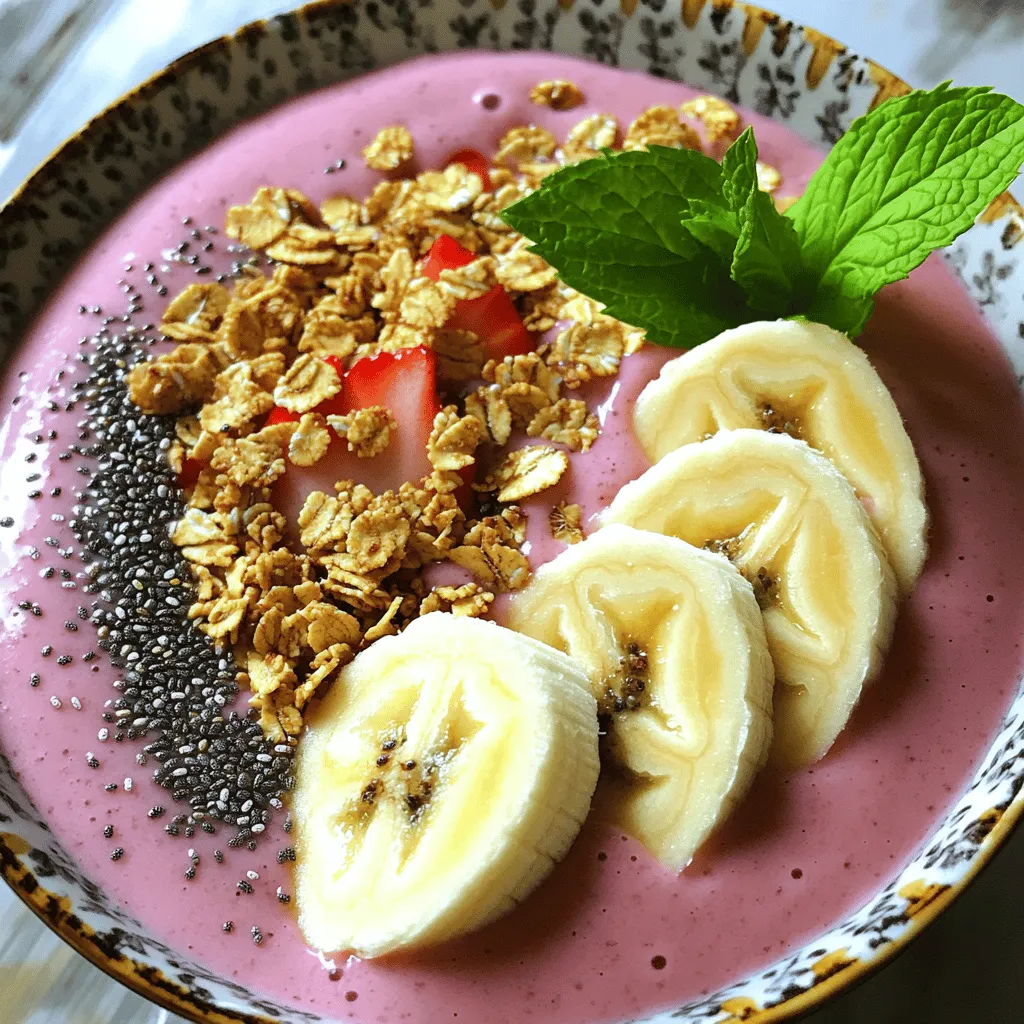
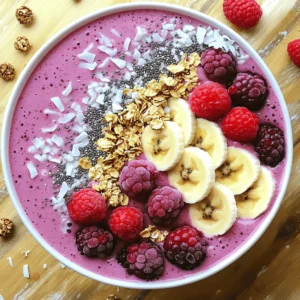
Strawberry Banana Smoothie Bowl Easy and Healthy Recipe
Are you ready to blend up a delicious Strawberry Banana Smoothie Bowl? This easy and healthy recipe packs nutrients while
Read more…browse recipes
![- 2 cups rolled oats - 1 cup creamy peanut butter - 1/2 cup honey or maple syrup These main ingredients are the heart of the bars. Rolled oats give texture and fiber. Creamy peanut butter adds richness and healthy fat. Honey or maple syrup brings sweetness and binds everything together. - 1/2 cup cocoa powder - 1/2 cup chocolate chips (dark or semi-sweet) - 1/4 cup shredded coconut (unsweetened) Cocoa powder gives a deep chocolate flavor. Chocolate chips add bursts of sweetness. Unsweetened shredded coconut offers a fun chew and extra taste. - 1/4 teaspoon salt - 1 teaspoon vanilla extract Salt balances the sweetness. Vanilla extract adds warmth and depth. Together, these flavor enhancers lift the taste of the bars, making them simply irresistible. For the full recipe, check the [Full Recipe]. 1. First, grab a large mixing bowl. Add the rolled oats, cocoa powder, and shredded coconut. This mix gives your bars a great texture and flavor. 2. Next, take a microwave-safe bowl. Heat the creamy peanut butter and honey (or maple syrup) together for about 30 seconds. Stir until smooth and well mixed. The heat helps blend these ingredients nicely. 3. Now, pour the warm peanut butter mixture over the dry ingredients in your mixing bowl. This step is key for a tasty bar! 4. Stir everything together until the dry ingredients are coated well. You want to make sure each oat gets some love. 5. Once mixed, fold in half of the chocolate chips. Save the rest for later to top your bars. 6. Line an 8x8-inch baking dish with parchment paper. Leave some paper hanging over the sides. This helps you lift the bars out later. 7. Transfer the mixture into the prepared baking dish. Press it down firmly using a spatula or your hands. This helps the bars hold their shape. 8. Sprinkle the remaining chocolate chips on top. Gently press them in so they stick. 9. Place the dish in the refrigerator for at least 1 hour. This time helps the bars firm up before you slice them. For the full recipe, check out the details above! To get the best no-bake chocolate oat bars, even mixing is key. Start by combining the dry ingredients well. This ensures each bite has the right flavor. When you mix the wet ingredients, make sure they are warm. This helps them coat the dry mix evenly. Pressing the mixture firmly is also important. If you do not press it down, the bars may crumble. Use a spatula or your hands. Ensure you compact the mixture well in the baking dish. This step helps the bars hold their shape when sliced. For a fun twist, drizzle melted chocolate on top of the bars. You can also add a sprinkle of coconut for extra flavor. When gifting these treats, wrap them in clear cellophane. Tie them with a ribbon for a lovely presentation. It adds a personal touch that friends and family will appreciate. One common mistake is not compacting the mixture. Skipping this step can lead to crumbly bars. Always press the mixture down firmly in the dish. Another mistake is overheating the peanut butter. If you heat it too much, it can separate and become oily. Heat just enough to make it smooth. This keeps the texture creamy and delicious. Remember, small steps make a big difference in your no-bake chocolate oat bars. For the full recipe, check out the section above. {{image_2}} You can change the taste of your no-bake chocolate oat bars easily. Adding nuts or seeds gives a nice crunch. I love using almonds or sunflower seeds. They add protein and healthy fats. You can also swap peanut butter for other nut butters. Try almond or cashew butter for a different flavor. Each nut butter brings its own twist to the bars. If you need gluten-free options, use certified oats. These oats are safe for those with gluten issues. You can also make these bars vegan. Just replace honey with maple syrup. This simple swap keeps the bars sweet and tasty without animal products. Get creative with your bars by adding dried fruits. Raisins, cranberries, or chopped apricots work great. They add natural sweetness and chewiness. You can also mix in different types of chocolate. White chocolate or even flavored chocolate can give a fun twist. Another idea is to sprinkle in some spices, like cinnamon. This adds warmth and depth to the flavor. You can explore these variations to make your bars truly unique. Enjoy crafting your perfect no-bake chocolate oat bars! For the full recipe, check the link above. To keep your No-Bake Chocolate Oat Bars fresh, store them in the refrigerator. The cool air helps maintain their texture and flavor. Use an airtight container to protect them from moisture and odors. This way, they stay tasty for longer. These bars stay fresh for about a week when stored properly. If you notice any off smells or a change in texture, it might be time to toss them. Signs of spoilage include a dry or crumbly texture and an unusual color. Always check before enjoying another bar! If you want to keep your bars for longer, freezing works well. Wrap each bar in plastic wrap or foil. Place them in a freezer-safe bag or container. When you’re ready to eat, thaw them in the refrigerator overnight. This keeps the texture nice and chewy, just like fresh. Enjoy your delicious treats anytime! No-bake chocolate oat bars can last about one week in the fridge. Store them in an airtight container to keep them fresh. If you want to keep them longer, you can freeze them. They can stay good for up to three months in the freezer. Just thaw them in the fridge before you enjoy them. Yes, you can swap peanut butter with almond, cashew, or sunflower seed butter. Each nut butter will change the taste a bit. Almond butter adds a nutty flavor, while sunflower seed butter is great for nut allergies. Just keep in mind that the texture may vary slightly based on your choice. These bars are a tasty and healthy treat. They have oats, which are full of fiber. The peanut butter adds protein and healthy fats. You can make them even healthier by using less sweetener or adding nuts for extra crunch. If you add dried fruits, like raisins or cranberries, they can boost vitamins and minerals too. You now have a simple and tasty way to make no-bake chocolate oat bars. We went through the key ingredients, step-by-step instructions, helpful tips, and creative variations. You can customize these bars to fit your taste and needs. Remember to store them well for lasting freshness. Enjoy the process and make it your own!](https://easycookingbite.com/wp-content/uploads/2025/06/becf4bef-ac5d-4af7-b02b-f35985270e1b.webp)
No-Bake Chocolate Oat Bars Easy and Delicious Treat
Craving something sweet but don’t want to turn on the oven? I’ve got just the thing for you! These No-Bake Chocolate Oat Bars are…
My Latest Desserts
-
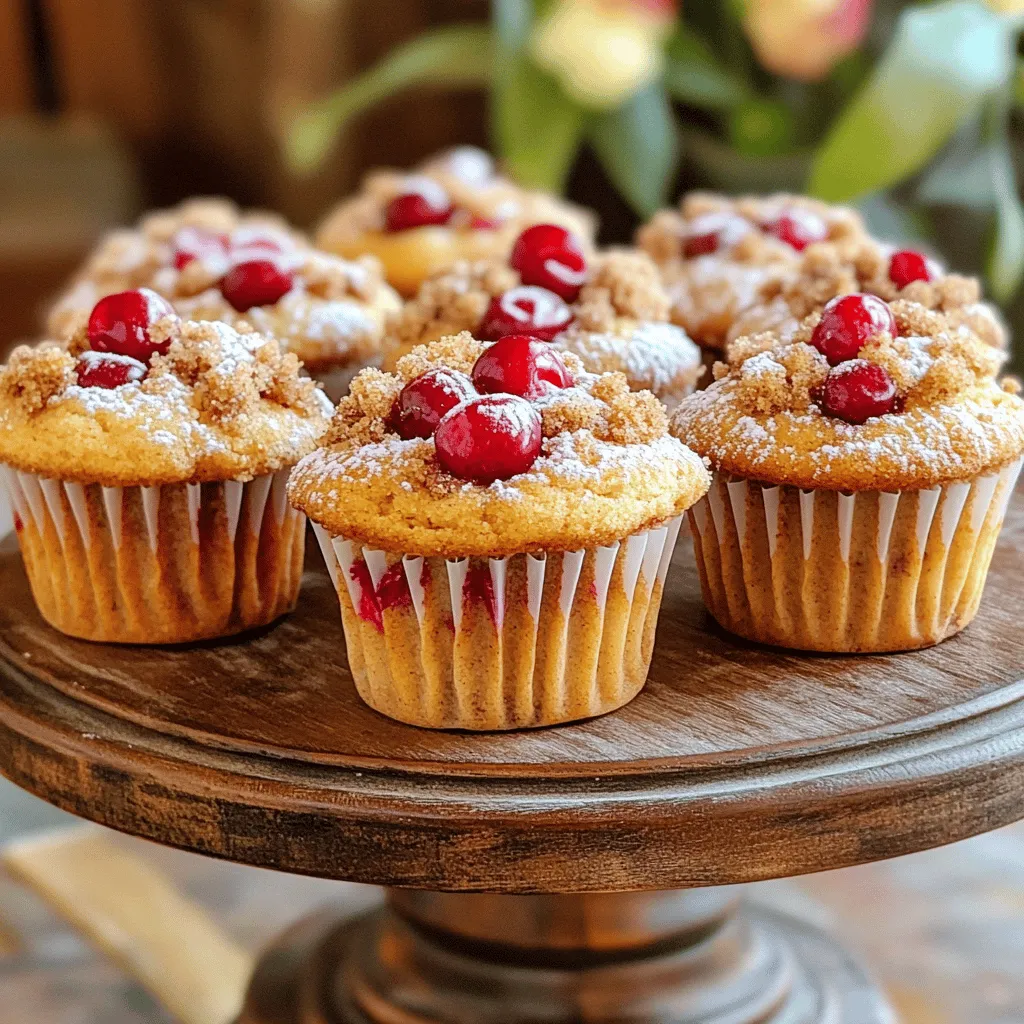
Cherry Coffee Cake Muffins Simple and Tasty Recipe
If you’re craving a fun and tasty twist on classic muffins, I’m here to share a simple and delicious recipe Read Full Recipe -
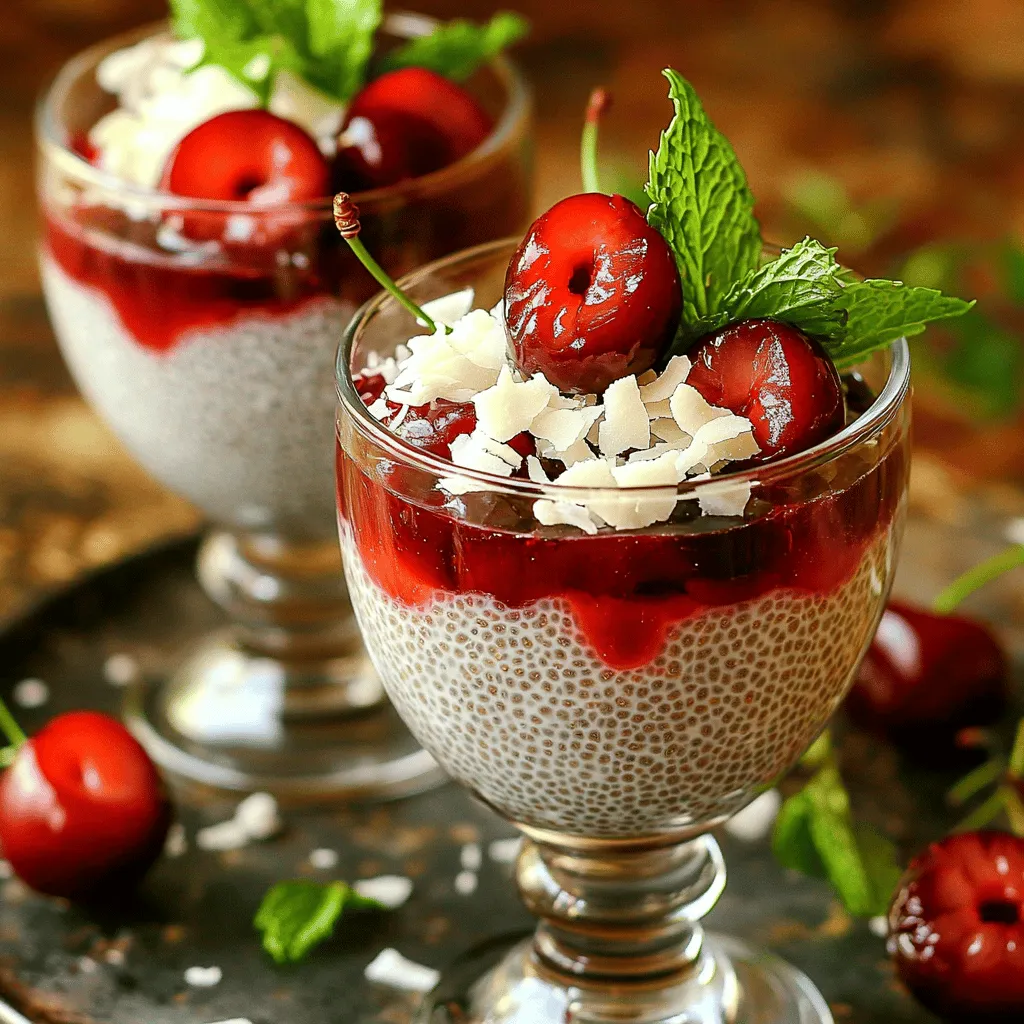
Cherry Coconut Chia Pudding Energizing Healthy Snack
Looking for a quick, tasty snack that’s both sweet and nutritious? Cherry Coconut Chia Pudding hits the mark perfectly! This Read Full Recipe -
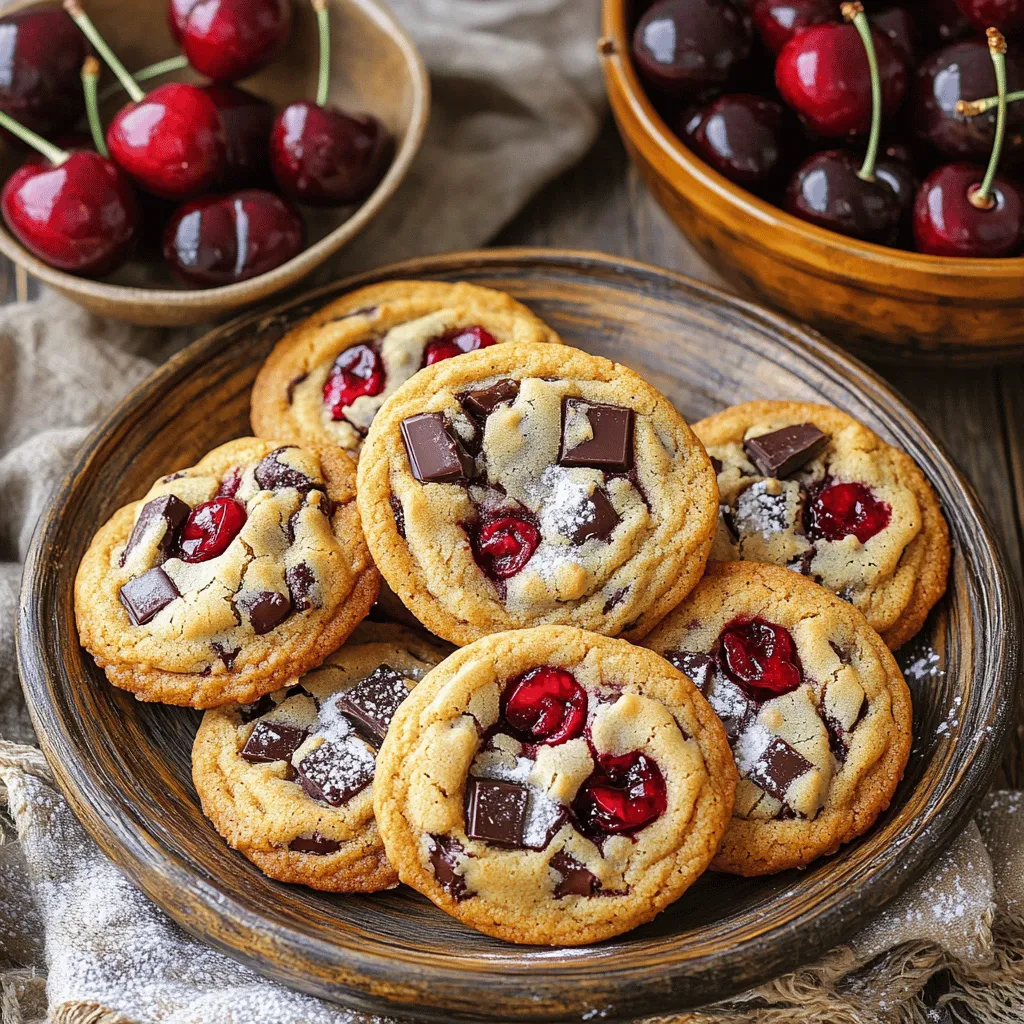
Cherry Chocolate Chunk Cookies Irresistible Treat Recipe
Get ready to indulge in a treat that combines the sweet tang of cherries with rich, dark chocolate. In this Read Full Recipe -

Cherry Nut Energy Bars Quick and Easy Recipe
Looking for a quick snack that fuels your day? These Cherry Nut Energy Bars are perfect for you! Packed with Read Full Recipe -
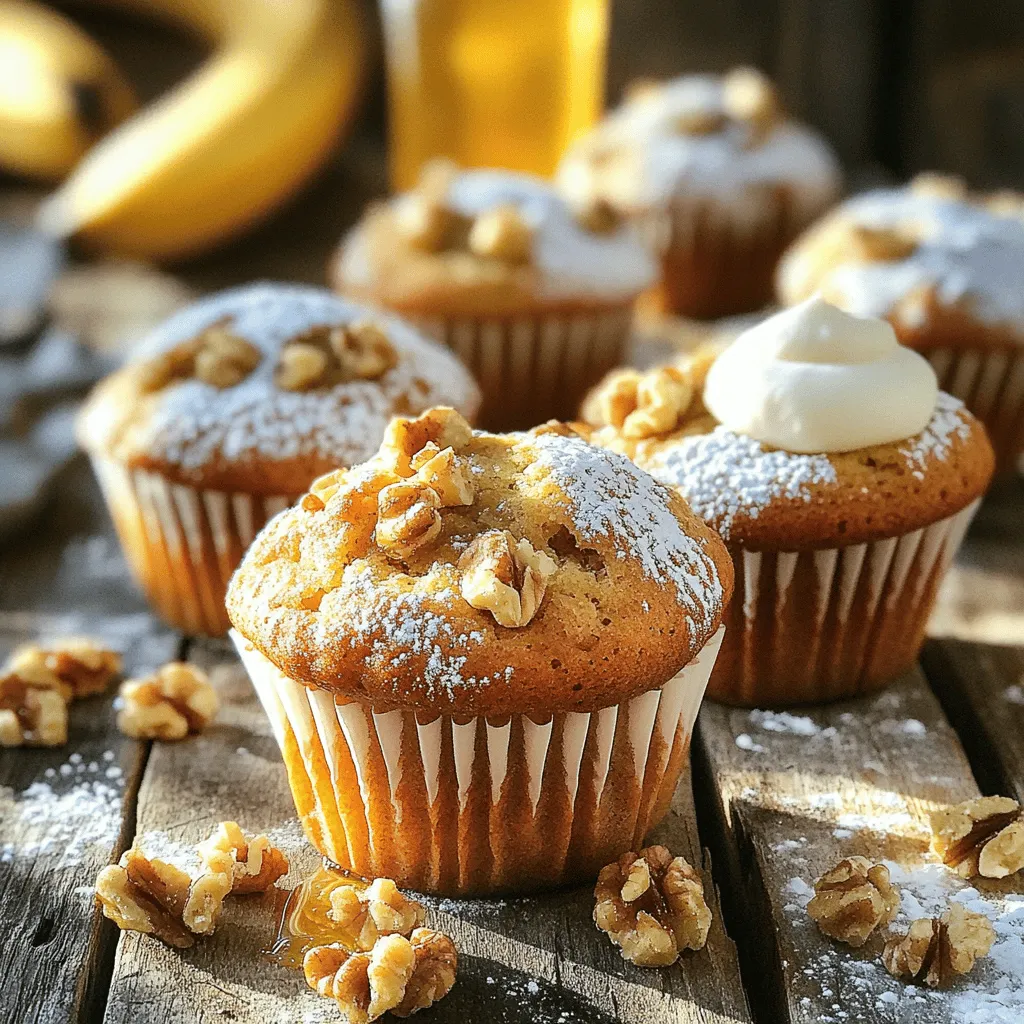
Banana Nut Muffins Quick and Easy Recipe Guide
Welcome to your new favorite baking adventure! In this guide, I’ll show you how to make delicious Banana Nut Muffins Read Full Recipe -
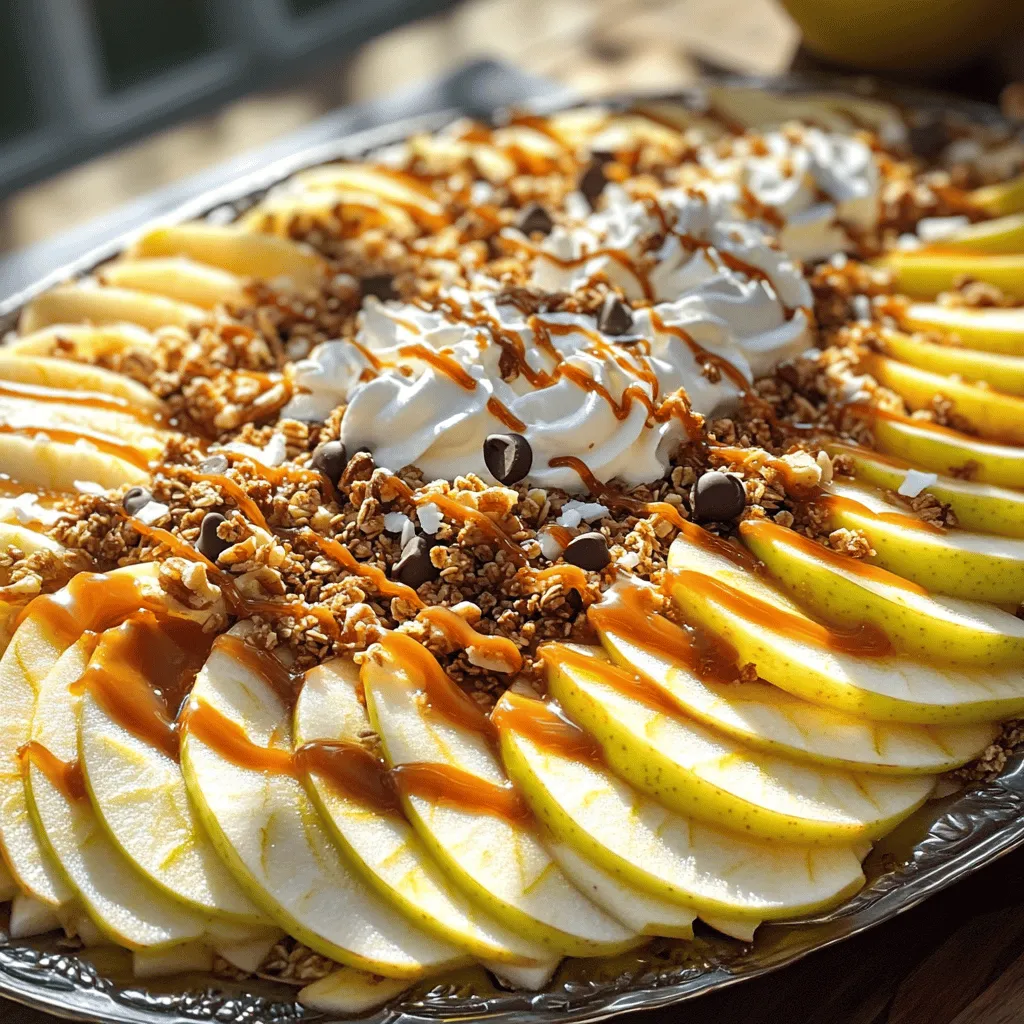
Caramel Apple Nachos Deliciously Simple Treat
Get ready for a snack that’s fun, easy, and oh-so-delicious: Caramel Apple Nachos! This treat lets you enjoy the crispiness Read Full Recipe -

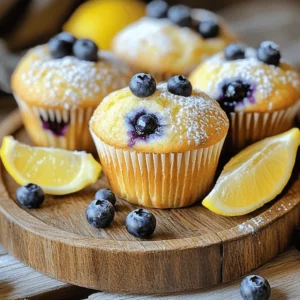
Blueberry Lemon Muffins Flavorful and Simple Recipe
If you crave a delightful treat that bursts with flavor, look no further than my Blueberry Lemon Muffins. This simple Read Full Recipe -
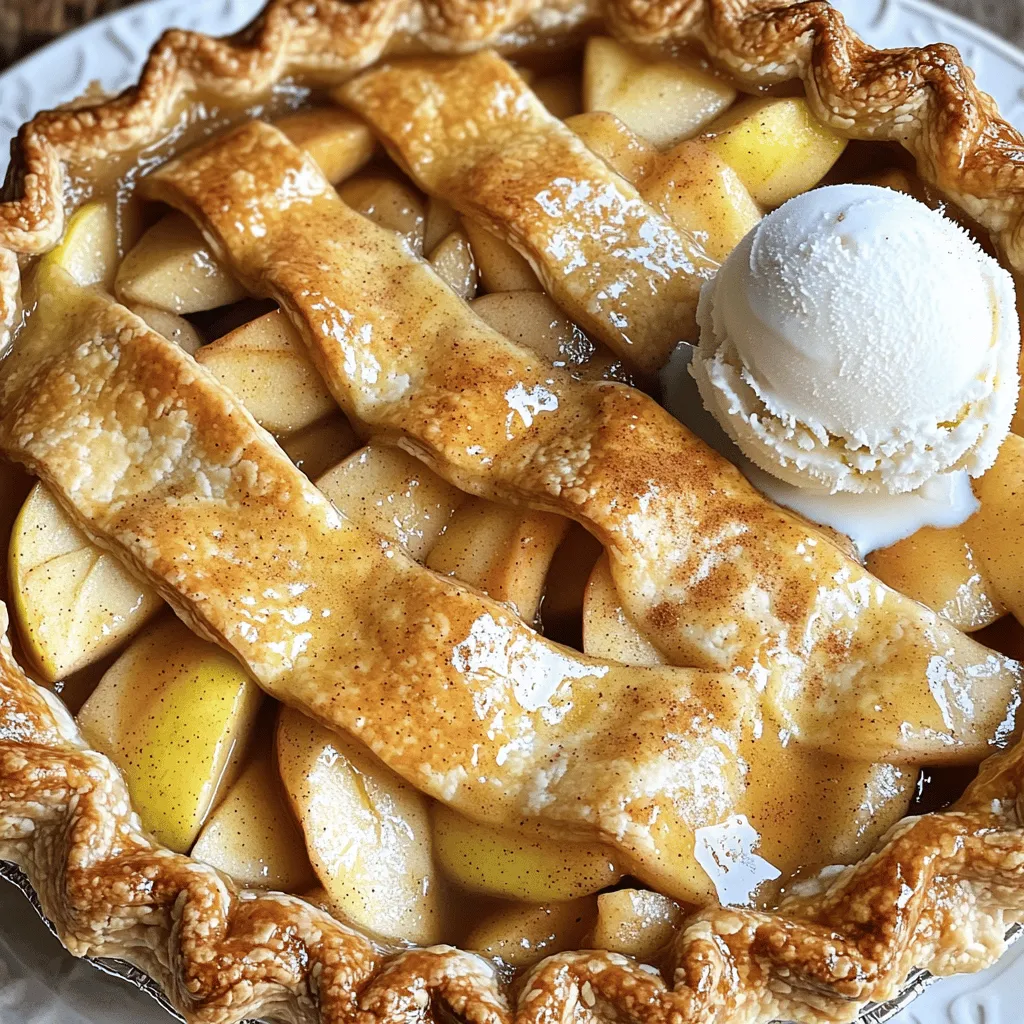
Classic Apple Pie Delightful and Simple Recipe
There’s nothing quite like a warm slice of classic apple pie straight from the oven. In this article, I’ll share Read Full Recipe -

Chocolate Chip Banana Bread Irresistible and Soft
Are you ready to make the softest, most delicious Chocolate Chip Banana Bread ever? This easy recipe gives you the Read Full Recipe -
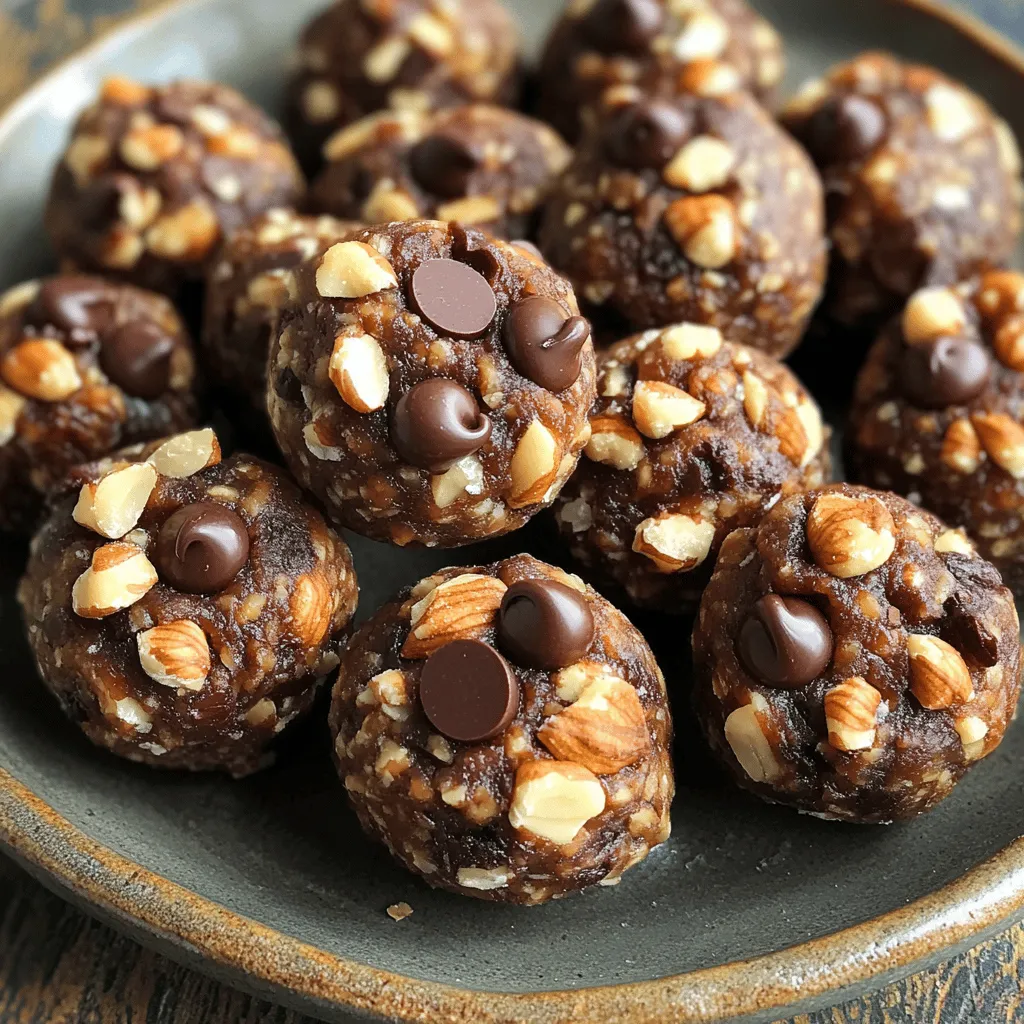
No-Bake Energy Bites Simple and Flavorful Snack
Looking for a quick and tasty snack? You’ll love these No-Bake Energy Bites! Made with simple ingredients like oats, peanut Read Full Recipe
My Latest Recipes

hey,
i’m !
I’m so happy you’re here!
Every dish I share is made with love and care. I hope they bring you the same comfort and joy they bring me. Let’s make memories, one recipe at a time.
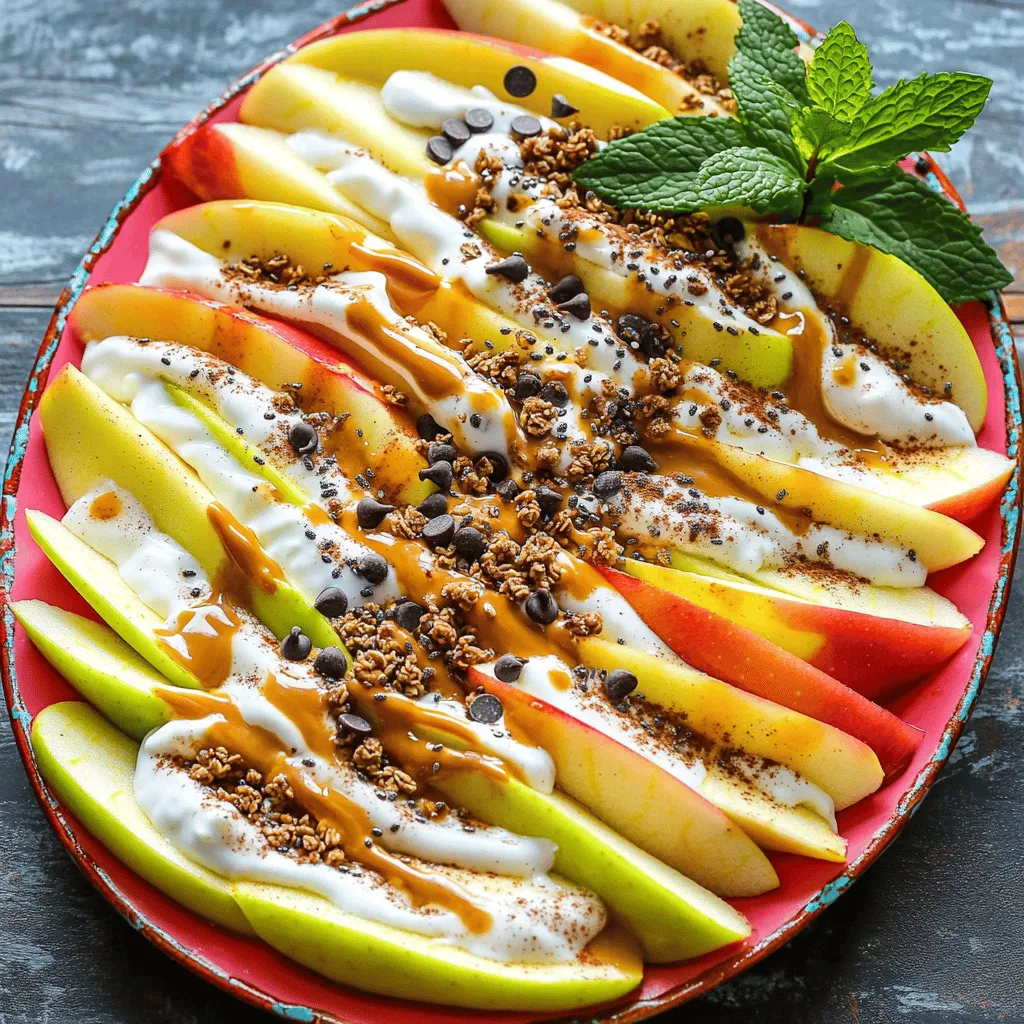
Healthy Apple Nachos Tasty Snack for Everyone
Looking for a fun and healthy snack? Try my Healthy Apple Nachos! Packed with delicious ingredients like apples, nut butter, and Greek yogurt, this…