


Latest & Greatest
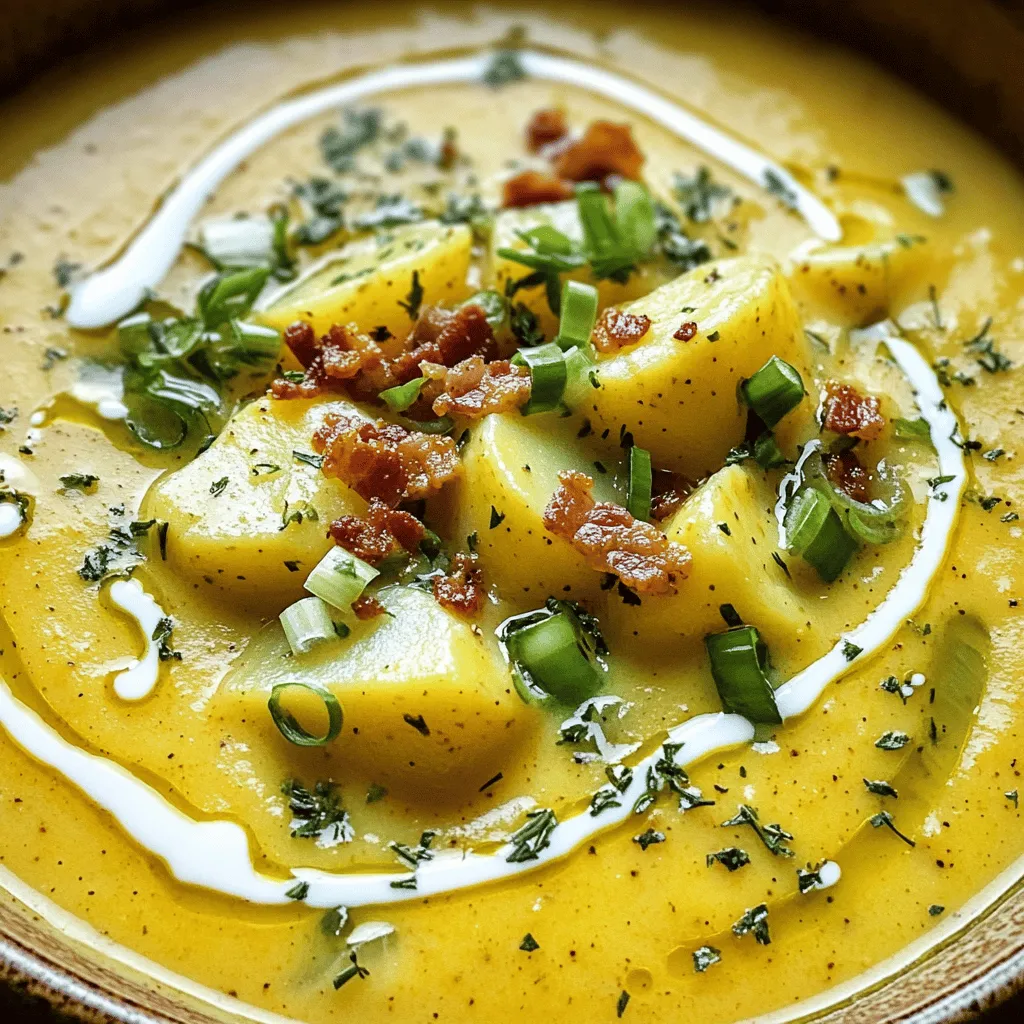
Cajun Potato Soup Hearty and Comforting Delight
Cajun Potato Soup is a warm hug in a bowl, perfect for any day. This hearty dish blends creamy potatoes
Read more…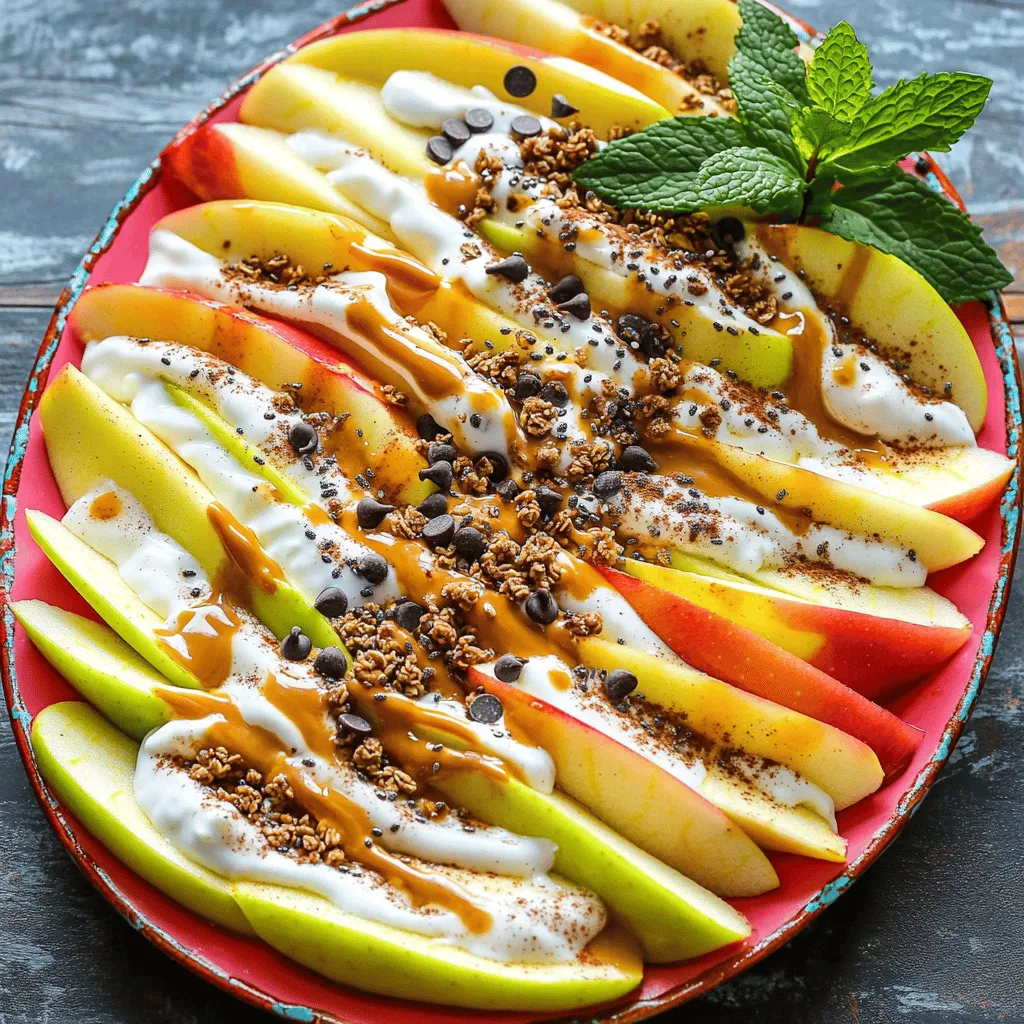
Healthy Apple Nachos Tasty Snack for Everyone
Looking for a fun and healthy snack? Try my Healthy Apple Nachos! Packed with delicious ingredients like apples, nut butter,
Read more…
Milk and Cookies Fudge Delightful Easy Recipe
Get ready to satisfy your sweet tooth with my Milk and Cookies Fudge! This delightful recipe blends the classic flavors
Read more…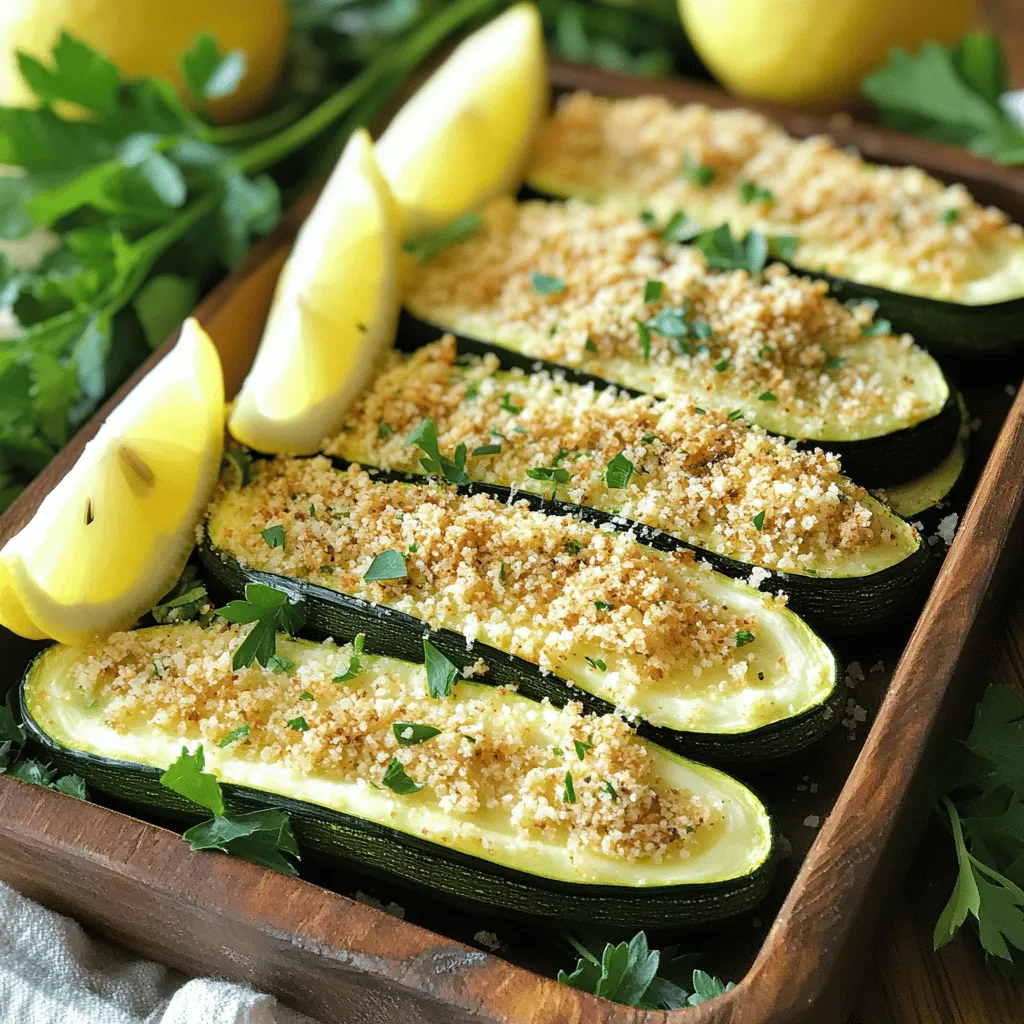
Baked Parmesan Zucchini Crisp and Flavorful Delight
If you’re craving a tasty, healthy dish, Baked Parmesan Zucchini is the answer. This simple recipe packs a crunch and
Read more…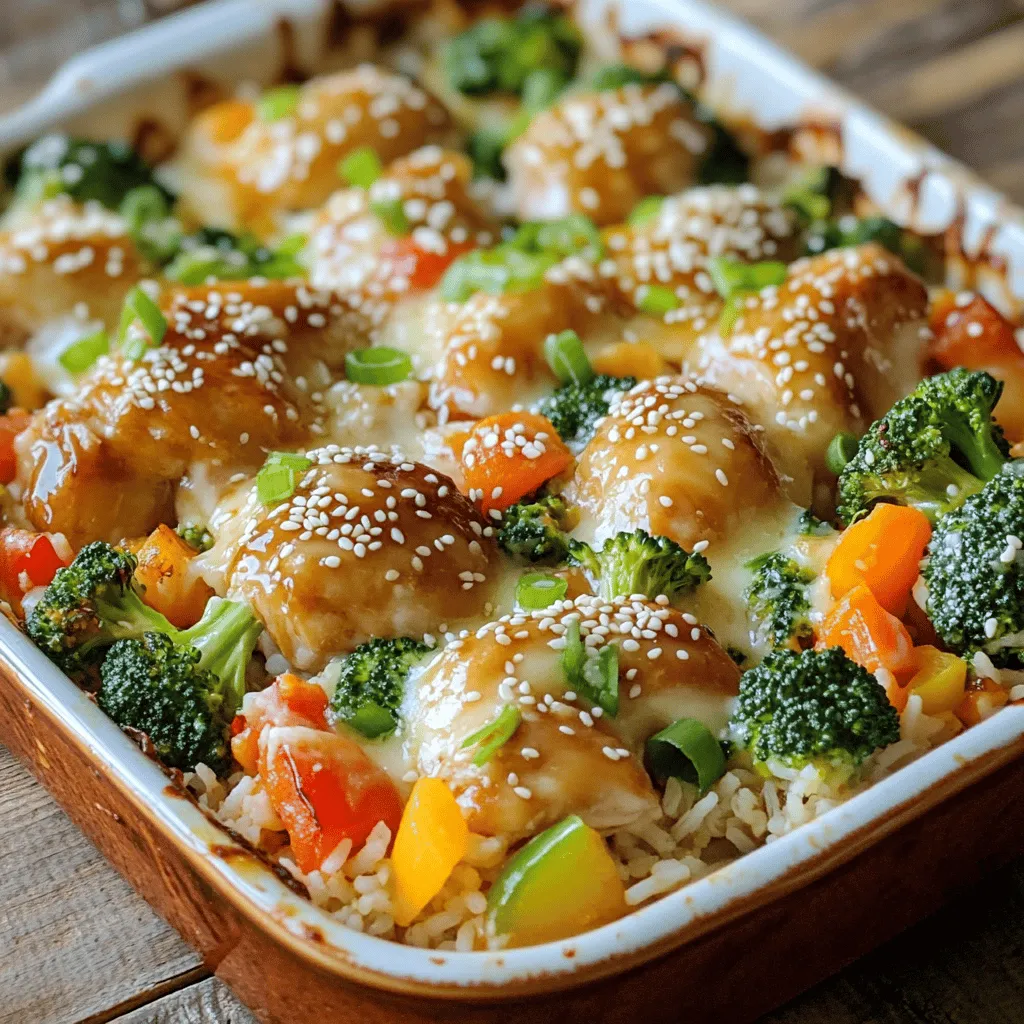
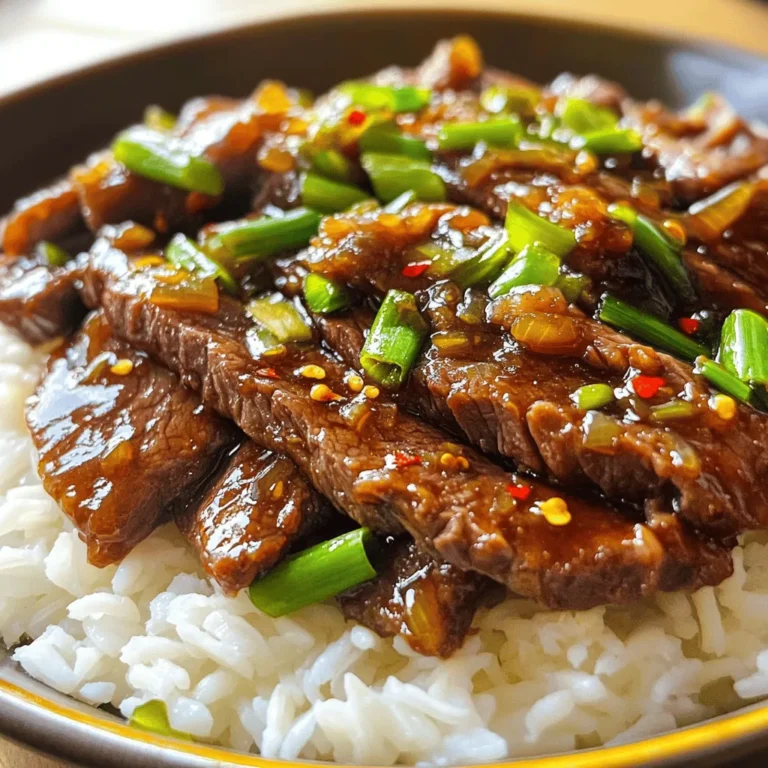
Teriyaki Chicken Casserole Flavorful Weeknight Meal
Weeknight dinners don’t have to be bland or boring. My Teriyaki Chicken Casserole combines juicy chicken, vibrant vegetables, and cheesy
Read more…
Savory Slow Cooker Broccoli Cheese Soup Delight
Are you craving a warm, cheesy bowl of soup? Look no further! My Savory Slow Cooker Broccoli Cheese Soup Delight
Read more…
Decadent Carrot Cake Bars Delightful and Easy Treat
If you’re craving a sweet treat that’s easy to make, you’ve come to the right place! These decadent carrot cake
Read more…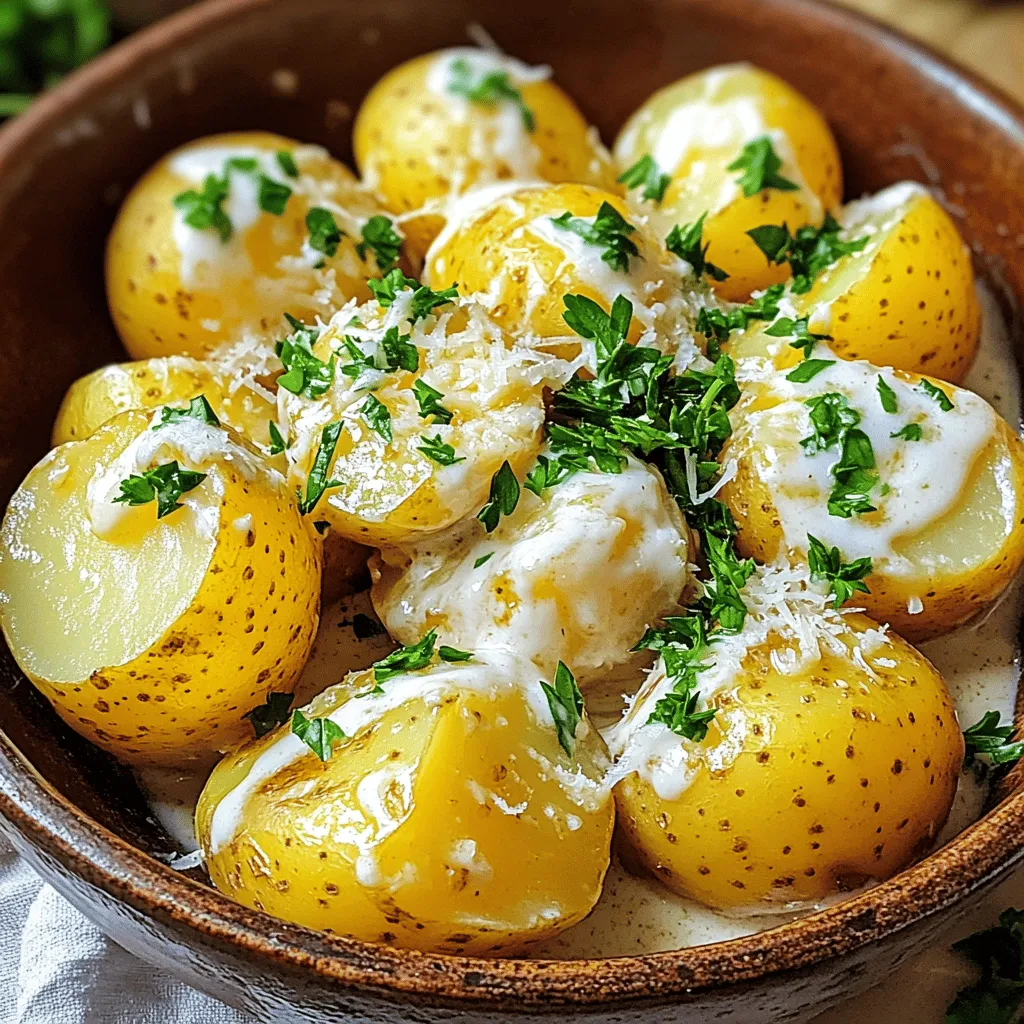
Easy Creamy Garlic Sauce Baby Potatoes Delight
Are you ready to elevate your potato game? In this article, I’ll show you how to make Easy Creamy Garlic
Read more…browse recipes


![To create a tasty bowl of spicy chicken ramen, you need a few key ingredients: - 2 boneless, skinless chicken thighs - 4 cups chicken broth - 2 packs of instant ramen noodles (discard the seasoning packets) - 1 tablespoon sesame oil - 2 garlic cloves, minced - 1-inch piece of ginger, grated - 1 tablespoon red chili paste (or to taste) These ingredients form the base of your ramen. The chicken thighs add rich flavor, while the broth creates a warm, comforting soup. Instant ramen noodles cook quickly and easily. Sesame oil gives a nutty aroma, and garlic, ginger, and chili paste bring depth and heat. You can also add some optional ingredients to make your ramen even better: - 2 soft-boiled eggs - 1 tablespoon miso paste - 1 small carrot, julienned - 3 green onions, chopped - 1 cup baby spinach - Toasted sesame seeds for garnish - Sriracha for extra heat (optional) Soft-boiled eggs add creaminess and richness. Miso paste deepens the umami flavor. Fresh vegetables like carrots, green onions, and spinach not only add color but also nutrients. Garnishes like sesame seeds and Sriracha give a nice finish and extra spice. For the full recipe, check out [Full Recipe]. - Marinate the chicken thighs Start by mixing 1 tablespoon of soy sauce with half of the red chili paste. Place the chicken thighs in this mix and let them sit for about 15 minutes. This helps to infuse the chicken with flavor. - Sauté garlic and ginger In a large pot, heat 1 tablespoon of sesame oil over medium heat. Add minced garlic and grated ginger. Sauté for about 1 minute until the aroma fills the kitchen. This step builds a great base for your ramen. - Brown the chicken Add the marinated chicken thighs to the pot. Cook them for about 5 minutes, turning them until both sides are brown. This locks in the juices and adds depth to the flavor. - Simmer with broth and miso Pour in 4 cups of chicken broth. Bring it to a gentle simmer. Stir in 1 tablespoon of miso paste and the rest of the red chili paste. Let it cook for 15-20 minutes, until the chicken is tender and cooked through. - Cook ramen noodles and vegetables Remove the chicken thighs and shred them with two forks. Return to the pot, add 2 packs of instant ramen noodles, and cook them according to package instructions, usually about 3 minutes. In the last minute, add the julienned carrot, chopped green onions, and baby spinach. This will keep the vegetables crisp and fresh. - Assemble in bowls with garnishes Divide the noodles into bowls. Top with the shredded chicken and soft-boiled eggs if you like. Ladle the broth and veggies over everything. Finish with a sprinkle of toasted sesame seeds and a drizzle of Sriracha for extra heat. Enjoy your flavorful and satisfying meal! For the full recipe, check out the details above. To make the best spicy chicken ramen, you can adjust the spice level. If you want it milder, use less chili paste. For more heat, add extra chili paste or Sriracha. The goal is to find a balance that suits your taste. The quality of your broth is key. A rich, homemade chicken broth gives the best flavor. If you use store-bought broth, look for low-sodium options. This way, you can control the salt in your dish. Shredding chicken efficiently can save time. After cooking, let the chicken cool for a few minutes. Use two forks to shred it quickly. This gives you tender pieces that blend well with the noodles. Timing your veggies is important for the right texture. Add the carrots, green onions, and spinach at the end. This keeps them crisp and bright. Just a minute in the broth will do! Bowl arrangement adds to the meal's appeal. Place the noodles at the bottom, then top with chicken and veggies. Ladle the broth over everything to blend the flavors. For garnishes, get creative! A sprinkle of sesame seeds adds crunch. A drizzle of Sriracha around the edges makes it pop. You can also add a slice of green onion for color. This makes your ramen look as good as it tastes! {{image_2}} You can easily switch the chicken with tofu. Use firm tofu for a good texture. Just cube it and marinate like you would chicken. For the broth, consider using vegetable broth instead of chicken broth. This allows the flavors to stay rich while keeping it vegetarian. If you love heat, try different chili pastes. Gochujang adds a sweet and spicy kick. You can also add toppings like kimchi for more flavor. The tangy taste of kimchi pairs well with ramen. Don't forget to sprinkle some green onions for extra crunch. For a gluten-free meal, use zucchini noodles or rice noodles instead of traditional ramen. Both options are tasty and work well with the broth. Ensure all your ingredients are gluten-free. This way, everyone can enjoy a warm bowl of spicy chicken ramen. Want to see the complete recipe? Check out the Full Recipe for more details! To keep your spicy chicken ramen fresh, cool it down first. Place it in the fridge within two hours after cooking. Use airtight containers to store it. This helps keep the flavors locked in. I recommend glass or BPA-free plastic containers for best results. Reheat ramen on the stove for the best taste. Pour the broth and noodles into a pot. Heat on low until warm. Stir gently to avoid breaking the noodles. You can also use a microwave, but this can change the texture. If using a microwave, heat in short bursts, stirring in between. You can freeze your ramen for up to three months. Freeze the broth and noodles separately to keep them fresh. For the broth, let it cool and pour it into freezer bags. For noodles, place them in a separate airtight container. When ready to eat, thaw the broth in the fridge overnight. Reheat and add the noodles at the end. This keeps everything tasting great. For this spicy chicken ramen, I recommend using instant ramen. Instant ramen cooks quickly and absorbs flavors nicely. Fresh noodles can also work well, but they may take longer to cook. Some good brands for instant ramen are Nissin and Maruchan. These brands offer tasty options that make meal prep easier. Yes, you can prepare parts of this recipe ahead. Marinate the chicken thighs and chop the veggies in advance. Store the marinated chicken in the fridge for up to a day. You can also cook the broth and noodles separately, then store them. When ready to eat, heat the broth and add the noodles and veggies. This method keeps the ramen fresh and tasty. To reduce heat, use less chili paste or skip it altogether. You can replace it with a milder sauce, like sweet chili sauce. If you want more spice, add extra chili paste or some crushed red pepper. Sriracha is another great way to kick up the heat. Just drizzle it on top before serving. This blog post covered how to make spicy chicken ramen. We explored essential ingredients and optional add-ons that enhance flavor. You learned step-by-step instructions, cooking tips, and variations to suit your needs. In conclusion, making spicy chicken ramen is easy and fun. You can customize it to match your taste. Enjoy your ramen journey and impress your friends with your new skills!](https://easycookingbite.com/wp-content/uploads/2025/06/47ba345f-8009-4d16-9e24-e15ee408d9b5.webp)
Spicy Chicken Ramen Flavorful and Satisfying Meal
Are you ready for a bowl of Spicy Chicken Ramen that warms your soul? This flavorful and satisfying meal is perfect for any day,…
My Latest Desserts
-

Peach Streusel Coffee Cake Delightful and Simple Recipe
If you love a good coffee cake, you’ll adore my Peach Streusel Coffee Cake recipe. It’s sweet, moist, and full Read Full Recipe -

Easy Lemon Loaf Cake Simple and Tasty Recipe
If you love bright, citrusy treats, then this Easy Lemon Loaf Cake is for you! It’s simple to make and Read Full Recipe -

Frozen Yogurt Granola Cups Delightful and Healthy Treat
Looking for a cool and tasty treat? Frozen yogurt granola cups are the answer! These delightful snacks blend creamy yogurt Read Full Recipe -

Raspberry Lemon Yogurt Parfait Tasty and Simple Treat
Looking for a quick, delicious treat? My Raspberry Lemon Yogurt Parfait is simple to make and bursting with flavor! This Read Full Recipe -
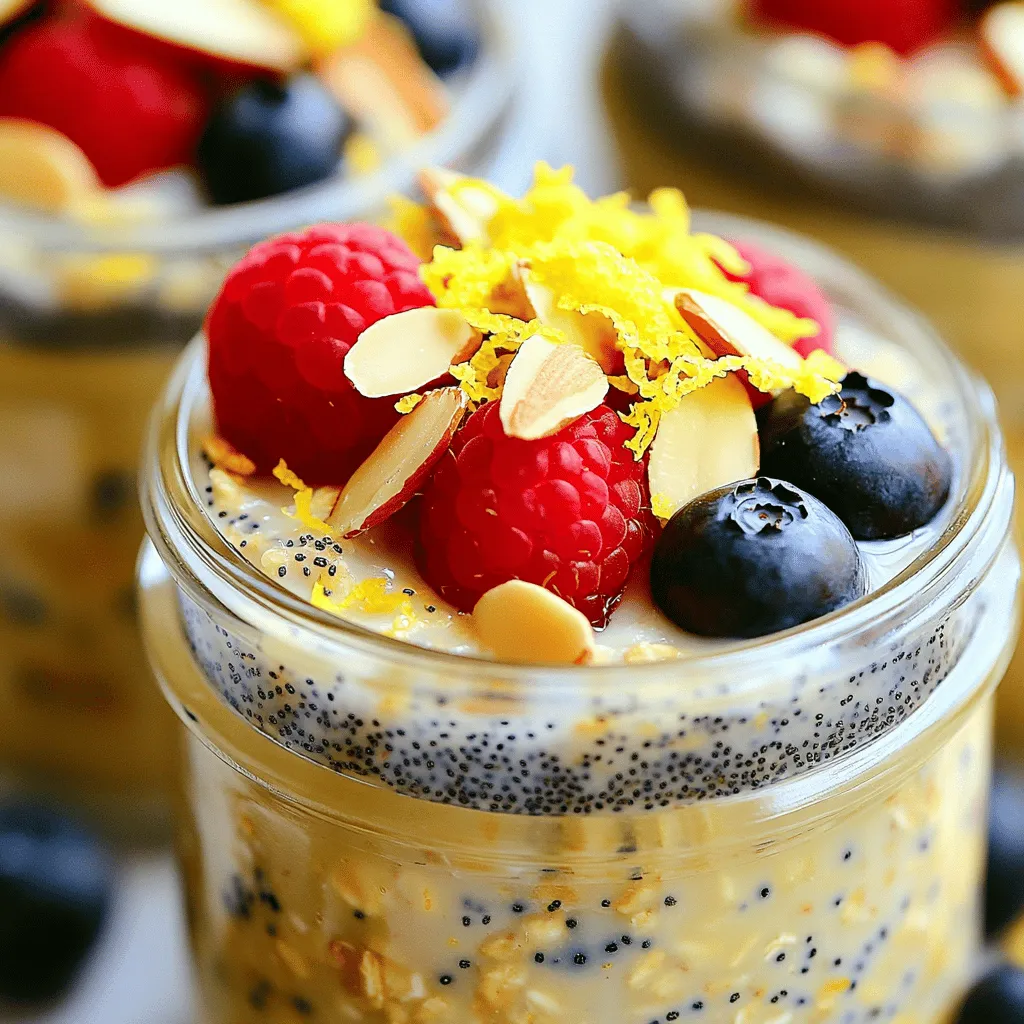
Lemon Poppyseed Overnight Oats Quick and Easy Recipe
Wake up to a burst of fresh flavor with my Lemon Poppyseed Overnight Oats recipe! This quick and easy breakfast Read Full Recipe -
Peanut Butter Energy Balls Easy Healthy Snack Recipe
Looking for a tasty treat that’s also healthy? Peanut Butter Energy Balls are your answer! This easy snack recipe packs Read Full Recipe -

Banana Nut Muffins Delightfully Soft and Tasty Recipe
Are you ready to bake the softest, tastiest banana nut muffins ever? I’ll take you through a simple recipe that Read Full Recipe -

Chocolate Peanut Butter Nice Cream Easy and Tasty Treat
Craving a delicious treat that’s both easy and healthy? Chocolate Peanut Butter Nice Cream is your answer! This creamy dessert Read Full Recipe -

Vegan Chocolate Mousse Rich and Creamy Dessert Recipe
Craving a rich, creamy dessert that’s completely plant-based? Look no further! This Vegan Chocolate Mousse is simple to make and Read Full Recipe -

Delicious Banana Oatmeal Pancakes Healthy Breakfast Option
Start your day right with delicious banana oatmeal pancakes! These pancakes are healthy, easy to make, and full of flavor. Read Full Recipe
My Latest Recipes

hey,
i’m !
I’m so happy you’re here!
Every dish I share is made with love and care. I hope they bring you the same comfort and joy they bring me. Let’s make memories, one recipe at a time.
. To cook chicken evenly, start with smaller pieces. Diced chicken cooks faster and more evenly. Use medium heat to avoid burning. Sauté until golden brown, about 5-7 minutes. This locks in flavor and keeps it juicy. For perfect vegetable tenderness, add your veggies based on their cooking time. Broccoli and bell peppers take longer than shredded carrots. Cook broccoli and peppers first. Add carrots in the last few minutes of cooking. This way, they stay crisp and colorful. Serve your casserole hot, right from the oven. It tastes best when warm and cheesy. For extra fun, offer chopsticks alongside forks. This adds a playful touch to your meal. Pair your casserole with simple sides. Steamed rice or a fresh salad complements it well. You can also serve it with pickled vegetables for a tangy crunch. To prepare in advance, cook the chicken and chop the veggies a day ahead. Store them in the fridge until you're ready to mix. This saves time on busy weeknights. For reheating, use the oven to keep the cheese melted. Cover the dish with foil to prevent drying out. Heat at 350°F (175°C) until warmed through, about 20-25 minutes. Enjoy your flavorful Teriyaki Chicken Casserole any night of the week! For the full recipe, check [Full Recipe]. {{image_2}} For those who need gluten-free options, swap the teriyaki sauce for a gluten-free brand. Use tamari or coconut aminos for great flavor. You can also use rice noodles instead of rice for a fun twist. If you want a vegetarian or vegan version, replace chicken with tofu or tempeh. Make sure to press the tofu first to remove excess water. Use a plant-based teriyaki sauce to keep it vegan-friendly. To add more depth to your teriyaki chicken casserole, consider introducing spices or herbs. Ginger, garlic, or even a dash of chili powder can enhance the flavor. A sprinkle of black sesame seeds can add a nice crunch and taste. Adjusting the sweet and savory balance can also elevate your dish. If you like it sweeter, add a bit of honey or brown sugar. For extra savory notes, add soy sauce or a splash of rice vinegar. You can serve the casserole in two styles: individual portions or family-style. For individual servings, use ramekins or small bowls. This makes for a fun and easy meal, especially for kids. For a family-style casserole, serve directly from the dish. Pair it with Asian-inspired side dishes like a simple cucumber salad or steamed edamame. This adds freshness and balances the rich flavors of the casserole. For the complete cooking process, check out the Full Recipe. After you enjoy your teriyaki chicken casserole, let it cool first. This step helps avoid moisture buildup. Once cool, pack the leftovers in an airtight container. Glass or plastic containers work well. Make sure the lid seals tightly to keep air out. You can freeze your casserole before or after baking. If you freeze it before baking, cover it tightly. Use aluminum foil or plastic wrap. When ready to bake, thaw it overnight in the fridge. If you bake first, cool it completely before freezing. Thaw the baked casserole in the fridge before you reheat it. In the fridge, your casserole lasts about 3 to 4 days. If you freeze it, it can stay good for up to 3 months. Always check for signs of spoilage. If you see mold or an off smell, throw it away. You can add hot sauce or red pepper flakes to your casserole. Start with a little, then taste. If you want more heat, add a bit more. This gives your dish a nice kick. You can also try using spicy teriyaki sauce. It adds flavor along with heat. Yes, you can! Cooking in a slow cooker is a great idea. First, brown the chicken in a pan. Then, add all ingredients to the slow cooker. Cook on low for 4 to 6 hours or high for 2 to 3 hours. Just check that the chicken is fully cooked before serving. Beyond sesame seeds and green onions, try these toppings: - Crushed peanuts for crunch - Chopped cilantro for freshness - Sliced jalapeños for heat - Avocado for creaminess These toppings add flavor and make your dish look great. Feel free to mix and match for a fun twist! For the full recipe, check out the earlier section. This Teriyaki Chicken Casserole is simple and tasty. You learned about the key ingredients and how to prepare them. I shared tips for ingredient swaps and ways to make it healthy. The cooking steps will help you create a flavorful meal. Lastly, I provided storage info and answers to common questions. Enjoy making this dish for busy nights or creating new flavors. Try your own ideas and share your results!](https://easycookingbite.com/wp-content/uploads/2025/05/457ab190-b4c0-4b09-90b4-eb72b6cb8770-300x300.webp)

![For the Savory Quinoa Salad with Feta, gather your ingredients to create a tasty dish. This salad is full of vibrant flavors and textures. You can find the complete recipe included below. Fresh ingredients make this salad pop. You will need: - 1 cup cherry tomatoes, halved - 1 cucumber, diced - 1 red bell pepper, diced - 1/2 red onion, finely chopped - 1/4 cup fresh parsley, chopped - 1/4 cup Kalamata olives, pitted and sliced These fresh items add crunch and color. The tomatoes bring sweetness, while cucumbers add a refreshing bite. The red onion gives a nice zing, and olives add a briny touch. Quinoa is the star of this dish. You will need: - 1 cup quinoa - 2 cups vegetable broth (or water) - 1 cup feta cheese, crumbled Quinoa is a great source of protein and fiber. It cooks up fluffy and light. Feta cheese adds creaminess and tang, bringing it all together. The broth makes the quinoa even more flavorful. Enjoy this nutrient-packed dish that balances flavors and textures! Start by rinsing the quinoa. Use a fine mesh strainer. This step removes the bitter taste. Next, bring two cups of vegetable broth or water to a boil in a medium saucepan. Add one cup of rinsed quinoa. Lower the heat, cover the pot, and let it simmer for 15 to 20 minutes. The quinoa will absorb all the liquid and turn fluffy. After cooking, remove it from heat and let it cool. While the quinoa cools, take a large bowl. In the bowl, combine one cup of halved cherry tomatoes, one diced cucumber, one diced red bell pepper, and half a finely chopped red onion. Add one-fourth cup of sliced Kalamata olives. Mix these fresh ingredients well to blend the colors and flavors. Once the quinoa is cool, add it to the bowl with the vegetables. Drizzle three tablespoons of olive oil and two tablespoons of lemon juice over the mixture. Sprinkle in one teaspoon of dried oregano, and season with salt and pepper to taste. Toss everything gently to combine. Finally, fold in one cup of crumbled feta cheese and one-fourth cup of chopped parsley. This adds a fresh aroma and enhances the dish. Allow the salad to sit for at least 15 minutes. This waiting time helps the flavors meld. For serving, use a large bowl or individual bowls. Garnish with a sprig of parsley and some extra feta for a stunning display. Enjoy this nutrient-packed dish, inspired by the [Full Recipe]. To boost flavor, try adding fresh herbs. Basil or mint works well. You can also add more lemon juice for a brighter taste. A pinch of chili flakes gives it a nice kick. Mix in some garlic for a savory touch. Always taste and adjust the seasoning to your liking. For a crunchy bite, add nuts or seeds. Almonds or sunflower seeds are great options. You can also switch up the quinoa. Use tri-color quinoa for more color and texture. If you like creaminess, try mixing in avocado. This will make the salad richer and smoother. Presentation matters! Serve the salad in a large bowl for sharing. Top it with a sprinkle of feta and parsley for color. For individual servings, use small bowls. You can layer the ingredients to show off the colors. A drizzle of olive oil on top adds a nice shine. For the complete recipe, check out the Full Recipe section. {{image_2}} You can change up the salad by adding more veggies. Try using spinach, kale, or arugula for a fresh twist. Carrots add a nice crunch, while roasted zucchini gives a warm flavor. You can also toss in some sweet corn or peas for extra sweetness. Each vegetable brings its own taste and nutrients. Want to boost the protein? Add cooked chicken, shrimp, or chickpeas. Black beans also work well for a hearty touch. If you like fish, grilled salmon adds a rich flavor. These protein options make the salad even more filling and satisfying. For a vegan version, skip the feta cheese. Use avocado or a dairy-free cheese instead. You can also mix in hemp seeds for extra protein and healthy fats. These swaps keep the salad tasty and nutrient-rich while fitting a vegan diet. Don't forget to check out the Full Recipe to create your own savory quinoa salad! After enjoying your savory quinoa salad, store leftovers in an airtight container. This will keep the salad fresh for up to three days in the fridge. Make sure to keep it cool. If you notice any moisture, drain it before sealing the container. Always check for any signs of spoilage before eating. You can freeze this salad, but it might change the texture of some ingredients. To freeze, place the salad in a freezer-safe container. It can last up to three months. However, I suggest freezing only the quinoa and veggies, leaving out the feta and fresh herbs. Add these back in when you thaw and serve. When you're ready to eat, thaw the salad overnight in the fridge. You can gently reheat the quinoa in the microwave. Add a splash of water or olive oil to keep it moist. Avoid reheating the feta, as it tastes best fresh. Mix the feta back in after reheating for the best flavor. Enjoy your meal! Yes, you can make this salad ahead of time. It tastes great when chilled. Just keep it in the fridge for up to three days. The flavors will blend nicely as it sits. To keep the feta fresh, add it just before serving. This way, it stays creamy and doesn’t get soggy. Quinoa cooks quickly. It usually takes about 15 to 20 minutes. Start by bringing your vegetable broth or water to a boil. Once you add the rinsed quinoa, reduce the heat and cover it. You’ll know it’s done when all the liquid is absorbed and the grains are fluffy. This salad pairs well with many dishes. Here are a few favorites: - Grilled chicken or fish adds protein. - Serve it with roasted veggies for more flavor. - A slice of crusty bread complements the meal nicely. - You can also enjoy it with a light soup on the side. These pairings make your meal even more satisfying and delicious. For more ideas, check the Full Recipe. This blog post covered a tasty salad recipe. We looked at fresh produce, grains, and dairy options. You learned step-by-step instructions for preparation, mixing, and serving. Our tips provided ways to enhance flavor and texture. We also explored variations, storage info, and answered common questions. Overall, making this salad is fun and easy. Enjoy your healthy dish any day!](https://easycookingbite.com/wp-content/uploads/2025/05/2ac94acb-0930-49f9-a95e-b04137fb382e-300x300.webp)
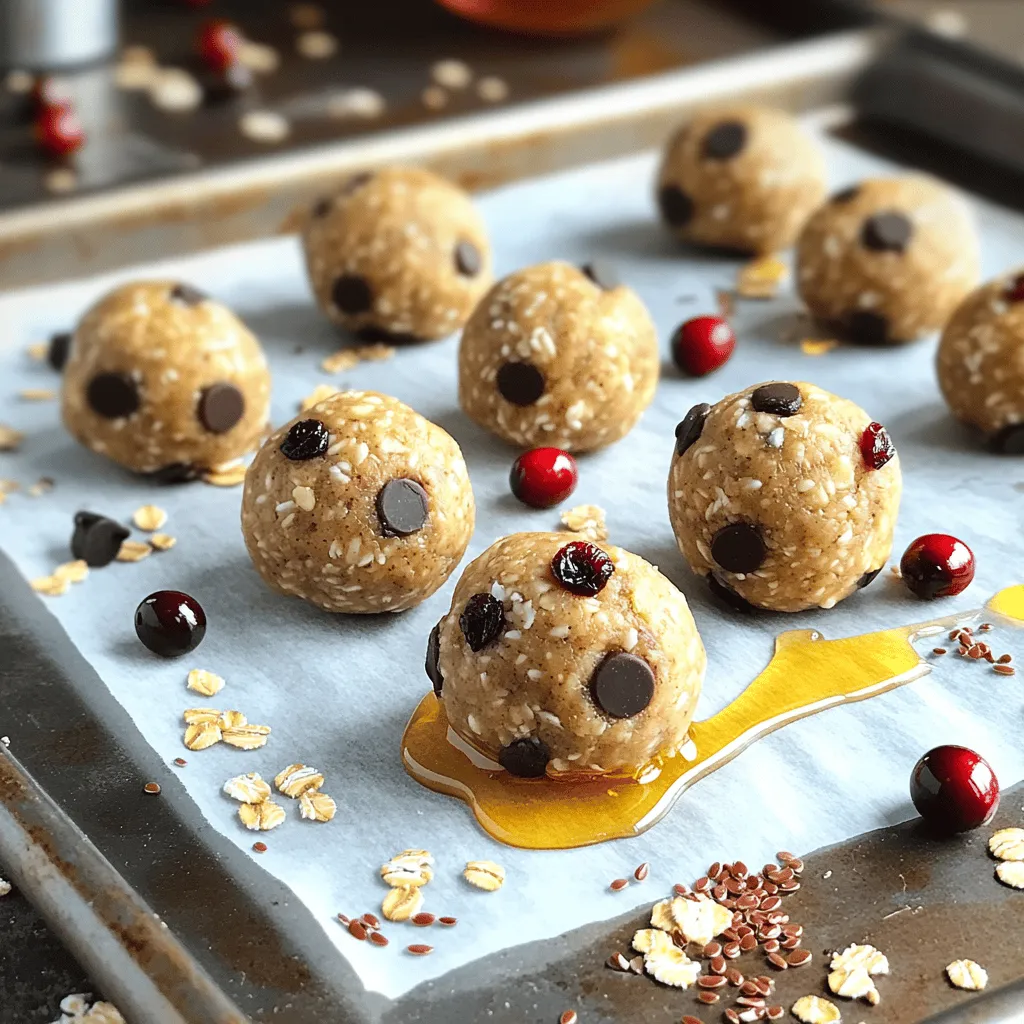
No-Bake Chocolate Oatmeal Cookies Easy and Quick Treat
Looking for a quick and easy treat that satisfies your sweet tooth? These No-Bake Chocolate Oatmeal Cookies are just what you need! With just…