

Latest & Greatest
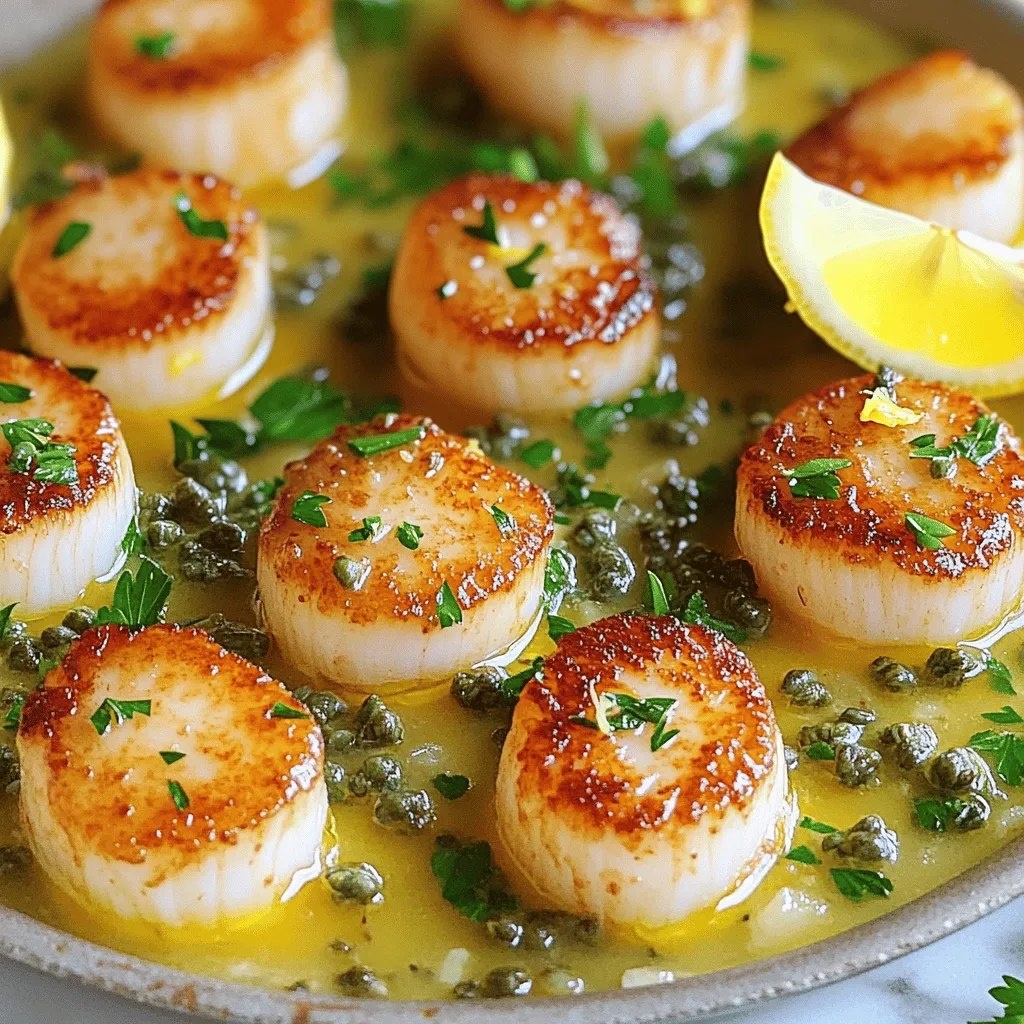
Pan Seared Scallops with Lemon Caper Sauce Delight
Welcome to my guide on making Pan Seared Scallops with Lemon Caper Sauce! If you love seafood, scallops are a
Read more…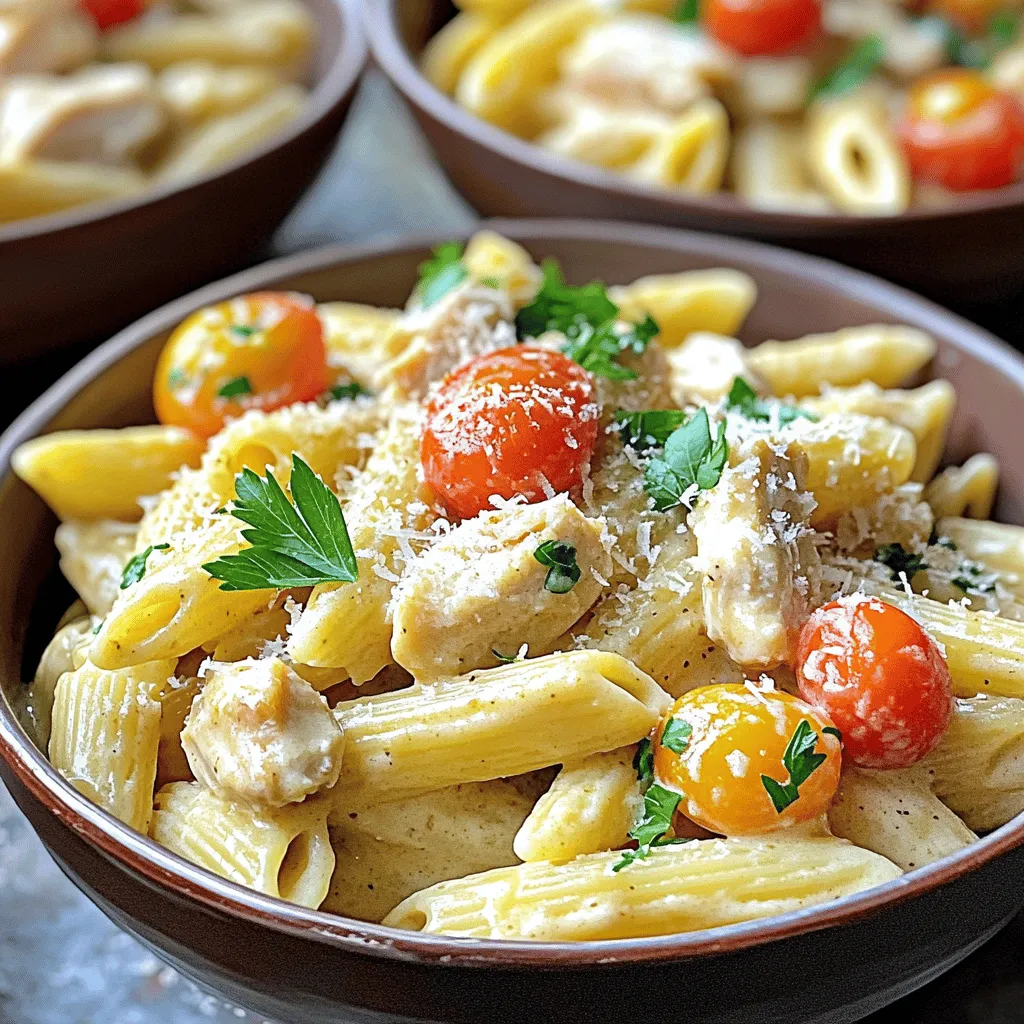
Creamy Chicken Ranch Pasta Tasty and Easy Recipe
Are you ready to dive into a creamy, savory delight? My Creamy Chicken Ranch Pasta recipe is not just tasty
Read more…
Cinnamon Sugar Pecans Simple and Tasty Snack Recipe
Craving a snack that’s easy to make and full of flavor? You’re in the right place! In this guide, I’ll
Read more…
Lemon Ricotta Cookies Delightful and Soft Treat
Ready to bake something special? Lemon Ricotta Cookies are your answer! These delightful, soft treats are bursting with bright lemon
Read more…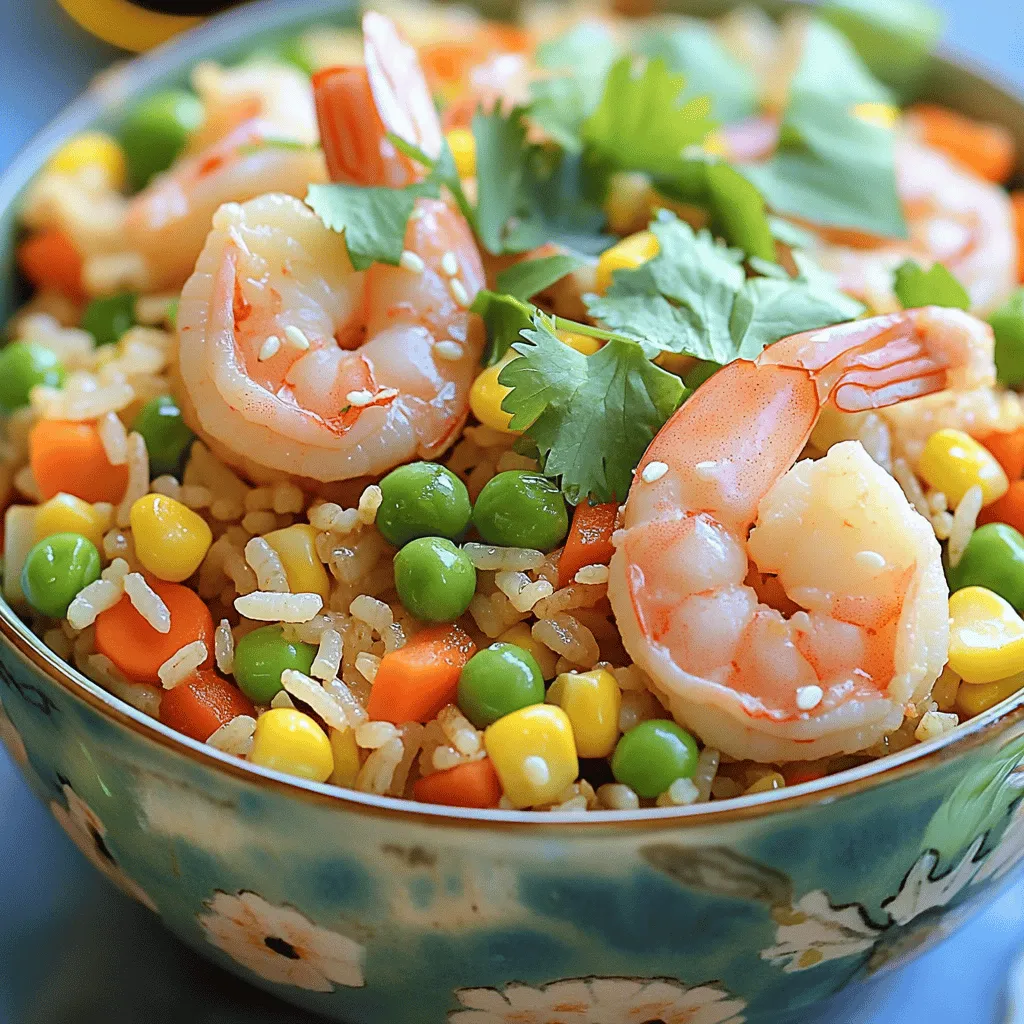
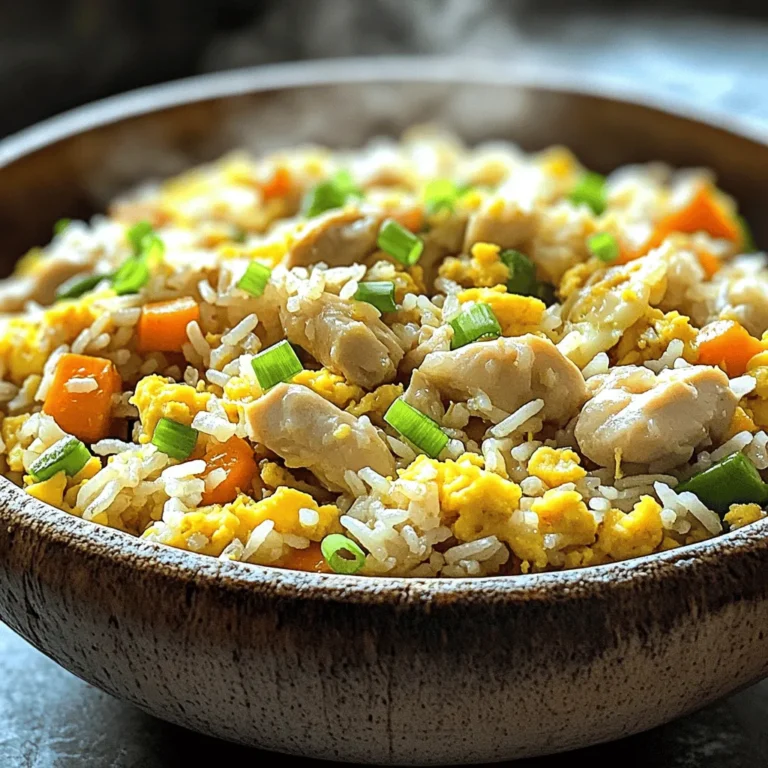
Shrimp Fried Rice Recipe Simple and Savory Delight
Dive into a bowl of comfort with my Shrimp Fried Rice recipe! This simple yet satisfying dish packs bold flavors
Read more…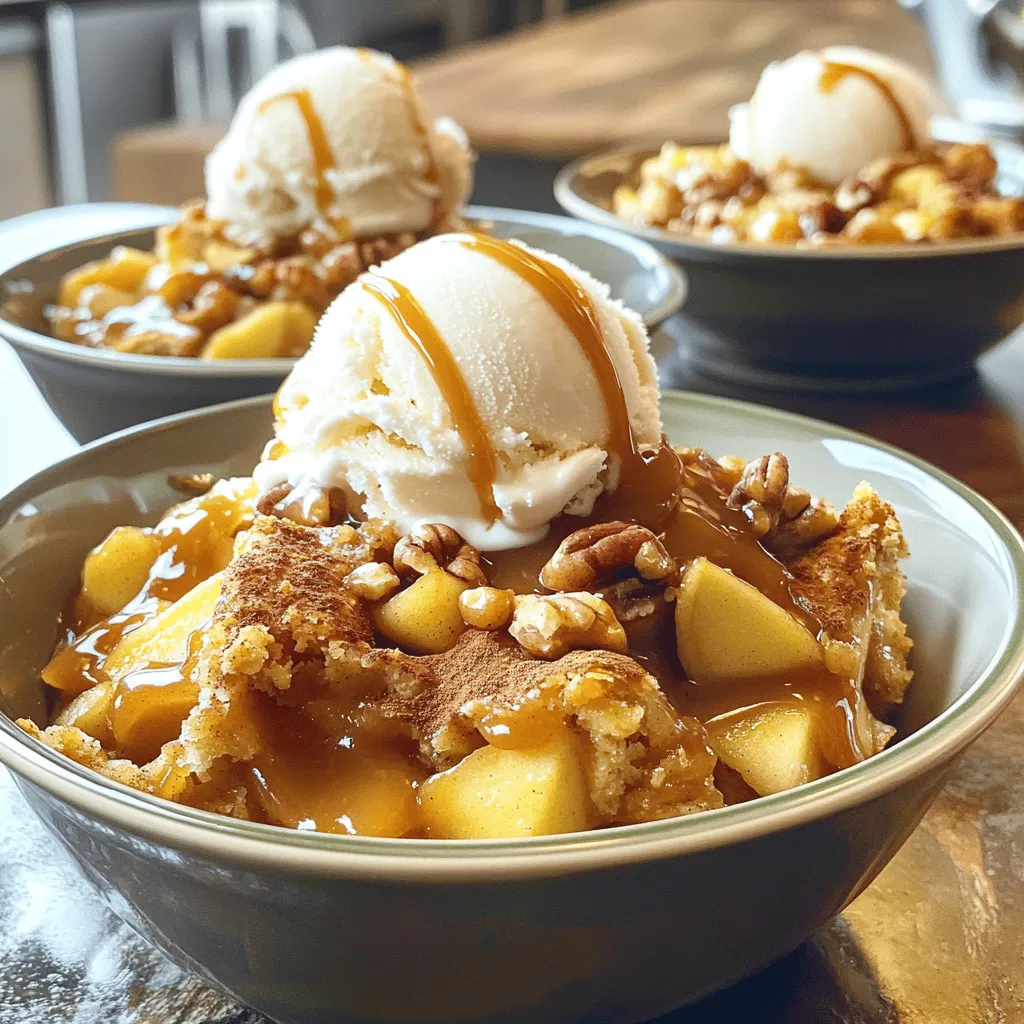
Caramel Apple Dump Cake Delightful and Easy Treat
If you’re craving a quick and delightful dessert, you’ve stumbled upon the perfect recipe! Caramel Apple Dump Cake combines warm,
Read more…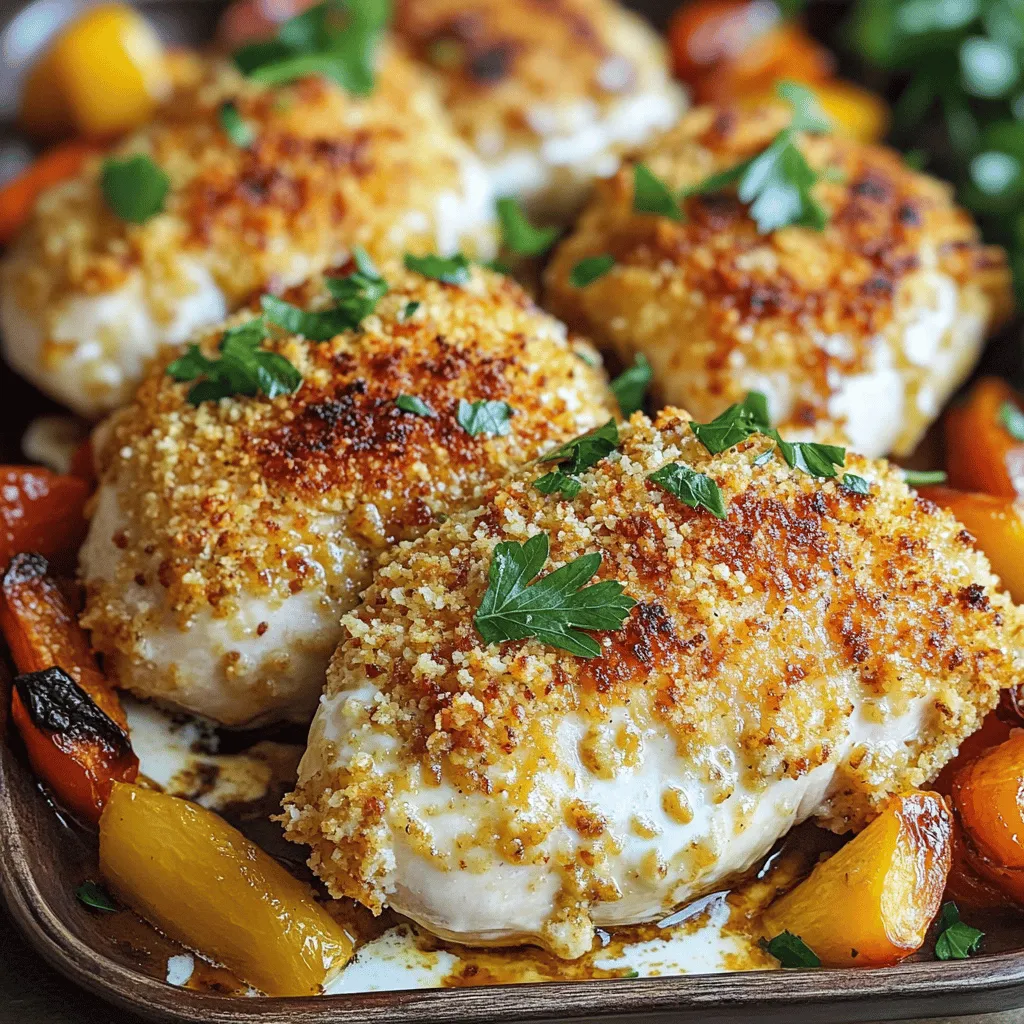
Melt In Your Mouth Chicken Breasts Easy Family Meal
Are you ready to impress your family with a simple and delicious meal? Melt-in-your-mouth chicken breasts will become your new
Read more…
Chinese Chicken & Broccoli Stir-Fry Tasty and Easy Recipe
Craving a delicious meal that’s quick and easy to whip up? Look no further! My Chinese Chicken & Broccoli Stir-Fry
Read more…browse recipes


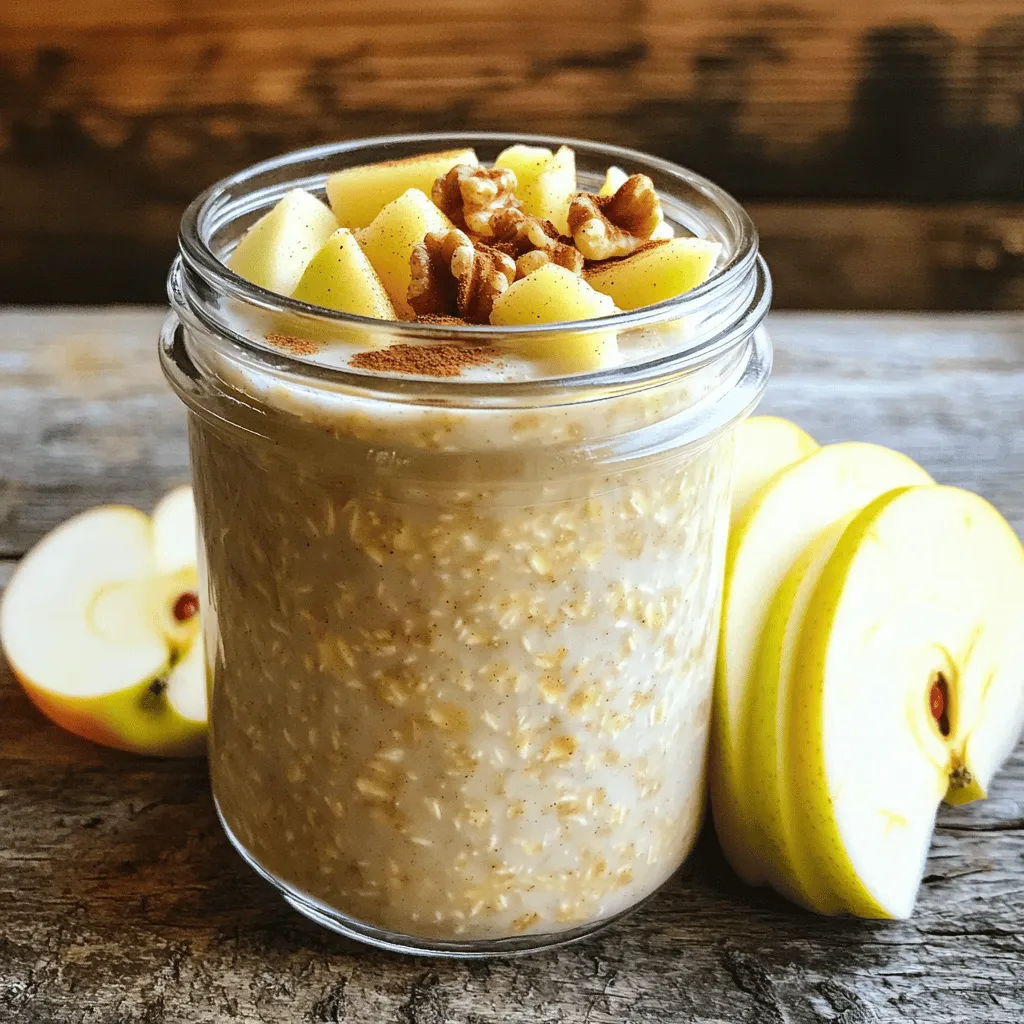
Apple Cinnamon Overnight Oats Healthy Simple Meal
Start your day right with Apple Cinnamon Overnight Oats! This simple, healthy meal combines delicious flavors with vital nutrients. In just a few minutes,…
My Latest Desserts
-

Easy Lemon Loaf Cake Simple and Tasty Recipe
If you love bright, citrusy treats, then this Easy Lemon Loaf Cake is for you! It’s simple to make and Read Full Recipe -

Frozen Yogurt Granola Cups Delightful and Healthy Treat
Looking for a cool and tasty treat? Frozen yogurt granola cups are the answer! These delightful snacks blend creamy yogurt Read Full Recipe -

Raspberry Lemon Yogurt Parfait Tasty and Simple Treat
Looking for a quick, delicious treat? My Raspberry Lemon Yogurt Parfait is simple to make and bursting with flavor! This Read Full Recipe -
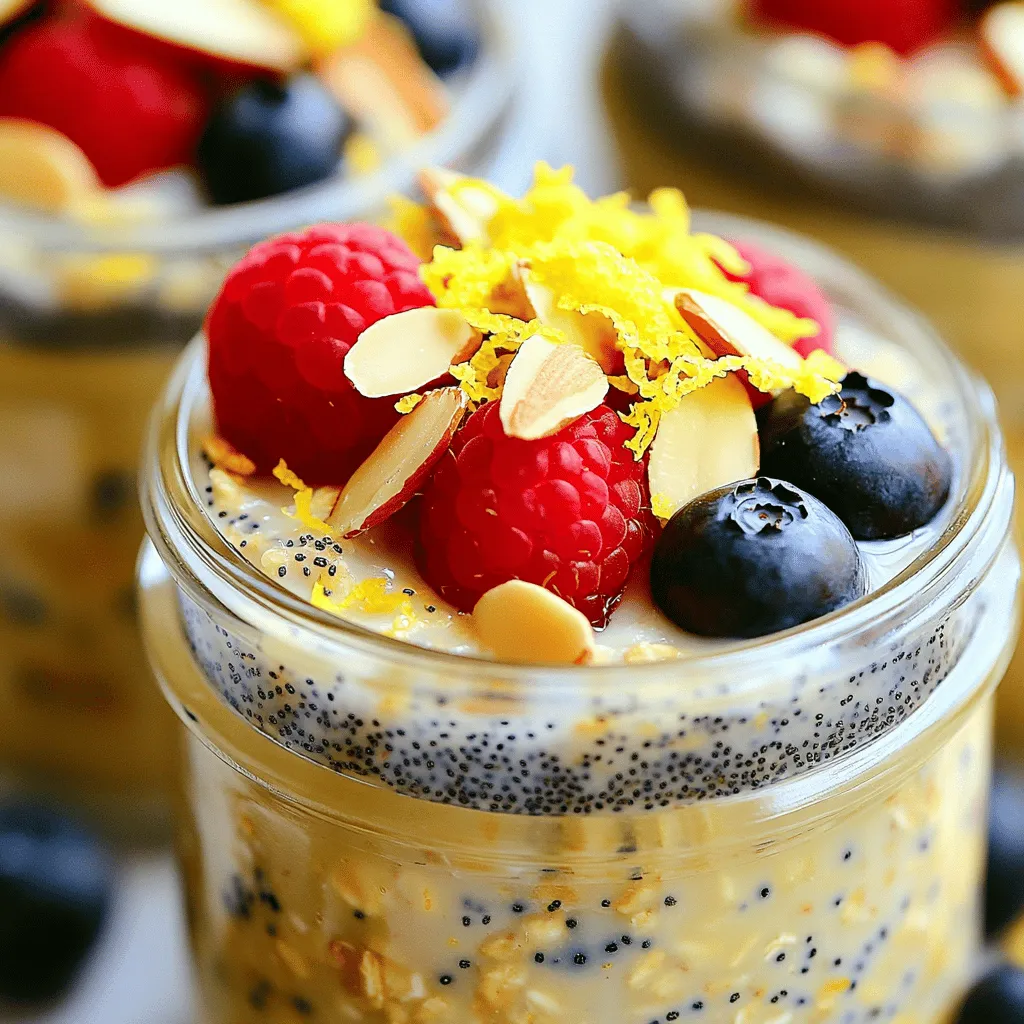
Lemon Poppyseed Overnight Oats Quick and Easy Recipe
Wake up to a burst of fresh flavor with my Lemon Poppyseed Overnight Oats recipe! This quick and easy breakfast Read Full Recipe -
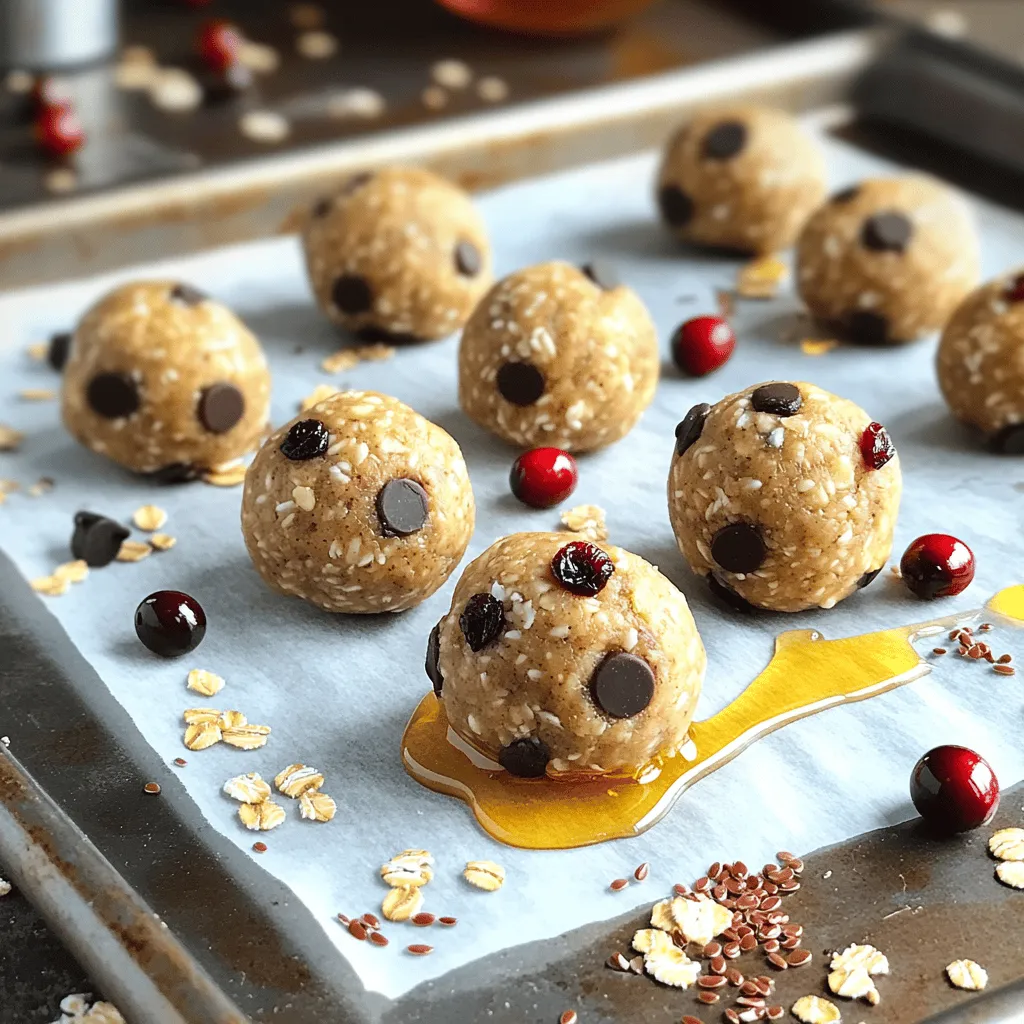
Peanut Butter Energy Balls Easy Healthy Snack Recipe
Looking for a tasty treat that’s also healthy? Peanut Butter Energy Balls are your answer! This easy snack recipe packs Read Full Recipe -
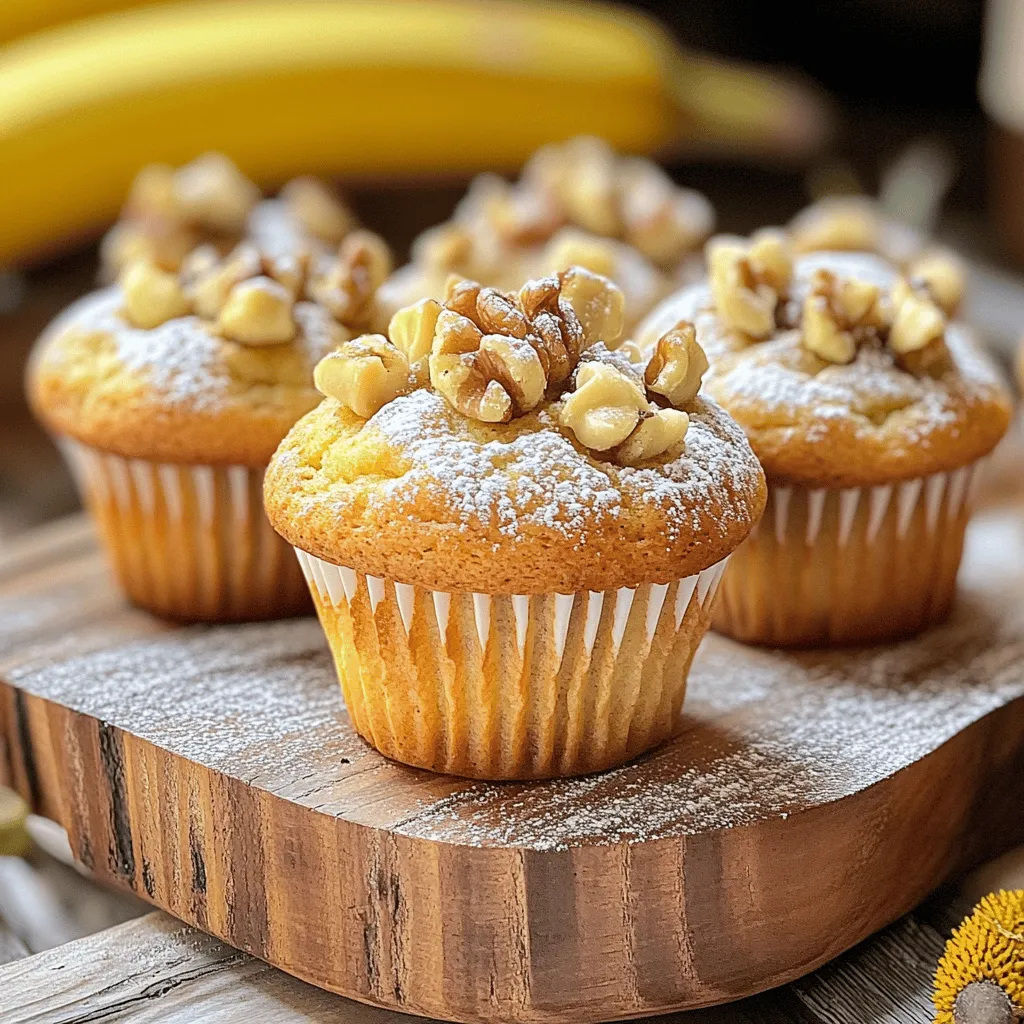
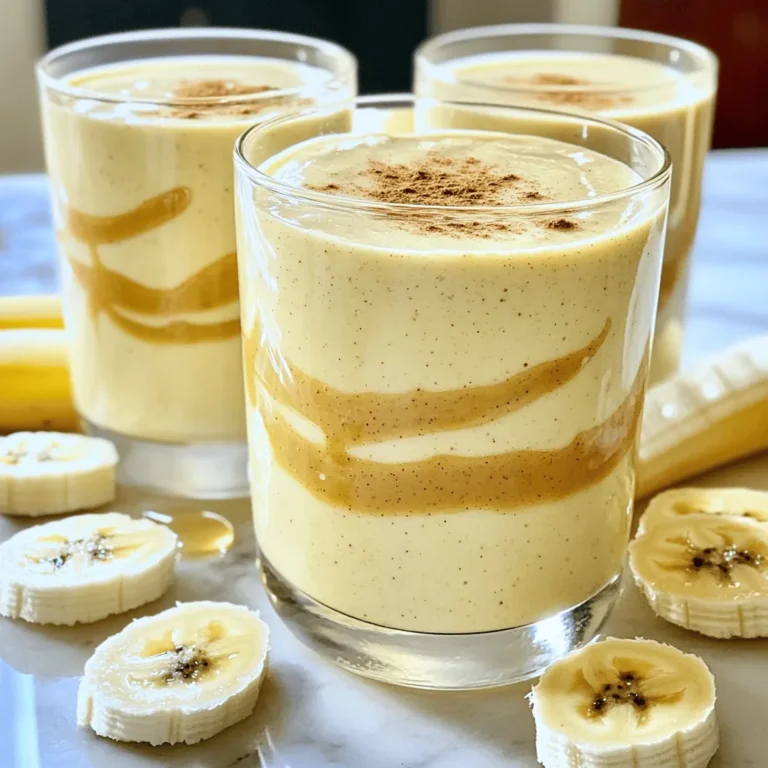
Banana Nut Muffins Delightfully Soft and Tasty Recipe
Are you ready to bake the softest, tastiest banana nut muffins ever? I’ll take you through a simple recipe that Read Full Recipe -
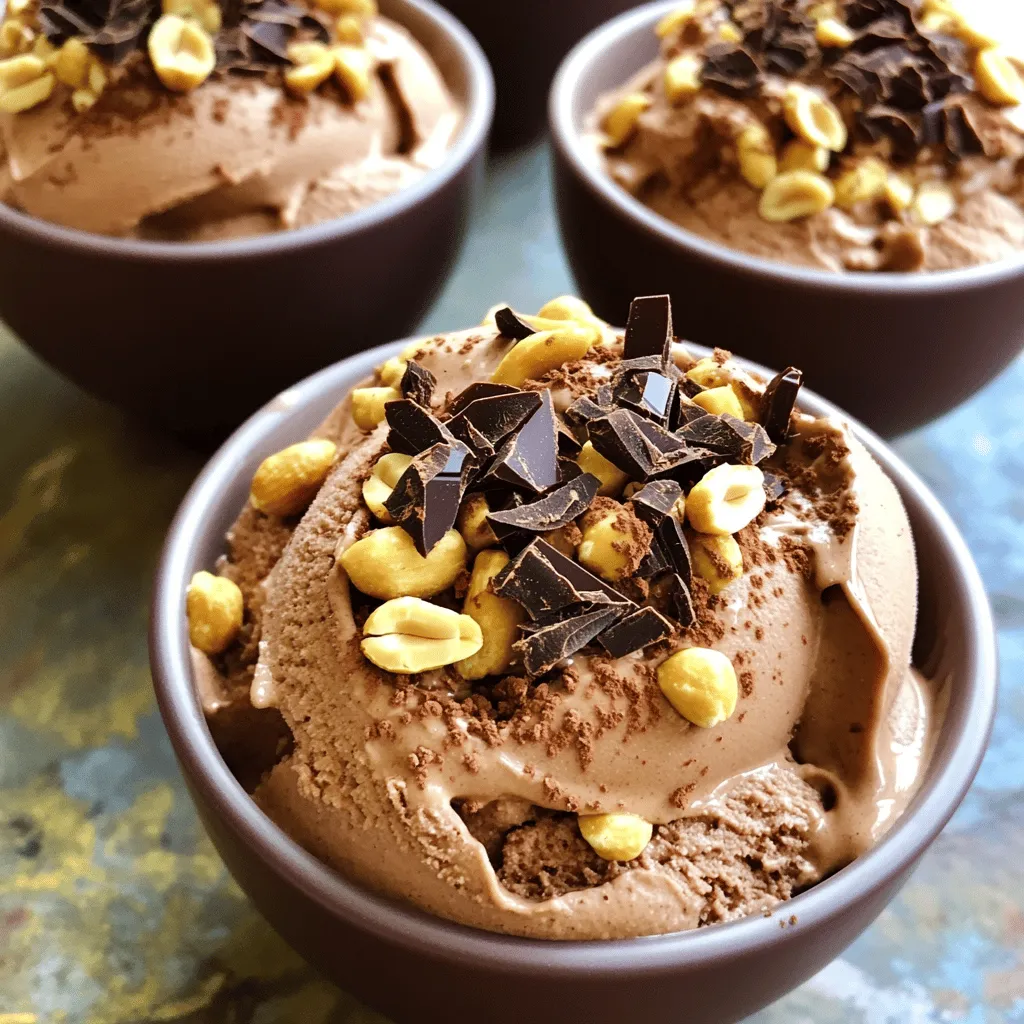
Chocolate Peanut Butter Nice Cream Easy and Tasty Treat
Craving a delicious treat that’s both easy and healthy? Chocolate Peanut Butter Nice Cream is your answer! This creamy dessert Read Full Recipe -

Vegan Chocolate Mousse Rich and Creamy Dessert Recipe
Craving a rich, creamy dessert that’s completely plant-based? Look no further! This Vegan Chocolate Mousse is simple to make and Read Full Recipe -

Delicious Banana Oatmeal Pancakes Healthy Breakfast Option
Start your day right with delicious banana oatmeal pancakes! These pancakes are healthy, easy to make, and full of flavor. Read Full Recipe -

Easy Lemon Ricotta Pancakes Light and Fluffy Delight
Are you ready to elevate your breakfast game? Try my Easy Lemon Ricotta Pancakes, where light and fluffy meet tangy Read Full Recipe
My Latest Recipes

hey,
i’m !
I’m so happy you’re here!
Every dish I share is made with love and care. I hope they bring you the same comfort and joy they bring me. Let’s make memories, one recipe at a time.


![- Pasta options: linguine or spaghetti - Fresh vegetables and herbs: garlic, red chili pepper, ginger, green onions, cilantro - Essential sauces and oils: soy sauce, sesame oil, rice vinegar - Seasonings: salt, pepper, crushed red pepper flakes This dish shines with simple, fresh ingredients. You can choose either linguine or spaghetti as your pasta base. I love linguine for its flat shape, but spaghetti works just as well. Next, we need fresh vegetables and herbs. Garlic is a must for that rich, aromatic flavor. The red chili pepper adds spice; you can adjust this based on your taste. Ginger gives a sweet heat that balances the dish. Green onions and cilantro add freshness and color. For essential sauces and oils, grab soy sauce for saltiness, sesame oil for nuttiness, and rice vinegar for a touch of tang. Finally, the seasonings are key. Use salt and pepper to taste. If you want more heat, sprinkle in crushed red pepper flakes. These ingredients come together to create a simple yet flavorful dish. For the full recipe, check the section above. First, boil a big pot of water. Add a pinch of salt to the water. This helps the pasta taste better. Cook 8 oz of linguine or spaghetti until it is al dente. This means it should still be firm. Drain the pasta in a colander, but save about 1/2 cup of the cooking water. You will need this later. Next, grab a large skillet and heat 4 tablespoons of olive oil over medium heat. Once hot, add 6 cloves of minced garlic and 1 sliced red chili pepper. Sauté them for about 2-3 minutes. You want the garlic to smell nice and turn golden, but not burn. This step adds a lot of flavor! Now, add 1 tablespoon of grated ginger to the skillet. Stir for about a minute. Then, reduce the heat to low. Add the cooked noodles into the skillet. Pour in 2 tablespoons of soy sauce, 1 tablespoon of sesame oil, and 1 tablespoon of rice vinegar. Toss everything together. If the noodles feel dry, add a little bit of the reserved pasta water. Season with salt and pepper to taste. If you want more heat, sprinkle in some crushed red pepper flakes. Finally, toss in 2 chopped green onions and 1/4 cup of chopped cilantro. Mix gently until everything is well combined. Enjoy your spicy garlic noodles! For the complete recipe, check out the [Full Recipe]. To achieve al dente pasta, cook the linguine for 8-10 minutes. Test it two minutes before the time ends. It should be firm but not hard. When you drain the pasta, save half a cup of the cooking water. This water helps make the sauce creamy. Balancing flavors is key. The garlic must shine without overpowering. Start with the right amount of garlic and chili. If it’s too strong, add more noodles. A pinch of sugar can also help tone down heat. To adjust spice levels, start with one red chili pepper. You can always add more later. If you want it mild, remove the seeds. For extra heat, sprinkle crushed red pepper flakes at the end. Using reserved pasta water effectively makes your dish shine. After you add noodles to the skillet, pour in a little pasta water. This helps combine flavors and creates a lovely sauce. If your noodles seem dry, add more water until you reach the desired consistency. For the full recipe, check out the Spicy Garlic Noodles section. {{image_2}} You can easily make this dish vegan. Instead of soy sauce, use tamari for a gluten-free option. For added protein, try tofu or tempeh. Simply cube the tofu and sauté it until golden before mixing it with the noodles. You can also add vegetables like bell peppers or broccoli for extra color and nutrients. To make this recipe gluten-free, swap the soy sauce for a gluten-free soy sauce or coconut aminos. Use gluten-free pasta, like rice noodles, to keep the dish safe for those with gluten allergies. Spicy garlic noodles pair well with many proteins. Consider adding grilled chicken, shrimp, or beef for a heartier meal. If you prefer a vegetarian option, sautéed mushrooms or chickpeas work nicely too. To add crunch, sprinkle toasted nuts or seeds on top. Sesame seeds or crushed peanuts offer a delightful texture. You can also garnish with extra green onions or cilantro for freshness. Serve in large bowls for a cozy feel, or on individual plates for a more refined look. To keep your spicy garlic noodles fresh, store them in an airtight container. Make sure the noodles cool first to avoid condensation. Refrigerate them within two hours of cooking for safety. They will stay good for about 3 to 5 days. When reheating, use a skillet for the best results. Add a splash of water or oil to prevent sticking. Heat over medium-low heat until warm. You can also freeze spicy garlic noodles for later. First, let them cool completely. Then, place them in a freezer-safe container or bag. Remove as much air as possible to avoid freezer burn. They can last up to three months in the freezer. When you're ready to eat, thaw them in the fridge overnight. Reheat them in a skillet, adding a little water if needed. This helps keep the noodles moist and tasty. For a quick meal, I recommend using the Full Recipe to create fresh, flavorful noodles anytime! If you need a soy sauce substitute, you can use tamari. Tamari is gluten-free and tastes similar. You can also use coconut aminos for a sweeter flavor. Both options work well in this recipe. To reduce the spice in this dish, skip the red chili pepper. You can also use less garlic, as it adds some heat. Adding more green onions and cilantro can give flavor without the spice. Another option is to add a pinch of sugar, which can balance the heat. Yes, you can make this dish ahead of time! Cook the noodles and store them in the fridge. Prepare the sauce and keep it separate. Mix them just before serving to keep the noodles fresh. For the best taste, reheat gently in a skillet over low heat. For the complete recipe, check out the full recipe section. In this post, we covered how to make spicy garlic noodles using simple ingredients. You learned to cook pasta, sauté aromatics, and combine flavors. I shared tips for perfecting your dish, looking at vegan options and serving ideas. Lastly, we talked about storing leftovers and answered common questions. With this knowledge, you can create a tasty meal that's both fun and easy. Enjoy experimenting with this recipe!](https://easycookingbite.com/wp-content/uploads/2025/06/70c9e450-578d-4073-839e-698e11ca5e38-300x300.webp)
Raspberry Lemon Cheesecake Bars Simple and Delicious
Are you ready to indulge in a sweet and tangy treat? These Raspberry Lemon Cheesecake Bars are simple, delicious, and perfect for any occasion.…