
Latest & Greatest
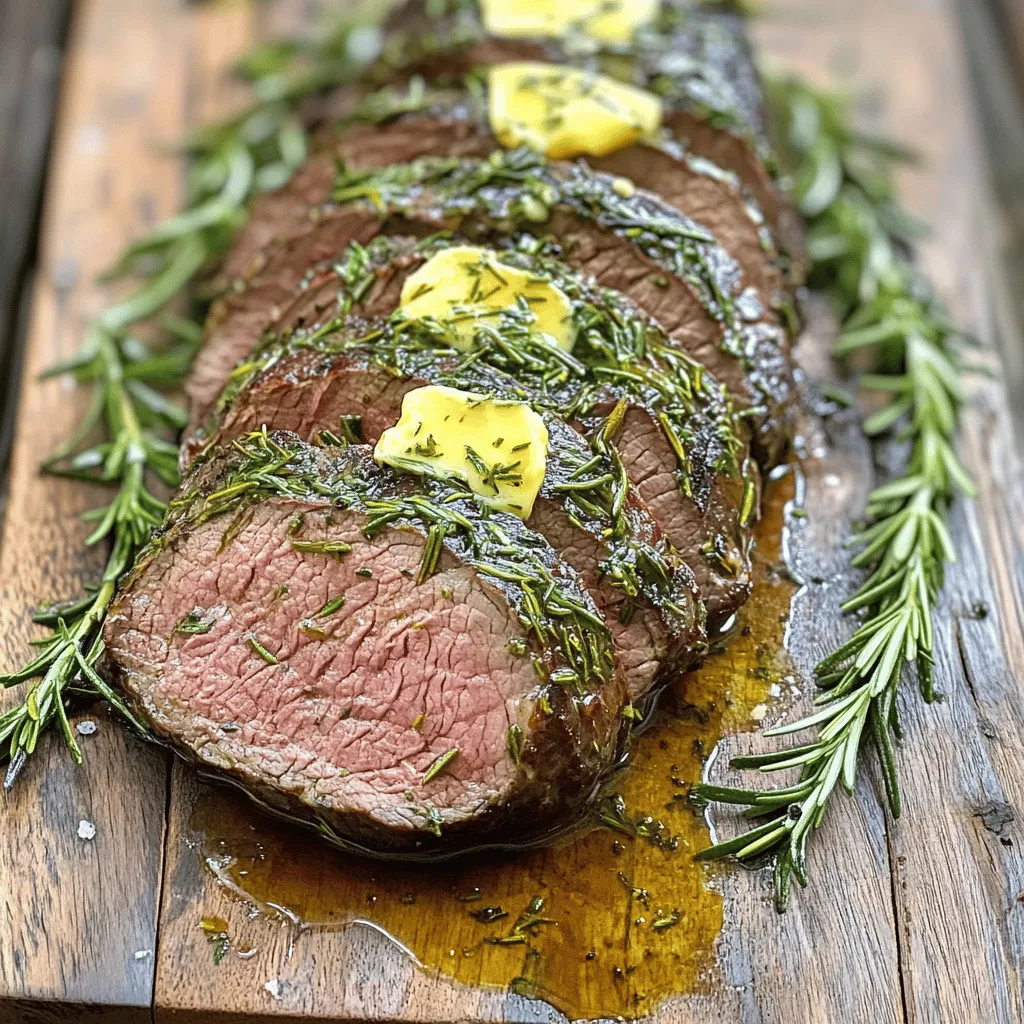
Herb Butter Beef Tenderloin Roast Deliciously Simple
Are you ready to impress your friends and family with a show-stopping meal? This Herb Butter Beef Tenderloin Roast is
Read more…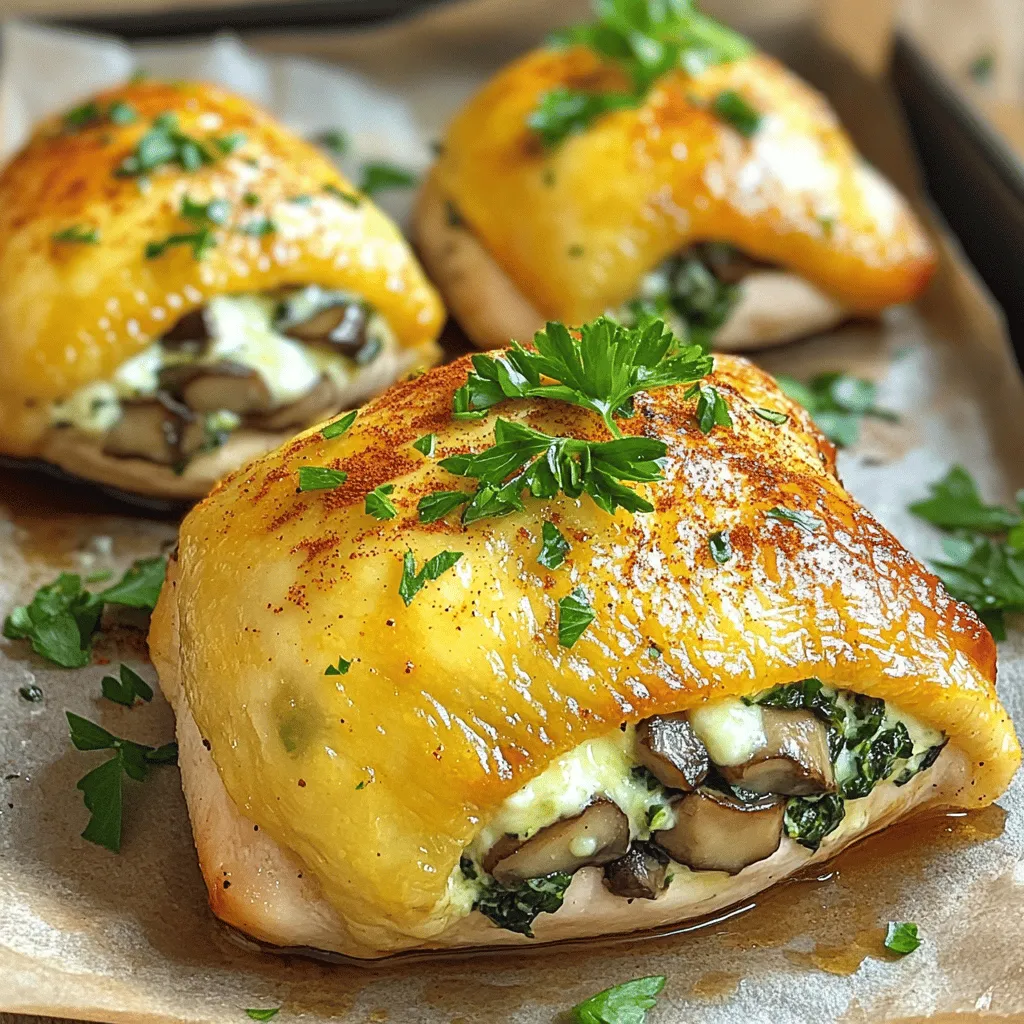
Healthy Mushroom Stuffed Chicken Breast Recipe Delight
Are you ready to transform your dinner routine? This Healthy Mushroom Stuffed Chicken Breast Recipe Delight is packed with flavor
Read more…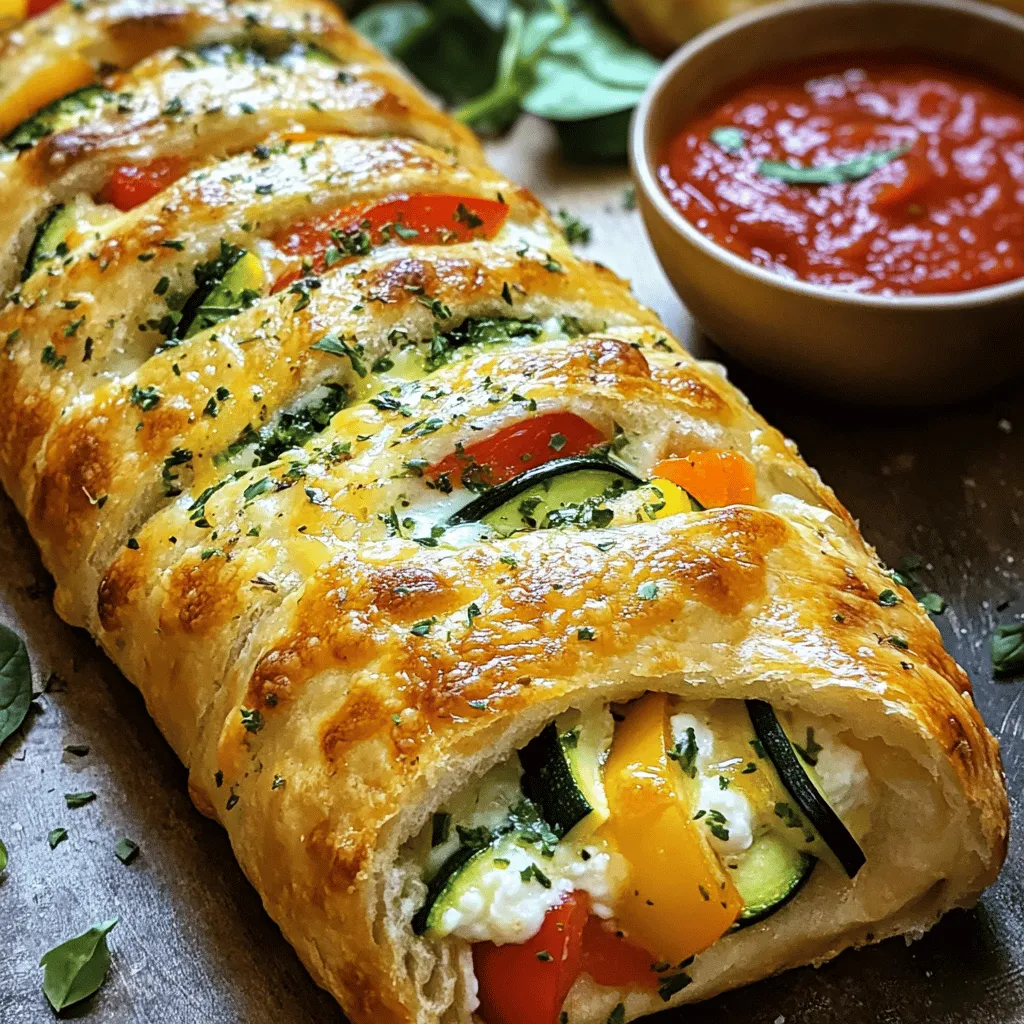
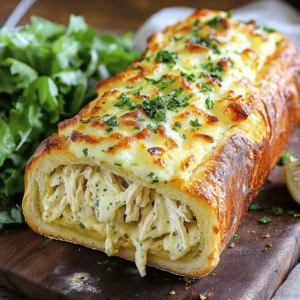
Easy Stromboli Dinner Quick and Delicious Recipe
Are you ready to whip up a quick and tasty Easy Stromboli Dinner? This fun recipe is perfect for busy
Read more…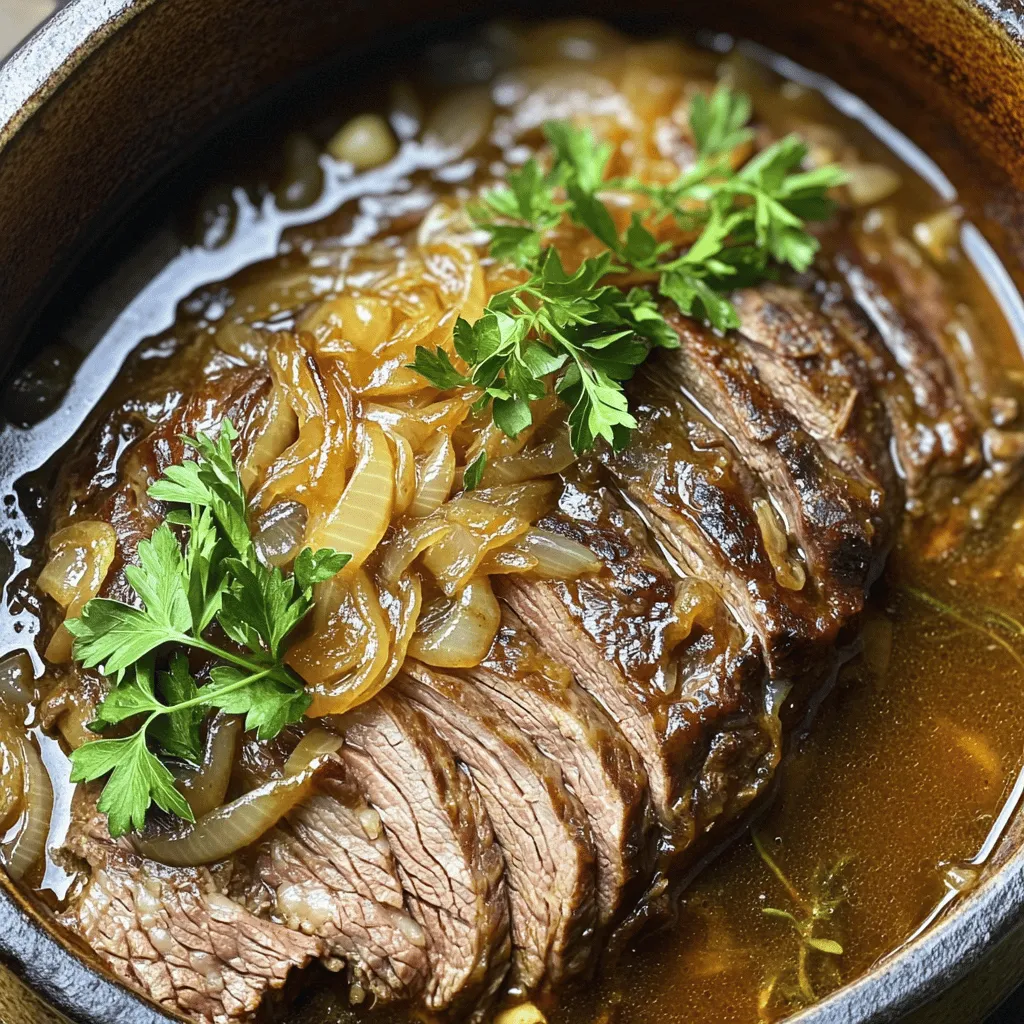
Savory French Onion Pot Roast Tender and Flavorful Dish
Are you ready to impress your family with a dish they’ll rave about? Savory French Onion Pot Roast brings the
Read more…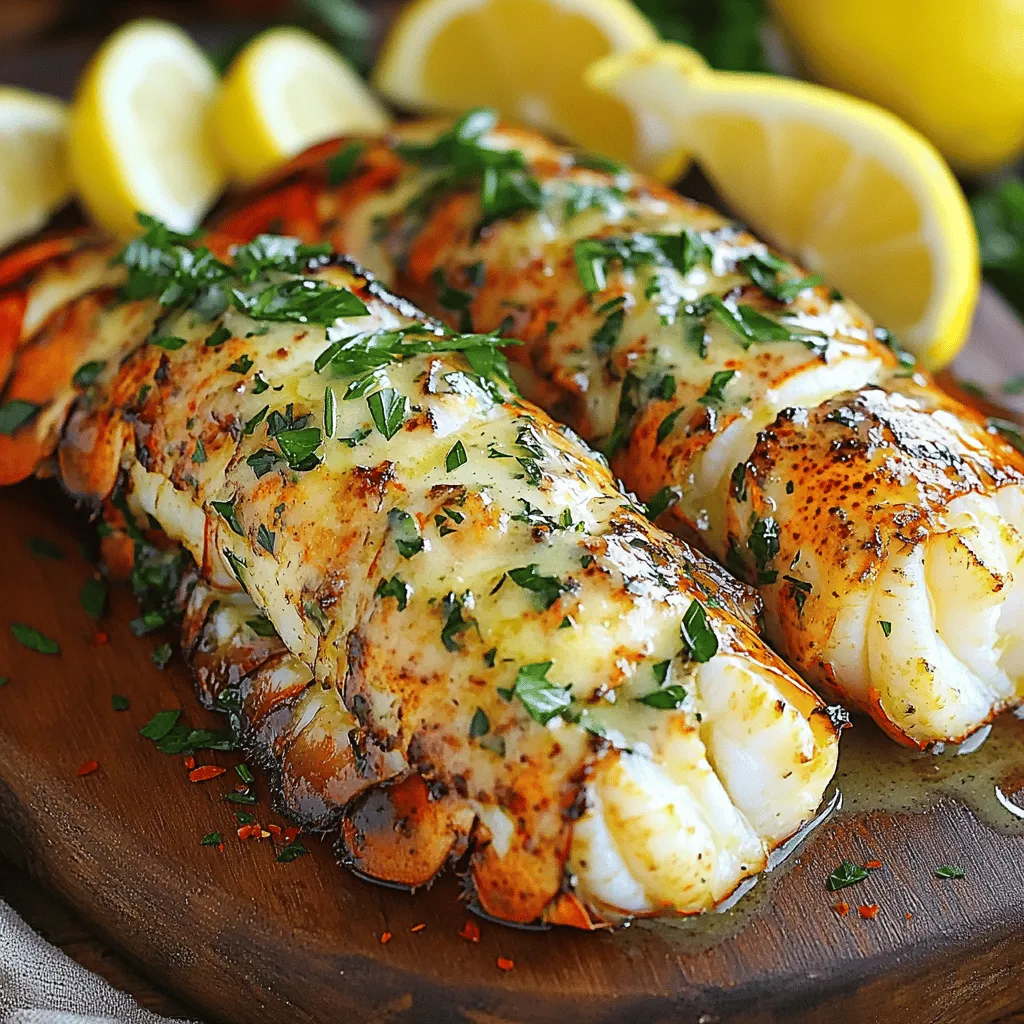
Lobster Tails with Garlic Herb Butter Sauce Delight
Dive into a delicious culinary adventure with my Lobster Tails with Garlic Herb Butter Sauce Delight. This dish is perfect
Read more…
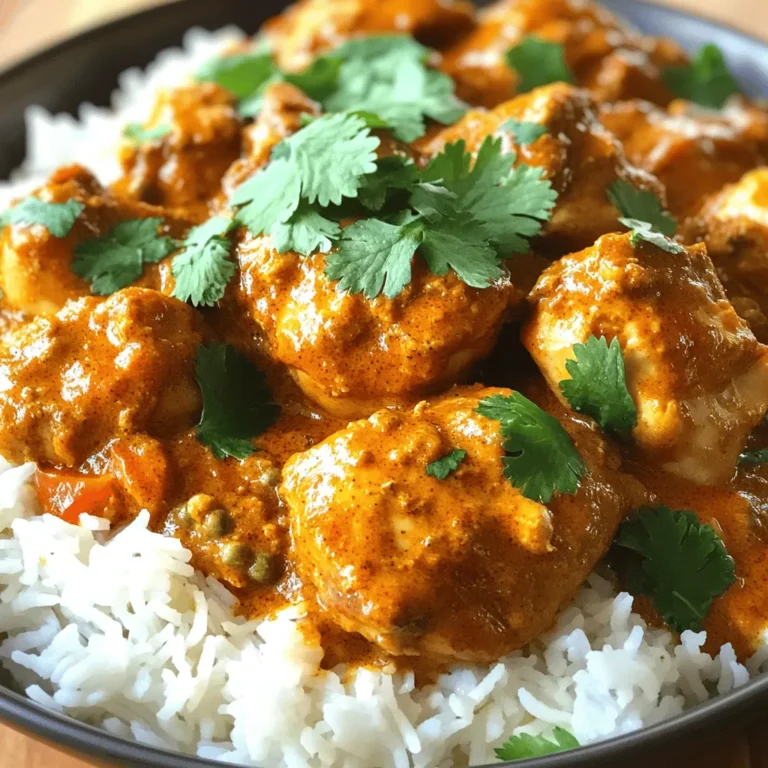
Cowboy Butter Chicken Linguine Tasty and Simple Dish
Craving a dish that’s bursting with flavor but easy to make? Look no further! My Cowboy Butter Chicken Linguine combines
Read more…
Refreshing White Sangria Simple and Tasty Recipe
Summer is here, and there’s nothing quite like a refreshing glass of white sangria to cool you down. This simple
Read more…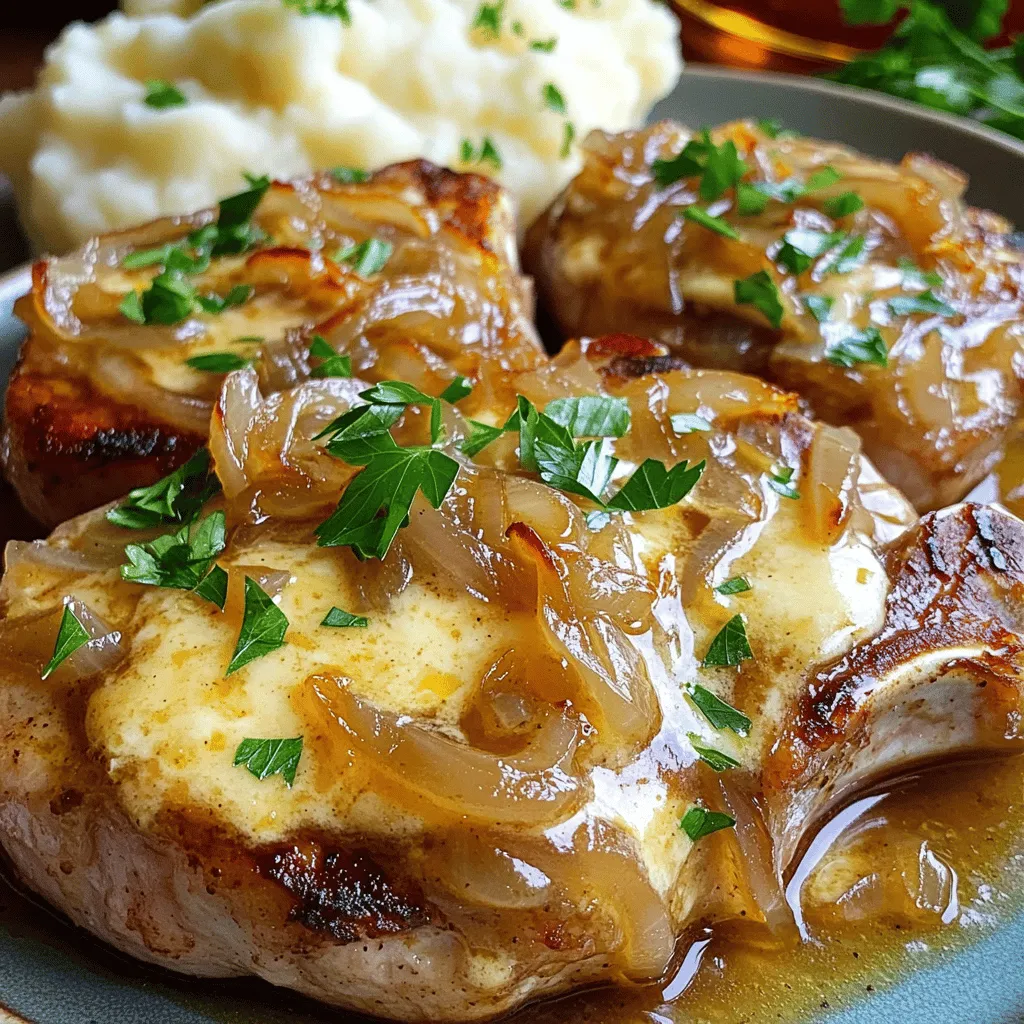
French Onion Smothered Pork Chops Flavorful and Easy
Looking to impress at dinner tonight? Let me introduce you to French Onion Smothered Pork Chops. This dish combines juicy
Read more…browse recipes

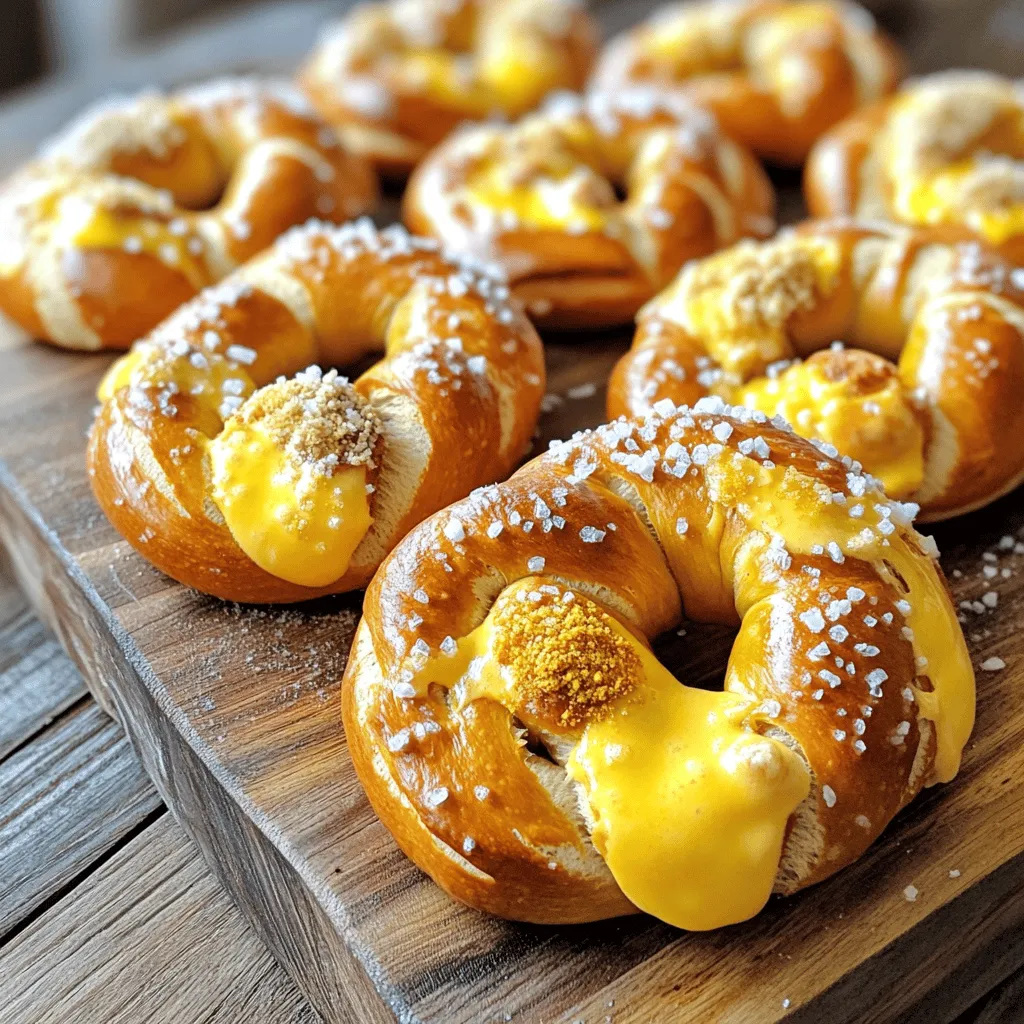
Homemade Soft Pretzels Delicious and Simple Recipe
Have you ever craved those warm, soft pretzels fresh from the oven? Good news! You can make them right at home with this simple…
My Latest Desserts
-
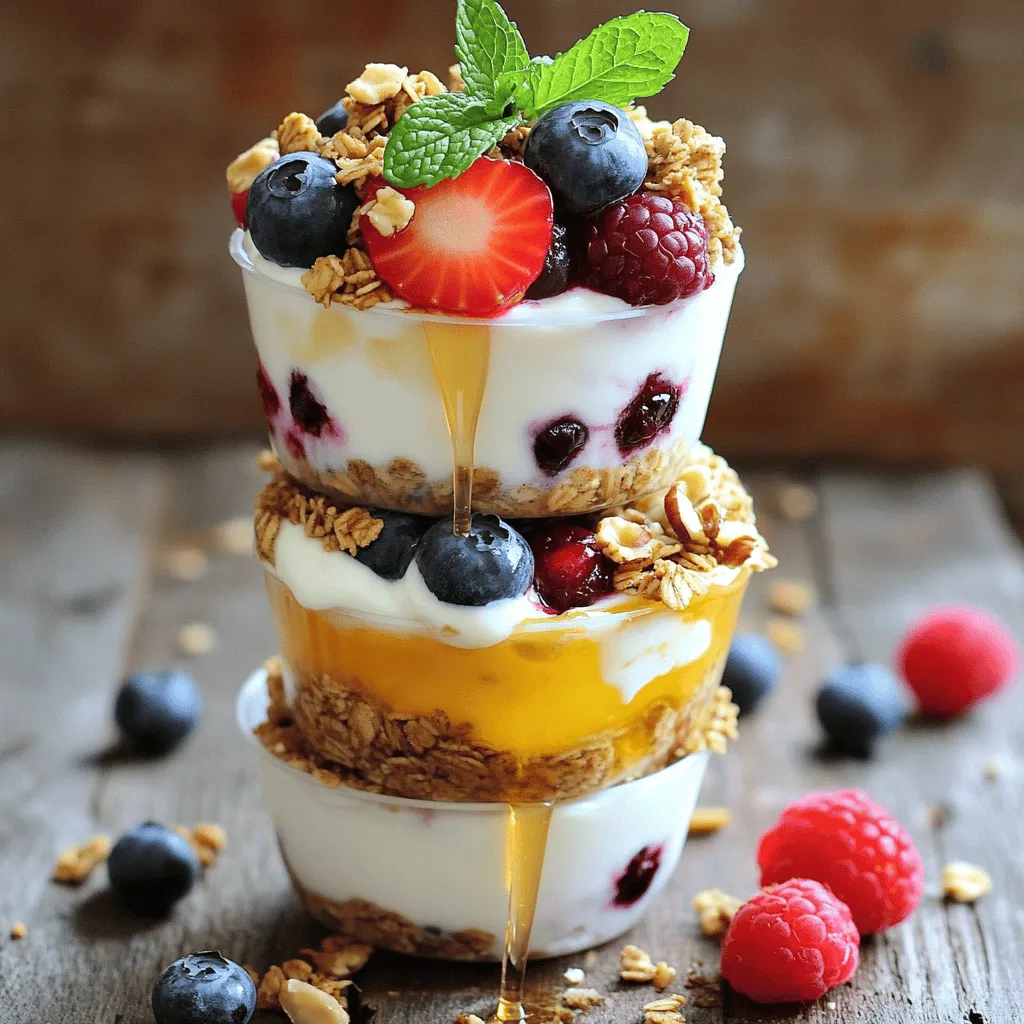
Frozen Yogurt Granola Cups Delightful and Healthy Treat
Looking for a cool and tasty treat? Frozen yogurt granola cups are the answer! These delightful snacks blend creamy yogurt Read Full Recipe -
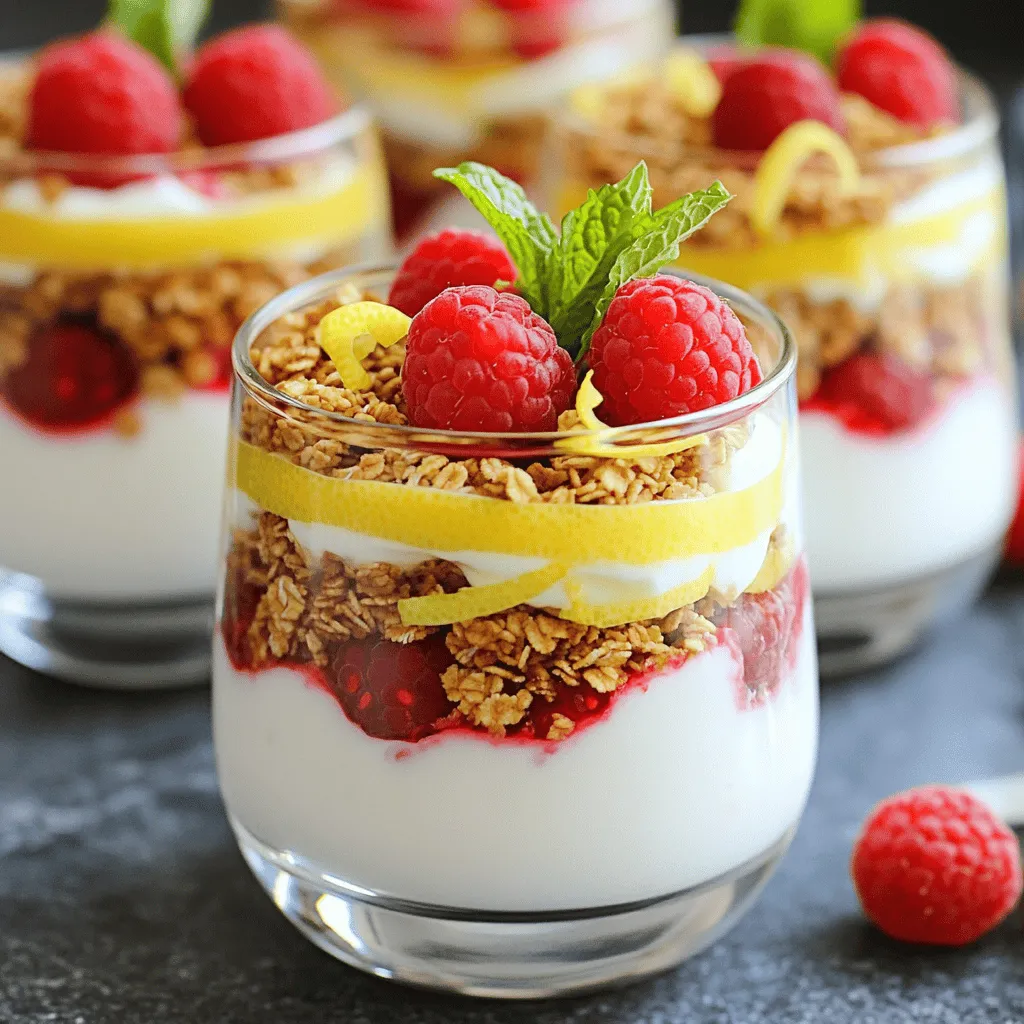
Raspberry Lemon Yogurt Parfait Tasty and Simple Treat
Looking for a quick, delicious treat? My Raspberry Lemon Yogurt Parfait is simple to make and bursting with flavor! This Read Full Recipe -
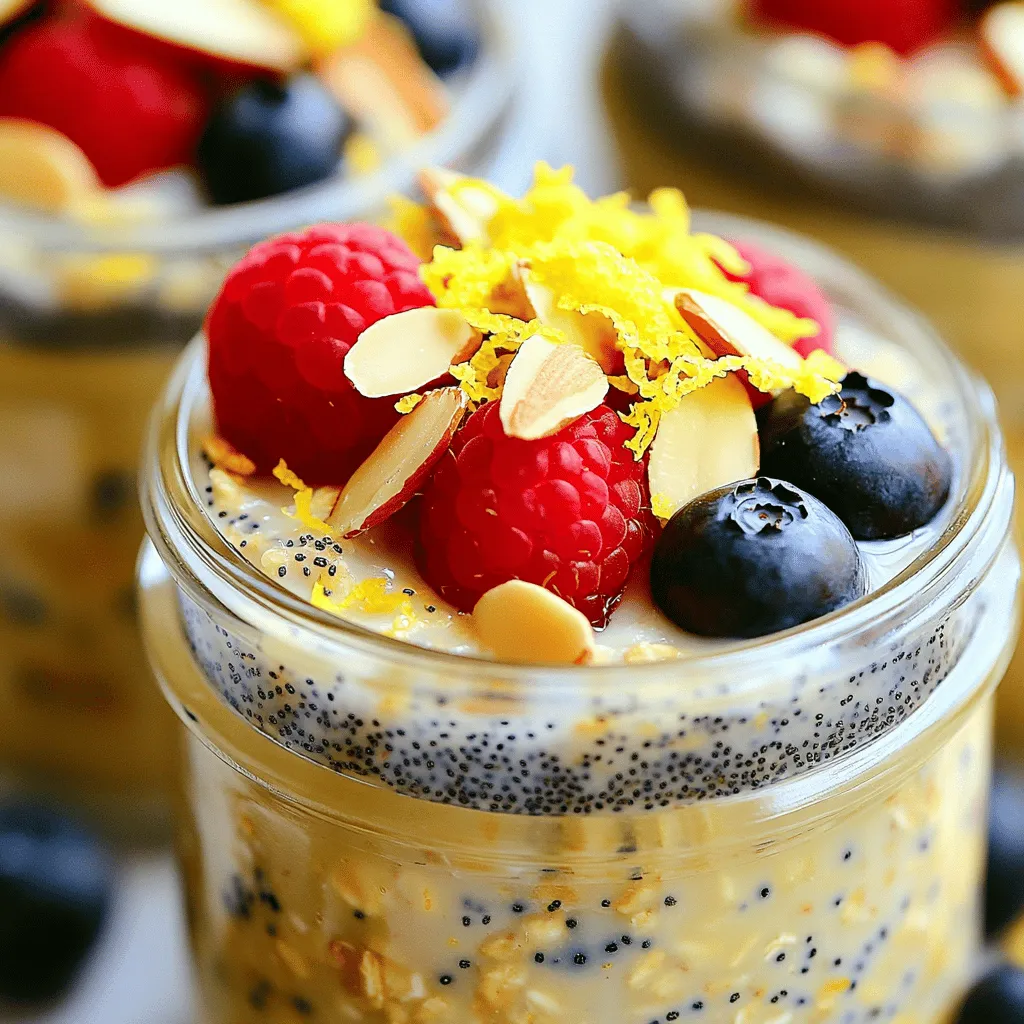
Lemon Poppyseed Overnight Oats Quick and Easy Recipe
Wake up to a burst of fresh flavor with my Lemon Poppyseed Overnight Oats recipe! This quick and easy breakfast Read Full Recipe -
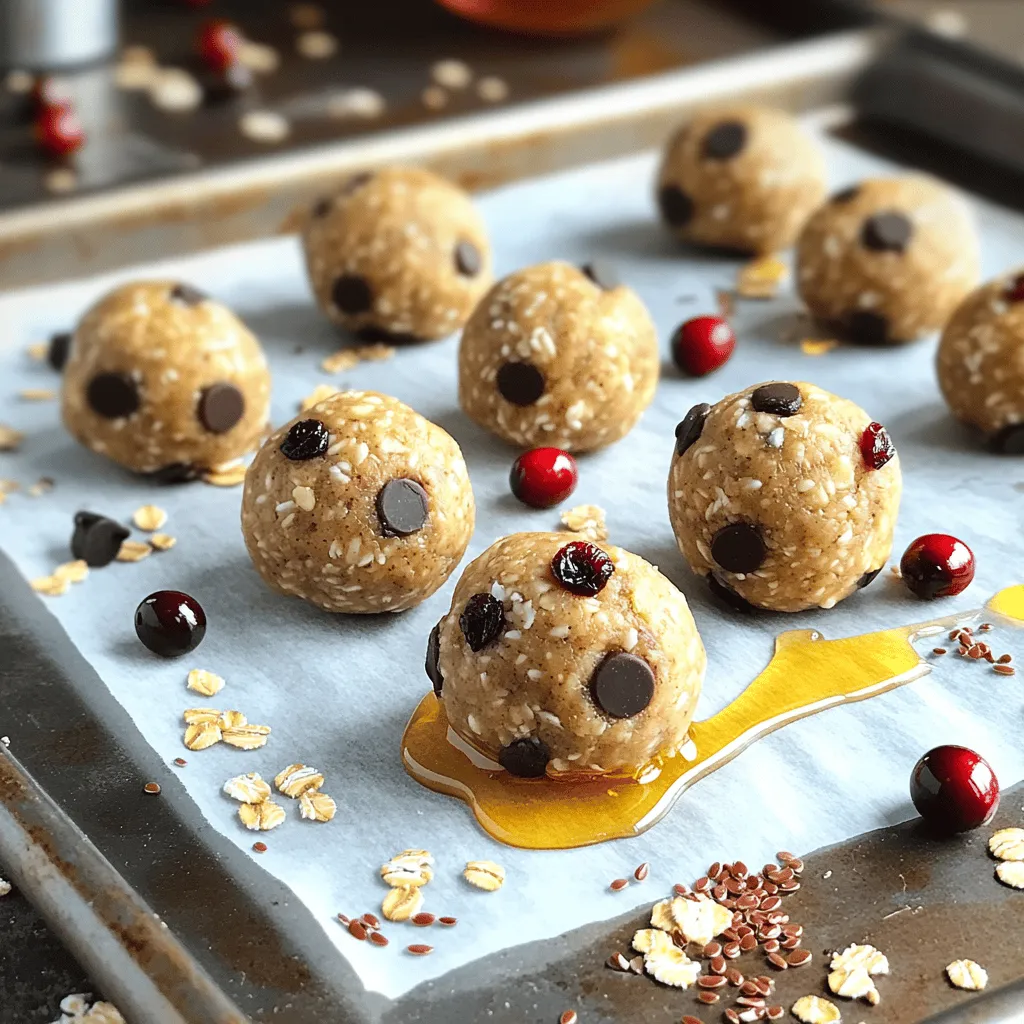
Peanut Butter Energy Balls Easy Healthy Snack Recipe
Looking for a tasty treat that’s also healthy? Peanut Butter Energy Balls are your answer! This easy snack recipe packs Read Full Recipe -
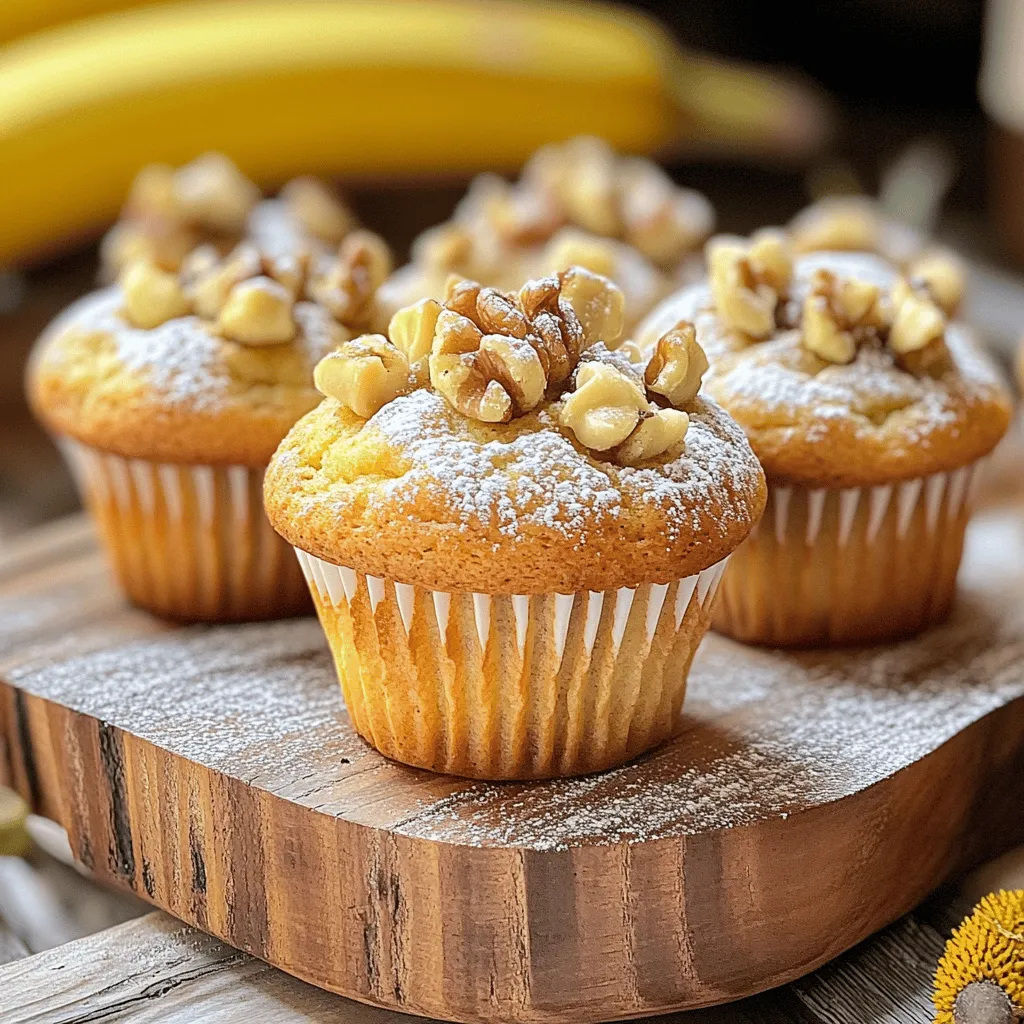
Banana Nut Muffins Delightfully Soft and Tasty Recipe
Are you ready to bake the softest, tastiest banana nut muffins ever? I’ll take you through a simple recipe that Read Full Recipe -
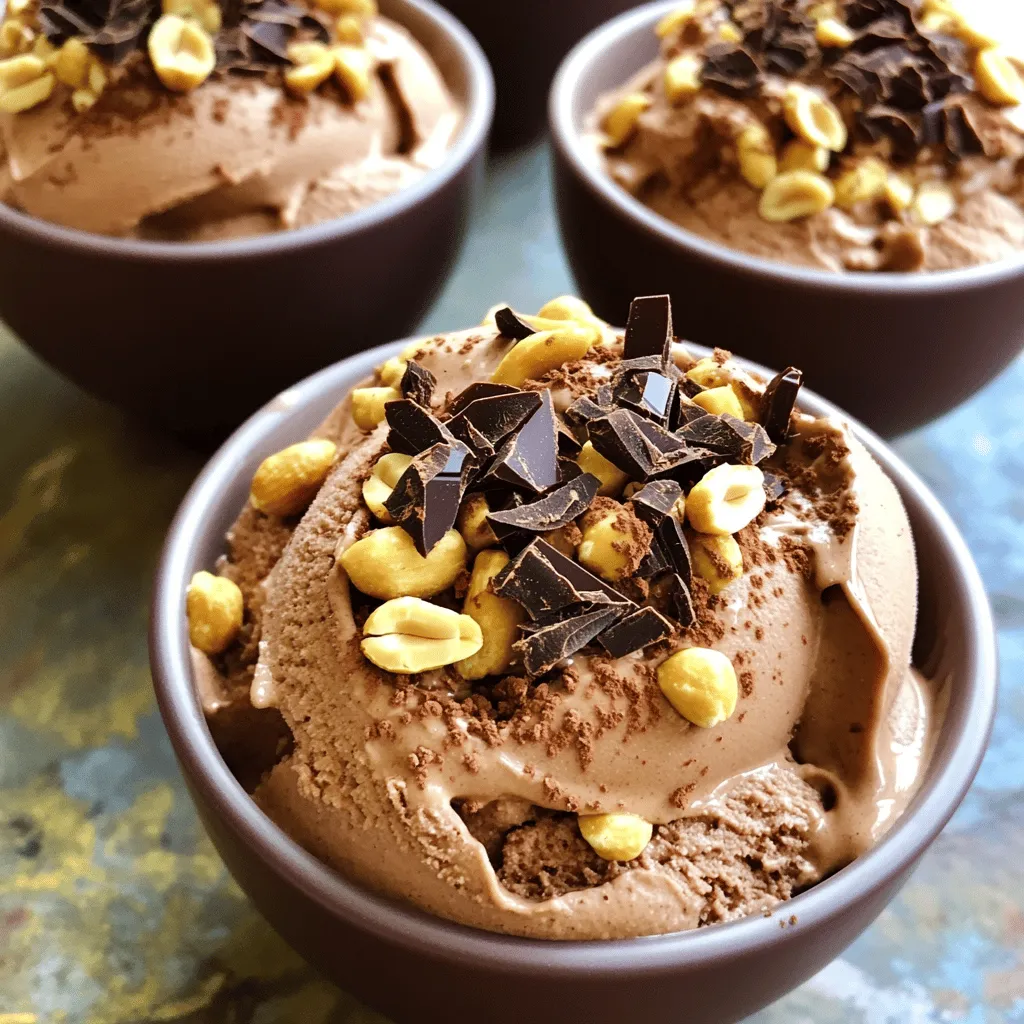
Chocolate Peanut Butter Nice Cream Easy and Tasty Treat
Craving a delicious treat that’s both easy and healthy? Chocolate Peanut Butter Nice Cream is your answer! This creamy dessert Read Full Recipe -
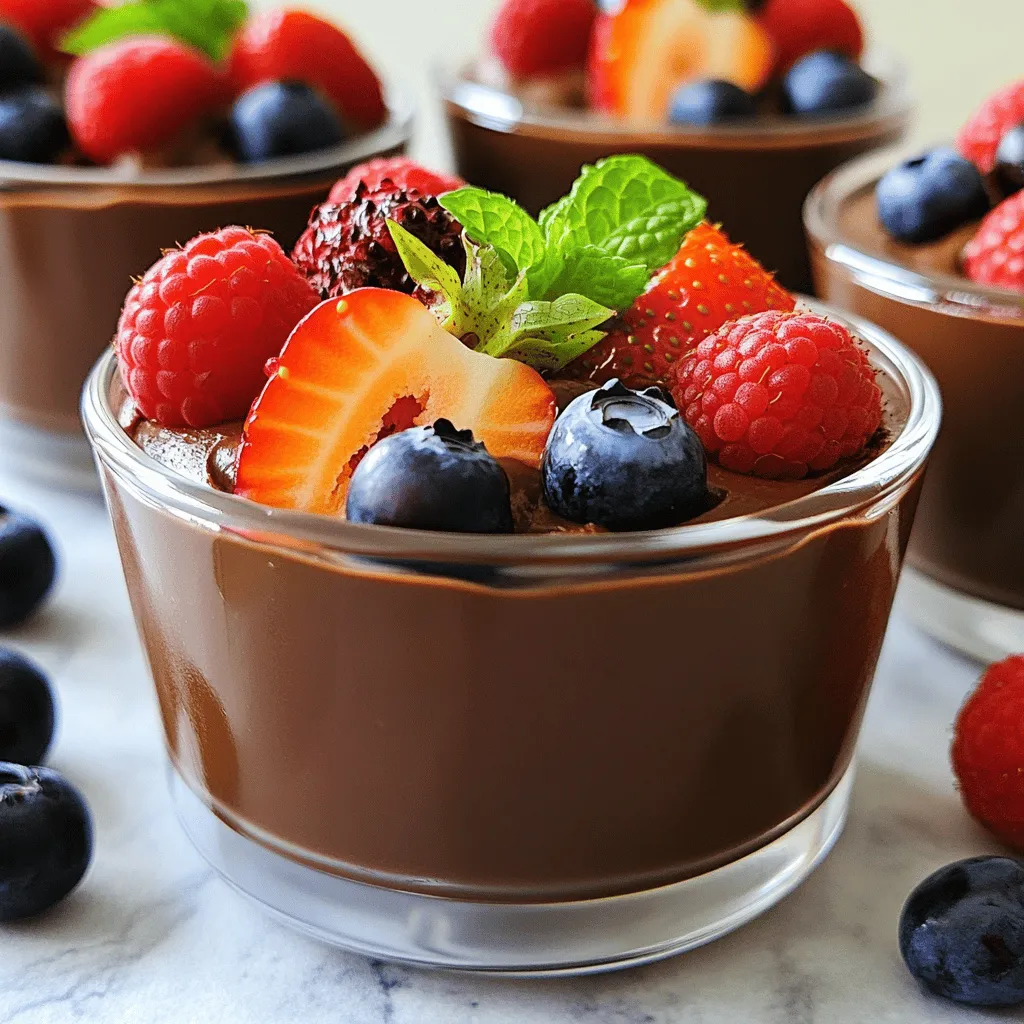
Vegan Chocolate Mousse Rich and Creamy Dessert Recipe
Craving a rich, creamy dessert that’s completely plant-based? Look no further! This Vegan Chocolate Mousse is simple to make and Read Full Recipe -
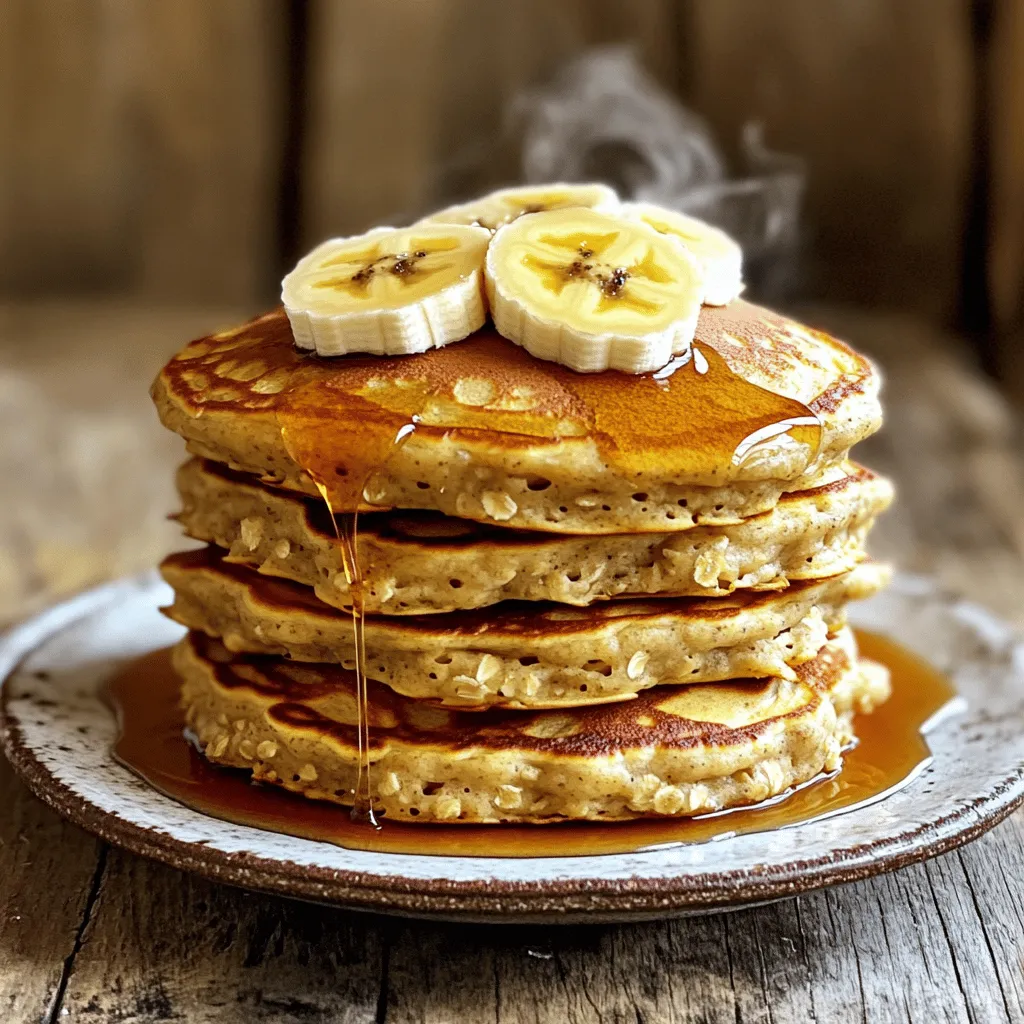
Delicious Banana Oatmeal Pancakes Healthy Breakfast Option
Start your day right with delicious banana oatmeal pancakes! These pancakes are healthy, easy to make, and full of flavor. Read Full Recipe -
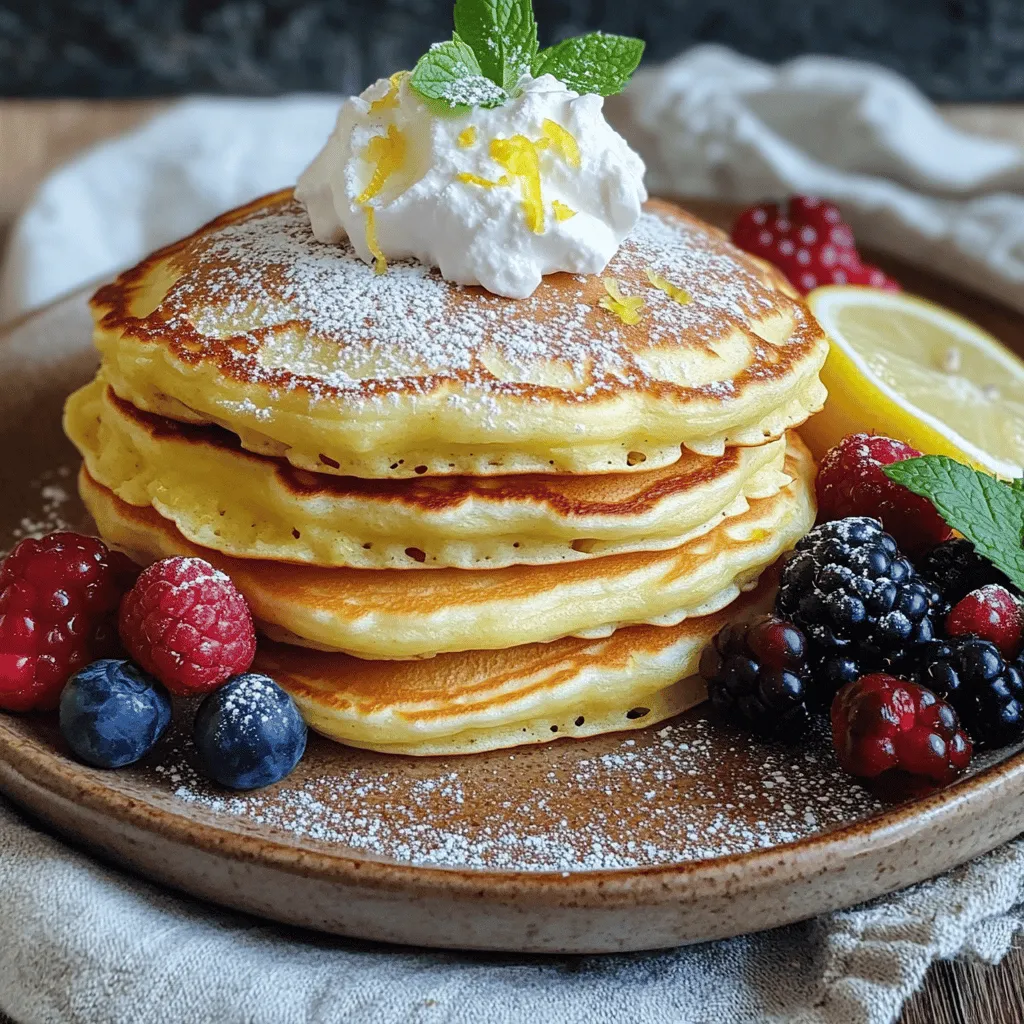
Easy Lemon Ricotta Pancakes Light and Fluffy Delight
Are you ready to elevate your breakfast game? Try my Easy Lemon Ricotta Pancakes, where light and fluffy meet tangy Read Full Recipe -
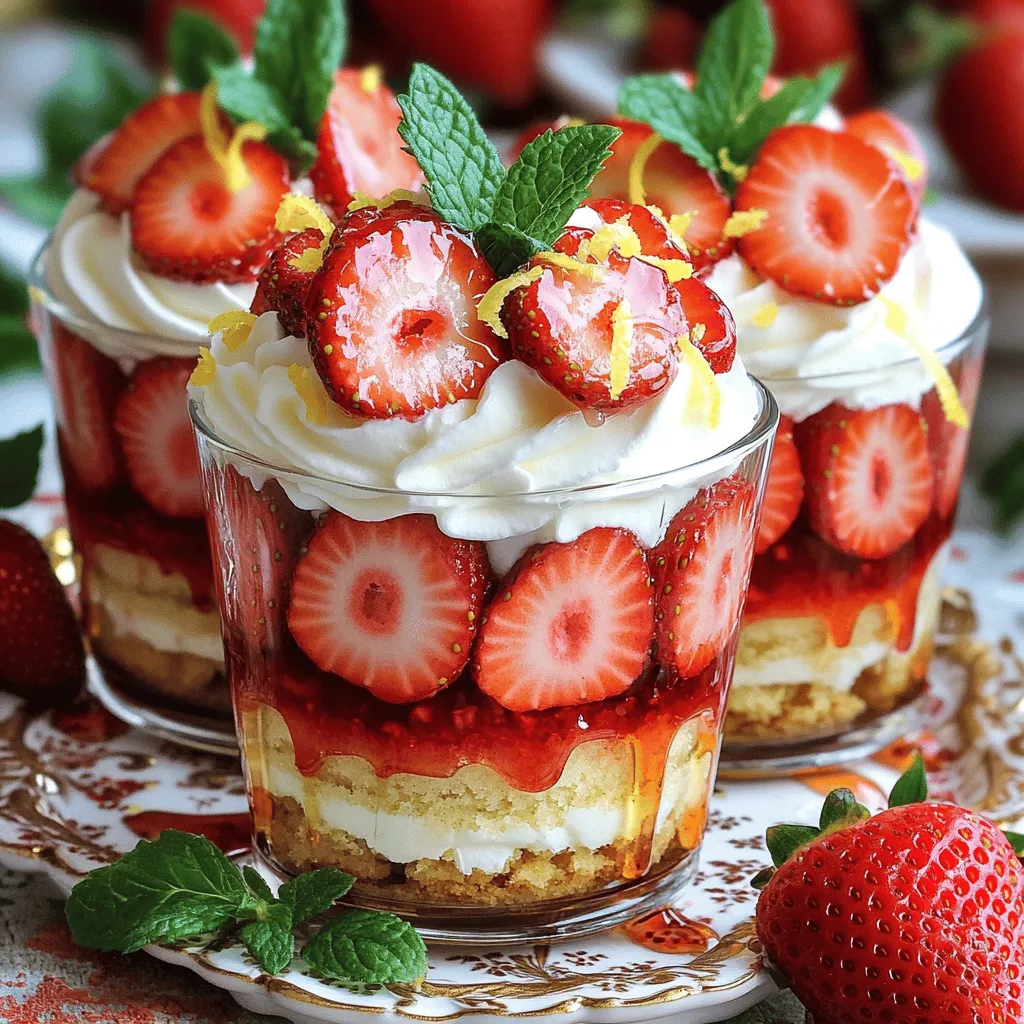
Strawberry Shortcake Cups Simple and Tasty Dessert
Looking for a simple yet delicious dessert that will wow your guests? Strawberry Shortcake Cups are the answer! With fresh Read Full Recipe
My Latest Recipes

hey,
i’m !
I’m so happy you’re here!
Every dish I share is made with love and care. I hope they bring you the same comfort and joy they bring me. Let’s make memories, one recipe at a time.
. To make banana oatmeal pancakes, start by gathering your ingredients. You need rolled oats, a ripe banana, milk, an egg, honey or maple syrup, baking powder, cinnamon, salt, and vanilla extract. First, put the rolled oats in a blender. Then, add the milk, mashed banana, egg, honey or syrup, baking powder, cinnamon, salt, and vanilla extract. Blend everything until it is smooth. If the batter is thick, add a bit more milk. Next, let the batter rest for about 5-10 minutes. This helps the oats soak up the liquid and makes the pancakes fluffier. While waiting, you can prepare your cooking area and toppings. When blending, make sure to scrape the sides of the blender. This ensures all the oats mix evenly. If you want a smoother batter, blend a little longer. However, some texture adds a nice bite. If you prefer a sweeter pancake, add a bit more honey or syrup to your mix. After resting, check the batter's consistency. It should be thick but pourable. If it’s too thick, add a splash of milk. This makes pouring easier. Heat a non-stick skillet over medium heat. Add a small amount of coconut oil or butter. This helps prevent sticking. Once the skillet is hot, pour about 1/4 cup of batter for each pancake. Cook for 2-3 minutes. You’ll see bubbles forming on the surface when it’s time to flip. Carefully turn the pancake over and cook for another 2-3 minutes. Look for a golden brown color on both sides. Keep repeating with the rest of the batter. You can add more oil or butter as needed. Serve warm and enjoy with your favorite toppings. For the complete recipe, check out the full recipe section. To make your pancakes fluffier, let the batter rest. After mixing, wait 5-10 minutes. This helps the oats soak up some liquid. You can also add a bit more baking powder. This will create extra lift in your pancakes. You can change the flavor easily. Try adding chocolate chips for a sweet treat. Mix in chopped nuts for crunch. For a more fruity taste, add blueberries or strawberries. If you like spice, a pinch of nutmeg works well too. Serve your pancakes warm for the best taste. Top them with sliced bananas for extra banana flavor. Drizzle with honey or maple syrup for sweetness. You can also add yogurt for creaminess. Chopped nuts give a nice crunch on top. For a fun twist, try a dollop of peanut butter. Enjoy your pancakes however you like! For the full recipe, check out the recipe section above. {{image_2}} You can easily make these pancakes gluten-free. Just use certified gluten-free oats instead of regular rolled oats. This small swap ensures that you enjoy your banana oatmeal pancakes without gluten. They will still taste great and keep their fluffy texture. To create a vegan version, replace the egg with a flax egg. Mix one tablespoon of ground flaxseed with three tablespoons of water. Let it sit for five minutes to thicken. You can also substitute regular milk with almond or oat milk. This way, you keep the delicious flavor while making it plant-based. Feel free to get creative with your pancakes! You can add blueberries, diced apples, or chopped nuts to the batter. Each fruit gives a new twist to the taste. If you like a little crunch, mix in walnuts or pecans. These additions make your pancakes more fun and nutritious. For the full recipe, check out the main article. After you enjoy your banana oatmeal pancakes, you might have some left. To store them, place the pancakes in an airtight container. You can keep them in the fridge for up to four days. Make sure they cool down before you seal the container. This keeps them fresh and tasty. When you're ready to eat your leftover pancakes, reheating is easy. You can use a microwave, skillet, or toaster. For the microwave, heat for 20-30 seconds. If using a skillet, warm it over low heat for about one minute on each side. The toaster works well too; just pop them in until warm. This helps bring back their soft texture. To freeze your banana oatmeal pancakes, stack them with parchment paper in between each one. Place the stack in a freezer-safe bag or container. You can freeze them for up to three months. When you're ready to eat, thaw them in the fridge overnight. Then, reheat as mentioned earlier. Enjoy fresh pancakes anytime! For the complete recipe, check out the Full Recipe. Yes, you can make these pancakes without eggs. Use a mashed banana instead. This will help bind the ingredients. You can also use a flaxseed meal. Mix one tablespoon of flaxseed meal with three tablespoons of water. Let it sit for five minutes to thicken before adding to the batter. To make your pancakes sweeter, add more banana. You can also try using extra honey or maple syrup. Another option is to mix in a tablespoon of brown sugar. If you like, add a dash of vanilla extract for extra flavor. You can use instant oats, but the texture will change. Instant oats are finer, so they may make the pancakes denser. If you prefer a fluffier pancake, stick with rolled oats. For the best results, check the [Full Recipe] for details on how to blend them. Banana oatmeal pancakes are simple and fun to make. You learned about the ingredients, methods, and tips for better pancakes. You can customize them to fit your taste. Remember, there are options for gluten-free and vegan diets. Storing and reheating leftovers is easy too. Enjoy your pancakes with your favorite toppings. With these steps, you will impress everyone with your cooking skills. Now, grab your ingredients and start making delicious pancakes today!](https://easycookingbite.com/wp-content/uploads/2025/06/ca0d7af1-aa6f-46f7-85b1-c2320c4debd3-300x300.webp)
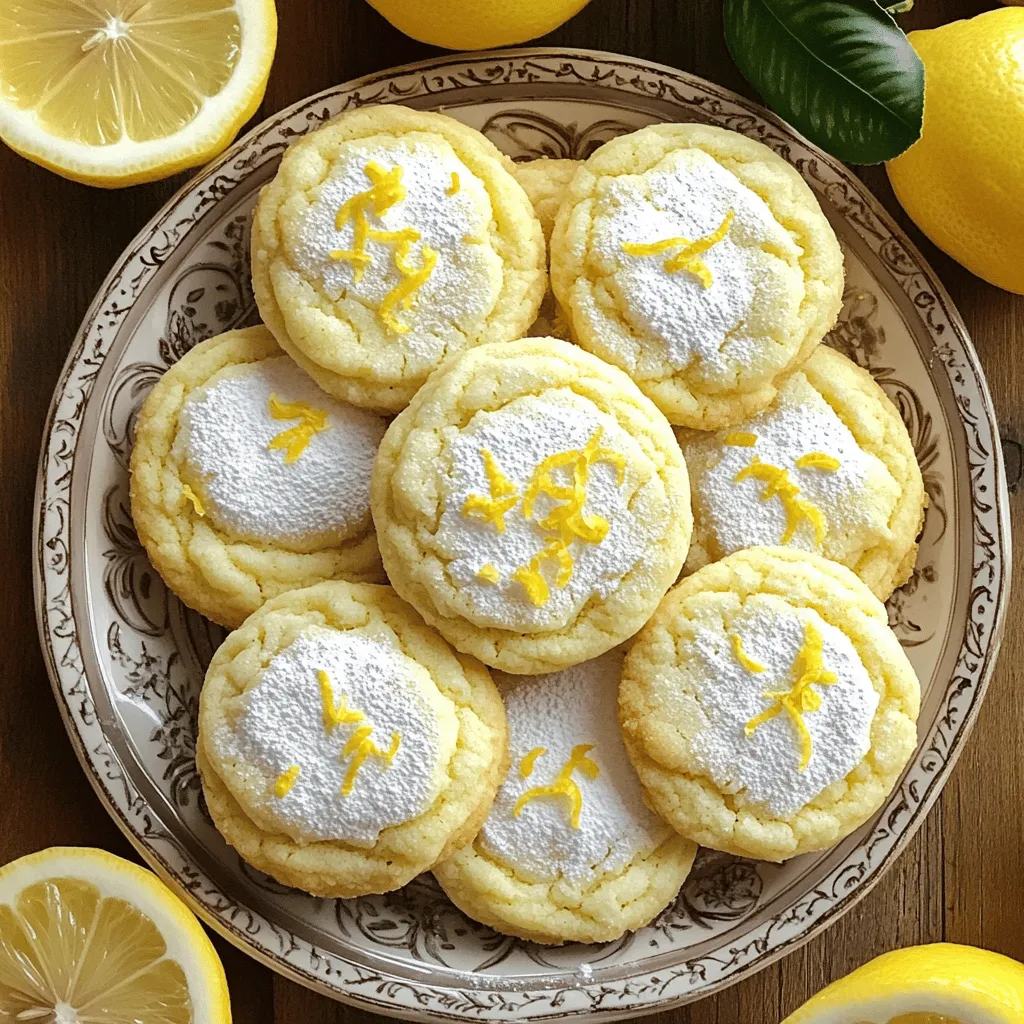
Lemon Ricotta Cookies Delightful and Soft Treat
Ready to bake something special? Lemon Ricotta Cookies are your answer! These delightful, soft treats are bursting with bright lemon flavor and a creamy…