

Latest & Greatest
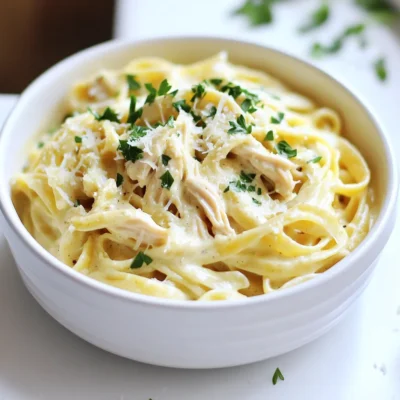
Creamy Garlic Parmesan Chicken Pasta Slow Cooker Delight
Are you ready to dive into a dish that combines comfort and flavor? My Creamy Garlic Parmesan Chicken Pasta Slow
Read more…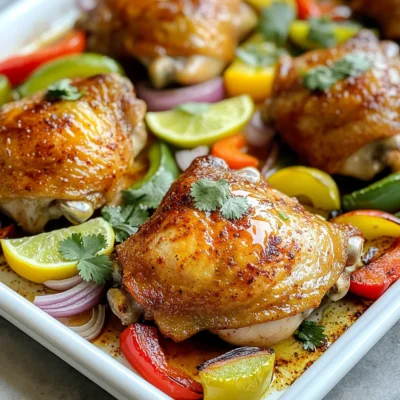
Chili Lime Chicken and Peppers Sheet Pan Delight
Get ready for a burst of flavor with my Chili Lime Chicken and Peppers Sheet Pan Delight! This easy recipe
Read more…
Roasted Butternut Squash Apple Soup Creamy Delight
Looking for a warm, creamy soup that bursts with flavor? This Roasted Butternut Squash Apple Soup is your answer. It’s
Read more…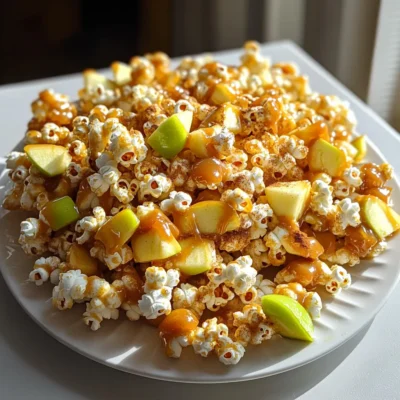
Caramel Apple Popcorn Clusters Tasty Fall Treat
Fall is here, and what better way to celebrate than with Caramel Apple Popcorn Clusters? This tasty treat blends crunchy
Read more…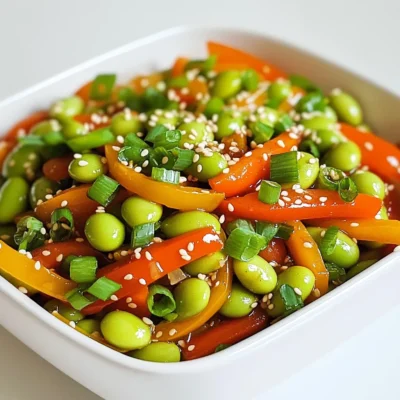
Spicy Garlic Edamame Stir Fry Flavorful Quick Meal
Looking for a quick meal packed with flavor? My Spicy Garlic Edamame Stir Fry is the answer. This dish combines
Read more…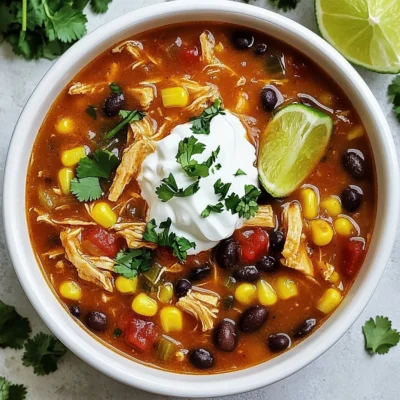
Savory Chicken Enchilada Soup Easy Family Recipe
Looking for a hearty meal that warms the soul? My Savory Chicken Enchilada Soup is your answer! Packed with tender
Read more…
Pumpkin Chocolate Chip Bread Pudding Delight Recipe
Craving a warm and sweet treat this fall? You’re in for a tasty surprise! My Pumpkin Chocolate Chip Bread Pudding
Read more…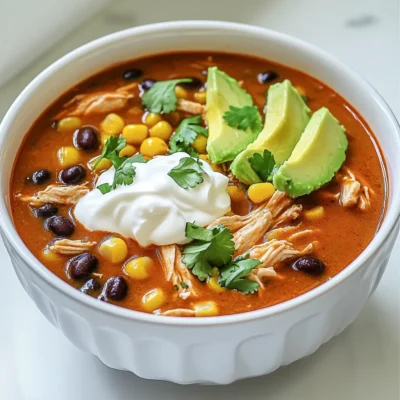
Savory Slow Cooker Chicken Enchilada Soup Recipe
Craving a warm and hearty meal? This Savory Slow Cooker Chicken Enchilada Soup is perfect for you! It’s simple to
Read more…browse recipes


No Bake Chex Peanut Butter Bars Easy and Tasty Treat
If you love tasty treats and easy recipes, you’re in for a delight! No Bake Chex Peanut Butter Bars are fun to make and…
My Latest Drinks

Strawberry Cheesecake Smoothie Creamy Refreshing Treat
Craving something delicious and cool? The Strawberry Cheesecake Smoothie is your answer! It blends creamy cheesecake flavors with sweet strawberries Read Full Recipe-
Mocktail Pink Punch Refreshing and Easy Recipe
Are you ready to impress your guests with a delightful drink? This Mocktail Pink Punch recipe is both refreshing and Read Full Recipe -
Blue Lagoon Tropical Lemonade Refreshing and Zesty Drink
Looking for a drink that’s both refreshing and fun? Say hello to Blue Lagoon Tropical Lemonade! This colorful beverage packs Read Full Recipe -
Pumpkin Spice Coffee Creamer Flavorful Fall Treat
Are you ready to embrace the cozy vibes of autumn? In this blog post, I’ll guide you through making your Read Full Recipe -
Apple Cider Margarita Mocktail Refreshing Fall Drink
Fall is here, and that means it’s the perfect time for a cozy drink! The Apple Cider Margarita Mocktail offers Read Full Recipe -
Pumpkin Spice Latte Copycat Cozy and Comforting Recipe
Craving that warm, cozy feeling of fall? You can enjoy a delicious Pumpkin Spice Latte at home! In this article, Read Full Recipe


My Latest Dinners
-
White Bean Soup Simple and Hearty Delight
Looking for a warm and filling meal? Let me introduce you to white bean soup! This simple and hearty delight Read Full Recipe -
Garlic Herb Roasted Sweet Potatoes Flavorful Side Dish
Looking for a side dish that’s both tasty and easy to make? Garlic Herb Roasted Sweet Potatoes are the answer! Read Full Recipe -
One Pot Beef Taco Pasta Easy and Flavorful Meal
Looking for a quick and tasty meal? One Pot Beef Taco Pasta is the perfect dish! This recipe packs bold Read Full Recipe -
Garlic Chicken Zucchini Noodles Stir Fry Delight
Are you ready for a tasty twist on dinner? My Garlic Chicken Zucchini Noodles Stir Fry is a quick and Read Full Recipe -
Stuffed Italian Meatloaf Easy and Tasty Recipe
Are you ready to elevate your dinner game? This Stuffed Italian Meatloaf is both easy and tasty! In this article, Read Full Recipe -
One Pot French Onion Pasta Flavorful Comfort Dish
Looking for a cozy dinner that warms your soul? Try my One Pot French Onion Pasta! This creamy, rich dish Read Full Recipe


hey,
i’m !
I’m so happy you’re here!
Every dish I share is made with love and care. I hope they bring you the same comfort and joy they bring me. Let’s make memories, one recipe at a time.
![- 1 ripe mango, diced - 1 can (15 oz) black beans, rinsed and drained - 1 red bell pepper, finely chopped - 1/2 red onion, finely chopped - 1 small jalapeño, seeded and minced - 1/4 cup fresh cilantro, chopped - Juice of 1 lime - 1 tablespoon olive oil - Salt and pepper to taste Mango black bean salsa shines because of its fresh and vibrant flavors. The main ingredients bring bright color and nutrition to the dish. The ripe mango adds sweetness, while black beans provide protein and fiber. The red bell pepper gives a nice crunch and a pop of color. I love adding a bit of red onion for its sharp flavor. The jalapeño adds a kick, but you can adjust it to your spice level. Fresh cilantro brings a herbaceous note that ties everything together. The dressing is simple yet effective. Fresh lime juice adds brightness. Olive oil gives a rich mouthfeel. A pinch of salt and pepper will enhance all the flavors. For the full recipe, check the detailed instructions. This salsa is perfect for any gathering or as a fresh topping on grilled meats. With these ingredients, you can create a refreshing and flavorful dish that everyone will enjoy! - Combine mango, black beans, red bell pepper, and red onion in a bowl. - Add jalapeño and cilantro to the mix. First, I like to gather all my ingredients. Dicing the mango is fun. You want it ripe but not mushy. Rinse the black beans well to remove extra salt. Chop the red bell pepper and red onion finely. Next, you add the minced jalapeño. This adds a great kick! If you want less heat, use less jalapeño. Finally, toss in some fresh cilantro. It makes everything bright and fresh. - Whisk together lime juice, olive oil, salt, and pepper. For the dressing, take a small bowl. Squeeze the lime juice into it. I love fresh lime juice; it tastes better than bottled. Then, add the olive oil. This brings a nice richness. Don’t forget to sprinkle in salt and pepper. Whisk it all together until it is smooth. - Pour dressing over salad and toss gently. - Adjust seasoning and let sit for flavor melding. Now, pour the dressing over your salsa mix. Toss gently to coat everything evenly. You want every bite to taste amazing. After that, take a moment to taste. You may want to add more lime or salt. Let your salsa sit for at least 15 minutes. This waiting time helps the flavors blend. Trust me, it makes a big difference in taste! For the full recipe, check out the section above. To make your mango black bean salsa shine, let it rest for a while before serving. This time allows all the flavors to blend well. I usually wait at least 15 minutes. You can adjust the lime and seasoning to fit your taste. If you want more zing, add a bit more lime juice or salt. This salsa tastes best with tortilla chips. The crunchiness of the chips pairs well with the soft mango and beans. You can also use the salsa as a topping for grilled meats. It brings a fresh twist to dishes like chicken or fish. Make your salsa look as good as it tastes. Garnish it with extra cilantro and lime wedges for a fresh look. Serving it in a colorful bowl adds to its appeal. A bright dish makes the salsa more inviting and fun to eat. You can find the full recipe to get started on this delightful dish! {{image_2}} You can switch things up with this salsa. Instead of black beans, try corn. Corn adds a sweet crunch. It pairs well with the mango. You can also add avocado for a creamy texture. The avocado makes the salsa rich and smooth. If you want less heat, use a milder pepper. A green bell pepper works well. It keeps the flavor but tones down the spice. If you like it hot, add more jalapeño. Just chop it finely and mix it in. Adjust the amount to your taste. You can serve this dish as a salad, not just as salsa. It makes a great side dish. Another fun idea is to pair it with different bases. Try it with cream cheese or Greek yogurt for a new twist. You can spread it on crackers or toast. These variations make the dish more versatile and fun to enjoy. Mango black bean salsa tastes best when fresh. You can store it in the fridge for up to 2 days. Keep it in an airtight container. This helps to lock in flavors and keep it crisp. Before serving, give it a quick stir. The salsa might separate a bit while sitting. I do not recommend freezing mango black bean salsa. Freezing changes the texture of fresh ingredients. The mango and peppers may become mushy when thawed. This will affect the salsa's taste and crunch. Enjoy it fresh instead! This salsa is best served cold. Do not reheat it, as heat can ruin the fresh taste. If you want to warm it up, try serving it with warm dishes instead. Pair it with grilled chicken or fish to enjoy the flavors together. For the full recipe, check out the previous sections. Mango Black Bean Salsa is a vibrant dish that mixes sweet and savory. It features ripe mango, black beans, and colorful veggies. The sweet mango balances the earthy flavor of beans. The lime juice adds a tangy kick. You get a refreshing taste with every bite. This salsa is perfect for warm days or any gathering. If you want to tone down the heat, here are some tips: - Use less jalapeño or skip it entirely. - Remove the seeds and ribs from the jalapeño. - Add more mango to balance the spice. - Mix in some diced bell pepper or cucumber for a cooler taste. You can use canned mango, but fresh is best. Fresh mango gives the salsa a bright flavor and nice texture. If using canned, make sure it’s in juice, not syrup. Drain it well before adding. Canned mango can work in a pinch, but fresh will always shine. Mango Black Bean Salsa stays fresh for about 2 days in the fridge. Store it in an airtight container for best results. After 2 days, the ingredients may lose their crunch. The colors might dull too, so enjoy it fresh for the best taste. Yes, you can get creative with fruits! Here are some ideas: - Add diced pineapple for a tropical twist. - Try chopped kiwi for a tart bite. - Use strawberries for a sweet and juicy addition. - Experiment with peaches for a summer flavor. Mango Black Bean Salsa pairs well with many dishes. Here are some of my favorites: - Serve it with crunchy tortilla chips. - Use it as a topping for grilled chicken or fish. - Try it on tacos for a fresh twist. - It also works great on a salad or in a wrap. For the full recipe, check out the [Full Recipe]. Mango Black Bean Salsa is easy to make and packed with flavor. We covered the main ingredients, preparation steps, and serving tips. Remember to let it rest for better flavor. You can also switch up ingredients for your taste. Store it in the fridge for a couple of days. This salsa is refreshing and perfect for many meals. Enjoy it with chips or grilled foods. You’ll love how simple and tasty it is!](https://easycookingbite.com/wp-content/uploads/2025/07/b762267d-480c-4eb5-b3d0-d77f3870bfef-300x300.webp)

. To keep your eggnog cake fresh, use an airtight container. This helps maintain moisture and flavor. You can also wrap the cake tightly with plastic wrap. Make sure to place it in a cool, dry spot. If you cut the cake, cover the exposed areas well to prevent drying out. Want to keep your eggnog cake for later? You can freeze slices for up to three months. First, let the cake cool completely. Next, wrap each slice in plastic wrap. Then, place the wrapped slices in a freezer bag. Label it with the date. When you're ready to enjoy, thaw it in the fridge overnight. How long can you keep eggnog cake? If stored properly, it lasts about three days at room temperature. In the fridge, it can stay fresh for about a week. Always check for any signs of spoilage before serving. Keeping it sealed will help maintain its taste and texture. Yes, you can use store-bought eggnog. It saves time and still tastes great. Just pick a quality brand to enhance the flavor. If you prefer homemade eggnog, that works too. The key is to ensure it is fresh and creamy. You can use applesauce or mashed bananas as an egg substitute. Use 1/4 cup for each egg. Flaxseed meal is another option. Mix 1 tablespoon of flaxseed with 2.5 tablespoons of water. Let it sit for a few minutes until it thickens. These options keep your cake moist and delicious. To add an alcohol flavor, use rum or bourbon. Replace some eggnog with your chosen alcohol. For example, if the recipe calls for 1 cup of eggnog, use 3/4 cup eggnog and 1/4 cup alcohol. This gives the cake a festive kick without overpowering it. Yes, you can make the cake in advance. Bake it a day or two ahead. Store the layers in an airtight container. Frost it the day you plan to serve it. This keeps the cake fresh and tasty. You can also freeze the layers for up to three months. Just thaw them in the fridge before frosting. For the [Full Recipe], check the details on how to prepare the cake. Eggnog cake is a festive treat you can make with ease. We covered key ingredients, from flour to spices and frosting. The steps to prepare, bake, and decorate this cake are simple. Remember the tips to enhance flavor and avoid common mistakes. You can even try variations like bundt cake or cheesecake. Proper storage ensures your cake stays fresh. Whether you want to serve it right away or save it for later, it’s a delightful dessert everyone will love. Enjoy baking and sharing this special holiday treat!](https://easycookingbite.com/wp-content/uploads/2025/05/b4c6d8e2-2d33-40bb-80ce-98982e7d6aa9-300x300.webp)
Creamy Pesto Chicken Pasta Delightful Easy Recipe
Are you ready to impress dinner guests with a creamy, dreamy dish? This Creamy Pesto Chicken Pasta is a winner for any occasion. With…
![- 2 boneless, skinless chicken breasts - 12 oz pasta (fettuccine or penne recommended) - 1 cup heavy cream - 1/2 cup basil pesto - 1/4 cup grated Parmesan cheese - Salt and pepper, to taste - 1 tablespoon olive oil - 1/2 cup cherry tomatoes, halved - Fresh basil leaves for garnish - Optional: crushed red pepper flakes for heat When I make creamy pesto chicken pasta, I focus on fresh and simple ingredients. The chicken breasts are the star, providing protein and flavor. I like to use fettuccine or penne pasta, as they hold the sauce well. For the sauce, heavy cream blends with basil pesto. This mix creates a rich, creamy texture. Grated Parmesan cheese adds a nice touch, enhancing the flavor. I always add salt and pepper to taste, adjusting as needed. Don't forget the cherry tomatoes; they bring a burst of color and freshness. Fresh basil leaves on top make the dish look great. If you want a bit of heat, crushed red pepper flakes are an easy option. You can find the full recipe for this delightful dish, so you're ready to cook! Start by seasoning the chicken breasts with salt and pepper on both sides. This simple step adds great flavor. Next, heat one tablespoon of olive oil in a large skillet over medium heat. Once the oil is hot, add the chicken breasts. Cook them for about 6-7 minutes on each side. You want them to be golden brown and fully cooked. After cooking, remove the chicken from the skillet. Let it rest for a few minutes. Then, slice the chicken into strips. While the chicken cooks, bring a large pot of salted water to a boil. Add 12 ounces of your choice of pasta. Fettuccine or penne work well for this dish. Cook the pasta according to package instructions until it is al dente. Once done, drain the pasta in a colander. Don’t forget to save 1 cup of the pasta water. This water helps adjust your sauce later. In the same skillet used for the chicken, reduce the heat to low. Pour in 1 cup of heavy cream. Stir for about 1-2 minutes until it starts to thicken slightly. Next, add 1/2 cup of basil pesto. Mix until it is fully combined with the cream. If the sauce looks too thick, slowly add some reserved pasta water. Keep mixing until you reach your desired consistency. Now, stir in 1/4 cup of grated Parmesan cheese. This adds a nice savory touch to the sauce. Add the cooked pasta and sliced chicken to the skillet. Toss everything together until coated in the creamy pesto sauce. For a pop of color and flavor, fold in 1/2 cup of halved cherry tomatoes. Let everything simmer for another 2-3 minutes until heated through. Taste your dish and adjust the seasoning as needed. If you like heat, sprinkle in some crushed red pepper flakes for an extra kick. For the complete recipe, check out the [Full Recipe]. How do I ensure chicken is cooked through? To ensure chicken is cooked through, use a meat thermometer. The thickest part should read 165°F. Cook for 6-7 minutes on each side. Let it rest before slicing. This keeps it juicy. How do I cook pasta al dente? Cook pasta al dente by boiling it in salted water. Follow package instructions but check a minute early. The pasta should be firm but not hard. Drain it right away to avoid overcooking. Should I use homemade or store-bought pesto? Homemade pesto offers fresh flavor and control over ingredients. Use fresh basil, garlic, nuts, and cheese. Store-bought pesto is convenient and saves time. Both options are tasty, so choose what fits your schedule. How can I add spice? Add crushed red pepper flakes for spice. Start with a pinch and taste as you go. This adds warmth without overpowering the dish. It’s a simple way to elevate your creamy pesto chicken pasta. What are some garnishing techniques? Garnishing can enhance the dish’s look. Use fresh basil leaves to add color. A sprinkle of Parmesan cheese can add a nice touch. Drizzle olive oil for a glossy finish. How should I serve it? Serve creamy pesto chicken pasta in bowls for a cozy feel. Ensure each bowl has a good mix of chicken, pasta, and sauce. This makes it inviting and ready to enjoy. For an extra touch, add more basil on top. For the complete steps, check the Full Recipe. {{image_2}} To make your creamy pesto chicken pasta gluten-free, choose pasta made from rice, quinoa, or chickpeas. These options work well and taste great. Many stores sell these gluten-free pastas. Always check the label to ensure they meet your needs. For a dairy-free version, swap out heavy cream for coconut cream or almond milk. Both options offer a creamy texture without dairy. You can also find dairy-free pesto in stores or make your own with nuts and herbs. Adding vegetables can boost the nutrition of your dish. Spinach and bell peppers are great choices. They add color and flavor, making the dish even more appealing. Simply toss them in during the last few minutes of cooking. You can also switch up the protein. Shrimp adds a nice twist, while mushrooms give a hearty feel. Cook them separately, then mix them in with the pasta for a delicious change. If you want to try different flavors, consider sun-dried tomato or arugula pesto. These options bring a new taste and can surprise your guests. They are easy to find in stores or online. For those who love to experiment, making homemade pesto allows for customization. Use any nuts, herbs, or oils you like. Blend them together until smooth for a unique flavor. This is a fun way to personalize your creamy pesto chicken pasta. You can find the full recipe for creamy pesto chicken pasta to try these variations! To store your creamy pesto chicken pasta, let it cool first. Place it in an airtight container. This keeps the pasta fresh and tasty. You can store it in the fridge for up to three days. After this, the quality may drop. Make sure to check for any off smells or changes in texture. To reheat your pasta, the stovetop works best. Add a splash of water or cream to the pan. This keeps the pasta moist and creamy. Stir it often over medium heat until warm. You can also use a microwave. Place your pasta in a microwave-safe bowl and cover it. Heat in short bursts, stirring in between, until heated through. If you want to freeze creamy pesto chicken pasta, use a freezer-safe container. It can last up to three months in the freezer. When ready to eat, move it to the fridge to thaw overnight. For faster thawing, you can use the microwave. Reheat it on low heat, stirring often, until hot. What is the best type of pasta for creamy pesto chicken? The best pasta for this dish is fettuccine or penne. They hold the sauce well. You can use other pasta shapes, too, like fusilli or farfalle, if you prefer. Can I make this dish ahead of time? Yes, you can make it ahead of time. Cook the pasta and chicken, then mix them with the sauce right before serving. This keeps everything fresh. What can I use instead of heavy cream? If you want a lighter option, try using half-and-half or coconut cream. Both will give you a nice texture without the extra calories. How spicy can I make this dish? You can adjust the spice easily! Add crushed red pepper flakes to the sauce. Start with a pinch, then taste and add more if you want it spicier. Can I use rotisserie chicken instead of cooking my own? Absolutely! Rotisserie chicken is a great time-saver. Just shred it and add it to the sauce with the pasta. Is this recipe suitable for meal prep? Yes, this dish is great for meal prep! Store it in airtight containers in the fridge. It stays tasty for up to three days. Caloric content per serving One serving of creamy pesto chicken pasta contains about 600 calories. This can vary based on your pasta and cream choices. Breakdown of macronutrients (protein, fats, carbs) - Protein: Approximately 30g - Fats: About 35g - Carbs: Roughly 60g For more details, check the full recipe for the complete nutritional breakdown! You can create a tasty creamy pesto chicken pasta with simple steps and fresh ingredients. You learned how to cook the chicken, boil the pasta, and make the creamy sauce. Remember to experiment with flavors and add veggies or proteins you like. This dish is flexible and easy for any meal. Store leftovers properly to enjoy later. With these tips, you can impress anyone at the table. Enjoy your cooking adventures and make this dish your own!](https://easycookingbite.com/wp-content/uploads/2025/07/b86ceccc-b130-4490-be9c-0ef1467f8bcb.webp)
