


Latest & Greatest

Spring Vegetable Stir-Fry Flavorful and Quick Meal
Ready for a fresh, tasty meal? My Spring Vegetable Stir-Fry is quick and simple! Packed with vibrant spring veggies, this
Read more…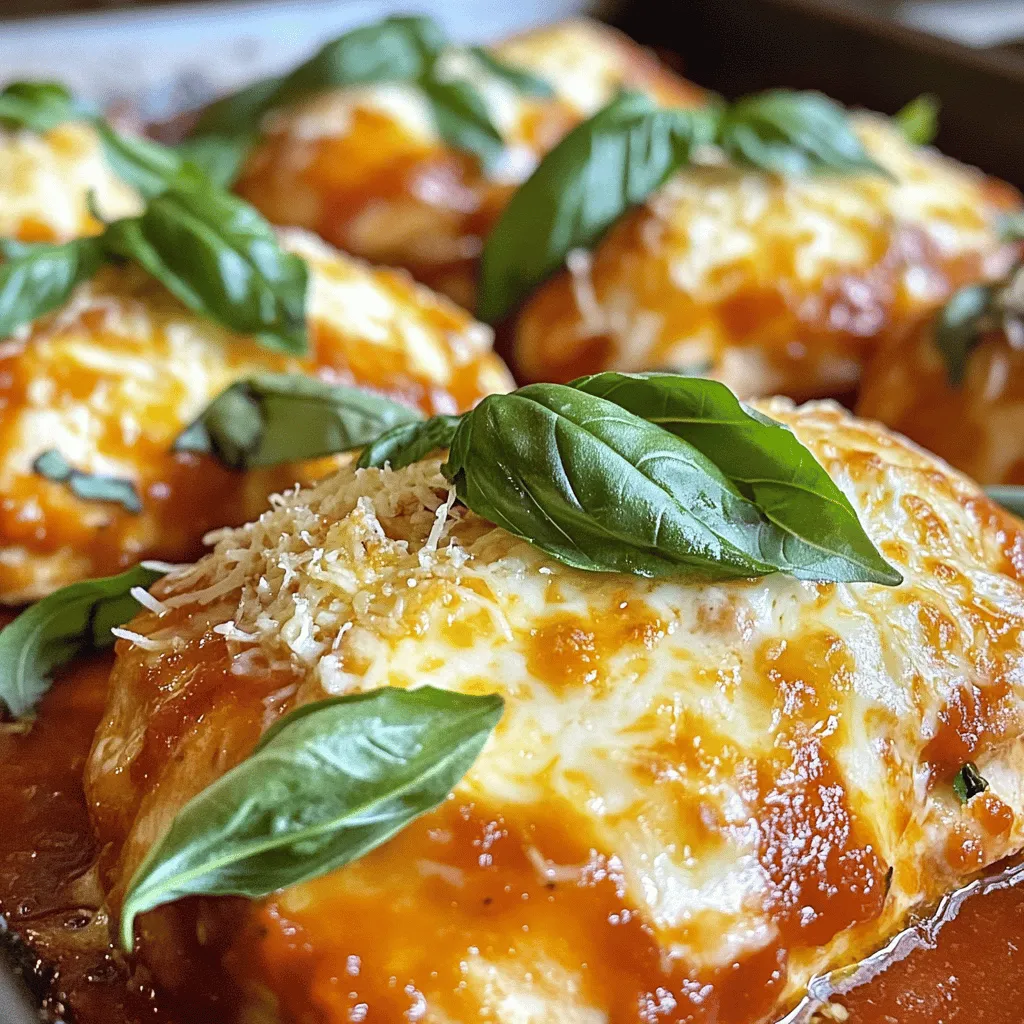
Easy Italian Baked Chicken Flavorful and Simple Meal
Are you ready to enjoy a warm, flavorful meal that’s easy to make? I’m excited to share my Easy Italian
Read more…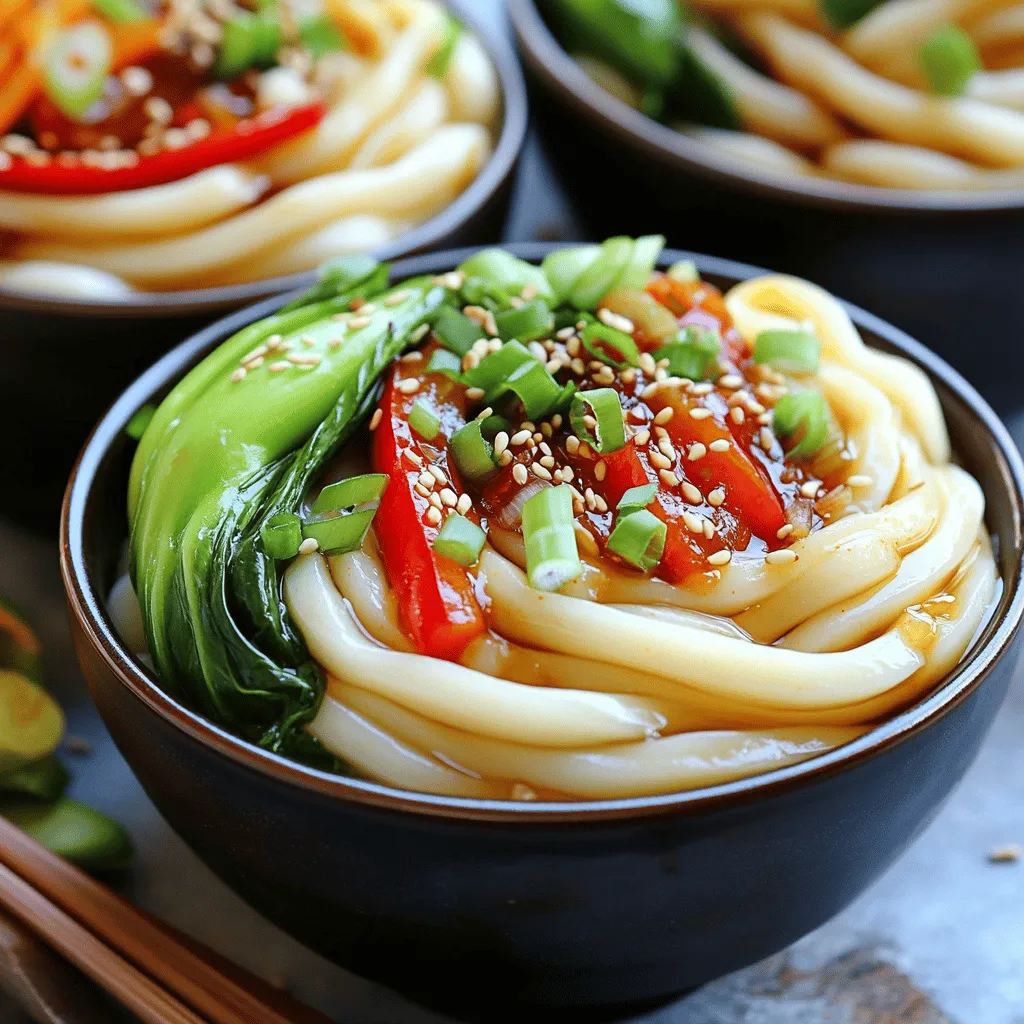
Chili Oil Udon Noodles Quick and Flavorful Stir-Fry
Are you ready to spice up your dinner routine? Chili Oil Udon Noodles are quick, tasty, and perfect for a
Read more…
Coconut Cream Pie Scrumptious and Simple Recipe
If you love desserts that are sweet and creamy, you will adore this Coconut Cream Pie recipe. It’s easy to
Read more…
Crispy Fried Chicken Delightfully Easy to Prepare
Do you crave crunchy, juicy fried chicken that’s easy to make? You’re in the right place! I’ll guide you through
Read more…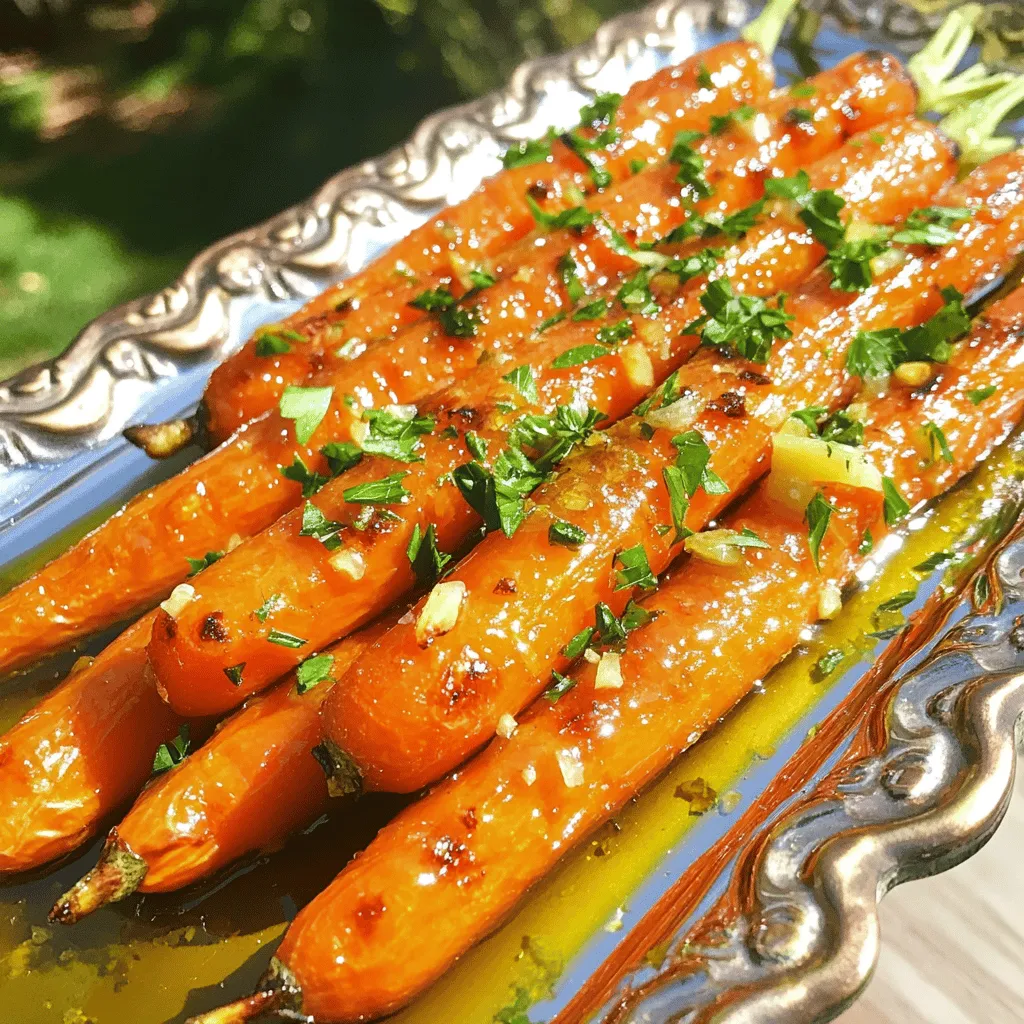
Tangy Lemon Garlic Roasted Carrots Flavorful Side Dish
Are you ready to elevate your dinner game with a vibrant, delicious side dish? Tangy Lemon Garlic Roasted Carrots are
Read more…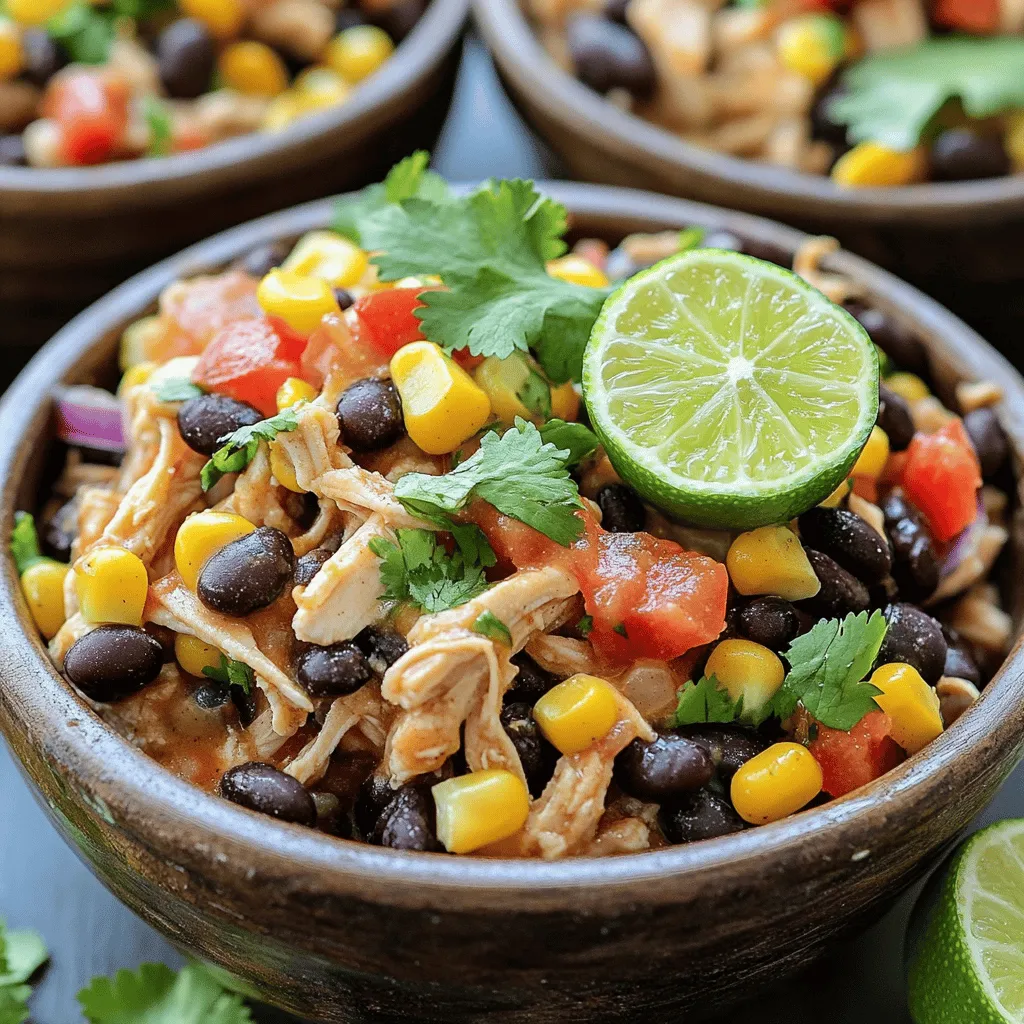
Crockpot Mexican Chicken Flavorful and Easy Recipe
Looking for a simple, tasty dinner idea? This Crockpot Mexican Chicken recipe is your answer. With just a few easy
Read more…
Spring Hash Brown Crust Quiche Flavorful and Easy Meal
Spring Hash Brown Crust Quiche offers a fresh twist on an easy classic. With crispy hash browns as the crust,
Read more…browse recipes


![- 4 boneless, skinless chicken breasts - 2 ripe mangoes, diced - 1 red bell pepper, diced - 1/2 red onion, finely chopped - 1 jalapeño, deseeded and minced - 2 tablespoons fresh cilantro, chopped - 2 tablespoons lime juice - 1 tablespoon olive oil - 1 teaspoon ground cumin - Salt and pepper to taste Mango Salsa Chicken shines with fresh and vibrant ingredients. The chicken gives you a juicy base. Ripe mangoes add sweetness and a tropical twist. The red bell pepper brings a nice crunch and color. In the salsa, finely chopped red onion adds zest. The jalapeño gives just the right kick. Fresh cilantro brightens the flavors. Lime juice ties everything together with a tangy touch. Olive oil keeps the salsa smooth. Ground cumin adds depth and warmth. Gather these ingredients for a dish that is easy and full of flavor. For the full recipe, follow the steps listed later. Enjoy the process of making this fresh summer meal! First, preheat your grill to medium-high heat. This helps get those nice grill marks on the chicken. While the grill heats up, gather and prepare your ingredients. You will need to dice the mangoes and red bell pepper. Finely chop the red onion and jalapeño. Next, in a large bowl, combine the diced mangoes, red bell pepper, red onion, jalapeño, cilantro, lime juice, and a pinch of salt. Mix well and set this aside. Letting the flavors meld for about 15 minutes makes the salsa taste even better. Now it’s time to season the chicken. Rub each breast with olive oil, ground cumin, salt, and pepper. Make sure every piece is evenly coated. Once seasoned, place the chicken on the grill. Cook each breast for about 6-7 minutes on each side. Use a meat thermometer to check the internal temperature. It should reach 165°F (75°C) for safe eating. After grilling, remove the chicken from the grill and let it rest for a few minutes. Resting helps keep the chicken juicy. When ready to serve, place each chicken breast on a plate. Top it generously with the fresh mango salsa. For an extra pop, garnish with more cilantro and a wedge of lime. This will make your dish look as good as it tastes! For the complete recipe, follow [Full Recipe]. To grill mango salsa chicken well, set your grill to medium-high heat. This temperature helps cook the chicken evenly. Each side should grill for about 6-7 minutes. Keep an eye on the time. You want the chicken to reach an internal temperature of 165°F (75°C). This ensures it is safe to eat. Letting the chicken rest after grilling is key. This step keeps the juices inside, making the chicken tender and juicy. Selecting ripe mangoes is essential for a bright salsa. When choosing mangoes, look for ones that are slightly soft to the touch. They should have a sweet smell at the stem. To balance the flavors in your salsa, mix sweet and spicy elements. The sweetness of the mango pairs well with the heat from the jalapeño. Adding lime juice brightens the salsa and ties the flavors together. Let the salsa rest for about 15 minutes before serving. This time allows the flavors to meld beautifully. For a complete meal, consider serving mango salsa chicken with rice or quinoa. These sides soak up the delicious juices. You can also add a fresh salad with mixed greens for crunch. When it comes to drinks, pair the meal with a light white wine or a refreshing iced tea. This combination enhances the summer vibe of your dish. For more ideas, check out the Full Recipe to explore variations and side options. {{image_2}} Grilling and baking are both great ways to cook mango salsa chicken. - Grilled: Grilling gives the chicken a nice char and smoky flavor. You can cook it on medium-high heat for about 6-7 minutes on each side. - Baked: If you prefer baking, preheat your oven to 400°F (200°C). Place the seasoned chicken in a baking dish and cook for 25-30 minutes. For a super easy option, try a slow cooker. Just place the chicken in the slow cooker with all the salsa ingredients. Cook on low for 6-8 hours. This method keeps the chicken tender and juicy. You can swap ingredients in mango salsa chicken to match your tastes. If mangoes are not available, try using peaches or pineapple. For the bell pepper, zucchini works well too. Adjusting spice levels is easy. If you prefer less heat, leave out the jalapeño. Want it spicier? Add more jalapeño or a dash of hot sauce. Making mango salsa chicken fit your diet is simple. To make it gluten-free, check that all sauces are gluten-free. You can also use low-carb options. Instead of chicken, try using cauliflower steaks or portobello mushrooms for a vegetarian dish. These variations give everyone a chance to enjoy this tasty meal, no matter their dietary needs. For the full recipe, check out the details above. For best results, store any Mango Salsa Chicken leftovers in airtight containers. This keeps the chicken juicy and the salsa fresh. I recommend placing the chicken and salsa in separate containers. Leftover chicken stays good in the fridge for about three to four days. Always check for any off smells or changes in color before eating. To freeze Mango Salsa Chicken, let it cool completely. Then, wrap each chicken breast tightly in plastic wrap. Place the wrapped chicken in a freezer bag. This helps to prevent freezer burn. The salsa can also be frozen in a separate container. Use the frozen chicken within three months for the best flavor. When ready to eat, thaw the chicken in the fridge overnight. Reheat it in the oven or microwave until hot. Ensure it reaches an internal temperature of 165°F (75°C) before serving. You can use leftover chicken in many ways. Shred it for tacos or salads. Mix it into a stir-fry or pasta dish. The mango salsa adds a sweet touch to any meal. If you have extra salsa, try it on fish or with chips. This keeps your meals fun and fresh. You can create new dishes that are quick and easy with your stored ingredients. You can pair Mango Salsa Chicken with many tasty sides. Here are a few ideas: - Rice: White or brown rice works great. It soaks up the salsa juice. - Quinoa: This is a healthy option packed with protein. - Corn on the cob: Sweet corn adds a nice crunch to the meal. - Salad: A fresh green salad with lime dressing complements the dish well. - Black beans: They add a rich flavor and protein boost. These sides will enhance your meal and make it more filling. Yes, you can prepare the mango salsa ahead of time. Making it early helps the flavors blend. Here are some tips: - Make it the day before: This gives time for the flavors to mix well. - Store it in the fridge: Use a sealed container to keep it fresh. - Stir before serving: This helps redistribute the juices and flavors. Enjoying salsa that’s been resting can make it even tastier! The best way to know if chicken is done is by checking its temperature. Aim for an internal temperature of 165°F (75°C). Here are some best practices: - Use a meat thermometer: Insert it into the thickest part of the chicken. - Check the juices: If they run clear, the chicken is likely done. - Look for firmness: Cooked chicken feels firm when you press it. Following these steps will help you serve perfectly cooked chicken every time! Mango Salsa Chicken is a fresh, tasty meal you can easily make at home. We covered essential ingredients like chicken breasts, ripe mangoes, and lime juice. You learned the steps to grill the chicken and prepare the salsa. Remember the tips for juicy chicken and the best mangoes. Feel free to explore variations based on your taste. With proper storage, leftovers can turn into new meals. Enjoy making this dish for you and your loved ones!](https://easycookingbite.com/wp-content/uploads/2025/05/ab457469-db5d-4213-a277-91f214bf8a3e.webp)
Mango Salsa Chicken Flavorful and Easy Summer Meal
Mango Salsa Chicken is the perfect dish for your summer meals! It’s quick to make and bursting with fresh flavors. Imagine juicy chicken topped…
My Latest Desserts
-

Cherry Coffee Cake Muffins Simple and Tasty Recipe
If you’re craving a fun and tasty twist on classic muffins, I’m here to share a simple and delicious recipe Read Full Recipe -
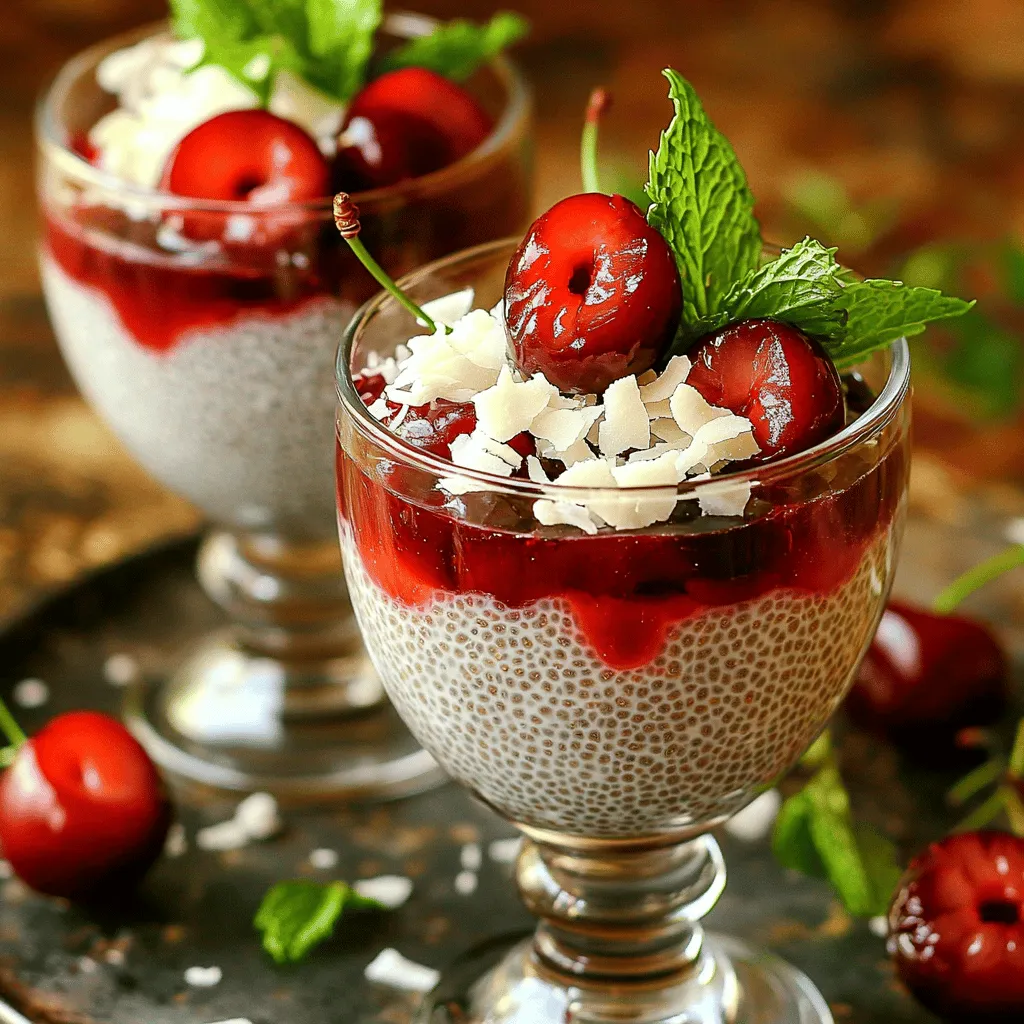
Cherry Coconut Chia Pudding Energizing Healthy Snack
Looking for a quick, tasty snack that’s both sweet and nutritious? Cherry Coconut Chia Pudding hits the mark perfectly! This Read Full Recipe -

Cherry Chocolate Chunk Cookies Irresistible Treat Recipe
Get ready to indulge in a treat that combines the sweet tang of cherries with rich, dark chocolate. In this Read Full Recipe -

Cherry Nut Energy Bars Quick and Easy Recipe
Looking for a quick snack that fuels your day? These Cherry Nut Energy Bars are perfect for you! Packed with Read Full Recipe -

Banana Nut Muffins Quick and Easy Recipe Guide
Welcome to your new favorite baking adventure! In this guide, I’ll show you how to make delicious Banana Nut Muffins Read Full Recipe -
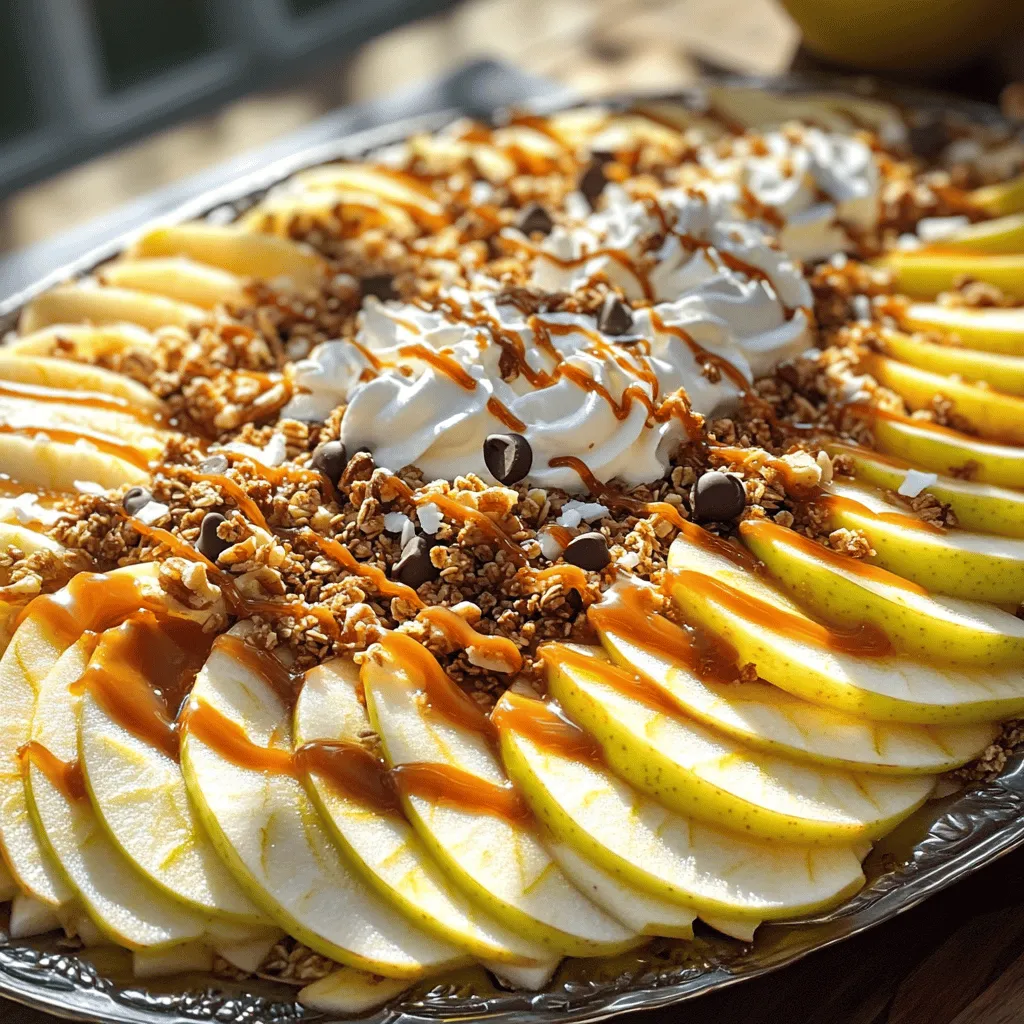
Caramel Apple Nachos Deliciously Simple Treat
Get ready for a snack that’s fun, easy, and oh-so-delicious: Caramel Apple Nachos! This treat lets you enjoy the crispiness Read Full Recipe -

Blueberry Lemon Muffins Flavorful and Simple Recipe
If you crave a delightful treat that bursts with flavor, look no further than my Blueberry Lemon Muffins. This simple Read Full Recipe -

Classic Apple Pie Delightful and Simple Recipe
There’s nothing quite like a warm slice of classic apple pie straight from the oven. In this article, I’ll share Read Full Recipe -

Chocolate Chip Banana Bread Irresistible and Soft
Are you ready to make the softest, most delicious Chocolate Chip Banana Bread ever? This easy recipe gives you the Read Full Recipe -

No-Bake Energy Bites Simple and Flavorful Snack
Looking for a quick and tasty snack? You’ll love these No-Bake Energy Bites! Made with simple ingredients like oats, peanut Read Full Recipe
My Latest Recipes

hey,
i’m !
I’m so happy you’re here!
Every dish I share is made with love and care. I hope they bring you the same comfort and joy they bring me. Let’s make memories, one recipe at a time.
![- 2 ripe avocados, pitted and flesh scooped - 3 cloves garlic, minced - 2 tablespoons lemon juice - 1/4 cup fresh basil leaves - 1/4 cup extra-virgin olive oil - 12 ounces whole wheat pasta (spaghetti or linguine) These main ingredients create a creamy and rich sauce. Ripe avocados give the best flavor and texture. Garlic adds a nice kick, while lemon juice brightens the dish. Fresh basil brings a lovely herbal note. Whole wheat pasta adds heartiness and nutrition. - 1/4 cup grated Parmesan cheese - Cherry tomatoes, halved (for garnish) - Red pepper flakes (for garnish, optional) Adding grated Parmesan gives extra creaminess. Cherry tomatoes add color and freshness. A sprinkle of red pepper flakes can give a spicy touch if you like heat. - Salt and freshly cracked black pepper These are key for enhancing flavors. Use enough salt in the pasta water. Always season the sauce to make every bite delicious. For the full recipe, check the section above. Start by boiling a large pot of salted water. This step is key for great flavor. Once the water is bubbling, add your whole wheat pasta. Cook it until it is al dente, which means it should be firm but not hard. This usually takes about 8 to 10 minutes, depending on the type of pasta you pick. Before draining, remember to reserve about one cup of pasta water. This water is starchy and helps to make the sauce creamy. Next, grab a food processor. Add the scooped avocados, minced garlic, lemon juice, fresh basil, and olive oil. Blend all of these ingredients until the mixture is smooth and creamy. If the sauce feels too thick, don’t worry! Just add a bit of the reserved pasta water, one tablespoon at a time, until it reaches the right consistency. Once your pasta is ready and your sauce is smooth, it's time to combine them. Place the hot, drained pasta into a large mixing bowl. Pour the avocado sauce over the pasta and mix it well to coat every strand. Taste your dish and adjust the seasoning with salt and black pepper as needed. If you like, stir in some grated Parmesan cheese for an extra touch of creaminess. Enjoy your creamy avocado pasta! For the complete instructions, check the [Full Recipe]. To make creamy avocado pasta, you need ripe avocados. Look for ones that yield slightly when you press them gently. They should feel soft but not mushy. If they are hard, they are not ripe yet. You can speed up ripening by placing them in a paper bag with an apple or banana. Store your avocados at room temperature until they ripen. Once ripe, move them to the fridge to slow down the spoiling process. This can keep them fresh for a few more days. To take your avocado pasta to the next level, think about herbs and spices. Fresh basil adds a nice touch. You can also try adding parsley or cilantro for a different flavor. For a kick, a pinch of red pepper flakes works great. Using fresh ingredients always gives the best taste. However, dried herbs can work in a pinch. Just remember that dried herbs are stronger, so use less. Getting the sauce just right is key. If your sauce is too thick, add some reserved pasta water. Start with a tablespoon at a time until you get the texture you want. For a creamy finish, blend your avocado mixture well. Make sure to mix it really smooth. This will help it coat the pasta evenly. For the full recipe, check out Creamy Avocado Pasta. {{image_2}} If you want to make this dish vegan, it's easy! You can replace the Parmesan cheese with nutritional yeast. Nutritional yeast gives a cheesy flavor without any dairy. You can also try toppings like fresh herbs, nuts, or seeds for extra crunch. These options bring a fun twist to the creamy avocado pasta. Want to add some protein? There are great choices! You can toss in cooked chicken, shrimp, or even beans. Each option keeps the dish tasty and filling. If you choose chicken or shrimp, cook them simply with salt and pepper. If you prefer beans, black beans or chickpeas work well. They add a nice texture and keep the avocado flavor front and center. For gluten-free needs, use gluten-free pasta. Many brands offer options that taste great. You can also make a low-carb version by using zucchini noodles. This keeps it light and fresh. The creamy avocado sauce still works perfectly with these choices. It’s a great way to enjoy this meal while sticking to your diet goals. For the full recipe, check out the detailed steps and ingredients to make this dish! To keep your creamy avocado pasta fresh, store it in an airtight container. Make sure the lid fits tightly. This keeps moisture in and air out. To avoid browning of the avocado sauce, add extra lemon juice before storing. The acid in the juice slows down browning. Reheat your pasta gently. Use a microwave or a pan on low heat. Add a splash of olive oil or a bit of reserved pasta water. This helps to restore the creamy texture. To refresh flavors, stir in a pinch of fresh basil or more lemon juice while reheating. You can freeze creamy avocado pasta, but it may change in texture. To freeze, place the pasta in a freezer-safe container. Leave some space at the top for expansion. When ready to eat, thaw it in the fridge overnight. Reheat gently to avoid making it mushy. You can use a fork or a potato masher. First, scoop the avocado into a bowl. Then, mash it until smooth. Add minced garlic, lemon juice, and olive oil. Stir well with a fork. If it gets too thick, add some pasta water. This method works well for a creamy texture. Yes, but with a few tips. Cook your pasta and make the sauce separately. Store them in airtight containers in the fridge. Mix them just before serving to keep the pasta fresh. Add a bit of lemon juice to the avocado sauce to slow browning. This keeps your dish bright and tasty. This pasta pairs well with many sides. Try a simple green salad with lemon vinaigrette. Garlic bread is another great option. You could also add roasted vegetables for a colorful plate. For a protein boost, serve with grilled chicken or shrimp. These sides make your meal even more delicious. You can make a delicious creamy avocado pasta using simple, fresh ingredients. Start with ripe avocados, garlic, lemon juice, and whole wheat pasta. Blend the sauce, mix it with hot pasta, and adjust as needed. Remember to choose avocados wisely and enhance flavor with spices. This dish offers many variations, from vegan options to adding protein. Store leftovers properly to keep them fresh. Enjoy this easy and tasty meal that fits many diets!](https://easycookingbite.com/wp-content/uploads/2025/05/06c761e8-ee8e-42cc-9f4b-b181cfaa7557-300x300.webp)
![- 2 large zucchinis, spiralized - 1 cup bean sprouts - 1 bell pepper, thinly sliced (preferably a mix of red and yellow) - 1 carrot, julienned - 3 green onions, chopped (white and green parts separated) Zucchini is the star of this dish. It makes a great noodle substitute. Spiralizing the zucchinis gives them a fun shape. The texture stays crunchy, which I love. Bean sprouts add a nice bite. They also bring freshness. Bell peppers and carrots offer vibrant colors and sweetness. Together, they make the dish lively and bright. - 2 tablespoons peanut butter (smooth) - 3 tablespoons low-sodium soy sauce - 1 tablespoon fish sauce (or use coconut aminos for a vegan option) - 1 lime, juiced - 2 cloves garlic, minced - 1 tablespoon fresh ginger, minced - 1 tablespoon sesame oil The sauce is where the magic happens. Peanut butter gives it creaminess. Soy sauce adds salt and umami. Lime juice brings a zesty kick. Garlic and ginger add warmth and depth. This simple blend creates a tasty sauce that hugs the noodles. - 1/2 cup unsalted peanuts, crushed - Fresh cilantro for garnish (optional) - Red pepper flakes (to taste; optional) Garnishes make your dish look pretty. Crushed peanuts give a nice crunch. Fresh cilantro adds a pop of color and flavor. Red pepper flakes can add heat if you like. These toppings make your Zucchini Noodle Pad Thai even better. For the full recipe, check the details above. Spiralizing Techniques To make zucchini noodles, start with two large zucchinis. You can use a spiralizer or a julienne peeler. Both tools create long, curly noodles. Take your time to get nice, even strands. Salting and Drying Once you spiralize the zucchinis, place them in a colander. Sprinkle a pinch of salt over them. Let them sit for about ten minutes. This process helps to draw out excess moisture. After ten minutes, pat them dry with paper towels. This step keeps your noodles from getting soggy. Heating the Oil and Aromatics In a large skillet or wok, heat one tablespoon of sesame oil over medium heat. Add two cloves of minced garlic and one tablespoon of minced ginger. Sauté them for about one minute until they smell nice and fragrant. Adding the Vegetables Now, add one thinly sliced bell pepper and one julienned carrot to the skillet. Also, toss in the white parts of three chopped green onions. Cook these veggies for about three to four minutes. You want them to soften a little but not lose their crunch. Mixing in the Sauce Next, stir in your zucchini noodles. Cook for an additional three to five minutes, tossing gently. You want them heated through but still a bit chewy. In a small bowl, whisk together two tablespoons of peanut butter, three tablespoons of soy sauce, one tablespoon of fish sauce, and the juice of one lime. Pour this sauce over the noodles and mix well. Adding Garnishes and Serving Toss in one cup of bean sprouts and cook for another one to two minutes. This keeps them crunchy. Remove the skillet from heat. Serve hot, garnished with crushed peanuts, the green parts of the scallions, and fresh cilantro if you like. Enjoy your fresh and flavorful Zucchini Noodle Pad Thai! For the full recipe, check out the detailed instructions above. Avoiding Overcooked Zucchini Noodles To keep your zucchini noodles firm, cook them briefly. Heat them just until warm. If you overcook them, they'll turn mushy. Remember, you want a nice chew. Keep an eye on them while cooking. They should be tender but not limp. When to Add Bean Sprouts Add the bean sprouts at the end of cooking. This way, they stay crunchy. If you cook them too long, they lose their snap. Toss them in for a minute, just to warm them up. Adjusting Spice Levels You can make this dish as spicy as you like. Add red pepper flakes to the sauce for heat. Start with a little, then taste it. You can always add more spice, but you can't take it out. Alternative Sauces If you want to change up the flavor, try different sauces. You can use tahini instead of peanut butter. Coconut aminos is a great soy sauce substitute for a sweeter taste. Experiment with what you like best. Best Spiralizer to Use A good spiralizer makes creating zucchini noodles easy. Look for one with a sturdy base. It should let you make long, even noodles. A handheld spiralizer is great for small kitchens. Choosing the Right Pan Use a large skillet or wok for making this dish. A wide pan helps the noodles cook evenly. Plus, it gives you room to toss everything together without making a mess. A non-stick pan works well to prevent sticking. For the complete recipe, check out the [Full Recipe]. {{image_2}} Vegan Substitutes You can easily make Zucchini Noodle Pad Thai vegan. Replace fish sauce with coconut aminos. This swap keeps the flavor but makes it plant-based. Use extra veggies or tofu for protein. Gluten-Free Options For gluten-free Pad Thai, choose gluten-free soy sauce or tamari. This keeps it safe for those with gluten allergies. Check labels to ensure all ingredients are gluten-free. Protein Options (Tofu, Chicken, Shrimp) You can add protein to your dish. Tofu works well as a meat substitute. Cube it and sauté until golden. Chicken or shrimp can also enhance flavor. Cook them well before adding to the noodles. Vegetables to Experiment With Feel free to add more veggies. Broccoli, snap peas, or mushrooms can add color and taste. Experiment with what you love. Each veggie brings a unique crunch and flavor. Using Other Vegetables If you want a twist, try other vegetables. Carrots or sweet potatoes can be spiralized too. These options offer different tastes and textures. Traditional Pad Thai Noodles You can also use traditional rice noodles. Cook them separately and mix with the zucchini noodles. This gives a classic Pad Thai feel while keeping it fresh. For the complete recipe, check out the [Full Recipe]. When you make Zucchini Noodle Pad Thai, you may have some leftovers. You can keep them in the fridge for about 3 days. Store them in an airtight container to keep them fresh. This helps lock in flavors and moisture. For reheating, you have two good options: microwave or stovetop. The microwave is quick, but it can make the noodles softer. The stovetop is better for keeping that nice texture. Heat them in a pan on medium heat. Stir gently until warm. This keeps the noodles from getting mushy. You might wonder, can you freeze zucchini noodles? Yes, but it’s best to freeze them before cooking. Raw zucchini noodles hold up better in the freezer. To thaw, place them in the fridge overnight. When ready, quickly sauté them in a pan. This method helps maintain their texture and flavor. If you want a full recipe to get started, check out the Zucchini Noodle Pad Thai recipe. Zucchini Noodle Pad Thai is a fresh take on traditional Pad Thai. Instead of using rice noodles, we use spiralized zucchinis. This dish has all the classic flavors you love but with fewer carbs and more veggies. You’ll find a mix of crunchy veggies and a creamy sauce that makes it so tasty. It’s fast, fun, and perfect for a weeknight meal. To keep zucchini noodles from getting soggy, start by salting them. After spiralizing, sprinkle salt on the noodles and let them sit for ten minutes. This will draw out excess water. Then, pat them dry with paper towels. Cooking them for just a few minutes helps keep them firm. Avoid overcooking, as this can turn them mushy. Yes, you can! If you want to swap zucchini, try using carrots or bell peppers. Spiralized carrots add sweetness and crunch. Thinly sliced bell peppers give a nice color and flavor. Other options include yellow squash or even cucumber for a cool twist. Mix and match to find your favorite veggie combo! For the full recipe, check the section above. In this blog post, I shared how to make Zucchini Noodle Pad Thai step-by-step. We covered the main ingredients, including zucchini, bean sprouts, and key sauce components. I provided tips for cooking and enhancing flavor. You also learned about storage and meal variations. This dish is simple and fun to make. It creates a healthy twist on a classic favorite. Enjoy your cooking adventure with Zucchini Noodle Pad Thai! Keep experimenting with different flavors and ingredients.](https://easycookingbite.com/wp-content/uploads/2025/05/9b92dd9d-9d96-4799-b2a1-3d780eed81ec-300x300.webp)
![To make delicious lemon blueberry overnight oats, gather these key items: - 1 cup rolled oats - 1 cup almond milk (or any milk of choice) - 1/2 cup Greek yogurt (vanilla or plain) - 1 tablespoon chia seeds - Zest of 1 lemon - 2 tablespoons lemon juice - 2 tablespoons honey or maple syrup (adjust to taste) - 1 cup fresh blueberries (plus extra for garnish) - A pinch of salt These ingredients work together to create a creamy, tasty breakfast. The oats soak up the milk and flavor, giving you a filling meal. You can change your overnight oats to suit your taste! Here are some optional ingredients: - Almonds or walnuts for crunch - Flax seeds for added fiber - Vanilla extract for more flavor - Other fruits like strawberries or bananas Feel free to mix and match these options. This lets you create a dish you will love every time. When it is time to serve, add some tasty toppings! Try these: - Extra fresh blueberries - A sprinkle of lemon zest - A drizzle of honey or maple syrup - A dollop of yogurt These toppings add a nice touch and make your oats look great. They also boost flavor and nutrition! Don't forget to explore the full recipe for more tips. Making lemon blueberry overnight oats is quick and easy. You only need ten minutes for prep. Gather all your ingredients first. This way, you stay organized. You will love how simple this is! 1. Begin with a medium bowl. Add the rolled oats and milk. 2. Next, mix in Greek yogurt and chia seeds. 3. Zest the lemon and add it to the bowl. 4. Pour in the lemon juice and honey. Add a pinch of salt. 5. Stir everything well until it combines. 6. Now, gently fold in the fresh blueberries. Make sure they spread evenly. 7. Take two mason jars or containers. Divide the mix between them. 8. Seal the jars and place them in the fridge overnight. Keep your overnight oats in the fridge. They stay fresh for up to five days. Use airtight containers to keep them sealed. You can add toppings like nuts or seeds before serving. If you want to change the texture, add a splash of milk before eating. Enjoy your delicious lemon blueberry overnight oats! For the full recipe, check out the details above. To make the best lemon blueberry overnight oats, use rolled oats. They soak up the liquid well and stay soft. Combine all your ingredients in a bowl before putting them in jars. This step ensures even mixing. Make sure to let the oats soak for at least four hours. Overnight is best for a creamy texture. Store your oats in the fridge for up to four days. Use airtight containers to keep them fresh. If you have leftovers, stir them well before serving. You might need to add a splash of milk to loosen the oats. This keeps the texture just right. Add more fruits to boost flavor. Try bananas or strawberries for a new twist. Adding nuts or seeds increases the protein and healthy fats. You can also switch honey for maple syrup for a different taste. For a zestier bite, add more lemon juice or zest. This makes your oats even more refreshing. For the full recipe, you can refer to the Lemon Blueberry Bliss Overnight Oats. {{image_2}} If you want to make your lemon blueberry overnight oats nut-free, it's easy! Swap almond milk for oat milk or coconut milk. Both options add creaminess without nuts. You can also use sunflower seed butter instead of nut butter. It gives a nice flavor and keeps it safe for school lunches. For a dairy-free twist, skip the Greek yogurt. Use coconut yogurt or a dairy-free yogurt of your choice. This keeps the oats creamy and tasty. The almond milk can also be replaced with soy or oat milk for a smooth texture. These options ensure you still enjoy the creamy goodness without dairy. Change up your fruit based on the season. In spring, try strawberries or raspberries. In summer, peaches or cherries work well. Fall calls for apples or pears, and in winter, you might enjoy dried fruits like cranberries or figs. Each fruit adds a unique flavor and keeps your oats fresh and exciting. For the complete recipe, check out the [Full Recipe]. You can keep lemon blueberry overnight oats in the fridge for up to five days. This makes them a great meal prep option. Store them in airtight containers to keep them fresh. Check for any off smells or changes in texture before eating. You can freeze overnight oats if you want to save some for later. Place the oats in freezer-safe containers or bags. They will last for about three months in the freezer. When you're ready to eat, just thaw them in the fridge overnight. You can enjoy your overnight oats cold or warm them up. If you choose to heat them, scoop the oats into a bowl. Add a splash of milk to keep them creamy. Microwave for about 30-60 seconds. Stir well and enjoy! Yes, you can use steel-cut oats, but they need more time to soak. Steel-cut oats are chewier and less creamy than rolled oats. If you choose them, let the mixture sit longer. Aim for at least 12 hours in the fridge. This gives the oats time to soften. To adjust sweetness, you can add more honey or maple syrup. Start with a small amount, about a teaspoon, and taste. If you want it sweeter, add a bit more. You can also use mashed banana or a splash of vanilla extract for a different flavor. These ingredients offer many health benefits. Oats provide fiber, which aids digestion. Blueberries are packed with antioxidants, helping to fight inflammation. Greek yogurt adds protein and probiotics for gut health. Chia seeds boost Omega-3 fatty acids, which are good for your heart. Lemon adds vitamin C, which supports your immune system. Yes, it is safe to eat overnight oats for up to three days in the fridge. After that, the oats may lose texture and flavor. Always check for signs of spoilage, like an off smell or mold. If they look and smell good, enjoy them! For the full recipe, check the earlier section. Lemon blueberry overnight oats offer a tasty, quick breakfast. We discussed the key ingredients, step-by-step instructions, and helpful tips for great results. You can customize your oats with various toppings and ingredients, creating a mix that suits you. Remember to store any leftovers properly to enjoy later. This meal is not only simple but also healthy. Dive into this recipe and enjoy a fun way to start your day!](https://easycookingbite.com/wp-content/uploads/2025/05/c069cd58-bb87-420e-b00b-df899806f4c8-300x300.webp)
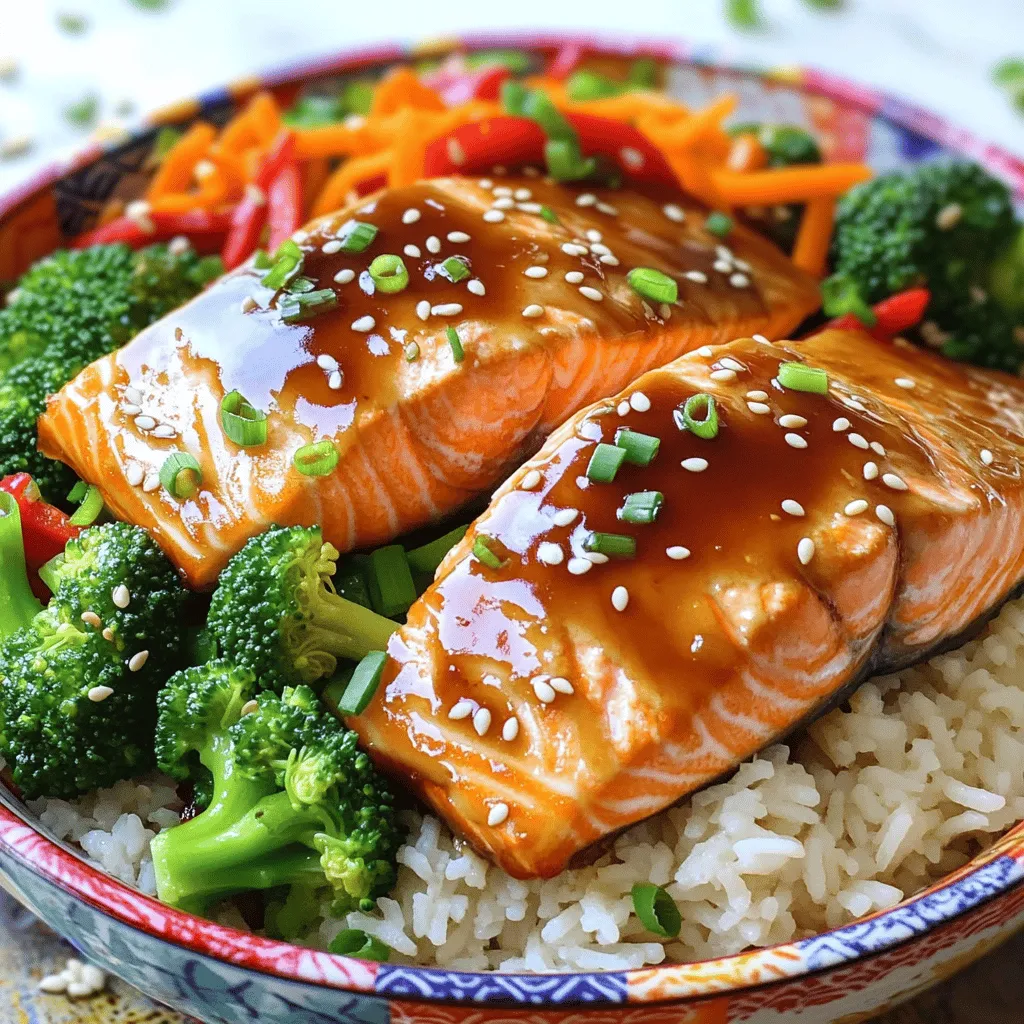
Teriyaki Salmon Bowls Flavorful and Easy Recipe
Are you craving a dish that’s both healthy and bursting with flavor? Teriyaki salmon bowls are your answer! In this recipe, you’ll learn how…