

Latest & Greatest
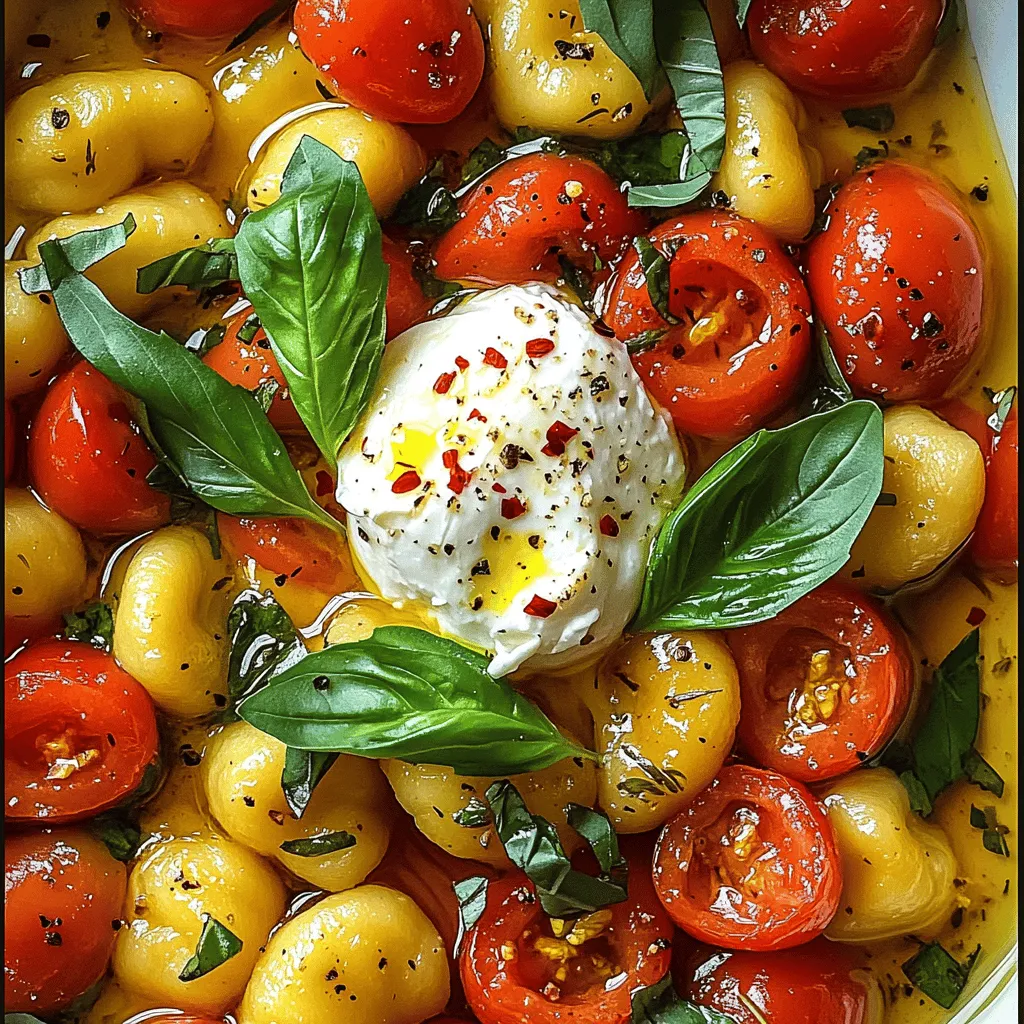
30 Minute Tomato Gnocchi with Burrata Flavor Burst
If you’re looking for a quick and tasty meal, you’re in for a treat! This 30 Minute Tomato Gnocchi with
Read more…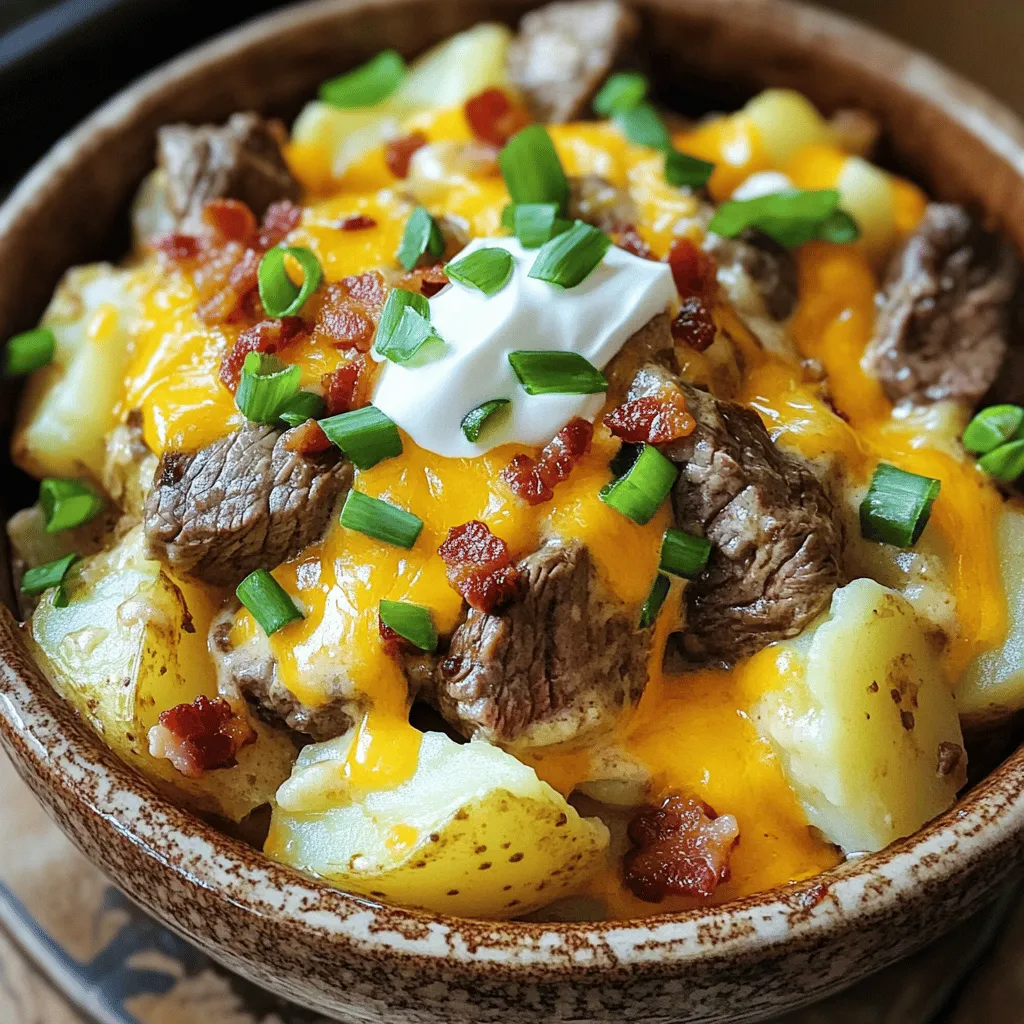
Crockpot Loaded Steak and Potato Bake Easy Comfort Dish
Are you craving a warm, comforting meal that practically cooks itself? Look no further! This Crockpot Loaded Steak and Potato
Read more…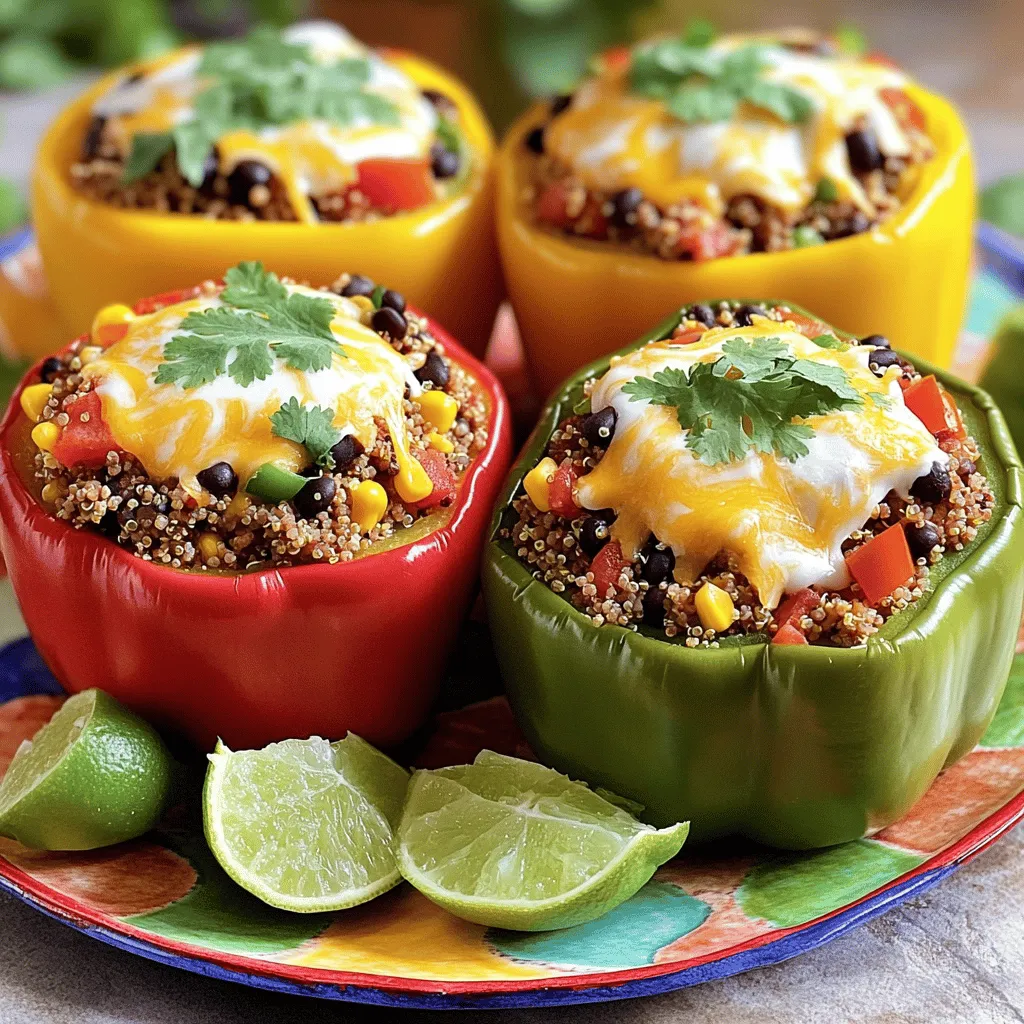
Stuffed Bell Peppers with Ground Turkey Delight
Are you ready to impress your family with a delicious and healthy meal? Stuffed bell peppers with ground turkey are
Read more…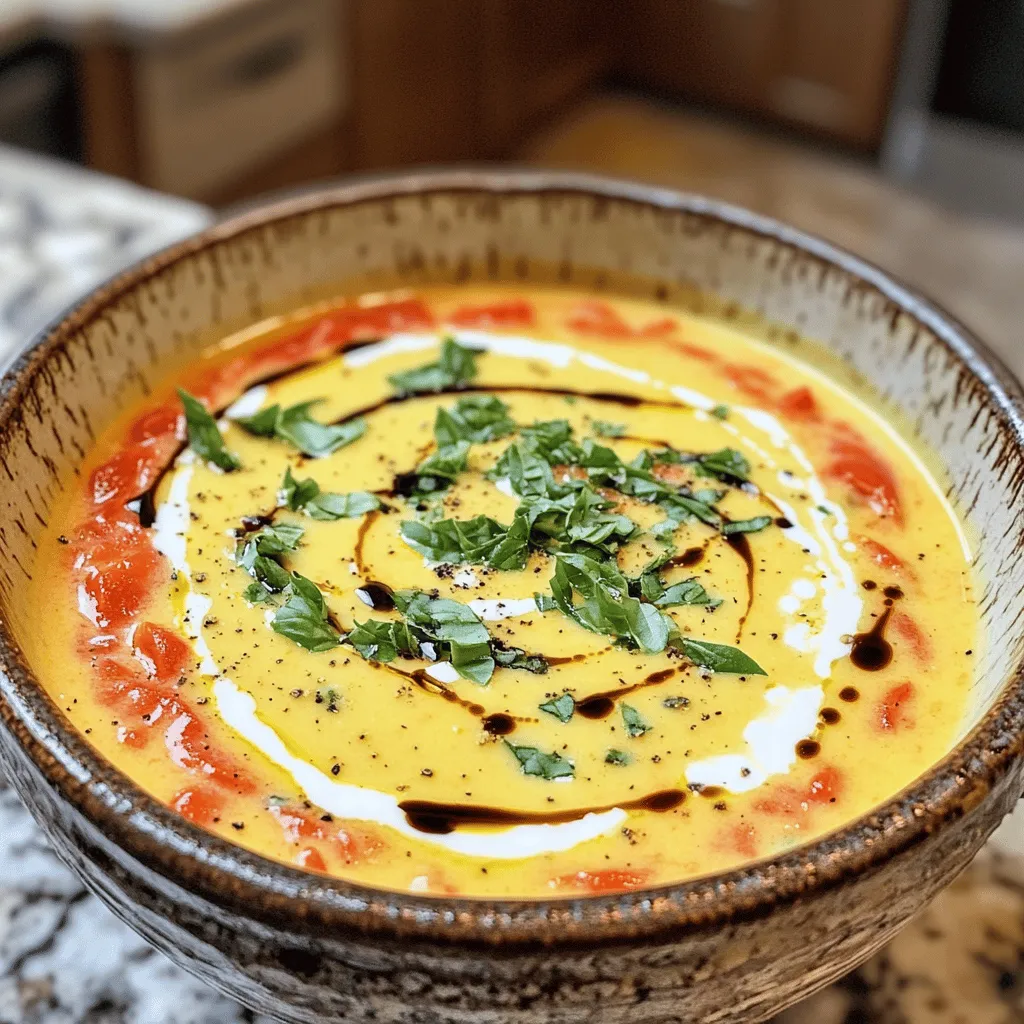
Creamy Tomato Basil Soup Flavorful and Simple Recipe
Looking for a warm and comforting bowl of creamy tomato basil soup? You’re in the right place! This simple recipe
Read more…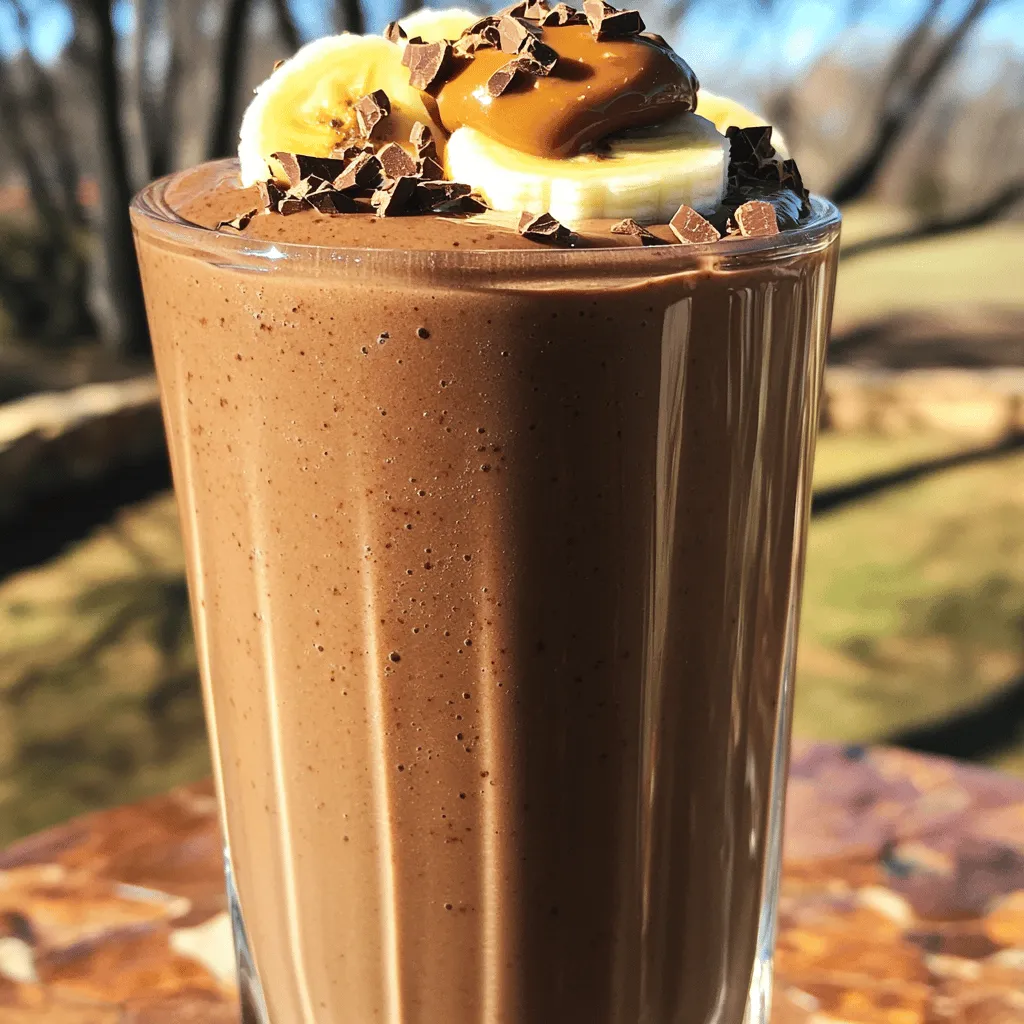
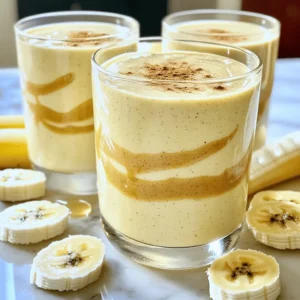
Chocolate Banana Smoothie Easy and Delicious Recipe
Looking for a quick treat that’s both tasty and healthy? This Chocolate Banana Smoothie is your answer! It’s a simple
Read more…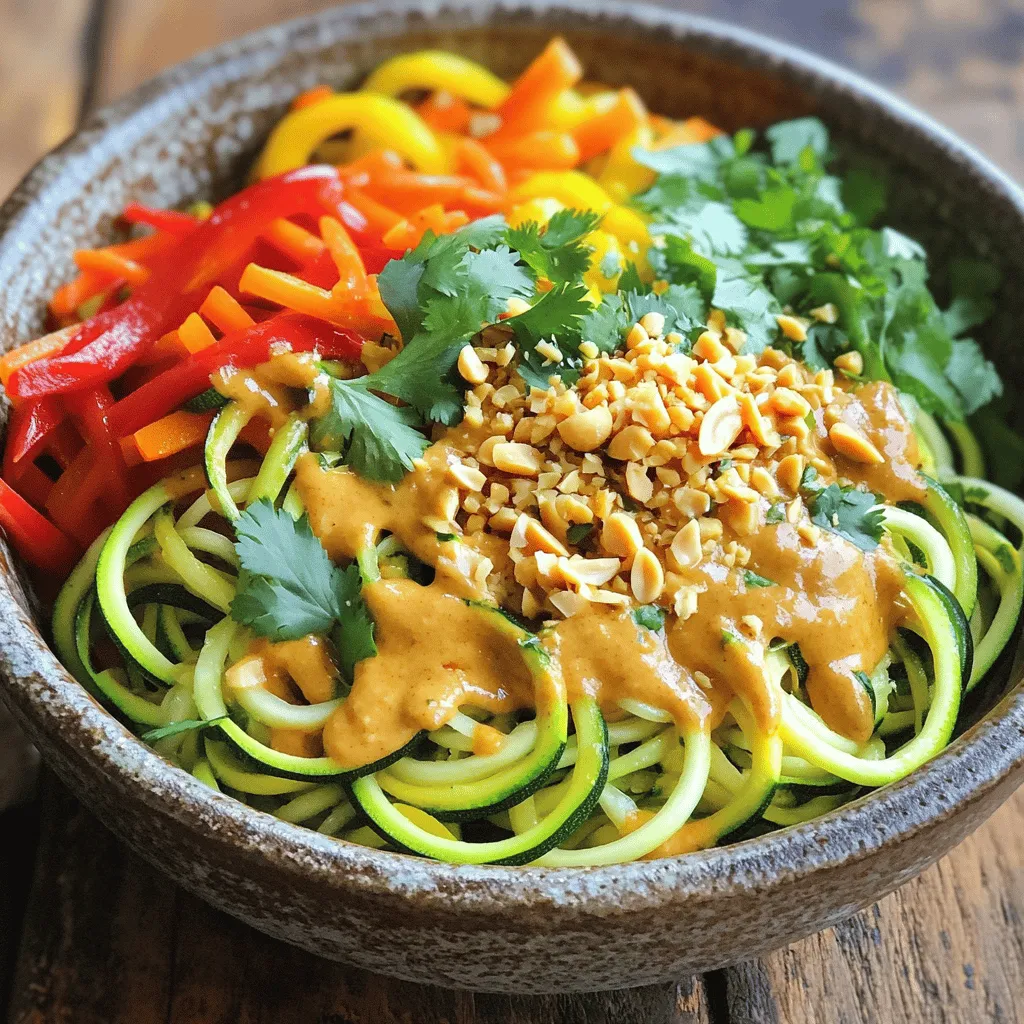
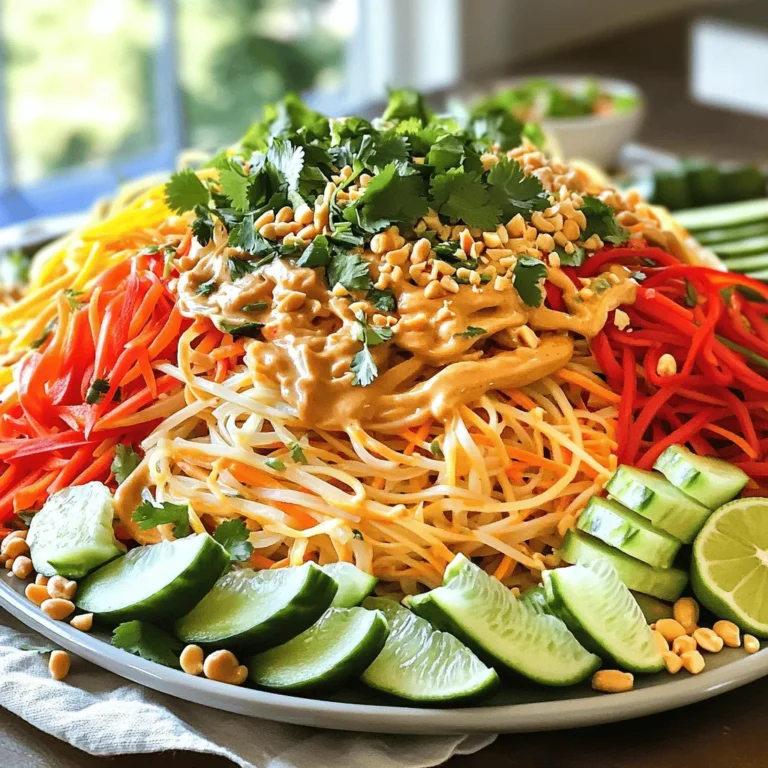
Zucchini Noodle Pad Thai Fresh and Flavorful Recipe
Are you ready to elevate your Pad Thai game? This Zucchini Noodle Pad Thai recipe is fresh, healthy, and bursting
Read more…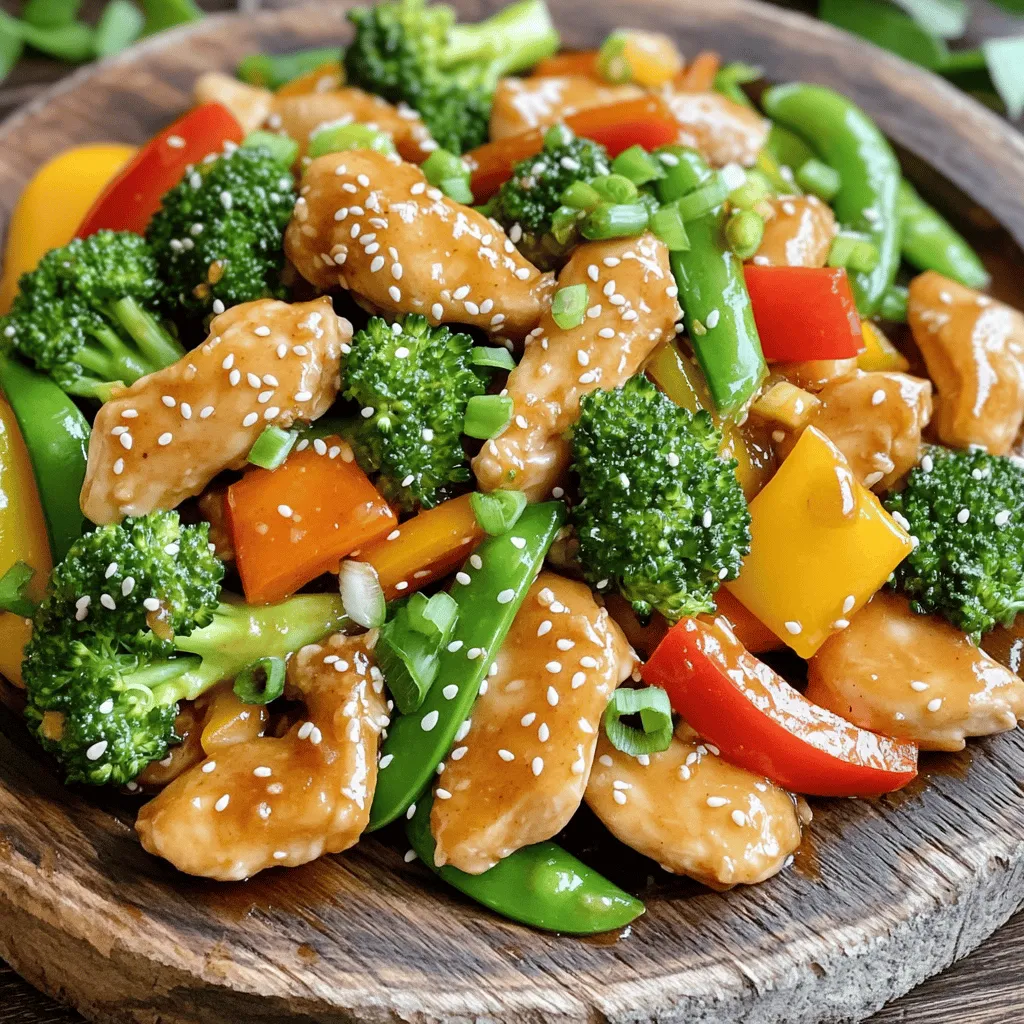
Honey Garlic Chicken Stir-Fry Flavorful Dinner Idea
Looking for a quick and tasty dinner? Honey Garlic Chicken Stir-Fry is your answer! This dish combines sweet honey and
Read more…
Creamy Spinach Artichoke Dip Delightful Party Snack
Looking for the perfect party snack? My Creamy Spinach Artichoke Dip is a crowd-pleaser! This cheesy, rich dip blends fresh
Read more…browse recipes


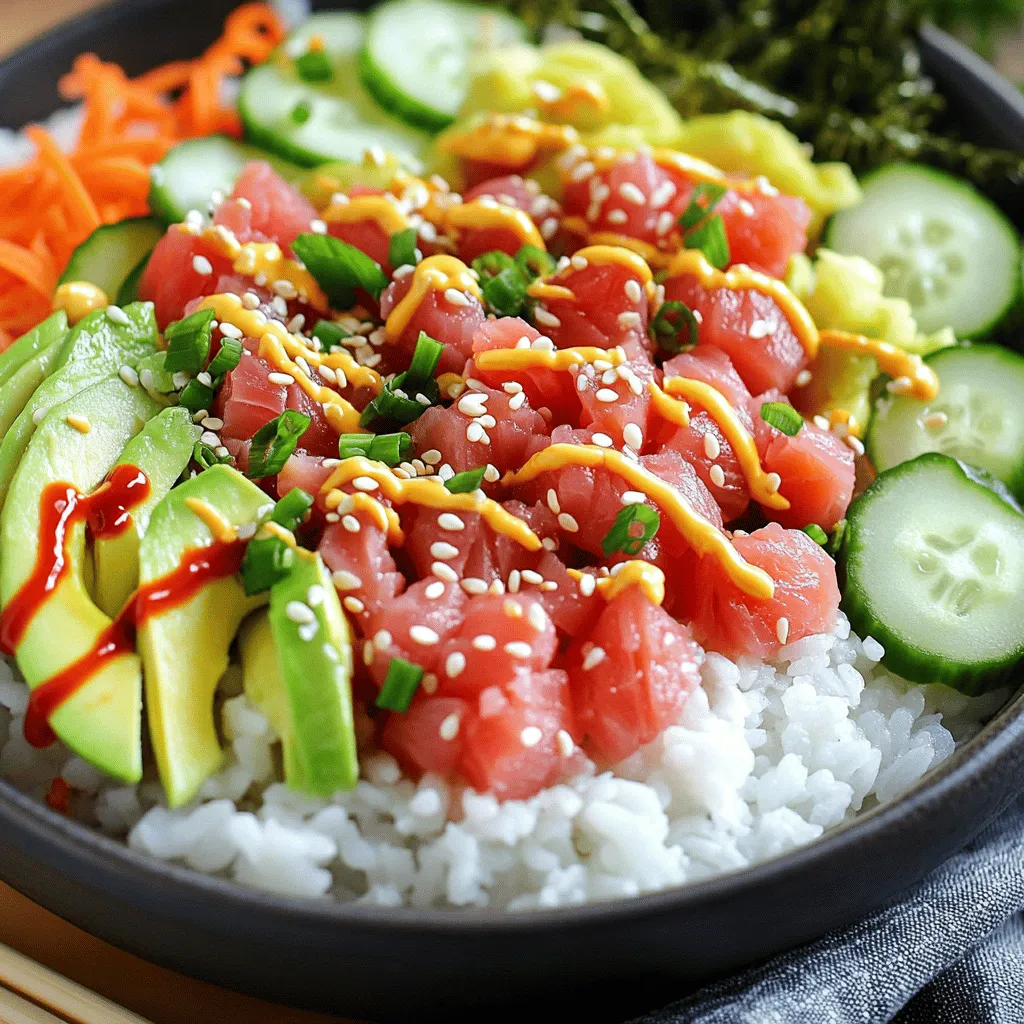
Spicy Tuna Sushi Bowls Flavorful Fresh Dish Delight
If you adore fresh flavors and want a fun twist on sushi, you’ll love Spicy Tuna Sushi Bowls! This delightful dish features sushi rice,…
My Latest Drinks

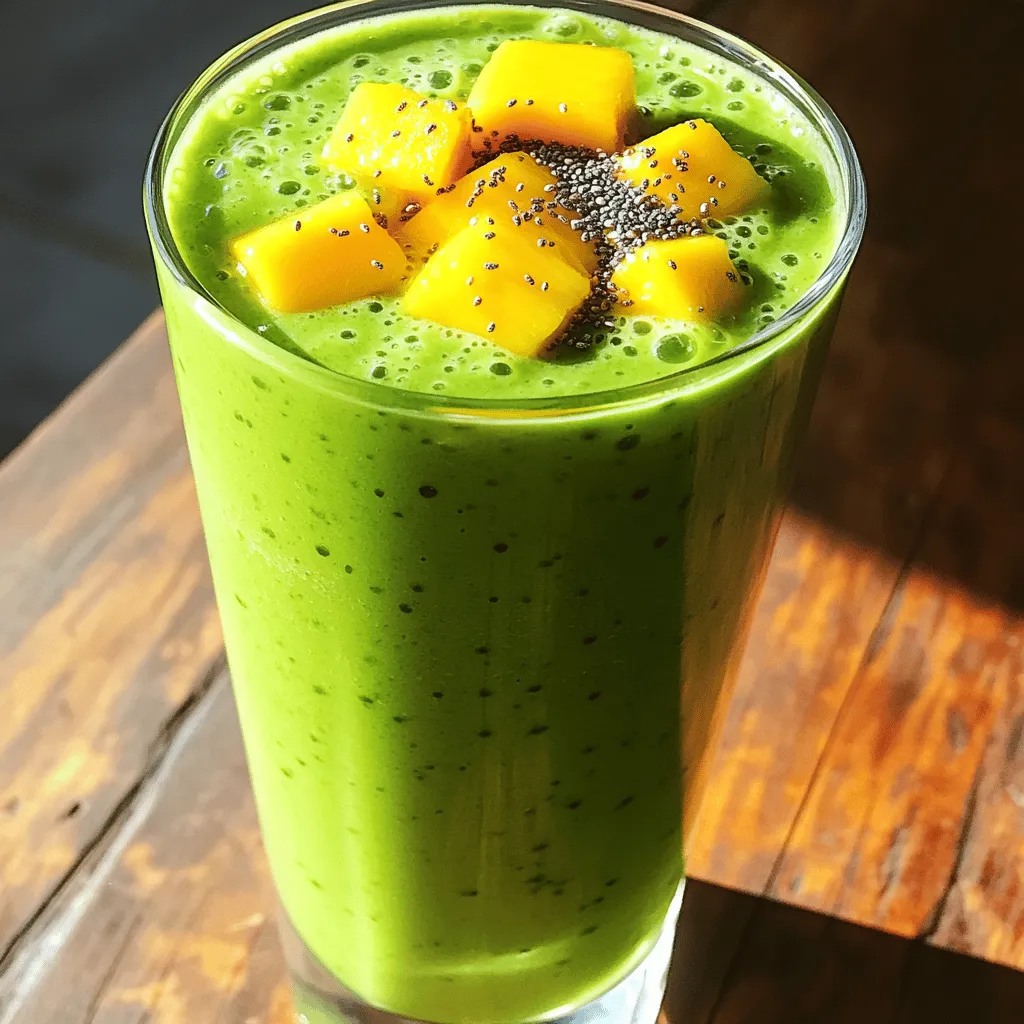
Tropical Green Smoothie Refreshing Health Boost Recipe
Looking for a refreshing drink that packs a health punch? My Tropical Green Smoothie is the perfect blend of fruits Read Full Recipe-
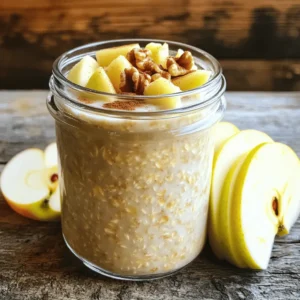
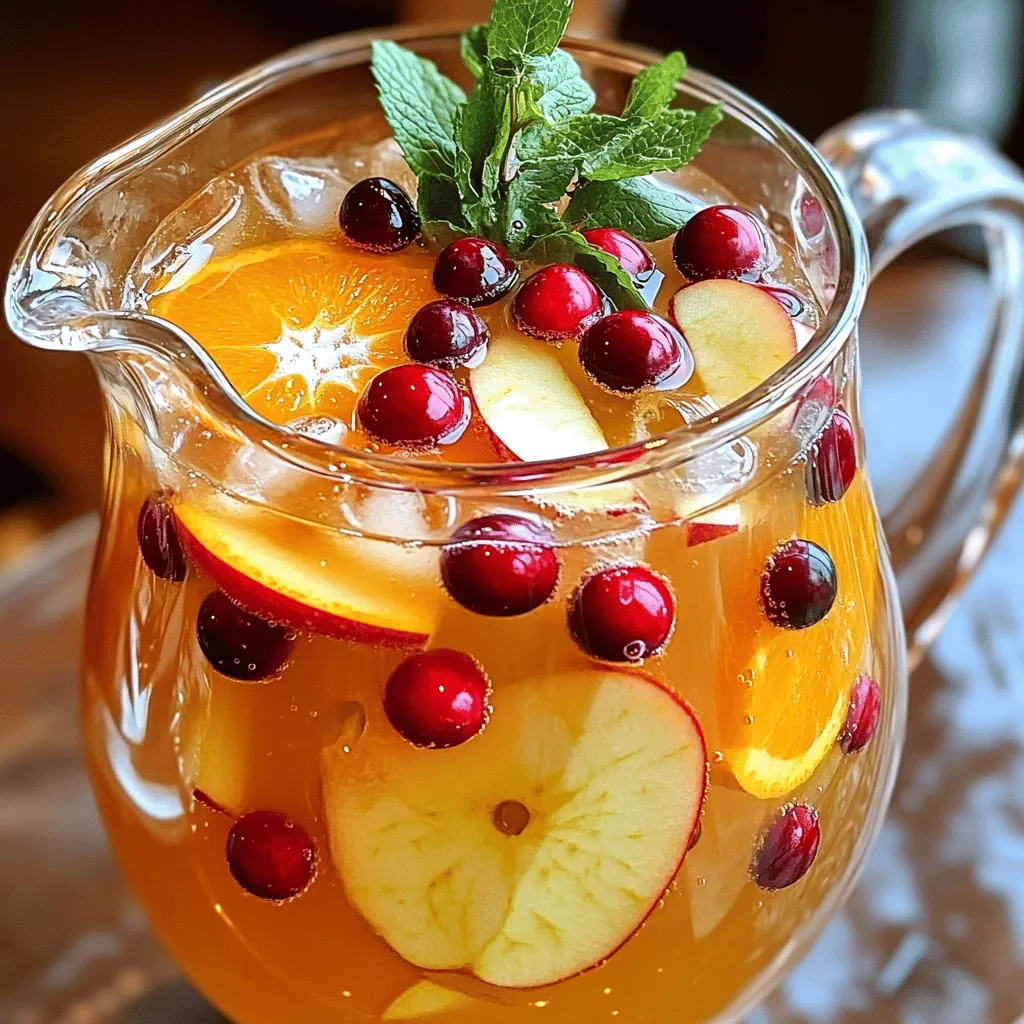
Apple Cider Harvest Punch Refreshing Fall Delight
Get ready for fall with my delicious Apple Cider Harvest Punch! This easy recipe blends fresh flavors that celebrate the Read Full Recipe -
Pineapple Coconut Smoothie Creamy and Refreshing Drink
Are you craving a drink that’s both creamy and refreshing? Look no further than my Pineapple Coconut Smoothie! This easy-to-make Read Full Recipe -
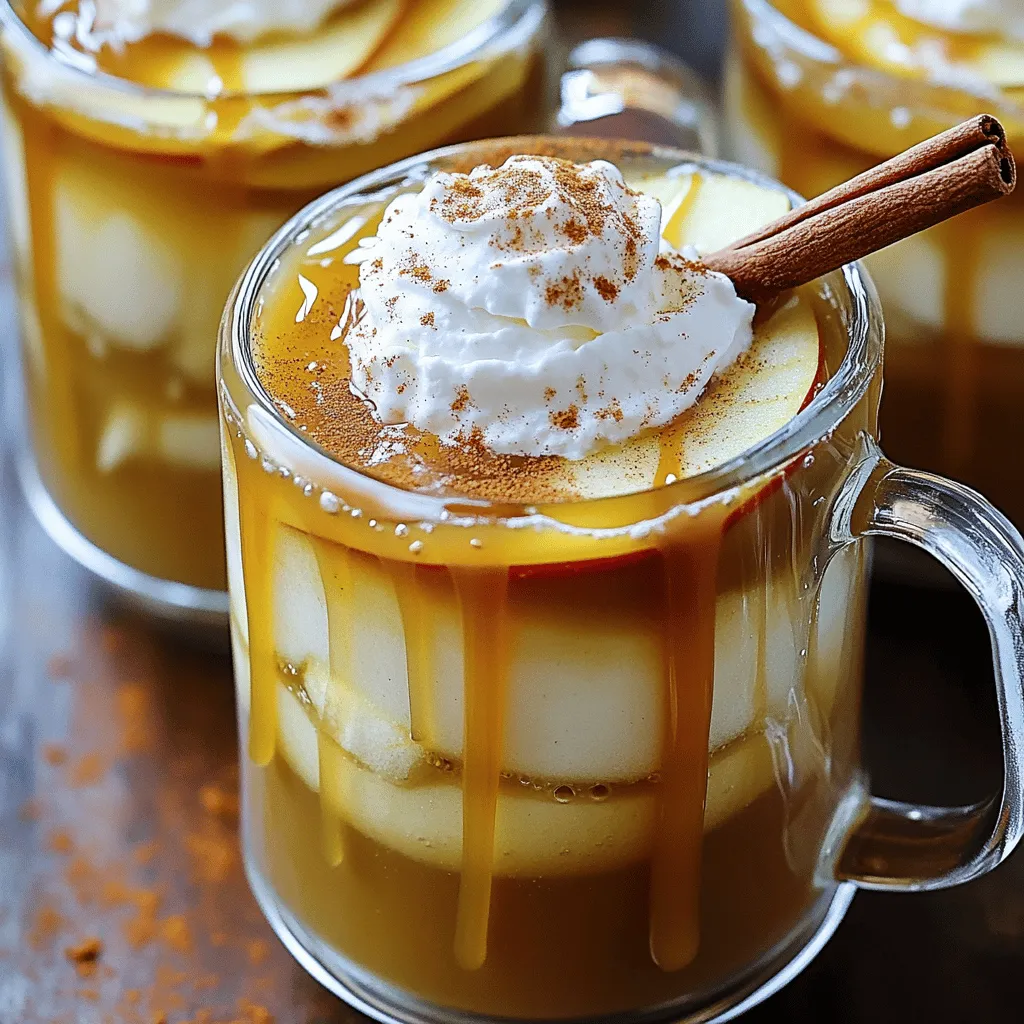
Delicious Caramel Apple Cider Cozy Fall Drink Recipe
Fall is here, and nothing says cozy like a warm cup of Caramel Apple Cider. This drink combines the sweet Read Full Recipe -
Instant Pot Apple Cider Quick and Flavorful Recipe
Looking for a quick and delicious way to make apple cider? The Instant Pot is your best friend! I’ll share Read Full Recipe -
Chocolate Covered Strawberry Smoothie Delicious Treat
Craving something delicious and healthy? The Chocolate Covered Strawberry Smoothie is the perfect treat! With fresh strawberries, cocoa powder, and Read Full Recipe


My Latest Dinners
-
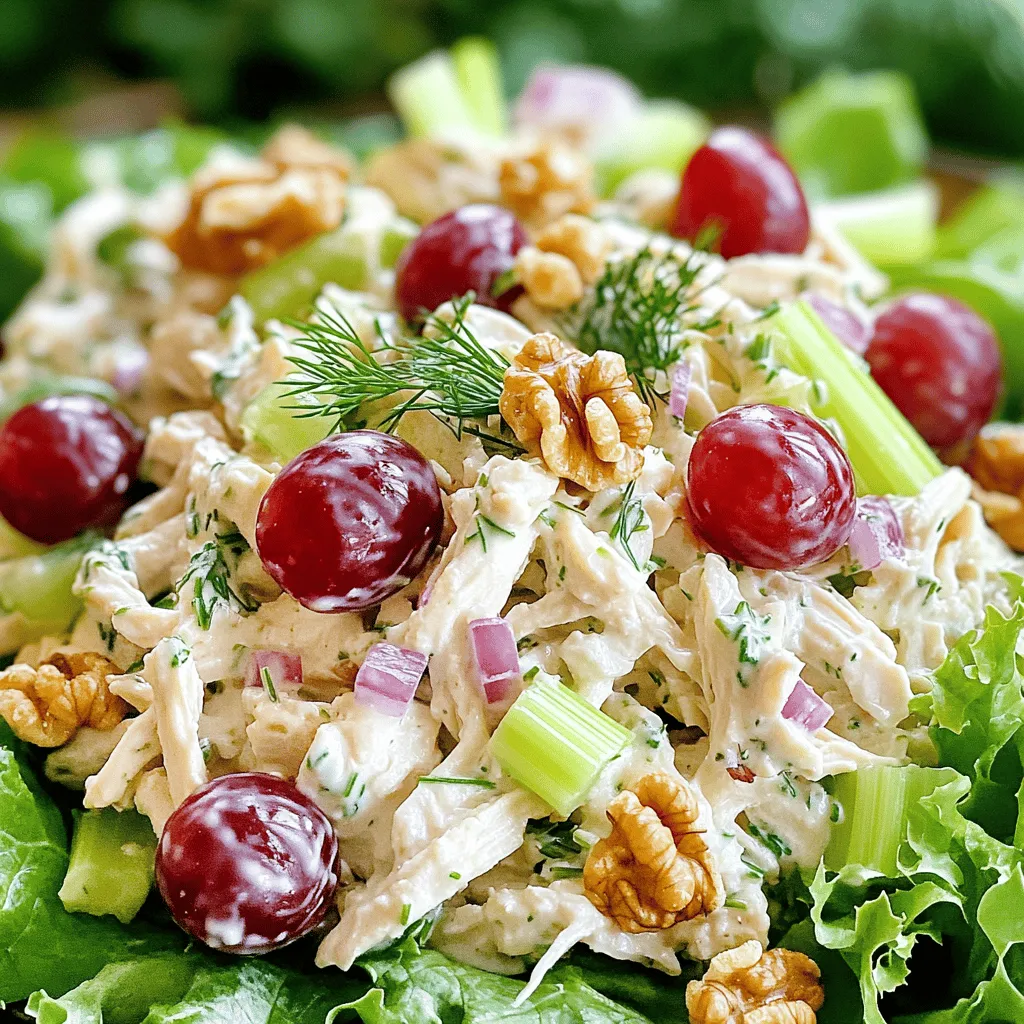
Greek Yogurt Chicken Salad Fresh and Flavorful Recipe
Looking for a fresh twist on a classic chicken salad? My Greek Yogurt Chicken Salad recipe is here to save Read Full Recipe -
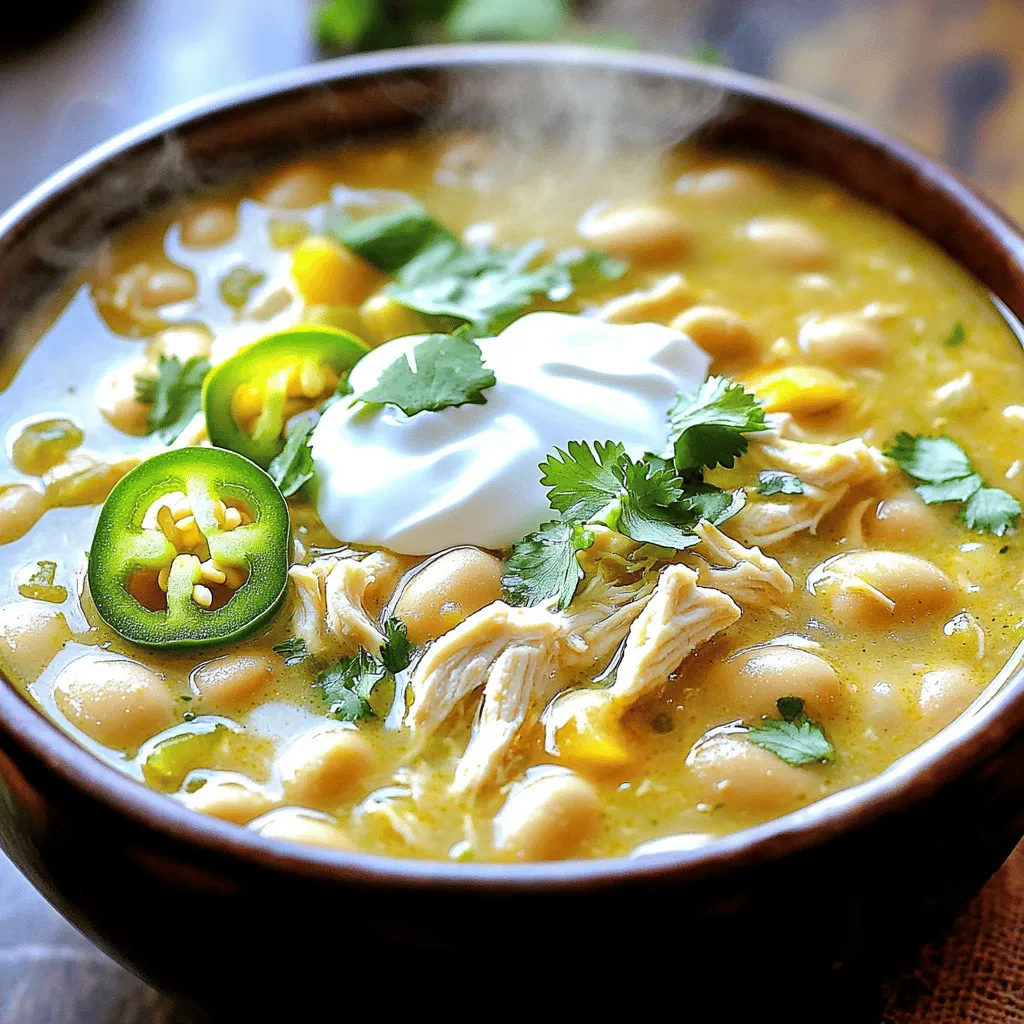
Slow Cooker White Chicken Chili Easy and Flavorful Recipe
Looking for a warm, comforting meal that’s easy to make? My Slow Cooker White Chicken Chili is just what you Read Full Recipe -
Taco Stuffed Zucchini Boats Flavorful and Simple Dish
Looking for a fun, flavorful dish that packs a punch? Taco Stuffed Zucchini Boats are the answer! This easy recipe Read Full Recipe -
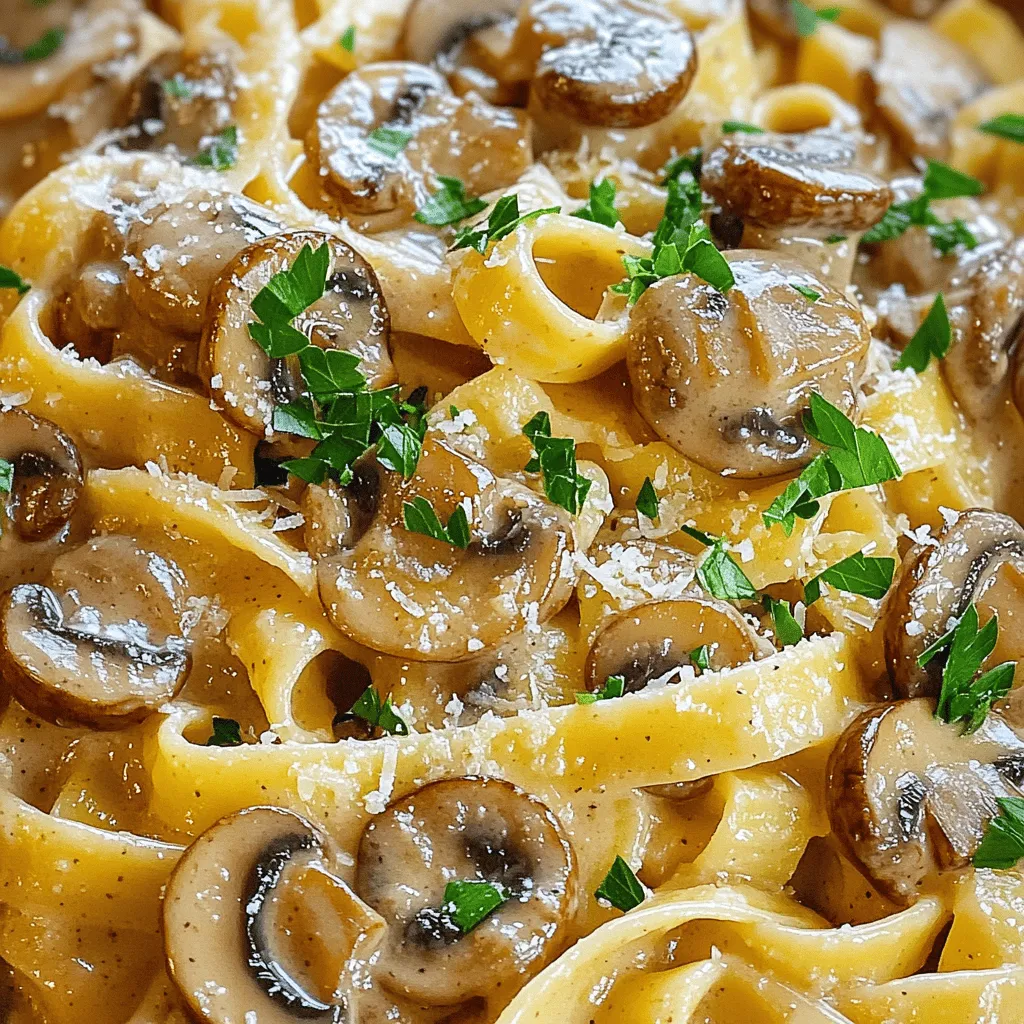
Creamy Mushroom Marsala Flavorful Dinner Delight
Are you ready to impress at dinner tonight? My Creamy Mushroom Marsala is a flavorful delight that will wow your Read Full Recipe -
Coconut Curry Chickpeas Flavorful and Easy Recipe
If you’re seeking a simple, tasty meal, look no further! My Coconut Curry Chickpeas recipe is a delightful blend of Read Full Recipe -
One-Pot Taco Rice Flavorful and Simple Dinner Delight
Looking for an easy and tasty dinner? Try my One-Pot Taco Rice! This simple dish combines savory flavors and requires Read Full Recipe


hey,
i’m !
I’m so happy you’re here!
Every dish I share is made with love and care. I hope they bring you the same comfort and joy they bring me. Let’s make memories, one recipe at a time.
![- 2 cups cooked chicken breast, shredded - 1 cup black beans, rinsed and drained - 1 cup corn kernels, fresh or frozen - 1 red bell pepper, diced - ½ red onion, finely chopped - 1 avocado, diced - 1 cup cherry tomatoes, halved - ½ cup shredded cheddar cheese - ¼ cup fresh cilantro, chopped - 3 tablespoons olive oil - 2 tablespoons lime juice - 1 teaspoon cumin - 1 teaspoon chili powder - Salt and pepper to taste Gathering fresh ingredients is key to a great salad. Start with cooked chicken breast. Shred it using your hands or two forks. This makes it easy to mix. Next, grab your black beans. Rinse and drain them well. This helps remove excess sodium. Then, add corn kernels. Fresh corn is great, but frozen works just as well. Chop your red bell pepper into small pieces. This adds a nice crunch. Finely chop the red onion for a bit of bite. Dice up the avocado carefully. You want creamy goodness without mush. Halve cherry tomatoes for a fresh burst. Shred your cheddar cheese. It adds richness to the salad. Finally, chop fresh cilantro for a bright flavor. Now, for the dressing. In a small bowl, whisk together olive oil and lime juice. Add cumin and chili powder for a kick. Season with salt and pepper to taste. For a full recipe with detailed steps, check out the [Full Recipe]. - Combine all solid ingredients in a large mixing bowl. This includes cooked chicken, black beans, corn, red bell pepper, red onion, avocado, and cherry tomatoes. Mixing these together gives you a colorful base for your salad. - Whisk together dressing ingredients in a small bowl. Use olive oil, lime juice, cumin, chili powder, salt, and pepper for a zesty flavor. Whisk until everything is well combined. - Toss salad and dressing together gently. Make sure all ingredients are coated well. This step is key for a balanced taste in each bite. - Add cheese and cilantro, folding them in carefully. This adds creaminess and fresh flavor. Be gentle to keep the avocado intact. - Let sit to allow flavors to meld. This resting time makes a big difference. It helps all the tastes blend together nicely. For the full recipe, check out the details above. To keep avocado from browning, use lime juice. The acid slows oxidation. Cut the avocado right before serving. If you must cut it early, coat all sides with lime juice. This method works wonders! For shredding chicken, start with warm meat. Use two forks to pull apart the chicken. This gives you nice, even shreds. You can also use a stand mixer with a paddle attachment. Just mix on low speed for a few seconds! For a beautiful presentation, use large bowls or a platter. Lay the salad in layers to show off the colors. You can also serve it in clear jars for a fun look. Garnish with cilantro and lime wedges for flair. Pair this salad with grilled corn or tortilla chips. For a complete meal, serve with a side of rice or quinoa. This adds flavor and makes it filling! Check the Full Recipe to see how to make this dish shine. {{image_2}} You can change the chicken in this salad for tofu or beans. Tofu gives a nice texture and absorbs flavors well. Beans, like black or pinto, add protein and fiber. Feel free to swap the cheddar cheese too. Try crumbled feta for a tangy flavor or pepper jack for a spicy kick. Each cheese brings its own special taste. Adding fruits can brighten your salad. Chopped mango or diced peaches work great in summer. They add sweetness and make the salad fun. You can also mix in seasonal veggies like zucchini or bell peppers for extra crunch. You can adjust the spice level based on your taste. If you like it spicy, use more chili powder. For a milder salad, cut back on the spice. This lets everyone enjoy their perfect bowl of Southwest Chicken Salad. For the full recipe, check the earlier section! To keep your Southwest Chicken Salad fresh, store it in an airtight container. This helps keep air out and prevents sogginess. Make sure to place it in the fridge right after serving. It stays fresh for about 3 days. After that, the flavors may weaken and the ingredients may wilt. You can freeze the salad, but do this with care. Avoid freezing the avocado and tomatoes, as they don’t freeze well. Instead, freeze the chicken, beans, corn, and peppers mix. Pack it in a freezer-safe bag or container. When you’re ready to eat, let it thaw in the fridge overnight. Then, add fresh avocado and tomatoes before serving. This way, you enjoy all the flavors and textures! For the full recipe, check out the details above. What can I use instead of chicken? You can use tofu, beans, or shrimp. Tofu is a great plant-based choice. Beans add protein and fiber. Shrimp brings a nice seafood twist. Can I make this salad in advance? Yes, you can! Prepare the salad a few hours ahead. Just keep the dressing separate until you are ready to serve. This will keep it fresh and crisp. Is Southwest Chicken Salad healthy? Absolutely! This salad packs nutrients. It offers lean protein, healthy fats, and fiber. The veggies add vitamins and minerals. It's a balanced meal choice. Where to find pre-made Southwest Chicken Salad. You can find pre-made options at grocery stores. Look in the deli section or salad bar. Some local cafes also serve this tasty salad. Restaurant recommendations for the best Southwest Chicken Salad. Try local diners or cafes. Many have their own take on this dish. Check online reviews for top spots near you. Average calories and macronutrient breakdown per serving. One serving has about 350 calories. It contains 30 grams of protein, 15 grams of fat, and 30 grams of carbs. This makes it a filling and nutritious meal. This blog post covered the vibrant Southwest Chicken Salad, from its main ingredients to helpful tips. You learned how to blend flavors and textures for a delicious meal. Remember to avoid browning your avocado and experiment with ingredient swaps. This salad is not only easy to make but also fun to customize. Enjoying it fresh or saved for later is a breeze. By following these steps and tips, you'll create a dish that everyone will love, making mealtime a joy.](https://easycookingbite.com/wp-content/uploads/2025/06/82619014-f88e-42f7-ae40-b8a9e67d74ff-300x300.webp)

Creamy Spinach Artichoke Dip Delightful Party Snack
Looking for the perfect party snack? My Creamy Spinach Artichoke Dip is a crowd-pleaser! This cheesy, rich dip blends fresh ingredients with classic flavors,…
