

Latest & Greatest

Peanut Butter Oatmeal Cookies No Bake Simple Treat
If you’re craving a sweet treat without the fuss of baking, you’re in the right place! These Peanut Butter Oatmeal
Read more…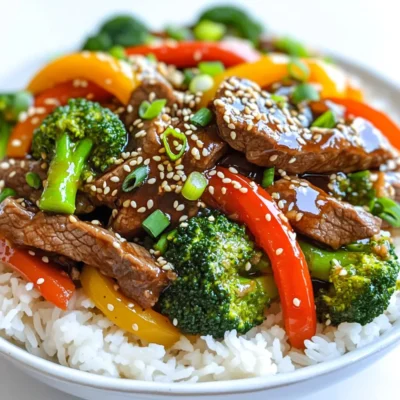
Teriyaki Beef Stir-Fry 15 Minutes Fast and Flavorful Meal
Looking for a quick dinner idea? My Teriyaki Beef Stir-Fry takes just 15 minutes! This fast and flavorful meal is
Read more…
Air Fryer Lemon Garlic Wings Flavorful and Crispy Dish
Get ready to tantalize your taste buds with Air Fryer Lemon Garlic Wings! This flavorful and crispy dish combines juicy
Read more…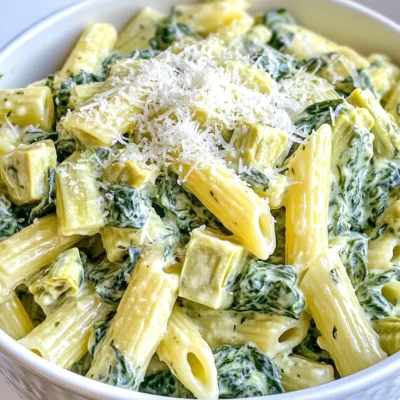
Creamy Spinach Artichoke Pasta One Pot Delight
Welcome to my kitchen! If you love creamy dishes that are quick and easy, you’ll adore this Creamy Spinach Artichoke
Read more…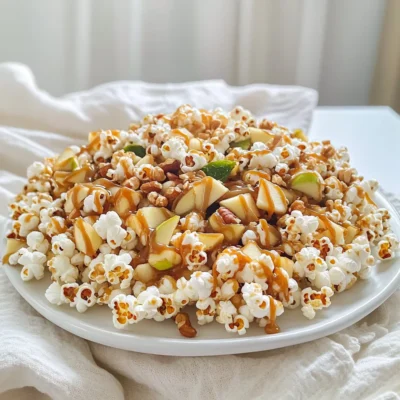
Caramel Apple Popcorn Clusters Tasty Fall Treat
Fall is the perfect time to enjoy sweet treats, and Caramel Apple Popcorn Clusters fit the bill! This easy recipe
Read more…
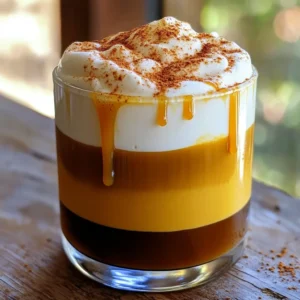
Pumpkin Spice Latte Copycat Cozy and Comforting Recipe
Craving that warm, cozy feeling of fall? You can enjoy a delicious Pumpkin Spice Latte at home! In this article,
Read more…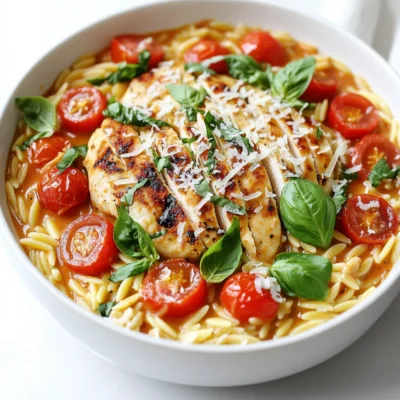
One-Pan Creamy Tomato Basil Chicken Orzo Delight
Looking for a quick and tasty dinner? Try my One-Pan Creamy Tomato Basil Chicken Orzo Delight! This dish combines juicy
Read more…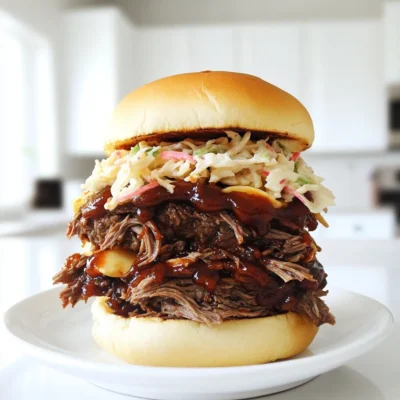
Slow Cooker BBQ Beef Sandwiches Flavorful and Easy
Looking for a meal that’s packed with flavor and easy to make? Slow Cooker BBQ Beef Sandwiches are your answer!
Read more…browse recipes


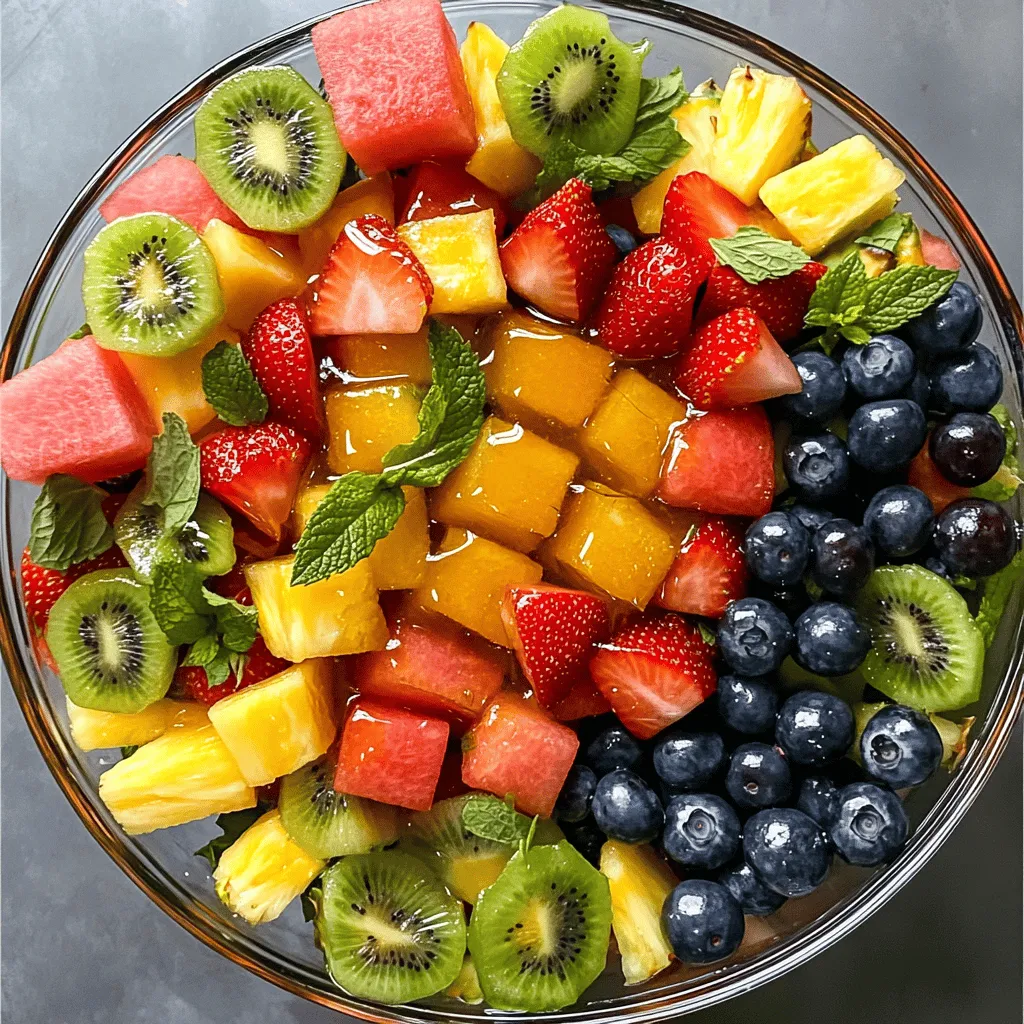
Honey Lime Fruit Salad Refreshing Summer Delight
Looking for a quick and tasty treat this summer? My Honey Lime Fruit Salad is a refreshing delight! Packed with vibrant fresh fruits like…
My Latest Drinks

Strawberry Cheesecake Smoothie Creamy Refreshing Treat
Craving something delicious and cool? The Strawberry Cheesecake Smoothie is your answer! It blends creamy cheesecake flavors with sweet strawberries Read Full Recipe-
Mocktail Pink Punch Refreshing and Easy Recipe
Are you ready to impress your guests with a delightful drink? This Mocktail Pink Punch recipe is both refreshing and Read Full Recipe -
Blue Lagoon Tropical Lemonade Refreshing and Zesty Drink
Looking for a drink that’s both refreshing and fun? Say hello to Blue Lagoon Tropical Lemonade! This colorful beverage packs Read Full Recipe -
Pumpkin Spice Coffee Creamer Flavorful Fall Treat
Are you ready to embrace the cozy vibes of autumn? In this blog post, I’ll guide you through making your Read Full Recipe -
Apple Cider Margarita Mocktail Refreshing Fall Drink
Fall is here, and that means it’s the perfect time for a cozy drink! The Apple Cider Margarita Mocktail offers Read Full Recipe -
Pumpkin Spice Latte Copycat Cozy and Comforting Recipe
Craving that warm, cozy feeling of fall? You can enjoy a delicious Pumpkin Spice Latte at home! In this article, Read Full Recipe


My Latest Dinners
-
White Bean Soup Simple and Hearty Delight
Looking for a warm and filling meal? Let me introduce you to white bean soup! This simple and hearty delight Read Full Recipe -
Garlic Herb Roasted Sweet Potatoes Flavorful Side Dish
Looking for a side dish that’s both tasty and easy to make? Garlic Herb Roasted Sweet Potatoes are the answer! Read Full Recipe -
One Pot Beef Taco Pasta Easy and Flavorful Meal
Looking for a quick and tasty meal? One Pot Beef Taco Pasta is the perfect dish! This recipe packs bold Read Full Recipe -
Garlic Chicken Zucchini Noodles Stir Fry Delight
Are you ready for a tasty twist on dinner? My Garlic Chicken Zucchini Noodles Stir Fry is a quick and Read Full Recipe -
Stuffed Italian Meatloaf Easy and Tasty Recipe
Are you ready to elevate your dinner game? This Stuffed Italian Meatloaf is both easy and tasty! In this article, Read Full Recipe -
One Pot French Onion Pasta Flavorful Comfort Dish
Looking for a cozy dinner that warms your soul? Try my One Pot French Onion Pasta! This creamy, rich dish Read Full Recipe


hey,
i’m !
I’m so happy you’re here!
Every dish I share is made with love and care. I hope they bring you the same comfort and joy they bring me. Let’s make memories, one recipe at a time.
. The detailed steps and ingredient amounts will help you create this tasty dish at home. In this blog post, we explored the key ingredients for a great stir-fry. You learned about chicken prep and cooking steps. I shared tips to achieve the perfect texture and ways to customize flavors. We also discussed tasty alternatives like vegetarian options and how to store leftovers properly. Remember, with simple changes, you can make this dish your own. Get creative in the kitchen, and enjoy every bite!](https://easycookingbite.com/wp-content/uploads/2025/04/3480b929-aaf6-4dde-a3fb-7d538bdd952c-300x300.webp)

![For these sweet and savory chicken bites, you need a few key items. Here’s what you will need: - 1 pound chicken breast, cut into bite-sized pieces - 1/3 cup honey - 3 tablespoons soy sauce - 3 cloves garlic, minced - 1 tablespoon fresh ginger, grated - 2 tablespoons cornstarch - 1 tablespoon vegetable oil - Salt and pepper to taste These ingredients come together to create a delicious sauce that sticks to the chicken. The honey adds sweetness, while the soy sauce gives depth. Garlic and ginger bring a lovely aroma and flavor. Garnishes make your dish look great and taste even better. I recommend these: - 2 green onions, chopped (for garnish) - Sesame seeds (for garnish) Green onions add a fresh crunch, while sesame seeds give a nice nutty flavor. Sprinkle them on top before serving for that perfect finish. Want to kick up the flavor? Here are some optional ingredients: - A pinch of red pepper flakes for heat - A splash of rice vinegar for tang These extras can change the dish in fun ways. If you like spice, the red pepper flakes will add a nice kick. The rice vinegar can balance the sweetness with some tartness. Experiment with these to find your perfect taste! For the full recipe, check out the section above. To start, gather your ingredients. You need chicken, honey, soy sauce, garlic, ginger, and cornstarch. Cut 1 pound of chicken breast into bite-sized pieces. Next, in a bowl, mix 1/3 cup honey, 3 tablespoons soy sauce, 3 minced garlic cloves, and 1 tablespoon of grated ginger. Stir it well and set it aside. In another bowl, coat the chicken pieces with 2 tablespoons of cornstarch. This step is key for a crispy finish. For cooking, I recommend using a skillet. Heat 1 tablespoon of vegetable oil in the skillet over medium-high heat. Once hot, add the chicken. Make sure to place the chicken in a single layer. This helps it cook evenly. Season with salt and pepper. Cook for about 5-7 minutes. You want the chicken to turn golden brown and be cooked through. If you prefer, you can also bake the chicken in an oven. Preheat the oven to 400°F and bake for 15-20 minutes. To make the chicken crispy, the cornstarch is vital. It creates a nice crust when cooked. Don’t overcrowd the skillet. If necessary, cook in batches. Also, keep the heat medium-high. This keeps the oil hot enough for crispiness. Once the chicken is golden, pour the honey garlic mixture over it. Let it bubble for 2-3 minutes. This thickens the sauce and gives you that sticky texture. For a full recipe, check the original recipe. Enjoy your tasty honey garlic chicken bites! To make the best honey garlic chicken bites, follow these simple tips: - Use fresh ingredients. Fresh garlic and ginger bring out the best flavors. - Coat the chicken well with cornstarch. This ensures a crispy texture. - Don’t overcrowd the skillet. Cook in batches if needed for even cooking. - Stir the sauce often while it cooks. This helps it thicken evenly. Avoid these common mistakes to ensure great results: - Skipping the cornstarch coating can lead to soggy chicken bites. - Cooking at too high a heat can burn the sauce before the chicken cooks. - Not letting the sauce bubble long enough can keep it thin. - Forgetting to season the chicken can make it bland. Pair these bites with flavors that enhance their taste: - Serve with steamed rice or quinoa. This balances the sweet and savory. - Add a side of crisp vegetables for crunch. Broccoli or snap peas work well. - Use a tangy dipping sauce on the side. A mix of soy sauce and vinegar is tasty. - Consider adding chili flakes for a spicy kick if you like heat. For the full recipe, check out [Full Recipe]. Enjoy cooking these delightful bites! {{image_2}} You can add veggies for a colorful twist. Bell peppers, broccoli, and snap peas work well. Cut them into bite-sized pieces. Toss them in with the chicken during cooking. This adds crunch and flavor. Plus, it makes the dish more filling! Want some heat? Add chili flakes or sriracha to the sauce. Mix them in when you combine honey, soy sauce, garlic, and ginger. You can adjust the heat level to your taste. This variation gives the bites a spicy kick that balances the sweetness. You can make this dish lighter. Substitute honey with maple syrup for a lower glycemic index. Use low-sodium soy sauce to cut back on salt. For a gluten-free option, try coconut aminos instead of soy sauce. These swaps keep the flavors while being healthier. For the full recipe, check out the detailed instructions above. To store leftover honey garlic chicken bites, first let them cool. Place them in an airtight container. This keeps the moisture in and prevents drying out. You can store them in the fridge for up to three days. If you want to keep them longer, freezing is a great option. To reheat, I suggest using a skillet. Heat it over medium heat and add a splash of water. This helps steam the chicken and keeps it moist. Add the chicken bites and cover. Cook for about five minutes or until warmed through. You can also use a microwave. Heat in 30-second bursts, stirring in between, to avoid overcooking. For freezing, place the cooled chicken bites in a single layer on a baking sheet. Freeze them for one hour. Once frozen, transfer them to a freezer-safe bag. Remove as much air as possible to prevent freezer burn. They can last up to three months in the freezer. When ready to eat, thaw overnight in the fridge before reheating. This method gives you tasty honey garlic chicken bites whenever you want! For the full recipe, check out the main article. You can serve Honey Garlic Chicken Bites with rice or noodles. They also pair well with fresh salad. For a fun twist, try them with steamed broccoli or snap peas. These sides balance the sweet and savory flavors of the chicken. Yes, you can easily make this recipe gluten-free. Just swap regular soy sauce for gluten-free soy sauce or tamari. Most brands offer a gluten-free option that tastes great. This way, you can enjoy the same flavors without the gluten. Honey Garlic Chicken Bites can last up to three days in the fridge. Store them in an airtight container to keep them fresh. Just make sure to cool them down before placing them in the fridge. If you want to skip soy sauce, try coconut aminos. It has a similar flavor but is soy-free. You can also use liquid aminos or a homemade broth for a unique taste. Each option will add different flavors to your dish. Yes, you can prepare the chicken bites ahead of time. Just cook them and store them in the fridge once cooled. When you are ready to serve, reheat them and add the honey garlic sauce. This makes for a quick meal on busy days. Honey garlic chicken bites are simple to make and full of flavor. We covered the must-have ingredients, steps, and tips for success. You learned how to make them crispy and flavorful. Plus, we looked at tasty variations and storage tips. By following this guide, you can impress anyone with this dish. Enjoy your cooking journey and the delicious results. Your meals will shine, and your guests will be happy!](https://easycookingbite.com/wp-content/uploads/2025/07/fb149d5d-ee74-4aab-909c-6729add78e8c-300x300.webp)
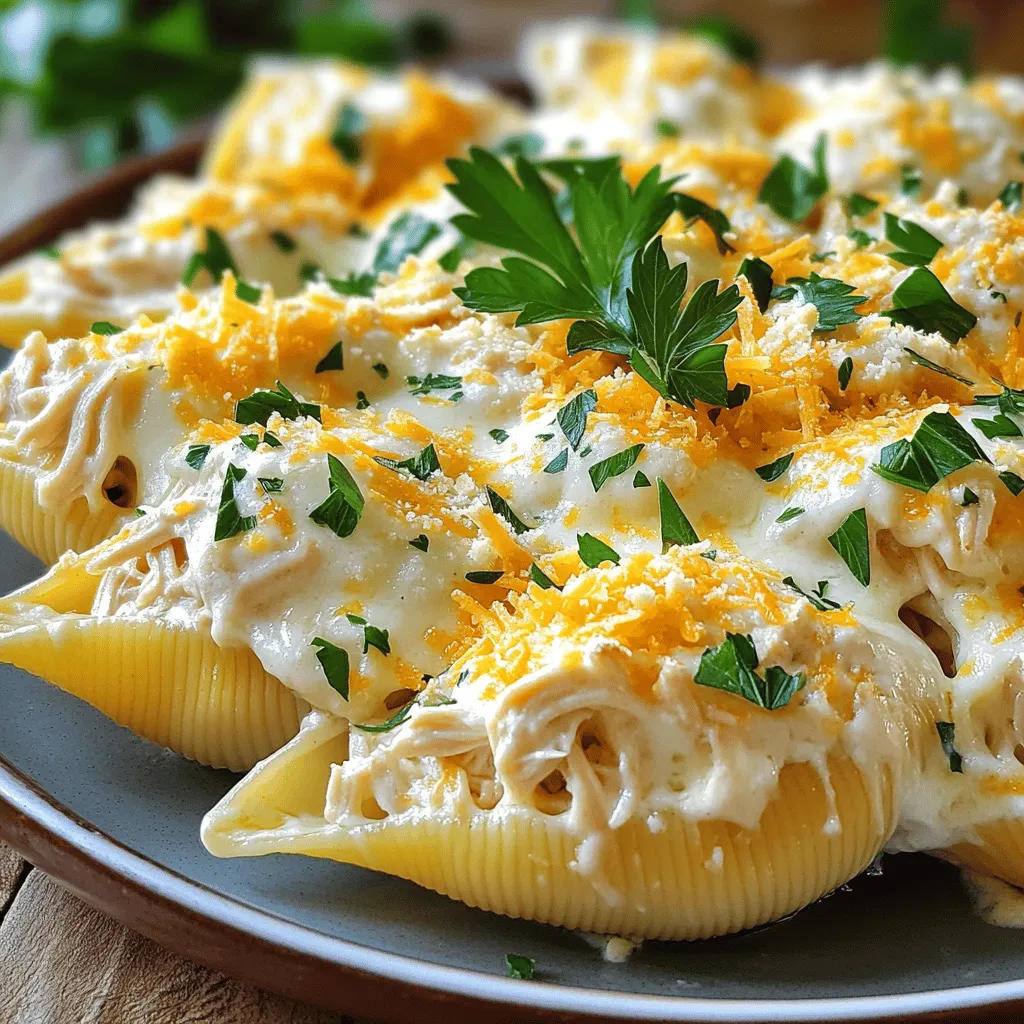
Delicious Chicken Alfredo Stuffed Shells Recipe
Are you ready to elevate your dinner game? In this blog post, I’ll share my favorite Chicken Alfredo Stuffed Shells recipe, packed with creamy…