

Latest & Greatest
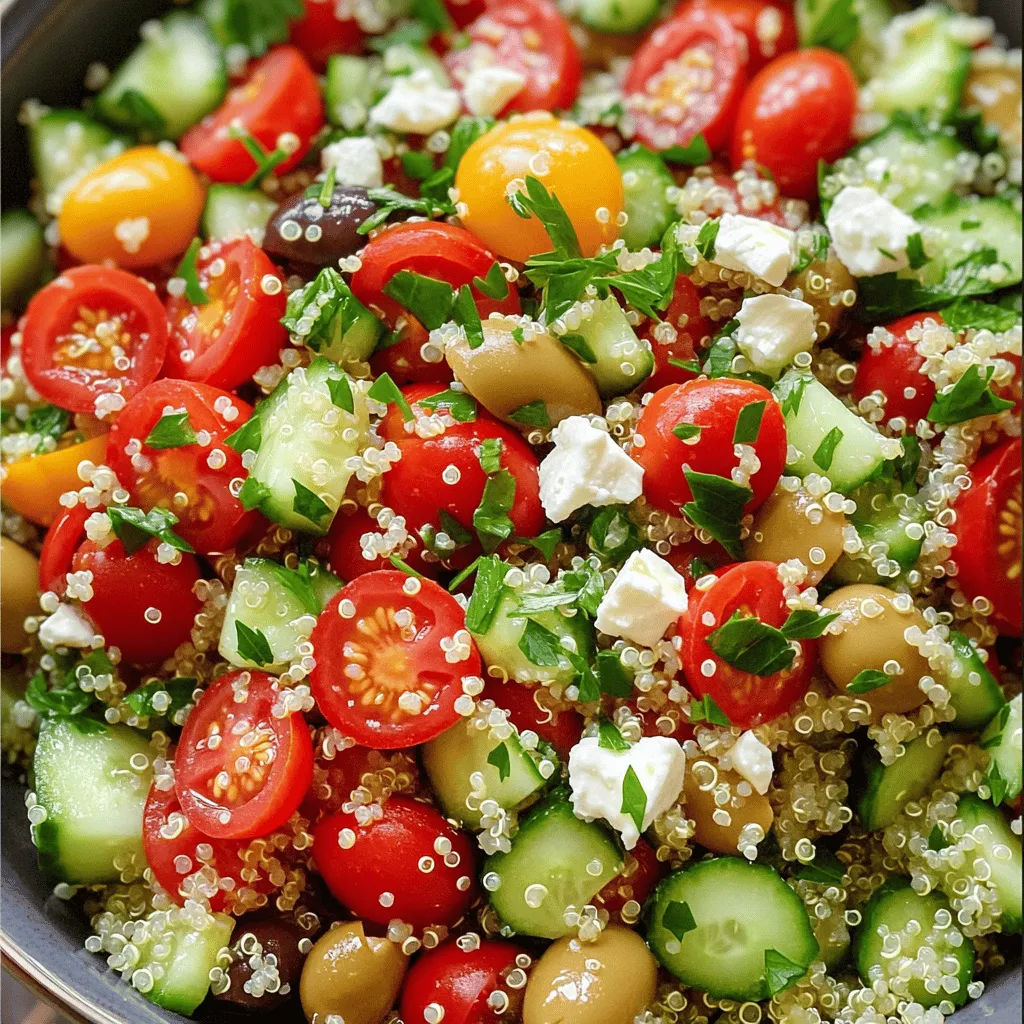
Savory Quinoa Salad with Feta Nutrient-Packed Dish
Looking for a dish that bursts with flavor and packs a nutrient punch? You’ll love this Savory Quinoa Salad with
Read more…
Nutella Rolls with Cream Cheese Delightful Dessert
If you’re looking for a sweet treat that’s easy to make, Nutella Rolls with Cream Cheese are perfect. This delightful
Read more…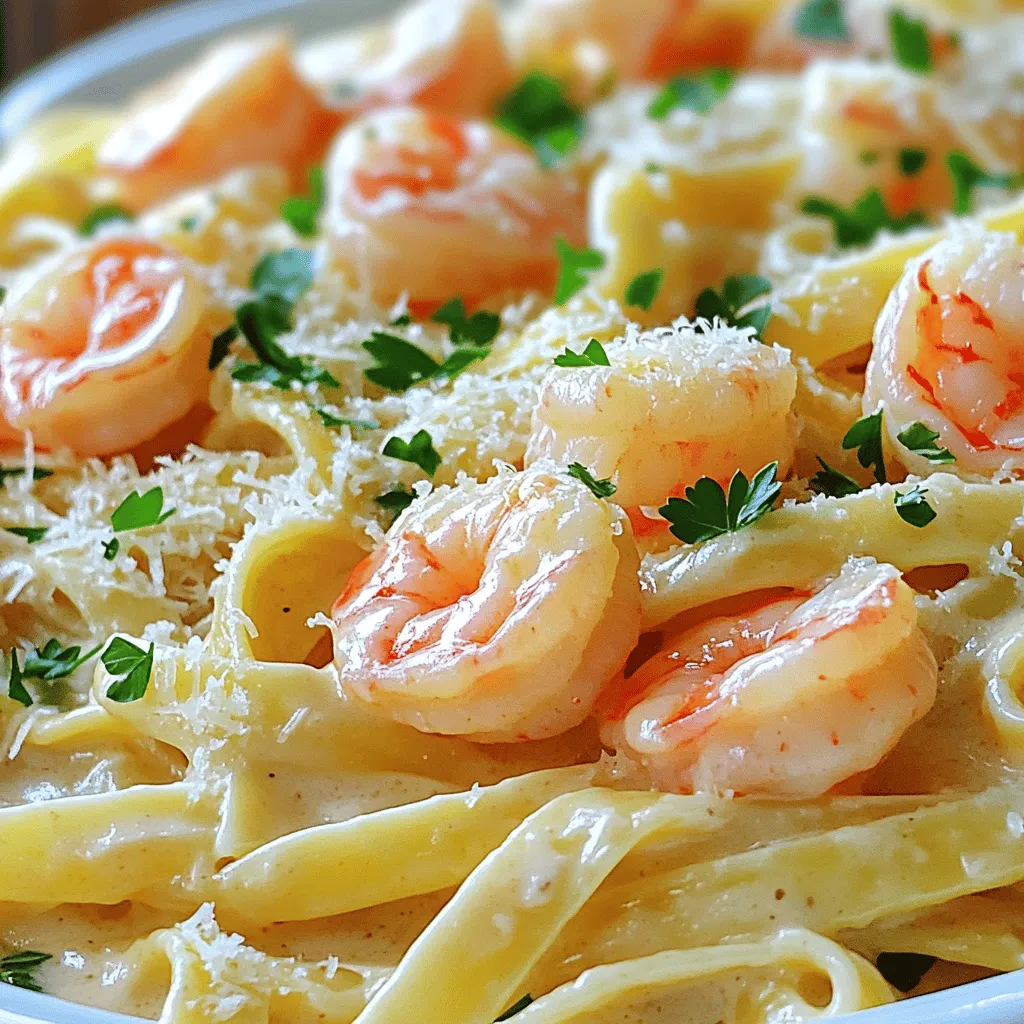
Creamy Shrimp Pasta Delightful and Simple Recipe
Are you ready to impress with a dish that’s both simple and delightful? This Creamy Shrimp Pasta recipe is a
Read more…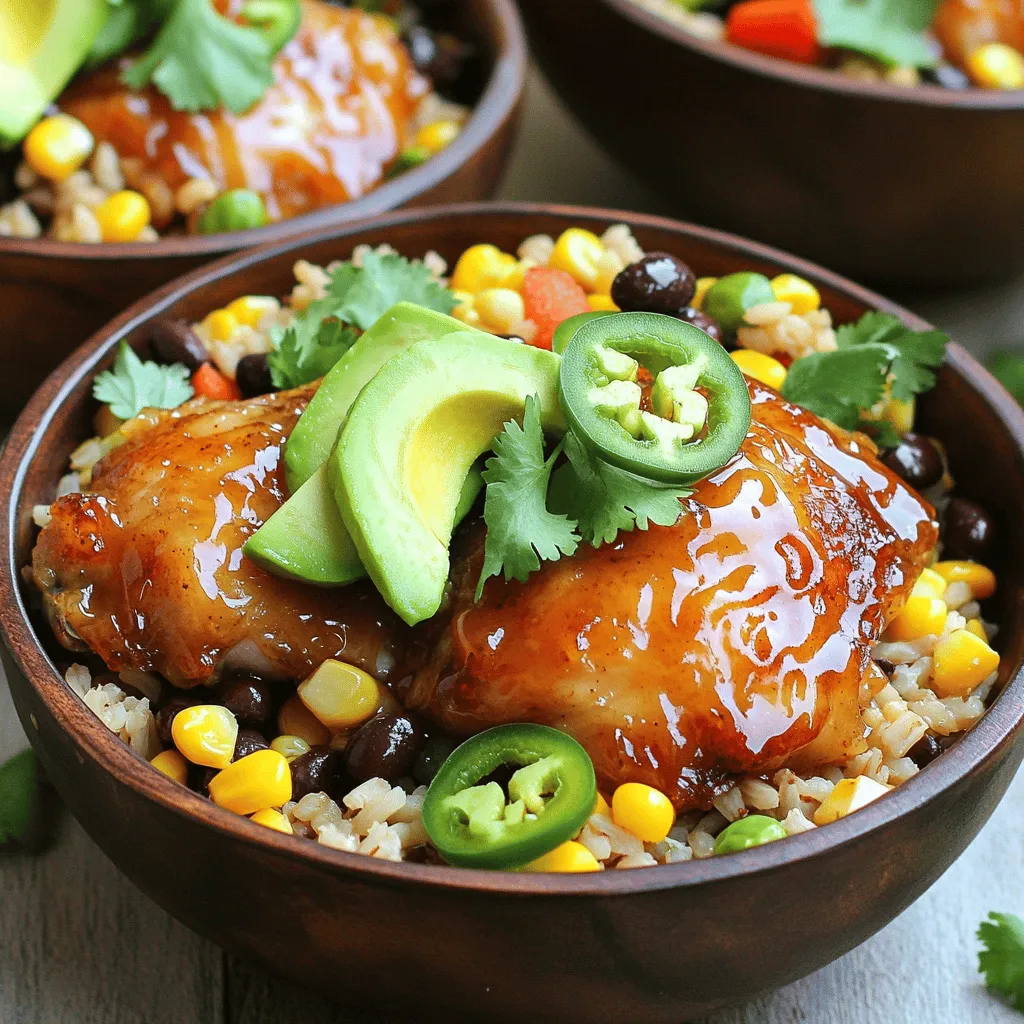
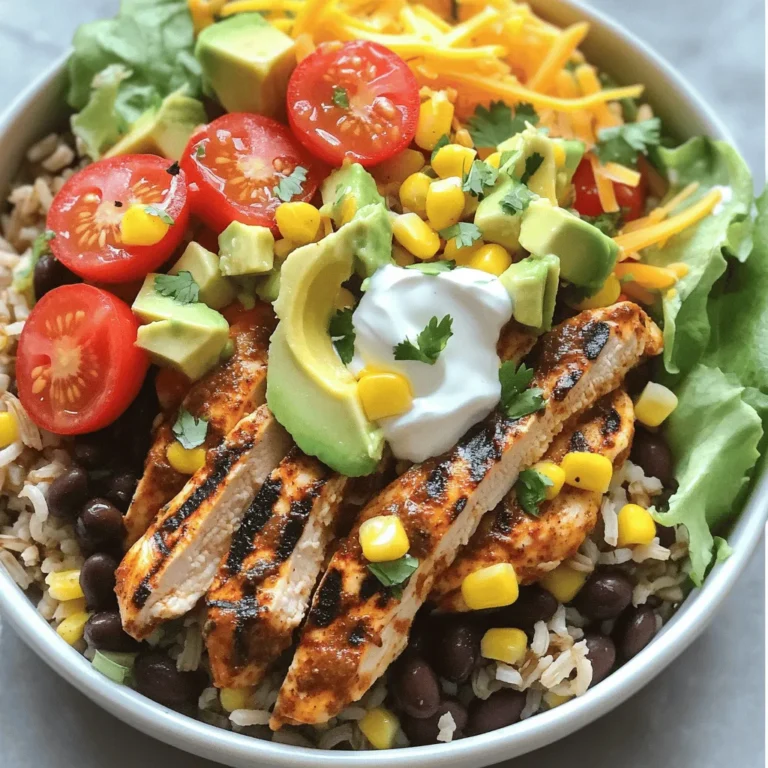
Savory Hot Honey Chicken Bowls Easy Weeknight Meal
Are you ready to spice up your weeknight meals? These Savory Hot Honey Chicken Bowls deliver a delightful mix of
Read more…
Pineapple Heaven Cake Irresistible Tropical Delight
If you’re craving a sweet escape to a tropical paradise, Pineapple Heaven Cake is your ticket! This delightful dessert balances
Read more…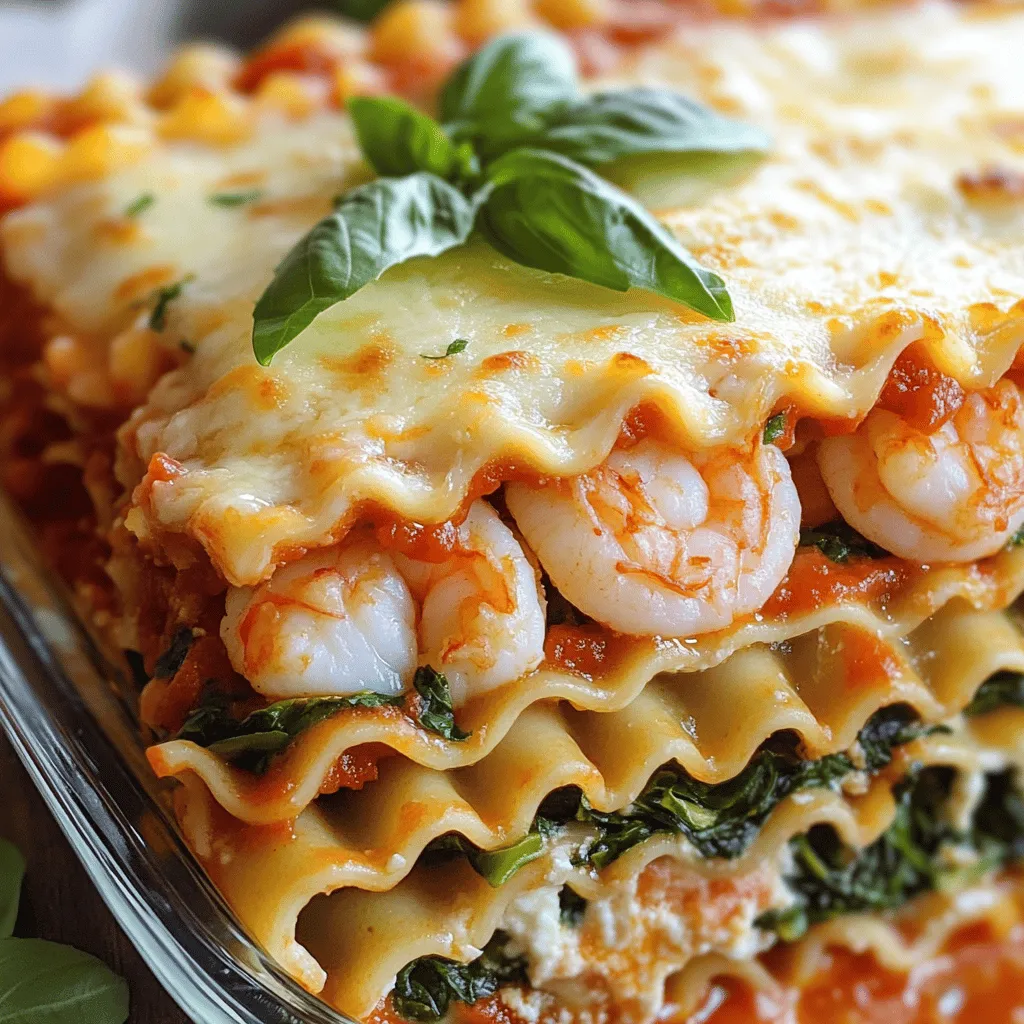
Seafood Lasagna Delightful and Creamy Dinner Recipe
If you love seafood and comfort food, seafood lasagna is a must-try! This creamy and delightful meal blends fresh shrimp
Read more…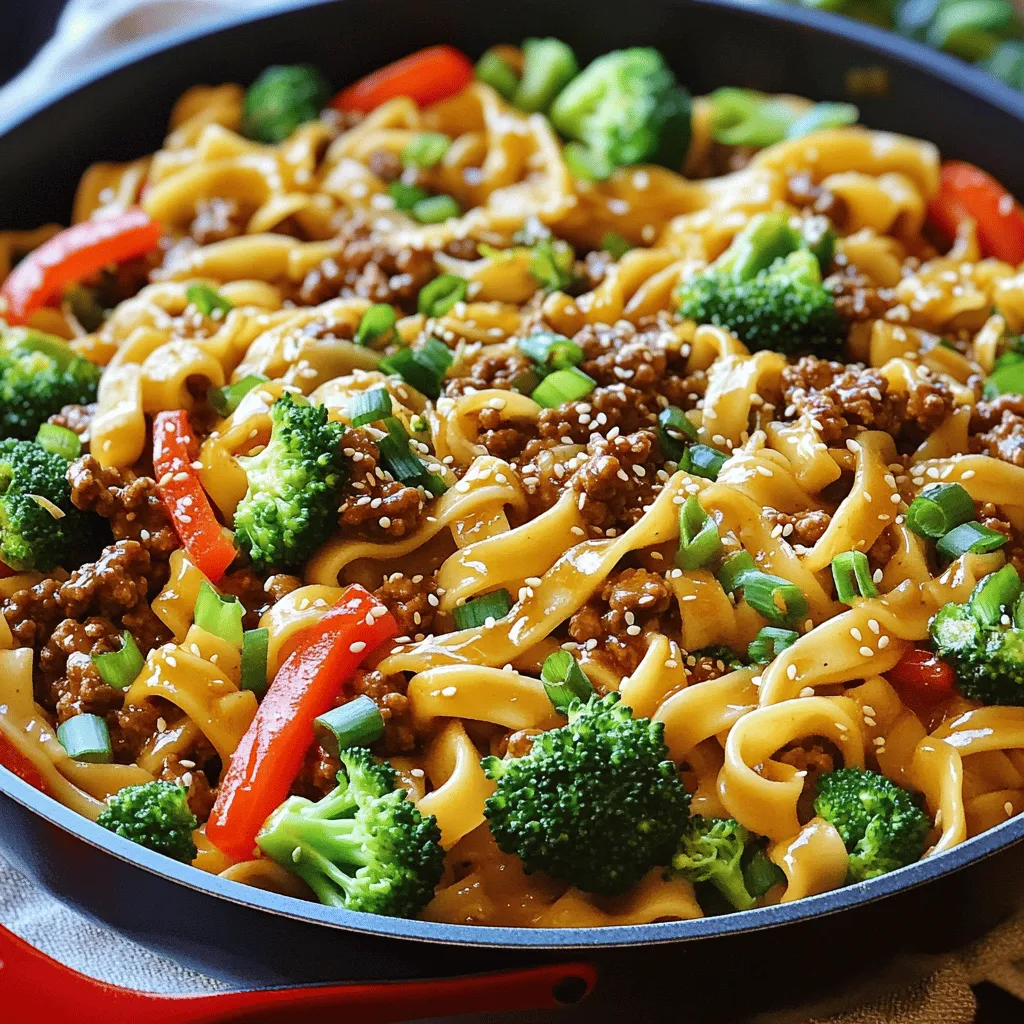
Mongolian Ground Beef Noodles Flavorful Easy Recipe
Welcome to my kitchen! Today, I’m excited to share my Mongolian Ground Beef Noodles recipe. This dish is not only
Read more…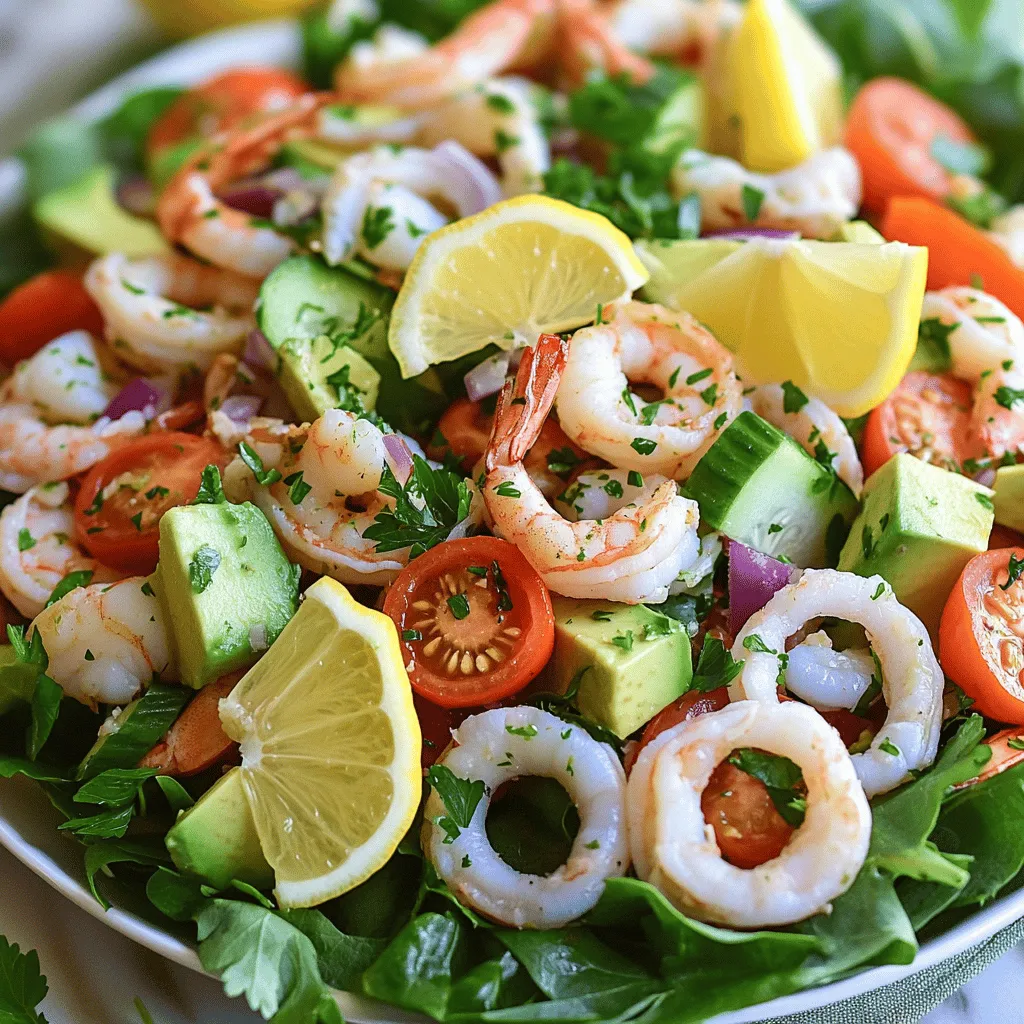
Seafood Salad Fresh and Flavorful Summer Dish
Summer is here, and nothing beats a fresh seafood salad! You’ll enjoy the mix of tasty seafood, crisp veggies, and
Read more…browse recipes


. You now know how to make delicious S’mores Cookie Bars. We covered all the key ingredients, including tasty options for substitutes. I shared clear steps from preparation to serving. I also provided valuable tips, fun variations, and creative presentation ideas to keep things exciting. Enjoy baking and sharing these sweet treats! They will impress friends and family. Don’t forget to explore the FAQ for any questions. Happy baking!](https://easycookingbite.com/wp-content/uploads/2025/06/3a5d70f6-bd19-4052-b342-b59ff64ba0af.webp)
S’mores Cookie Bars Irresistible and Easy Treat
Get ready to delight your taste buds with S’mores Cookie Bars! This easy treat combines creamy chocolate, fluffy marshmallows, and crunchy graham crackers. In…
My Latest Drinks

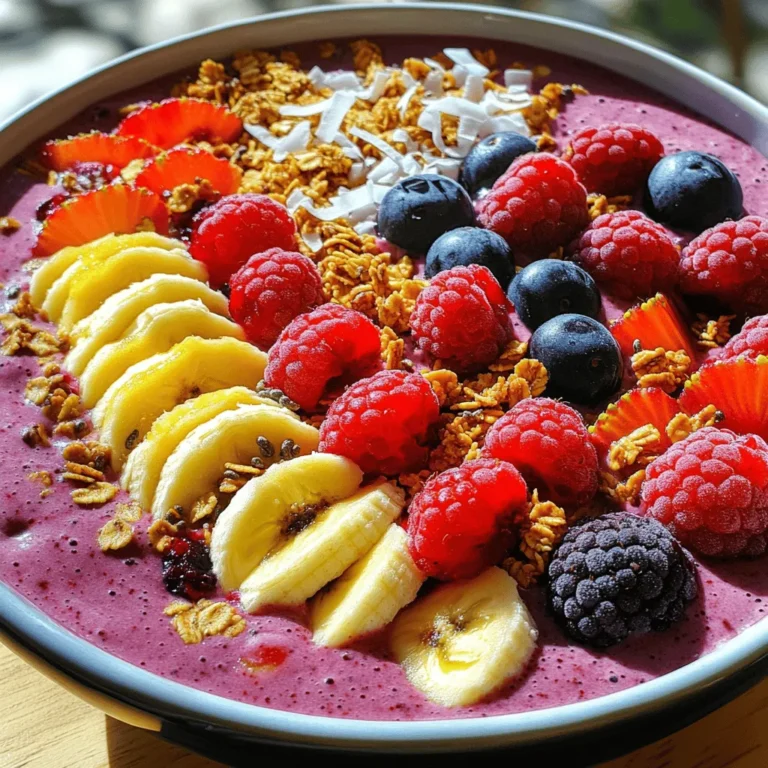
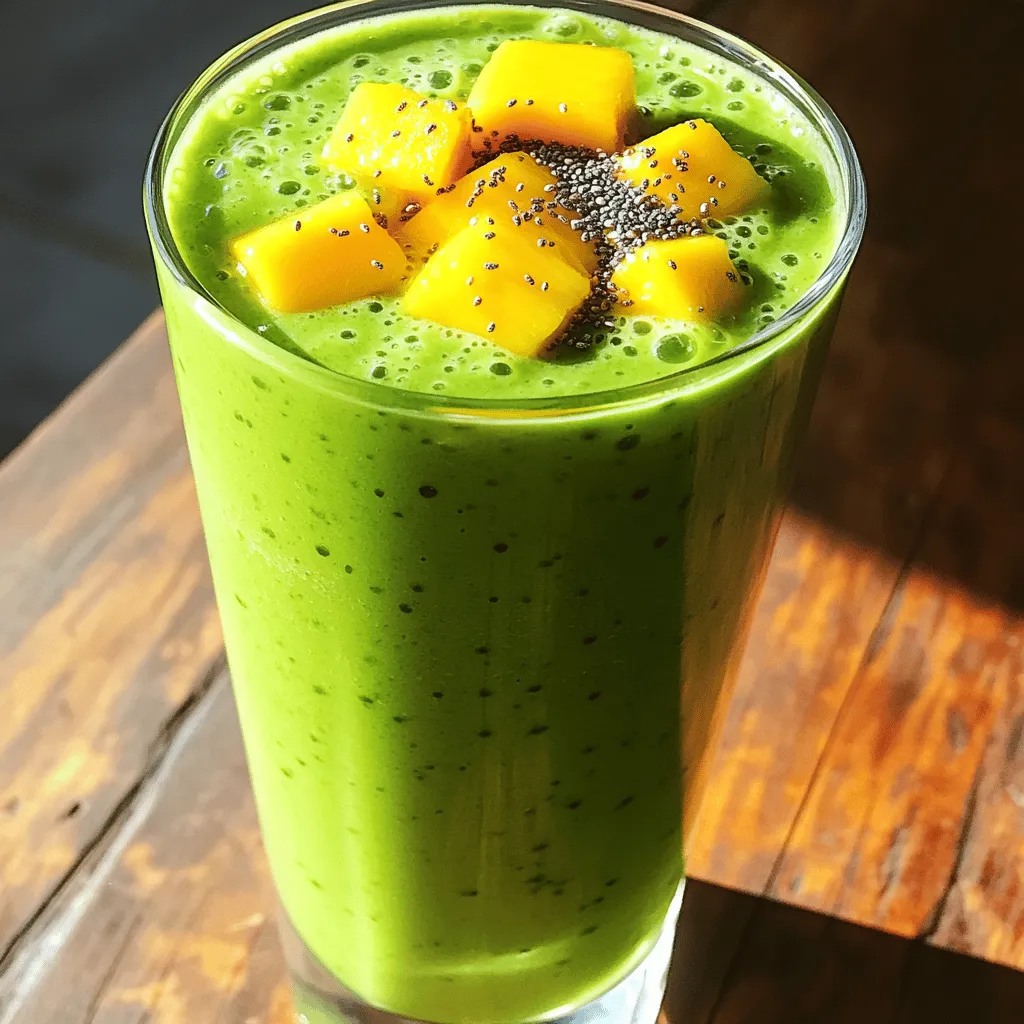
Tropical Green Smoothie Refreshing Health Boost Recipe
Looking for a refreshing drink that packs a health punch? My Tropical Green Smoothie is the perfect blend of fruits Read Full Recipe-
Apple Cider Harvest Punch Refreshing Fall Delight
Get ready for fall with my delicious Apple Cider Harvest Punch! This easy recipe blends fresh flavors that celebrate the Read Full Recipe -
Pineapple Coconut Smoothie Creamy and Refreshing Drink
Are you craving a drink that’s both creamy and refreshing? Look no further than my Pineapple Coconut Smoothie! This easy-to-make Read Full Recipe -
Delicious Caramel Apple Cider Cozy Fall Drink Recipe
Fall is here, and nothing says cozy like a warm cup of Caramel Apple Cider. This drink combines the sweet Read Full Recipe -
Instant Pot Apple Cider Quick and Flavorful Recipe
Looking for a quick and delicious way to make apple cider? The Instant Pot is your best friend! I’ll share Read Full Recipe -
Chocolate Covered Strawberry Smoothie Delicious Treat
Craving something delicious and healthy? The Chocolate Covered Strawberry Smoothie is the perfect treat! With fresh strawberries, cocoa powder, and Read Full Recipe


My Latest Dinners
-
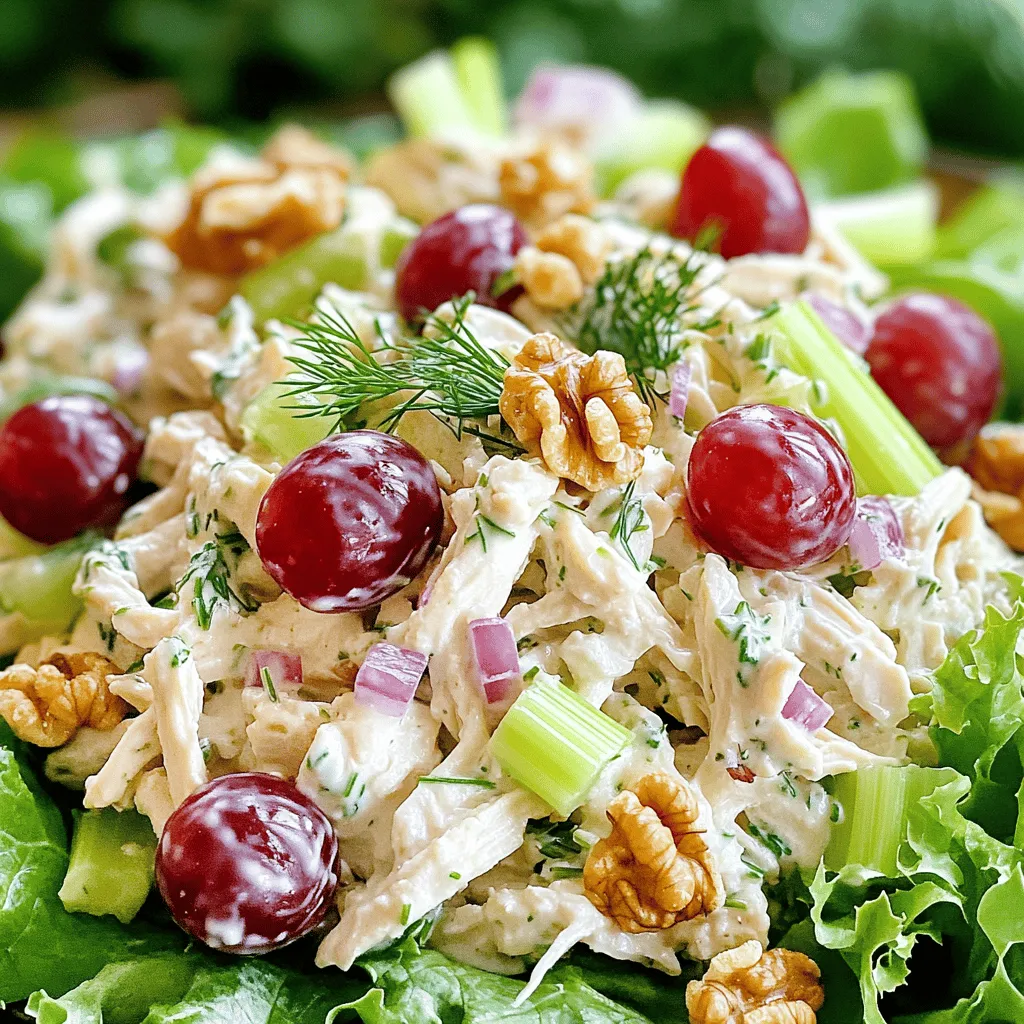
Greek Yogurt Chicken Salad Fresh and Flavorful Recipe
Looking for a fresh twist on a classic chicken salad? My Greek Yogurt Chicken Salad recipe is here to save Read Full Recipe -
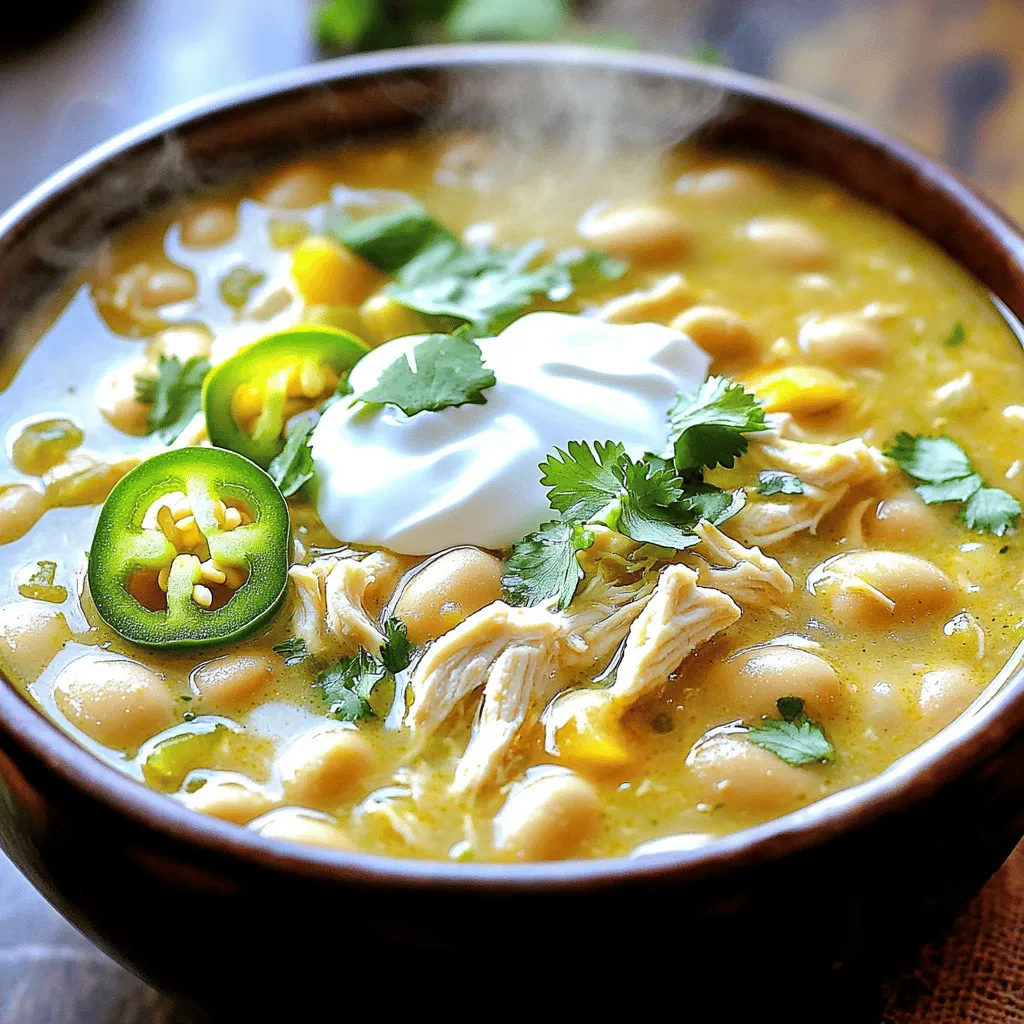
Slow Cooker White Chicken Chili Easy and Flavorful Recipe
Looking for a warm, comforting meal that’s easy to make? My Slow Cooker White Chicken Chili is just what you Read Full Recipe -
Taco Stuffed Zucchini Boats Flavorful and Simple Dish
Looking for a fun, flavorful dish that packs a punch? Taco Stuffed Zucchini Boats are the answer! This easy recipe Read Full Recipe -
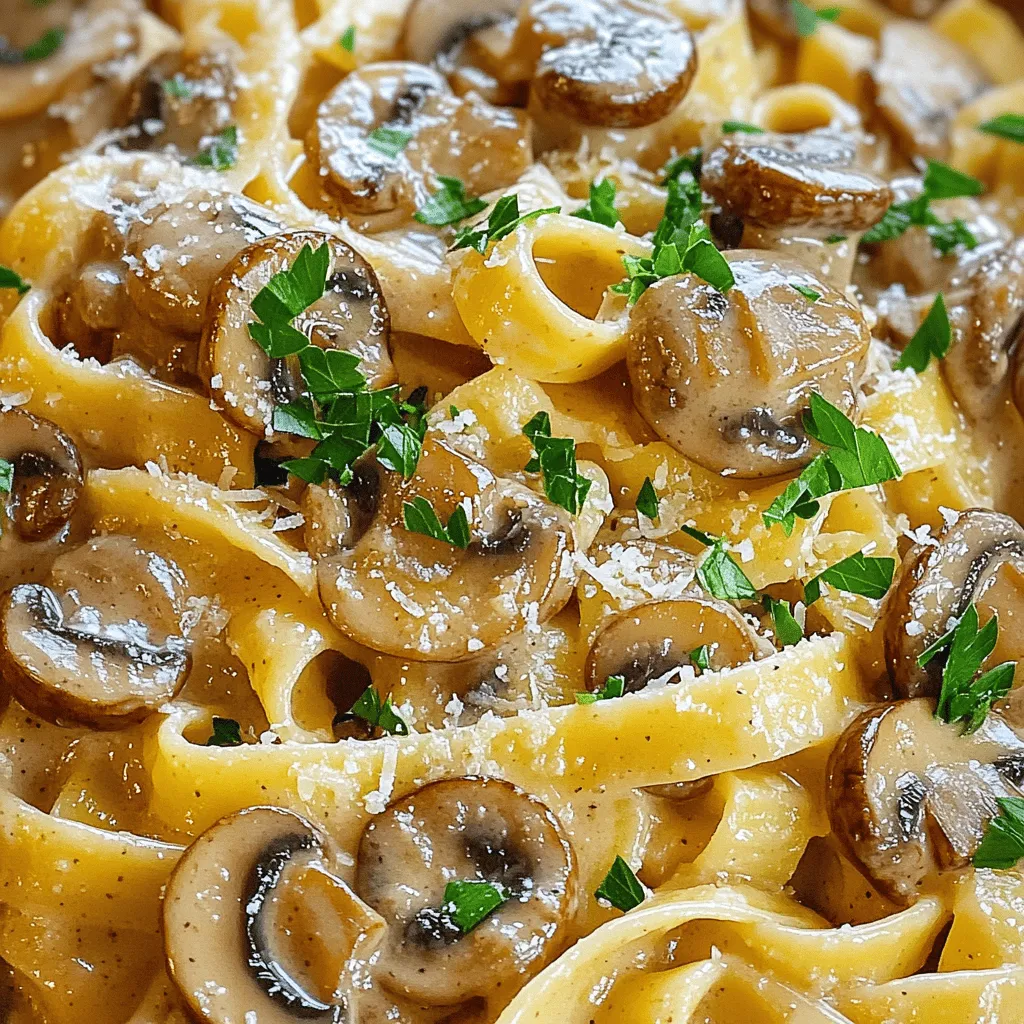
Creamy Mushroom Marsala Flavorful Dinner Delight
Are you ready to impress at dinner tonight? My Creamy Mushroom Marsala is a flavorful delight that will wow your Read Full Recipe -
Coconut Curry Chickpeas Flavorful and Easy Recipe
If you’re seeking a simple, tasty meal, look no further! My Coconut Curry Chickpeas recipe is a delightful blend of Read Full Recipe -
One-Pot Taco Rice Flavorful and Simple Dinner Delight
Looking for an easy and tasty dinner? Try my One-Pot Taco Rice! This simple dish combines savory flavors and requires Read Full Recipe


hey,
i’m !
I’m so happy you’re here!
Every dish I share is made with love and care. I hope they bring you the same comfort and joy they bring me. Let’s make memories, one recipe at a time.
![To make a tasty Chinese Style Shrimp Fried Rice, you need the right ingredients. Here’s what you’ll need: - 2 cups cooked jasmine rice (preferably cold) - 1 cup medium shrimp, peeled and deveined - 2 tablespoons vegetable oil - 2 eggs, beaten - 1 cup mixed vegetables (peas, carrots, corn) - 3 green onions, sliced (white and green parts separated) - 3 garlic cloves, minced - 2 tablespoons soy sauce (low sodium) - 1 tablespoon oyster sauce (optional) - 1 teaspoon sesame oil - Salt and pepper to taste - Fresh cilantro for garnish (optional) These ingredients work together to create bold flavors. The cold jasmine rice helps achieve the perfect texture. Using shrimp adds a nice protein boost. Fresh vegetables and green onions bring color and crunch. The soy sauce and oyster sauce provide that classic umami taste. Garlic gives a punch of flavor, while sesame oil adds richness. Feel free to adjust the ingredients based on your taste. For a full recipe, check out the details above. Enjoy making your shrimp fried rice! - Prepare Shrimp: Start by seasoning the shrimp in a bowl with salt and pepper. This simple step makes a big taste difference. Set the shrimp aside to soak in those flavors. - Scramble Eggs: Heat 1 tablespoon of vegetable oil in a large skillet over medium heat. Pour in the beaten eggs. Stir until they are fully cooked and fluffy. Remove the eggs from the pan and set them aside. - Cook Shrimp: In the same skillet, add the remaining tablespoon of oil. When it’s hot, add your seasoned shrimp. Cook for about 2-3 minutes. The shrimp should turn pink and opaque. Remove them from the skillet and set aside. - Sauté Vegetables: Using the same skillet, toss in the minced garlic, the white parts of the green onions, and the mixed vegetables. Sauté for about 2-3 minutes. You want the veggies to be tender but still bright. - Combine Ingredients: Add the cold jasmine rice to the skillet. Break up any clumps as you stir. Mix the rice with the vegetables until everything is well combined. - Flavor the Rice: Pour in the soy sauce and the optional oyster sauce. Mix well to coat the rice evenly. Add the scrambled eggs and cooked shrimp back into the pan. Stir everything together and heat through. - Finish with Sesame Oil: Drizzle sesame oil over the fried rice. This adds a nutty flavor. Toss everything again to incorporate the oil. - Garnish and Serve: Taste your dish and adjust seasoning if needed. Garnish with the green parts of the green onions and fresh cilantro if you like. Serve hot and enjoy! For the full recipe, check the details above. Choosing the Right Rice Use jasmine rice for the best flavor and texture. It has a nice aroma and a slightly sticky quality. Day-old rice works best since it dries out a bit, making it easy to fry. Perfecting Shrimp Texture To keep shrimp tender, avoid overcooking them. Cook just until they turn pink. This usually takes 2 to 3 minutes. Make sure they are peeled and deveined for a better bite. Achieving Authentic Flavor Use soy sauce for saltiness. Add oyster sauce for depth if you like. Fresh garlic adds a kick, while sesame oil gives a nice finish. Don’t skip the green onions; they add freshness. Importance of Cold Rice Cold rice helps prevent clumping. It fries better and mixes well with other ingredients. If you don’t have leftover rice, spread freshly cooked rice on a tray to cool it down quickly. For more details on making this dish, check the Full Recipe. {{image_2}} Vegetarian Option: Replacing Shrimp and Adding Tofu If you want a vegetarian dish, swap the shrimp for tofu. Use firm tofu for the best texture. Cut the tofu into small cubes and sauté it until golden. This gives you a protein boost while keeping the dish tasty. Add the tofu after cooking the vegetables for a nice blend of flavors. Different Proteins: Chicken or Pork Fried Rice You can also use chicken or pork instead of shrimp. Dice the meat into small pieces. Cook it in the same way as shrimp, until it is no longer pink. Chicken or pork adds a different flavor and makes the dish heartier. Flavor Enhancements: Adding Spices or Hot Sauce Want to spice things up? Add your favorite spices or hot sauce. A pinch of chili flakes or a splash of sriracha can add a nice kick. Experiment with different sauces, like teriyaki or sweet chili, for unique flavors. These changes can make your fried rice even more exciting. For a full recipe and detailed instructions, check out the [Full Recipe]. Refrigeration Guidelines After enjoying your shrimp fried rice, let it cool for about 30 minutes. Place it in an airtight container. Store it in the fridge for up to 3 days. Always ensure the container is tightly sealed to keep it fresh. Freezing Instructions If you need to store it longer, you can freeze the fried rice. Use a freezer-safe container or bag. Remove as much air as possible. It can last in the freezer for up to 3 months. When ready to eat, thaw it in the fridge overnight. Reheating Tips for Maintaining Flavor and Texture To reheat, use a skillet or wok. Heat a little oil over medium heat. Add the fried rice straight from the fridge or thawed. Stir frequently to heat it evenly. You can add a splash of soy sauce to boost the flavor. Enjoy your meal just like the first time! For the complete recipe, check the Full Recipe above. Yes, you can use frozen shrimp. Just make sure to thaw them first. Place them in a bowl of cold water for about 15 minutes. This way, they cook evenly and taste great. To make this dish gluten-free, use gluten-free soy sauce. Many brands offer this option. You can also skip oyster sauce, as it often contains gluten. I recommend using low-sodium soy sauce. It adds flavor without being too salty. This way, you can enjoy the taste without overpowering the dish. To add some heat, try using chili sauce or a pinch of red pepper flakes. You can also add diced jalapeños for a fresh kick. Adjust the spice level to your liking. This dish pairs well with steamed vegetables or a light salad. You can also enjoy it with egg rolls or spring rolls for a complete meal. For the full recipe, check out the steps above. In this post, we explored the ingredients and steps for making Chinese Style Shrimp Fried Rice. You learned about the key ingredients needed and step-by-step instructions to cook this dish perfectly. We shared tips for choosing rice and cooking shrimp, plus variations to try. You now know how to store leftovers well and answers to common questions. With this knowledge, you're ready to create a delicious meal at home. Enjoy the process and experiment with flavors to make it your own.](https://easycookingbite.com/wp-content/uploads/2025/05/cd935795-0dc6-4338-84d8-ae04be4788f1-300x300.webp)

![- 4 boneless, skinless chicken breasts - 2 tablespoons olive oil - 1 teaspoon garlic powder - 1 teaspoon onion powder - 1 teaspoon dried oregano - 1 teaspoon dried thyme - Salt and pepper to taste - 1 lemon (zested and juiced) - 1 cup cherry tomatoes, halved - 1 bell pepper (red or yellow), sliced - Fresh parsley, chopped (for garnish) When I make One-Pan Lemon Herb Chicken, I love how simple the ingredients are. Using just boneless, skinless chicken breasts makes it easy. The olive oil adds richness, while garlic and onion powders give a great base flavor. I always add dried oregano and thyme for a warm, herbal touch. Salt and pepper bring everything together. The fresh additions really make this dish shine. The zest and juice of a lemon add bright notes. Cherry tomatoes burst with sweetness, and bell peppers bring crunch and color. Lastly, a sprinkle of fresh parsley makes it look appealing and adds a fresh taste. This mix of ingredients creates a meal that is both simple and full of flavor. You can find the Full Recipe to see how to put it all together! - Preheat your oven to 400°F (200°C). - In a bowl, mix olive oil, garlic powder, onion powder, oregano, thyme, lemon zest, lemon juice, salt, and pepper. This mix is your marinade. - Take your chicken breasts and coat them well with the marinade. - Let the chicken sit for 10-15 minutes to soak up all the flavors. - Get your oven-safe skillet and add the cherry tomatoes and sliced bell pepper. - Place the marinated chicken among the veggies in the skillet. - Pour any leftover marinade over the chicken and vegetables. This method makes a simple and flavorful meal. You can find the full recipe above. Enjoy cooking! To make sure your chicken is safe to eat, check that it reaches an internal temperature of 165°F (75°C). This step keeps your meal safe and tasty. After you bake it, let the chicken rest for a few minutes. This helps the juices stay inside. That way, each bite is moist and full of flavor. Want to boost the flavor? Add fresh herbs like basil or rosemary. You can also throw in different veggies to make it colorful. Think about adding lemon juice or lime juice for a zesty kick. These small changes can make a big difference in taste. Using a high-quality oven-safe skillet is key. It helps the chicken cook evenly and stay juicy. A meat thermometer is also a great tool. It ensures your chicken reaches that perfect temperature every time. These tools make cooking easier and keep your meal delicious. For more tips and the full recipe, check out the One-Pan Lemon Herb Chicken section! {{image_2}} You can change the herbs in this dish. If you love basil or rosemary, use them instead. Fresh herbs pack a strong flavor. They can make your meal shine even more. When using fresh herbs, chop them finely. This helps release their oils and boosts the taste. Try different combinations to find your favorite mix. Feel free to add veggies you like. Seasonal vegetables are a great choice. Zucchini and asparagus add a nice crunch. You can also use colorful bell peppers for variety. Red, yellow, or even green peppers bring both taste and texture. Mix and match to create a vibrant dish. You can even toss in some carrots or broccoli for extra nutrition. Baking is not the only way to cook this chicken. You can grill it for a smoky flavor. Grilling gives your chicken nice char marks and a tasty crust. If you're short on time, try stovetop cooking. Sear the chicken in a pan, then add the veggies. This method is quick and still keeps the meal flavorful. Each method brings a unique twist to your One-Pan Lemon Herb Chicken. For the complete recipe, check out the [Full Recipe]. To store leftovers, place the chicken in an airtight container. This keeps the chicken fresh for up to three days. I recommend storing it with the veggies. This helps maintain flavor and moisture. If you have extra marinade, drizzle a bit over the chicken before sealing. It adds more taste when you reheat it. You can freeze portions of One-Pan Lemon Herb Chicken. Make sure to cool the chicken completely first. Then, wrap each piece tightly in plastic wrap. After that, place them in a freezer-safe bag. This keeps them good for about three months. When you are ready to eat, thaw the chicken in the fridge overnight. This helps keep the texture and taste intact. To reheat the chicken, use the oven for the best results. Preheat it to 350°F (175°C). Place the chicken in a baking dish and cover it with foil. This keeps it moist while warming. Heat for about 15-20 minutes or until it's hot. For the veggies, you can quickly sauté them in a pan. This keeps their color and crunch. Enjoy your delicious meal again! It takes about 15 minutes to prep. The cook time is 25-30 minutes. So, you can have a tasty meal ready in around 45 minutes. Yes, you can use bone-in chicken. Just remember to adjust the cook time. Bone-in chicken takes longer to cook, about 35-40 minutes. Check the internal temperature. It should reach 165°F (75°C) for safety. Several sides go well with this chicken. You can make simple rice or a fresh salad. Roasted vegetables also add great flavor. Choose what you like! In this blog post, we covered how to make One-Pan Lemon Herb Chicken, step by step. We highlighted key ingredients like chicken, olive oil, and fresh veggies. You learned how to marinate, cook, and store it well. Remember, you can switch up the herbs and veggies to suit your taste. Try different cooking methods for variety. This dish is easy, flavorful, and a great way to enjoy healthy meals at home. Happy cooking!](https://easycookingbite.com/wp-content/uploads/2025/07/2d6954d7-dd4e-4e53-843b-8a25e58d1b6d-300x300.webp)
Easy Margherita Pizza Simple and Delicious Recipe
If you crave a taste of Italy, look no further! This Easy Margherita Pizza recipe brings fresh flavors right to your kitchen. With simple…