


Latest & Greatest

Easy Creamy Garlic Shrimp Tasty and Quick Dish
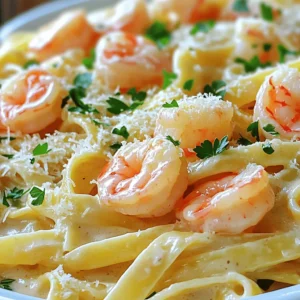
If you’re craving a quick and tasty meal, look no further! My Easy Creamy Garlic Shrimp recipe combines rich flavors
Read more…
Tuscan Shrimp with Spinach Artichokes Delicious Dish
Are you ready to indulge in a creamy, flavorful dish? Tuscan Shrimp with Spinach Artichokes combines succulent shrimp, fresh spinach,
Read more…
French Onion Soup Burgers Tasty and Juicy Dish
Are you ready to take your burger game to the next level? French Onion Soup Burgers combine the bold flavors
Read more…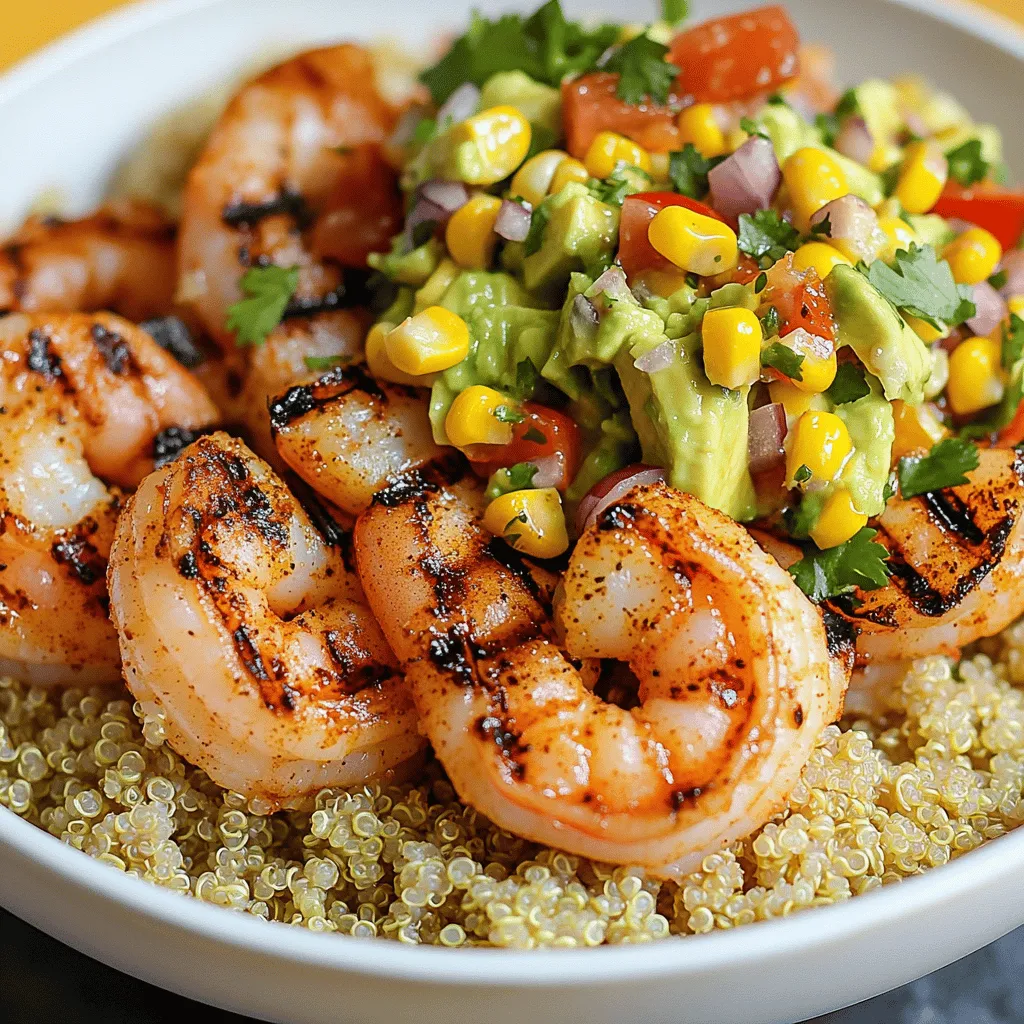
Grilled Shrimp Bowl with Avocado Corn Salsa Delight
Get ready for a fresh and vibrant meal that’s perfect for any occasion! My Grilled Shrimp Bowl with Avocado Corn
Read more…
Savory Shanghai Fried Noodles Quick and Easy Recipe
Craving a delicious meal that’s quick to whip up? You’re in the right place! In this post, I’ll share my
Read more…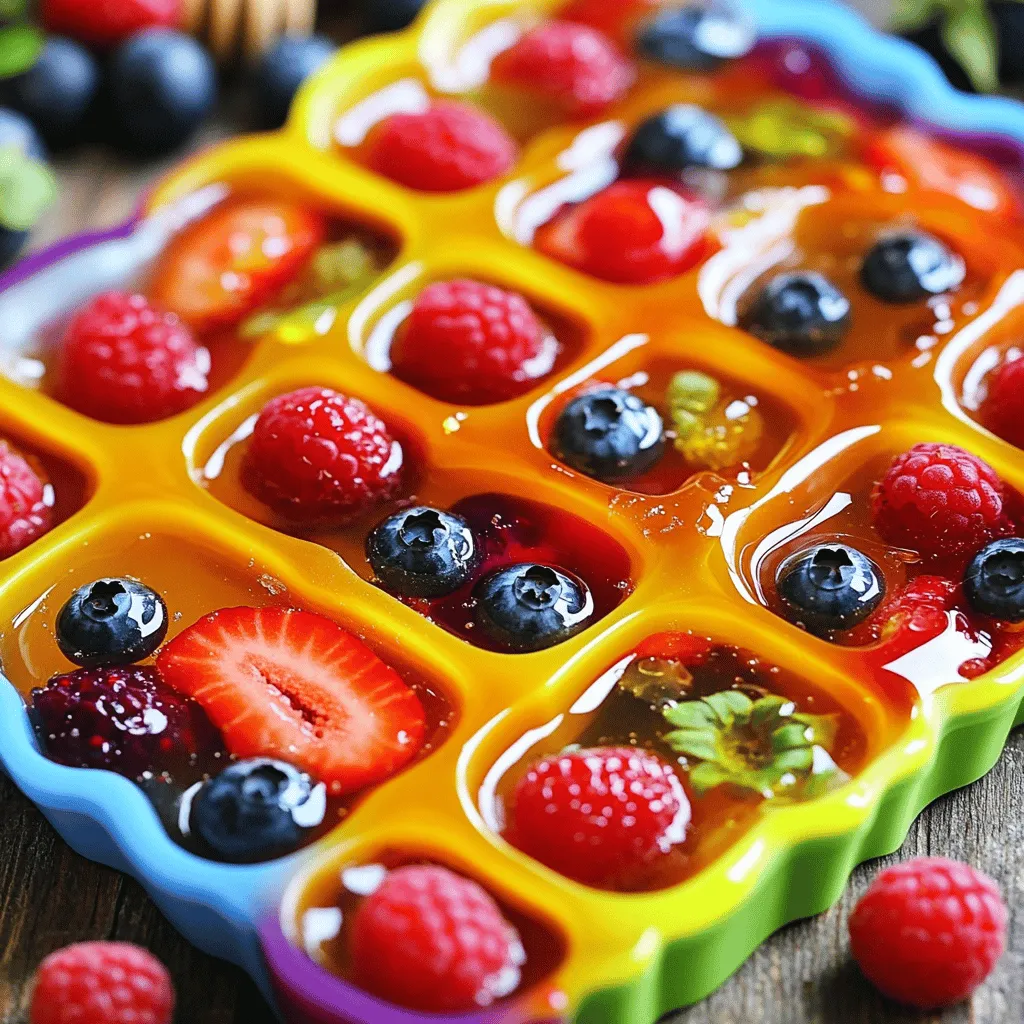
Homemade Fruit Snacks Tasty and Healthy Treats
Are you ready to make delicious homemade fruit snacks that are both tasty and healthy? In this guide, I’ll share
Read more…
Southern-Style Honey Butter Cornbread Poppers Delight
Get ready for a treat! Southern-Style Honey Butter Cornbread Poppers are a delicious fusion of sweet and savory. You’ll love
Read more…
Satisfying Beef Stroganoff Simple Comfort Food Recipe
Looking for a dish that warms the soul? Beef Stroganoff is the answer. This simple comfort food combines tender beef
Read more…browse recipes


Chocolate Peanut Butter Mug Cake Easy and Tasty Treat
If you’re craving a quick and tasty dessert, you need to try this Chocolate Peanut Butter Mug Cake! It’s simple, satisfying, and ready in…
My Latest Drinks

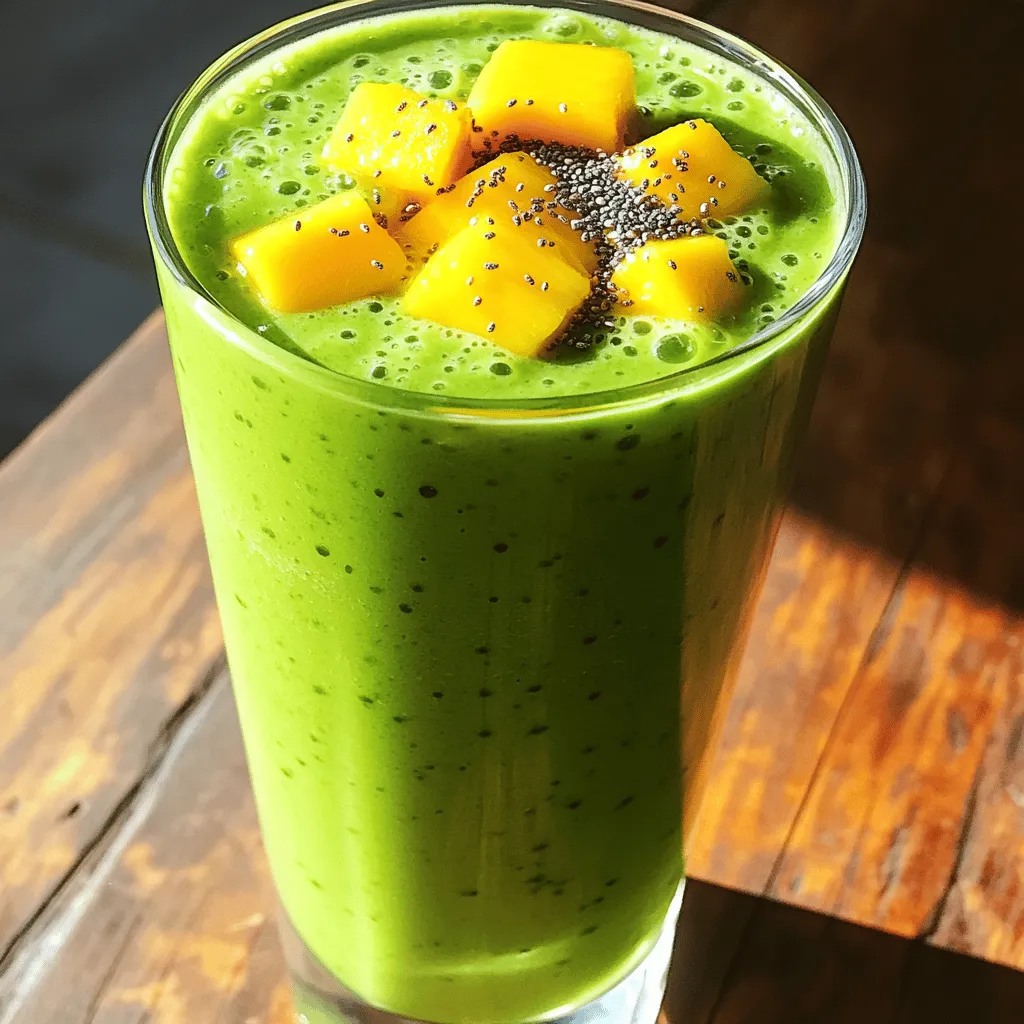
Tropical Green Smoothie Refreshing Health Boost Recipe
Looking for a refreshing drink that packs a health punch? My Tropical Green Smoothie is the perfect blend of fruits Read Full Recipe-
Apple Cider Harvest Punch Refreshing Fall Delight
Get ready for fall with my delicious Apple Cider Harvest Punch! This easy recipe blends fresh flavors that celebrate the Read Full Recipe -
Pineapple Coconut Smoothie Creamy and Refreshing Drink
Are you craving a drink that’s both creamy and refreshing? Look no further than my Pineapple Coconut Smoothie! This easy-to-make Read Full Recipe -
Delicious Caramel Apple Cider Cozy Fall Drink Recipe
Fall is here, and nothing says cozy like a warm cup of Caramel Apple Cider. This drink combines the sweet Read Full Recipe -
Instant Pot Apple Cider Quick and Flavorful Recipe
Looking for a quick and delicious way to make apple cider? The Instant Pot is your best friend! I’ll share Read Full Recipe -
Chocolate Covered Strawberry Smoothie Delicious Treat
Craving something delicious and healthy? The Chocolate Covered Strawberry Smoothie is the perfect treat! With fresh strawberries, cocoa powder, and Read Full Recipe


My Latest Dinners
-
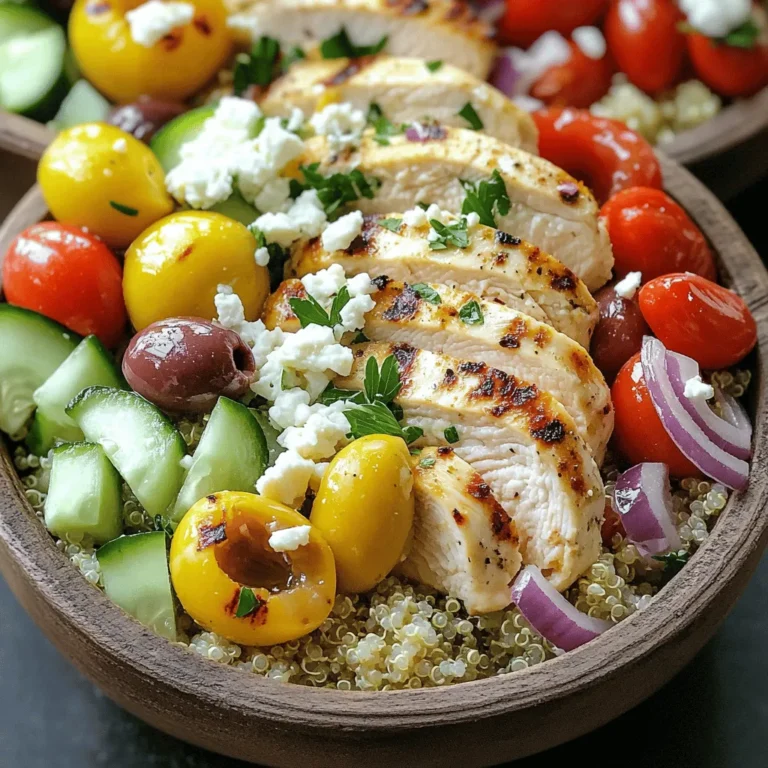
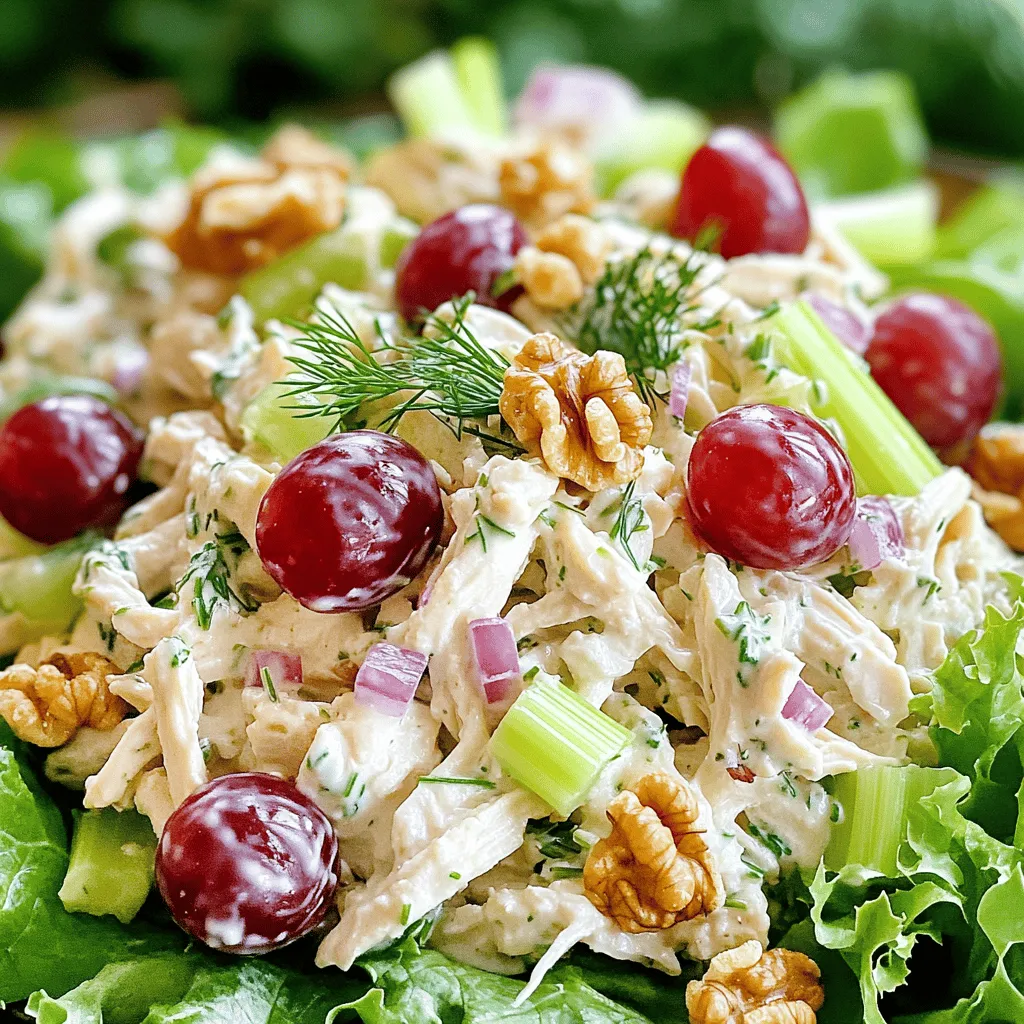
Greek Yogurt Chicken Salad Fresh and Flavorful Recipe
Looking for a fresh twist on a classic chicken salad? My Greek Yogurt Chicken Salad recipe is here to save Read Full Recipe -
Slow Cooker White Chicken Chili Easy and Flavorful Recipe
Looking for a warm, comforting meal that’s easy to make? My Slow Cooker White Chicken Chili is just what you Read Full Recipe -
Taco Stuffed Zucchini Boats Flavorful and Simple Dish
Looking for a fun, flavorful dish that packs a punch? Taco Stuffed Zucchini Boats are the answer! This easy recipe Read Full Recipe -
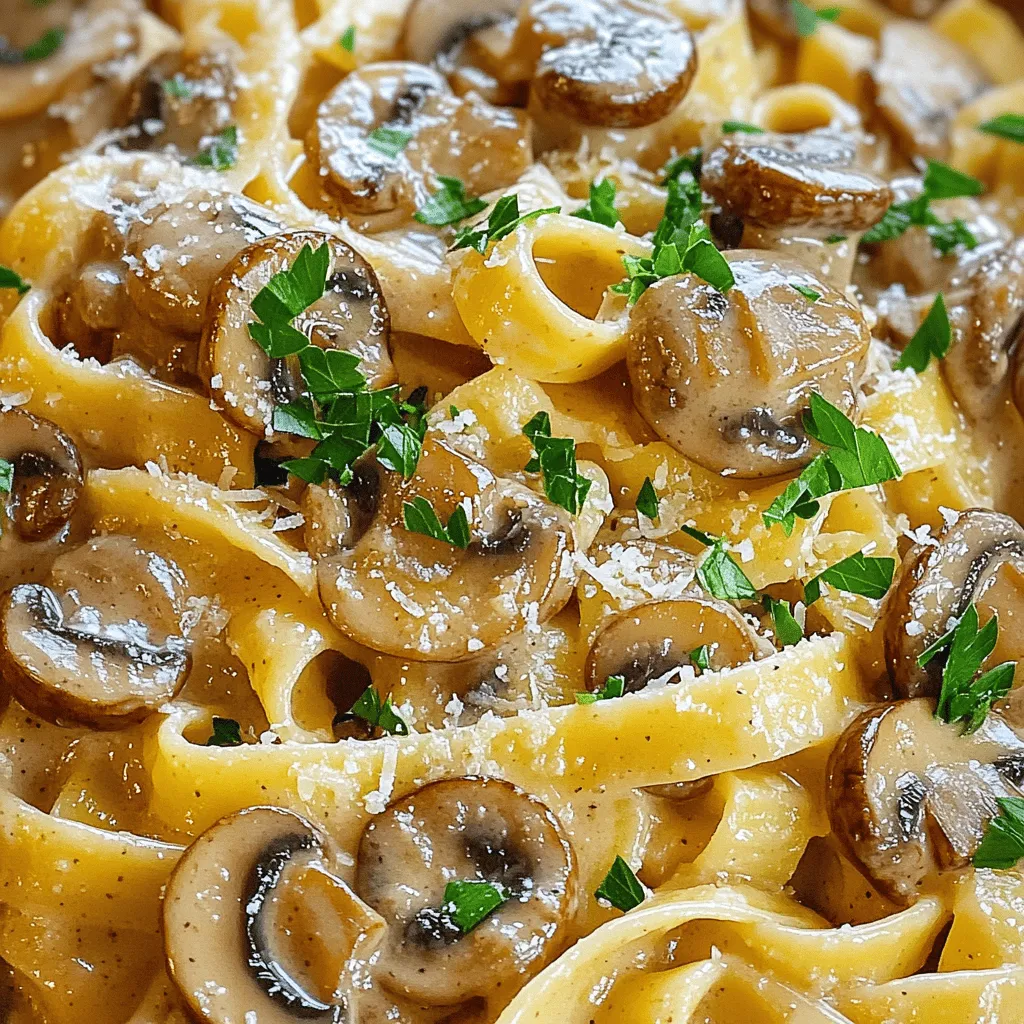
Creamy Mushroom Marsala Flavorful Dinner Delight
Are you ready to impress at dinner tonight? My Creamy Mushroom Marsala is a flavorful delight that will wow your Read Full Recipe -
Coconut Curry Chickpeas Flavorful and Easy Recipe
If you’re seeking a simple, tasty meal, look no further! My Coconut Curry Chickpeas recipe is a delightful blend of Read Full Recipe -
One-Pot Taco Rice Flavorful and Simple Dinner Delight
Looking for an easy and tasty dinner? Try my One-Pot Taco Rice! This simple dish combines savory flavors and requires Read Full Recipe


hey,
i’m !
I’m so happy you’re here!
Every dish I share is made with love and care. I hope they bring you the same comfort and joy they bring me. Let’s make memories, one recipe at a time.
![- 2 cups fresh strawberries, hulled and sliced - 1/4 cup granulated sugar - 1 tablespoon lemon juice - 1 pound vanilla sponge cake or pound cake, cut into cubes - 2 cups heavy whipping cream - 1/4 cup powdered sugar - 1 teaspoon vanilla extract - Fresh mint leaves for garnish (optional) The key to a great Strawberry Shortcake Trifle is fresh ingredients. Start with ripe strawberries. They should be bright red and sweet. The sugar helps to draw out their juice. Lemon juice adds a fresh zing. It balances the sweetness perfectly. Next, choose your cake. I love using vanilla sponge cake for its light texture. A pound cake adds richness, so pick what you prefer. Cut the cake into cubes for easy layering. Whipped cream is the star here. Use cold heavy whipping cream for the best results. It whips up fluffy and light. Adding powdered sugar and vanilla gives it a sweet flavor. Mint leaves are optional but add a nice touch. They bring a pop of color and fresh taste. For the full recipe, check the details above. Enjoy creating your trifle delight! Start by hulling and slicing 2 cups of fresh strawberries. Place them in a medium bowl. Add 1/4 cup of granulated sugar and 1 tablespoon of lemon juice. Mix gently to combine. Let the strawberries sit for about 15 to 20 minutes. This process is called macerating. It helps the strawberries release their juices and become sweeter. Next, take 2 cups of heavy whipping cream and pour it into a large mixing bowl. Use an electric mixer on high speed to whip the cream. After about 2 minutes, slowly add 1/4 cup of powdered sugar and 1 teaspoon of vanilla extract. Keep whipping until you see soft peaks form. Be careful not to over-whip the cream. You want it fluffy but not too stiff. Now, it's time to build your trifle. In a large glass trifle bowl or individual cups, start with a layer of sponge cake cubes. Use about 1/3 of the cake. Then, add a layer of your macerated strawberries, including their juices. Follow this with a layer of whipped cream. Repeat these layers until you run out of ingredients. For the last layer, make sure to finish with a generous dollop of whipped cream on top. Cover the trifle with plastic wrap. Place it in the refrigerator for at least 2 hours. This chilling time helps the flavors blend well. Your Strawberry Shortcake Trifle will be ready to enjoy after it cools! For the complete recipe, check the [Full Recipe]. For this trifle, I recommend using vanilla sponge cake. It has a light texture that soaks up the strawberry juices well. Pound cake is a great choice too. It adds a rich flavor and holds its shape nicely. No matter what cake you pick, make sure it is fresh. Stale cake will not taste good in your trifle. Whipped cream is the star of this dessert. To get it just right, start with cold heavy cream. Beat it on high speed until soft peaks form. This takes about two minutes. Be careful not to over-whip. If you whip too long, it turns into butter. To sweeten the cream, add powdered sugar while mixing. You can also add a splash of vanilla for extra flavor. Presentation makes this dessert special. Use clear glass bowls or cups to show off the layers. This way, everyone can see the beautiful colors of the strawberries and cream. For a fun touch, add a whole strawberry on top. You can also sprinkle fresh mint leaves for a pop of green. This adds freshness and color to your trifle. For a detailed guide on making this delightful treat, check out the Full Recipe. {{image_2}} You can switch up the fruit in your trifle. Raspberries and blueberries add a lovely color and taste. They make your dessert pop with flavor, too. You can even mix different fruits for a fun tropical twist. Try adding mango or kiwi for a bright, fresh vibe. This keeps your trifle exciting and new every time. If you want a lighter trifle, you can use whipped cream alternatives. For a fluffy texture, try using Greek yogurt. It gives a creamy feel with less fat. If you’re looking for vegan options, coconut cream works great. It adds a rich flavor and is dairy-free. Just whip it up like regular cream for a smooth finish. Want to take your trifle to the next level? Infuse the cake with liqueurs like amaretto or orange liqueur. This adds a hint of warmth and depth to your dessert. You can also add chocolate shavings or nuts for extra flavor and crunch. These add-ins make your trifle unique and delicious. Don't forget, you can find the full recipe [here](#). To keep your strawberry shortcake trifle fresh, you should store it in the fridge. Use a tight lid or cover it with plastic wrap. This helps keep it moist and tasty. The trifle will stay good for up to 3 days in the refrigerator. After that, the cake might get too soggy. You can freeze the trifle, but it's not the best choice. Freezing can change the texture of the whipped cream and cake. If you decide to freeze it, store it in a freezer-safe container. To thaw, move it to the fridge for a few hours. Avoid using a microwave, as it can ruin the layers. Enjoy your lovely trifle while it’s fresh for the best taste! Strawberry Shortcake Trifle lasts about 3 days in the fridge. Keep it covered to keep it fresh. The layers may get a bit soggy after a couple of days, but it still tastes good. I recommend enjoying it within this time for the best flavor and texture. Yes, you can make your trifle a day ahead of time. This lets the flavors mix well and makes it even tastier. Just make sure to keep it in the fridge, covered with plastic wrap. It will save you time on the day you want to serve it. Serve your trifle in clear glass bowls or cups. This way, everyone can see the pretty layers. Add a few whole strawberries or mint leaves on top for a nice touch. It makes the dessert look extra special and inviting. You can use frozen strawberries if fresh ones are not available. Just thaw them and drain excess juice before using. The taste may be different, but frozen strawberries can still work well in the trifle. They are a great option when fresh strawberries are out of season. In this post, we explored how to make a delicious Strawberry Shortcake Trifle. We covered important ingredients, step-by-step instructions, and helpful tips. You learned about choosing the right cake and perfecting the whipped cream. Plus, we shared fun variations to try. A trifle is simple but lets your creativity shine. Whether for a party or family night, this dessert always impresses. Enjoy making your own tasty trifle!](https://easycookingbite.com/wp-content/uploads/2025/05/9940a55c-c868-4c90-ac68-3c62ae910262-300x300.webp)

![- 1 can (15 oz) chickpeas, rinsed and drained - 2 tablespoons olive oil - 1 teaspoon smoked paprika - 1/2 teaspoon cumin - Salt and pepper to taste - 4 cups mixed greens (spinach, arugula, romaine) - 1 cup cherry tomatoes, halved - 1 cucumber, diced - 1/4 red onion, thinly sliced - 1 avocado, sliced - 2 tablespoons tahini - 1 tablespoon lemon juice - Fresh herbs (parsley or cilantro) for garnish - Baking sheet - Mixing bowls - Whisk for the dressing The crispy chickpea salad is a fun dish to make. It is simple and packed with flavor. First, you need chickpeas. I use a can of chickpeas because they save time. Rinse and drain them well. You also need olive oil to help the spices stick. Smoked paprika adds a rich, warm flavor. Cumin gives it a nice touch. Don’t forget salt and pepper for taste. For the salad, I love using mixed greens. Spinach, arugula, and romaine are great choices. Cherry tomatoes add sweetness, while diced cucumber brings crunch. Thinly sliced red onion adds a bit of zing. Avocado is a must for creaminess. The tahini dressing ties it all together. It has a nutty flavor and pairs well with lemon juice. This simple dressing is easy to make with just a whisk. Gather these ingredients and tools, and you are ready to create this tasty salad. Check out the Full Recipe for step-by-step instructions. - First, preheat your oven to 400°F (200°C). This step is crucial for crispiness. - Next, take a can of chickpeas. Rinse and drain them well. In a bowl, mix the chickpeas with 2 tablespoons of olive oil. Add 1 teaspoon of smoked paprika, 1/2 teaspoon of cumin, and some salt and pepper to taste. Stir until all chickpeas are covered in the mix. - Spread the seasoned chickpeas on a baking sheet. Make sure they are in a single layer. This helps them cook evenly. - Bake them for about 25 to 30 minutes. Halfway through, take them out and stir. This stirring helps them get crispy all over. Keep an eye on them; you want them golden brown and crunchy. - While the chickpeas bake, prepare your salad base. In a large bowl, add 4 cups of mixed greens, 1 cup of halved cherry tomatoes, 1 diced cucumber, and 1 thinly sliced red onion. Toss them together gently. - Now, make the dressing. In a small bowl, whisk together 2 tablespoons of tahini, 1 tablespoon of lemon juice, a pinch of salt, and about 1 tablespoon of water. This will help thin it out. Adjust the taste as you like. - Once the chickpeas are done and have cooled for a bit, add them to the salad. - Drizzle the tahini dressing over the salad and toss it all together. Make sure everything is nicely coated. - For a beautiful finish, top it with sliced avocado and fresh herbs before serving. This adds color and flavor to your dish. For the full recipe, check the [Full Recipe]. Enjoy your delicious crispy chickpea salad! To get the best crunch from your chickpeas, start by draining and drying them well. After rinsing, lay them on a clean kitchen towel. Pat them dry to remove excess moisture. This step helps them crisp up in the oven. If you have time, let them sit for a bit to dry completely. Oven times may vary based on the model. Check your chickpeas around the 20-minute mark. If they aren’t golden yet, give them a few more minutes. Remember, every oven is different, so keep an eye on them. Stir halfway through for even cooking. You can boost the flavors in your crispy chickpea salad by adding spices. Try garlic powder, cayenne pepper, or even a hint of curry powder. These can add nice depth to your dish. You can also mix in other ingredients like bell peppers or radishes for extra crunch and color. If tahini isn’t your favorite, consider using a yogurt-based dressing. A simple vinaigrette made with olive oil, vinegar, and herbs can work wonders too. Experiment until you find what suits your taste best! This salad pairs well with proteins like grilled chicken or shrimp. You can also serve it with grains like quinoa or farro for a hearty meal. Mixing different textures makes the dish exciting. For a fun presentation, serve the salad in bowls, layering the ingredients. You can also use mason jars for an appealing grab-and-go option. Remember, how you present food can make it even more enjoyable! For the complete dish, check the Full Recipe! {{image_2}} You can make this salad even more exciting by switching up the legumes. Try black beans or lentils instead of chickpeas. Both pack a punch of protein and taste great. You can also add seasonal vegetables for fresh flavors. Think of adding bell peppers, zucchini, or corn. These veggies bring color and crunch to your plate. Make sure all the ingredients you choose are gluten-free. Most chickpeas and fresh vegetables are naturally gluten-free, but check labels just to be safe. If you want to add grains, quinoa or brown rice work well. Both give a nice texture and are gluten-free. For a Mediterranean vibe, add feta cheese or olives. Feta gives a creamy, salty taste, while olives add a briny kick. You can also mix in different herbs and spices. Oregano, basil, or dill can brighten your salad. These flavors will transport you to a sunny Mediterranean patio. For more details, check the [Full Recipe]. To store your crispy chickpea salad, use airtight containers. This keeps the salad fresh. Place the chickpeas in a separate container. They stay crispy longer that way. The salad will last in the fridge for about 3 days. However, the chickpeas may lose some crunch after a day. You can freeze chickpeas if you have extras. Spread them on a baking sheet and freeze until firm. After that, transfer them to a freezer bag. They can stay frozen for up to 3 months. When you’re ready to eat, let them thaw in the fridge overnight. Reheat in the oven to get them crispy again. To keep your salad fresh, keep ingredients separate until serving. This helps prevent sogginess. Add the dressing just before you eat. Also, store cut vegetables in their own container. This keeps them crisp and flavorful until you are ready to enjoy your meal. Yes, you can use dried chickpeas. First, soak them in water overnight. This helps them soften. After soaking, drain and rinse them. Then, boil them in fresh water for about one hour. Check for doneness; they should be tender. You can then season and bake them like canned chickpeas. This way, you get the same crispy texture. If your chickpeas are not crispy, check a few things. First, make sure they are dry. If they are wet, they won’t crisp up. Use a clean towel to pat them dry after rinsing. Next, spread them out evenly on the baking sheet. If they are crowded, they will steam instead of bake. Lastly, ensure they cook long enough. Check them at 25 minutes, and keep baking until golden. To prepare this salad in advance, you can cook the chickpeas ahead of time. Store them in an airtight container in the fridge. You can also wash and chop your veggies. Keep the greens, tomatoes, cucumber, and onion separate until you are ready to eat. This keeps everything fresh. The dressing can be made in advance too. Just store it in a jar in the fridge. If you want to skip tahini, try these simple dressings. Mix olive oil with balsamic vinegar for a quick option. A lemon vinaigrette works well too. Just whisk together lemon juice, olive oil, salt, and pepper. Another great choice is yogurt mixed with herbs. This gives a creamy texture and fresh taste. These alternatives keep your salad exciting. For the complete recipe, you can refer to the [Full Recipe]. This crispy chickpea salad is a simple, tasty dish you can enjoy anytime. You learned about the key ingredients, like chickpeas, fresh veggies, and tahini dressing. We covered step-by-step instructions, useful tips, and fun variations to match your tastes. Remember to store leftovers correctly to keep them fresh. Whether you stick to the original recipe or add your twist, this salad can fit any meal. Enjoy making this healthy option that brings flavor and joy to your plate!](https://easycookingbite.com/wp-content/uploads/2025/05/723887ad-f627-4e0d-8183-610fb89f7341-300x300.webp)
Sweet Pineapple Chicken & Rice Flavorful Family Meal
Looking for a fun and tasty dinner idea? Try my Sweet Pineapple Chicken & Rice! This dish combines juicy chicken, vibrant vegetables, and sweet…