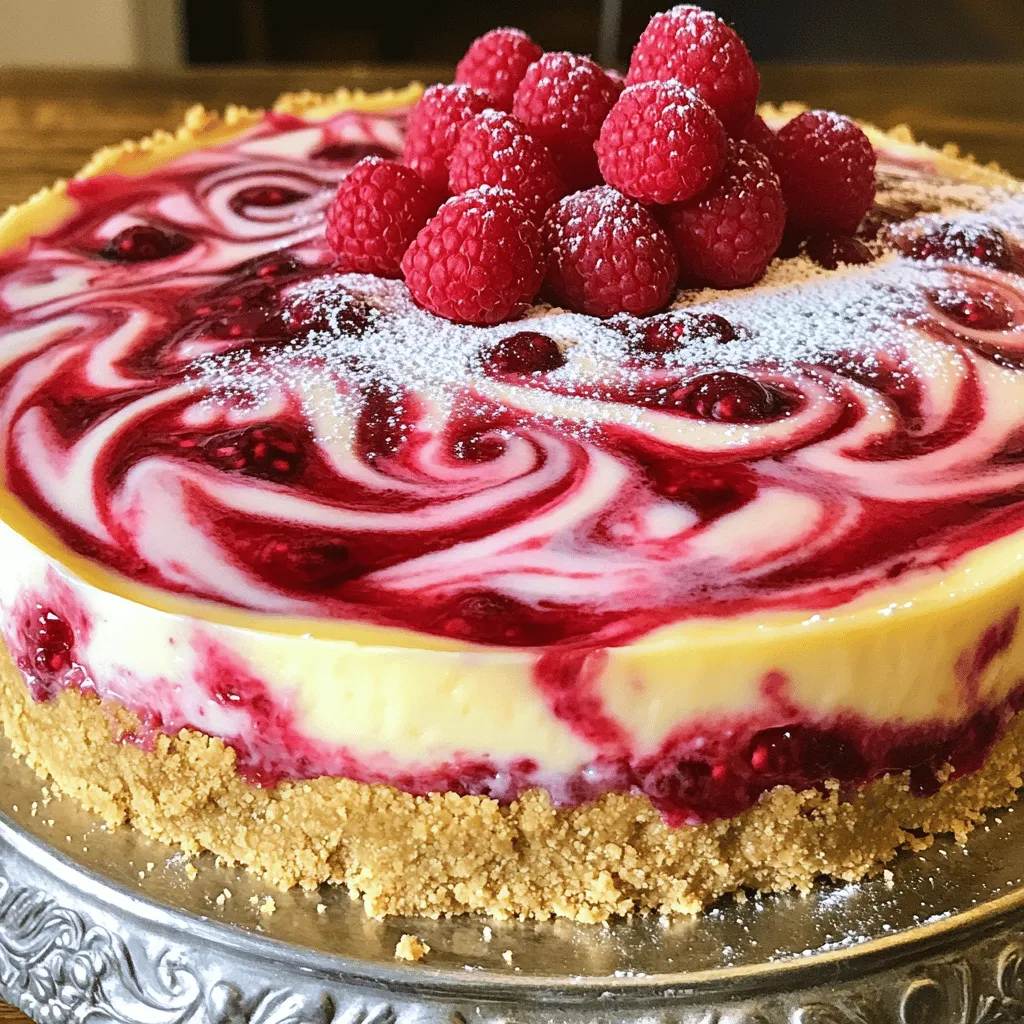
If you love creamy desserts that are easy to make, you’re in the right place! My Raspberry Swirl Cheesecake combines smooth cream cheese with fresh raspberries for a delightful treat. This recipe is simple and packed with flavor. Whether you want to impress guests or enjoy a sweet bite at home, this cheesecake will shine on any table. Let’s dive into the ingredients to get you started on your baking adventure!
Ingredients
To create a delicious Raspberry Swirl Cheesecake, gather these key ingredients:
– 1 ½ cups graham cracker crumbs
– ½ cup unsalted butter, melted
– 2 tablespoons sugar
– 3 (8 oz) packages cream cheese, softened
– 1 cup granulated sugar
– 1 teaspoon vanilla extract
– 3 large eggs
– 1 cup sour cream
– 1 cup fresh raspberries
– ¼ cup raspberry puree (fresh or store-bought)
– 2 tablespoons cornstarch
Each ingredient plays a special role in building flavor and texture. The graham cracker crumbs and butter form a buttery crust. Cream cheese gives the cake its smooth texture. Eggs help it set firm but creamy. Raspberries add a sweet and tangy swirl that brightens every bite.
For the best results, ensure your cream cheese is soft. This helps create a smooth filling. If you want to reduce sugar, feel free to adjust the amounts, but keep the balance in mind. Each ingredient works together, so swapping too much can change the taste.
Step-by-Step Instructions
Preparation of the Crust
First, preheat your oven to 325°F (160°C). Next, gather your crust ingredients. In a mixing bowl, combine 1 ½ cups of graham cracker crumbs, ½ cup of melted unsalted butter, and 2 tablespoons of sugar. Mix until everything blends well. Now, press this mixture firmly into the bottom of a 9-inch springform pan. Bake the crust for 10 minutes. Let it cool while you prepare the filling.
Making the Cheesecake Filling
For the cheesecake filling, start with 3 packages of softened cream cheese. Place it in a large bowl. Beat the cream cheese with a mixer until it is smooth. Gradually add 1 cup of granulated sugar, mixing until creamy. Add 1 teaspoon of vanilla extract and mix until combined.
Now, add the eggs, one at a time, mixing well after each one. Be careful not to overmix the batter. Next, mix in 1 cup of sour cream until smooth. Finally, add 2 tablespoons of cornstarch, ensuring everything is well blended.
Creating the Raspberry Swirl
To make the raspberry swirl, take 1 cup of fresh raspberries. Using a fork, gently mash them in a separate bowl. Stir in ¼ cup of raspberry puree until combined. Keep some raspberry chunks for texture.
Now, it’s time to assemble. Pour half of the cheesecake batter over the cooled crust. Drop spoonfuls of the raspberry mixture over the cheesecake layer. Pour the remaining cheesecake batter on top. Use a knife or skewer to swirl the raspberry mixture gently into the batter. This will create a lovely marbled effect.
Tips & Tricks
Achieving the Perfect Cheesecake Texture
To get a creamy cheesecake, avoid overmixing. Overmixing adds too much air, leading to cracks. Mix just until the ingredients blend well. Use room temperature cream cheese and eggs. This helps them mix easily and creates a smooth filling.
Baking Tips
To prevent cracks, bake your cheesecake in a water bath. This helps keep the temperature even. You can check for doneness by gently shaking the pan. The edges should be set, but the center should still jiggle a bit.
Presentation Tips
Garnish your cheesecake with fresh raspberries. They add a burst of color and flavor. For a nice touch, dust the top with powdered sugar. Serve it chilled for the best taste.
Variations
Flavor Combinations
You can make your raspberry swirl cheesecake even more exciting. Try adding lemon zest for a zesty kick. The bright flavor pairs well with the sweet raspberries. You can also include chocolate for a richer taste. Just melt some chocolate and swirl it into the cheesecake. Both options add fun and unique flavors.
You can also use other fruits for swirls. Strawberries, blueberries, or blackberries work great. Just mash them like you do with raspberries. You can mix the fruit puree into the batter for a colorful design. Each fruit adds its own flavor, making every bite special.
Dietary Adjustments
For those who need gluten-free options, you can swap the graham cracker crust. Use gluten-free cookies or ground nuts. Almond flour or crushed gluten-free cookies work well. Just mix them with melted butter and sugar, then press into the pan.
If you’re looking for a vegan cheesecake, there are simple swaps. Use vegan cream cheese and coconut cream instead of sour cream. Replace eggs with flaxseed meal or aquafaba. These changes make your cheesecake dairy-free and still delicious.
Mini Cheesecake Options
Mini cheesecakes are a great idea for parties or gifts. You can make them in cupcake liners or mini springform pans. Just use the same filling and crust. For baking time, check them after 20-25 minutes. They should be set around the edges but still a little jiggly in the center.
These mini treats are easy to share and fun to eat. Plus, they look adorable on any dessert table. Enjoy making these little bites of joy!
Storage Info
How to Store
To keep your raspberry swirl cheesecake fresh, store it in the fridge. Use an airtight container or cover it tightly with plastic wrap. This helps protect it from drying out. Place it on a flat shelf to avoid crushing it.
If you want to keep it longer, freezing is a great option. Wrap the cheesecake in plastic wrap, then in foil. This double wrap prevents freezer burn. You can freeze it for up to three months. Just remember to label it for easy identification later.
Shelf Life
If stored well, your cheesecake can last about a week in the fridge. Look for any signs of spoilage, like off smells or a change in color. If you freeze the cheesecake, it will taste best within three months.
When you thaw the cheesecake, it may change a bit. The texture might become softer or a little grainy. This is normal. To maintain the best quality, let it thaw slowly in the fridge. Enjoy your delicious dessert by following these storage tips!
FAQs
What can I do if my cheesecake cracks?
Cracking can happen for several reasons. Here are some tips to fix it:
– Overmixing: Mixing too much adds air which makes cracks. Mix just until smooth.
– Temperature: If the oven is too hot, it can cause cracks. Use a water bath for even heat.
– Cooling: Cool slowly. Turn off the oven and leave the door open a bit. This helps.
To fix cracks, you can cover them with fruit or whipped cream. It gives a nice look and taste.
Can I use frozen raspberries?
Yes, frozen raspberries work well. Here are some tips:
– Thawing: Thaw them first. This helps them mix easier.
– Draining: Drain excess water after thawing. Too much liquid can affect the batter.
– Flavor: Frozen raspberries might be less tart. Taste them before using. You can add more sugar if needed.
Fresh raspberries add a nice texture, but frozen are great too.
How long does it take to set?
Setting time is important for a good cheesecake. Here’s what to expect:
– Cooling Time: After baking, let it cool in the oven for about an hour.
– Chilling Time: Refrigerate the cheesecake for at least 4 hours. For best results, chill overnight.
This time helps the cheesecake firm up and flavors to blend.
Can I make this cheesecake ahead of time?
Yes, you can make the cheesecake ahead of time. Here are best practices:
– Make it a day before: This gives it time to set well.
– Store properly: Cover it with plastic wrap or foil. This keeps it fresh.
– Add toppings later: If you use fruit or cream, add it just before serving.
Making it ahead saves time and lets flavors develop.
This blog post covered everything you need to make a delicious raspberry cheesecake. We explored the ingredients, from creamy cheese to fresh raspberries. I shared step-by-step instructions for the crust, filling, and swirl. You learned tips for texture, baking, and presentation.
In conclusion, baking this cheesecake can be fun and rewarding. Experiment with flavors and presentation to make it your own. Enjoy sharing this treat with friends and family!