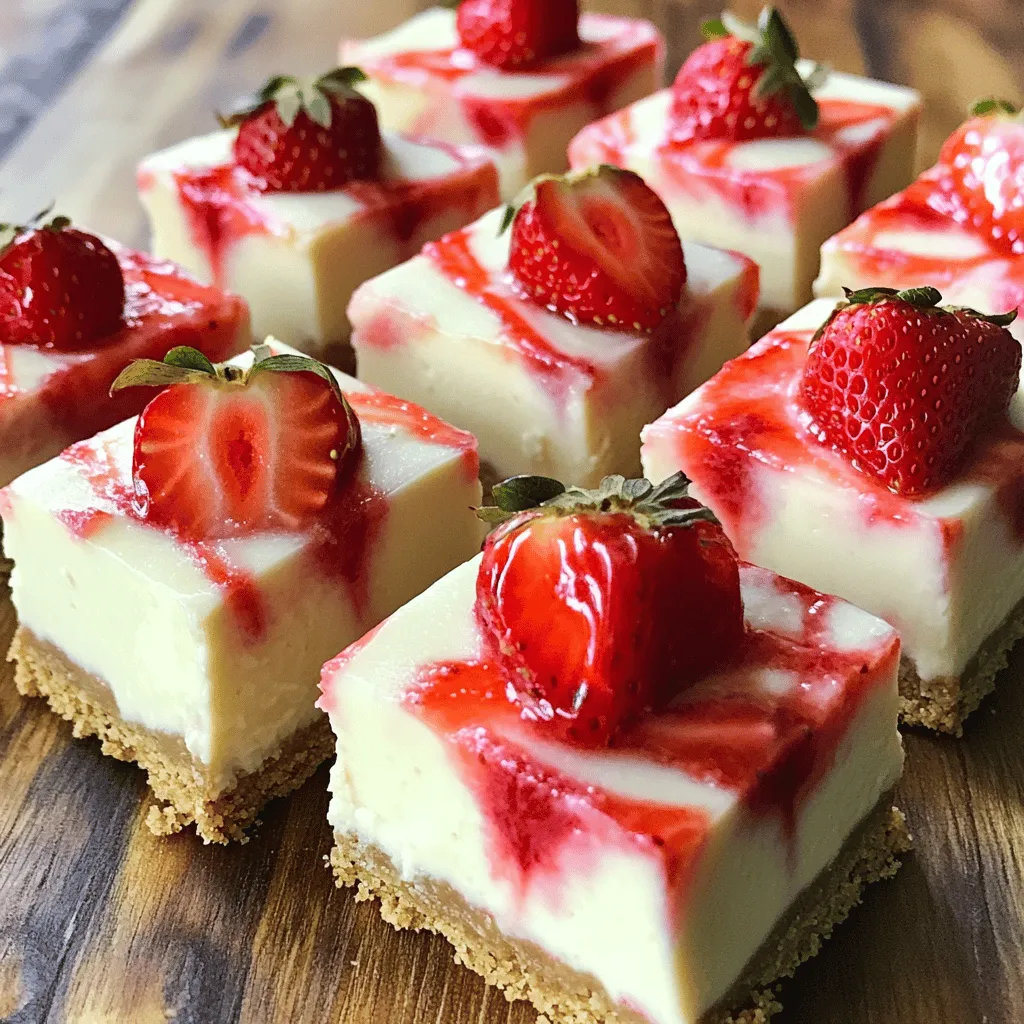
Looking for a delicious dessert that’s quick and easy? These No-Bake Strawberry Cheesecake Bars are the perfect treat! With a smooth, creamy filling and a crunchy crust, they’ll satisfy your sweet tooth without turning on the oven. Plus, I’ll walk you through each step, share tips for the best texture, and explore fun variations. Let’s dive into making this delightful dessert together!
Ingredients
List of Ingredients
– 2 cups graham cracker crumbs
– 1/2 cup unsalted butter, melted
– 1/4 cup powdered sugar
– 16 oz cream cheese, softened
– 1 cup granulated sugar
– 1 teaspoon vanilla extract
– 1 cup heavy whipping cream
– 2 cups fresh strawberries, chopped
– 1/4 cup strawberry puree (fresh or store-bought)
– Fresh strawberries for garnish
Key Ingredients Explanation
Each ingredient plays a special role in making these bars. The graham cracker crumbs create a crunchy base. Melted butter binds the crumbs, making a sturdy crust. Powdered sugar sweetens the crust without making it grainy.
Cream cheese gives the bars their rich, creamy texture. Granulated sugar adds sweetness to the filling. Vanilla extract enhances the flavor, making each bite delicious. Heavy whipping cream is key for lightness, making the mixture fluffy.
Fresh strawberries provide a burst of flavor. The strawberry puree adds extra sweetness and color. Finally, fresh strawberries on top make the bars look beautiful and inviting.
Potential Substitutions
You can swap graham crackers for digestive biscuits for a different taste. If you need a dairy-free option, use vegan cream cheese. Coconut cream can replace heavy cream for a lighter version. You can also use frozen strawberries if fresh ones are not available. Just make sure to thaw and drain them first.
Step-by-Step Instructions
Preparing the Crust
To start, grab a medium bowl. Mix together 2 cups of graham cracker crumbs, 1/2 cup of melted unsalted butter, and 1/4 cup of powdered sugar. Stir until everything is well combined. This mixture should feel like wet sand. Next, take a 9×9-inch baking dish and press the crust firmly into the bottom. Make sure it is even. Once you have done this, chill the crust in the refrigerator while you prepare the filling. This helps the crust set and hold its shape later.
Making the Cheesecake Filling
Now, let’s make the filling. In a large mixing bowl, add 16 oz of softened cream cheese, 1 cup of granulated sugar, and 1 teaspoon of vanilla extract. Beat these together until the mixture is smooth and creamy. It’s important that there are no lumps. In another bowl, whip 1 cup of heavy whipping cream until stiff peaks form. This step gives the cheesecake its light texture. Carefully fold this whipped cream into the cream cheese mixture. Do this gently to keep the air in the whipped cream.
Next, you’ll want to add 2 cups of chopped fresh strawberries and 1/4 cup of strawberry puree. Fold these in too, making sure the strawberries are evenly mixed throughout the cream mixture. This adds a burst of flavor and color to the filling.
Assembling and Chilling the Bars
With the crust and filling ready, it’s time to assemble. Pour the strawberry cheesecake mixture over the chilled crust. Use a spatula to spread it evenly across the top. Make sure it reaches all corners of the dish. After that, cover the dish with plastic wrap. Place it back in the refrigerator. Let it chill for at least 4 hours. This helps the bars firm up nicely.
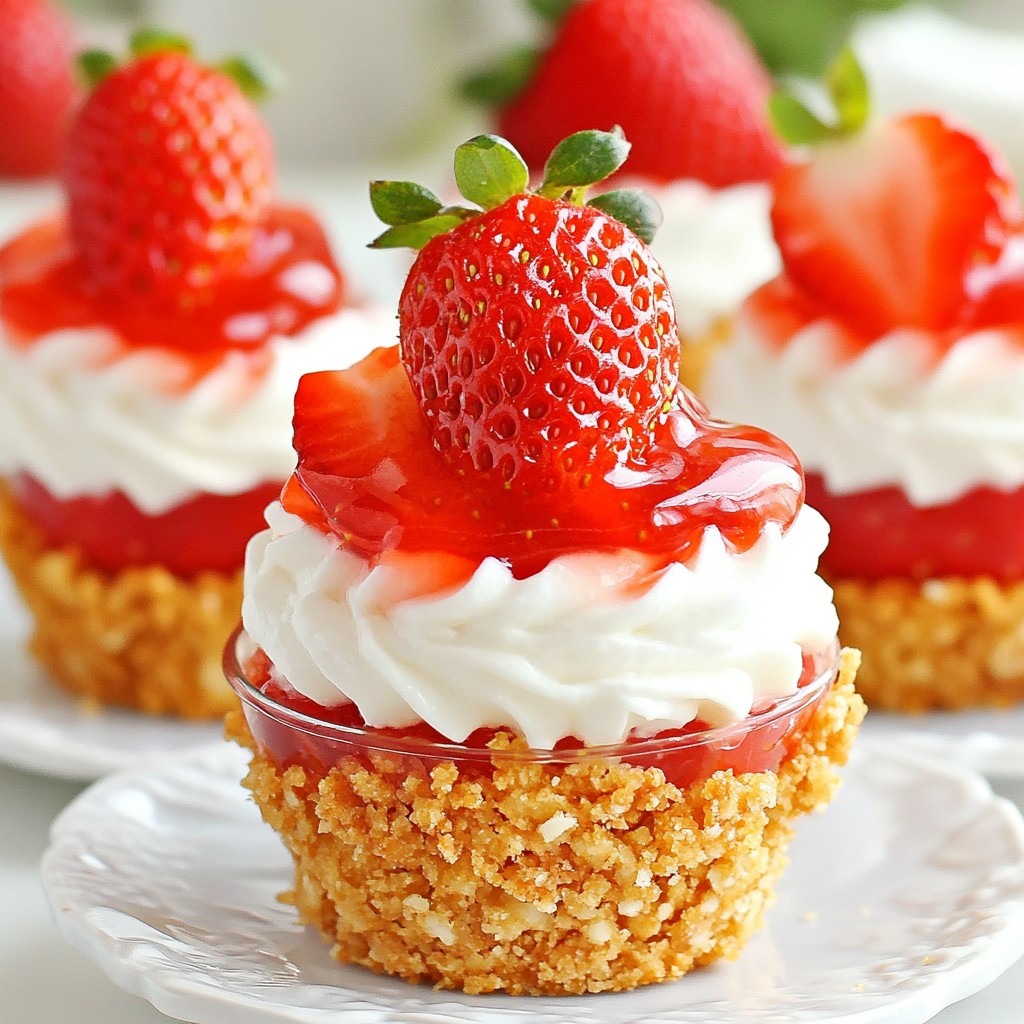
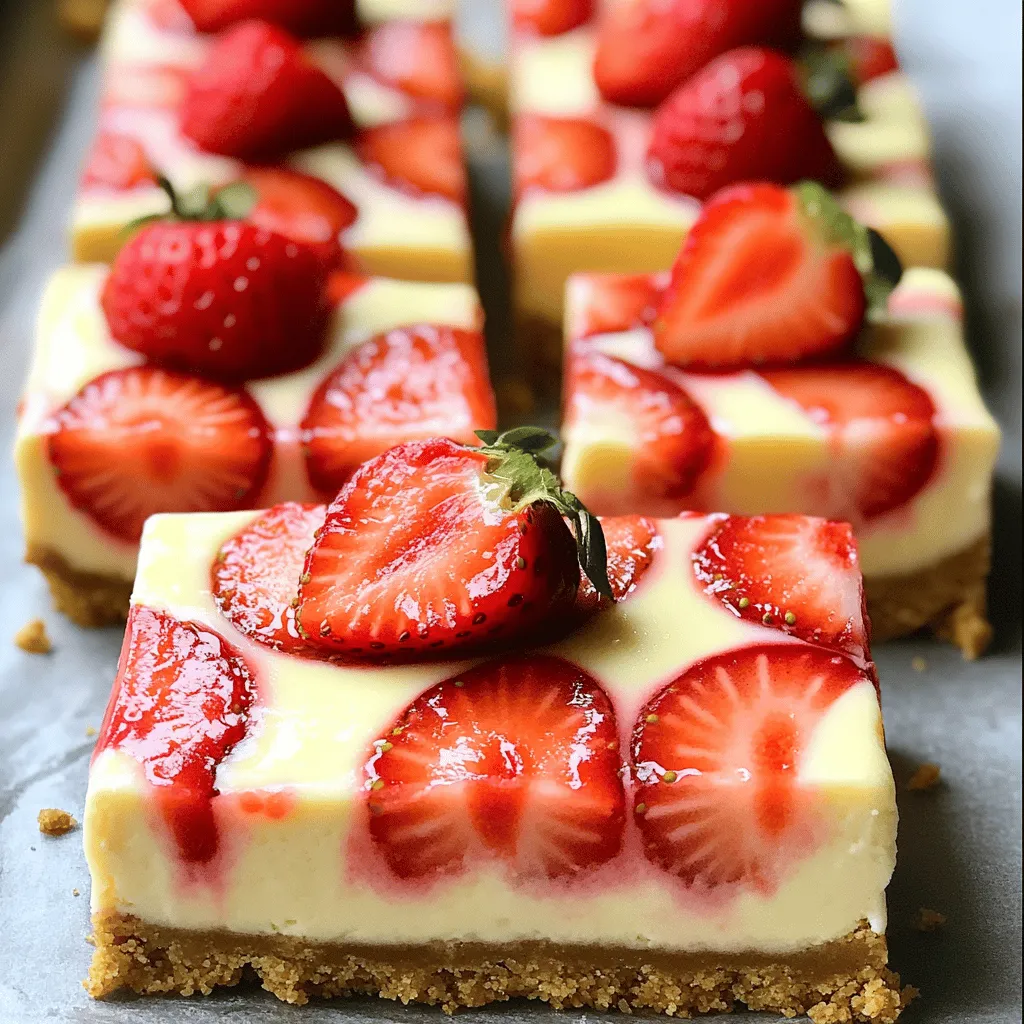
Once firm, lift the cheesecake out using the edges of the plastic wrap. Carefully cut it into bars. For a nice finish, garnish each bar with fresh strawberries on top. Enjoy your delicious no-bake strawberry cheesecake bars!
Tips & Tricks
Achieving the Perfect Creamy Texture
To get that smooth and creamy texture, start with softened cream cheese. Cold cream cheese won’t mix well. Beat it well with sugar and vanilla until it’s fluffy. Then, whip the heavy cream until it forms stiff peaks. Gently fold this whipped cream into the cheese mix. This keeps your bars light and airy. Be careful not to overmix; this can deflate the whipped cream.
How to Make Ahead of Time
You can easily make these bars a day ahead. Prepare the crust and filling, then chill them overnight. This helps the flavors blend well. Just remember to cover the dish tightly with plastic wrap. When you’re ready to serve, simply lift them out and slice. This saves time on busy days.
Suggestions for Serving
Serve these bars cold for the best taste. Garnish with fresh strawberries for a pop of color. For extra flair, drizzle some strawberry puree on top. You can even sprinkle crushed graham crackers for added crunch. These little touches make your dessert look great and taste even better.
Variations
Different Fruit Options
You can change the fruit in the recipe. Use blueberries, raspberries, or peaches. Each fruit gives a new taste. Just chop the fruit into small pieces like strawberries. Fold them into the filling just like the strawberries. This keeps the bars fresh and fruity. You can also add some fruit puree for more flavor. Try mixing a little mango or passion fruit for a tropical twist. The options are endless!
Chocolate Drizzle Variation
If you love chocolate, try adding a drizzle. Melt some dark or milk chocolate. Once your bars chill, drizzle the melted chocolate over the top. This gives a nice contrast to the fresh fruit. You can also add chocolate chips to the filling for a richer taste. The chocolate adds a fun twist that makes these bars even more special.
Gluten-Free Substitutes
If you need a gluten-free option, switch the graham cracker crumbs. Use gluten-free cookie crumbs or ground almonds. Just make sure the butter and other ingredients are also gluten-free. This way, everyone can enjoy these tasty bars. With these changes, you won’t lose any flavor. They will still taste just as good!
Storage Info
Best Practices for Storing
To keep your strawberry cheesecake bars fresh, store them in the fridge. Place the bars in an airtight container to avoid moisture. If you have leftovers, make sure they are covered well. This keeps them from drying out and losing flavor. Always use a clean utensil when serving to avoid cross-contamination.
Shelf Life of No-Bake Cheesecake Bars
These no-bake cheesecake bars will last for about 5 days in the fridge. After that, they may lose their creamy texture and taste. Always check for any signs of spoilage before eating. If they start to smell or look odd, it’s best to toss them out.
Freezing Instructions
You can freeze these bars if you want to save some for later. Cut them into squares first and place them in a single layer on a baking sheet. Freeze for about 2 hours. Then, wrap each piece tightly in plastic wrap and place them in a freezer bag. They can last for up to 3 months in the freezer. To enjoy, simply thaw them in the fridge overnight before serving.
FAQs
How long do these bars need to chill?
These bars need to chill for at least 4 hours. This time helps them set properly. If you can wait longer, they taste even better. I often leave them overnight for a firmer texture.
Can I use frozen strawberries?
Yes, you can use frozen strawberries! Just make sure to thaw and drain them first. This step keeps the bars from becoming too watery. Chopped frozen strawberries work well, but fresh ones taste best.
What can I use instead of cream cheese?
If you want a cream cheese substitute, use Greek yogurt. It gives a nice tangy flavor. You can also try mascarpone for a creamier texture. Both options keep the bars delicious and smooth.
We covered key ingredients, step-by-step instructions, and helpful tips for no-bake cheesecake bars. You learned about variations and how to store them best. Remember to experiment with flavors and make it your own. With these simple methods, you can create a tasty treat for any occasion. Enjoy the fun of making these bars, and impress your friends and family with your skills.