Skip to content
DisclaimerTerms Of UseGDPR PolicyCookie Policy

easycookingbite

  • Home
  • Drinks
  • Appetizers
  • Dinner
  • Dessert
  • About
  • Contact
  • Privacy Policy
DisclaimerTerms Of UseGDPR PolicyCookie Policy

NO-ING-IMG

- 1 cup pomegranate juice - 1 cup sparkling water - 2 tablespoons fresh lime juice - 1 tablespoon agave syrup (optional) - Pomegranate seeds - Lime slices - Fresh mint leaves - Pitcher - Glasses - Ice cubes To make the Sparkling Pomegranate Mocktail, gather these simple ingredients. You need pomegranate juice for sweetness and color. Sparkling water adds the fun fizz. Fresh lime juice gives a zesty kick. If you like a sweeter drink, add agave syrup. For garnishes, pomegranate seeds look lovely. Lime slices on the rim add a pop of color. Fresh mint leaves bring a fresh scent and taste. You’ll need a pitcher to mix the drink. Use glasses for serving and some ice cubes to keep it cool. With these items ready, you can start your refreshing drink journey! {{ingredient_image_1}} To start, grab a large pitcher. Add 1 cup of pomegranate juice to the pitcher. Next, squeeze in 2 tablespoons of fresh lime juice. If you like it sweet, add 1 tablespoon of agave syrup. Stir all the ingredients well until mixed. This mixture creates a bright and tangy base for your drink. Now, get your serving glasses. Fill each glass with ice cubes. Pour the pomegranate mixture into the glasses until they are halfway full. Then, top each glass with 1 cup of sparkling water. Watch the bubbles rise! This makes the drink fizzy and fun to enjoy. Gently stir the drink. This helps mix the sparkling water with the pomegranate blend. Now for the fun part: garnish! Sprinkle some pomegranate seeds on top. Add a slice of lime to the rim of each glass. Finally, place a few fresh mint leaves on top. This adds a pop of color and fresh flavor. To make your mocktail just right, you can adjust the sweetness. If you want it sweeter, add more agave syrup. If you prefer it less sweet, skip the syrup. Taste as you go. This way, you get the flavor you love. Choosing the best sparkling water is also key. Look for a brand with fine bubbles. This gives your drink a nice fizz. You can pick plain sparkling water or flavored ones to add a twist. For a festive look, serve your mocktail in fun glasses. You can use clear glasses to show off the bright colors. A tall glass can make your drink look fancy. You can also rim the glasses with sugar or salt. This adds extra flavor and makes it eye-catching. Add some ice cubes for that refreshing chill. Pomegranate juice brings many health perks. It’s full of antioxidants. These can help fight free radicals in your body. It may also support heart health. Lime juice is not just tasty; it’s healthy too. It can help with digestion and boost your immune system. The vitamin C in lime juice gives your health a nice boost. Enjoying this mocktail is a fun way to get these benefits! Pro Tips Use Fresh Ingredients: Always opt for fresh lime juice and mint leaves to enhance the flavors of your mocktail. Chill Your Ingredients: For the best experience, chill your pomegranate juice and sparkling water before mixing. Adjust Sweetness to Taste: If you prefer a sweeter drink, feel free to add more agave syrup or even a splash of simple syrup. Garnish Creatively: Use additional garnishes like citrus zest or edible flowers for an impressive presentation. {{image_2}} You can switch up the flavors with other fruit juices. Try using cranberry juice for a tart kick. Orange juice adds a sunny taste and a fresh feel. Mix and match to find your favorite combo. Each juice brings a new twist to the mocktail. Herbs can bring a whole new level to your drink. Adding fresh basil gives a sweet and earthy flavor. Rosemary offers a fragrant and bold note. Just a few leaves can change your drink in a fun way. Experiment with different herbs to find your perfect mix. Using seasonal fruits can make your mocktail even more special. In summer, try adding fresh berries for color and taste. In winter, pomegranate pairs well with citrus fruits. These changes can make your drink fit any holiday or event. Enjoy crafting a drink that reflects the season! To store your leftover mocktail, put it in a pitcher with a lid. This keeps the drink fresh in the fridge. Use it within two days for the best taste. If you have leftover garnishes like mint leaves or lime slices, keep them in a separate container. Cover them with a damp paper towel. This helps them stay fresh and green. Pomegranate juice can last about a week in the fridge after opening. Lime juice lasts around two weeks if stored in the fridge. Always check for any off smell or change in color before using. If you buy fresh lime, keep it in the fridge for about a week. Prep your pomegranate juice and lime juice ahead of time. You can mix them and store in the fridge. This makes it easy to whip up the mocktail when you want it. You can also pre-slice your garnishes. Store them in the fridge until you are ready to serve. This way, you can enjoy your drink without much hassle. A Sparkling Pomegranate Mocktail is a fun, fizzy drink. It combines pomegranate juice, sparkling water, and fresh lime juice. This drink is refreshing and perfect for any occasion. You can add agave syrup for extra sweetness. It’s garnished with pomegranate seeds, lime slices, and mint leaves for a colorful look. You will love how it looks and tastes! Yes, you can prepare this mocktail ahead of time. Mix the pomegranate juice, lime juice, and agave syrup first. Store this mix in the fridge for up to 24 hours. When you're ready to serve, add sparkling water and ice. This keeps the drink fizzy and fresh. Just remember to add the garnishes right before serving. You can easily adjust the sweetness of your mocktail. Start by reducing or skipping the agave syrup. This change will make the drink less sweet without losing flavor. You can also add more lime juice for a tangy taste. Sparkling water can help balance the flavors too. Play around with these adjustments until you find your perfect mix! You learned how to create a delicious sparkling pomegranate mocktail with ease. We covered the main ingredients, equipment, and steps to make it delightful. The mocktail's health benefits and presentation tips can impress guests. Feel free to experiment with fruit variations or enhance flavors. Store leftovers properly for later enjoyment. This refreshing drink is perfect for any event. You can now make a flavorful mocktail that everyone will love! Enjoy your creation and share it with friends and family.

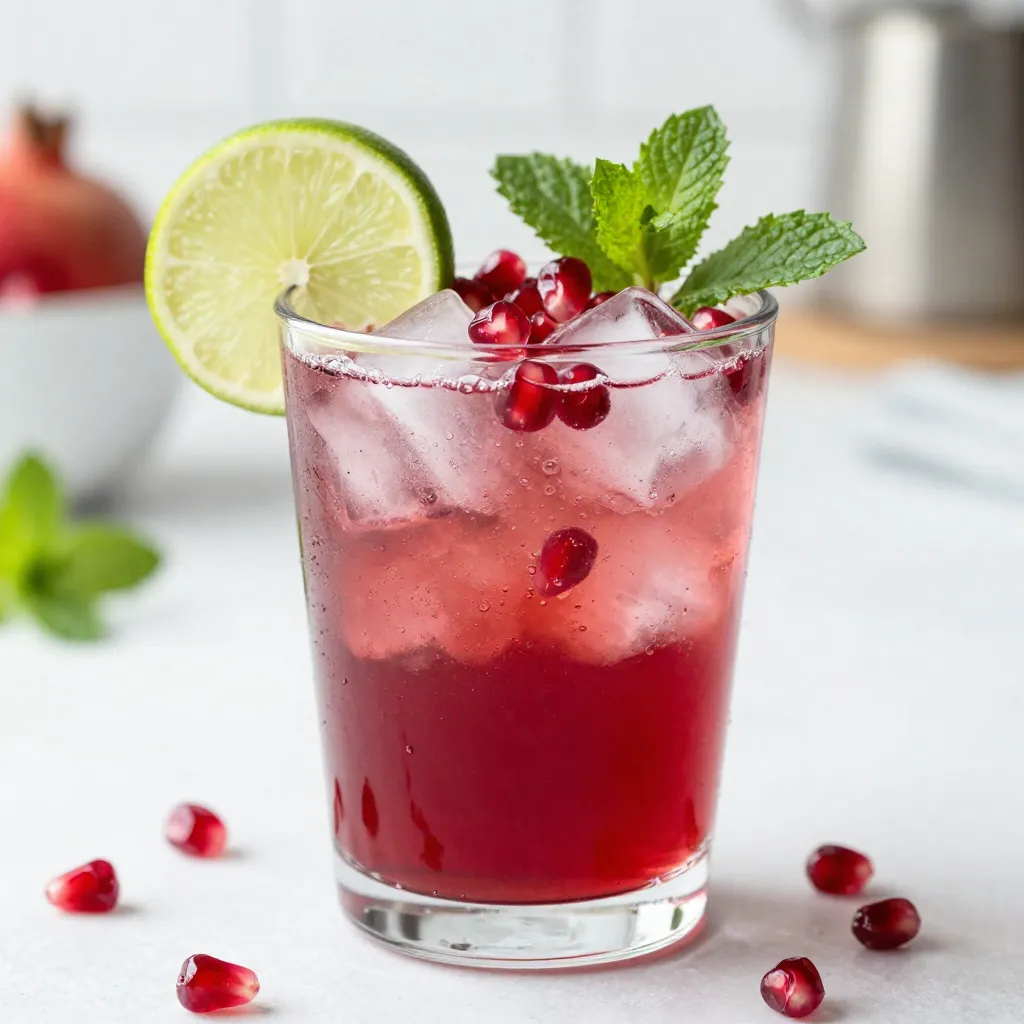
Sparkling Pomegranate Mocktail Refreshing Drink Recipe

Looking for a refreshing drink that impresses? Try my Sparkling Pomegranate Mocktail! This vibrant drink blends the tartness of pomegranate

- 1 medium zucchini, grated (about 1 cup) - 1 cup granulated sugar - 1/2 cup brown sugar, packed - 1/2 cup vegetable oil - 2 large eggs - 1 teaspoon vanilla extract The grated zucchini adds moisture and a subtle flavor. It makes the bread soft and rich. I like to use medium-sized zucchini, as it yields about one cup when grated. The sugars sweeten the bread and help it rise. They balance the cocoa powder’s bitterness. Eggs and oil bring the ingredients together, creating a smooth batter. - 1 1/2 cups all-purpose flour - 1/2 cup unsweetened cocoa powder - 1 teaspoon baking soda - 1/2 teaspoon baking powder - 1/2 teaspoon salt All-purpose flour is the base for the bread. It provides structure and strength. Cocoa powder gives a deep, rich chocolate flavor. Baking soda and baking powder work together to make the bread rise. Salt enhances all the flavors, making each bite better. - 1 cup semi-sweet chocolate chips - 1/2 cup white chocolate chips - 1/2 cup dark chocolate chunks I love using three types of chocolate. Semi-sweet chocolate chips bring a classic taste. White chocolate adds sweetness and creaminess. Dark chocolate chunks give a bold flavor. Together, they create a chocolate lover's dream in every slice! {{ingredient_image_1}} First, set your oven to 350°F. This temperature ensures even baking. Next, grab a 9x5 inch loaf pan. You can grease it well with butter or oil. If you prefer, line it with parchment paper. This makes removing the bread easier later. In a large bowl, add the grated zucchini. This should be about one cup. Then, mix in one cup of granulated sugar and half a cup of brown sugar. Next, pour in half a cup of vegetable oil. Add two large eggs and one teaspoon of vanilla extract. Stir all these ingredients until they blend well. This mixture should be smooth and creamy. In another bowl, whisk together one and a half cups of all-purpose flour. Add half a cup of unsweetened cocoa powder. Now, toss in one teaspoon of baking soda, half a teaspoon of baking powder, and half a teaspoon of salt. Mix these dry ingredients together. Gradually add this dry mix to your wet ingredients. Stir gently until just combined; don't overmix. Finally, fold in one cup of semi-sweet chocolate chips, half a cup of white chocolate chips, and half a cup of dark chocolate chunks. This adds a rich chocolate flavor. Pour your batter into the prepared loaf pan. Use a spatula to smooth the top. Place the pan in the preheated oven. Bake for 50 to 60 minutes. To check if it's done, insert a toothpick into the center. If it comes out clean, your bread is ready. Allow it to cool in the pan for about ten minutes. Then, transfer it to a wire rack to cool completely. Enjoy the rich and decadent treat! To make great zucchini bread, avoid overmixing your batter. Mix just until your dry and wet ingredients blend. Overmixing can lead to tough bread. Next, ensure your zucchini has the right moisture. Grate your zucchini and let it sit in a clean cloth. Squeeze out excess water before adding it to your batter. This helps keep your bread from being too soggy. You can add spices like cinnamon or nutmeg for extra warmth. Chopped nuts, like walnuts or pecans, can also add a nice crunch. For serving, think about pairing your bread with a scoop of vanilla ice cream. It makes a perfect dessert. You can also enjoy it with a cup of coffee or tea for a lovely snack. For a creative serving idea, slice your bread and serve it on a wooden board. Dust it with powdered sugar for a pretty touch. You can also use fresh berries or mint leaves as garnishes. These add color and make your dish look more appealing. Enjoy your delicious Triple Chocolate Zucchini Bread! Pro Tips Fresh Zucchini is Key: Choose firm, fresh zucchini for the best flavor and moisture. Older zucchini might have a bitter taste and an uneven texture. Don't Skip the Cooling: Let the bread cool in the pan for at least 10 minutes. This helps it set properly and makes it easier to remove without falling apart. Mixing Method Matters: Avoid overmixing the batter. Gently fold the dry ingredients into the wet to maintain a tender crumb. Storage Secrets: Store the zucchini bread in an airtight container at room temperature for up to 3 days, or refrigerate for up to a week to keep it fresh. {{image_2}} You can make this bread a bit better for you. Try using whole wheat flour instead of all-purpose flour. This adds fiber and nutrients. You can also swap some sugar for a sugar substitute. This keeps the sweet taste while cutting calories. Adding nuts or seeds gives you a nice crunch. Chopped walnuts or pumpkin seeds work well here. Change the types of chocolate to mix things up. You can use milk chocolate or dark chocolate instead of semi-sweet. Each choice gives a unique taste. Want to add more depth? Consider spices like nutmeg or cinnamon. You could also add fruits like chopped cherries or bananas for a fun twist. Use seasonal ingredients to keep the bread fresh and exciting. In fall, add pumpkin puree or spices like allspice. In summer, throw in fresh berries for a burst of flavor. These additions can change the bread's taste while keeping it delightful. Experiment with what is in season for the best results. To keep your zucchini bread fresh, wrap it well. You can use plastic wrap or aluminum foil. Place it in an airtight container too. This helps avoid drying out. Store it at room temperature for up to three days. If you want to keep it longer, refrigeration is an option. Just remember, cold can change the texture a bit. If you want to freeze your zucchini bread, let it cool first. Once cool, wrap it tightly in plastic wrap. Then, place it in a freezer-safe bag or container. This keeps it safe from freezer burn. For best quality, eat it within three months. When ready to enjoy, take it out and let it thaw in the fridge overnight. You can also warm it in the oven for a few minutes. I love serving zucchini bread warm. It brings out the chocolate flavors. You can pop it in the oven at a low heat to warm it up. However, it tastes great cold too. Many enjoy it straight from the fridge. It all comes down to your personal taste. Yes, you can! Some good alternatives are: - Carrots - Squash - Apples (for a sweeter bread) These options add moisture and flavor. Each choice can change the taste a bit, so pick what you love. To make Triple Chocolate Zucchini Bread vegan, swap out the eggs and dairy. Use: - 1/4 cup unsweetened applesauce for each egg - Non-dairy milk instead of dairy milk - Use coconut oil or another plant-based oil in place of vegetable oil These swaps keep the bread moist and tasty. This bread pairs well with many treats. Try: - A scoop of vanilla ice cream - Fresh berries - A drizzle of chocolate sauce These pairings enhance the chocolate flavor and add fun textures. Triple Chocolate Zucchini Bread is a treat that combines taste and health. You learned about key ingredients, step-by-step instructions, and useful tips for success. Finally, I shared variations to keep your baking exciting. Embrace the joy of creating this delicious bread. Enjoy it fresh, or try freezing for later. Each slice can be a delight! Try your own twists and make it your own. Happy baking!

Triple Chocolate Zucchini Bread Rich and Decadent Treat

Craving a sweet treat that’s as rich as it is healthy? Look no further! My Triple Chocolate Zucchini Bread combines

- 2 cups strawberries, hulled and sliced - 1 cup blueberries - 2 ripe kiwis, peeled and diced - 1 large mango, diced - 1 medium-sized banana, sliced - 3 tablespoons honey - 2 tablespoons lime juice - Zest of 1 lime - 1 tablespoon fresh mint leaves, finely chopped To make a tasty Honey Lime Fruit Salad, you need a mix of fresh fruits. Strawberries, blueberries, kiwis, mangoes, and bananas work great together. I love how colorful and vibrant this salad looks. Each fruit adds its own sweet and juicy flavor. Next, you need the dressing. The honey brings a nice sweetness. The lime juice adds a tangy twist. The lime zest gives extra zing. This dressing coats the fruits and takes them to the next level. Finally, don’t forget the mint leaves. They add a fresh touch. The mint makes the salad feel bright and lively. You can easily find these ingredients at your local store. Enjoy creating this refreshing dish! {{ingredient_image_1}} Start by gathering all your fresh fruits. You will need: - 2 cups strawberries, hulled and sliced - 1 cup blueberries - 2 ripe kiwis, peeled and diced - 1 large mango, diced - 1 medium-sized banana, sliced In a large mixing bowl, combine the sliced strawberries, blueberries, diced kiwi, mango, and sliced banana. Make sure to toss them gently so they mix well without bruising. This colorful mix will make the salad look lovely. For the dressing, you need: - 3 tablespoons honey - 2 tablespoons lime juice - Zest of 1 lime In a small bowl, whisk together the honey, lime juice, and lime zest until smooth. This dressing adds a sweet and tangy flavor that brightens the fruits. The lime zest gives it a nice punch, enhancing the salad's taste. Now it’s time to put it all together. Drizzle the honey-lime mixture over the mixed fruits. Toss gently to coat all the fruit pieces evenly. Be careful not to mash any fruits. Finally, sprinkle the finely chopped mint leaves on top for a fresh touch. Give it one last gentle toss. Let the fruit salad sit for about 10 minutes. This resting time allows the flavors to meld together nicely. Enjoy your refreshing and vibrant honey lime fruit salad! Let your salad sit for 10 minutes. This helps the flavors blend together. The honey and lime juice soak into the fruits, making each bite tasty. You will notice a big difference after the wait. Serve your fruit salad in a large glass bowl. This makes it look bright and inviting. Add extra mint leaves on top for color. A slice of lime also adds a nice touch. Your guests will love the way it looks! This salad is great as a dessert or side dish. It is refreshing for warm days and perfect for gatherings. Pair it with grilled meats or enjoy it alone. Everyone will appreciate this light and bright dish! Pro Tips Choose Ripe Fruits: For the best flavor and sweetness, make sure your fruits are perfectly ripe. Check for slight softness and vibrant color. Mint Freshness: To enhance the mint flavor, gently bruise the leaves before chopping them. This releases more of their essential oils. Chill Before Serving: For a refreshing taste, chill the fruit salad in the refrigerator for at least 30 minutes before serving. Variations are Key: Feel free to swap in other seasonal fruits such as peaches, nectarines, or grapes for a different twist each time. {{image_2}} You can change the fruit in this salad easily. Try adding pineapple for a tropical twist. Orange segments bring a bright flavor. Grapes add a nice crunch. Mix and match your favorites to create your own version. If you want a different sweet taste, try agave nectar. Maple syrup also works well as a substitute for honey. Both sweeteners blend nicely with lime juice. Adjust the amount to fit your taste. Herbs can add a fun twist to this salad. Fresh basil gives a sweet and savory flavor. Cilantro adds a fresh and bright note. Just a little bit can change the whole dish. Don't be afraid to experiment! To keep your Honey Lime Fruit Salad fresh, store it in an airtight container. This helps lock in moisture and flavor. Place the container in your refrigerator right after you make it. Avoid leaving it out at room temperature for too long. For best freshness, eat the salad within 1-2 days. After that, the fruits can lose their crispness and flavor. Each fruit has a different rate of spoilage. Eating it sooner ensures you enjoy the bright, sweet taste. I do not recommend freezing this salad. Freezing can change the texture of the fruits. They may become mushy when thawed. Enjoy the salad fresh to appreciate its vibrant flavors and textures. Yes, but it’s best to add mint just before serving. This keeps the mint fresh and bright. If you make it early, the fruits will soak in the dressing. The taste will still be good, but the mint will lose its crispness. Other berries, stone fruits, and melons can be great additions. You can add raspberries, peaches, or even cantaloupe. The key is to choose ripe, sweet fruits. They blend well with the honey and lime. Feel free to mix and match based on your favorites. Customize honey or lime juice to taste during preparation. If you like it sweeter, add more honey. If you prefer a tart taste, use extra lime juice. Always taste as you mix. This way, you can find the perfect balance for your salad. This blog post outlines how to make a fresh and tasty fruit salad. You start with vibrant fruits like strawberries, kiwi, and mango. Then, you mix a sweet honey-lime dressing. After that, toss everything together with fresh mint. For best taste, let the salad rest for a bit. You can also try different fruits or sweeteners as you like. Store leftovers in a cool, airtight container. Enjoy your fruit salad as a sweet treat or side dish for any gathering!

Honey Lime Fruit Salad Refreshing and Simple Dish

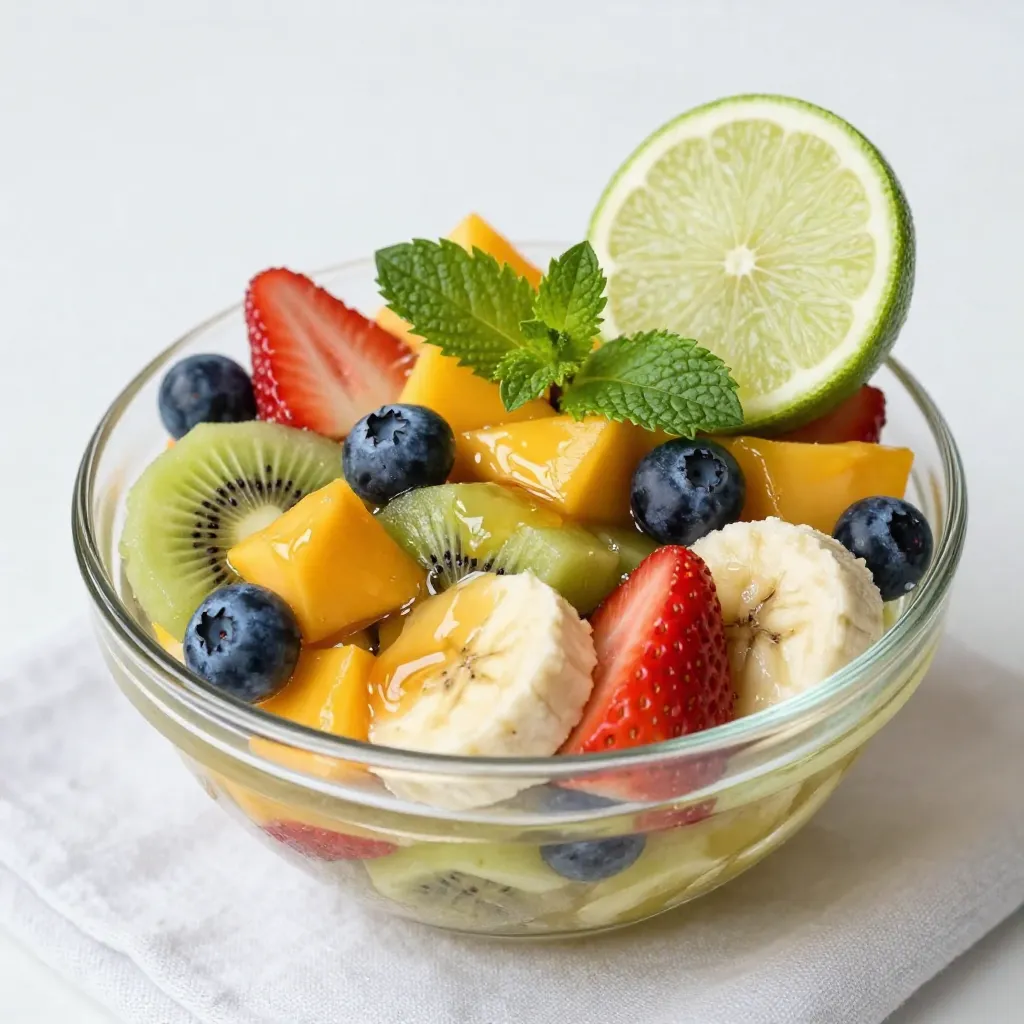
Looking for a quick and tasty dish? My Honey Lime Fruit Salad is perfect for you! Bursting with fresh fruits

- 1 cup orzo pasta - 1 pound large shrimp, peeled and deveined - 3 tablespoons olive oil - 4 cloves garlic, minced - 1 lemon, zested and juiced - 1 cup vegetable broth - 1 cup cherry tomatoes, halved - 1 cup fresh spinach - 1 teaspoon dried oregano - Salt and pepper to taste - Fresh parsley, chopped for garnish - Grated Parmesan cheese (optional) When you gather your ingredients, focus on fresh items. They make a big difference in flavor. I love using large shrimp; they cook quickly and taste great. You can buy them frozen if fresh is not available. Just remember to thaw them first. Orzo pasta is small and cooks fast. It soaks up all the lemon and garlic flavors well. I prefer using vegetable broth for a rich base, but chicken broth works too. Garlic brings a warm, inviting aroma. Use fresh cloves for the best taste. Lemon zest and juice brighten the dish. It adds a nice tang that pairs perfectly with shrimp. Cherry tomatoes add sweetness and color. They soften nicely when cooked, giving the dish a burst of flavor. Fresh spinach is a must; it wilts down and adds a lovely green touch. Dried oregano gives a nice earthy note. Always have salt and pepper on hand to season your food just right. For the finishing touch, I like to sprinkle fresh parsley and Parmesan cheese. They add a pop of color and extra flavor. {{ingredient_image_1}} To cook the orzo, start by filling a large pot with water. Add salt to the water to enhance flavor. Bring the water to a boil over high heat. Once boiling, add 1 cup of orzo pasta. Cook the orzo according to the package instructions. It usually takes about 8 to 10 minutes to reach an al dente texture. After cooking, drain the orzo in a colander and set it aside. Next, heat a large skillet on medium-high heat. Pour in 2 tablespoons of olive oil. When the oil is hot, add 4 cloves of minced garlic. Sauté the garlic for about 1 minute until it becomes fragrant. Then, add 1 pound of peeled and deveined shrimp to the skillet. Season the shrimp with salt, pepper, and 1 teaspoon of dried oregano. Cook the shrimp for about 2-3 minutes on each side. They should turn pink and opaque when done. After the shrimp are cooked, it's time to make the lemon sauce. Pour in 1 cup of vegetable broth, the juice of 1 lemon, and the zest from that lemon. Stir the mixture well. Let it simmer for about 2 minutes to blend the flavors nicely. Now, add 1 cup of halved cherry tomatoes and 1 cup of fresh spinach to the skillet. Stir everything together. Cook for another 2-3 minutes. You want the spinach to wilt and the tomatoes to soften. This adds color and nutrition to the dish. Finally, fold the cooked orzo into the skillet. Mix well to ensure everything is combined. Let it heat through for another 2 minutes. Drizzle the remaining olive oil over the dish. Taste and adjust the seasoning if needed. Serve hot, garnished with chopped parsley and a sprinkle of grated Parmesan cheese if you like. Enjoy your meal! To avoid overcooked shrimp, cook them for just 2-3 minutes per side. Look for that lovely pink color and opaque look. If they curl tightly, they’re overdone. For orzo, al dente means firm but not hard. Cook it for about 8-10 minutes in boiling, salted water. Drain it right away to keep it from becoming mushy. Add fresh herbs like basil or dill for extra flavor. A pinch of red pepper flakes gives a nice kick. You can also try a splash of white wine with the broth for depth. Consider tossing in veggies like bell peppers or zucchini. They add color and crunch to your dish. Pair this dish with a crisp green salad. It adds freshness and balances the flavors. Garlic bread is a great side for soaking up the sauce. For drinks, try a chilled white wine like Sauvignon Blanc. Sparkling water with a slice of lemon also works well, keeping it light and refreshing. Pro Tips Fresh Shrimp is Key: For the best flavor and texture, use fresh or high-quality frozen shrimp. Avoid previously cooked shrimp for this recipe. Customize Your Veggies: Feel free to add or substitute vegetables based on your preference. Bell peppers or zucchini make great additions! Perfectly Cooked Orzo: Be careful not to overcook the orzo; it should be al dente for the best texture in the final dish. Enhance the Flavor: A splash of white wine can be added when cooking the shrimp for an extra layer of flavor. {{image_2}} You can switch shrimp for other seafood. Scallops bring a sweet taste and tender bite. Fish like salmon or tilapia works well too. They cook quickly and soak up flavors. You can also add shellfish like clams or mussels for extra depth. Just make sure they are fresh and cleaned. For a plant-based twist, replace shrimp with tofu or tempeh. Both options absorb flavor well. You can also add more vegetables for texture and color. Bell peppers, zucchini, or artichokes add great taste. This makes the dish healthy and vibrant. To make this dish gluten-free, choose a gluten-free orzo. Rice or quinoa also makes a good substitute. They cook similarly and keep the dish light. Always check the labels to avoid gluten. Adapting this recipe is easy and fun. You can enjoy Lemon Garlic Shrimp Orzo, no matter your dietary needs. To keep your Lemon Garlic Shrimp Orzo fresh, use airtight containers. Glass or plastic containers work well. Make sure to seal them tightly to avoid air exposure. If you plan to eat it later, store it in the fridge. You can refrigerate it for up to three days. For longer storage, freeze the orzo. Portion it into smaller containers for easy reheating. When reheating, the best method is to use a skillet. Heat it on low to medium heat. Add a splash of vegetable broth or water to help it steam. Stir gently to avoid overcooking the shrimp. You want to heat it through without making it tough. This method preserves the dish’s bright flavors. In the fridge, your leftovers stay fresh for about three days. After that, check for any off smells or changes in color. If you see signs of spoilage, it’s best to toss it. Freezing can extend its life to about three months. Always label your containers with the date to keep track. Yes, you can make Lemon Garlic Shrimp Orzo ahead. Cook the orzo and shrimp, then let them cool. Store them in the fridge for up to two days. When ready to eat, reheat it in a skillet with a splash of broth or olive oil. This keeps the dish moist and tasty. If you don’t have orzo, try other pasta types. Small shapes like ditalini or shells work well. You can also use grains like quinoa or farro for a different twist. Just adjust the cooking time based on what you choose. Yes, this dish is quite healthy. Shrimp is low in calories and high in protein. Spinach adds vitamins and minerals. The dish is light yet filling, making it a great choice for a balanced meal. Using olive oil provides healthy fats. You can skip some ingredients if needed. For example, if you don’t have spinach, use kale or other greens. If you dislike shrimp, chicken or tofu works too. The lemon and garlic are key flavors, so keep those if possible. Serve it warm in a bowl or plate. Top with fresh parsley for color. A sprinkle of grated Parmesan adds richness. You can pair it with a side salad or crusty bread for a complete meal. You’ve learned how to make Lemon Garlic Shrimp Orzo from scratch. We covered the key ingredients, step-by-step cooking methods, and helpful tips. You also explored variations to fit your taste and dietary needs. Finally, we discussed storing leftovers and answered common questions. This dish is simple, tasty, and perfect for many occasions. Try it out, and enjoy every bite!

Lemon Garlic Shrimp Orzo Simple and Flavorful Recipe

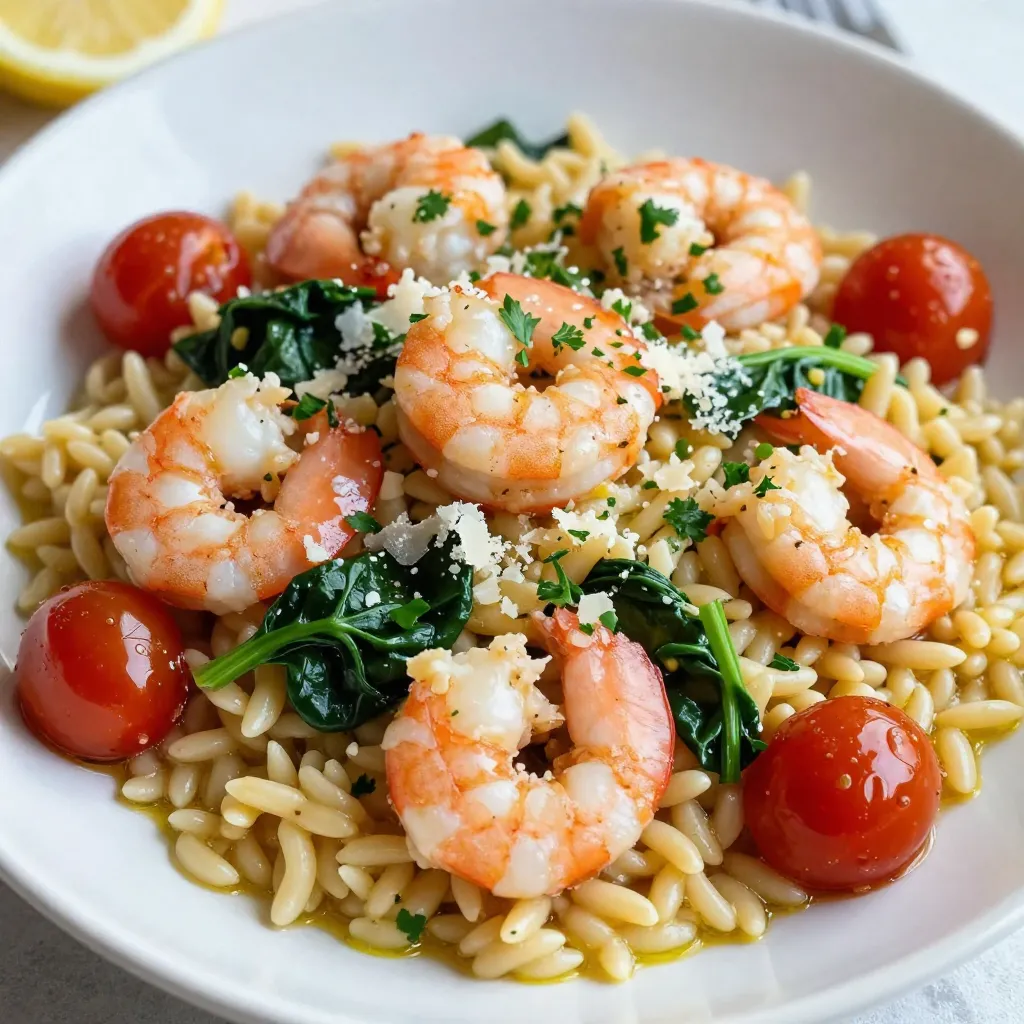
If you’re looking for a delicious meal that’s quick and easy, Lemon Garlic Shrimp Orzo is a must-try! This dish

- 2 cups rolled oats - 2 medium apples, peeled and diced - 1 cup almond milk (or any milk of your choice) - 2 tablespoons maple syrup - 1 teaspoon vanilla extract - 1 teaspoon ground cinnamon - 1/2 teaspoon nutmeg - 1 teaspoon baking powder - 1/4 teaspoon salt - 1/2 cup walnuts or pecans, chopped - 1 tablespoon brown sugar (for topping) - 1 tablespoon melted coconut oil (for greasing) To make this Apple Pie Oatmeal Bake, gather these ingredients. Start with rolled oats as the base. They provide fiber and make it filling. Next, use two medium apples. Peeling and dicing them adds sweetness and texture. Almond milk is a great choice for creaminess. You can also use any milk you prefer. Maple syrup gives a nice sweetness to the dish. For flavor, add vanilla extract. It brings warmth to the bake. Ground cinnamon and nutmeg add that apple pie taste. Baking powder helps it rise. A little salt balances the sweetness. If you want extra crunch, chop some walnuts or pecans. They add a nice texture. Lastly, sprinkle brown sugar on top before baking. This creates a sweet, caramelized crust. Greasing the dish with coconut oil prevents sticking. These ingredients come together to create a cozy, delicious bake. {{ingredient_image_1}} - Preheat your oven to 350°F (175°C). - Grease the baking dish with coconut oil. - Combine 2 cups of rolled oats, 2 medium diced apples, and 1 cup of almond milk. - Add 2 tablespoons of maple syrup and 1 teaspoon of vanilla extract. - Stir in 1 teaspoon of ground cinnamon, 1/2 teaspoon of nutmeg, 1 teaspoon of baking powder, and 1/4 teaspoon of salt. - If you want, add 1/2 cup of chopped walnuts or pecans for crunch. - Pour the mixture into the greased baking dish. - Sprinkle 1 tablespoon of brown sugar on top for sweetness. - Bake for 30-35 minutes. Check if the center is set by using a toothpick. - Let it cool for about 10 minutes before slicing. Baking can vary based on your oven. If your oven runs hot, check the bake at 25 minutes. In cooler ovens, you may need the full 35 minutes. Use a toothpick to check doneness. Insert it in the center; it should come out clean when ready. Spices can take your oatmeal bake to the next level. Try adding ginger or cloves for a warm twist. If you want to change the sweetness, use honey or agave syrup instead of maple syrup. This gives a unique flavor while keeping it tasty. Serve your oatmeal bake warm for the best taste. I love adding a scoop of yogurt or ice cream. It feels indulgent and balances the spices. For a pretty touch, garnish with apple slices and a sprinkle of cinnamon. It makes for a beautiful dish! Pro Tips Use Fresh Apples: Choose a mix of sweet and tart apples for a balanced flavor. Varieties like Granny Smith and Honeycrisp work beautifully together. Customize Your Sweetness: Adjust the amount of maple syrup based on your taste preference. You can also substitute with honey or agave syrup for variation. Make Ahead: Prepare the mixture the night before and refrigerate. Bake in the morning for a quick and delicious breakfast. Serve with Toppings: Enhance your oatmeal bake by serving it with yogurt, nut butter, or a drizzle of additional maple syrup for extra indulgence. {{image_2}} You can switch up the fruit in this dish. Try using blueberries or diced peaches. They add a fresh twist. You can also mix in dried fruits like raisins or cranberries. Dried fruits give a nice chew and extra flavor. If you need vegan or gluten-free options, it's simple. Use almond milk or another plant milk. For gluten-free, choose certified gluten-free oats. You can also lower the sugar. Replace maple syrup with a sugar-free sweetener. Want a chocolate twist? Add a tablespoon of cocoa powder to the mix. It creates a rich, chocolatey flavor. If you don’t like nuts, swap them for seeds. You can even leave them out entirely. Each variation gives you a new taste adventure. To store your Apple Pie Oatmeal Bake, place it in an airtight container. This helps keep it fresh. It lasts in the fridge for about 4 to 5 days. If you want to save some for later, this method works well. You can freeze Apple Pie Oatmeal Bake for longer storage. First, let it cool completely. Then, cut it into portions. Wrap each piece in plastic wrap. Place the wrapped pieces in a freezer-safe bag or container. It can stay in the freezer for up to 3 months. You can reheat your bake in the oven or microwave. For the oven, preheat to 350°F (175°C). Place your portion in an oven-safe dish. Heat for about 10 to 15 minutes. This keeps the texture nice. For the microwave, heat on medium for 1 to 2 minutes. Check to make sure it’s warm all the way through. Enjoy your warm, delicious Apple Pie Oatmeal Bake! You can use quick oats, but the texture will change. Quick oats cook faster and can become mushy. Rolled oats hold their shape better. They give a nice chewy bite. For best results, I recommend sticking with rolled oats. After baking, let the oatmeal bake cool for about 10 minutes. This cooling time helps it set up nicely. It makes slicing much easier too. If you serve it too hot, it may fall apart. Yes! You can prepare the mix ahead of time. Just cover it and store it in the fridge for up to 24 hours. When ready, pour it into the baking dish and bake it. This makes meal prep simple and quick. This blog post covered a simple and tasty recipe for Apple Pie Oatmeal Bake. You learned about the main ingredients and flavor enhancers that make this dish special. We also shared tips for perfect texture and ways to store leftovers. Remember, you can mix in different fruits or make it vegan. Enjoy experimenting with this recipe and make it your own! Each bite brings warmth and good taste. Happy baking!

Apple Pie Oatmeal Bake Tasty and Simple Recipe

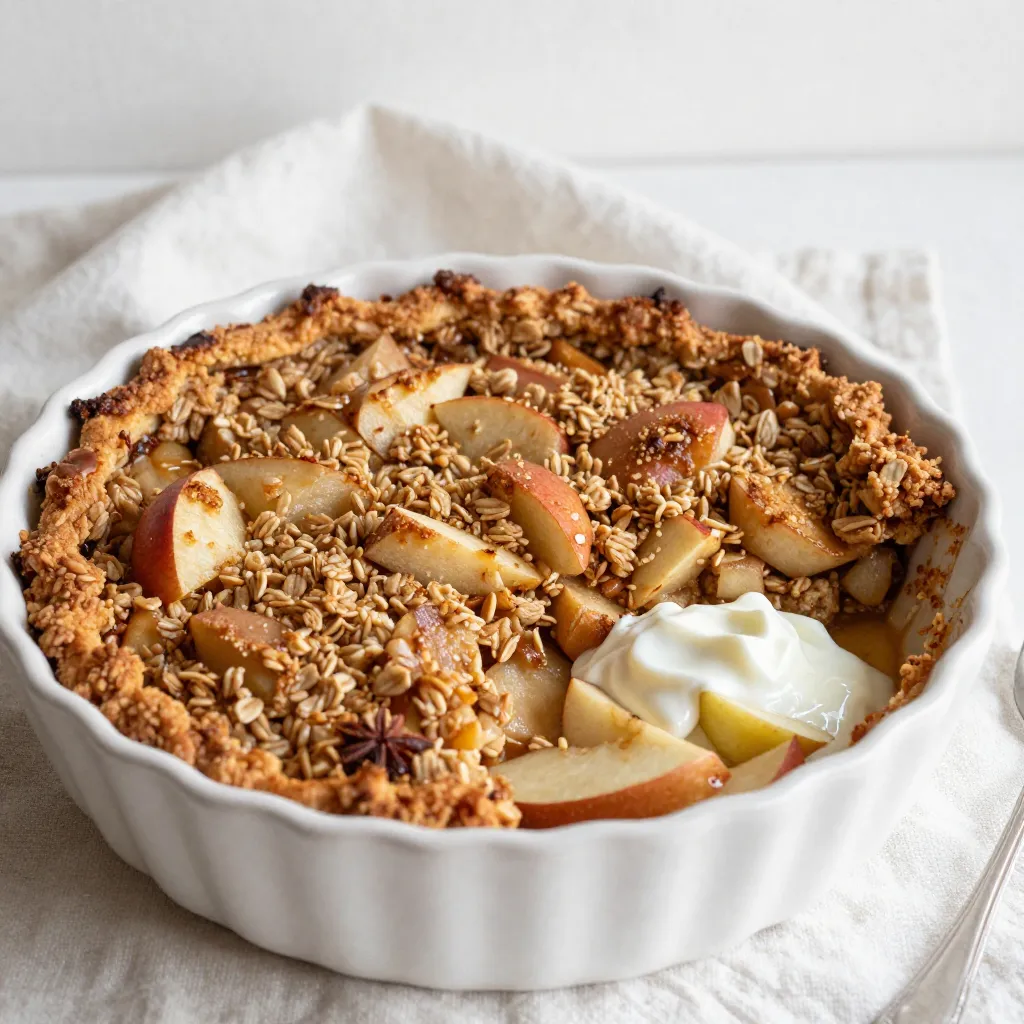
Looking for a warm, easy breakfast? You’ll love this Apple Pie Oatmeal Bake! It combines rolled oats and fresh apples

- 4 large russet potatoes - 1 tablespoon olive oil - Salt, to taste - 1 cup shredded cheddar cheese - 1 cup shredded Monterey Jack cheese - 1/2 cup cooked black beans, drained and rinsed - 1/2 cup corn kernels (fresh, frozen, or canned) - 1/2 cup diced tomatoes (fresh or canned) - 1/4 cup sliced jalapeños (fresh or pickled) - 1/4 cup sour cream - 1/4 cup guacamole - 2 tablespoons chopped fresh cilantro - 1 teaspoon taco seasoning These ingredients come together to create a amazing party snack. The russet potatoes serve as a sturdy base, perfect for holding all the tasty toppings. You can use any potatoes, but russets have that nice fluffy texture inside. The olive oil adds flavor and helps the skins get crispy. I love adding both cheddar and Monterey Jack cheese for a rich, melty taste. The black beans and corn bring a nice crunch and extra protein. Fresh or canned tomatoes add juiciness, while jalapeños give a kick. Don’t forget the sour cream and guacamole! They balance the flavors and add creaminess. Finally, fresh cilantro brightens everything up. This mix of ingredients makes each bite full of flavor. Enjoy putting these delicious toppings on your potato skins! {{ingredient_image_1}} First, set your oven to 400°F (200°C). This temperature helps the skins get crispy. Make sure you preheat it well, so your potatoes cook evenly. Wash your russet potatoes under cool water. Scrub them to remove dirt. Pat them dry with a towel. Use a fork to poke holes in each potato. This step helps steam escape. Rub each potato with olive oil and sprinkle salt on top. Place the potatoes directly on the oven rack. Bake for 45 to 60 minutes. They are done when a fork easily goes in. After baking, take the potatoes out and let them cool for a few minutes. This makes them easier to handle. Slice each potato in half lengthwise. Use a spoon to scoop out the potato flesh. Leave about 1/4 inch of potato inside. This keeps the skins sturdy. In a large bowl, mix the scooped potato flesh with the cheeses, black beans, corn, diced tomatoes, jalapeños, and taco seasoning. Stir well until the mix is even. This filling is the heart of your nacho potato skins. Spoon the filling back into each potato skin. Make sure to fill them generously. Place the filled skins on a baking sheet. Bake them for another 15 to 20 minutes. Look for melted cheese and crispy skins. They should be golden and bubbly. Once baked, let the skins cool slightly. Top each one with sour cream, guacamole, and chopped cilantro. For extra fun, add more jalapeños. Arrange them on a platter and serve warm. Enjoy every bite! To save time on party day, you can prep these potato skins in advance. Bake the potatoes a day before. Once they cool, slice and scoop out the insides. Store the skins in the fridge. You can also mix the filling ahead of time. Just keep it in a sealed container. On the day of your party, refill the skins and bake them. This helps you enjoy the fun without too much stress. For the best melted cheese, use a mix of cheeses. Cheddar and Monterey Jack work well together. After filling the potato skins, bake them at a high heat. This helps the cheese melt evenly. Keep an eye on them to avoid burning. If you want extra gooey cheese, cover the skins with foil for the first part of baking. Remove the foil for the last few minutes to get that perfect golden brown finish. Want a lighter version of these tasty snacks? Swap regular cheese for low-fat cheese. You can also use Greek yogurt instead of sour cream. Try using more veggies in the filling. Chopped bell peppers or spinach add great flavor and nutrition. If you want a vegan option, skip the cheese and sour cream. Use plant-based cheese and avocado instead. These simple swaps keep the taste while making the dish lighter. Pro Tips Choose the Right Potatoes: Opt for russet potatoes as they have a fluffy texture that holds up well when baked and stuffed. Make It Spicy: If you love heat, consider adding diced fresh chili peppers or a dash of hot sauce to the filling mix for an extra kick. Don't Waste the Flesh: Use the scooped-out potato flesh to make mashed potatoes or potato pancakes to avoid waste and enjoy another dish. Keep Them Crispy: For extra crispy skins, broil the filled potato skins for the last few minutes of baking; just keep an eye on them to prevent burning. {{image_2}} You can make these loaded nacho potato skins vegetarian by swapping in extra veggies. Instead of black beans, try using bell peppers, zucchini, or even mushrooms. These add color and nutrients. You can also mix in some spinach for a tasty twist. The key is to keep the filling hearty and fun. If you love heat, add more jalapeños to your mix. You can use fresh or pickled ones. For an extra kick, try adding diced serrano peppers or a splash of hot sauce. This will give your potato skins a fiery flavor. Just be careful not to overdo it unless you really enjoy spicy food. Get creative with your toppings! Instead of just sour cream and guacamole, consider adding salsa or pico de gallo for freshness. Crumbled bacon bits can add a nice crunch. Green onions or chives bring a mild onion flavor that pairs well with the cheese. Each topping can change the taste and look of your dish, making it fun to try different combinations. To keep your loaded nacho potato skins fresh, store them in the fridge. Place them in an airtight container. Make sure they cool down first. This keeps the skins from getting soggy. They will stay good for about 3 days. When you want to eat them again, take them out and reheat. You can also freeze these tasty snacks. First, let them cool completely. Wrap each potato skin in plastic wrap. Then, place them in a freezer-safe bag. Remove as much air as you can. They can last up to 3 months in the freezer. When you want to enjoy them, just thaw in the fridge overnight. To reheat your potato skins, the oven is best. Preheat it to 375°F (190°C). Place the skins on a baking sheet. Bake them for about 15 minutes. This helps keep the skins crispy. If you want, you can also use an air fryer for a quicker option. I love using large russet potatoes for this dish. They are perfect because they have thick skins. Their starchy flesh makes them fluffy inside. You can also try Yukon Golds if you prefer a creamier texture. Both types hold the toppings well and add great flavor. Yes, you can use an air fryer for loaded nacho potato skins! Start by baking the potatoes in the oven as usual. Once you scoop out the insides, refill them with the tasty mix. Then, place the filled skins in the air fryer. Cook them at 375°F for about 10-12 minutes. This will make the skins crispy and the cheese nice and melty. To keep your potato skins crispy, avoid adding too much moisture. Drain canned ingredients like beans and corn well. Store the skins in a single layer on a plate or tray. When reheating, use the oven or air fryer instead of the microwave. This method helps maintain that perfect crunch. This blog post covers how to make delicious loaded nacho potato skins. We reviewed key ingredients, preparation steps, and tips for success. You learned how to bake, fill, and serve these tasty snacks. Remember to experiment with toppings and variations to suit your taste. Enjoy sharing these potato skins at your next gathering. They are sure to impress all your friends and family. Now, you’re ready to create a dish that’s both fun and delicious. Happy cooking!

Loaded Nacho Potato Skins Irresistible Party Snack

If you’re looking for a party snack that steals the show, you’ve found it! Loaded Nacho Potato Skins are a

You need 1 cup of fresh blueberries for this drink. They give a rich color and a sweet flavor. Blueberries also add healthy antioxidants to your lemonade. You can blend them until smooth for the best taste. If you prefer, you can strain them to remove seeds and skins. You will use 1 tablespoon of dried culinary lavender. This lavender adds a unique floral note to your drink. Make sure you use culinary lavender, as other types may not be safe to eat. It is best to steep the lavender in hot water to get the full flavor. For the tangy taste, use 1 cup of fresh lemon juice. This is about 4 to 6 lemons. You can adjust the sweetness with 3/4 cup of honey or agave syrup. This step is important to balance the tartness of the lemons. Taste and change the amount of sweetener as you like. You will need 1 cup of water for the lavender infusion and 4 cups of cold water to dilute the lemonade. The water helps to mix all the flavors together. Finally, ice cubes will chill your drink and keep it refreshing. Use as many as you like when serving. {{ingredient_image_1}} Start by boiling 1 cup of water in a small saucepan. Remove it from heat once it boils. Add 1 tablespoon of dried culinary lavender to the hot water. Let it steep for 15 minutes. This step makes a fragrant lavender infusion. After steeping, strain the mixture to remove the lavender flowers. Set the infusion aside to cool. While the lavender steeps, grab 1 cup of fresh blueberries. Place them in a blender. Blend them until smooth. If you prefer a smoother drink, strain the puree through a fine mesh sieve. This removes the skins and seeds, leaving only the delicious blueberry juice. In a large pitcher, mix the cooled lavender infusion with 1 cup of fresh lemon juice. Squeeze about 4 to 6 lemons to get enough juice. Next, add 3/4 cup of honey or agave syrup. Stir well to combine these ingredients. Then, pour in the blueberry puree. Mix everything thoroughly until it is nicely blended. Now, pour in 4 cups of cold water to dilute the lemonade. This helps balance the flavors. Taste the mixture and see if it’s sweet enough. You can add more honey for sweetness or more lemon juice for tartness. Adjust to your liking for the best flavor. Refrigerate the lemonade for at least 1 hour. This step is key for a refreshing drink. When you’re ready to serve, fill glasses with ice cubes. Pour the blueberry lavender lemonade over the ice. For a beautiful touch, garnish with fresh blueberries and a sprig of lavender. Enjoy your refreshing summer drink! When picking lavender, always choose dried culinary lavender. Look for brands that say "culinary" on the label. This type has a sweet flavor that pairs well with lemonade. Avoid lavender from garden shops, as it may have chemicals. The right lavender makes your drink taste great. Sweetness is key to a tasty lemonade. Start with 3/4 cup of honey or agave syrup. After mixing, taste the drink. If it’s too tart, add more sweetener. If it’s too sweet, add more lemon juice. This way, you can make it just right for your taste. Serve your blueberry lavender lemonade chilled. Fill glasses with ice cubes first. Pour the lemonade over the ice. For a nice touch, garnish with fresh blueberries and a sprig of lavender. This not only looks pretty but adds extra flavor too. Enjoy your refreshing drink! Pro Tips Fresh Ingredients Matter: Always use fresh blueberries and lemons for the best flavor. The quality of your ingredients will significantly impact the taste of your lemonade. Sweetness Adjustment: Feel free to adjust the amount of honey or agave syrup based on your taste preference. Start with less and add more gradually for control over sweetness. Lavender Quality: Make sure to use culinary-grade lavender to ensure safety and flavor. Non-culinary lavender may contain harmful chemicals or not taste good. Presentation Counts: Garnish with fresh blueberries and a sprig of lavender for an appealing presentation. A beautiful drink enhances the overall enjoyment! {{image_2}} You can make this drink even better by adding other fruits. Try raspberries or strawberries for a nice twist. Simply blend them with the blueberries. This mix gives your lemonade a fun flavor. You can also add peach or mango chunks for a tropical vibe. Just remember to adjust the sweetness based on the fruit's taste. You can change the sweetener to suit your taste. If you want a lower-calorie option, use stevia or monk fruit. These sweeteners blend well and keep the drink light. Maple syrup is another tasty option. It adds a unique flavor. Just add it slowly and taste as you go. For a bubbly treat, use sparkling water instead of regular water. This gives your lemonade a fun fizz. You can also add some soda for extra sweetness. This version is perfect for parties or hot days. Just mix the sparkling water in right before serving to keep the bubbles. To keep your blueberry lavender lemonade fresh, store it in the fridge. Use a clean glass jar or pitcher. Make sure it has a lid or cover it with plastic wrap. This helps keep out odors and keeps the drink fresh. Your lemonade will stay good for about 3 to 5 days in the fridge. After that, it might lose flavor or freshness. Always check for any off smells or changes in color before drinking. If it looks or smells strange, it’s best to throw it away. You can freeze blueberry lavender lemonade for later use. Pour the lemonade into ice cube trays or freezer-safe containers. This way, you can enjoy a cool drink anytime. Just remember to leave some space in the container. Liquid expands when it freezes. When ready to use, thaw the lemonade in the fridge for a few hours or overnight. Yes, you can use frozen blueberries. They will still give great flavor. Just blend them like fresh ones. You might not need to strain them, as they break down easily. Frozen blueberries are also handy when fresh ones aren't in season. Yes, culinary lavender is safe to eat. It adds a lovely floral taste. Make sure to use culinary-grade lavender. This type is meant for cooking and baking. Other types of lavender may not be safe. Always check labels to ensure quality. To make fewer servings, simply cut the ingredients in half. If the original recipe serves 6-8, use half the blueberries and lemon juice. For example, use 1/2 cup blueberries and 1/2 cup lemon juice. This keeps the drink's flavor just right. Yes, you can skip honey or agave syrup. Try using other sweeteners like maple syrup or stevia. You can also make it unsweetened if you prefer. Just be sure to adjust the lemon juice for balance. This blog post covered how to make a refreshing blueberry lavender lemonade. We discussed using fresh blueberries and culinary lavender for flavor. We also went through easy steps to make this drink, from infusing the lavender to blending the ingredients. Remember, you can tweak it with different fruits or sweeteners. Store leftovers properly for later enjoyment. I hope you feel inspired to try this unique drink; it’s simple and fun to make! Enjoy your fresh lemonade on a warm day!

Blueberry Lavender Lemonade Refreshing Summer Drink

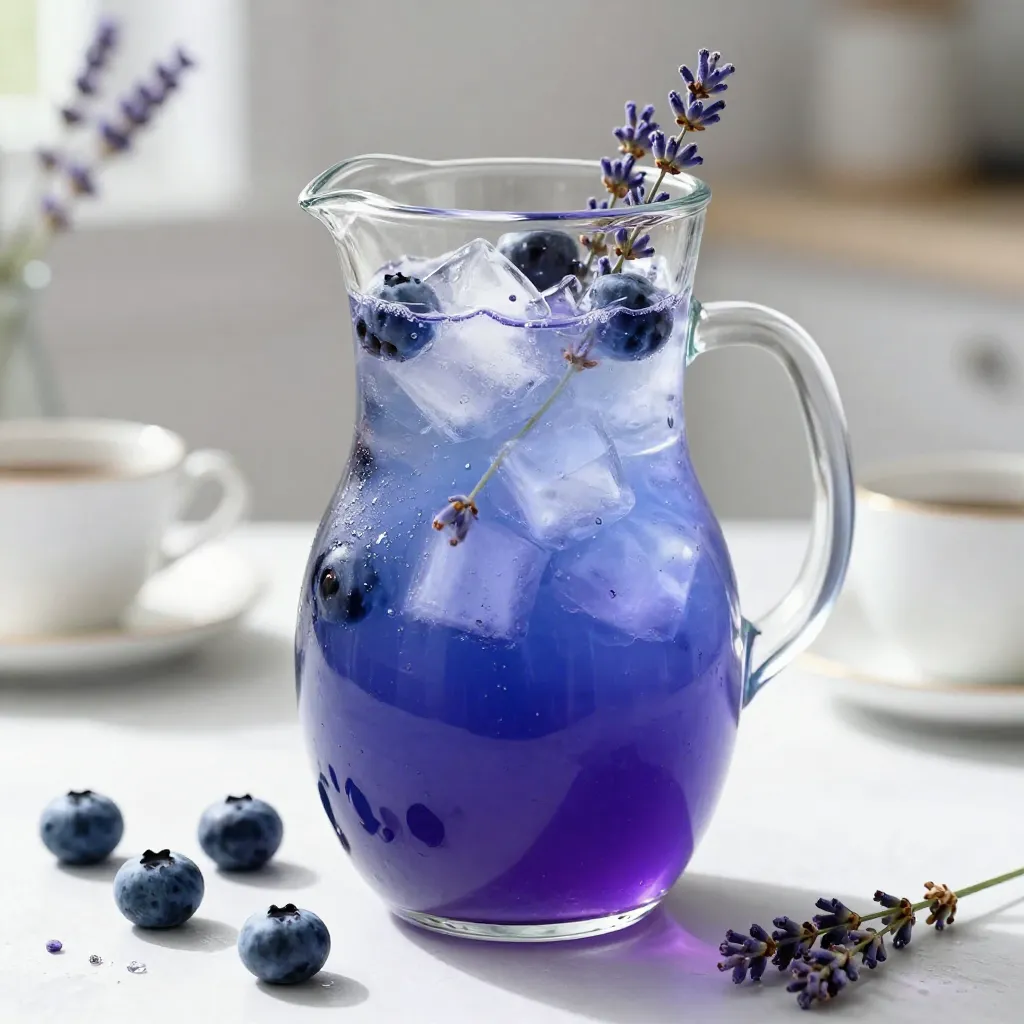
Looking for a refreshing drink that embodies summer? You’ll love this Blueberry Lavender Lemonade! This bright and fruity blend will

This recipe needs a few key items to make the donuts tasty. Here’s what you will need: - 1 cup apple cider - 2 tablespoons unsalted butter, melted - 1 large egg - 1/2 cup brown sugar, packed - 1/2 cup granulated sugar - 1 teaspoon vanilla extract - 2 cups all-purpose flour - 1 teaspoon baking powder - 1/2 teaspoon baking soda - 1 teaspoon ground cinnamon - 1/2 teaspoon ground nutmeg - 1/4 teaspoon ground ginger - 1/4 teaspoon salt - 1/2 cup granulated sugar (for coating) - 1 tablespoon ground cinnamon (for coating) To make the donuts even better, you can add some fun toppings. Consider these options: - Light icing made from powdered sugar and apple cider - Thin apple slices for garnish - Extra sprinkle of cinnamon on top You can swap some ingredients if needed. Here are some ideas: - Use fresh apple juice if you don't have cider. - Replace all-purpose flour with a gluten-free mix. - Swap the egg with a flax egg for a vegan option. - Try using coconut oil instead of butter for a dairy-free choice. These tips help you customize the donuts to fit your taste and needs. Enjoy making your baked apple cider donuts! {{ingredient_image_1}} First, you need to preheat your oven to 350°F (175°C). This step is key for even baking. While the oven warms up, grab your donut pan. Grease it well with baking spray or butter to prevent sticking. Next, pour 1 cup of apple cider into a small pot. Bring it to a boil over medium heat. Once it boils, lower the heat and let it simmer. You want to reduce it to about 1/2 cup. This process takes about 10-15 minutes. After reducing, let it cool slightly before using. In a large bowl, combine the melted butter, egg, brown sugar, granulated sugar, vanilla extract, and your reduced apple cider. Whisk these together until they blend well. In another bowl, sift together the flour, baking powder, baking soda, cinnamon, nutmeg, ginger, and salt. This helps mix the dry ingredients evenly. Now it’s time to mix the wet and dry ingredients. Gradually add the dry mix to the wet mix. Stir gently until just combined. Don’t overmix; a few lumps are okay. To fill the donut pan, you can use a piping bag or a zip-top bag with a corner snipped off. Fill each cavity about halfway with batter. Place the filled donut pan in your preheated oven. Bake for 12-15 minutes. Check doneness by inserting a toothpick into the center. If it comes out clean, your donuts are ready. Once they’re baked, let them cool in the pan for about 5 minutes. After that, transfer them to a wire rack to cool completely. To get the best texture in your baked apple cider donuts, focus on the mixing. Combine the wet and dry ingredients gently. You want to mix just until everything is combined. If you overmix, the donuts will be tough. A few lumps are okay; they make your donuts light and airy. The batter should be thick but pourable. Make sure to fill the donut pan only halfway. This allows space for the donuts to rise without spilling over. One common mistake is not reducing the apple cider enough. You want it to be about half a cup. If it’s too watery, your donuts won’t have strong flavor. Another mistake is overbaking. Keep an eye on your donuts. They only need 12-15 minutes in the oven. A toothpick should come out clean when they’re done. Lastly, don’t skip the coating. The cinnamon-sugar mix adds a nice crunch and great taste. Coating your donuts while they are warm is key. This helps the cinnamon-sugar stick better. Mix the sugar and cinnamon in a shallow bowl. When the donuts come out of the oven, let them cool for five minutes. Then, toss them gently in the mixture. Make sure to coat all sides. For an extra touch, add a light icing made from powdered sugar and apple cider on top. This makes them even more delicious! Pro Tips Use Fresh Apple Cider: For the best flavor, opt for fresh, unfiltered apple cider rather than store-bought. It enhances the taste of your donuts significantly. Don’t Overmix the Batter: Mixing the batter just until combined will ensure your donuts are light and fluffy. Overmixing can lead to dense donuts. Cool Before Coating: Allow the donuts to cool for a few minutes before rolling them in the cinnamon-sugar mixture. This helps the coating stick better. Experiment with Spices: Feel free to add other spices like allspice or cloves to customize the flavor profile of your donuts to your liking. {{image_2}} You can spice up your donuts by adding fun flavors. Consider mixing in chopped apples, which add great texture. You can also fold in some walnuts or pecans for a nutty crunch. If you like chocolate, add mini chocolate chips for a sweet surprise. For a zesty kick, try adding a bit of orange zest. Each of these options can change the flavor and make your donuts unique. While the classic cinnamon-sugar coating is fantastic, you can try other toppings too. For a sweet twist, glaze the donuts with a simple icing made from powdered sugar and apple cider. If you're feeling bold, you can even dip them in melted chocolate. For a healthier option, dust them with unsweetened cocoa powder or a sprinkle of powdered sugar. Each coating gives the donuts a new look and taste. These donuts pair perfectly with several drinks. Enjoy them with a warm cup of coffee for a cozy morning treat. If you prefer tea, a spiced chai complements the flavors well. For something fun, serve them with hot apple cider, enhancing the apple flavor. You could even enjoy them with milk for a classic touch. Each drink choice brings out the best in your baked apple cider donuts. To keep your baked apple cider donuts fresh, place them in an airtight container. A container will help maintain their softness and flavor. Keep them at room temperature for up to three days. If your home is warm or humid, you may want to refrigerate them. However, this can change their texture slightly. You can freeze these donuts for later enjoyment. Allow them to cool completely first. Then, wrap each donut in plastic wrap. Place the wrapped donuts in a freezer-safe bag or container. They can last up to three months in the freezer. When ready to eat, simply take out the desired number of donuts. To reheat the donuts, preheat your oven to 350°F (175°C). Place the donuts on a baking sheet. Heat them for about 5-8 minutes until warm. You can also microwave them for about 10-15 seconds. This method keeps them soft and tasty. Enjoy them fresh as if they were just baked! Yes, you can use fresh apple juice. However, cider has a stronger flavor. This stronger flavor gives the donuts a richer taste. If you use juice, you may want to add more spices to boost the flavor. To keep donuts from sticking, grease the pan well. Use butter or baking spray. Make sure you coat every crevice of the pan. Let the donuts cool for a few minutes before removing them. This helps them release easily. Yes, you can make these donuts gluten-free. Just use a gluten-free flour blend. For vegan donuts, swap the egg for a flax egg. Mix 1 tablespoon of ground flaxseed with 2.5 tablespoons of water. Let it sit for a few minutes to thicken. These baked apple cider donuts last about 3 days at room temperature. Store them in an airtight container. You can also keep them in the fridge for up to a week. If you want to save them longer, freeze the donuts. They can last up to 3 months in the freezer. You learned how to make baked apple cider donuts from scratch. We covered key ingredients, step-by-step instructions, and tips for perfect texture. I shared variations and storage info to keep your donuts fresh. Remember, you can customize the recipe to suit your taste. With these insights, you can create yummy treats that your friends and family will love. Enjoy the process and happy baking!

Baked Apple Cider Donuts Easy and Tasty Treat

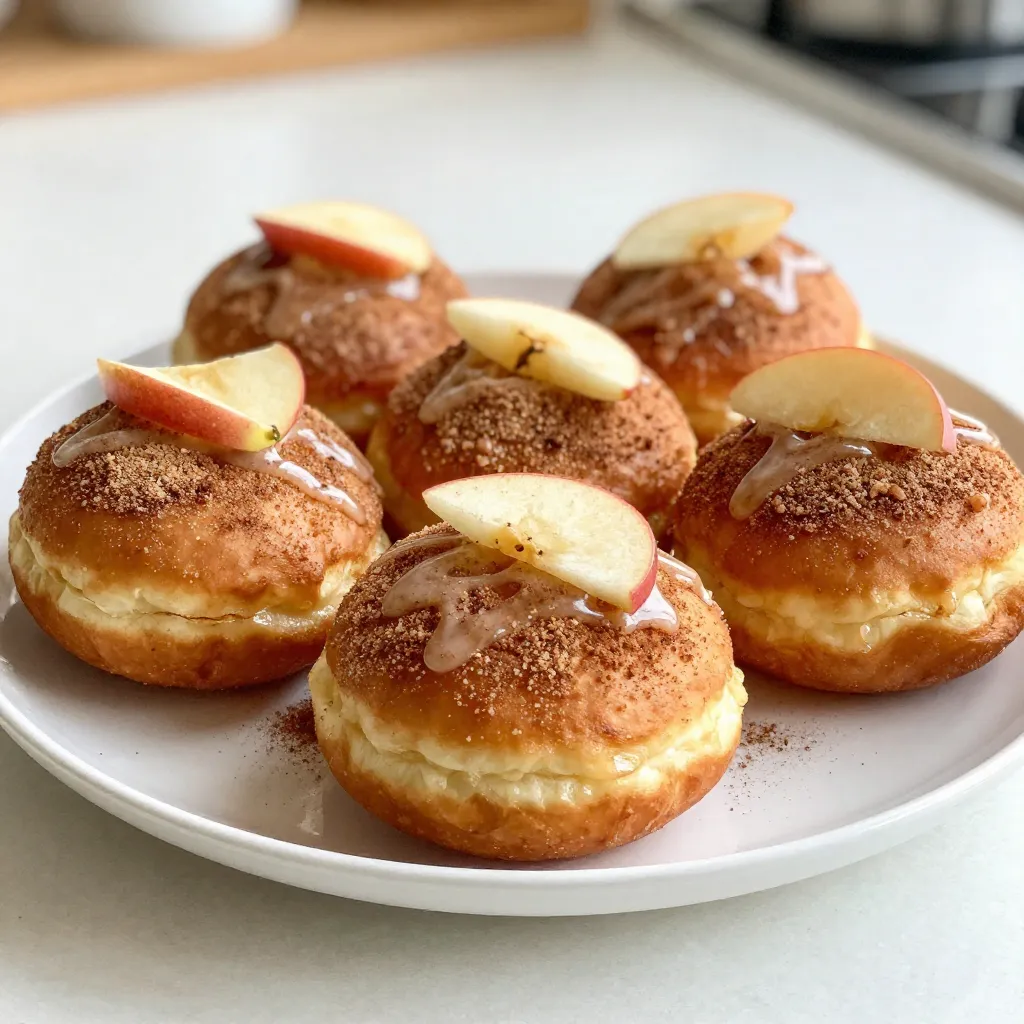
Baked apple cider donuts are a delightful treat that can warm any chilly day. If you love fall flavors, you’ll

- 2 cups pretzel twists - 1 cup semi-sweet chocolate chips - 1 cup caramel bits - 2 tablespoons heavy cream - Sea salt, for sprinkling Using the right ingredients makes a big difference in this treat. Pretzel twists provide a perfect crunch. The semi-sweet chocolate chips bring rich flavor. Caramel bits melt easily and add sweetness. Heavy cream helps the caramel become smooth. Finally, sea salt gives it a nice touch. - Baking sheet - Parchment paper - Microwave-safe bowl - Spatula Gathering your tools makes cooking easier. A baking sheet is essential for baking. Parchment paper prevents sticking, making cleanup a breeze. A microwave-safe bowl is needed for melting. A spatula helps spread the chocolate evenly. Having these tools ready will make your process smooth and fun. {{ingredient_image_1}} 1. Preheat your oven to 350°F (175°C). 2. Line a baking sheet with parchment paper. 1. In a microwave-safe bowl, combine 1 cup of caramel bits and 2 tablespoons of heavy cream. 2. Microwave the mixture in 30-second intervals. Stir in between each interval. Keep going until the caramel is smooth. 1. Spread 2 cups of pretzel twists evenly on the prepared baking sheet. 2. Pour the melted caramel over the pretzels. Make sure they are well coated. 3. Place the baking sheet in the oven for 5-7 minutes. You want the caramel to be bubbly. 4. Remove the baking sheet from the oven. Immediately sprinkle 1 cup of semi-sweet chocolate chips over the caramel. 5. Let the chocolate chips sit for 2-3 minutes to soften. 6. Use a spatula to spread the melted chocolate evenly over the caramel and pretzels. 7. Sprinkle a pinch of sea salt over the top. This adds a tasty salty-sweet finish. 8. Let the bark cool at room temperature for about 30 minutes. 9. Transfer the bark to the fridge for 1 hour to fully set. 10. Once set, break the bark into pieces and enjoy! To get smooth caramel, heat it gently. Stir the caramel bits and heavy cream often. This helps avoid burning. If your caramel is too thick, add a bit more cream. It will flow better. For melting chocolate, use a microwave in short bursts. Heat for 30 seconds, then stir. This keeps the chocolate from seizing. If it does, you can add a touch of oil to fix it. Use about half a teaspoon of sea salt for the best flavor. This adds just the right touch of saltiness. If you want it sweeter, add more caramel or chocolate. Taste as you go to find your perfect balance. Remember, a little salt can enhance sweetness, so don’t skip it! You can add fun toppings like crushed nuts or sprinkles. These add crunch and color to your bark. Try using different chocolate types, like dark or white chocolate. It changes the flavor and makes it unique. When serving, break the bark into fun shapes. This makes it easy to share and enjoy! Pro Tips Use Quality Chocolate: Opt for high-quality semi-sweet chocolate chips for a richer flavor that complements the sweetness of the caramel. Don't Overbake: Keep an eye on the caramel while baking; you want it bubbly but not overly browned to maintain a smooth texture. Chill for Best Texture: After cooling at room temperature, refrigerate the bark to ensure it sets firmly, making it easier to break into pieces. Experiment with Toppings: Feel free to add nuts or crushed candies on top before the chocolate sets for an extra crunch and flavor variety. {{image_2}} You can switch things up with different types of chocolate. Try dark chocolate for a richer taste. White chocolate adds a sweet touch that pairs well with caramel. You can even mix chocolates for a fun twist. Adding nuts or dried fruit can enhance flavor and texture. Chopped pecans or almonds add a nice crunch. Dried cranberries or apricots bring a fruity surprise. These ingredients make your bark unique and delicious. For holiday fun, think about seasonal themes. Use red and green sprinkles for Christmas bark. Add pumpkin spice for a cozy fall treat. For Halloween, you can sprinkle candy corn on top. Themed variations make your bark perfect for any occasion. Seasonal ingredients can also inspire new recipes. In spring, use fresh berries for a fruity twist. In summer, try adding toasted coconut for a beach vibe. Each season offers fun chances to change your bark. If you need gluten-free options, use gluten-free pretzels. They still give that great crunch and salty flavor. For dairy-free adaptations, try dairy-free chocolate and coconut cream. This way, everyone can enjoy this tasty treat without worry. To keep your salted caramel pretzel bark fresh, store it in an airtight container. This helps prevent moisture and keeps the bark crunchy. You can use a glass jar or a plastic food storage box. Make sure it is sealed tight. At room temperature, the bark lasts about one week. Keep it out of direct sunlight and heat. If you want it to last longer, store it in the fridge. In the fridge, the bark can stay fresh for up to two weeks. Just be sure to let it sit at room temperature before serving for the best taste. If your bark hardens, don’t worry! You can revive it easily. Place the pieces in a microwave-safe bowl. Heat them in short bursts of 10 seconds until they slightly soften. Be careful not to melt them completely. This will make the bark nice and chewy again! Yes, you can make Salted Caramel Pretzel Bark ahead of time. This treat stays fresh for up to two weeks. Store it in an airtight container at room temperature. It is great for parties or gifts. Just remember to keep it away from heat. You know your caramel is ready when it turns bubbly and slightly golden. It should be smooth and pourable. If it becomes too thick, it may not coat the pretzels well. Keep an eye on it while it melts in the microwave. Yes, you can use homemade caramel. Just ensure it has a smooth texture. If it is too thick, add a little heavy cream to loosen it. Homemade caramel can add a personal touch to your bark. To cut the bark, wait until it is fully set and cool. Use a sharp knife or break it by hand for rustic pieces. If you want clean edges, use a chef's knife. Wipe the knife between cuts for a neat finish. Yes, you can freeze Salted Caramel Pretzel Bark. Wrap it tightly in plastic wrap and place it in a freezer bag. It will keep well for up to three months. Thaw it in the fridge before serving for best results. You now have a simple guide to making Salted Caramel Pretzel Bark. With just a few ingredients and tools, you can create a tasty treat. Follow the steps for melting caramel and mixing flavors perfectly. Remember, adjust the salt and sweetness to your liking. You can also get creative with variations. Store them well for fresh snacks later. Enjoy your delicious bark, and share it with friends or family!

Salted Caramel Pretzel Bark Irresistible Delight

If you’re craving a treat that combines sweet, salty, and crunchy, I have the perfect recipe for you: Salted Caramel

- 4 boneless, skinless chicken breasts - 2 cups button mushrooms, sliced - 1 cup chicken broth Chicken breasts are the star of this dish. They soak up the sauce well. I prefer boneless, skinless chicken for ease. Next, mushrooms add depth. Their earthy flavor complements the chicken. Use fresh button mushrooms for the best taste. Finally, chicken broth binds all the flavors. It adds moisture and richness. - 1 cup all-purpose flour - 4 tablespoons olive oil - 2 tablespoons balsamic vinegar - 1 tablespoon soy sauce You need flour to coat the chicken. It helps create a nice crust. Olive oil adds flavor and helps with cooking. Balsamic vinegar brings a sweet tang, while soy sauce adds depth. Together, they create a sauce you will love. - Fresh parsley, chopped Fresh parsley is a bright touch. It adds color and a hint of freshness. Sprinkle it on just before serving. It makes your dish look nice, too. {{ingredient_image_1}} 1. Start by placing chicken breasts between two sheets of plastic wrap. 2. Use a meat mallet to pound the chicken to an even thickness. This helps it cook evenly. 3. In a shallow bowl, mix flour, garlic powder, onion powder, salt, and pepper. 4. Dredge each chicken breast in this seasoned flour mixture. Shake off any extra flour. 1. Heat two tablespoons of olive oil in a large skillet over medium-high heat. 2. Once the oil is hot, add the chicken breasts. 3. Cook for about 5-6 minutes on each side. You want them golden brown and fully cooked. 4. Once done, carefully take the chicken out and set it aside on a plate. 1. In the same skillet, add the sliced mushrooms. 2. Sauté the mushrooms for about 4-5 minutes, until they are browned and tender. 3. Next, stir in chicken broth, balsamic vinegar, and soy sauce. 4. Bring this mixture to a simmer. Let it reduce for 3-4 minutes. 5. Add the cooked chicken back to the skillet. Let it simmer in the sauce for another 2-3 minutes. 6. Finally, stir in the butter until it melts. This makes the sauce rich and tasty. To get the best flavor in Chicken Marsala, use fresh ingredients. Fresh chicken and mushrooms taste better. They add more depth to your dish. Also, balance the seasoning. Too much salt or pepper can ruin the taste. A little bit goes a long way. When cooking chicken, avoid overcrowding the skillet. If you add too much chicken, it will steam instead of brown. This step is key for a nice crust. After cooking, let the chicken rest before serving. This keeps it juicy and tender. A few minutes makes a big difference. Pair your Chicken Marsala with simple sides. Mashed potatoes or pasta go well. They soak up the sauce nicely. Steamed vegetables also add color and nutrition. Fresh bread is great for dipping in the sauce too. Enjoy your meal with friends and family! Pro Tips Even Thickness: Ensure your chicken breasts are pounded to an even thickness for consistent cooking and juiciness. Flour Coating: For a crispier texture, allow the dredged chicken to rest for a few minutes before cooking to let the flour adhere better. Flavor Boost: Enhance the sauce by adding a splash of white wine along with the chicken broth for a richer flavor profile. Garnish Wisely: Use fresh parsley not just for garnish; it adds a fresh flavor that brightens the dish beautifully. {{image_2}} You can easily make a vegetarian version of Chicken Marsala. Instead of chicken, use plant-based proteins like tofu or tempeh. These options soak up the sauce well and give a meaty texture. Slice the tofu into thin pieces. Marinate it in soy sauce for extra flavor. Cook it just like the chicken in olive oil until golden. If you need a gluten-free meal, you can use gluten-free flour. Many types are available. Almond flour or rice flour works well. These flours can create a nice crust on the protein. Just replace all-purpose flour with your choice. The flavor of the dish will still shine through. You can adjust the spice level to suit your taste. If you like heat, add red pepper flakes while cooking the mushrooms. This will give a nice kick to the dish. You can also add more veggies. Spinach or bell peppers can enhance the meal. Their colors and textures add to the plate. Don't hesitate to experiment and find your favorite mix! To keep Chicken Marsala fresh, store it in the fridge. Place leftovers in an airtight container. Make sure it cools to room temperature first. This will help prevent moisture buildup. Eat the leftovers within three days for the best flavor. When reheating Chicken Marsala, I recommend using a skillet. Heat it over medium-low heat. This method helps keep the chicken tender. Add a splash of chicken broth to prevent drying out. Stir occasionally until warmed through. You can also use the microwave. Just cover it with a lid or a damp paper towel. Heat in short bursts, checking often. To freeze Chicken Marsala, let it cool completely first. Use freezer-safe containers or heavy-duty bags. Remove as much air as possible to prevent freezer burn. It can last up to three months in the freezer. When ready to eat, thaw it in the fridge overnight. Reheat it gently on the stove to enjoy its full flavor again. You can serve Chicken Marsala with many tasty sides. Here are some great options: - Mashed potatoes: Creamy and smooth, they soak up the sauce well. - Steamed broccoli: This adds a nice crunch and color to your plate. - Garlic bread: Perfect for dipping in the rich sauce. - Pasta: Choose a simple type like fettuccine or angel hair. - Rice: A light, fluffy rice complements the dish nicely. Each of these sides will enhance your meal and bring out the flavors of the Chicken Marsala. Making Chicken Marsala in a slow cooker is easy and convenient. Here’s how: 1. Prepare the chicken: Pound the chicken breasts to an even thickness. 2. Season and brown: Dredge the chicken in flour, garlic powder, onion powder, salt, and pepper. Brown the chicken in a skillet for 2-3 minutes on each side. This step adds flavor. 3. Add ingredients: Place the browned chicken in the slow cooker. Add sliced mushrooms, chicken broth, balsamic vinegar, and soy sauce. 4. Cook: Cover and cook on low for 4-6 hours or high for 2-3 hours. The chicken will be tender. 5. Finish: Stir in butter before serving for a rich sauce. This method gives you a hands-off way to enjoy this dish with great flavor. Yes, you can use various mushrooms in Chicken Marsala. Here are some options: - Cremini mushrooms: These are more flavorful than button mushrooms. They add a deeper taste. - Shiitake mushrooms: These bring a rich, earthy flavor. They pair well with the sauce. - Portobello mushrooms: If you slice them, they add a meaty texture. Great for a heartier meal. - Oyster mushrooms: These have a mild flavor and unique shape. They look nice on the plate. Feel free to mix and match mushrooms to find your favorite flavor combination. This blog covered the key ingredients and steps to make great Chicken Marsala, plus useful tips. You learned how to prepare chicken, cook it to perfection, and make a tasty sauce. We also explored variations, storage tips, and common questions. Try fresh ingredients for the best taste. With practice, you’ll impress everyone at the table. Enjoy your cooking and happy eating!

Chicken Marsala Flavorful Recipe for Dinner Delight

Looking to impress at dinner tonight? This Chicken Marsala recipe is both flavorful and simple! You’ll love the tender chicken

Older posts
Page1 Page2 … Page84 Next →

dsad

© 2026 easycookingbite • Built with GeneratePress

Our Policies

  • Copyright Policy
  • Cookie Policy
  • GDPR Policy
  • Privacy Policy
  • Disclaimer
  • Terms Of Use

More Information

  • Home
  • About
  • Contact
  • Appetizers
  • Dessert
  • Dinner
  • Drinks
©2026, easycookingbite About Back To Top